One of our favorite easy DIY projects from the past is this simple tutorial on how to make your own window hardware. We hope you enjoy.
This weekend, I am sad to say I spent most of it in the bed. I’ve had a tough case of bronchitis, so I took advantage of resting up a bit and catching up on all my saved up DVR. I really can’t complain. Being sick DOES have its perks: A month’s worth of guilty teli trash via Desperate Housewives + Greys… were kind of a rare treat.

But by Sunday, I was feeling a little more up to par, so we were able to squeeze a small amount of DIY in. And doing so reminded me of a little project I wanted to share with all of you.

I’ve mentioned it before, but like our coffee table, never really shared the how-to part of it. I wasn’t sure it would be something anyone else would be interested in. In short, it’s how to make your own window hardware.

how to make your own window hardware
It’s my no fret, low-expense approach to hanging simple panels. The materials? Copper pipes. Simply take any measurement you need, and cut accordingly. This space, for instance, was super long. So we put one {slightly smaller} pipe inside of another, cut it to fit, used some eye hooks, adjusted accordingly, and…there we have it. Your own custom hardware at a fraction of the cost.

We have this in several places in our home, because we like the unique look of it, it’s easy, go-to availability, and how simple it is to do. And the best part: It nicely patinas over time.

These window treatments were some simple panels I threw up the week we moved into our home. And since that was nearly four years ago, I’m kind of in the process of weeding out all of the things I’m officially tired of. These were some that were leftovers from our first home, so they were “free” at the time. When we redid our kitchen, I loved the panels that were over our window, so I simply transplanted them to the bathroom.

TADA! Instant update with cleaner lines and simple hardware. {via some Joel Dewberry fabric}
Want to know how we did it?
how to make your own window hardware: Here’s what you’ll need:
In the piping section of your home improvement store, grab up a pipe cutter, end caps, brackets, and a pipe {sized in thickness to what you will need.} After you choose your pipe, head over to the window treatments department and grab up some hanging hooks. {make sure the hanging hooks-I guess that’s the right word???-will fit nicely over the pipe. You can always do a rod pocket for your curtains as well. We just like the hooks.}

Deciding where your brackets will go on the wall, eyeball it and screw them onto the wall. (or measure. We’re just too lazy to measure) Cut your pipe according to the length you will need. Pipe cutters are simple to work: simply insert the pipe, tighten like a vice, and twist and tighten as you go. Just like above. Turn it until it snaps off at the correct length you need. Then simply slide it into place on the wall.

how to make your own window hardware: touch up paint
I usually come back later {only if you can see it} and touch up those silvery screws with some paint. Speaking of paint…I had difficulty locating some hanging hooks of a copper color. I already had some cream ones, so I hit them with some spray paint, on each side.

When they were dry, I placed them on the rod, capped off the ends with the end caps, and placed the panels on the window.

how to make your own window hardware: total cost
Total cost for pipe parts: less than 10 dollars.
*Again, If you needed it for a particularly long area, like the ones in our veranda, simply grab up two, one that can fit into a longer size, and then cut to fit. If you need it to stick out from the wall a little more, for easier sliding, grab up some eye hooks, as shown above, in our veranda pic. For the eye hooks and hanging hooks, I painted them all with spray paint. And while the tones don’t immediately match, the “real” copper patinas nicely over time. When all is said and done, they blend quite nicely.

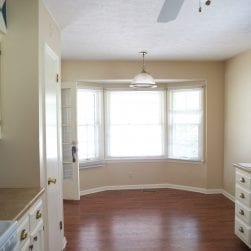
While we were at it, I also removed these gargantuan pieces this weekend. Goodbye, overwhelmingly heavy curtains.

It’s the beginning of an entire living room redo. {Think white.} I’m not sure what will go back…if anything at all, on those windows. With some of the ideas I have, this will be a long process. But, in the meantime, I’m really kind of enjoying that wide open window. Until I decide, anyway.
I hope you all had a restful weekend, and if you try our little window trick, as always, let me know? Have a happy week, everyone!


Hope you feel better soon! We had some copper pipe and brackets left over from a previous project and used them as a curtain rod for our grill cabinet outside. It was free and has worked perfectly being in the “elements”.
I think your living room is already so cute, hard to imagine it getting better, but I can’t wait to see what you come up with! I love your blog!
Oh my word mindy you are too sweet. 😉
I used electrical pipe for ours! I love them =) Great minds think alike!
Like Holly, I used electrical conduit for my outdoor curtains. Although this is a great idea too! Lucky for me, DH is a plumber & has random buckets of supplies & pipe cutters too. I am sure he will just shake his head at me. 🙂
THANK you for posting this! I have so many rods to purchase for our house I was thinking it would be a good long while before we could save up to get some; this is a fantastic idea.
I’m glad you are feeling better!
I did this copper tubing for my living room at my old home . At the time I needed a rod and the price of the ones I wanted were over 200 hundred dollars. So while at the local lumber yard with hubby ( waiting for him to get supplies in the plumbing department decided why not use the copper tubing for rods. Found to great looking ends for my copper tubing also in copper. Had brackets that fitted the copper tubing and their I had a beautiful curtain rod. I moved and we took the rod with me and now it is in my new living room. I always look at things and think what can I do with them.
Just thought you would like to know.
Hello! I just found your blog and am drooling, I mean, enjoying, the photos of your home! HA HA! Very inspiring, so thank you! We are remodeling my bathroom (Score!) and I’ve chosen a beach cottage theme. In the spirit of simplifying my bathroom experience, I’d recently purchased some of these same hooks, but for a different purpose! I have added a few to my shower curtain rod to hold onto some of the doodads I use in there – my scrubby gloves and my shower cap, namely – but give me some time and I’ll think of more uses. Keep up the great blog!
I can’t wait to try this in my room. However, I’m going to paint black or silver (haven’t decided just yet.). Thanks so much for the tut!
A girl after my own heart!
I’ve used copper pipes to make a curtain rod, a pot rack, and towel bars for the kitchen.
Your blog is fantastic – I’m adding myself as a follower.
Awe! Thanks girl! 😉
That is so funny, my husband & I used copper piping as well in out first home together.
13 years ago! Beautiful & inexpensive!
You mention end-caps in the list of supplies, I am wondering what those are used for? I don’t see them in your pictures! Thanks, this is a great idea. Can the copper pipes be spray-painted? I need white for our bathroom!
Interesting, researching this idea and had not heard about the double piping– but it makes PERFECT sense as copper is so soft. Thanks!
I want to use this with your loft idea but if I do I think I am going to use a wooden rod and stain it to match the color I want! (: