Hey all you wonderful people! I hope you’ve had a fabulous weekend! In honor of Valentine’s day, I couldn’t resist a little last minute valentines shirt action for the kids. So on Sunday I decided to whip something different up for their school parties.

Aiden is kind of past the age of monogramming matchy-ness, but I’m riding this cash cow all the way to the bank as far as the matchy part…while I still can. So, I absolutely adore the freezer paper method. Ever since I broke some out for our disney trip, I’ve been itching to try it again…and again….this process is kind of addictive.
I know there are plenty o’ great fantastical tutes out there. But I’ve gotten a few questions about my shirts, and I thought I’d share a quick version, here:

• Simply print out any art you prefer {I usually print my art on normal printer paper…some tutorials say you can run the freezer paper through the printer, but it may melt, so I never risk it} trace it on to the non-slick side, and cut out anything you want to transfer, onto the fabric. It definitely helps to consider your negative space, and what will be transferred once cut.
• When you’ve finished cutting your design, lay it, slick side down, and iron it. Once you are satisfied with it’s placement, break out the fabric paint, and any brush of your choice. {I prefer sponge brushes when working with stenciled designs.} Stamp lightly, and paint away from the edges. It helps to do two passes, when dealing with colors like white, for opacity’s sake.
• Once it’s dry, peel all of the paper away, and seal in via the iron on a low heat. {Make sure you wait a few days before you wash it.} TADA! You have your very own little ‘screen printed’ design.

And here we are! Silly little t-shirts for the kids and their grand v-day celebrations.
What are some of your favorite v-day crafts you’ve been up to? Please do tell! That reminds me…don’t forget that you can still download our valentines cards, here. Enjoy!
Have an inspired day, y’all!


How cute!!! And the shirts are adorable too! What a great pic of your crew! I love the “sister sandwich”!!
the skull and cross bones tat is a super nice touch too! 🙂 Will definitely be trying this one during naptime. Thanks!!!!
Ha! The girl loves her tats…to the point where is greatly disturbs her father. 😉 you’re super observant-I’d forgotten that was on her arm! 😉
Adorable kiddos! I am going to try this for St. Patrick’s Day.
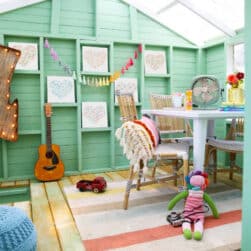
Do you happen to know the name of the fabric on the pillow behind the kids. It’s the diamond shaped fabric? I love it!
Hey Lauren! It’s actually a premier prints fabric via fabric.com. I am not sure they carry it anymore, but you may be able to find something similar there. I hope that helps!
Where do you buy the freezer paper at and do you put the reverse the design on the paper?
Hi laura, you can get freezer paper at walmart or the grocery store. No reverse design needed!
I am wondering could you use a Cricut to cut out the letters?
Jeanne, I have no idea…I am not a cricut user, but I am sure it wouldn’t hurt to try! ;}
This is so cool. I really want to try this, but I am not very crafty. Do I have to use an exacto knife, of will scissors work?
I think I just realized why you need exacto, bc otherwise you would have individual letters to iron. Sorry that was dumb. But it does say you need a self healing mat? Is that like just an ironing board?
Great idea
Excellent! Do you have a preference on what type of fabric paint to use?
Not really- I just grab some whenever I’m out and need more at the store- just about any kind will do!
Is freezer paper the same thing as was paper??
Hey Christy! It has a different backing that allows you to iron it down. You will find it in the same section of your grocery aisle!
What setting do you use the iron at? I tried this today, but the freezer paper bubbled on the edges and the paint didn’t have clean lines 🙁
Hey becky – I use it at a medium to low setting. And I paint closely to the fabric very carefully. All of this will vary depending on your iron and fabric. Hope that helps!
HI!! This is such a great idea!! Silly question but when you iron at the end to set the paint, are you ironing inside out?
Jessica – My apologies for taking a while to get to this comment – we’ve been a little out of pocket and I haven’t had a chance to reply to all the comments. ;} Not silly at all! We just place the design right on top, glossy side of paper down, matte side up, right where you want it on the tshirt or pillow or what have you. It’s pretty straight forward – just iron and paint – I hope that helps! ;}