My oldest is six, and finally has his very first loose tooth.
This is kind of a big deal.
A very big deal.

Because at least twice a month, for over a year, he’s been asking me when this will happen. All of his friends are loosing their teeth, and he’s been patiently waiting for his rite of passage. When he announced aforementioned big deal, and I was able to confirm it with congratulatory squeals and the wiggling of said tooth from yours truly, I knew it was time to up the ante with his excitement and make his pillow. And not a day too late, either, because now he has two loose teeth…and he’s bouncing off the walls about it.

So I told him I would make a special pillow for him. I thought it was a special way to mix it up in the family trads department along with a few other things…they’re only young once. I started out by sketching out what he might want, and began from there.

This pillow is a lot like Regina the rabbit + Lulu the lamb-a basic shape with a few little extras. Today, I thought I’d share how we made ours. Here’s what you’ll need: Fabric for the main ‘body’, enough fabric for two wings, a small pocket, buttons, felt, thread, an embroidery needle, stuffing, scissors, and a sewing machine. Though you could make one of these by hand if you had the time. {I know. The operative word being if.}
I started out with some butcher’s paper to re-draw two basic elements to size: the tooth {make it wider than this-for seam allowance} and the wing {wider for seam allowance.} Once you’re happy with your shape {make sure it’s fatter than what you will want for the final product} cut it out, and use it as your actual pattern.
Use these as guides to cut two sides for the tooth, and four pieces for wings.
Just a little side note: If you use a patterned fabric, pay attention to what you’re cutting-sometimes I can get a little mixed up with this-and the pattern will need to be reversible for each side, so the right sides are facing out when the pillow is finished. Be particularly careful with the wings. Just make sure you think through each step or it may be seam-ripper-ville for a few steps. Sewing is not for the sleepy.
This may or may not have happened to me. ;}

When you’re done with the ‘front’ of your tooth, sew on the felt and buttons and construct whatever face you want.

Do the same for the backside: Take a simple square, hem the edges, and attach them as a pocket. Before you do this: make sure your tooth will make sense and line up with the outer sides, finished. Since you drew this pattern, it won’t be perfect, and you’ll want your lines to work together. Test it out, with the right sides facing out, before hand. One “root” may be fatter than the other. If not, you may need to flip one side. Make sure you know which sides will be your outer sides before you commit to your details.

Starting with your wings {right sides together, wrong sides out} simply treat them as mini pillows. Sew them together with the right sides in, and the wrong sides facing out. Leave a portion to be turned right side out {the way they will look when finished} and stuff your pillow. You may leave the portion you had open, or finish it up with your sewing machine and a top stitch.

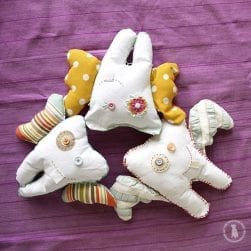
Once your wings are finito, your tooth fairy pillow is ready to be assembled. Place the front part of your tooth wrong side down, right side up. My photo above on the left is actually incorrect, and if it was right, you would have your face, facing up, with the wings on top.
Then place your wings, facing inward, as shown above. Put the final side {your pocket side} right side in, wrong side up. {Just like your face. This way, the right sides are in, and the wrong sides are out.}
Carefully sew the sides, making sure to include enough of the wing so that it doesn’t flop about too much. I’d probably make sure to tack an upper part as well when you give it a pass in the sewing machine. Leave about two to three inches worth to pull all of this inside {right sides} out. After you pull it right sides out {and everything looks right} your pillow is ready to be stuffed.
Stuff, and top stitch {by hand, or with your sewing machine} the last section left.
I then chose to finish off my pillow by polishing it up with a blanket stitch. To take it all the way around, I simply did the top portion of the white fabric near the wings. This way it was a continuous stitch. ![]()
To sew a blanket stitch, 1. bring the fabric through on one side, and pull it through to your knot at the end of the thread. 2. Come back around, looping your fabric the same way. 3. + 4. Bring your needle back through the established loop, and pull it in the direction you plan to place your next stitch. Simply repeat steps 2-4 again. For a great video of a blanket stitch in action {it helps to see it in action } click here.
![]()
Tada! You’re done. As you can see {no judging} I’m not the expert seamstress. But the pillow is a labor of love…in all honesty, he probably looks like a deranged bat. Pulling my embroidery needle through the leftover duck cotton I had nearly removed all my fingernails…but he has a fun, handmade feel to him.

And my little guy certainly loves him! I think he’s kind of fun that way.

It definitely meets his six-year-old, tooth-wiggling approval.
As always, let me know if you decide to try it! I’d love to see. Have an inspired day, everyone!


Oh my, that is cute!!! He would still be super sweet without the wings too if someone didn’t want to tackle that part. Great job!
Fun idea! I’m trying to come up with fun little traditions like this for our family, too. Thanks for another great idea!
I wouldn’t necessarily gone straight to “deranged bat,” but now that you’ve said it, that’s all I can see 😉 Hilarious!
Haha so glad you can see it. I think. ;}
Ha, my oldest will be seven at the end of the month and his first tooth is rocking in his mouth, while he bounces of the walls in excitement. I love this tooth fairy pillow, and might do something similar with him, that is if I get my act together before the tooth actually falls out of his mouth…
haha Ruth-I barely had mine done! And even if you don’t make it before…you can still do it after! ;}
Ashley, this is the cutest darn thing I’ve ever seen!!!!! I JUST bought a new sewing machine, so this project is going on my list. Minus the fact that my son is still in my belly… and won’t grow teeth for like over a year… and therefore, won’t be losing any teeth for a few years… it’s still a project I love : ) Maybe for my nieces and nephew!
Oh my gosh, this it too cute for words! And the best part is the smile on your little boys face. Perfect.
Cindy Sue
I love this, it is extremely cute and clever,I might be stealing this for my son. Such a better idea than a typical square pillow. Thank you for sharing. 🙂
I adore this! I have zero sewing ability though