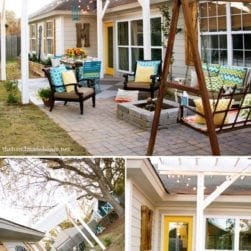
Jamin here again, and I’m glad to be back state side with you wonderful people after a week south of the border building a home for a family in Maneadero, Mexico. We also took on a whole lot of other relief work. The trip, as always, was amazing and always gives us fresh perspective, but this one had a unusual twist as about half the group got sick with the stomach bug, a-la Ashley’s sisters wedding. So prayers were said, and shots were given… and I fought it off. ::Breathes huge sigh of relief::
All that aside, it was a blessing to be able to use some of the very same skills we are talking about in this series, to provide a family with a home they can call their own.

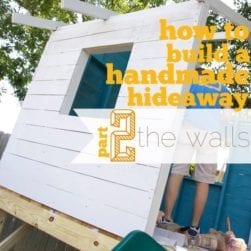
On to part 3 of building your very on Handmade Hideaway. (If you missed part 1 and 2 they can be found here (part 1)and here (part 2)
Supply list (links included below, in case you need one, or need to know what one is.)
• 2 – 4 x 4 x 8 post (cut to 32 inches)
• 5 – 2 x 4 x 10 (we will discuss the cuts below)
• 6 – 6 ft cedar fence boards (we will discuss the cuts below)
• 1 – 1 x 2 x 8 (we will discuss the cuts below)
• 8 – hinges of your choice
• 1 – box of 2 ½ screws (I actually used left over ones from the earlier supplies)
• 1 – small box 1 inch screws
• 1 – small box 4 inch screws
• 1 – small box of 3 inch screws (I actually used left over ones from the earlier supplies)
• Drill
• Slide
We don’t have a cut list today, simply because we plan to cheat geometry calculations in our construction. We’re all about eyeballing over here. I never liked math, except for when I had Ms. Miller, my 9th and 10th grade math teacher. Those were the years I was in love with math. I’m pretty sure I had a little bit of a crush on Ms. Miller…and thus the liking of the math… But I digress.

Slide
First things first, you will need to decide if you want a slide. We knew we wanted one, and that it would make a most excellent escape hatch. And we I decided to go for basic, because I had no desire to put together the swirly tube slide. The simple cool wave slide would be the best option. So depending on the slide size, your measurements could be a little different than mine, but no worries.
If you decide on a slide, you will want to install it first. If you go simple like we did, all this means is laying it’s end on the deck and screwing in 4 simple screws. Tada! Let the fun begin!
Railings
To build the rails you will want to set your (6) 4 x 4 posts, first. I suggest lining up as many as you can vertically, with the post holding up the deck. Following our example, that would would be 4 of the 6. I would also suggest putting at least (4) 4 inch screws in to these post. Just pre-drill from underneath the deck and screw them in. Don’t forget to make sure they are straight!
Next, pick a railing to start with and measure between the post. In this example I am going to use our side railing on the right side, if you are facing the fort. {If you look carefully at our fort, you’ll notice our railing is not evenly placed. The ladder, because of the position, had to be a bit off center.} Our measuremeant is 48 inches across on both the top and the bottom. Make sure to check both, they should be the same, but if your board is warped by even 1/8 of an inch you could have a gap.
Once I found my 48 inch measurement, I cut a 2 x 4 into two 48 inch pieces.
Place a post cap on the top of both 4 x 4’s and mark both posts with a pencil where the cap ends. This is where the top of the 2 x 4 you just cut will rest. Then place the 2 x 4 in place make sure the tops do not go over the marks and 24 inch level to make sure the board is level. Once you have it level, screw it in with 4 inch screws or longer if you have them.

Next, measure up 2 ½ inches from the deck and place a mark on the inside of both posts, so that the marks would be facing each other. Then place the 2 x 4 to make sure it’s top does not go over the marks you have made and use a 24 inch level to make sure the board is level. Once you have it level, screw it in with 4 inch screws or longer if you have them.

Here is where we get to scoff at geometry and ignore things we should remember. Take another 2 x 4, and place it on the outside of the railing, at a diagonal angle. Running from the top of the screwed in rail, to the opposite side bottom of the screwed in 2 x 4. Have your buddy stand on the inside of the railing and mark the 2 x 4 you are holding. You will need to mark the 2 x 4 where the 2 x 4 railing meets the 4 x 4 post. This should give you your angles to cut for your first cross bar. Cut the wood on these marks, then slide it into place, and screw it in. Where you place the screws is up to you, but I would use at least 2 on one side and 1 on the other(2 1/2 or 3 inch screws). You may also have to toe nail one or more of the screws (screw or nail in at an angle).

To complete the other cross angle railing, get another 2 x 4 and run it on the outside from the bottom corner where the 4 x 4 and 2 x 4 meet, across the new 2 x 4 cross angle railing you just installed, all the way to the top corner where the 2 x 4 top rail meets the 4 x 4 post. Again, make your marks, and cut. However this time, you should have two “L” shaped marks (one at the top and one at the bottom, as well as two lines near the middle.) Cut the wood on these marks, then slide it into place, and screw it in(should be two boards). Again, where you place the screws is up to you, but I would use at least 2 on one side and 1 on the other at both ends(2 1/2 or 3 inch screws). You will also have to toe nail one or more of the screws (screw or nail in at an angle).
Repeat this process with all the railings and bask in the fact, unlike you were often told, you in fact did not need to know that equation. You just needed a little old fashioned smarts and common sense. Take that, math! Jamin : 1 Geometry : 0
Repeat this on all sides to get all your cross bars.

Next, you will need to add the post caps and balls, assuming you are using these. Simply place the cap on the post, mark the center of the cap, pre drill the hole all the way into the 4 x 4. Then remove the cap, spread some wood glue on the top of the post, place the cap back on the post and screw on the ball. Repeat this for all your post and shaazzam, you got yourself one fine piece of carpentry there!

Shutters
You ready for simple?
For some reason, we were so excited about creating these, we didn’t get any photos of them in action. But that’s okay. Because it’s really so simple, that all you need is a few written instructions, and the finito product.
Going on our measurements of 11 inches wide by 24 inches tall…
Measure off all of your fence board into 3 5/8 inch strips and cut. (Using a Chalk line will make this much easier.)
Next, measure all your cut 3 5/8 fence board and cut them into 24 inch pieces. Lay them aside.
Now measure your 1 x 2 x 8 into 10 ½ inch pieces and cut 8 of them. Lay them aside.
Take 3 of the cut fence boards, lay them flat on the ground and line up the tops and the bottoms. Measure up 3 inches, and down 3 inches. This is where you will place your cut 1 x 2’s. Make sure everything is level then begin screwing the 1 x 2 to the cut fence board using the 1 inch screws. You will need 6 screws for each 1 x 2, 2 screws going into each fence board. Repeat the process on the opposite end and you will have half of one shutter built.
Repeat the above process 3 more times and you will have your shutters complete.
Finally screw your hinges on to the shutter. The side depends on how you want them to face, we screwed ours onto the side that does not have the 1×2. We also placed it at around the 3 inch mark, if you place the hinge on the other side of the shutter with the 1 x 2 you will have to put the hinge above the 1 x 2 or adjust your 1 x 2 mark.
Once the hinges are on the shutters, hold them up and screw them to the outside of the fort. Repeat for the other 3 shutters.(Note: we did this after everything was painted, makes life much easier.)

On painting: We assembled them, and then decided what kind of finish to use. We used more flood finish, (simply wiped it off the black hardware) and once that was dry on each side, we dry brushed some blue over them. If anyone is wondering what color that is, it’s Benjamin Moore’s Calypso Blue. {They can now rename it Ashley’s obsession.} Those little shutters added so much character, and really brought the brown stain of the deck and blue interior together, for a glimpse on the outside.
Step back and pat yourself on the back. You’re finished with phase 3!
Now, the only construction left, is to add the roof. We will be back with that installment soon. Until then happy building, and we’d love to hear how things are going on your own handmade hideaway!

Out of curiousity, how much did supplies cost?
Getting a list NOW. FINALLY. It took us a while with being out of town, etc. to round up all the receipts! that should have been something we did first, but I promise I list will be posted today-so many people have asked. ;} coming your way asap!
So the shutters are Calypso Blue! What are the colors of the walls inside? Love those colors!!!
The inside is calypso blue, as well! ;} I’m posting one last post after the roof how-to on paint details, how we hung the curtains, etc. ;}
Thank you so much for posting such amazing instructions, I can’t wait for phase 4! We plan to build a bungalow for our son this summer too and you guys have made it so much easier, with this great open design (perfect for Southern California weather)! I’m a new follower and I’m really loving your blog!
Any tips on how to construct the roof – frame and shingle? My daughter and I are going to make an attempt at this project!! Thanks
Hey Cheryle! That will be up by next week-we promise! ;}
Wow, just had a thought. I have some old bifold doors shutter style that I think I just might paint a fun color and hang them on either side of the french doors in my pool house. Love the blue color you used!
We just finished the siding on our walls and WOW. I have to say I was a bit skeptical that this could be done while keeping our marriage healthy 😉 but it has been SO FUN! Thanks for the easy and detailed posts! We’re following along each step of the way!
Hey Tiffany! So glad you guys are building it! Roof is coming up Thursday! 😉
Love, love, love the “fort”! My husband and I liked it so much that he is now building it for our little ones. I’ve been scouring your site looking for the name of the interior color. Is that also Calypso Blue? And exactly what color was used on the exterior? I’m picking up paint today or tomorrow and wanted to be sure. Thanks so much for posting this – it’s truly fantastic!
Hey Alena! Yes, it’s all Calypso. You can see a list of our paint colors, here!
Phase one and two completed…Now on to the railings and shutters…..You said 4 of the 6 post railings lined up with your deck legs but it looks to me like only the front two corners are going to line up as the legs in the middle of the deck are actually under the walls. Am I missing something ?
Yes and No. If you add a slide like we did it will mess it up a tad bit, because your railing will end short. But on the side without the slide it should line up with the railing, right before the wall.
Hi! Can I get a little more clarification on the posts? John Fields asked about them lining up over the deck legs and you clarified only 3 of the four would if you have a slide. But aren’t the front corner two actually about four inches back from the edge of the deck and therefore not directly over the deck posts (which would allow them to be screwed in straight from below)? But how is the one that is directly over a deck leg screwed in? At an angle?
Thanks so much!! I can’t wait until spring to get started!!! Going to add a sandbox underneath!
Penny, yes you are correct. They are recessed a little to allow you to screw them in from underneath. Another option if you are setting the post in ground would be to let your 4×4’s run straight up through the deck and then cut the decking around them. You’d also need to cutt he 4×4 at the top. Hope that helps!
Just looking for the “How to” for the roof construction. Thanks and LOVE it!!! We have two boys who would have SO much fun with this fort!! Thanks!
Hi there,
We are a family of 4 and we live in Missouri. We have two daughters, a 9 yr old and a 2 yr old.
The other day I was looking at playhouses online and your site seemed to be EVERYWHERE! I showed my husband your playhouse and the next day we were off to the store to buy lumber for the decking. That is unheard of in our household, as spontaneous is a month process for us. Anyway, we have the decking built and the walls are almost finished. We will send a finished picture as soon as we are done.
Thank you for posting your diy playhouse. Our 2 yr old doesn’t understand what is happening, although she was upset about her old playhouse being turned into a chicken coop, but she is now happy to even run under the decking!
We will keep you posted!
Have a great day!
Mindy
Yay Mindy! Thank you so much for the kind words + for stopping by! I can’t wait to see! We love that people are using these tutorials and creating their own little hideaways! Have an awesome day!
Such an awesome creation! It’s so nice to see families working together and building something.
I am concerned about the railing post vertical support. I was not completely following how you are screwing those in. How are ensuring the post have a good vertical support?
We simply screwed them in from underneath. If you’re concerned about the support you can use a 4 x 4 post bracket. Hope that helps.
Hi There!
First of all, thank you for providing these detailed posts! We build a hideaway last summer and have a few finishing touches we need to do this spring. The first thing on our list is shutters, but I noticed your link is no longer working to the hinges ordered from amazon. Would you please provide another link and/or specify which type to use? We would appreciate it so much!!
Hey!
That is so exciting that you are almost done, we would love to see the finished project. A hinge like this one would work just fine for it. (https://amzn.to/2RPVea2)
Have fun putting the finishing touches on.
Do you have a complete supply list and plans that could be purchased?