
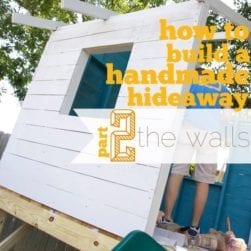
Hey guys! Jamin here today with our much promised part one of a how-to for The Handmade Hideaway. First things first: we divied up this project into a three part series. As far as the time that went into this, we had a vision of what we wanted for our back yard, something fun we knew we’d wanted for the kids for a very long time, and as a result, figured out some things as we went. With that in mind, it took around 20 hours to complete.
Ashley and I literally sat down one night and sketched it out, revised, and then sketched it out again until we had a working model of what was feasible in our heads. We had a few requirements: Something that was tall, but not too tall, big enough with growing room for our growing children, could stand securely on it’s own, etc. We also decided to keep it open for more of a “bungalow” type of feel, to combat those hot summer months here in the south. We figured the less, the better, as far as wild imaginations and letting kids be kids.
We still plan to make a few additions and adjustments but the kids are already in love…We’ve never constructed a playhouse of any kind before, so this was a learning experience for us, too. We’re sharing today, because while maybe you can look at the photos and figure it out, we’re hoping you can avoid some of our mistakes. ;} So sit tight, and thanks for being patient with us.

Remember this post? What if we took the basic idea of the loft, and made it into a super cool tree house in which to shoot all the bad guys hopping over the fence, a-la A Christmas Story {minus the red rider BB gun of course.We don’t want anyone to shoot their eye out.}
Just remember this is completely possible for your own homes. I’ve learned every bit of carpentry I know along the way, and have never been formally trained. It’s very touch and go, and it’s fun that way. You have a real sense of accomplishment when you’ve finished!
Here’s the tools you will need:
• Drill
• Drill bits
• Nut driver
• Socket wrench
• Screw gun or adapter for your drill to drive screws
• A buddy to help you lift… or in my case I just called on the minions. {Being a youth minister has its perks.}
Determine the base size of your ‘hideaway.’ Ours is 10 ft long x 8 ft wide x 4 ft tall.
Based on our size, here is the cut list. Adjust your cut list to the size of your base. We used all pressure treated southern pine.
Cut List
• 5 – 2 x 8 x 10
• 2 – 2 x 8 x 8 or 1 – 2x8x16 cut in two
• 3 – 4 x 4 x 8 (cut at 4 feet each for the post legs)
• 22 – 5/4 x 6 x 8
•For the stairs • 3 – 1 x 6 x 8 {(5) cut to 24 inches and (2) cut to 6 feet
Supply List
• 5 #’s of exterior galvanized deck screws – 2 ½ inches long
• 30ish lag screws. I choose to use 3 ½ (l) screw at a width of 3/8 inches. (Pick your own sizes depending on weight bearing.)
Let’s get started.
A simple Box
• Layout (1) 2 x 8 x 10 and (1) 2 x 8 x 8 into a “L” shape. Screw two lag screws into the joined end. (I pre-drill all my holes when using lag screws, It makes life much easier.)
• Join a 2 x 8 x 10 to the other end of the 2 x 8 x 8 with (2) more lag screws.
• Place a 2 x 8 x 10 on the one open end to join the two and complete the box, again use (2) lag screws

Joists
Once your box is built, you need to add in the joists. Simply measure out from one end of your 2 x 8 x 8 from 2 feet, and place an “x”. There should be an “x” at the 2 foot mark, the 4 foot mark and the 6 foot mark. Do this at the top, and the bottom. If you are a little OCD like me, you can do one more thing. From the center of the “x” measure both right and left .75 inches and draw a line. This show you where your 2 x 8 x 10 joist will need to go.

Now just place a 2 x 8 x 10 at each of those spots and screw them in. At this point, you should have a box with 3 joists in the middle.
Legs
I find it much easier to put the legs on while the deck is on the ground rather than when it is up in the air. ;}

Place your first cut 4 x 4 in a corner and screw it in. It will take (4) lag screws (two from each direction.) Repeat this on all four corners. Once the corner posts are put in place, find the middle of the deck, and screw in the middle posts. (Side note: if you are going to have a rail like ours, you might want to decide to place your post in such a way as to make it appear it is one continuous post, from the white (painted) railing, to the posts underneath. Even though they are separate, we tried to simplify the design by placing them flush, vertically, with the deck in between from upper to lower levels. To do this, you need to decide how big your hideaway will be, and if there are any attachments, such as a slide. These affect post placement.)
Now that we have all the posts on, its time to turn the deck upright. Unless you are Dr. Banner, you might want to call in a little assistance. I find the easiest way, is to simply roll it up on one side and then, roll and lift it to its final standing position. (You want to be careful not to put to much awkward pressure on the legs, so make sure to lift as you are rolling to relieve some of the pressure.)

If your hideaway is not already in place, use the friend while you have them and move the guts of your platform/deck into place, where you want it to stay. {Side notes: we will probably use garden rocks later, underneath, to help prevent the rotting of the wood over time. In this photo, we also added the fifth and sixth (middle) posts, later, even though we already told you to, above. {See? Learning from our mistakes!} But this little hideaway is extremely sturdy. It’s even stood up to two strong wind storms so far…}

One other tidbit of stabilizing, that we added are some braces to the front and back legs. To do so, I used four 2 x 4’s cut to 30 inches. I then made a 45 degree angle cut on both ends (obviously going the opposite way of each other.) Or you can simply make one 45 degree cut then place the board on the underneath side of the decking, run it to the leg and mark the edge with a pencil and cut. Once you have your wood cut, simply screw or nail it into place.
Decking
Once in place with the platform, it’s time to put the decking on. Go ahead and lay out your 5/4 x 6 x 8 on top of the platform, and arrange them. In our example, it will probably hang over slightly. If this bothers you, trim one down to make them all fit. It didn’t bother us because we placed it on the back side and who’s gonna notice a ½
inch on the back side of this guy?

Once you are happy with the placement, simply start screwing in the boards. I’d start at the front and work back. Use the 2 ½ screws making sure to screw 2 into each joist.
Stairs
This design is probably the most difficult aspect to the base of the fort, so don’t feel discouraged if it seems like Greek.
There was a little a lot of trial and error. In all honesty we eyeballed a lot of it, and made a few extra cuts. So if you make a few extra measurements and cuts, welcome to the club!
• First, take your 1 x 6 and cut one end at a 30 degree angle. (Do this for two boards.)

• Place the cut end of the board flush on the ground, and then measure back to the deck where it should meet. Then cut another 30 degree angle. (Ideally the board will fit. But if it doesn’t, don’t worry. Adjust your cut, and get it flush. Then screw or nail the boards to the deck, leaving 24 inches (or however you want your steps to be).
• Cut your boards for the steps, out of 1 x 6’s. I suggest doing one for every 6.5 inches of rise. (Be careful to make sure the top stair is placed in such a away that it meets the bottom of the 2 x 8 decking. You may need to adjust the 6.5 inch to another height.) Then place the boards in between the 1×6’s that are already screwed in, and screw them to the outside boards.
•If you would like a more traditional stair, this is a great resource.

Your decking is now complete…and you’re ready for walls!

Have fun creating the beginnings of a great outdoor Haven! We promise we’ll be
back soon with the next step in building your own Handmade Hideaway…The walls!
If you do this, of course we’d love to see it! Stay tuned, and have an inspired day!

I wish I could build this TODAY–If only I weren’t 8 months pregnant!! I love the finished product, thank you so much for sharing how you did this!!
I Love this! So excited!!!!! Sending photos your way!! Y’all rock.
Awesome! Showing the hubs now, we can do it!
I am so thrilled you’re doing this tutorial!! Maybe now I can get my hubby to build one of these!!
This has to be the cutest play house I’ve ever seen! I’d love to just copy the whole thing and have it for my kids!
The only problem with your design though, is that a real deck has the posts buried deep in the ground so that one won’t just start sinking and set the deck all crooked. : \ I don’t know how many play houses I’ve seen on stilts that are sunk so much on one side that it’s dangerous for the kids to get in it!
I think if I went to all the effort of making it, I’d make sure that it was set well so that it’d only have to be done once!
Very cute design though! Love it!
Thank you Jennifer. We are going to set the entire thing on garden rocks. And after that, we will keep an eye on it, to make sure it’s still level, safe etc. Thanks!
Any update on this? I’m trying to build something similar and want to avoid concrete footers!
Hey, Andrew. I am not sure what type of update you are referencing, but we do deal with the concrete question in the comment section right above this question.
Thanks Jamin, I meant any update on setting it atop garden rocks and watching it to ensure it stays level. In the end, did it shift or have you made it 8 years without anything more than the weight of the structure? I’ve been exploring options for my soggy backyard and don’t want it to be permanent either!
Does this materials list include everything needed or just the part you are showing in this post???
Just the part for this post.
HI Guys! One thing for your supply list. When we purchased based on the list, we were short lag screws. If you do 6 legs, you would need a total of 40 lag screws (hopefully saving an extra trip to the hardware store :))
Thank you so much for your pictures and tutorial! My husband and I just finished step 3 over the weekend, and my boys can’t wait to try it out. We added a rock wall on the opposite side of the slide 🙂
Thanks so much, Michelle. That would probably be because we added the fifth and sixth legs after the fact. Per my {Ashley’s} insistent request over the absolute terror that the thing would collapse on my children. It won’t of course, I’m just hard core paranoid helecopter nightmare mom. So keeping up with it all was a little overwhelming. I’ll try and repair that graphic/info in a bit. Thank you! And send pics when you’re done! ;}
Ha! This hardcore paranoid mom made my husband put vertical slats on the rails because I thought our 2 year old would climb through the “X’s” and fall 😉
I love everything about this space!! Thanks so much for inspiring. Your how-tos might actually give my husband the confidence to try this himself!! Beautiful!!
This is seriously the coolest thing I’ve seen in AGES! I am so beyond not hand at all with saws and nails and screws, but super duper wanting to find someone to help me give it a try! WOW!
Thanks Lauren! Go for it!
This is so magical, we are going to try it! Where did you get the slide? I didn’t see it on the supply list, just wondering what the specs are. Also, where did you find the curtains?
Thanks so much!!
Karolyn
Hey Karolyn! You can read more about the slide here, and the curtains, here. Check out the links and it will take your straight to them. They also sell the same slide at Home Depot. Thanks!
So I never ever comment but I absolutely love love this fort. I told my husband I want to build this for my kids, but I really think it is for me as well! This would totally be an awesome place for all 4 of us to “camp” out in our own backyard…. I think it would be fun for all of us. Anyway just wanted to give you kuddos on the work you did and say that you have done an awesome job explaining it! Thank You!
Thank you so much sweet mindy! I think it’s partially for us, too. 😉 now if the weather will actually cool down here in the tropics, we can have a camp out, ourselves! Let us know if you build it! 😉
Hi love the loft idea! Want to build it soon. I have been plotting and planning what to do and now know. I want to do the outside fort/deck as well do you have a finished picture? what do the walls look like?
Hi Cheryl! You can see all of our posts on this project, linked up here. Thanks!
I built the platform and got most of the decking done yesterday and just finished the deck this morning. Now onto sanding and sealing before building a playhouse on top. Thank you so much for the idea and plans. We are making the top part our own but the deck is almost as specified. I used pressure treated 4×4 for the legs and went with a 5′ height since my 6 year old is already 4’2″. I’m also using reclaimed 2×6 for the stairs instead of 1×6. I’m hoping to add a center brace underneath and hang a tire swing. We will be adding a slide and a rock wall later.
Again, thank you for the plans. I hope your kids are still enjoying their fort.
Awesome! send us some photos when you’re finito… and they are! Hope your kids enjoy yours! ;}
This is wonderful and I hope to do a project like this soon! I was just wondering if you could substitute the flooring wood with plywood? And the walls? I feel like it would be faster and possibly cheaper, but I’m wondering if it would be safe.
Hey Kelsey! Yes, safety is my one concern. And if you’re going to go to all the trouble, maybe quality? It may not hold up as long, either. Sorry I’m not much help, but I probably wouldn’t recommend plywood.
Thanks for this, well written and great view point
Thank you for the awesome pictures, descriptions, and stair tips. I have our house planned out, but was clueless about a ladder. I really wanted one like this (more stair-like than ladder-like). I had a playhouse when I was a kid that had little 1 x 1 boards screwed into the side like a ladder. Boy, was it hard to get up top!
how do you get to part 2
Hi brittany, you can read all about our back yard projects in series form, here. I hope that helps! ;}
Many thanks for your project!
Hubby just arrived with our gigantic truck load of lumber. Woohoo! Starting in the morning!
Just wanted to say how impressed I am with all you’ve done (site, family, posts, projects, etc.). You’ve inspired me to teardown our store-bought playground and build the hideaway from scratch.
Reading through all 5 posts on this, I really wanted to get a grasp on some of the measurements and such before I started to build. Since there weren’t any plans (so to speak), I challenged myself to learn Google SketchUp and create the plans based on your series of posts. I hope your future readers will find them useful. I tried to stay true to your original design: https://github.com/ericrasch/sketchup-models/tree/master/handmade-hideaway
Now, time to finish ordering my supplies so I can get started this weekend!
Um, you’re kind of amazing. Thank you, Eric! ;}
Hi!
First let me say thanks for the great plans!!!
My husband and I started this clubhouse a few weeks ago. Today we installed decking and were about to start stairs when we realized the 1×6’s we’re not included in the master supply list, therefore we didn’t get them. Was this an oversight on our part or were stairs considered optional and excluded from master supply list?
Thanks again.
Sincerely,
Julie and Kevin
Pittsburgh, pa
Hey Julie, Hope you are having fun building it. Yes, the stairs can be optional, but the construction of the stairs are detailed in the lower portion of the post.
I noticed an unfinished kids picnic table in the background of the final two photos above that you later painted. Did you build or purchase this table? Would love to do the same!
Thanks for your amazing documentation of this project so that my three kids can benefit (once our build is complete)!
Hey Zach! We purchased it at a flea market a long time ago for probably about 20 bucks – sometimes when you can snatch up something for super cheap, it’s not worth trying to make your own. ;} This plan may help though! Thanks for your sweet comments – we’d love to see when you’re finished!
Starting this project this week! Did you use any concrete block as a base below the posts to prevent settling? Also did you use any anchors for the posts to prevent lift in a wind storm?
My husband and I have been talking about building this for a few years now. Today I finally sat down and when through and made “blueprints” of my own, made a list of that we needed and the adjustments that wed like to make to better fit out family and our space. The wood will be ordered tomorrow and I couldn’t be more excited!!! Thanks so much for sharing these plans!
Thank you so much! Can’t wait to see what you do! Be sure to share with the hashtag. So fun!
Have been following your plan and now have the frame up. My kiddo is super excited. Curious – any reason you didn’t sink the posts and use cement? I sunk my posts about a foot and am planning on pouring some quick concrete today. Any reason why I shouldn’t?
Thanks for the plans. Really excited to get the deck installed this weekend!
Thanks!
Elsa
Hey, we simply didn’t want it to be permanent. If you are planning to sink your post then make sure they are deep enough for the frost line in your area plus a few inches. 12″ will cover the most southern portion of the US, but if you above that, you’ll need to go deeper with your post. You can see the frost line for your area here.
I hope that helps.
Thanks for the fast reply! Wouldn’t have thought about the frost line issue.
Many thanks!
If I wanted to do an 8×8 and 5’ off the ground, would you recommend concreting the posts in? The size is in between this and your 2.0. I was also thinking of adding a bottom deck so it won’t be so top heavy.
It would probably be best to secure it in concrete.
Love this! How tall did y’all make the walls for the top part?
Jamin and/or Ashley,
did you use lag screws for the joists or screws?
thank you. great work and great step by step instructions
Hey, Anthony.
You’ll want to use galvanized lag screws on the joist for sure or use some joint hangers. Traditional screws wouldn’t offer you the support you need.
Have fun building!
– Jamin