Hello lovelies!

We’re back to share a few how-tos from Emerson’s watercolor party today! It’s all squeezed into one post, and stay tuned for some freebies at the end ;}
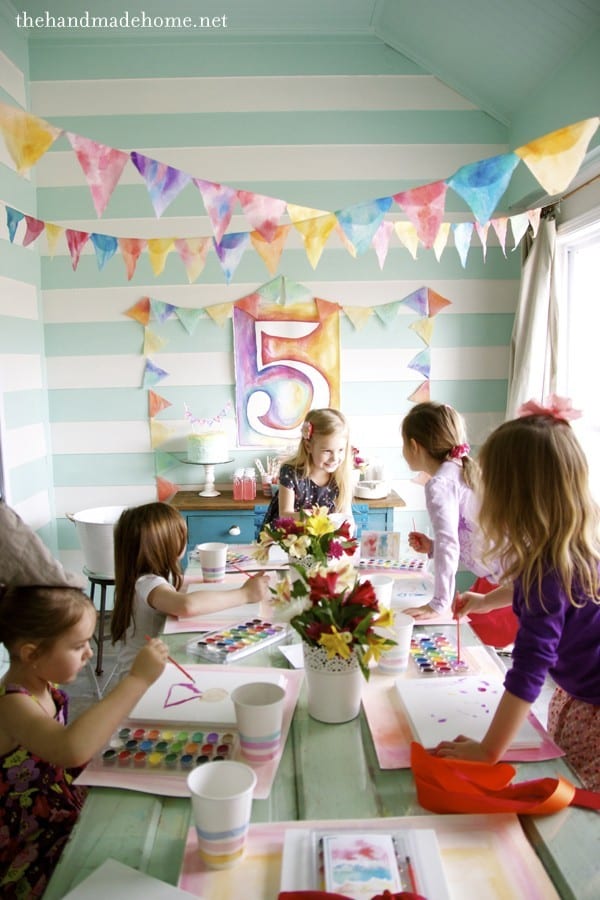
We had a blast this weekend with this little party…thank you all for your sweet comments from Monday. This shindig is manageable without being completely over the top…especially if you do a few things ahead of time. Not (ahem) the day before, like me.
This was a low maintenance, fun and easy kinda birthday. Side note: Is there such a thing as a low maintenance birthday party, or is that an oxymoron? Unless you’re smart (like most normal people) and throw said partay at your local Chuck E. Cheeses, probably not. But sometimes, it’s fun to do something a little different. This felt a little sweet, a little special, and gave me a much needed shot of color and fun in what I like to refer to as the doldrums of winter. Besides, I can only be super cheesy while they’re young, right? (WRONG. I will totally going to be THAT mom when they’re in high school. Hide and watch.)
No.5
First things first: Here’s how we created our giant number.
The key to making this work is using actual watercolor paper. I tried this first with some craft paper I had under the notion that I would make a watercolor runner, and it turned into a watery, wrinkly mess. Being an actual art major, I guess you could plaster a big DUH oh my forehead. I was trying to save a little moolah and wasn’t sure how it would turn out. So I recommend going to your local craft store and splurging on a sheet of large watercolor paper. This sheet was on sale the week before (usually for 9.95) + a coupon (score!). Something to remember: If you plan ahead, you can always save money on art supplies. I guess this would apply to anything, so take my not-so words of wisdom with a gigantic grain of salt. My particular paper was hot pressed. This means that the paper is smoother so the paint will dry quickly.
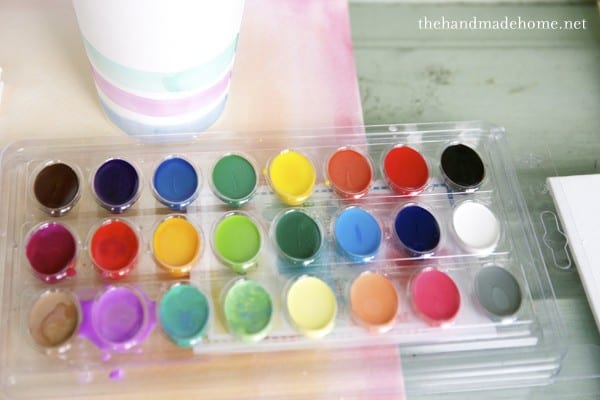
I also picked up a water color set at the craft store, that had plenty of colors beyond just the usual primary variety to work with. (See top photo) Watercolors can become expensive fast if you purchase the individual tubes… just something to keep in mind.
I started by sketching out a five on the paper, lightly with a pencil (You could easily trace or use a projector if you’re not comfortable with freehanding. I recommend using a 5 to refer to as your guide, and if you draw lightly, you can erase). From there, I simply painted around it, varying my texture and layers as I went.
A few quick points as it pertains to watercolors and watercolor paper:
• If you are not familiar with this medium, I recommend practicing on a smaller sheet of paper (like a watercolor pad) before going for the gusto. Watercolors are partially forgiving, but only after you thin them out with water. This isn’t the same as working with say, acrylic paint. I know. No pressure. ;}
• The colors are easy to muddle, and will muddle quickly. For this style, keep your colors from the same groupings together, and merge them gradually. Reds and yellows, purples and blues. But even within those colors are other colors, if you think about them. Within the right shade of purple you can see a hint of pink… or blue… so if you plan to join them, allow room for bleeding them together, if you will. Think along the lines of the basics: yellow + red = orange (so sprinkle some pink in there as well). Play with the same colors all around in different areas, to unify them.
• Watercolor paper will buckle on you, unless you have a giant piece of wood to presoak your paper, and staple it down. I couldn’t be bothered, so I painted as I went. I think it only adds to the genuine, painterly look. Like a vintage parchment or art rediscovered. We’ll hang this in her room later so it’s fun to have it as a work of art once we’re finished.
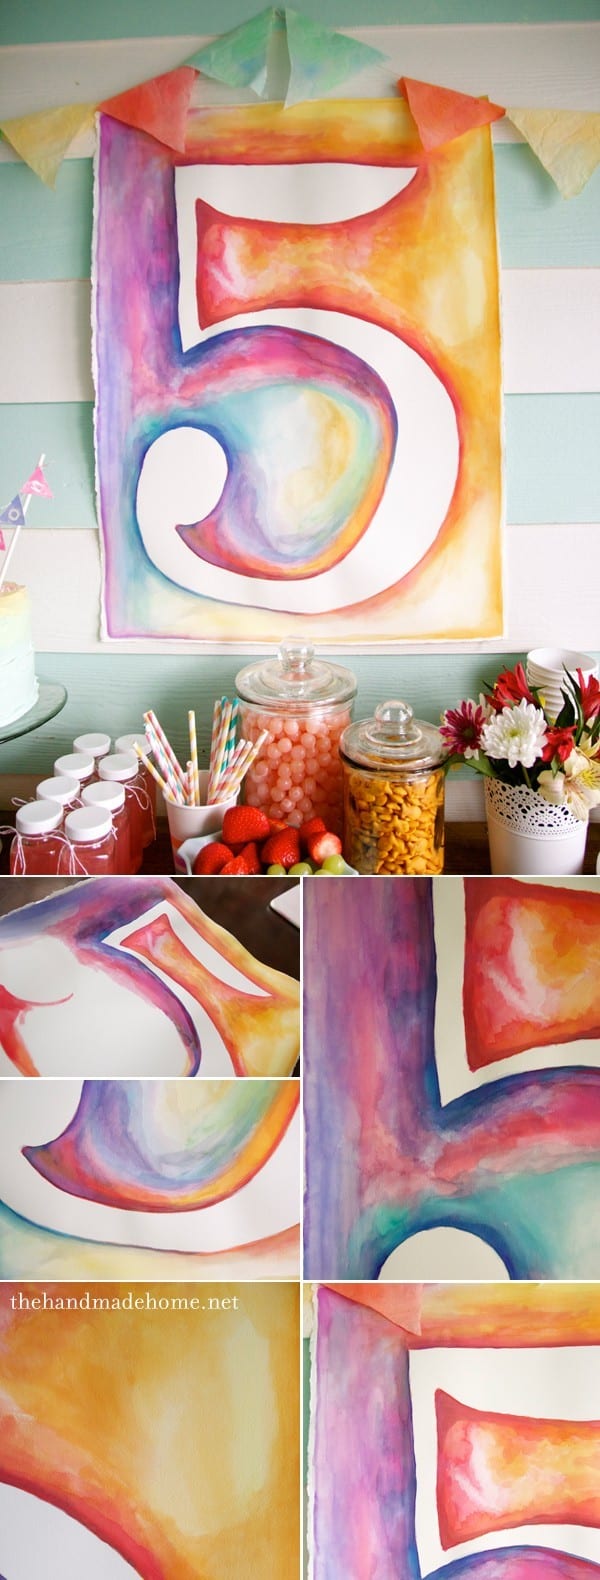
Just remember to have fun with it, and merge the colors as you go. Keep the actual number area blank, so it stands out. If you mess up just keep working with it, until you have the results you want. Side note: To hang this piece, we used a dab of hot glue in the corners and we will just pop it off when we’re finito. (Basic tape won’t hold.)
Watercolor Banner
My absolute most favorite thing from Emerson’s party. I can’t bring myself to take it down just yet. What’s it made from? Coffee filters. TAflippinDA!

I decided to try out coffee filters when I was thinking of something affordable to use for her party. Once I cut the filters into a triangle shape (leave the top curved) I painted each one. When they’re dry, you can flip the top side over a string, and secure it in the back with tape. You can soak these, but I liked the varying shades in the painted look. I laid them out all over my kitchen table, and when they were dry, used some easy clean up by hitting the surface with a clorox wipe.
By the end, I was running out of time, so I did a few of them in bulk, by stacking them together, and painting on top. Just make sure the paint goes all the way through, and you separate them to dry.
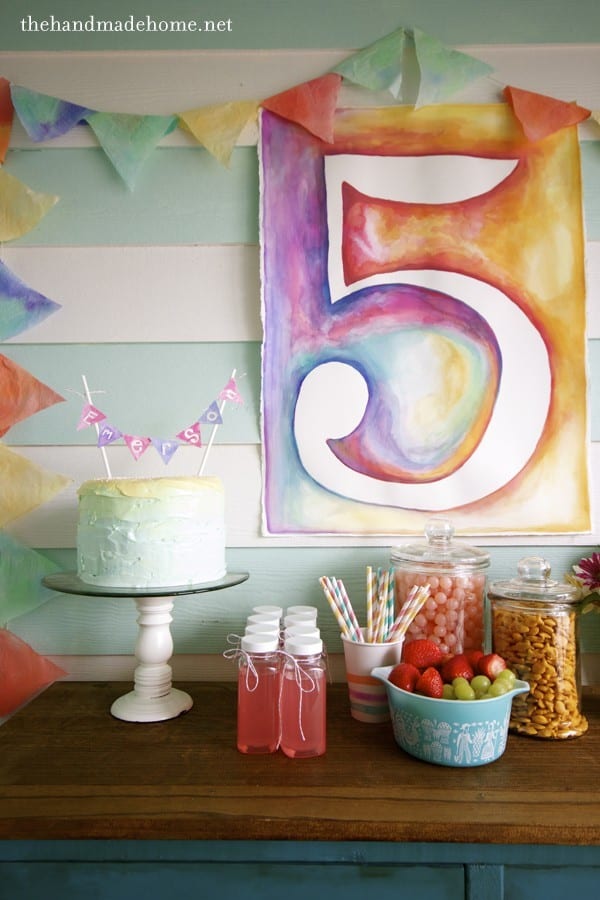
The Cake:
I knew I wanted a watercolor cake, but was clueless on where to start. I didn’t really have time to practice, or the patience, either. I’m a do or die kinda gal, and I also know they have emergency rando cakes at the local bakery should a gal be so inclined and or frazzled. Enter this fabulous tutorial, from Sweetapolita. Watch her video and be charmed. She is oh so cute and smart and brillz. I am not a baker-aficionado-genius so it was super fun! I don’t have all the fancy materials that a real baker would (As opposed to a fake baker) So I just improvised. But I did splurge on a spatula thingy like she uses in the video from the cake section of our craft store. It was three dollars and worth the small investment so I could control my icing.
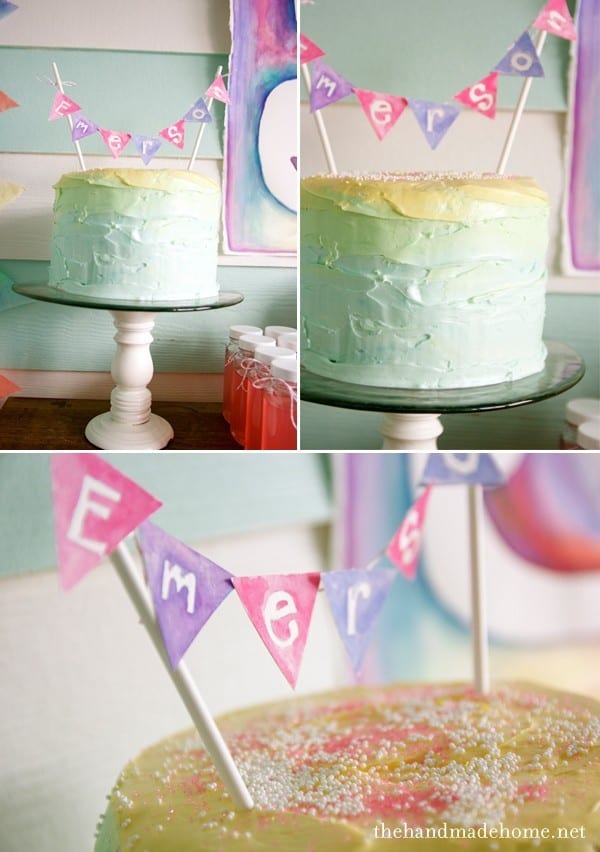
For the top of the cake, I just used some sticks you can purchase at your local craft store (from the baking section) with twine. I cut some triangles from watercolor paper, drew a quick letter, and carefully went around each one with watercolor. I just stuck it to the back of the twine with more tape, and I’m quite relieved it didn’t catch on fire when we sang happy birthday. ;}
I didn’t go homemade with this, and mixed up some cream cheese icing (about one container per color) so I had plenty to work with. I used Wilton’s colors (Golden Yellow, Leaf Green, and Aqua) and let me just say, a dab will do ya. I may have suffered an icing casualty in the form of dark neon green. It was tragic.
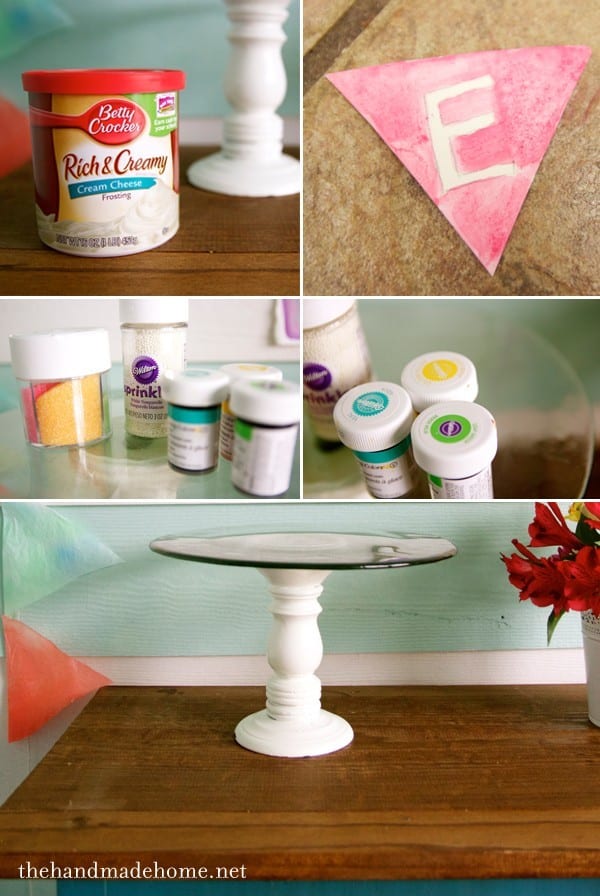
I threw together this cake holder before the party. I simply made the cake on the glass part (it was easy to rotate and ice) and went back to wipe some of the icing off for a neater look on the dish when I was finished. This top glass piece is something I picked up at a garage sale years ago, and I think it was originally a candle holder? I really have no idea. This is one of those obnoxious look-what-I-found-at-the-store-by-luck projects, but you could easily do this with a plate as well. I used a painted candlestick I’ve had around my house, and glued the two together. I was going to use something permanent, but wasn’t digging all the “poison” notices on the bottle, so I went for hot glue. This way I still have my candle stick when I don’t need it to be a cake holder. Just cut the cake carefully (be careful about how you apply pressure on one side) so it doesn’t pop off-an extra set of hands can help balance it. But we had zero problems.
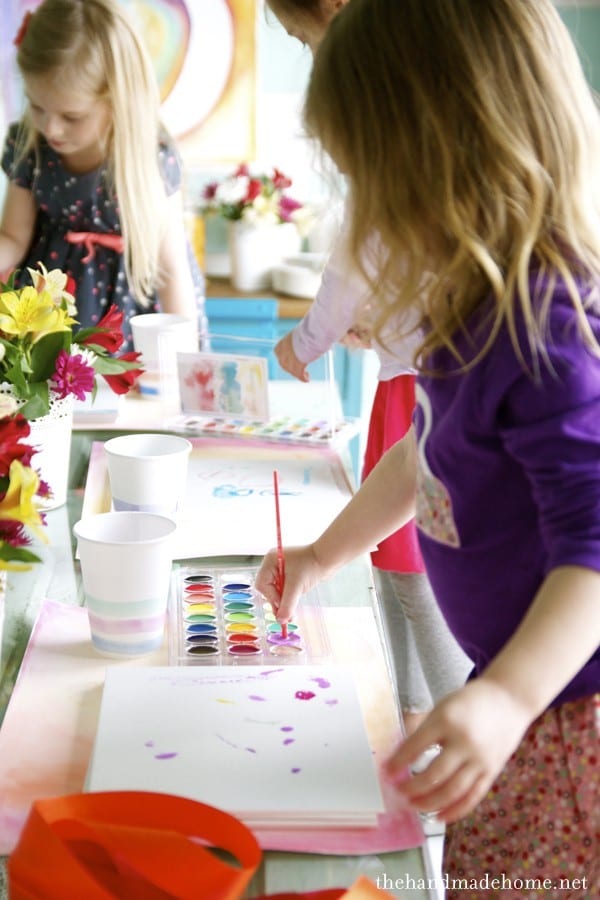
For the girls’ painting materials, we ordered these paints. Their prices were lower than other stores for the number of colors available, and there were only a few girls so it wasn’t ridiculous. Bonus: Washable. I also ordered some canvases for them to work with, but I must say this is my one regret. I wanted to give the girls something nice to take home, but in retrospect, I would wait for art supplies to go on sale, and snatch up a few small watercolor pads. This would yield better results on the painting end. They still had fun, but the art dork in me wouldn’t let it go.
I also used ‘placemats’ (more watercolor paper) from a pad I had. I simply cut them lose and painted each one to set their supplies and water on top.
The food for the party was basic. Just simple strawberries, goldfish, carrot sticks, guacamole and salsa. I also wanted something fun in the realm of candy, so I ordered these little sour balls. They were chewy and tasted like watermelon. They have a lot more confectioner’s style candy, here.

The stripey straws and little (unbreakable) milk bottles are from Shop Sweet Lulu. This is my go-to for precious little party supplies.
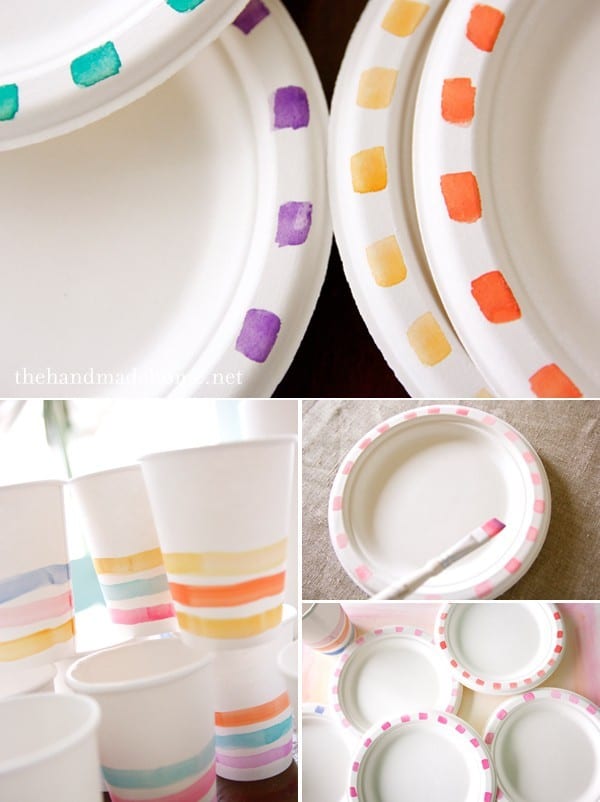
I couldn’t find any paper plates like I wanted, so I purchased some eco-style ones instead, (plain white ones are usually plastic coated) via our local party store, and hit each one with a different shade of simple watercolor. The cups are plain coffee cups I scooped up in a package. (Again, with the plastic) And I added a different color stripe on each one.
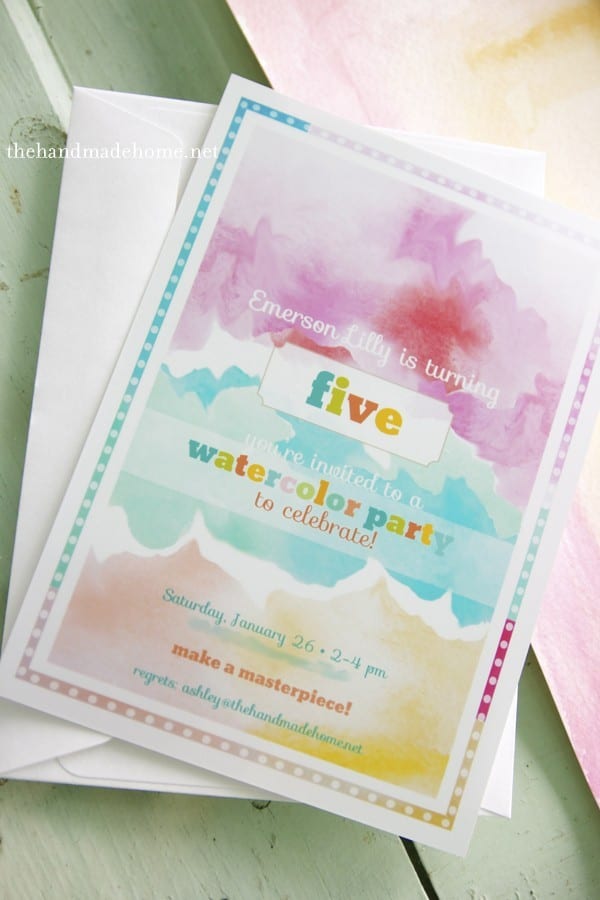
As I mentioned before, I designed the invites, but if you wanted to do your own version for a little girl or liked it as stationery, I’ve uploaded them to our site as free printables.
The Stationery (5 x 7) and tags (2.5 x 3.5) in both blank (like the stationery) and with birthday phrases – are available on our downloads page. To see the rest of our freebies, click here! (Look for Watercolor Stationery.)
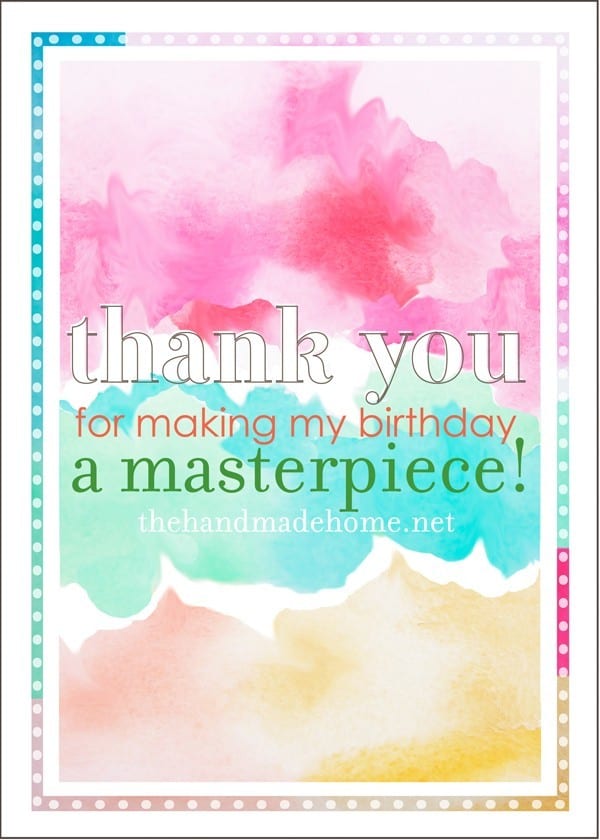

Tada! Simply click, print and enjoy!

And that wraps it up!
If you decide to do this have fun and as always, we’d love to see! Especially if you mix it up for gender appropriate-ness. ;} Have an amazing day!


Thank you so much for sharing this with all of us. I can’t wait to try those banners! Or the number painting. Awesome!!
I never knew there was a difference in watercolor paper. The more you know.
so precious, Ashley ~ she’ll always remember this! Way to put your art major to work!
xo Heidi
this is such a wonderful idea! I have done a “artist” type but I love the colors, soft and bright and cheerful all at the same time….
All your tips (what works & doesn’t) brilliant.
I love that it didn’t’ include a bunch of oriental trading “cr__” to just get chucked when the party is over! And your 5 came out smashing.
Thanks for the watercolor downloads too- this might be just the thing for my almost 9 year old, who loves anything creative!
nice job in every way 🙂
P.S. I have to say I love our blog, the look, colors, fonts- all of it. Kinda smitten today!
So very cute and creative!! 🙂
I love the painting! What brand of paints did you use?
Hey Cara! i have no idea. They were a basic set from Michaels. I hope that helps! (the label is long removed by rabid children) ;}
Everything looks so professional and beautiful! Well played.
For those not so handy with a brush – you can draw/color on coffee filters with washable markers then spritz with water to get a watercolor effect. (glue to popsicle stick for butterflies – camp counselors holla)
This is the cutest idea Ashley! I am still trying to figure out my daughter’s party, who is turning 5 in Feb and got some great ideas here. I hope you are doing well! Hopefully see you again at Haven this year?
Oh my goodness, this is absolutely darling! We are doing a small, family party for our almost-three-year-old in one week, and I have a crazy desire to make some watercolor decorations just for us. Thank you for the inspiration!
What a wonderful party! I always love the soft colors of watercolors. Thanks for sharing the details. Now, off to convince my kids to have a watercolor party someday.
LOVE this party idea! Everything looks gorgeous! FYI – I blogged about your gorgeous home today. I’m making my house a home in 2013 and your beautiful spaces are going to keep me focused! Thanks for being an inspiration for my home! 🙂
You are so sweet, Kacey! Thank you for your sweet sweet words! HUGS!
What a beautiful party, LOVE that “5” art, great theme! (have you seen my emails to you about the series? Starts tomorrow, and hoping you saw them;)
This seems so much fun to do, kids will love the colors and they could even participate preparing their birthday decorations.
I’m curious, how do you make the water color effect? How did you design the invites?
Hey Autumn! That’s kind of a complicated thing to explain. It was actual watercolor that I painted, and then brought them into photoshop. ;}
Am I missing something? I clicked the link to download the watercolor stationary and invites and I don’t see “watercolor stationary” anywhere on the page. Are they under a different name?
Haha no Korey- I’ve been sick and te Internet wasn’t working at our home that day-I forgot to link them up! I will have them working by this afternoon 😉 sorry ab that & stay tuned 🙂
LOVE this party! Great job! LOVE LOVE LOVE. So glad I have little girls : )
Thank you, Paige!
oh my goodness. how am i just now seeing this?
it’s perfection in a party.
i will pin this and lydia’s next party will be a watercolor feast. thankyouverymuch. 🙂
Fabulous artistic party! Totally pinning this for my own kids!
I love your birthday party idea. I loved planning fun and different parties for my kids – now adults. I will store this one away in my memory for a time when I have grandchildren.
Actually, I think it would be fun to copy your idea for an adult friends art day.
I couldn’t agree more, Carol! Go for it! ;}
unbelievably awesome!
well that is just as cute as can be! thanks for sharing. i like the teepee too.
Oh I love this! I am doing a rainbow painting party for my daughter’s 5th birthday in just a few weeks and I might just have to borrow a few of our ideas! I really love what you did! Thanks for sharing!
You’re No.5 banner inspired me to create a similar one for my son’s second birthday. It turned out great. Your tutorial was so helpful because I’d never used watercolors before! I shared it today in my post: http://craftivitydesigns.blogspot.com/2013/03/pom-poms-photo-garland-watercolors.html
Such a gorgeous, gorgeous party! Thanks for sharing all the details on the (beautiful!) #5 painting, and your other crafts. I’m sure all the guests had such a special day!
Thank you! ;}
I am completely in love with this party!!! So beautiful and creative! Awesome job!
This is JUST beautiful!!
This is the cutest birthday party idea ever! I love it!!!
Thank you thank you thank you!! Perfect timing for your party to be featured on Craft Gossip. Miss 5 decided she wanted an artist party which I had been pondering ideas, had a few but this just pulls it all together beautifully. An artist tea party it is!! Looking forward to bringing it all together- fun times ahead!!
Hi Ashley! All I can so is “awesome”! How cute! I love the watercolor theme! You did an outstanding job on everything! Thanks for sharing all of the tutorials and all of the great photos of the party! Blessings from Bama!
I LOVE THIS SO MUCH! Did you purchase regular white canvas? Or special watercolor canvas?
Hey Ashley! My one regret = not purchasing watercolor canvases. I just grabbed some up, trying to save moolah because art supplies are soooo pricey. Wrong. I should have done watercolor canvases. ;} Hope that helps!
I absolutely love your daughters watercolor party. I was wondering if you sell a pdf template for the invitation that I could order?
Meaghan
SOO beautiful! My youngest has her fifth coming up . I can put this in the idea box for party
In your description of the party favors, you mentioned that you purchased small canvases for the girls to paint on…then you said ” I wanted to give the girls something nice to take home, but in retrospect, I would wait for art supplies to go on sale, and snatch up a few small watercolor pads. This would yield better results on the painting end. They still had fun, but the art dork in me wouldn’t let it go.”
In what way would the watercolor paper have been a better choice than the canvases you bought?
Hey Kirsten! I simply scooped up some generic canvases for their price, and in a hurry because the party was soon and it was on sale. They were not, however, especially for watercolor canvases. So just makes sure you choose watercolor friendly canvases, or the paint will bead up and not work as nicely as it can. ;} I hope that helps!