{Alternate title – intro : the basics of color}
Recently, Aiden asked if he could take art lessons.
I have an undergrad in graphic design. Which means I took every art class under the sun. And to top things off, once upon a time I went back for my masters (Masters is the new bachelors which means no one can officially afford anything… can’t wait til we get to do that one… hurray!) Only I ended up with (surprise!) expecting Aiden, and decided to put the big halt on my education at the time. And a blog was born. What a great story, right? No? Yeah. I was bored too.
Incessant rambling aside, It really didn’t make sense to not do it myself. But I even asked Jamin if we should sign him up for art classes somewhere. He laughed at me. I know. I syke myself out, and have this idea that my kids will be missing out if I do it. I don’t think I’m very good at this. But I made the decision in this process, that all three children should be ‘homeschooled’ in art. Most schools simply don’t provide it anymore, and if I can supplement in any way, it’s this.
I want my children to have a rich background in the arts, and education is certainly never a wasted thing… so I guess it’s up to me. Our kids love to create, and if they later decide to go into anything in that field, they’ll have a nice little back knowledge of art and design. It’s sad to me that it isn’t offered much.
So a new idea was born.
I thought I’d introduce a new idea, for all you moms out there who want to work with their children from home, as well.
They won’t be official “lesson plans” or anything, but I just thought we’d start sharing a few ideas we will work on, starting with the basics. That, and honestly it kind of holds me accountable if I’m writing about it. Anyone in? Because as usual, it’s more fun in groups! (I’m one of those, jump-off-the-bridge-with-me kinda people). These will include a fun activity to do with your kids, some of them projects. Along with a few talking points and questions to ask.
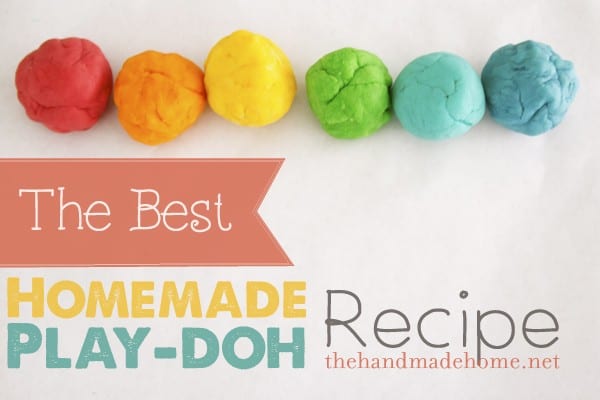
Today, I thought I’d share a little something I was up to this weekend with the kiddos. We decided to make some homemade play-doh. Why play-doh do you ask? I’m getting there, I promise. But in the process, I thought this was a fun recipe that everyone should have.

I know there are probably quite a few recipes floating around out there. Emerson recently brought some home from her preschool, and when playing with it, while I do love a good nostalgia a-la a sense of smell (it’s kind of like cheerios, school supplies and fruit loops) this dough was just a lot of fun and seems to hold up in terms of moisture and the anti-crumblies. So I totally asked Emerson’s teacher to oh so graciously share her recipe…
Here’s what you’ll need :
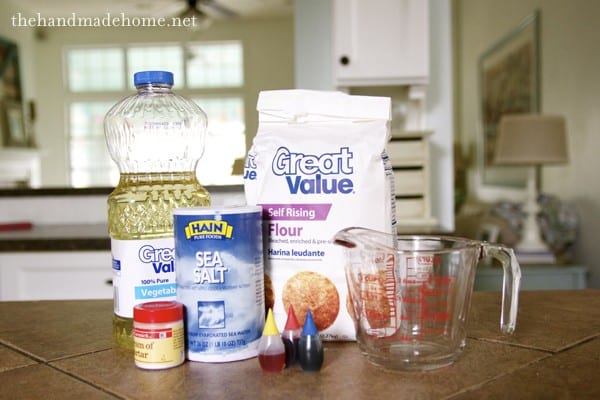
3 cups of flour
1.5 cups of salt
6 tsp. cream of tartar
3 tbsp oil
3 cups of water
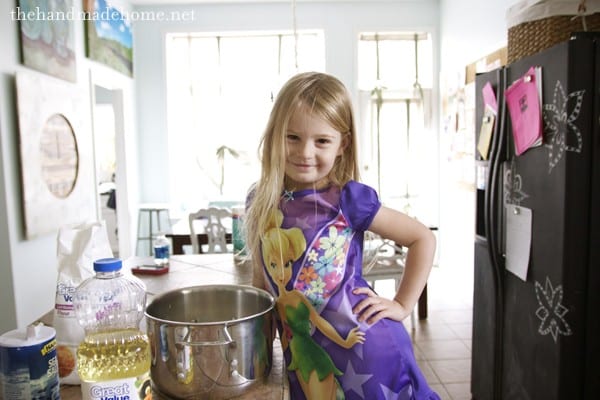
{We. Are. In. Trouble. See : Vanna.}
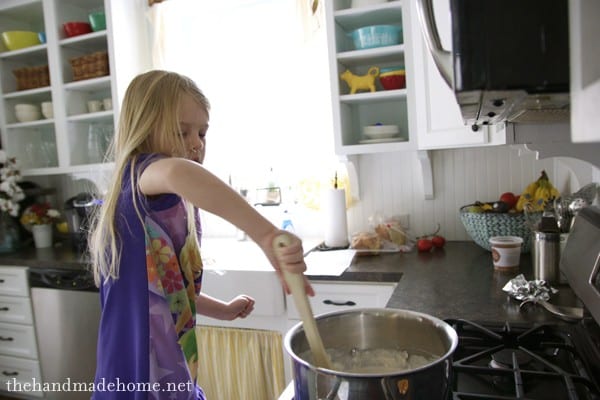
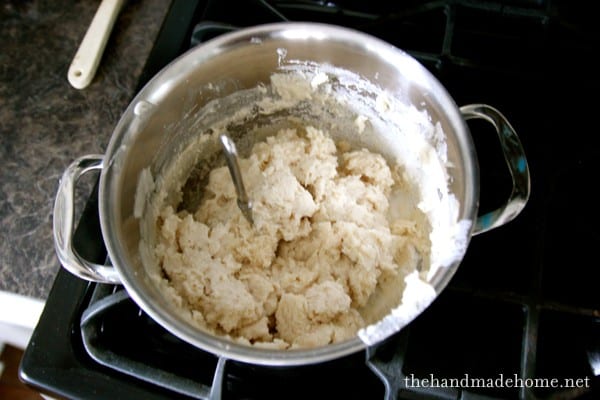
Pour all your ingredients into a large pot. Stir constantly over medium heat until a dough forms by pulling away from the sides. Knead the dough until the texture matches play-doh. (It takes about 1-2 minutes)
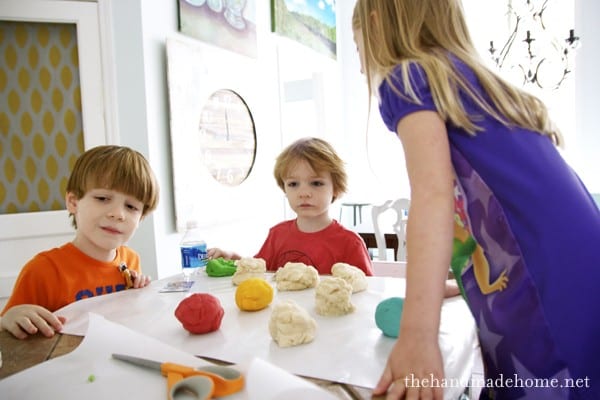
Apparently, hot plates work great, as well. Emerson is a mini chef and loves all things cooking, so it was a fun little process.
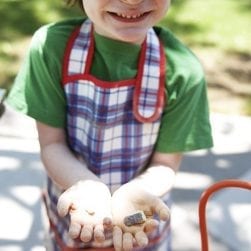
Remove it from the heat source, and it should look a little something like this.
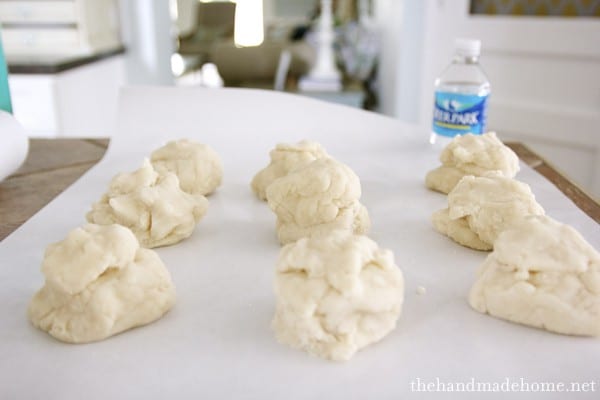
This recipe yielded enough to make 9 good handfuls of play-doh… the rough equivalent of what you would find in a classic container. Let it cool a little before you start the fun part.
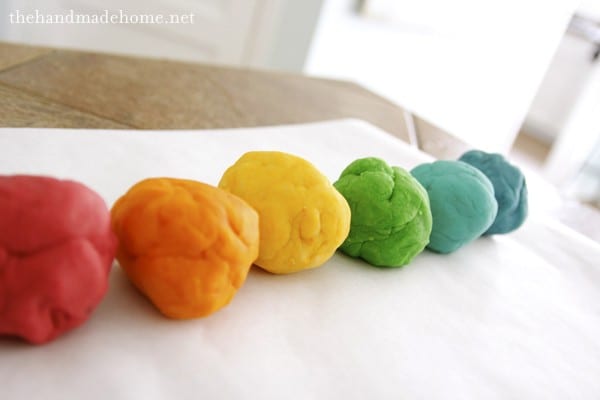
I’m sure there are other ways to do this, But we decided to use food coloring for our play-doh colors. And from there, it was a little bit of a discovery-based learning process. Your hands will get dirty.
I decided to use this as an introduction to color basics.
Talking points with your kids:
Did you know that color comes from reflected light?
You see color because light waves are reflected from objects, to your eyes. The light we see from the sun is called white light. It is actually all of the colors.
(Note: For this part, you can use a crystal from a chandelier in the sun. Our kids started asking questions when they saw this.) When light passes through a wedge of shaped glass (called a prism) the beam of white light is bent, and divided up into bands of color. That is what a rainbow is made of.
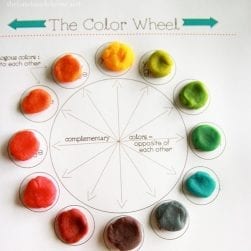
The rainbow is also called a spectrum of color. It’s always seen in the same order :
Red, Orange, Yellow, Green, Blue and Violet.
A rainbow or spectrum is divided into two main groups of colors.
Do you know what a primary color is?
Primary Colors : The main colors from which all other colors are made. They can not be created by mixing other colors. Can you tell me what they are?
These colors are Red, Blue + Yellow.
If we just talked about red, yellow and blue, what colors can you think of that we have left?
Orange, green and purple.
Secondary Colors : are made by mixing primary colors. Red + Blue = Purple. Red + Yellow = Orange. Blue + Yellow = Green.
Today we’re going to mix those colors!
——————-
You can mix your play-doh colors after you establish the primary colors, and we will cover that in a future little lesson. But we had a little fun creating all of our colors from food coloring.
I let the kids predict what the primary colors (of food coloring) would make, and guess as we went. I started them off by mixing them with my own hands and letting them watch (They can be super messy, but once they dry, they’re fine) and they were surprised by some of the combinations we ended up with.

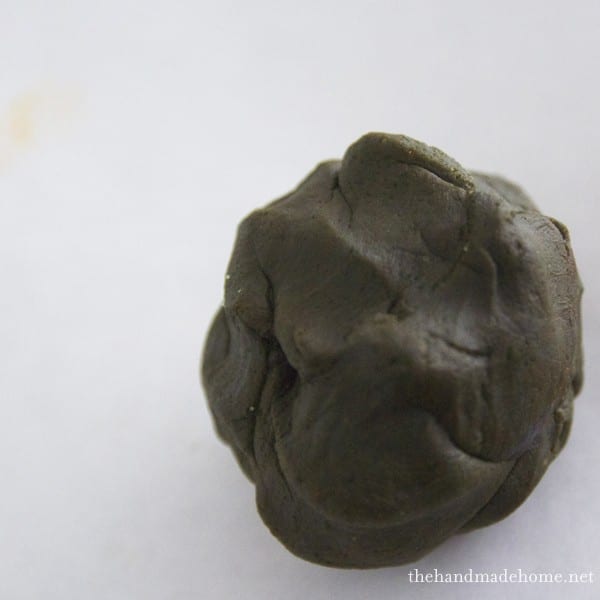
As you can tell, our purple was a little smaller, because we even ‘blew it’ with an entire section of play-doh. They learned the hard way what happens when you mix two complementary colors. Yellow will not lighten up the (red + blue) Purple. This gave them brown. Two complementary always equal brown.
Not pretty, but the boys liked it. And it was fun.
This little recipe will last up to three months, or longer! We simply stored them in plastic bags.
 And there you have it! A simple, discovery-based way to help your kids learn more about the basics of color. A good foundation, for sure!
As always, let us know if you guys will use some of these with your kids. It’s a great way to learn, and have fun all at the same time!
Have an inspired day everyone!

Hi!
I love this idea, it’s a great way to introduce color knowledge!
I also wanted to mention that you have Red + Blue = Yellow up there. No biggie – things happen! 🙂
What? That’s wrong? ;} Let me be a testament to what happens when I try to write posts and kids are all over me. I have fixed it. Thanks! ;}
Awesome. We love homemade play dough at our house too! I’ll try this recipe out. It’s a little different than mine. I’m excited for art lessons! Great idea.
Oh. Em. Gee, I am so stinkin excited! Thank you thank you thank you!!!
Just when I thought your site couldn’t get any better… So pumped
My sis was telling me about adding scents to her playdough. I’m going to try adding some of my peppermint extract and orange extract to your recipe and hope the little one doesn’t decide to taste it.
What a great idea!! Trying this for sure!
That is a good idea! Awesome.
I put Lemon Tea Tree in mine (and glitter!) and I swear that it helps preserve it for a bit longer whilst smelling lovely.
Great suggestion! ;}
I know I did to and apparently the little one tried to at it luckily it was nontoxic
sheesh those little round balls of playdough bring me back to my days working in daycare. We spend many a days making playdough! Love the beautiful colours!
I am excited for this series. I too have a BA in graphic arts, but I feel like I’ve failed to incorporate art at home enough with the kids. They hardly ever have it at school – I think once a week for 20 minutes. I’ll be trying to follow your lead!
I am IN love with that play-doh styling you have going on there. LOVE. Dot, dot, dot… 🙂
How cool are you!? Already pinned it and I’m passing the info along to my SIL. He little girl just started PreK and loves (loooooves) PlayDoh. I’m sure they’ll have tons of fun making their own!
Cute idea! I remember these lessons from my art days too… what a great way to show them. Much more interesting than lessons on a chalk board!
Hi, I am in with you! I will be trying this play doh recipe with my son. Thank you for sharing!
My kids are older, 9, 15 and 16, but they still love play dough. My 15 yr old wants to be an artist. I will be trying this recipe out when next they ask for play dough. I have found that it great for them when they are upset/angry. Also I found that real play dough mad great molds for my polymer clay projects and will be interested to see if this does as well.
Love this idea, totally looking forward to future posts!! Thanks, sometimes in my hectic life it’s hard to just sit back and be creative…this will definitely help!!
must make this- pinning now
yay!!! love the idea of homeschool art series. 🙂 I have a 4 yo, 3 yo, 2 yo and 6 1/2 mo and this will be a great series to use with them! thanks. 🙂
I love making homemade playdoh with my 7 year old. Mixing the colors can get messy but we just grabbed some rubber gloves and go to town creating.
Thank you for sharing this– I love this idea! My grandmother was an artist and used to give me lessons when I was little. Those lessons make up some of my favorite memories of my childhood. I love to do art projects and crafts with my preschool age sons and I’m excited about following along as you share your ideas!
what a neat idea! Being a graphic artist as well (though my college training was more based on the Advertising side then art), I stink this is a great idea for my (future) kids!!
Great post indeed! I love your idea about starting art lessons, would be really looking forward for your inspirational activities.
Keep it up 🙂
This is wonderful! I have found that kids learn so much more fully if they can be hands on. I did something like this in my summer neighborhood art class. Here’s the post if you are interested!
http://lassothemoon.typepad.com/lasso_the_moon/2012/07/craft-wednesday-light.html
Next time I’ll use your recipe and make my own!
Anna
This is so great! Thank you for sharing.
I love this…. I am going to make balls of it and put it in baby food jars with a dot of food coloring in the middle. When they mix it up they will discover what color they have and then the kids can bring it home after my little Eliza’s one year birthday party!
I’m in!!! I have the desire, but no art skill so I would love to do this with my kids! Thank you thank you thank you!!!
Thank you, I was worried what to do with my six year old boy ( grandson) lots of energy.
I care for him fortnightly.
Regards Angela
Any more wonderful easy ideas. We have done the volcano eruption from hard . He and I want more.
Hey Angela! Thanks so much for stopping by. Please be sure to check out our entire section for kids where we have a wide range of ideas – from slime to soap to keychains. Hope that helps! ;}