Side note: I was a little torn about what to call this post. I mean, it could be DIY Wood Slice Monogrammed Tassel Keychains for Teachers, but that would have been overkill. So DIY Wood Slice Keychains it is.
My job is weird.

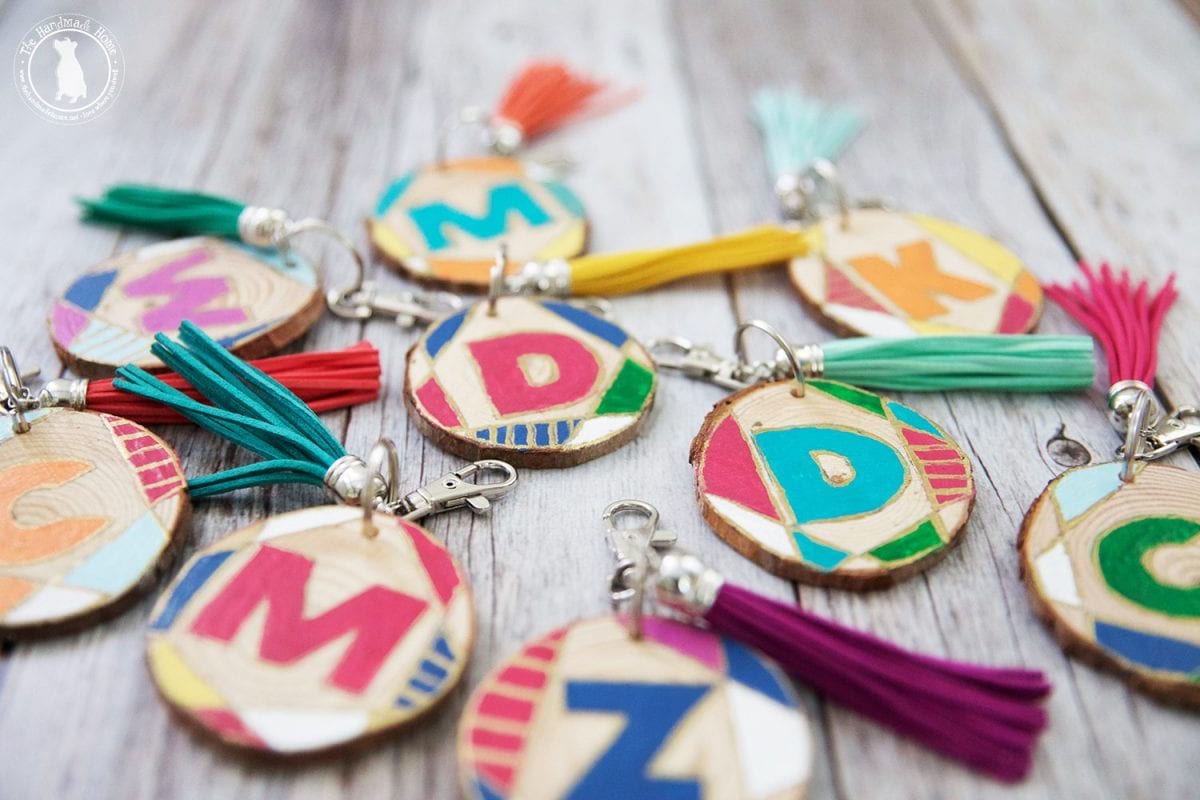
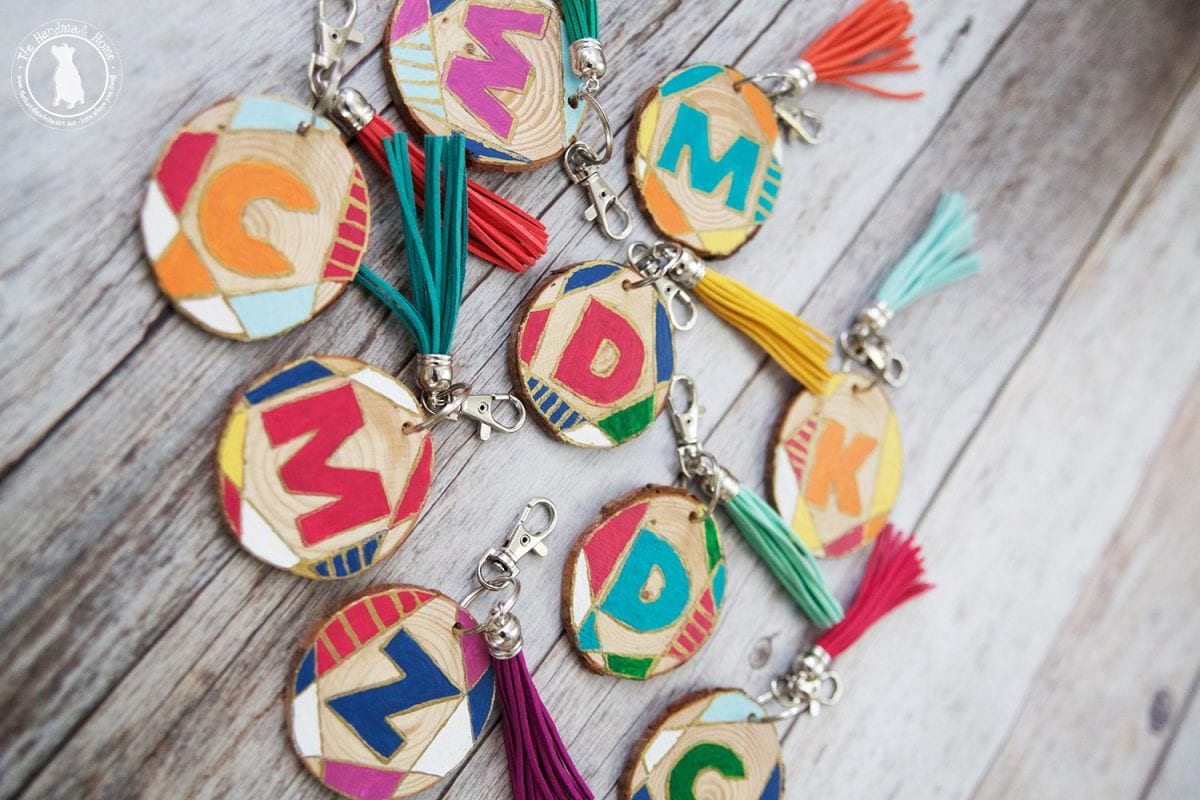
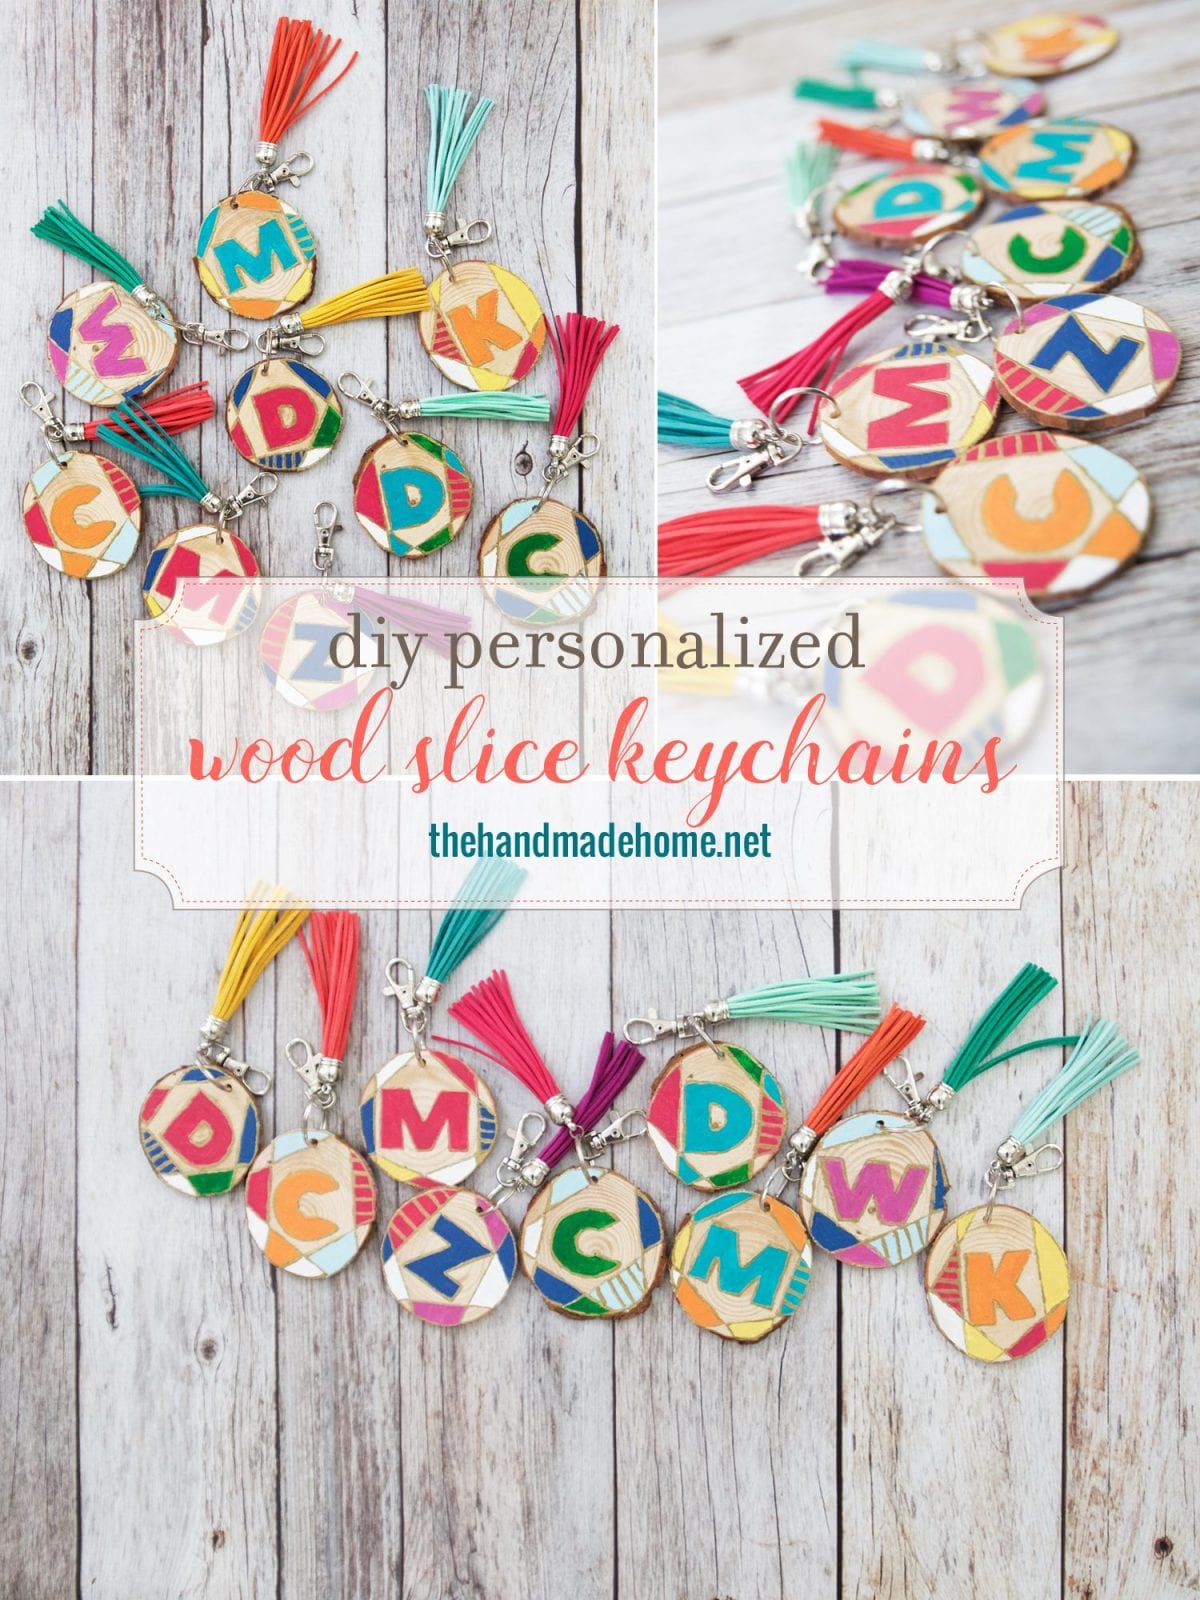
diy wood slice keychains
Teachers are amazingly talented people with a whole lot of patience to put up with my children every day. Sometimes, my own children annoy me so I can’t imagine what it’s like to teach other people’s children. I would have to hide in the closet daily and gorge myself on dark chocolate. They have souls made of gold, sprinkled in diamonds and will have a higher bracket of importance than me in Heaven after the zombie apocalypse or whatever it is that finally takes me out. {That was self-important, because trust me, it will be that I choked on some peanut butter and tripped up the stairs. I just hope it’s not too soon, because I plan to be the old lady with lots of clever snark, humor and glorious baubles who teaches yoga and drinks morning martinis. I look forward to it.} But that was a total thought derailment.
My point?
There is no way ever that any lame-o gift from me could show my appreciation. Ever. I mean, after three years of DIY-ing it in the school department, I know.
Also, we have like nine amazing teachers to show our never-dying appreciation to.
So we decided to go the clever/colorful/thoughtful/handmade route.
Some monogrammed wood slice tassel keychains, {with some awesome free printables should you also choose to give the gift of amazing puns this end-of-the-year} thus my true indecisiveness on all things titles.
Maybe I shouldn’t have shared this because you’re all embarrassed for me right now. But I like them so much, I’m making one for myself.
Shhhhhhhh.
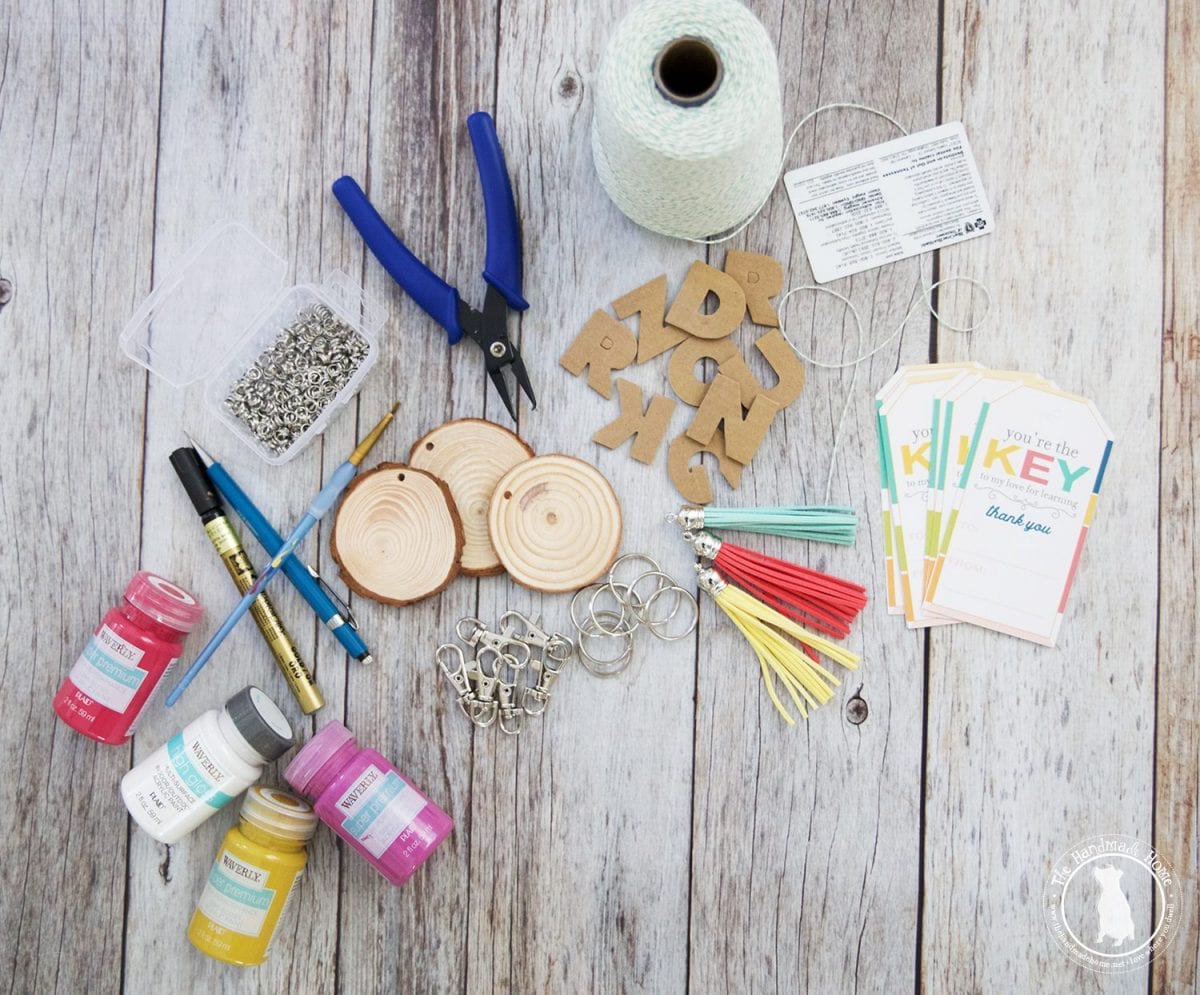
diy wood slice keychains – Here’s what you’ll need:
• wood slices – we nabbed some pre-drilled ones here, because it’s one less step for you.
• cardboard letters – any that measure around 1.25 in width should fit nicely on these particular wood slices.
– you can also print them out on card stock – I have a free alphabet that I mixed in with mine
– check the scrapbooking section at your local store if you’re looking for some like this
• pencil + small paint brush + gold pen + old credit card
• craft paint of any kind – you’ll definitely need white
• jewelry double loops + jewelry plier thingy
• keychain pieces – we opted for the lanyard kind
• faux leather tassels
• matte mod podge + fat brush
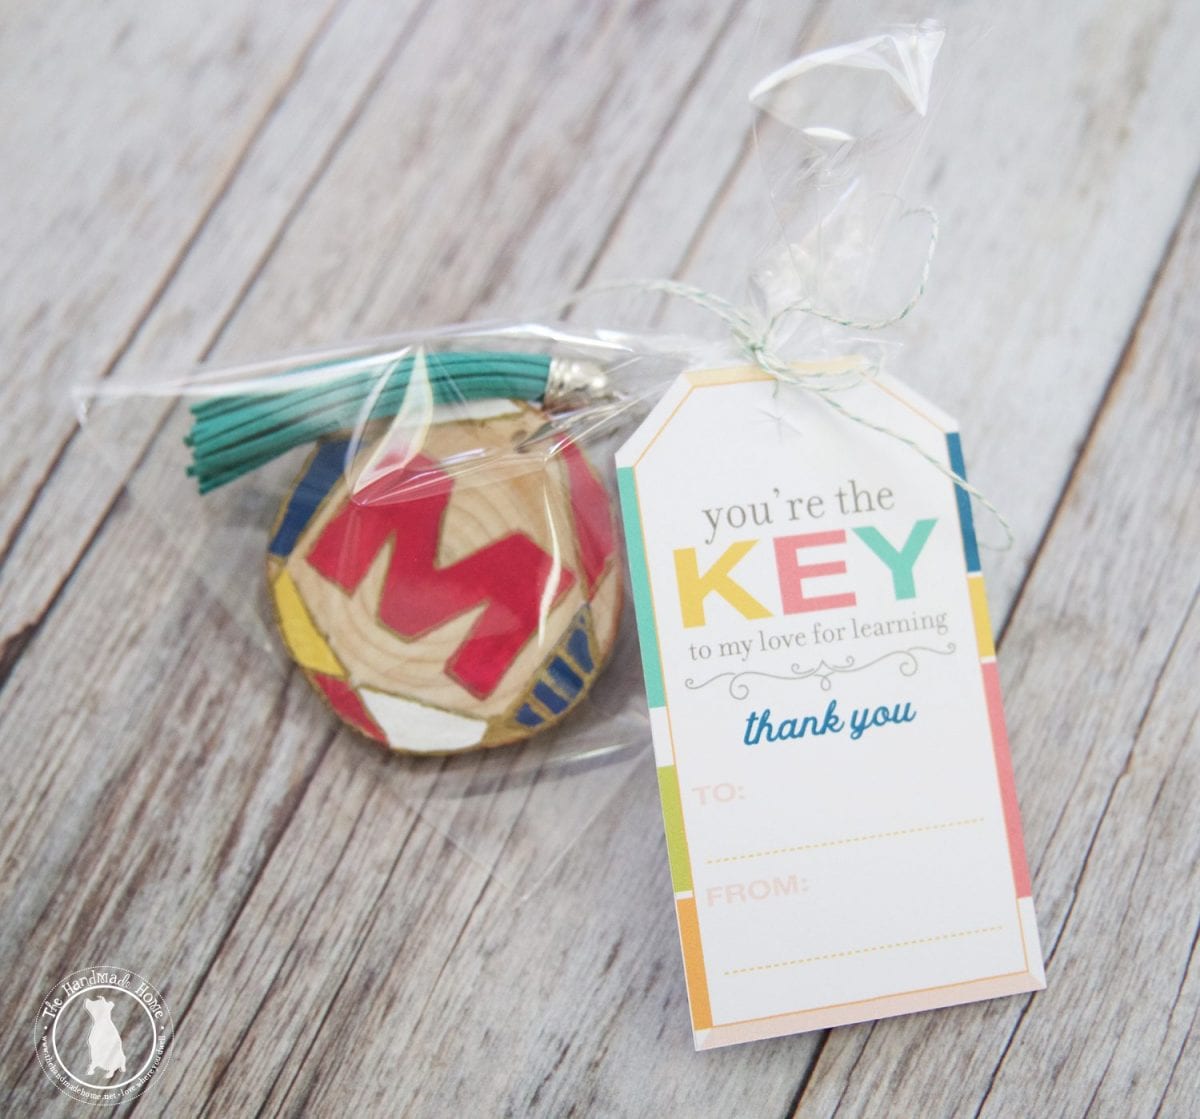
• gift baggies + tags {free printables here} + twine
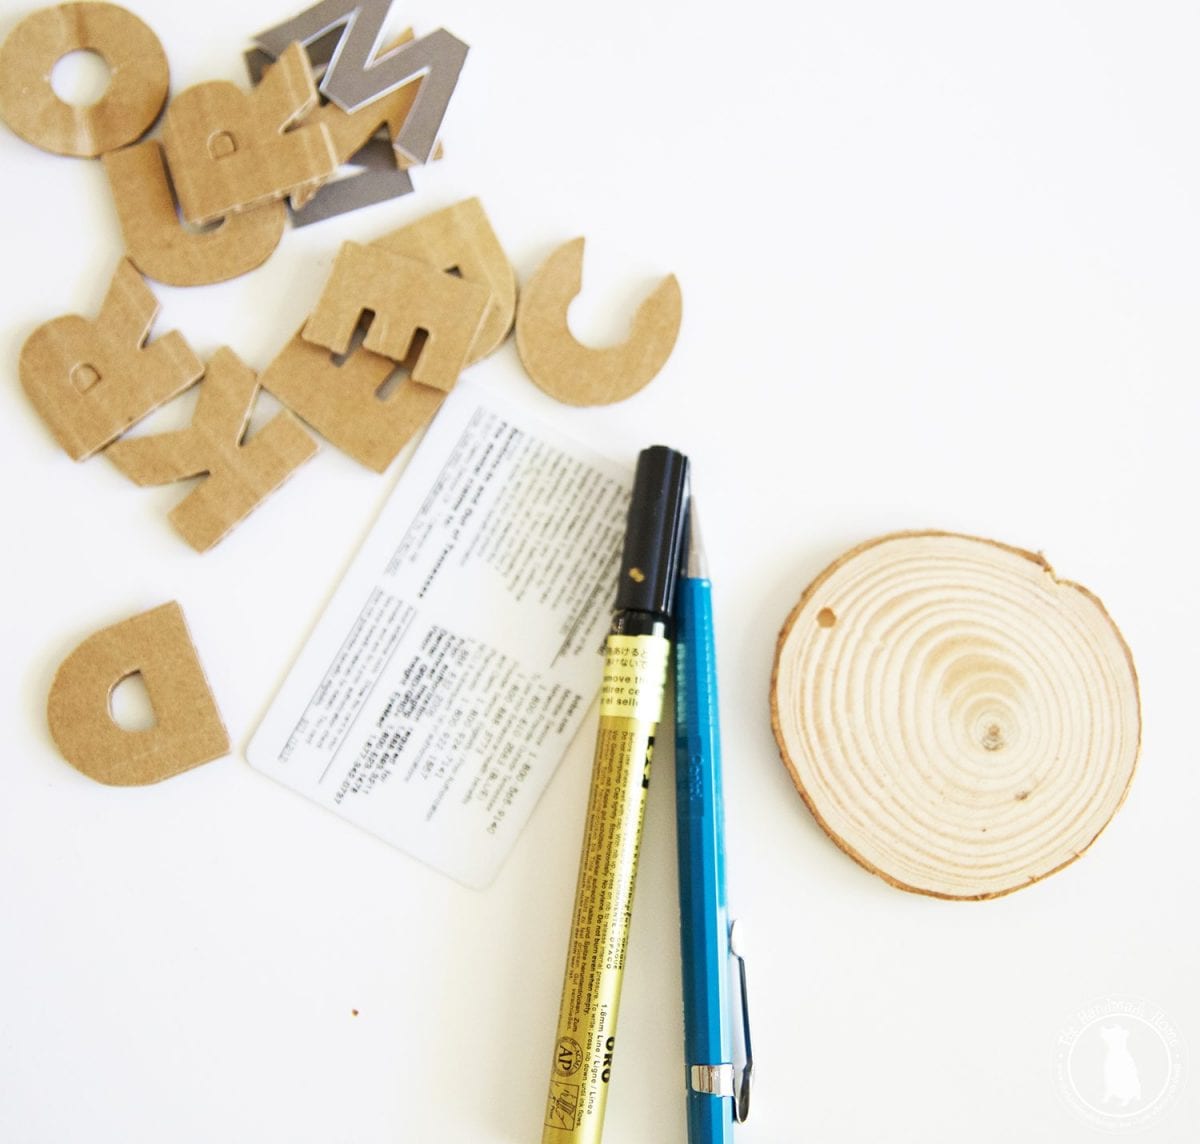
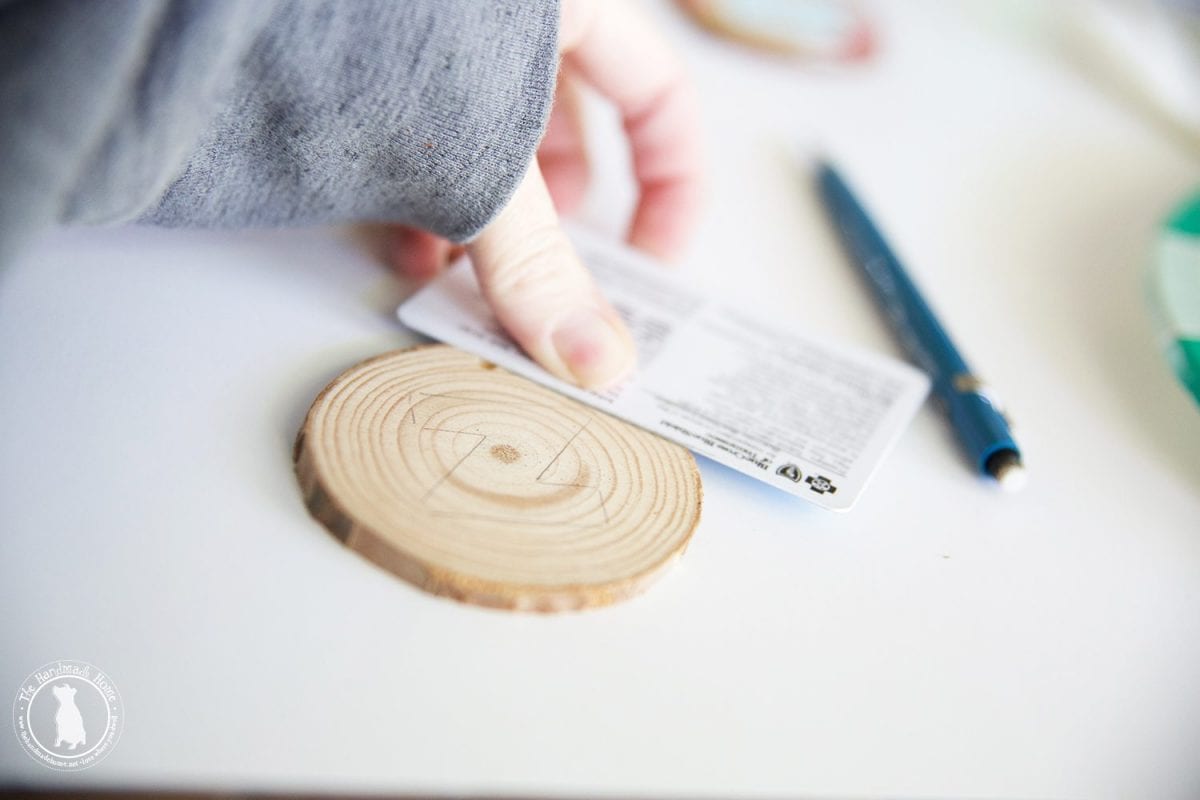
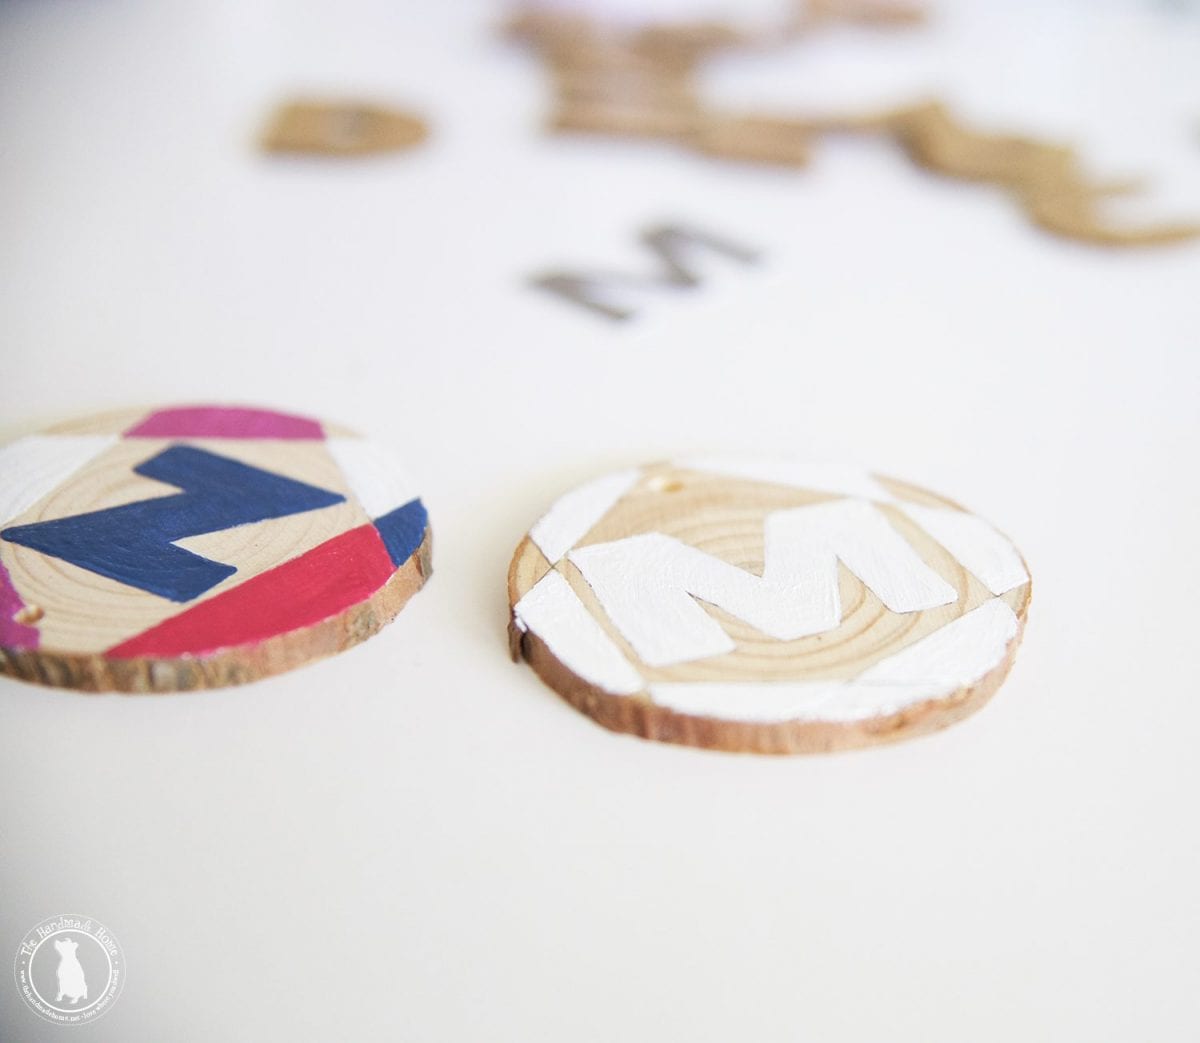
step 1. the letters – DIY wood slice keychains
First things first, bust out your letters, pencil, card + wood slice.
Side note on the font: We thought that with this design, the thicker the better.
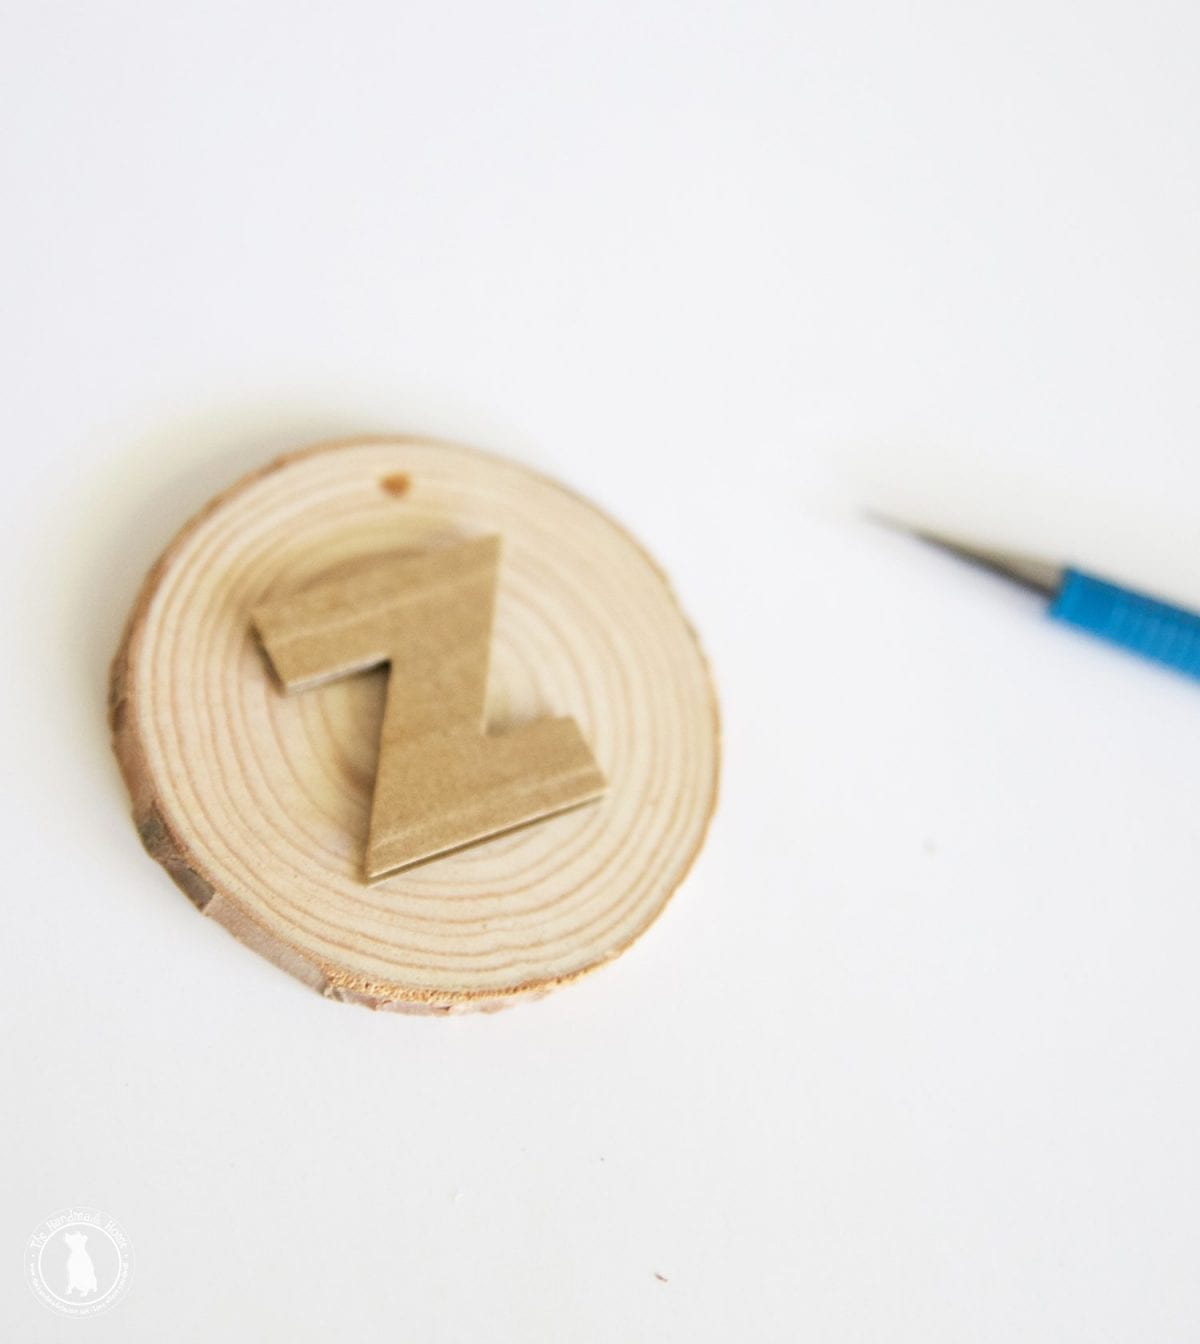
step. 2 – trace and design – DIY wood slice keychains
Center your letter of choice, and trace it with your pencil onto the wood slice. {Make sure the hole is on the top}
Then, placing your old card loosely on the edges, form a design by going from corner to corner, until you’re happy with over all look.
This will vary by your keychain, and you can overlap, as well.
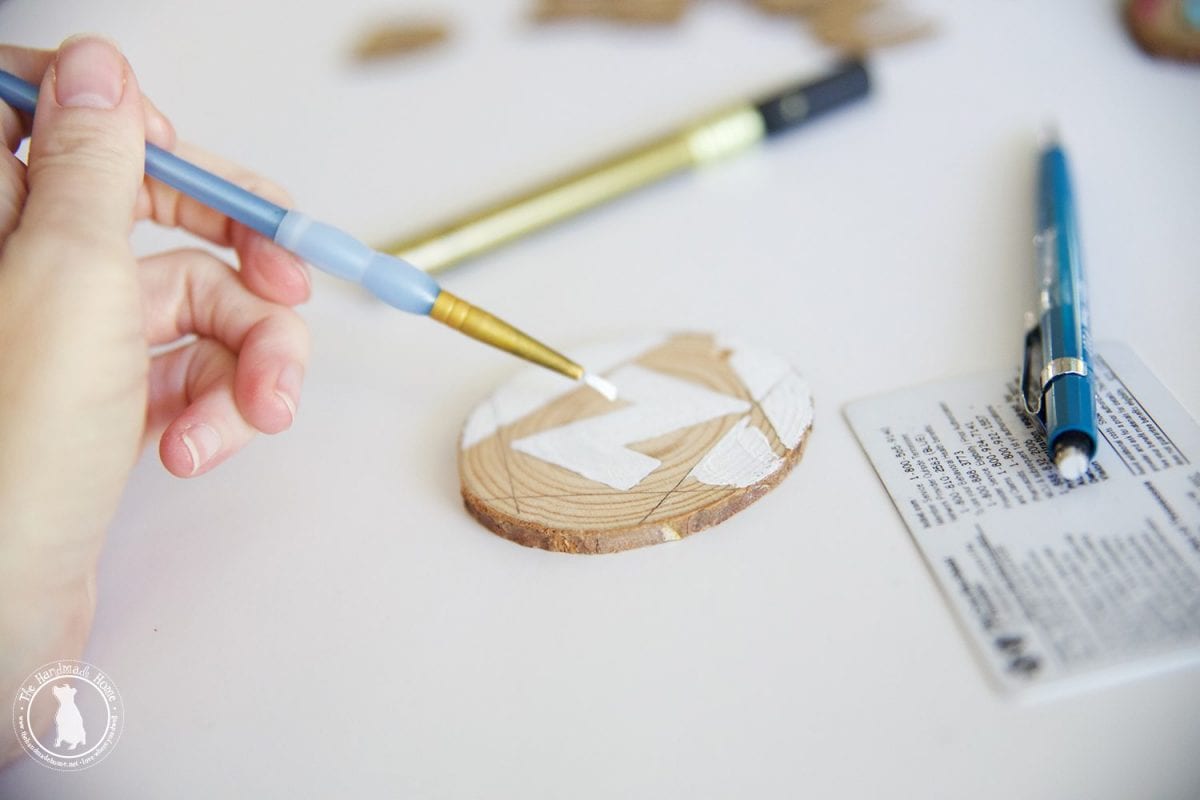
Fill in all your areas with white paint, first. The nature of the wood wants to absorb any paint. This helps it to stand out better on the raw wood. If you have any cross over designs, just leave the lines barely there on the edges, like below.
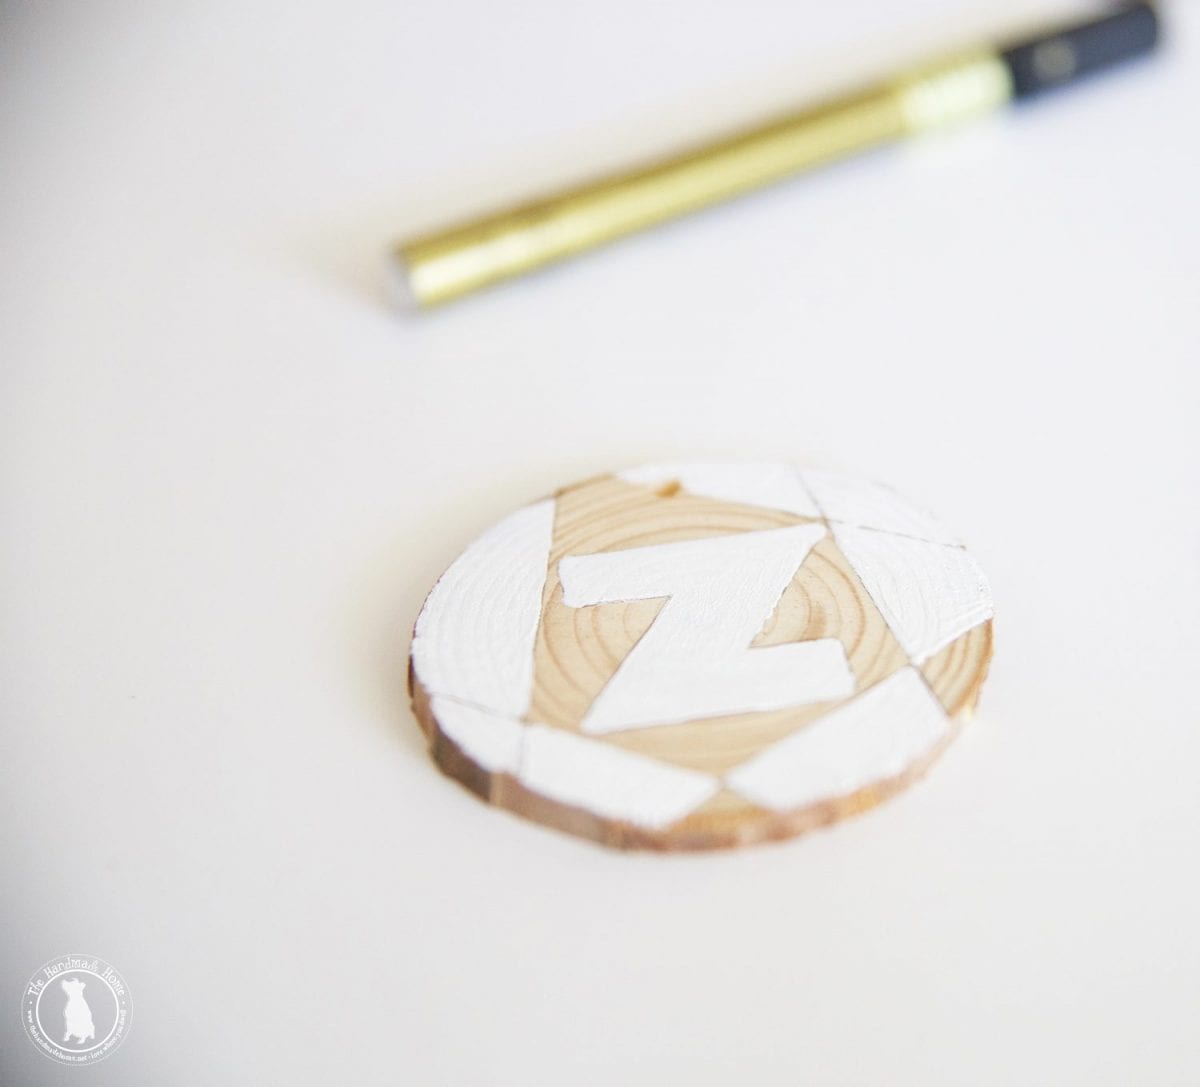
step 3. add white – DIY wood slice keychains
For each keychain, we chose three colors to use, and then added them to the white.
We also left some white areas exposed.
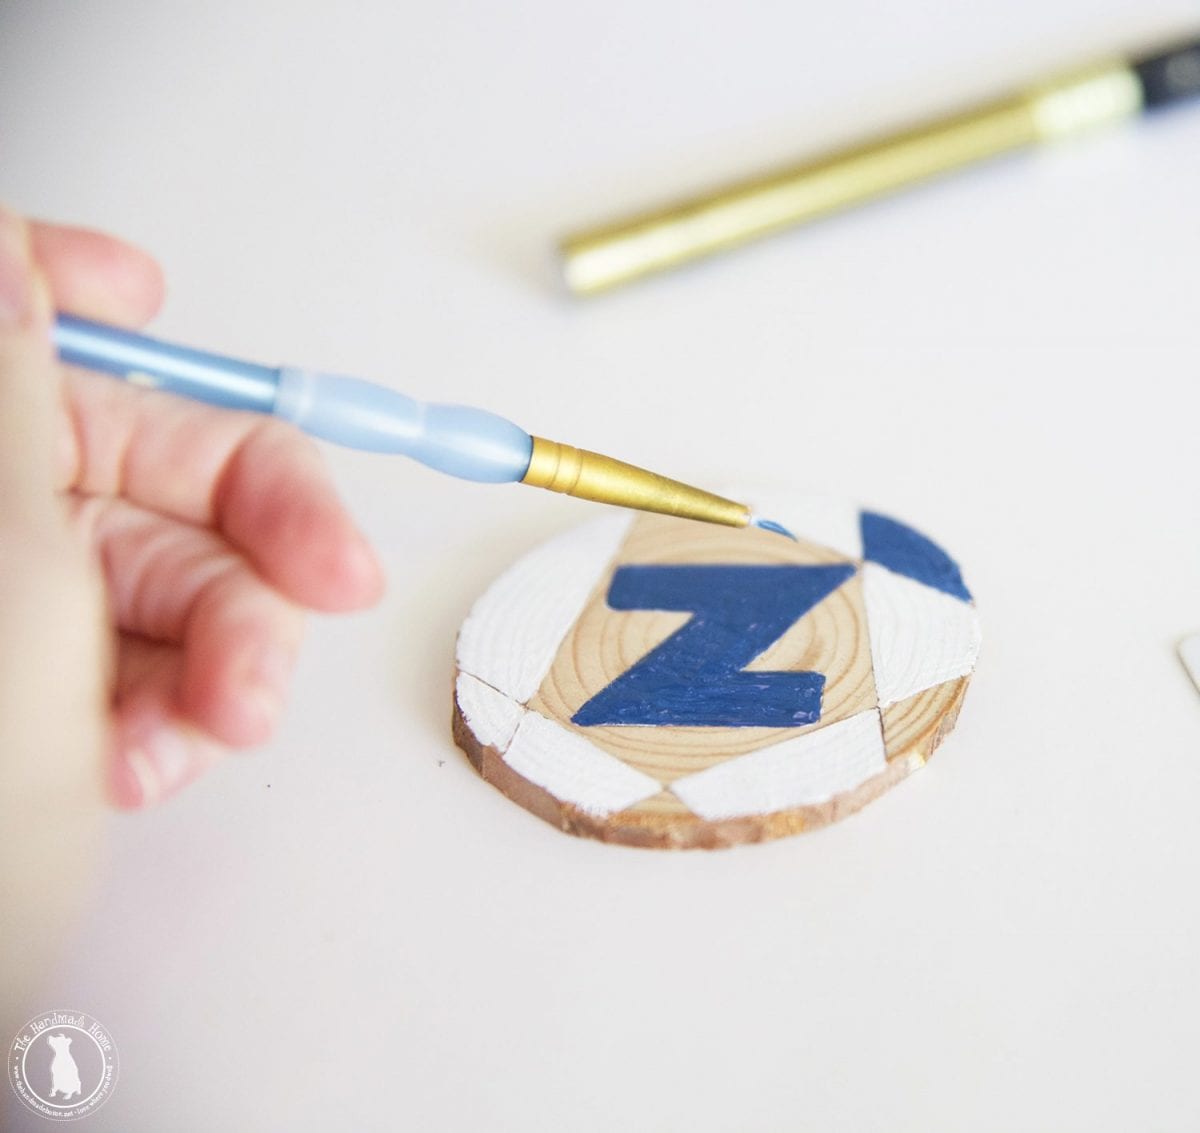
Some paint may require two coats. The thicker the better.
Helpful Hint: With multiple keychains, we found it useful to gang up on some, and do them in phases. So while one group was drying on their first round, we started on the next.
This part can become time consuming if you’re working on multiples. But I also found it oddly therapeutic because I’m weird like that.
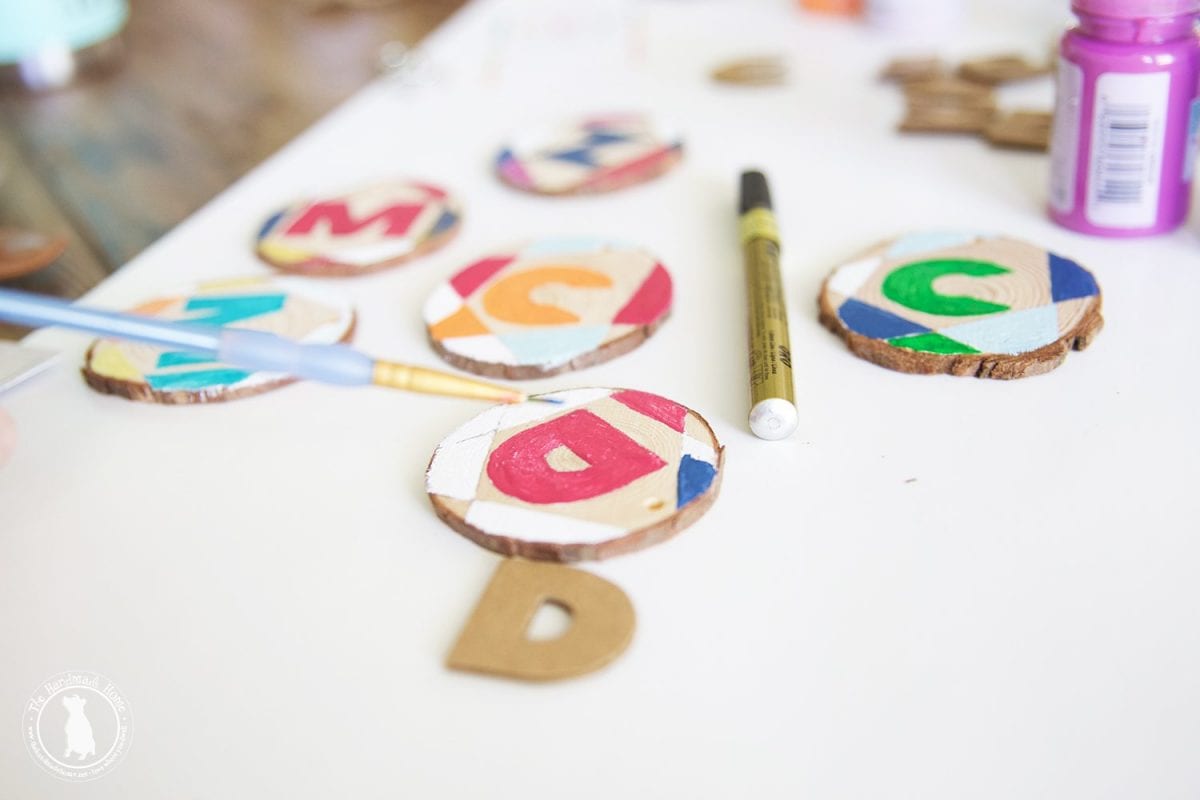
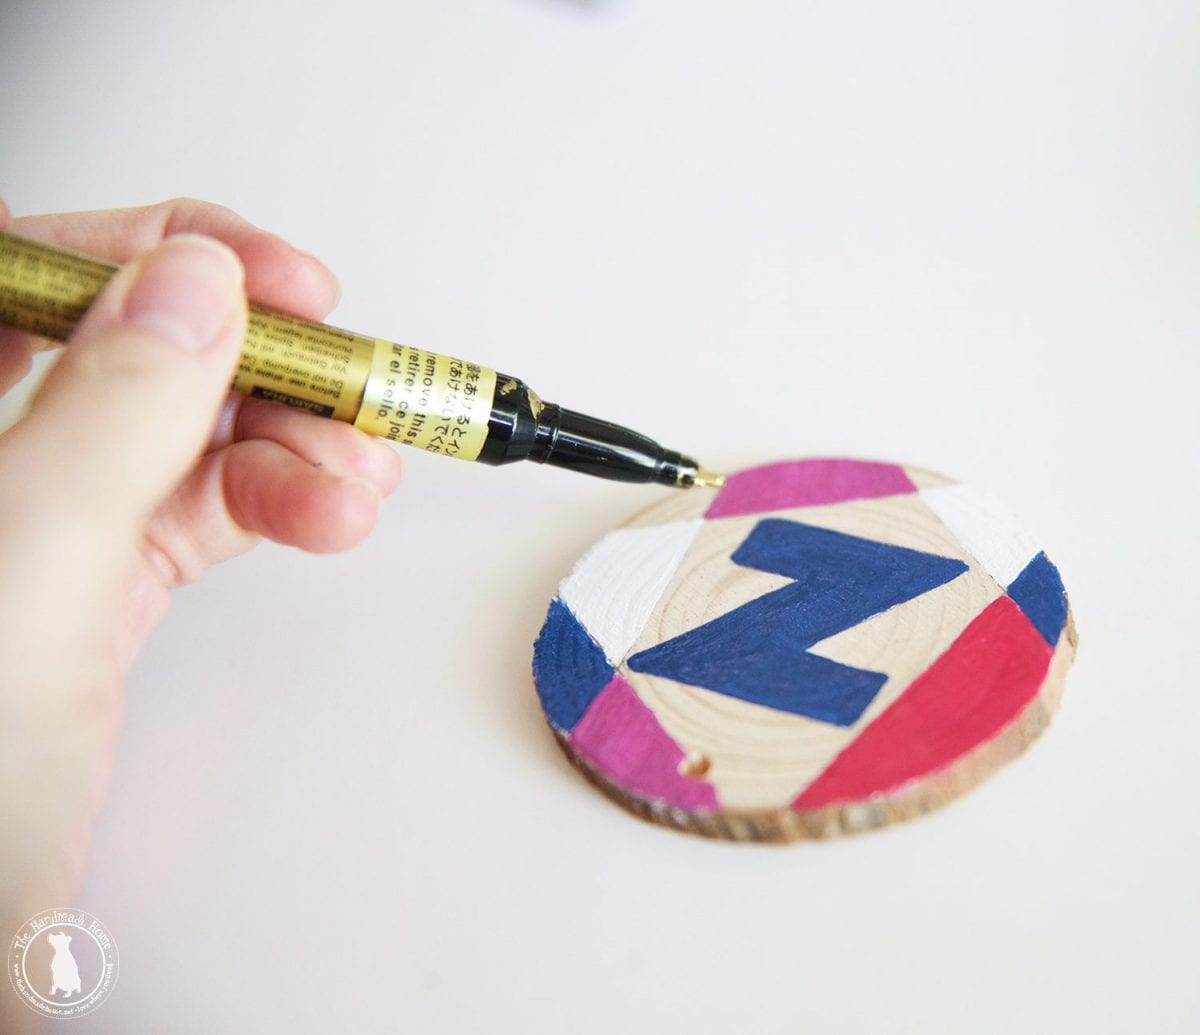
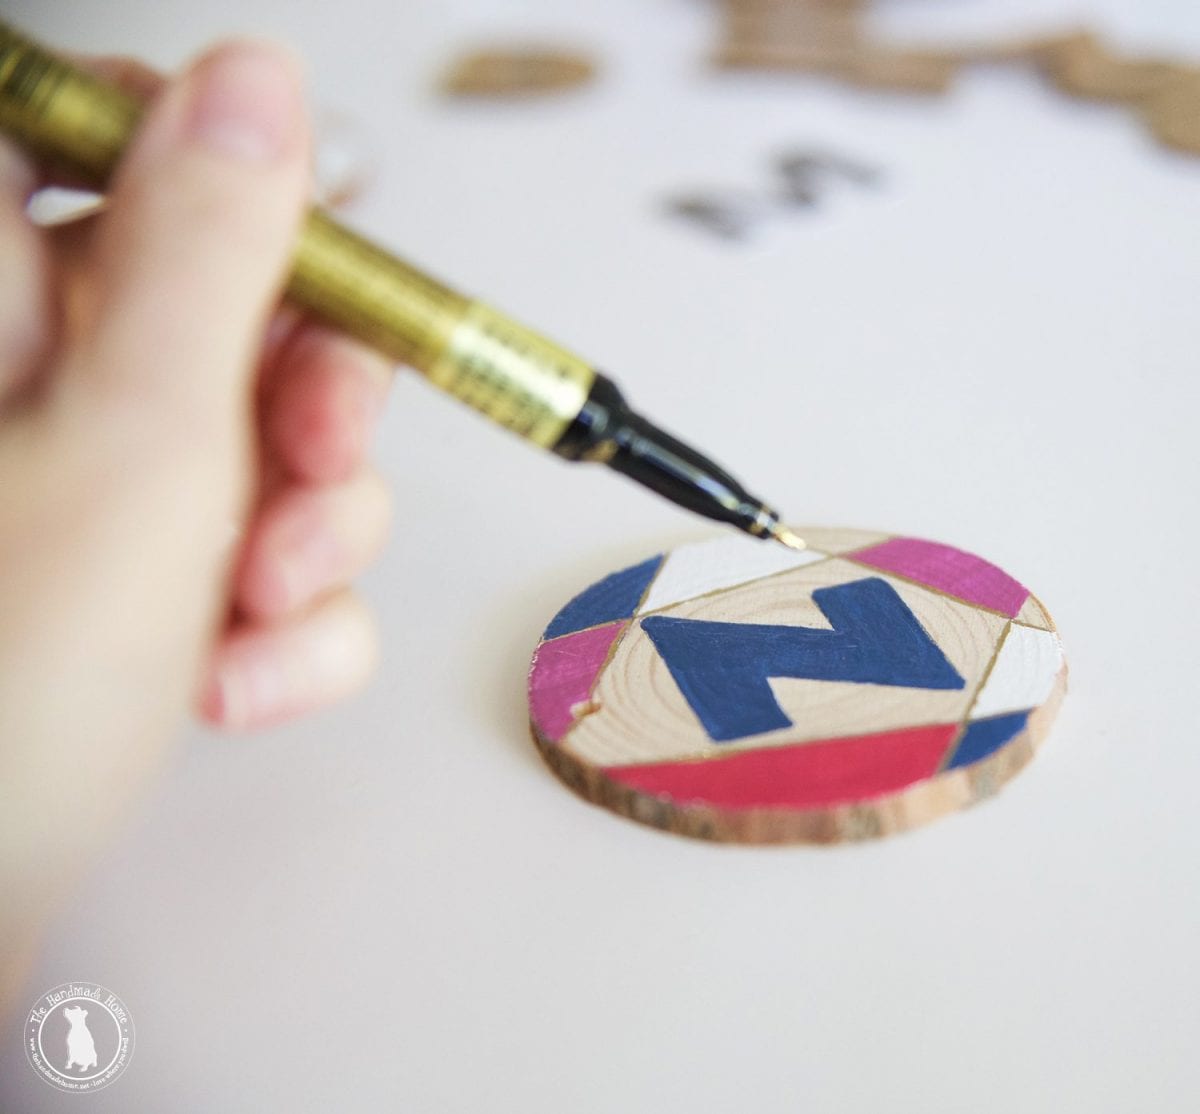
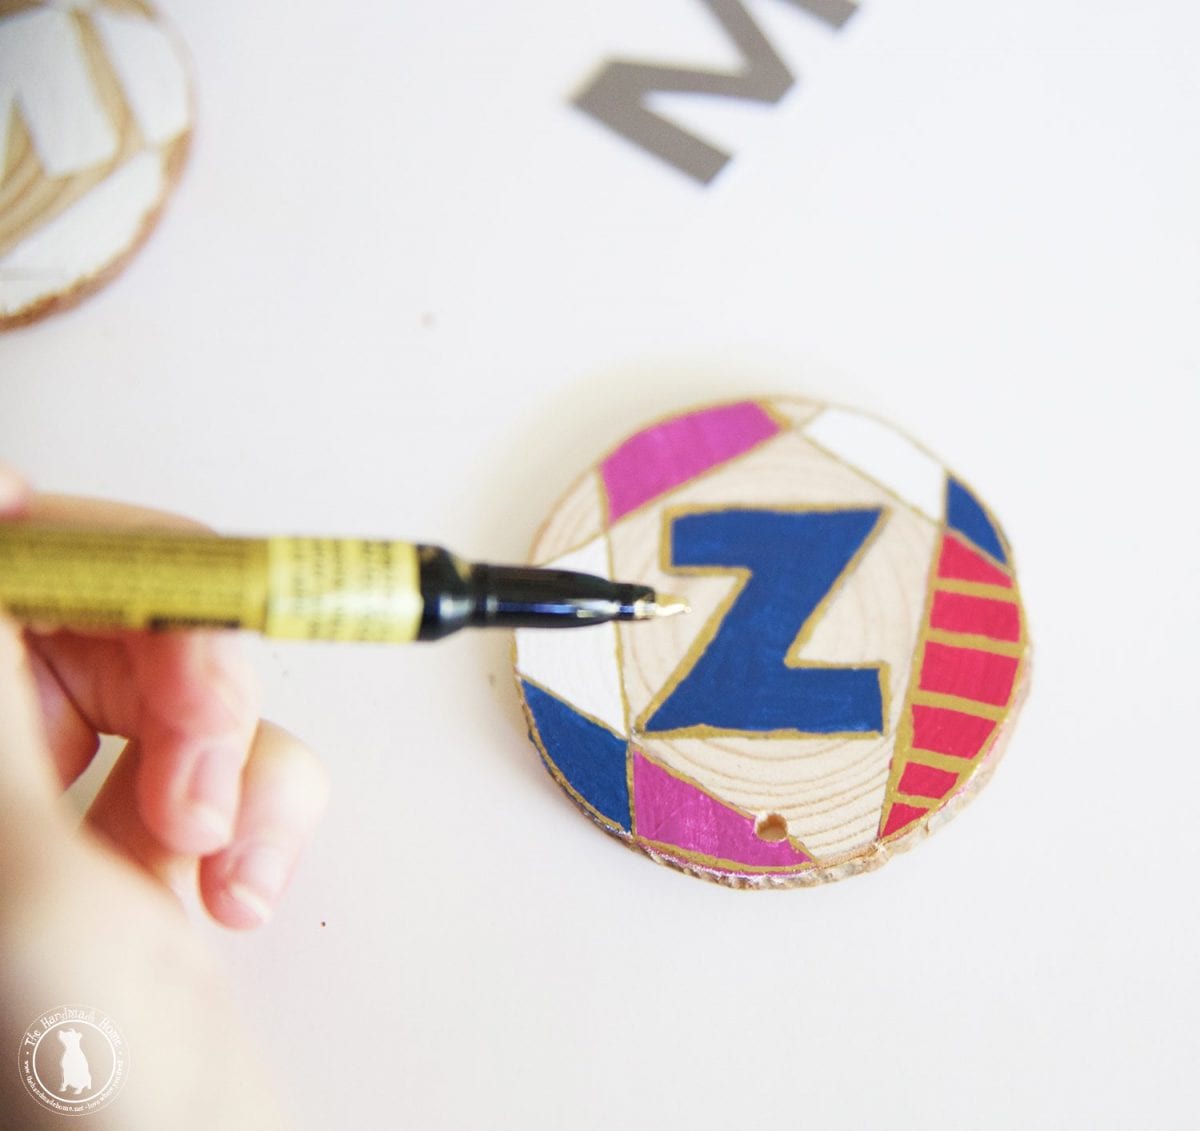
step 4. highlight with a gold pin – DIY wood slice keychains
When you’re happy with your designs, this is where your gold pen comes into play.
Go back over those lines, and highlight all the edges.
We even got a little crazy and added some lines in one color on each keychain. No worries, if you get gloopy in some areas, you can always go back over with the paint on top to straighten it up a bit.
Let this final gold layer dry, and then come back with the Mod Podge and a fat brush.
We used a top layer of matte Mod Podge {clear spray paint would also work} to protect the paint. Keychains are not for the faint of heart because they’re clanging up against stuff and can scratch easily. This was to protect that final monogram.
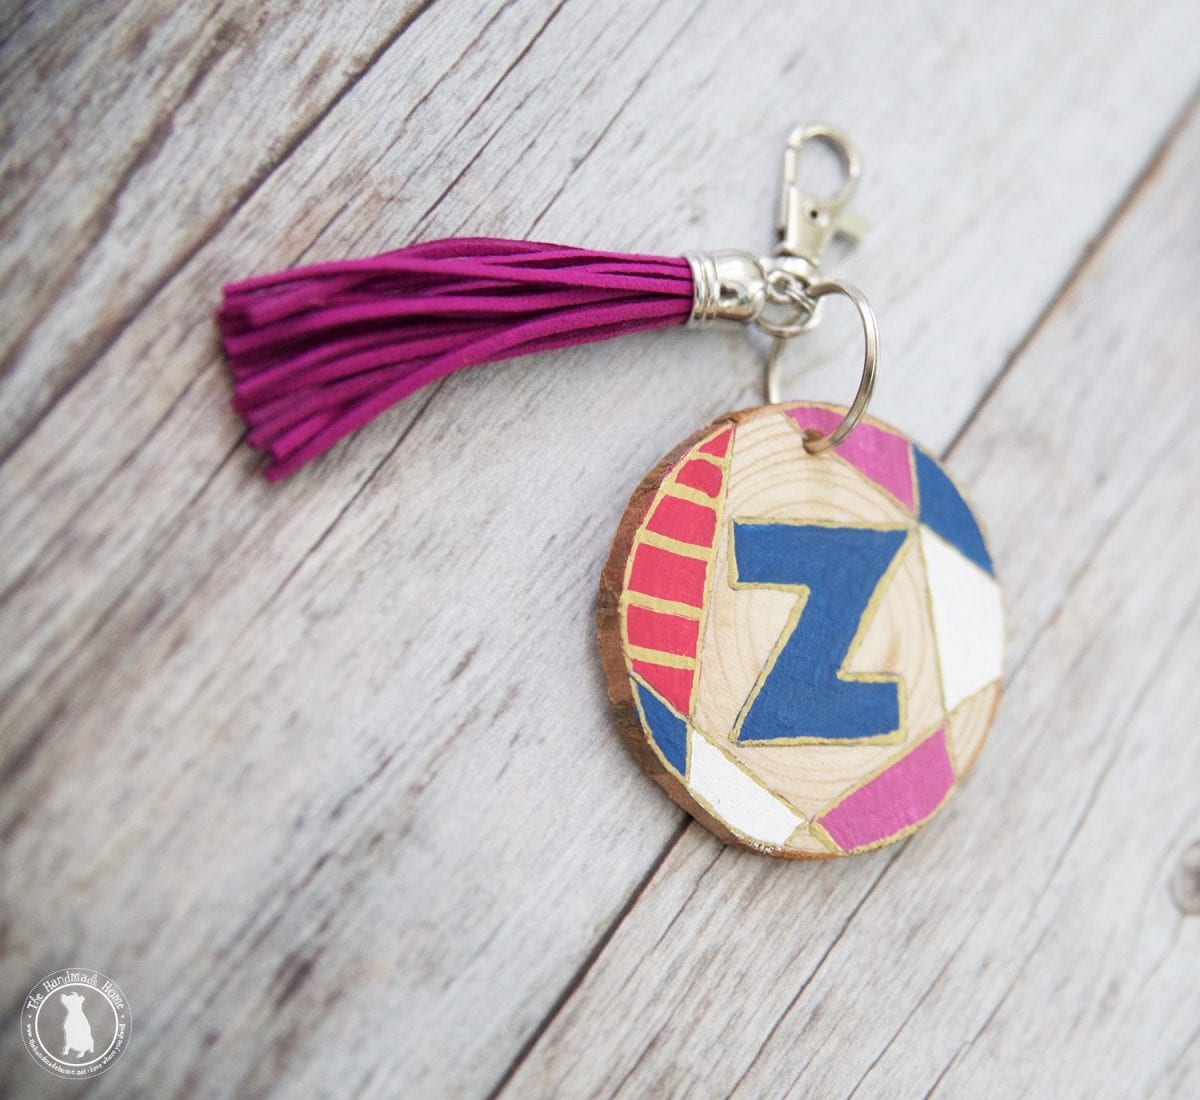
step 5. time to assemble – DIY wood slice keychains
When they were all dry, it was assembly time!
We added the keychain part to the wood, and then the smaller loops to the tassels with the pliers. Finally, we attached the looped tassels to the keychain.
The smaller jewelry loops are a little tricky, but there’s a learning curve – I found that if I could wedge the loop on with the pliers, and then slowly pull it forward with the pliers, it helped keep a grip – my hands and fingernails fell a little short in the get this done department. If you can wear glasses when you do this, do. I had one spring up and almost hit me in the eyeball. Just sayin. {After our garden stool incident, one can never be too careful.}
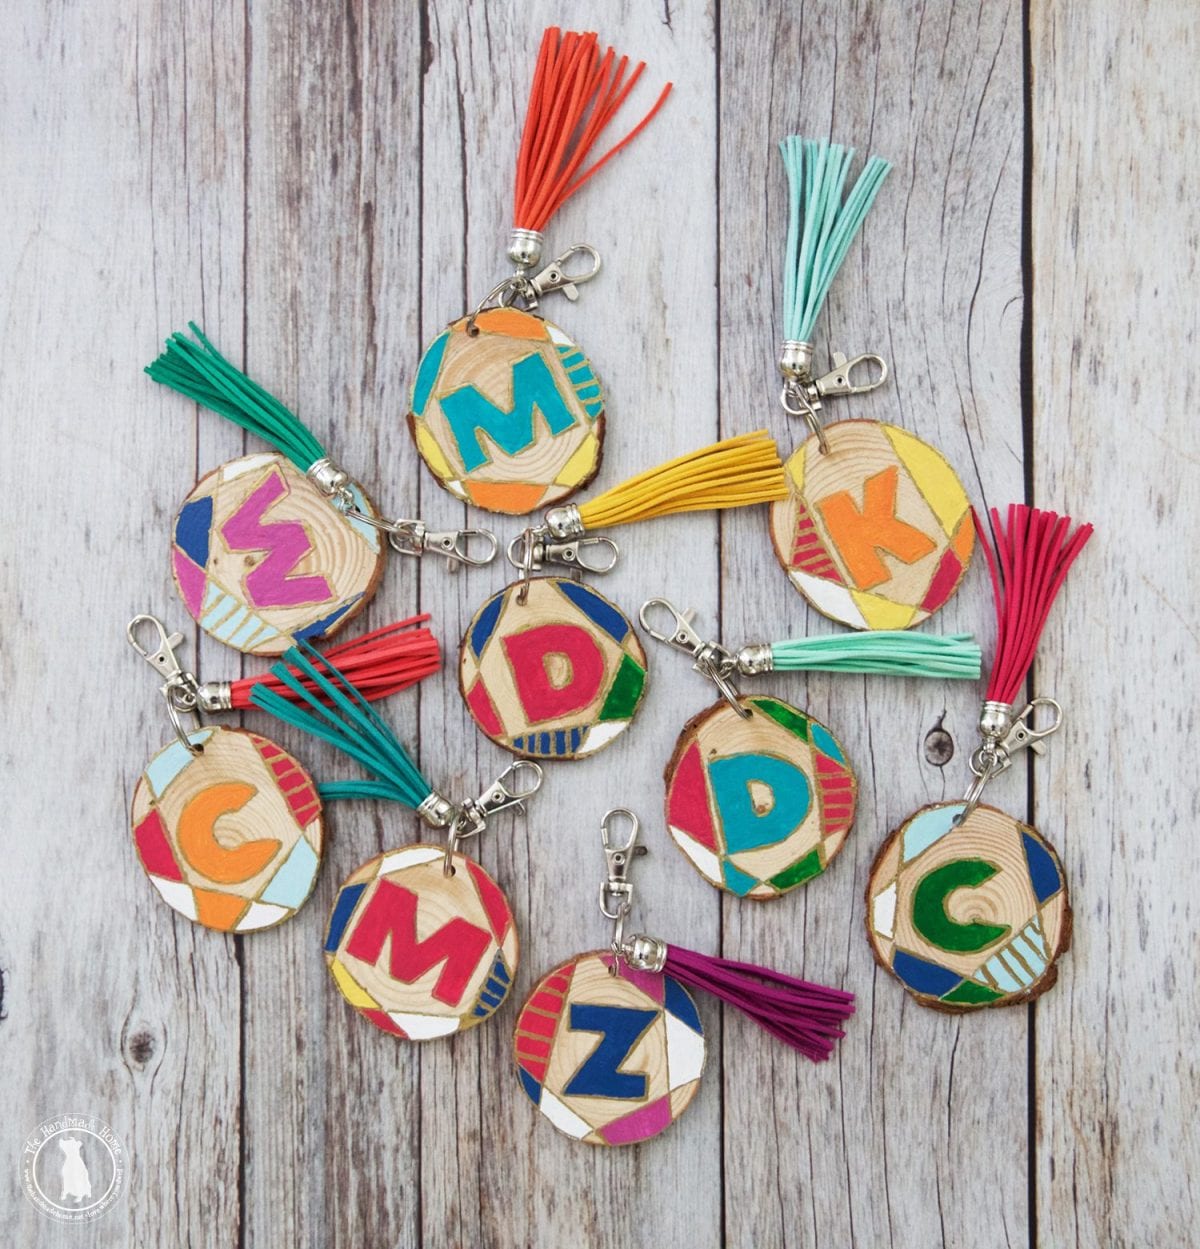
Tada!
The cutest little keychains we ever did see.
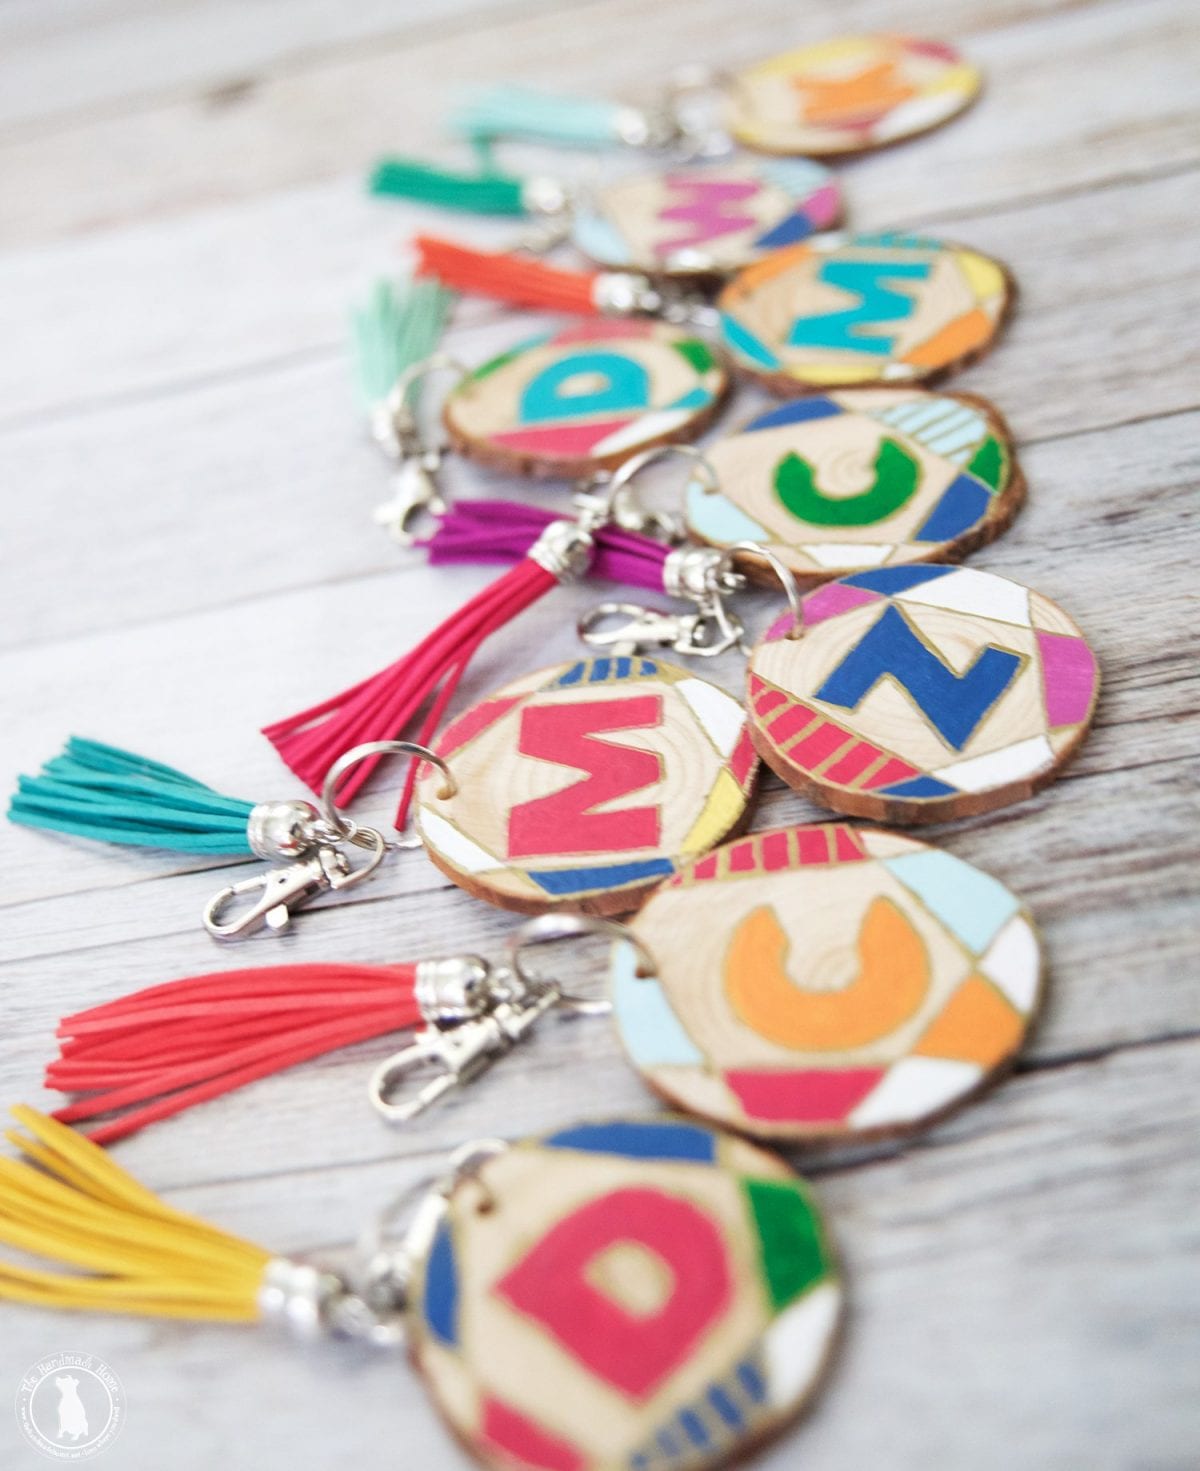
We love the fun colors combined with the raw wood look. And I’m just in love with these tassels. Who knew they could be so fun?
Here they are, all wrapped up and ready to go with their teachers’ names waiting to be added.
This school has been the best thing that ever happened to us, and while our little gift doesn’t begin to show how grateful we are, we hope our children’s teachers know how invaluable they are to us.
As always, let us know if you try it or have any questions. We’d love to hear from you!
I’m off to make one for MAHSELF!
Have an inspired day!


I have to say, subscribing to your blogs (?) was the smartest thing I’ve ever done. I am quite the crafty mom myself and I find your DIY craft blogs to be a wonderful addition to the already overwhelming pile of crafty items (think of the pile of garbage in the movie The Fifth Element…yeah, I have issues too.) because each one I read, I find I have to go out and buy the necessary items to pull off whatever craft you’ve implanted into my brain and I just had/have to do it! All that aside, I’m firmly convinced my family thinks I’m off my rocker because every time I read one of your blogs, I’m sitting here at my computer cackling like a dotty old lady, quite hysterically at some points I might add. Ma’am, you simply crack me up with your humor and I’m ever so grateful. Please don’t ever change the style in which you write your blog posts…is that what they’re even called?
HAHA! I’m so glad I could help your “problem” – though I consider hoarding craft supplies smart – I’m pretty sure we’d be dangerous if we ever got together. Thank you for the sweet words ;} You are too kind!