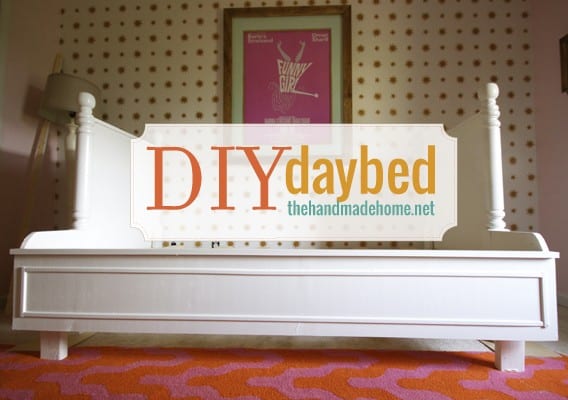
Hey friends, Jamin here today! We wanted to continue with our series on Emerson’s room, focusing on her bed. With a simple tutorial on how to build a daybed.
build a daybed: The supply list.
• (1) 1 x 12 x 10 • (1) 1 x 2 x 6 • (1) 1 x 2 x 8 • (2) 1 x 4 x 8 • (2) 2 x 4 x 8 • (1) 2 x 4 x 8
• (4) rail post • (4) deck post toppers • (1) sheet of ¾ oak plywood
• 32 ½ feet of trim of your choosing
• (8-12) 3 1/2 lag bolts • screws • wood putty • sand paper
• (#8) 3 inch wood screws • (#6) 2 inch wood screws • box of finishing nails
build a daybed: Tool List {We heart RYOBI!}
• 10 Portable table saw • skill saw • cordless drill • corded drill • cordless jig saw • 18 inch belt sander • Airstrike nail gun {our new fave!}
build a daybad: Cut list – (You can choose to precut all the wood or you can cut as you go)
• Cut your sheet of Oak hard board down to (2) 26 x 42 inch pieces
• Cut your (4) railing post down to 42 inches
• Cut your 1 x 12 x 10 down to (1) @ 78 inches and (2) @ 12 inches
• Cut your 1 x 2 x 6 down to (2) @ 25 inches
• Cut your 1 x 2 x 8 down to 78 inches
• Cut your trim down to (2) @ 7 inches (2) @ 76 inches (4) @ 19.5 inches and (4) at 36 inches.
• Cut your 2 x 4 down to (1) @ 76 1/2 inches, (1) 79 1/2 inches, (2) @ 37 inches and (4) @ 12 inches
• Cut your 1 x 4 down to (5) @ 39 1/2 inches
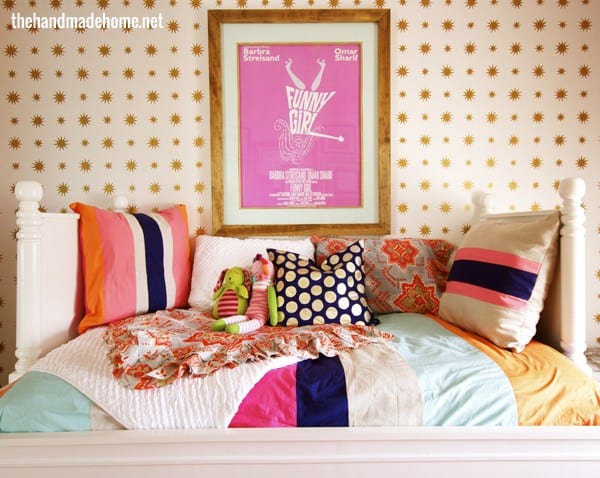
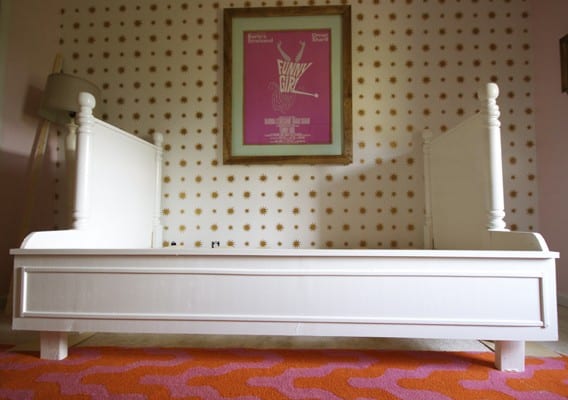
We decided to make her bed, because we didn’t see anything that we truly loved for her space. So we planned and built this one, and in the end achieved something unique and fun for around $215. {As opposed to the usual prices you can find at other stores, we were kind of stoked}. Seems like a no brainer to build a daybed.
housekeeping.
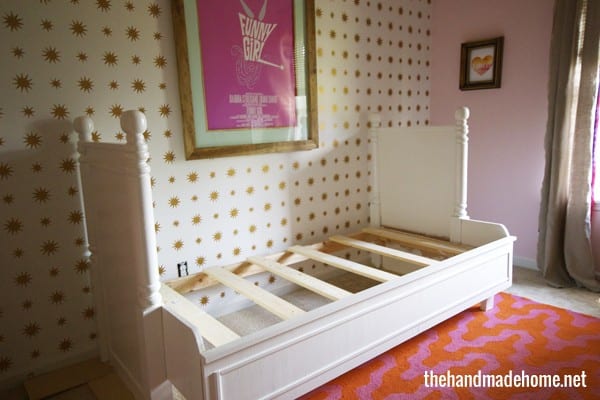
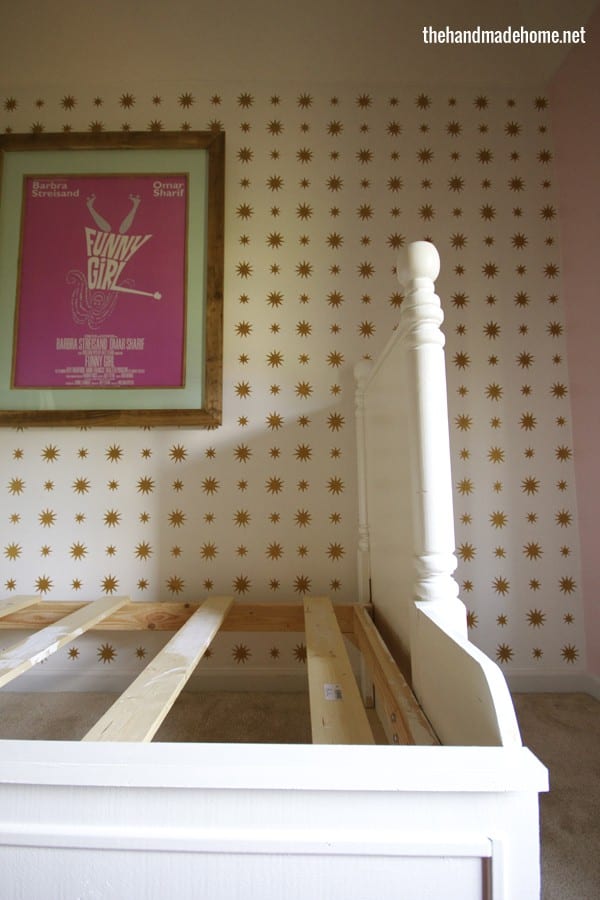
Before we jump in to how to build a daybed, let me remind you to measure your mattress and make sure it is similar to ours (39 x 75). We built this bed to allow for about 3 inches all the way around. This was for the style we wanted, to accommodate room for her bedding to tuck into the sides.
I also suggest either building the bed in the room that you plan on using it in, or building it in parts, and then moving it. It’s pretty bulky and hard to squeeze through an average doorway once it’s all put together.
This is what our house looks like when we’re trying to put a space together…
 Build a daybed: Building the head and footboards.
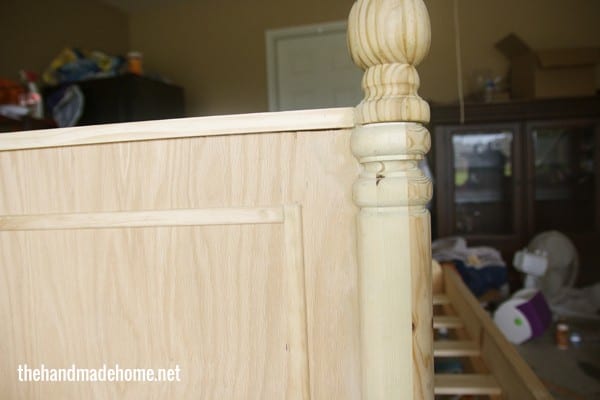
You should already have your post and your sheet of oak plywood cut, so the trick now is to cut grooves into the post so that you can slide the oak plywood into the post. This will help create a seamless look.
As you begin the process of how to build a daybed you will need to measure the width of your oak at the top and the bottom. Next, you will need to mark out where you will cut the groove into your post. This can be very tricky. To make it easier to slide the plywood into the groove on the post I would suggest cutting 1/8 inch bigger than you need. We cut our groove at 7/8 inch since our plywood was 3/4 inch.
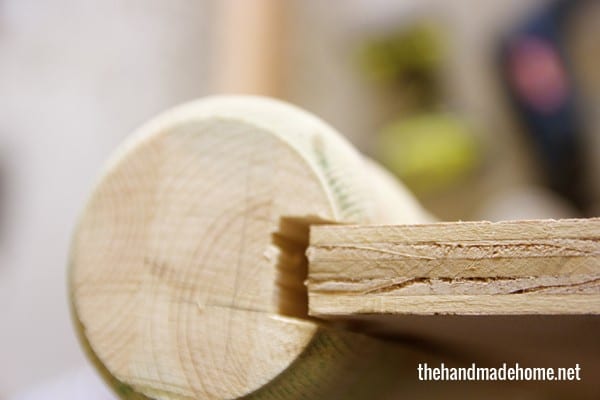 The easiest way to do this is to use a table saw, Simply measure the width of your post, subtract your groove width (7/8 inch) divide by two, and set you blade guide to this width.
We then set our blade depth at 1/2 inch and fed the post through the table saw on both sides, creating two cuts on each edge of where we wanted the groove to be. Now you can either continue feeding the post through the table saw, or you can take a skill saw and cut up and down the middle 3 or 4 times until you have several cuts running the length of your post. Take a hammer, chisel or flat head screwdriver and chisel out the groove. Use a sander or some sand paper to flatten out the surface. Repeat this with all 4 posts.
Pat yourself on the back… You’re finished with the hardest part and are well on your way as you build a daybed.
Just a note: You can also make the grooves without a table saw, but it will require some precise measuring and marking, as well as being fairly competent with a skill saw. Do what you are comfortable with!

Once the grooves are cut, slide the oak into the grooves to check for fit and adjust as necessary. Fill the gaps with wood putty. (Wood putty is your best friend.) Once the putty dries, sand it to a smooth finish.
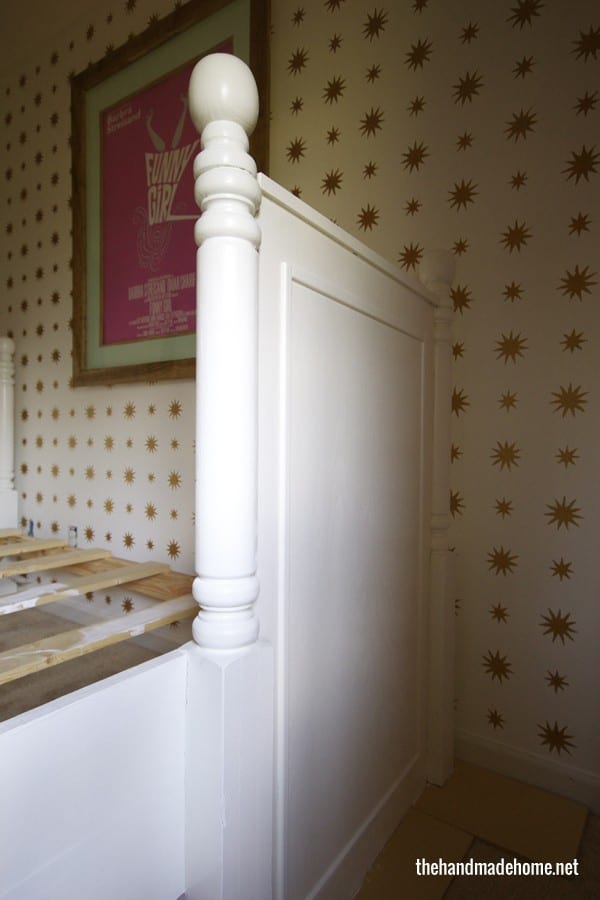
You will need to attach the post toppers to the top of the post now. Measure to the center of the post, drill a pilot hole, and then screw in the toppers. These come in a variety of shapes and can give the bed an entirely different look!
Building the frame:

Lay out your two longer 2 x 4’s (76 1/2 & 79 1/2 inches). Mark the 79 1/2 inch one at 1 1/2 inches from each end. This will be your back peice. Next, place the outside edge of your 2 x 4 that is 37 inches at the mark you just made and flush with the end of the 76 1/2 inch 2 x 4.
Screw all this together making sure it is square with (# 8) 3 inch wood screws.
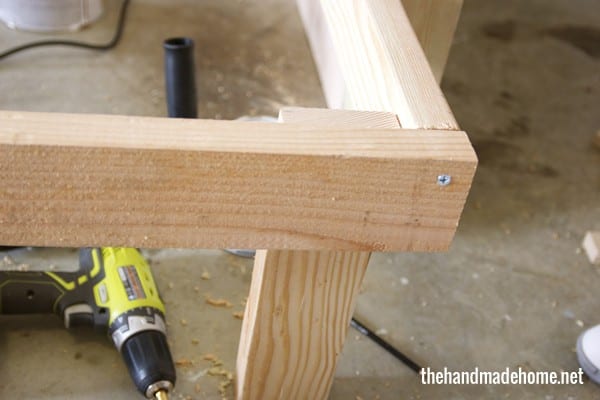
Take your (4) 12 inch 2 x 4 pieces and secure them to the frame on the inside of all 4 corners using your (# 8) 3 inch wood screws. (As seen above.)
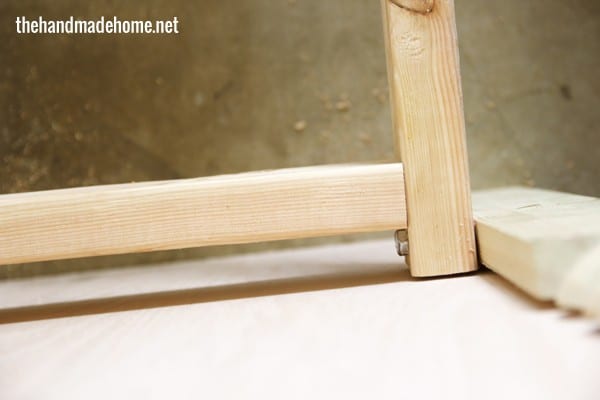
Take your 3.5 inch lag bolts and use them to bolt the frame to the post legs of the headboard and footboard you just built. (I suggest using a corded drill for the extra power as well as pre drilling pilot holes.) Use at least (2) lag bolts, but I suggest (3). (The back set of bolts will attach as you see in the picture above and the front set will bolt in from the inside of the 2 x 4 @ 37 inches.
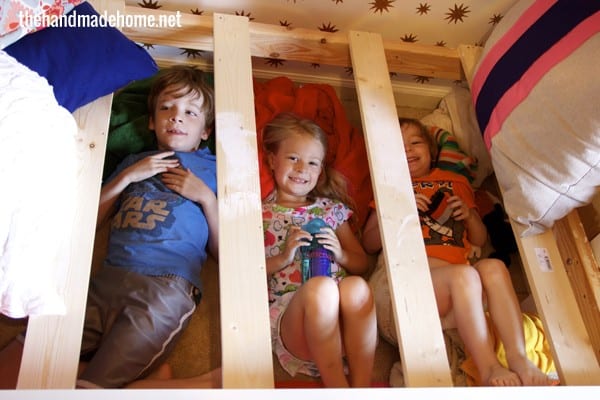
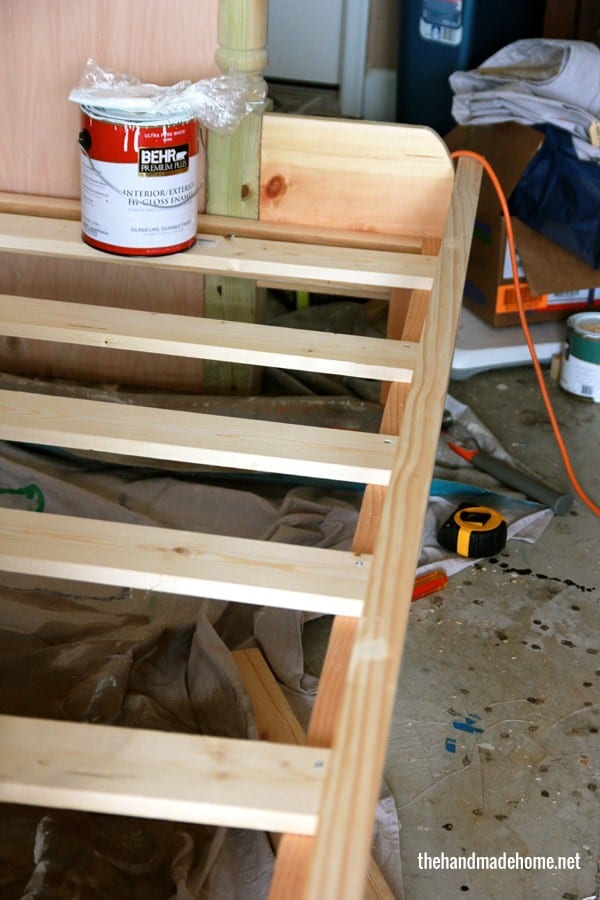
Next screw in your 1 x 4’s evenly down the frame, these will be your slates.
Attaching the facing to the frame.
We wanted to round off the end/sides of our bed. To do this, simply draw your curve or pattern and use a jig saw to cut the pattern or curve out. Sand it to a smooth finish. Repeat this exact shape with the second piece… We usually cheat with tracing.
Next in your journey to build a daybed attach the 1 x 12 @ 12 inches to the side 2 x 4 using #6 2 1/2 inch wood screws. Then attach the 1 x 12 @ 78 inches to the front 2 x 4 using #6 2 1/2 inch wood screws.
We chose to have our 12 inch side piece sit about 4 inches higher than the front board.
Helpful hint: if you have a finishing nail gun you can use it to temporarily secure the facing piece to the frame until you are able to screw them in. Otherwise you will need a few helping hands or some good support.
Trimming the facing.
Simply attach the trim using hot glue and wood glue. Use the 19 1/2 and 36 inch pieces on the head/foot boards and the 7 and 76 inch piece on the front facing. You can also trim these to go at an angle, but we chose to leave them as is.
The hot glue will provide a temporary hold while the wood glue will provide a permanent hold.
Put the 1 x 2 x 78 inches on top of the 1 x 12 x 78 inch piece and glue and nail it in with the finishing nails. (We used the RYOBI Airstrike nail gun for this, and we actually placed this piece on after we moved it into her space.)
Finally, sand and paint the bed to your liking. We ended up painting around some areas that couldn’t be seen {shhh} and in sections once we moved it to our space. Here, we used a high gloss Chantilly Lace. (Benjamin Moore)
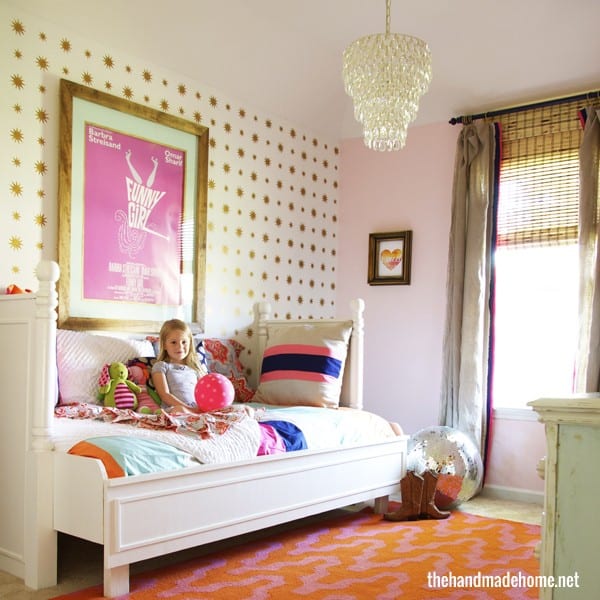
Tada! The bed is finished and she loves it!
Build a day bed: Let us know how it goes.
Please let us know if you have any questions here, and as always, if you try it! We’d love to see. Have an inspired day, y’all!


Absolutely love this project! Thanks for the DIY info, its really well explained. I’ll definitely be giving this a go 🙂 ill have to get my tools ready, could def use a new table saw and sander tho 😉
Thanks so much for posting this. I can’t wait to make it
Lovely.
Thanks for sharing. I’ve been looking all over for a day bed for my daughter…and this has given me inspiration to draw up plans for making my own. We want to incorporate a trundle bed underneath hers.
This is so, so cute!!!! Love your blog by the way!!!! I just love it!
Amazing! I love how the end boards are a little shorter (less deep) to open up the room more but not skimp on drama.
So gorgeous! Totally pinning this for future reference!
Omg. Can you tell me about that wallpaper?! Where is it from and what is it called?!!
How will you move it out if you change houses?
The same way we moved it in. ;} The front comes off easily!
I’m going to give this one a go for the girls new shared room… thank you ( =
How cute is this bed?! Your kids are blessed to have such creative parents.
I love it!!!! Turned out great and your girl’s room is just beautiful.
Vanessa
Thank you so much, Vanessa! ;}
Such a lovely space. The bed is great! You make it look so simple.
This is amazing and very impressive! A little too advanced for my abilities, though. I would probably just shove a twin bed up against the wall and cover it in pillows:)
Super cute and the coordinating room colors and patterns are beautiful:) I tried to pin the overall room shot but the image wouldn’t show. I pinned the closeup (the only one that would pin) to the better homes and garden board 🙂