Hey guys – Jamin here again today!
So we actually got real live snow… and icicles here in the tropics of south Alabama on Tuesday and Wednesday. It’s a novelty around these parts and a great prelude to the Winter Olympics in a few weeks.
At least it felt like that when Ashley busted it down our driveway in the ice, nearly doing the splits. Southerners are awesome in the snow.
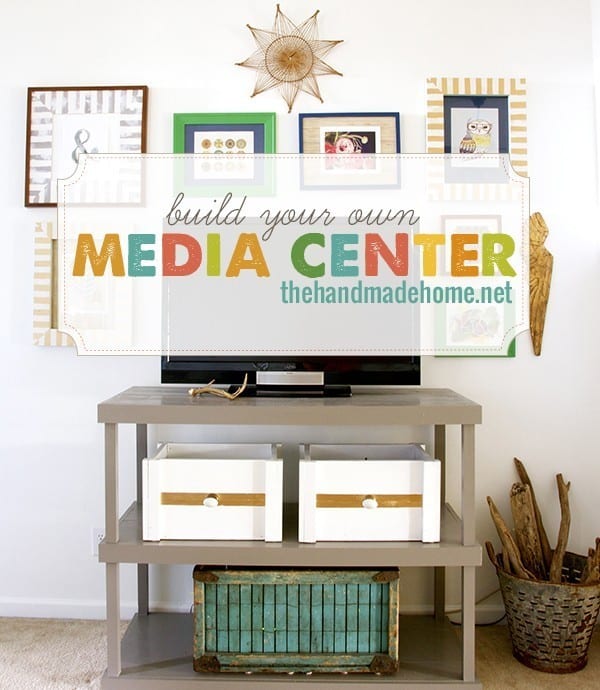
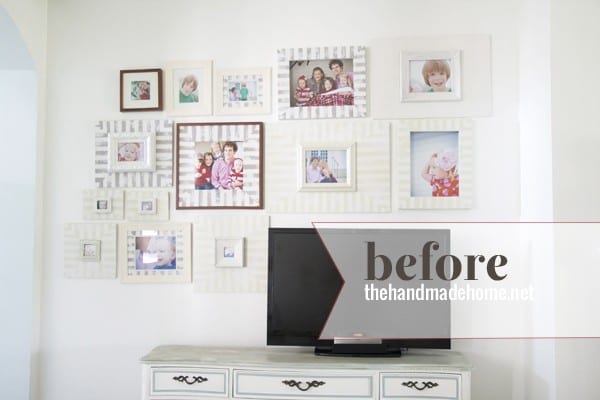
We realized we’d never shared this easy diy media center with any of you and thought it was time to give a little how to in case you wanted it for your own home.
This is a super simple project, and it’s made a fun difference in our living room for a nice change. So let’s dive into the list.
Supply list
• (8) 2 x 2 x 8 • (6) 1 x 6 x 12 • (1) 1 x 2 x 6 (if you have a table saw you won’t need this piece.) • (3) 1 x 3 x 8 • (1) box of 2 1/2 inch #10 wood screws • (1) box of 1 1/2 inch finish nails • wood glue • wood putty or paintable caulk
Cut list
• Cut (4) of your 2 x 2 x 8’s into (4) 39 inch pieces and (4) 47 inch pieces
• Cut (3) of your 2 x 2 x 8’s into (2) 19 inches pieces and (1) 47 inch pieces
• Cut (1) of your 2 x 2 x 8’s into (2) 47 inches pieces
• Cut your 1 x 6 x 12’s down to 50 inch pieces
• If you have a table saw rip the left over 1 x 6 pieces down to (3) 19 inch pieces, if not cut your 1 x 2 x 6 down to (3) 19 inch pieces
• Cut your (3) 1 x 3 x 8 down to (2) 22 3/4 inch pieces and (1) 50 inch piece. You will also need to cute a 45 degree angle bevel cut on both ends of all these pieces.
Tool List
• Drill • Impact driver • Miter saw • Belt Sander • Table saw • Nail Gun • Scroll saw
Framing
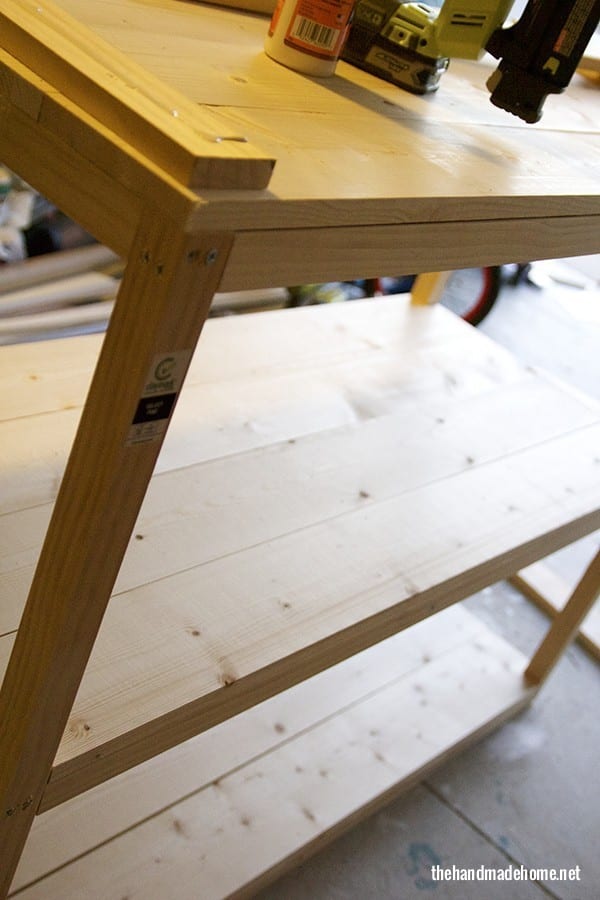
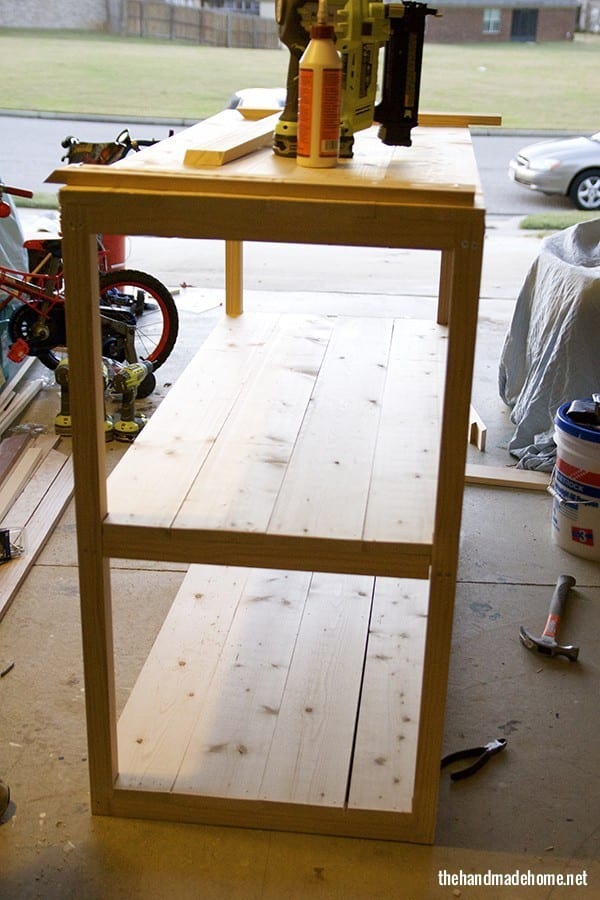
As always we have to start with the guts or the frame. So you will need to gather all your cut 2 x 2’s and 1 x 2’s.
Take your (4) 39 inch pieces (2) of your 19 inch pieces and (2) of your 47 inch pieces. Pre-drill and screw in the 19 & 47 inch pieces to the bottom of the 39 inch pieces. {Use (2) screws per side} Do this in such a way that you form a 22 x 50 inch rectangle.
Now measure from the bottom up 22 inches, and attach (2) of your 19 inch pieces and (2) of your 47 inch pieces in the same way. Then repeat the process at the top of the 39 inch 2 x 2’s.
Next, attach your 1 x 2’s on each level in the center of the 2 x 2’s for support.
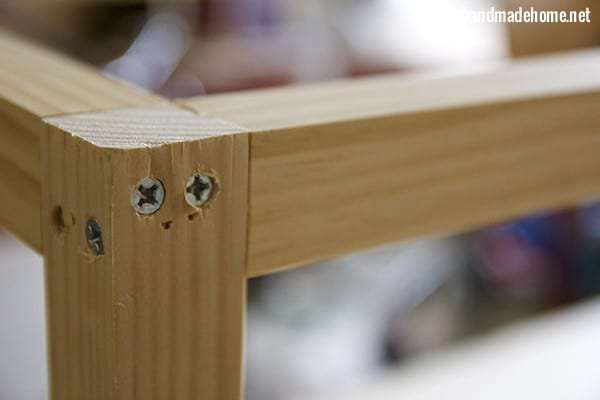
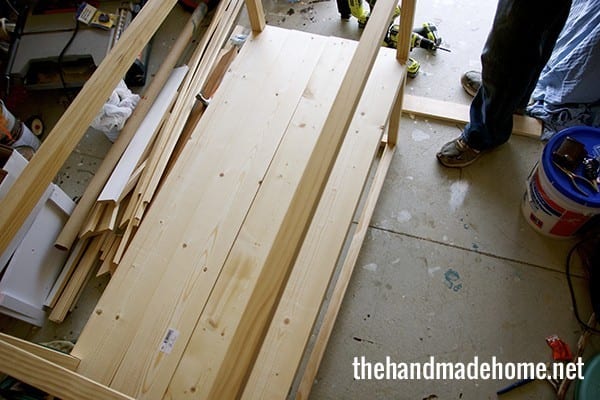
Table top
To start, grab (6) of your 1 x 6 pieces and you will need to cut out the edges on one side. On both ends of one side, measure in 1 1/2 inches from the side and end. Then using your scroll saw, cut out the 1 1/2 inch x 1 1/2 inch box you just drew. This cut out will fit around the post of the frame. Then place the other 1 x 6’s in-between to make sure they fit.
Sand all the 1 x 6’s to a smooth finish. Now remove them and spread wood glue on the top of the frame and lay the 1 x 6’s back down. Secure them with a finishing nail.
Trim
Your 22 3/4 inch 1 x 3 pieces will be the side trim and the (3) 50 inch pieces will be the front trim. Attach the pieces with wood glue and finishing nails.
Finish up and paint
Fill any holes or gaps with either wood putty, or my favorite, paintable caulk. Then smooth or sand.
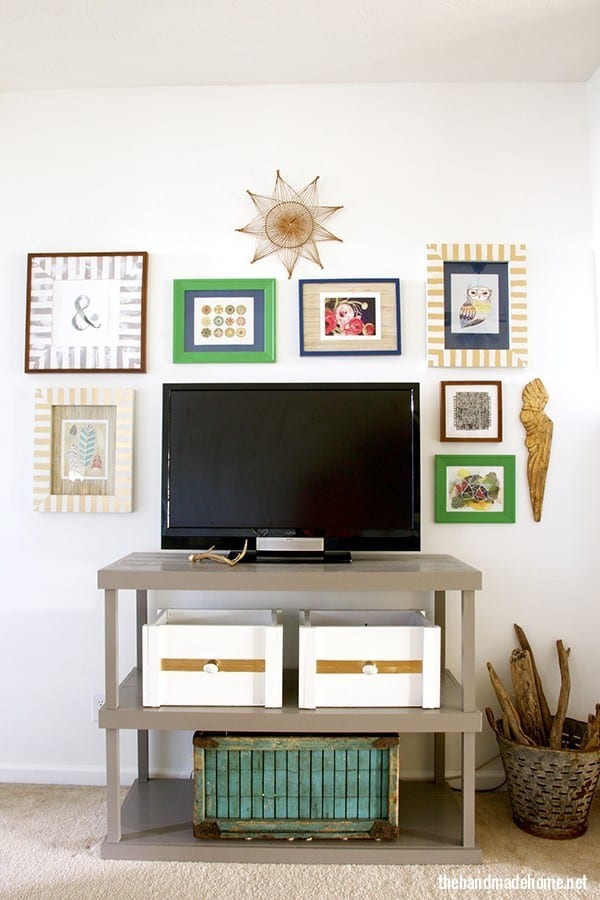
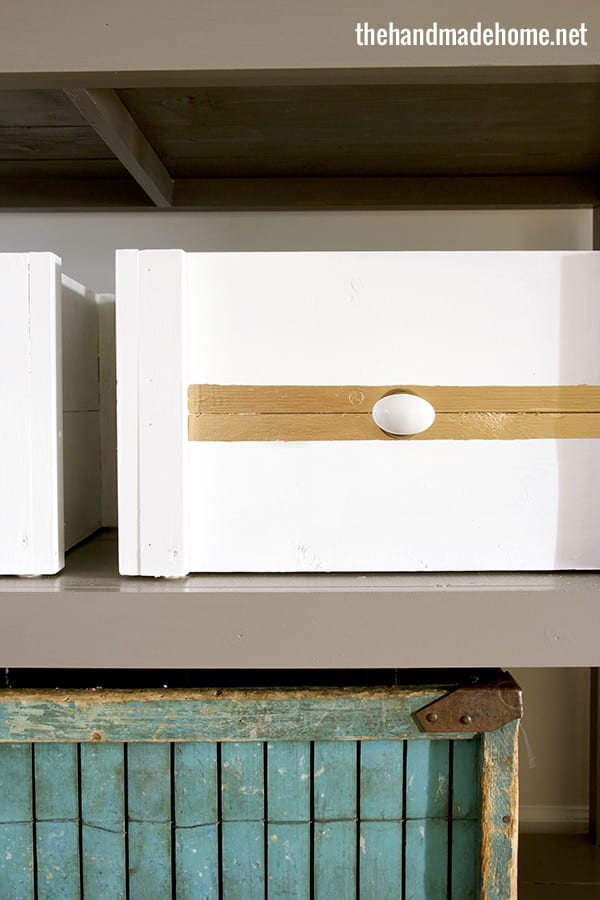
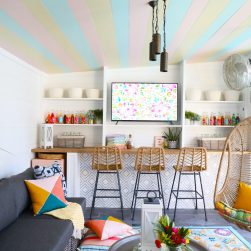
For this piece we used Benjamin Moore’s Eagle Rock. We paired it with some leftover crates from this project and just added a fun stripe with leftover gold leafing. A blue crate we found at a local flea market holds things like our cable box and additional cords that were formerly a big mess.
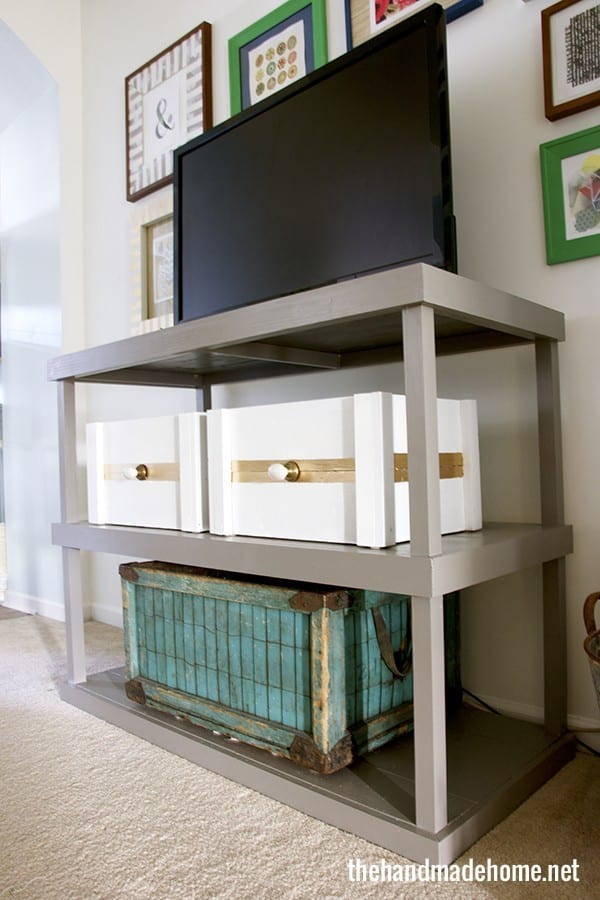
We love the personality and simplicity it brings to our living room!
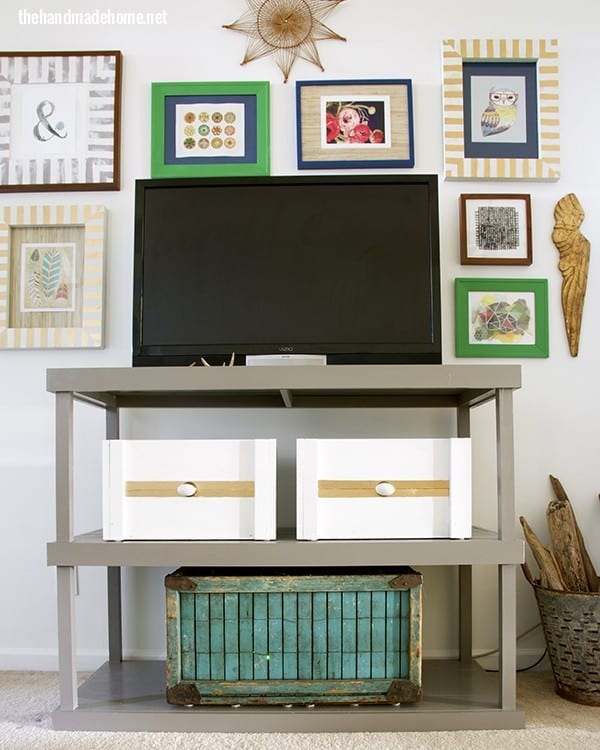
Our cost was $130, as always though, this depends on where you purchase your supplies and what you have left over from previous projects.
So shop around, and never forget to shop your house. Let us know if you have any questions – have an inspired day!

I love it! We have a similar looking tv stand and the one thing that has bothered me is the cable box and how unsightly it is..but I never thought to put it in a crate! Brilliant! Does the remote still work okay? Do you think a dvd player would work in there too? Love the open look…hate wires.
Hey Tania! Yes, the remote works great because of the little gaps in the crate. ;} I’m pretty sure a DVD player would do the same thing. The wires were terrible and this made a huge difference with everything! ;}
This is fabulous- such a clean open look & a space saver! 🙂
Love the crates. Love the whole thing! Thank you for sharing.
great tutorial and it looks great!
YES! I have been looking for something just like this. Perfect, guys. Thanks so much.