The other day, I was walking with the offspring through lowes, and I totally saw this.
 I said to myself, “Self, you know what you’re making with that.”
And Aiden said, “Mommy. Stop referring to yourself in the third person/self important/creepy tense again. GAH.”
 The best part is, it already had a hole. No. Wait. The BEST part is that we didn’t have to paint ANYTHING for once. So after immediately scooping it up + bringing it home, I took one of these…
 {Home Depot : 15.00}
and did this:

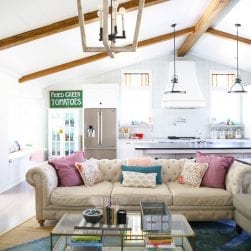
At this point, we’ve had so many babies, and switched out so many chandeliers and lighting, {Yeah, I just made that sound like we have ten babies. People with more than three are scoffing right now.} …Putting it in was no biggie for the Jamin on the wiring end of things. But it’s a little bit of a learning curve, and the pendant light kit comes with directions.
{Just be sure to turn off the electricity first.}
{I know you know that.}
{Still feel like I need to include that dorky disclaimer, in case someone tries it, and gets all mad because they fry their arm and it no longer has hair, so they have to walk around with freaky hairless twitching arm that now stinks like fried hair, and people are all, ‘Dude. Did you shave your arm?’ All because that stupid girl at the handmade home said to. I know. Embarrassing, right?}

Simply unscrew the wire from the face plate, above, by loosening the wires, stringing them back through the planter, and replacing them back into the face plate. Then install, and Tada! A brand new pendant light for the boy’s room… 29 smackers.

To see it in the boys’ room, click here!
As always, let me know if you try it!


This looks great! We did something similar a few weeks ago, but with. Bee skep and for our kitchen. I’m lovin it!
That is AWESOME! Absolutely LOVE it!! My parents just closed on their cottage and I am going to have to mention this idea to them – thanks for the inspiration!
I.LOVE.IT! You’ve given me so many ideas for whenever we sell our house and get to move! No way I’m doing all these cool things just to leave them for someone else!
That is fantastic!
LOVE it!!!!
You are a genius! Love it! Don’t listen to Aiden, I do the same thing!! LOL
This is fantastic, such a great idea!!! I’m storing this for when I redo my bedroom, it would be the perfect addition! Thanks so much!
I totally love this idea and plan to use it for my little man’s room! Awesome…just awesome! Keep using the third person speak if it produces little gems like these…
I love your disclaimer! (and the light, too.)
HOW CUTE!!!!! {I’m happy you didn’t have to paint. ;}
AHHHH LOVE IT! Gotta have it! Can’t wait to make it…..then figure out where to hang it. LOL! I am thinking over the kitchen table maybe?????
oooooo kitchen would be fantastic. now go scoop one up at lowes!
*love*
I love how this turned out! I’ve been looking to do something similar (but with a wire mesh wastebasket or a regular old drum shade I have), though I wasn’t sure how to attach the to the pendant hardware. The pendant kit seems to be designed for the glass shades, which have a much larger hole in the top. How did you make it work with the small hole in the planter?
Hey Lisa!
When you take the pendant fixture out of the box you will notice that it has two ends. A light bulb fixture end and a ceiling fixture end. These ends are usually connected by the positive, negative and ground wires, occasionally having some type of steel wire for support.
After you have laid the fixture out and identified the ends, take the ceiling fixture end and look for how the wires are feed through the fixture. Normally they are only held in place by a screw, bolt or nut. Loosen the screw, nut or bolt and this should allow the wires to feed easily through the fixture. Then feed the wires through your basket and back through the ceiling fixture. Decide the length of your light, cut the excess off and retighten the screw, bolt or nut .Then follow the directions for hanging the light.
Thanks! -Jamin.
Sounds straightforward enough. Thanks for explaining!
This is such a great idea! I can’t wait to see the boys’ room!
Totally, totally cool. I can not WAIT to see the boys’ room tomorrow!
Love it! I’m so stuck on what fixture to use for my son’s new room and I can’t decide!!!
GENIUS! Looks fabulous… can’t wait to see the boys room. =)
Ashley, I absolutely love this pendant light! Way to think outside the bucket (hee, hee.)
Thanks so much for sharing.
Brittany
Thanks, Brittany! You’re so sweet. 😉
oh yeah, ill be doing this. totally giving you credit, of course. AWESOME…can’t wait to see the boys’ room!
🙂
shaunna
How cute is that?!! Very clever. And best of all, you always make me laugh out loud!
shut the front door!
smarty pants. it looks so awesome!!!!
love it, girl!
Haha! thanks sweet gal. 😉
I love this! Such a great idea!
xoxo
I love this, pure genius. Love, love, love it. And thank you for telling where you got the materials with pictures too! 🙂
AWESOME idea! Saw on censational girl! Glad I found your site 🙂
Wow what a great idea! I will definitely look for some jars here in Sweden!
Thanks!
Seriously creative. Pendant lighting is all the rage now – and for $33 smackers tells me what a creative genius you are. Love em!
Do you mind if I ask where it was located in Lowe’s??? Was it with the outdoor stuff??? I looked and asked around and the woman that I asked said that they didn’t have any buckets. :-/ She wasn’t too helpful…
Hey Andrea! It was in the outdoor section. They were with the planters. On one of the walls, stacked. just happened by, and there they were!
What a great idea! I need to do this to hang over my kitchen bar!
I have been stalking my local Lowes since this post (and I mean the very day you posted this fab tutorial) and they don’t have any of these awesome buckets. boo-hoo 🙁
I will just have to continue my stalking because I must have this for my boys room!
P.S.
I loved the swordfish in your original idea board for the room…I have one (long story but it was FREE) and my boys room may be just the place!
Thanks for all the great ideas!!
Love it! Really, I sooo want one of these!!! I’ve got this linked to my pendant lights post too today, I want to keep this project for sure!
I love this and think it would work in our boys’ room. Quick question, though…does it put out much light? It seems like the bucket would block out the light and just create a spot light where it shines down. This is my husband’s theory, anyway! I’d love to know your thoughts!
Brilliant! I do want to comment on the pendant but first I want to say hello. This is the first time I’ve visited you, via Pinterest, and just have to say that YOU are brilliant!
I like to think that the term “design on a dime” was coined by moi because …… a looong time ago when I became a new stay at home mommy living in a 900 square foot bungalow by the beach, waving good-bye to the daddy every morning meant time to play house with no decorating dinero!
I, just like you, looked at magazines and though to moi self…good grief, I can do that! Let’s just say that my son’s first word was “Lowes?”
Fast forward 15 years, I now have the decorating dinero and have a hard time parting with it because….the prices….geeeez….and I know how easy it can be to make (like you say) some things on my own.
All this self promoting, sorry, leads me to my comment….sort of.
YOU really are brilliant for not only teaching your readers, but for teaching your adorable little ones HOW to do and make and create. They might not say it but I bet they believe that “mommy” can do anything!
Ok….saw those buckets and thought the SAME thing!!!! Now I’m trying to figure out if I can split one in half to make matching wall sconces.
This is turning into War & Peace so I will close.
Have a great weekend!
Lisa
LOVE! I was looking for lights to put over my island and got frustrated with the cookie cutter selections and costs. I decided to make something and this came up on google! Do you think it would look ok with three of them over the island?? I love the silver pendant you used. Do you think black would look good for the pendant part?
Hey Amy! I love that idea for over the island in your kitchen! I would totally use the dark for a kitchen. Keep me posted-I’d love to see! ;}
Love it — cute idea! Might try this — would love to replace the ugly builder-grade ceiling light in my home’s living room.
You are awesomely creative so following you on Pinterest just makes sense, however were you to be a dud in the creativity dep, I would follow your blog anyways because you are hysterically funny in your descriptiveness (is that even a word??) and have given me a good chuckle this morning! Oh yeah, and a great diy idea for lighting too 🙂
Ha! Thanks so much, Anna! ;}