We shared this one nearly a year ago, and thought that it would be good to bring it to the forefront again. With organizing and new shared responsibilities around the home, these might be more relevant than ever… and a fun craft to boot. Happy making!
________________________
Hey hey everyone! If you’re new to The Handmade Home, welcome! We’re thrilled to have you here. If you’re not familliar with our site, be sure read more about us. Check out our one of a kind spaces here, {shop our spaces, here} + be sure to check out the rest of our categories, like our free printables, here. There’s a lot to peruse, so pull up a cozy seat and drink… we do hope you’ll stay a while!
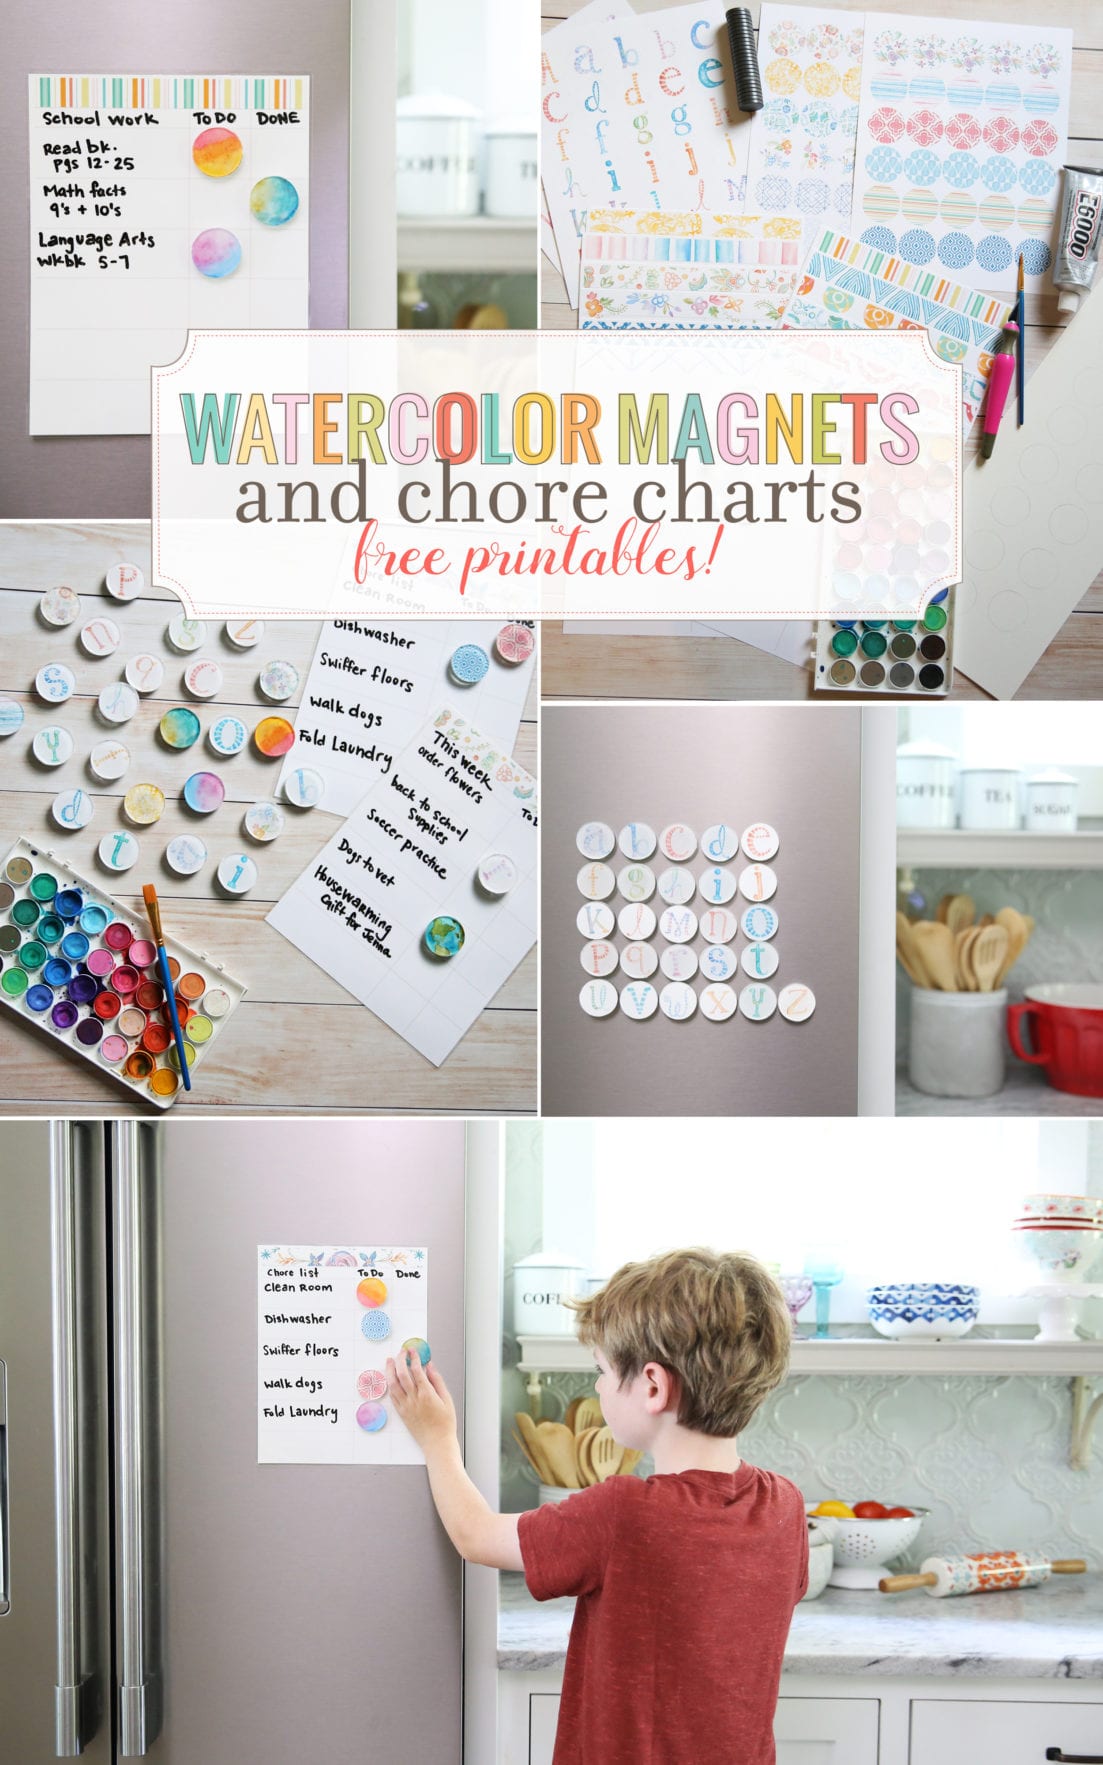
So without further ado, DIY watercolor magnets and free chore charts!
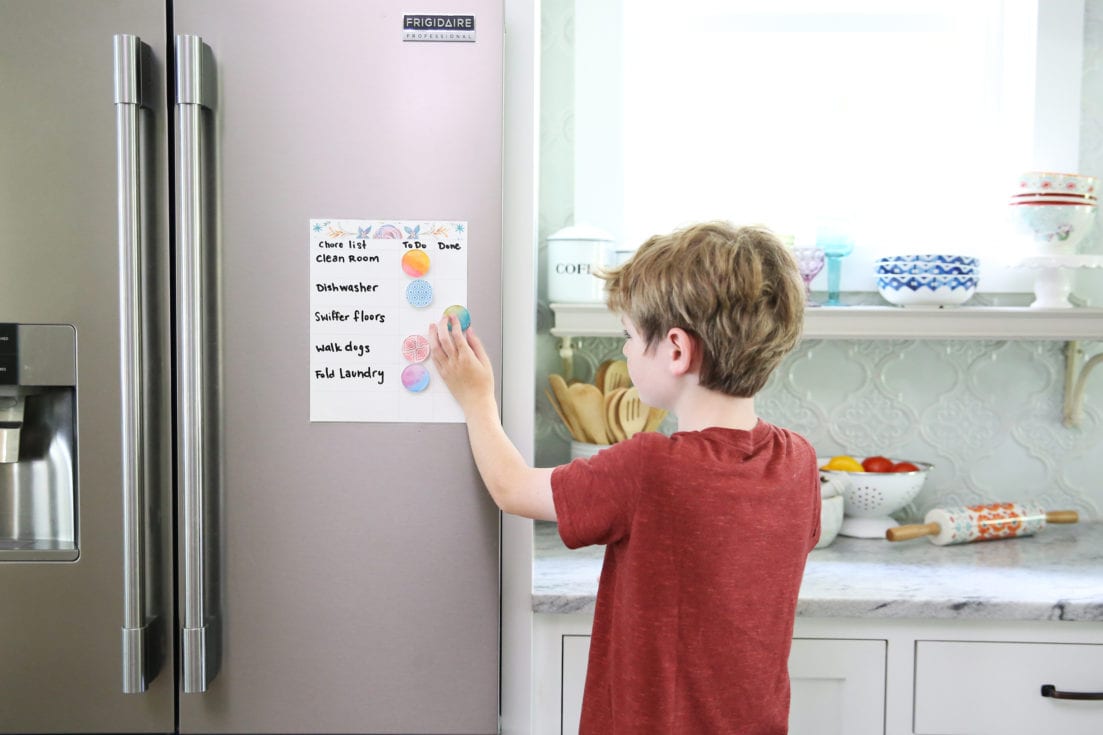
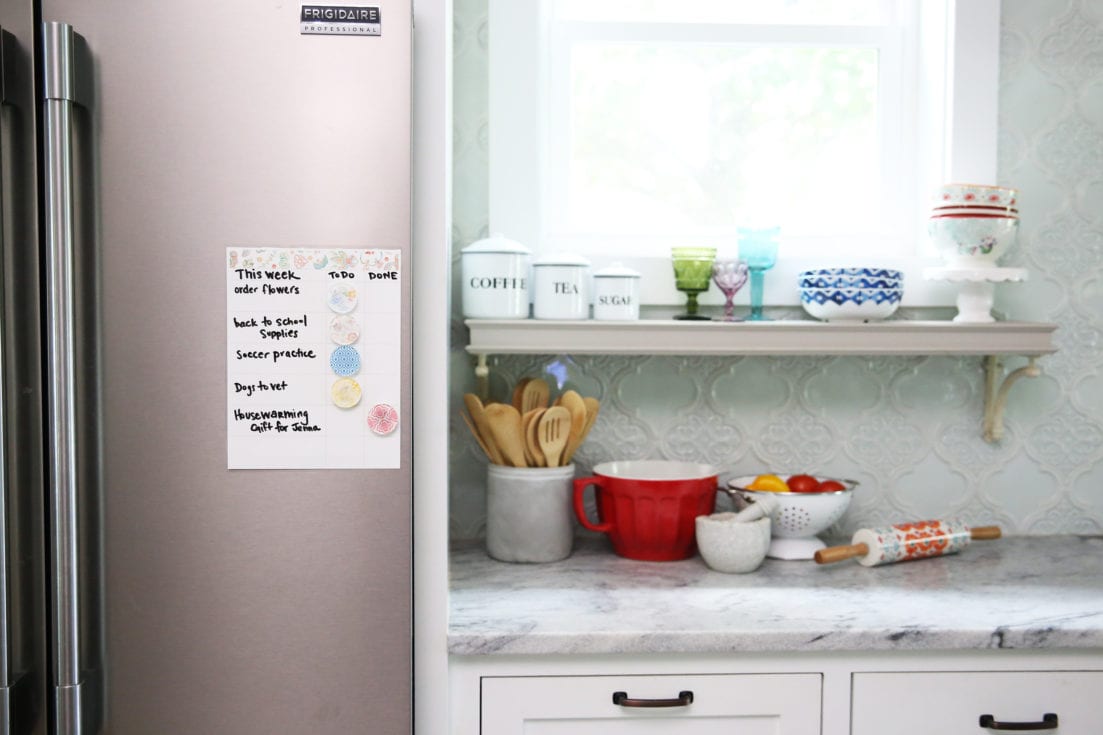
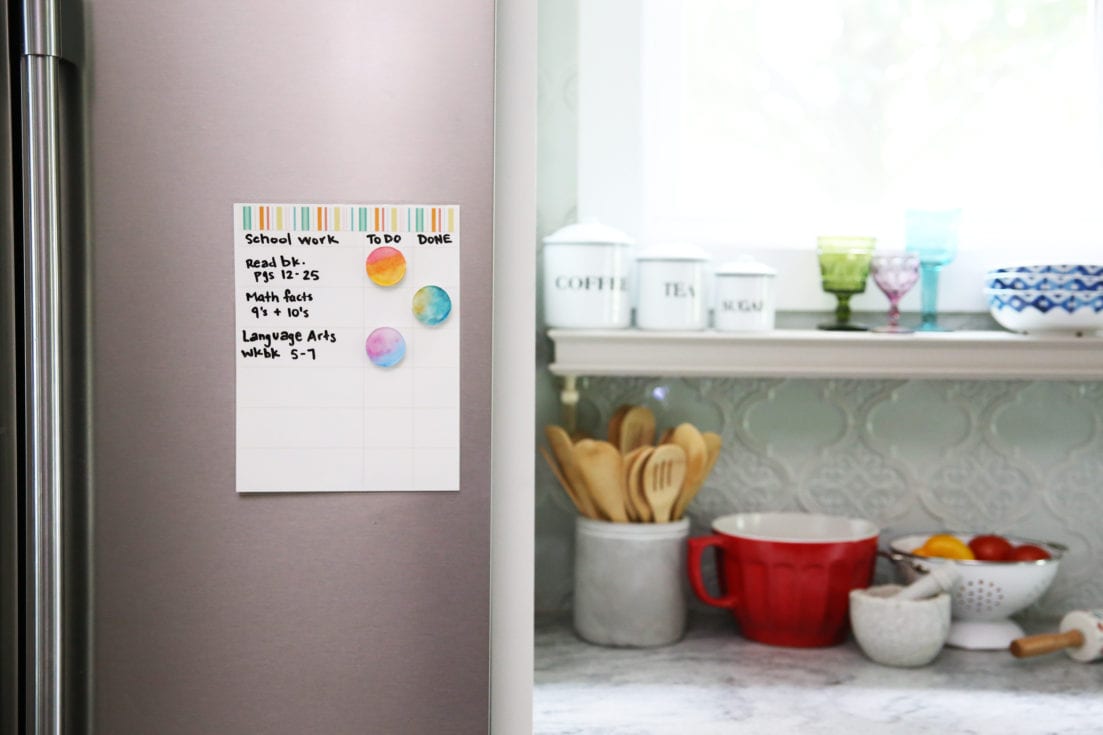
We decided it would be fun to cook up this little combo for a variety of never ending possibility. So we’re offering free chore chart downloads, which we left blank so you can use for whatever.
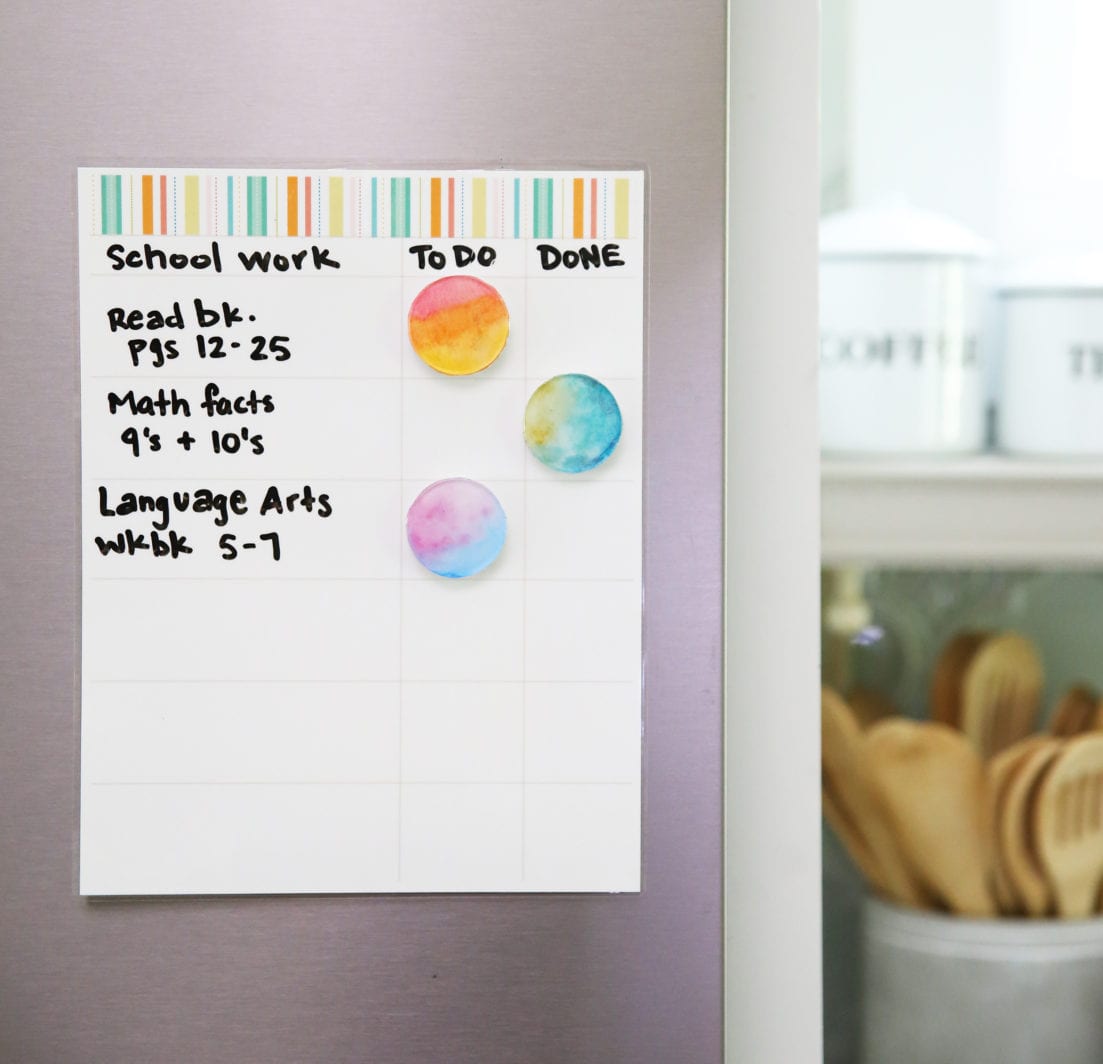
As you can see, we laminated this one, and then used it to keep up with the kiddo’s school work.
This idea is perfect for stuff around the house, menu plans, weekly schedules, schoolwork, homework, chores… you name it.
And the magnets we’re sharing today to go with it, are a little bit of a variety.
From your own personal monogram, to one of a kind patterns, and the true watercolor diy version, we thought this would be oh so fun and unique to share!

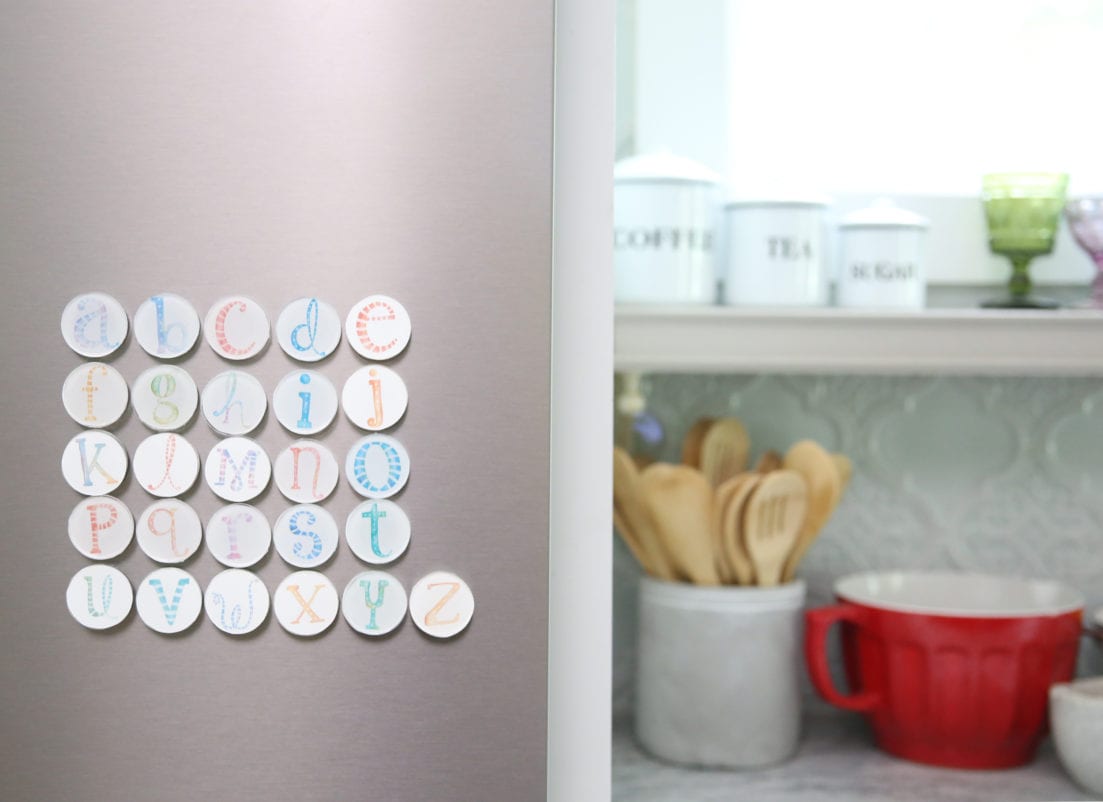
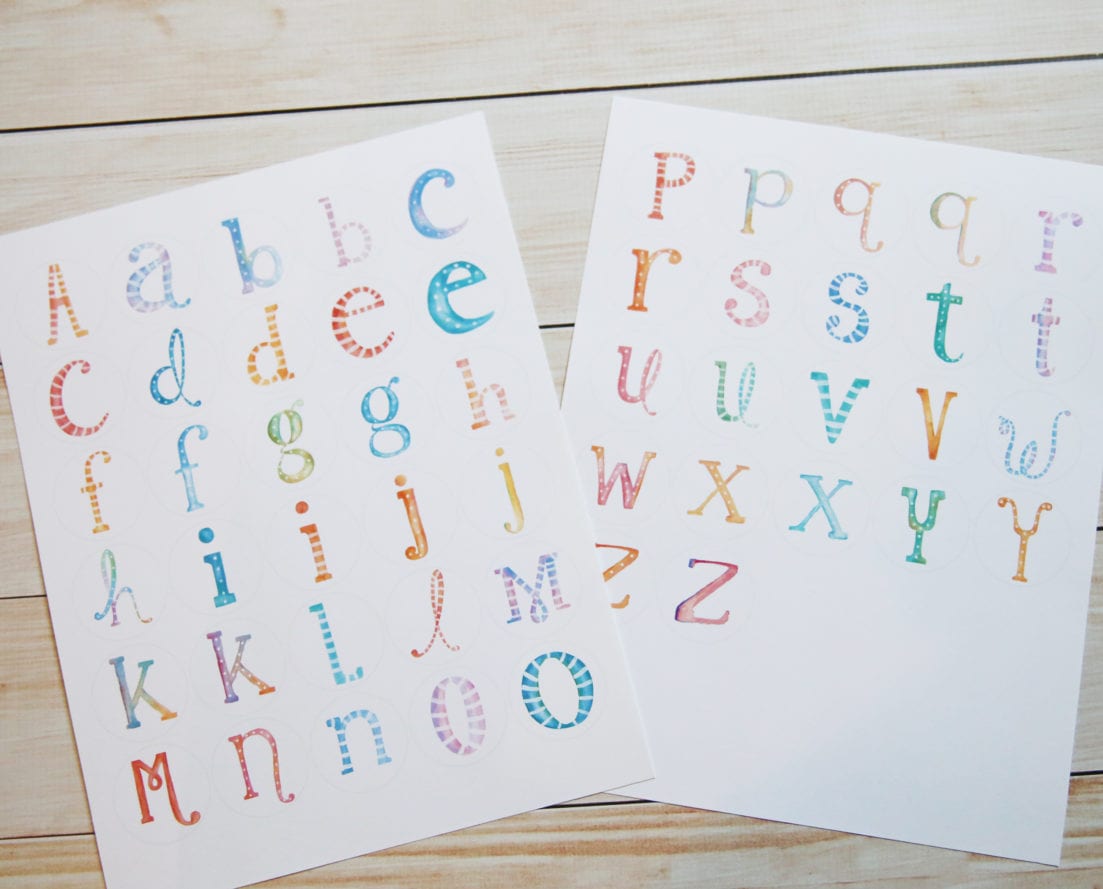
We even have the entire alphabet, with two options for each letter.
Handmade by us and ready to go if you’d like to create your own. We’re always suckers for a good alphabet fun, especially on the fridge!
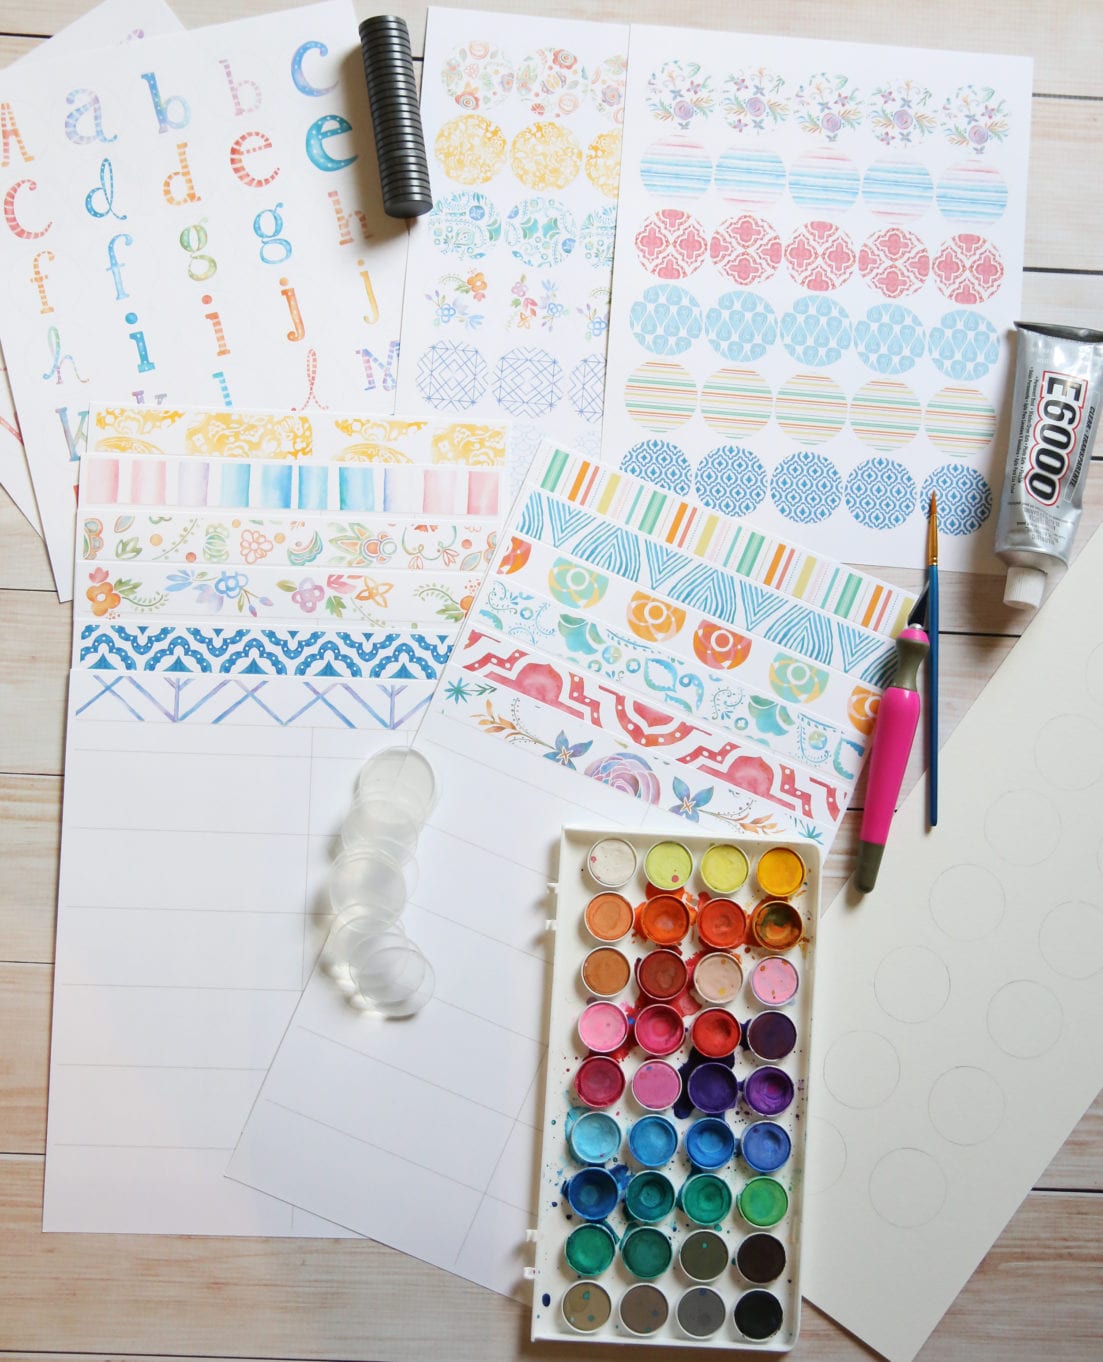
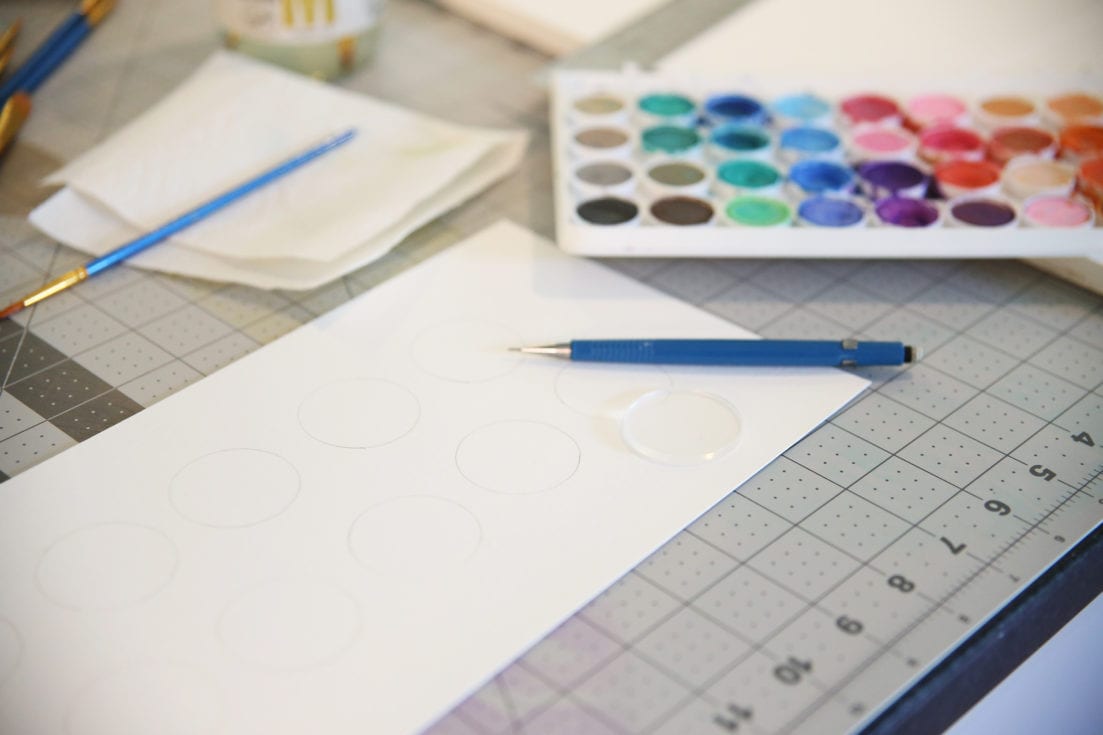
Here’s what you’ll need – pick and choose depending on what version you’ll be making: {affiliate links below}
• Printables – linked below – just click the link and print from home – easy peasy
• cardstock
• safe work surface
• scissors or X-acto blade
– we think that cutting circles is easier with a blade, and we’ll share more on tips and tricks below
• E6000 glue
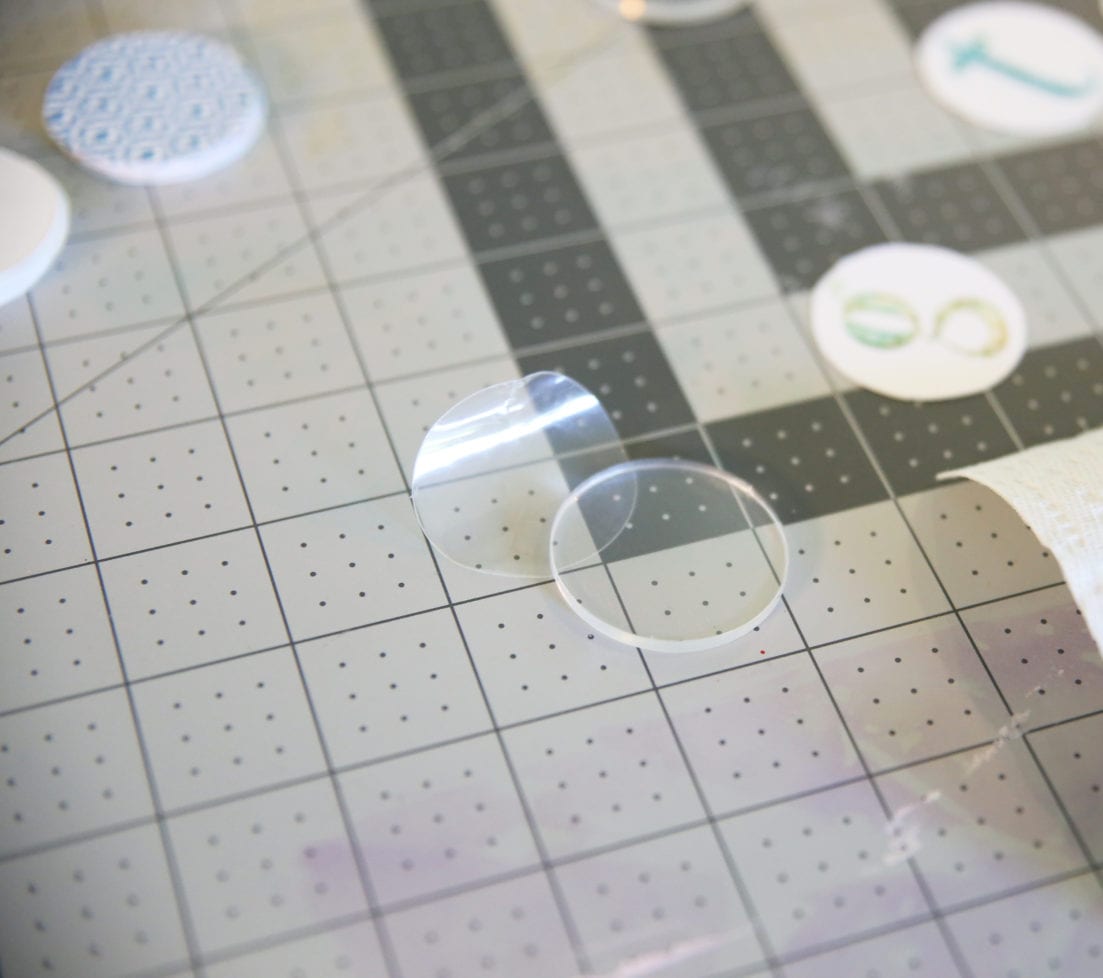
• 1.5 inch acrylic disks
• magnets
• paintbrush + watercolor paints + watercolor paper
• hot glue gun
• laminator or access to one {optional} – linking our fave
If you’re making the simple watercolor version sans our printables, we’ll start there with the how to.
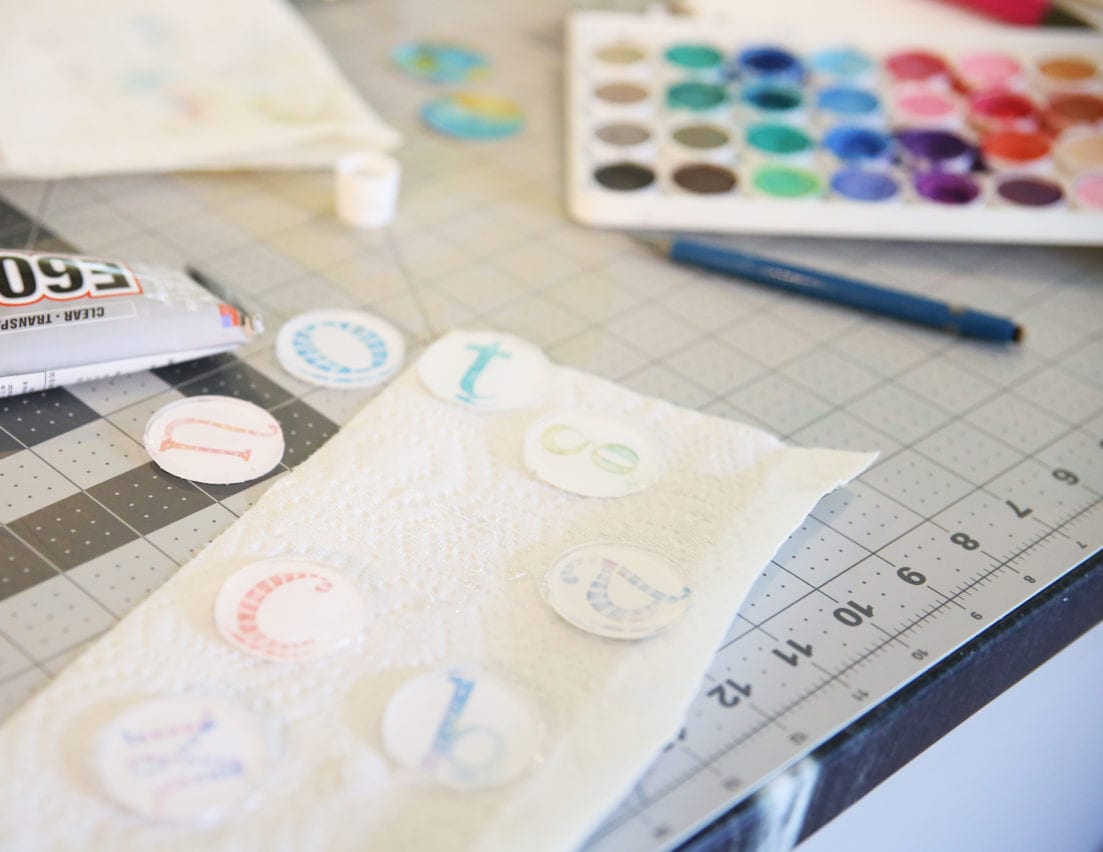
We simply took our disk and traced it lightly with a pencil on watercolor paper.
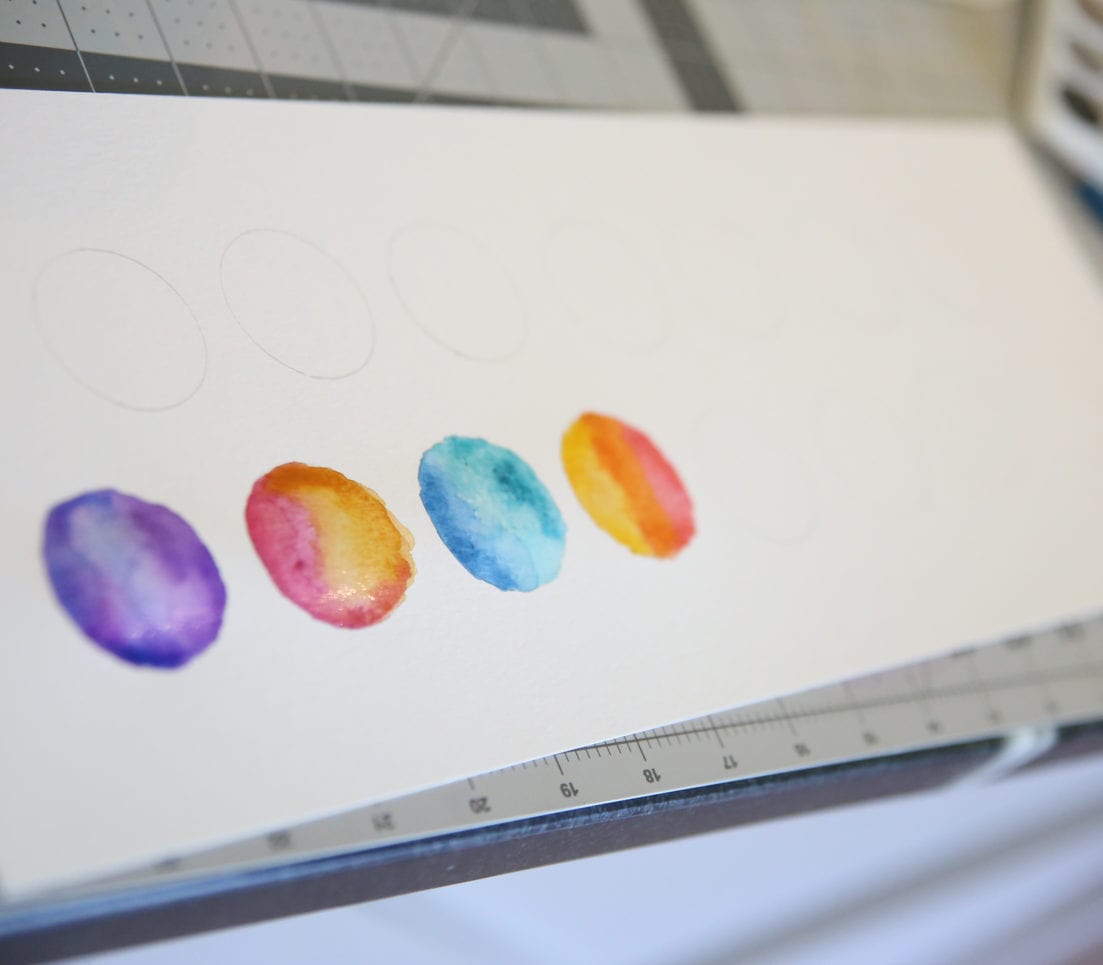
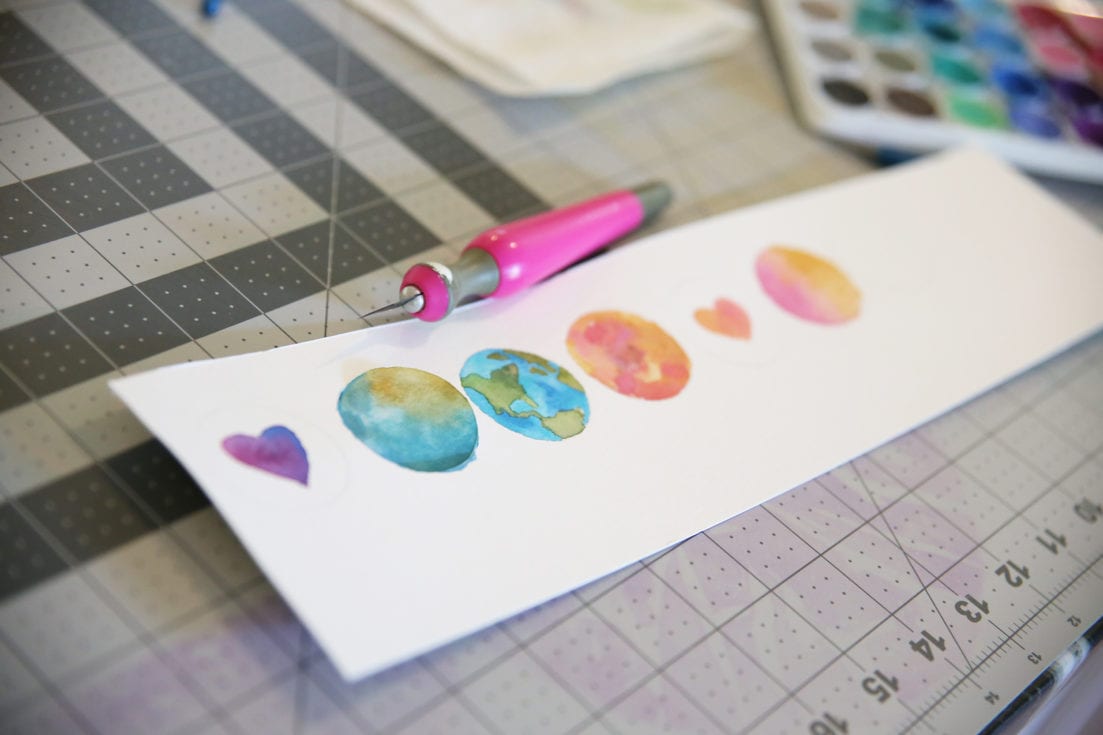
Then choosing whatever colors we wanted, filled them in.
The possibilities here are endless, but we love layering in complimentary hues and making them work together, along with the ombre affect of similar colors. You can even use salt for some contrast with your watercolors to add a little texture.
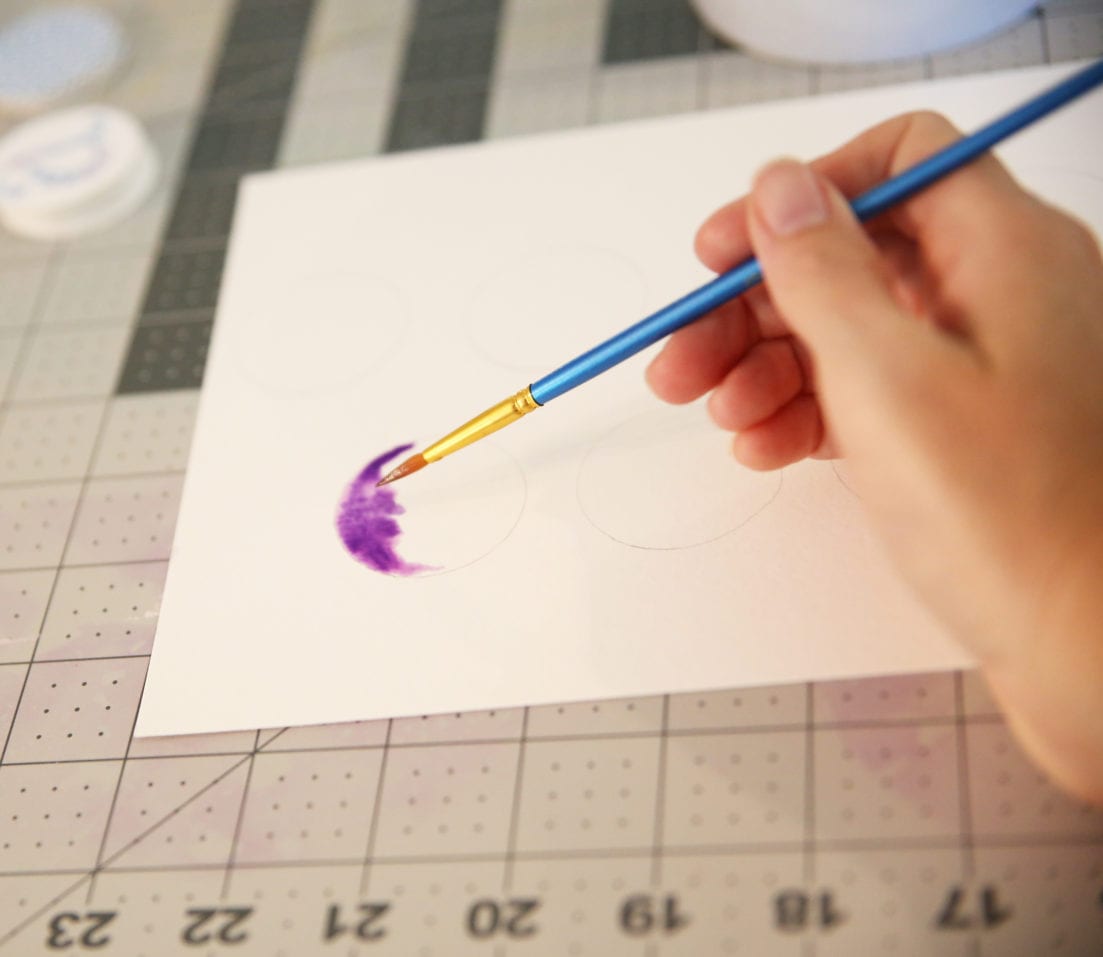
From designs to abstract looks, we love this version.
They especially look bright and bold on the fridge with a simple chore chart.
When they’re dry, cut out your circle. As mentioned above, we love using a self healing mat, and an X-acto blade. They just make for cleaner circles since you’re working with such a small element.
A few tips:
• use the tip of your blade and lightly push into the edge. Pushing down too hard will give you jagged edges.
• slightly turn the paper as you cut, keeping your knife engaged into the mat rather than moving your knife to reduce angles.
• a little practice makes it easier.
• also, don’t expect perfection – your circle will be hidden behind the magnet so there’s room for mistakes.
We’ll combine the next steps for the watercolor version with the printables version below:
If you’d like to get your hands on the alphabet magnets, they’re available here!
• monogram 1
• monogram 2
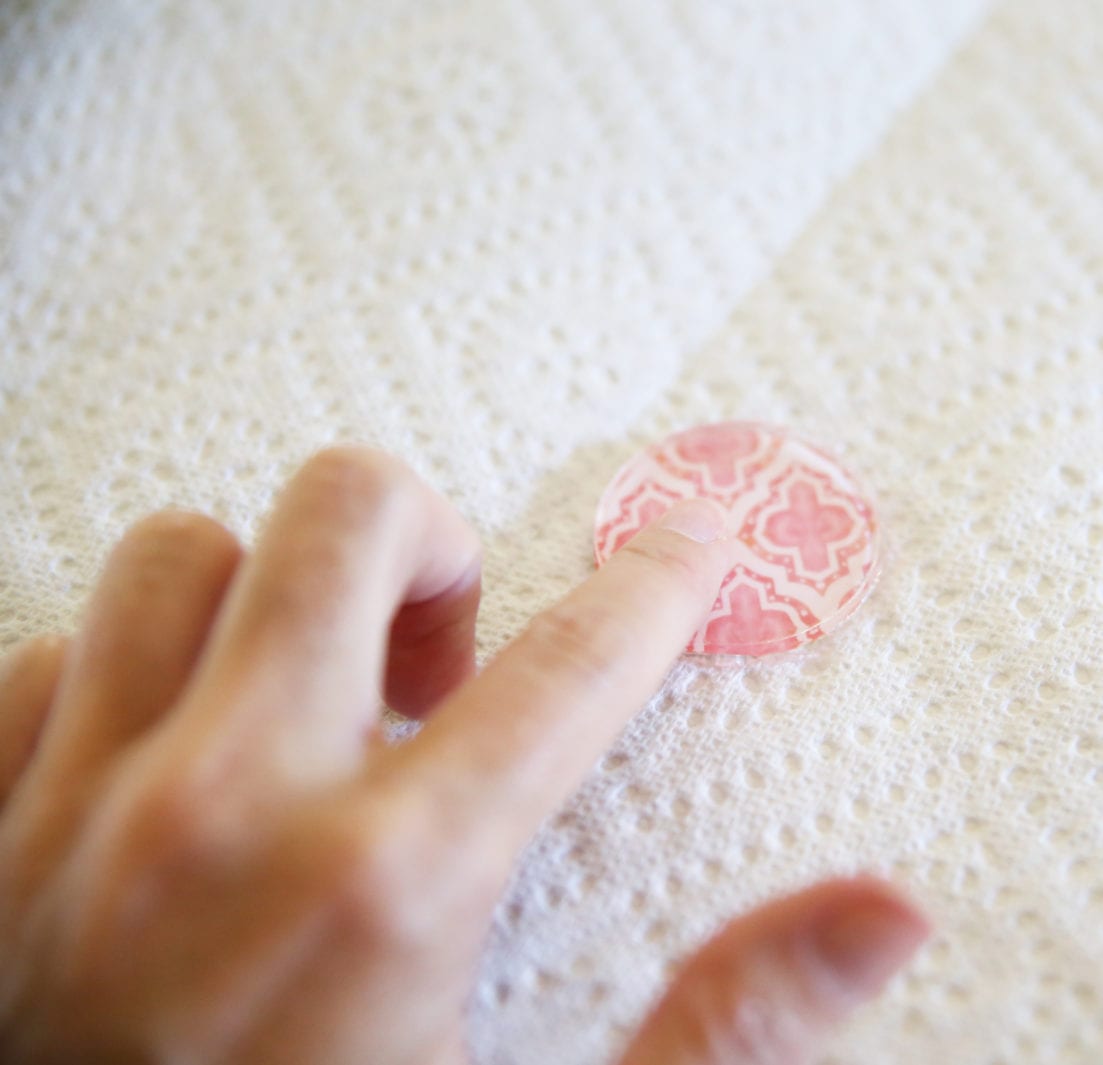
When you’re ready to glue your cut circle onto your acrylic, remove one side of the protective plastic.
Leave the other for now for protection.
On the side that you’ve removed, place your E6000 glue.
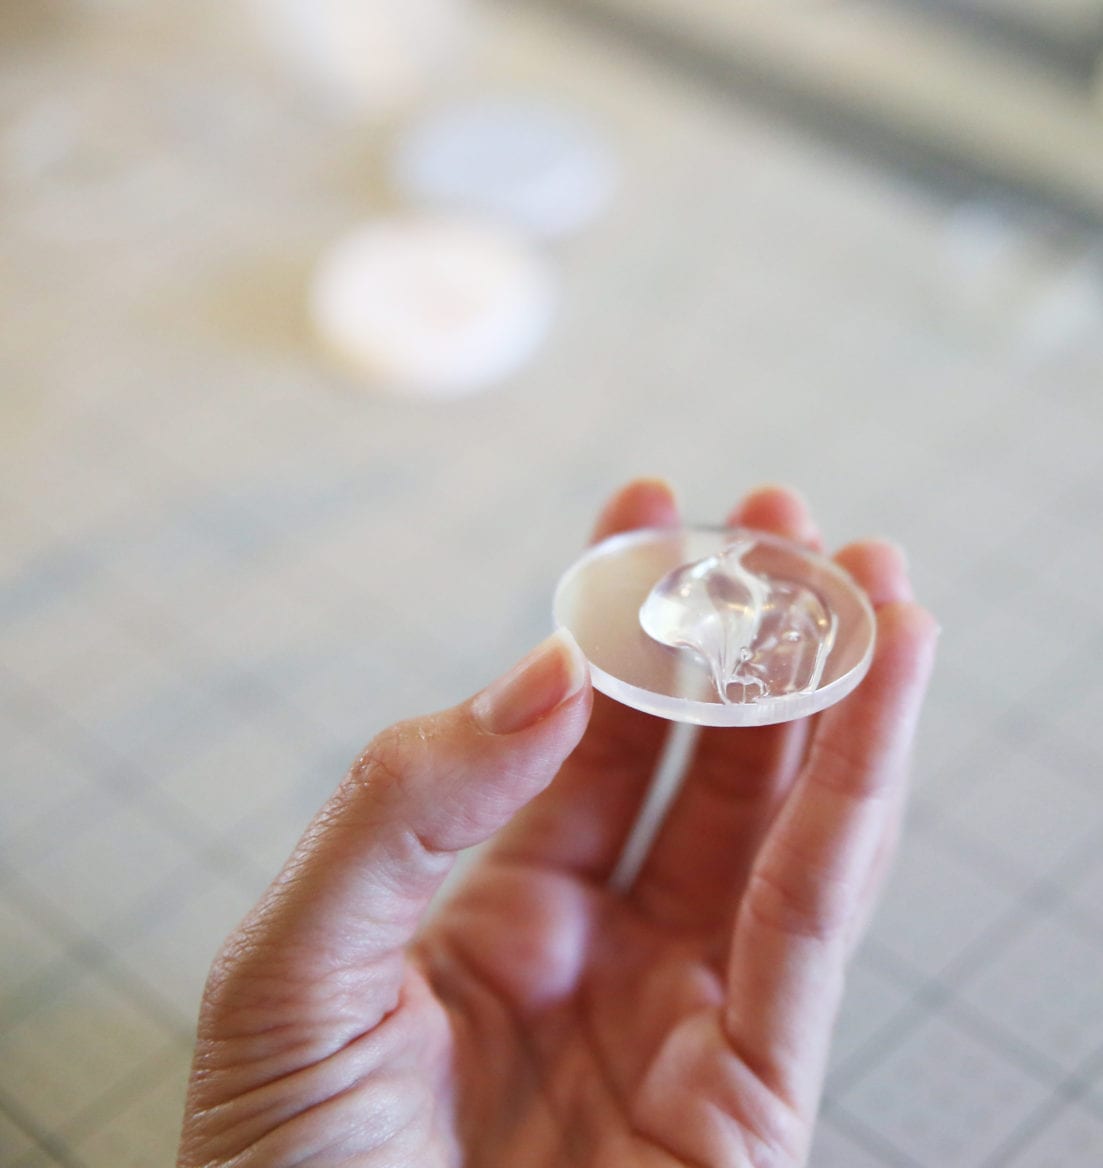
Taking your circle, place it down into the glue. It’s okay to use a generous amount, because pressing down on it will help get rid of obvious amounts of air bubbles between your acrylic and the design.
Place it on a safe surface to dry, and when it’s to a gooey consistency, {about 7 minutes in} remove the excess by peeling it off.
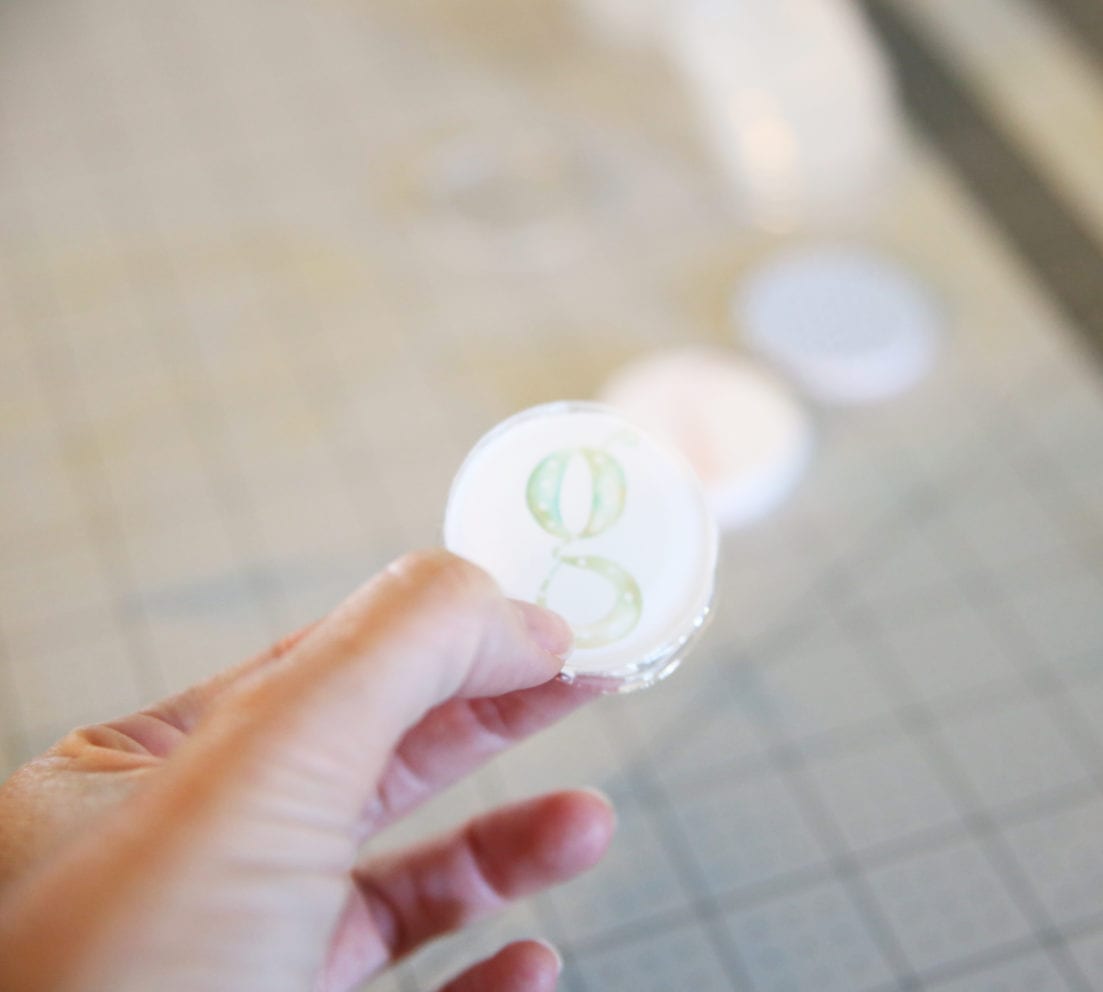
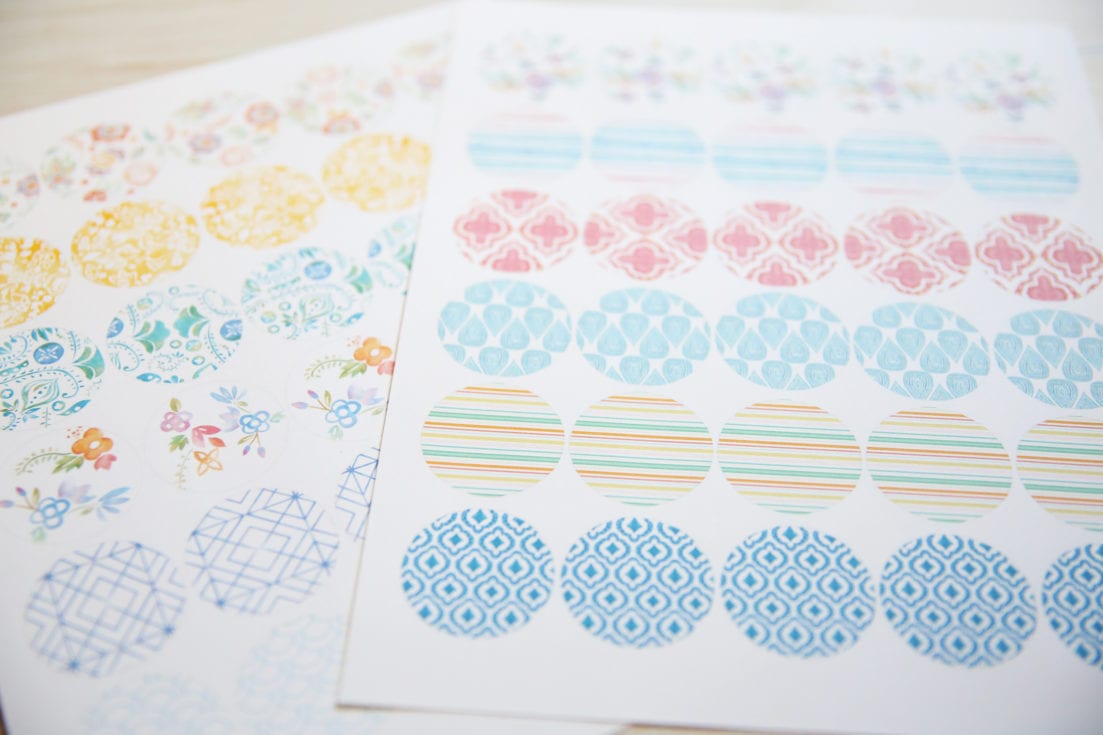
It’s the very same with these fun patterns. Available here:
• patterns
• patterns 2
Showing you how to glue them again:
Take the circle and place it face down onto the side which you removed the plastic off the acrylic.
When it’s stuck there, press down, to remove any air bubbles and spread the glue.
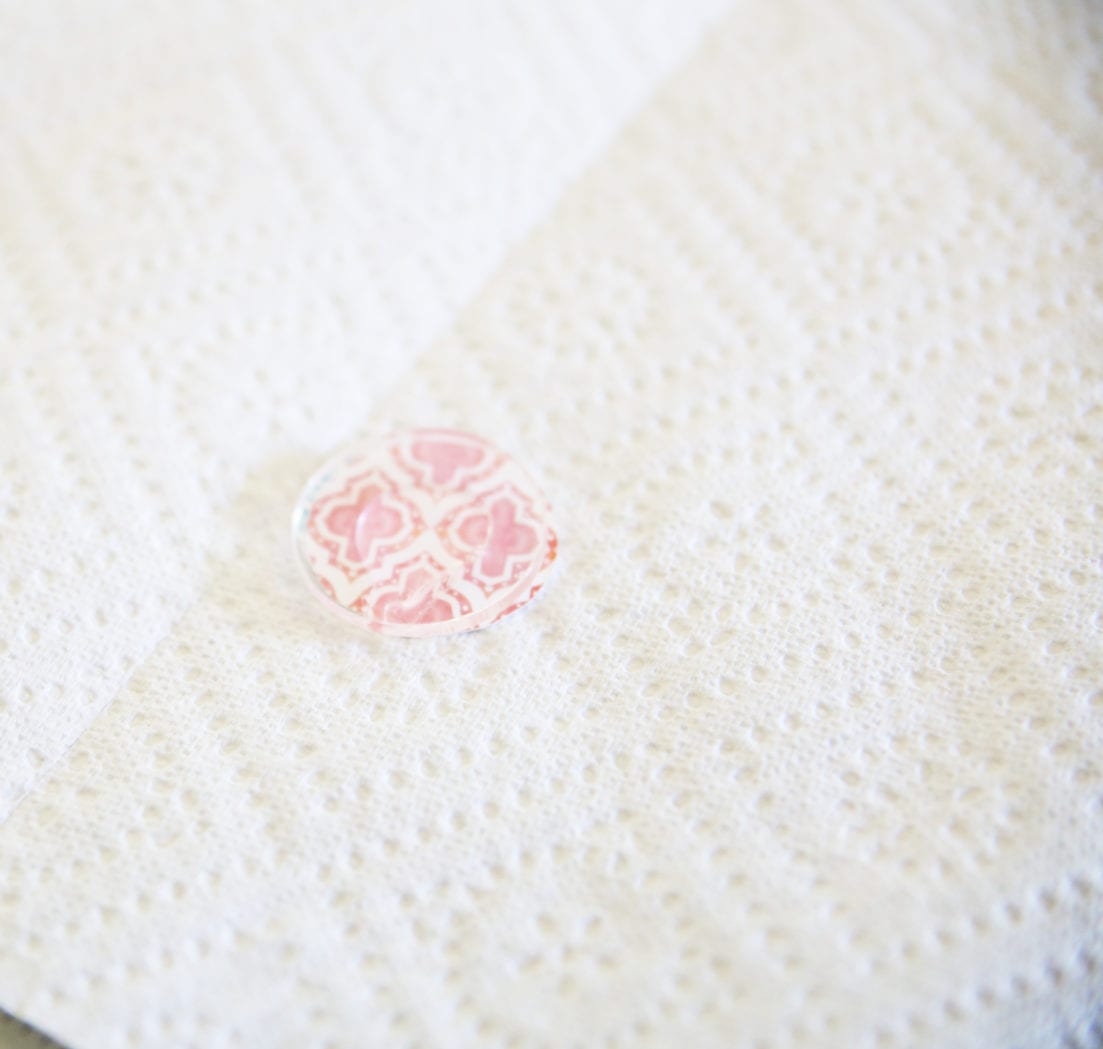
Tada!
Allow to dry around 30 minutes to one hour, and you’re ready to go!
When those are ready, flip them over, and adhere your magnet.
NOTE: we recommend using your glue gun for this part, since the E6000 comes through the paper, and you’ll be able to see the magnet. The hot glue gun should work fine with the paper. I learned this the hard way, when I flipped over some of my designs after adhering the magnets, and you could see them through the paper. Boooo. We used card stock for this reason, but unfortunately, it wasn’t enough. Thus the glue gun should help with this problem.
When it’s all dry and ready to go, remove the last protective coating of plastic, on the other side.
Chore charts are available here:
• classic floral
• blue bejeweled
• geometric
• colorful stripes
• raindrops
• colorful rosettes
• sea creature swirl
• golden polkadots
• watercolor stripe
• pink trellis
• fall florals
• spring florals

Aren’t they oh so pretty?
Just run them through the laminator and add your own categories with a dry erase marker, as you wish.
Tada! You’re well on your way to accomplishing all the things. It’s a great way to help your kids keep up with all the stuff, or just decorate your fridge because you can.
So what do you think? What would you use yours for?
Did you tune in today? If so, we’d love to hear from you.
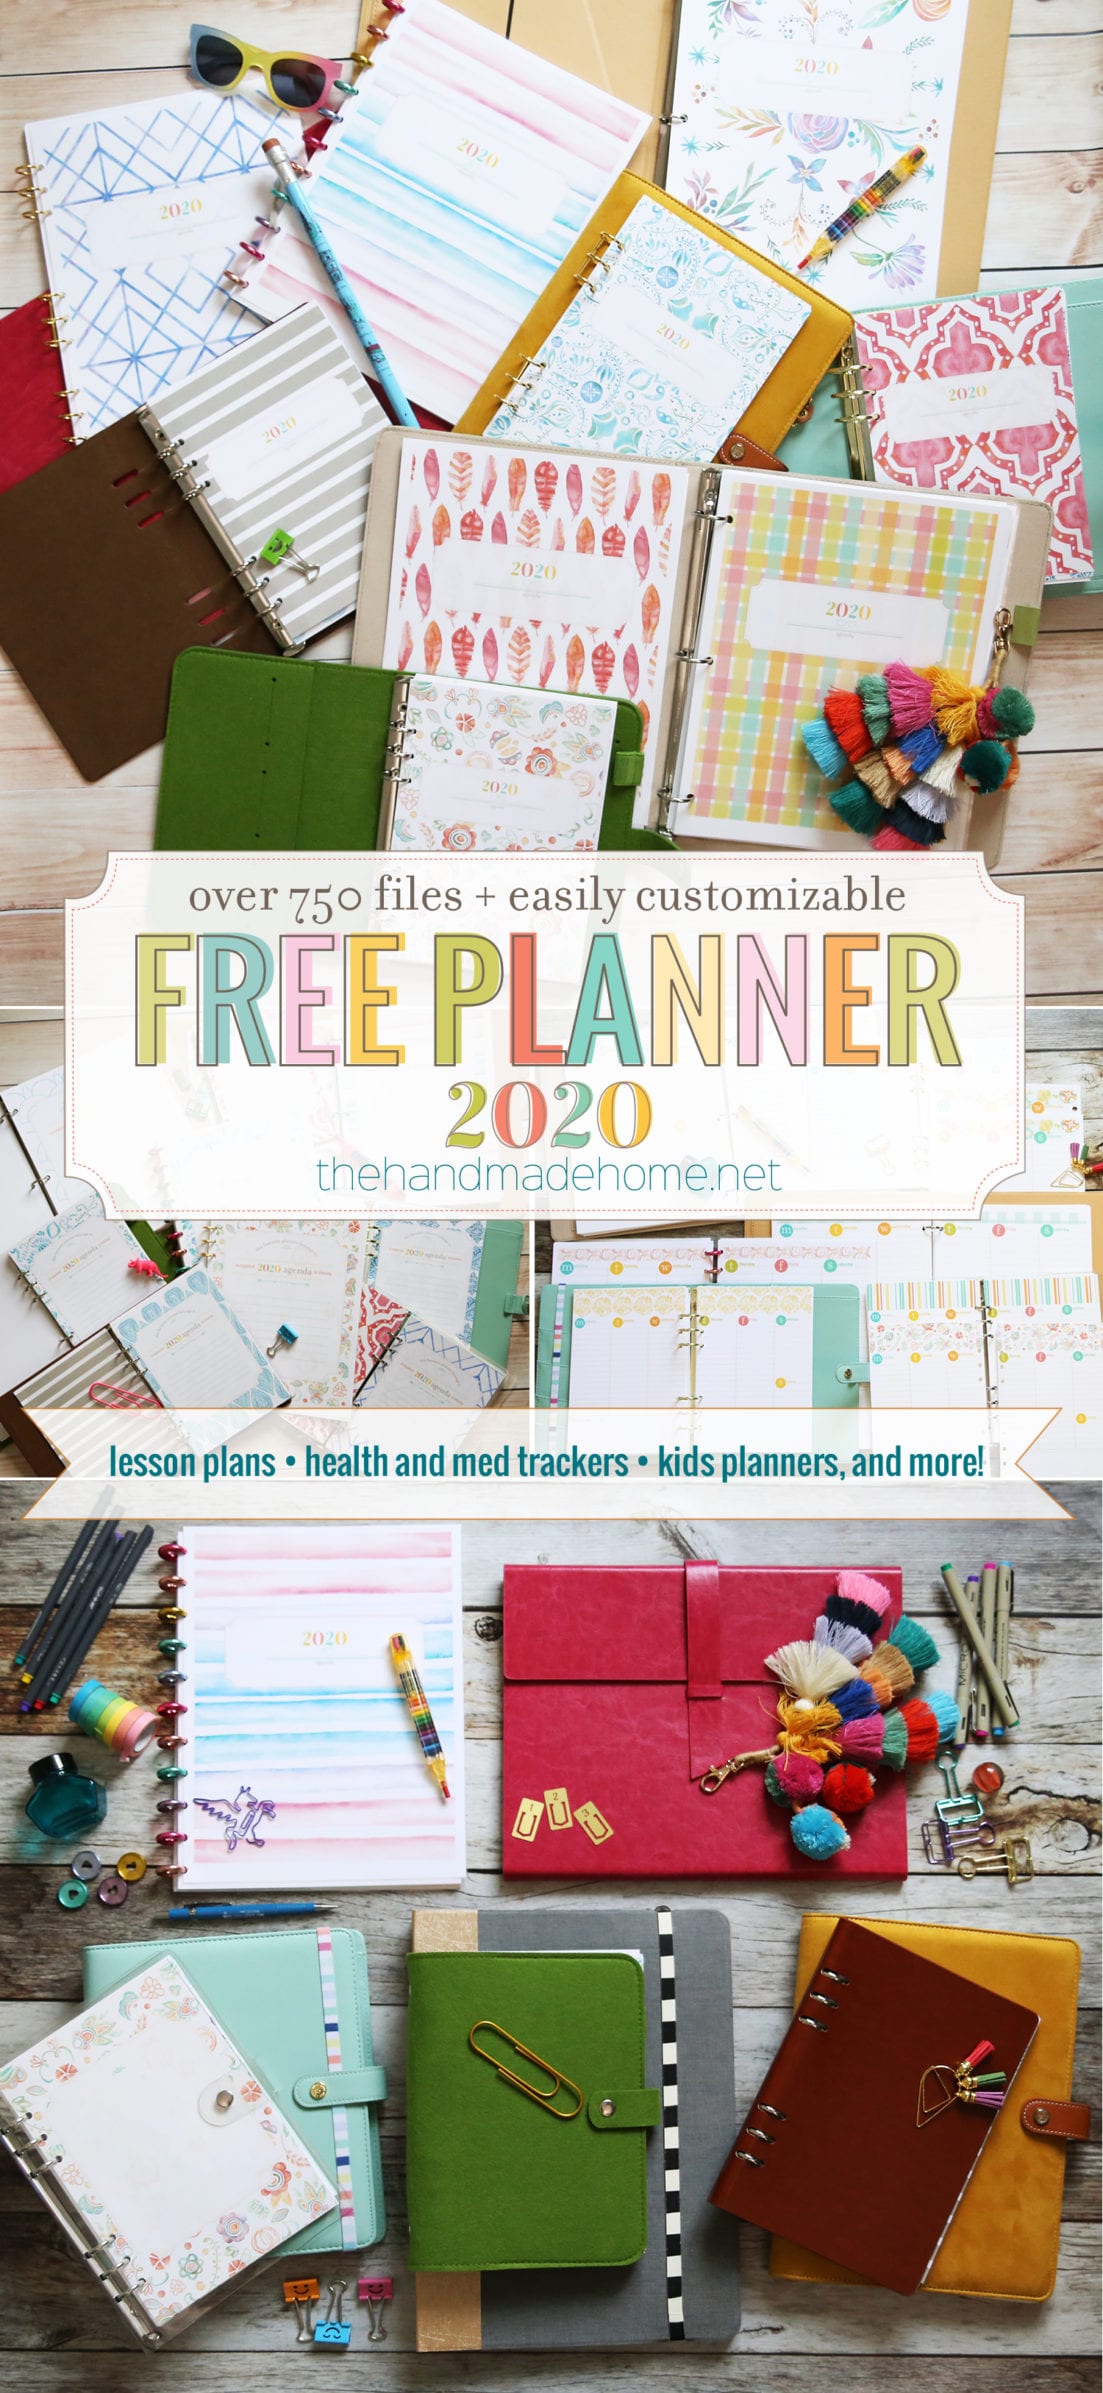
Psssst… this works perfectly with our FREE planner.
Check out 2020 {with the link to 2019} here!
Have an inspired day!


Is there a printable for the watercolor instructions that is free of ads? It takes so many pages to get it on paper for my family who doesn’t do much on internet plus it’s just easier to read without all the ads in the way. I can copy and paste it all but the color tutorials are nice to have along with the printed instructions.