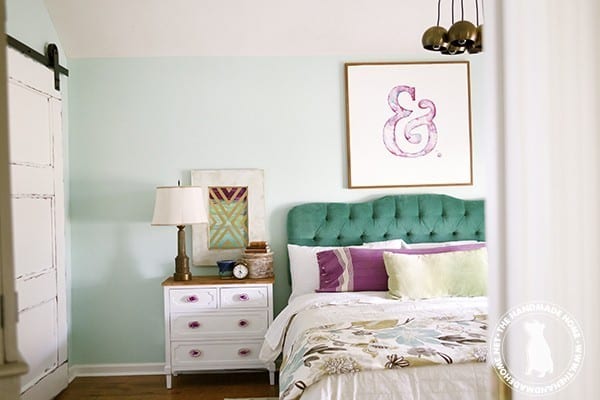
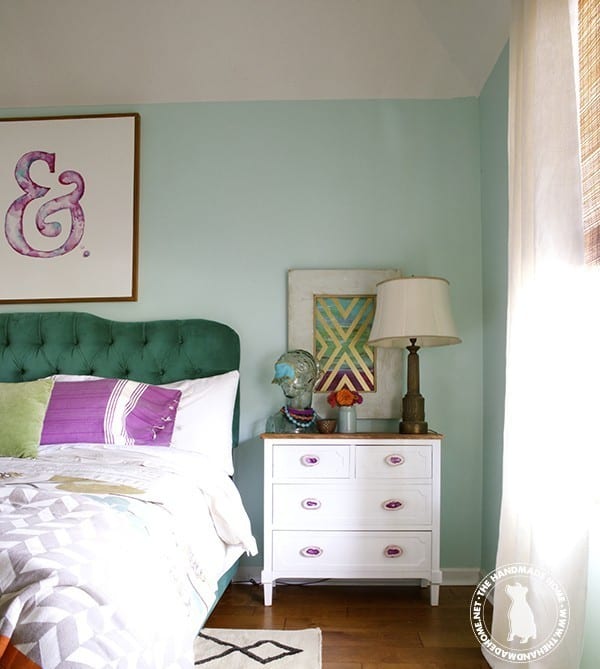
We’re back today with one of the simplest, easiest elements for our bedroom: easy metallic abstract art. It brought in a fun splash of color and modern touch to our space, and it’s a great way to use bring some affordable character to your walls. Today, we’re sharing just how we did it.

Here’s what you’ll need:
• Assorted brushes + basic acrylic paints of your choice. We went with three main colors: Aqua, green, + purple. Also, I used a touch of white in different areas to bring in some depth, but that’s totally up to you.
• Canvas or thin MDF cut to size – we had MDF in our garage, so we coated ours with some matte white paint for a good surface to work with. – Your size will depend on your frame of choice – our how to for this particular frame can be found in our book here, but you can always use an old one from around your home.
• Gold leaf paint {found at your local craft store}
• ScotchBlue™ Painter’s Tape -original multi us 2090{we used the thinnest width at 1 inch}
• An X-Acto ® Knife {with fresh blades}
 For part one, you’ll be creating your underpainting. Adjust it to the size you plan to frame it, and start in blocks. We basically divided it into 1/3 and did a bit of color blocking.
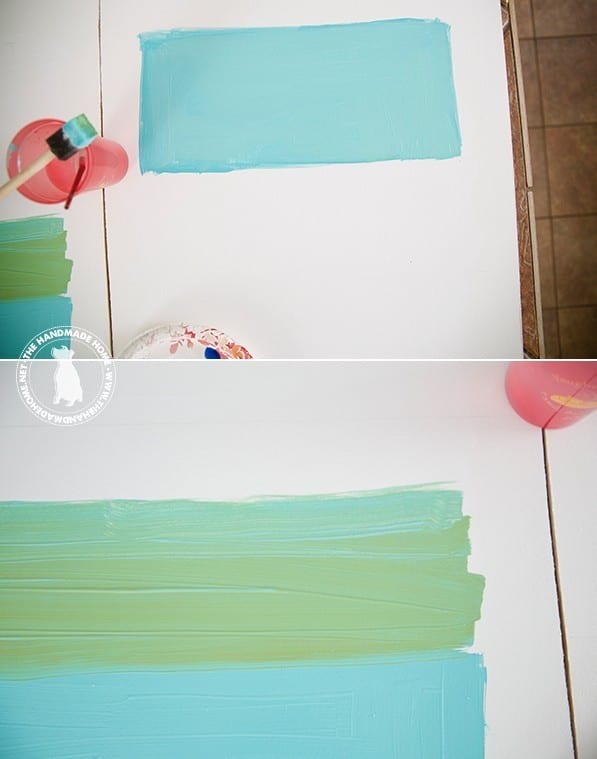
Once all three color blocks are established, have fun and carry colors from each section into the other. We thinned it out, carried it through, and even used touches of white in various areas.
Literally play with your painting until you’re happy with it. In the end, the under painting look is all up to you, but since the top painting {metallic part} is so basic, we thought the more detailed it was, the more interesting it became. have fun, until you’re happy with the final look.
Remember – this is your art, and it’s abstract, so it’s all up to you!

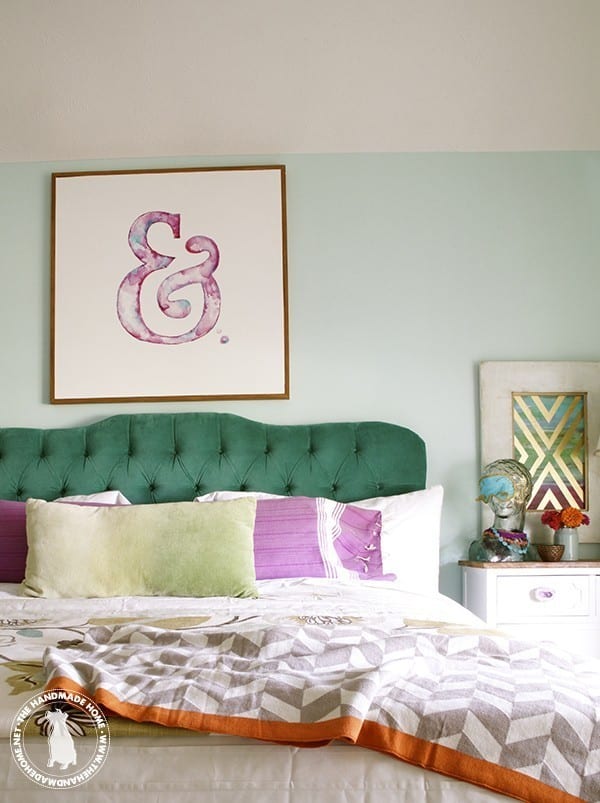
Here’s how it would have looked in the frame without the top painting part. We did two paintings for each side of the bed, and when we were finished with both, we flipped one, so that they would be opposites on each side.

Once your under painting is completely dry, place your tape in an ‘X’ across it. The beauty of this is that there really is no need to measure, unless you’re just feeling really meticulous. I just eyeballed it, and made an x with our ScotchBlue™ Painter’s Tape.
*Be sure to test your surface in an inconspicuous area to make sure it won’t pull up your acrylic blocking. Ours was absolutely fine, and the tape worked beautifully. It’s just always good to be sure so you don’t lose your work. {. You can also use the ScotchBlue™ Painter’s Tape Delicate Surfaces which is recommended for taping over freshly painted surfaces (24hr).}
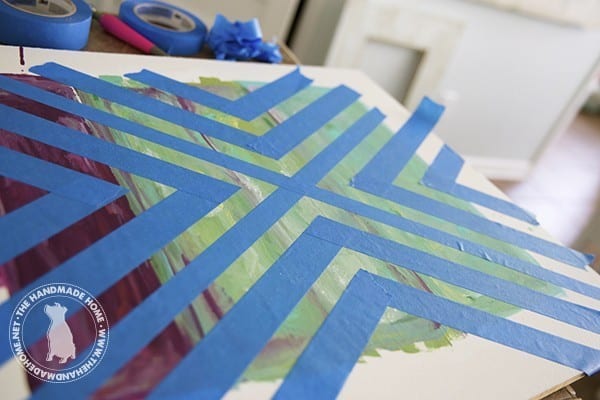
Your painting is now divided into four triangles. From here, it’s literally a leapfrogging process, of repeating the pattern all the way across each section.
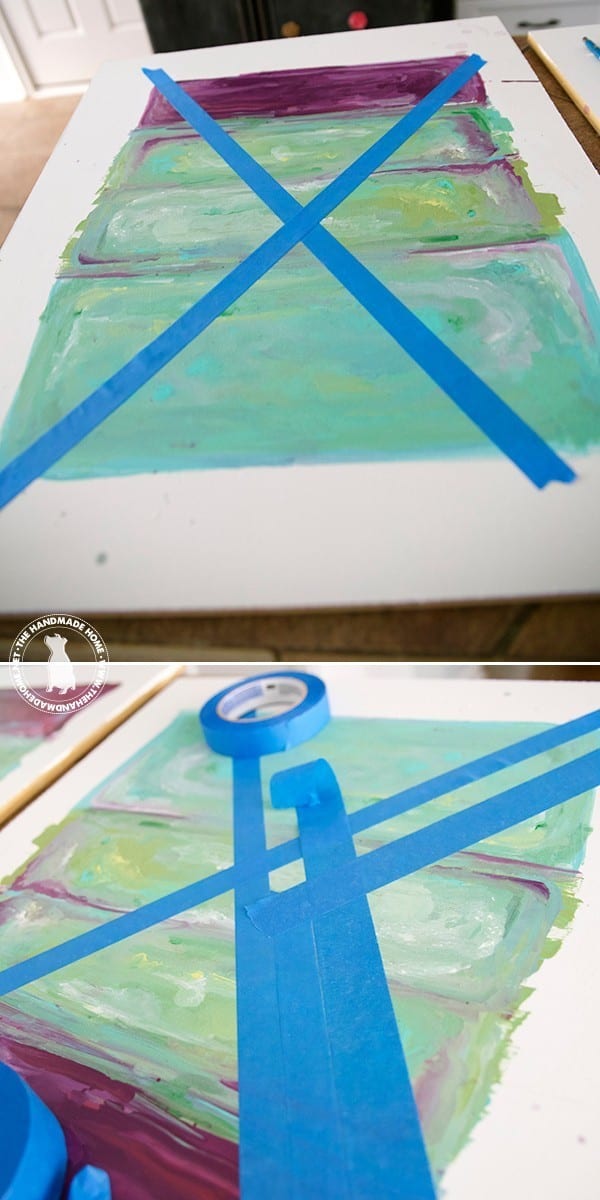
Again, no measuring required. Moving outward in one triangle section, just lay another two pieces of tape on one of those four sections, right next to the original X. This will create the correct space for your gold stripes.
Then, another piece, in the exact same way. Pull up the middle section once the third triangle is placed.
Your tape will overlap, so feel free to gently use an X-Acto® Knife to trim it up, and create those sharp points you’ll have in each stripe with your overpainting.
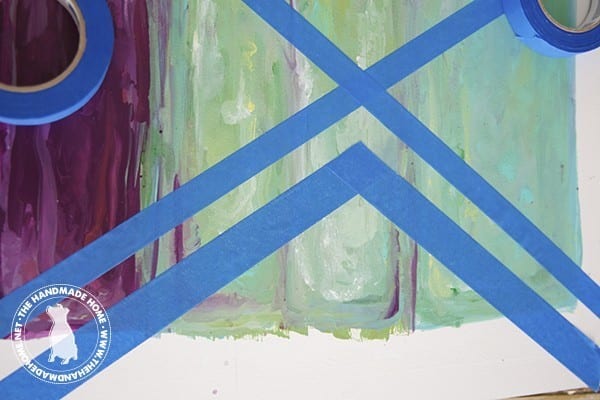
Repeat the same step you just did, slowly working your way outward in this section.
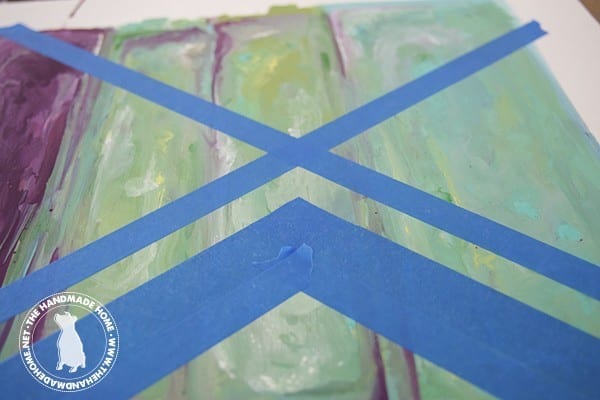
Place the tape in a triangle, place more tape right beside it, and remove the center piece. Use your X-Acto® Knife to trim up any overlaps to help get that nice, sharp triangle.
When you’re finished with your first section, move onward to the next, simply repeating those steps in each four sections of your painting. Do this until your entire underpainting is covered in the triangle pattern in four areas.
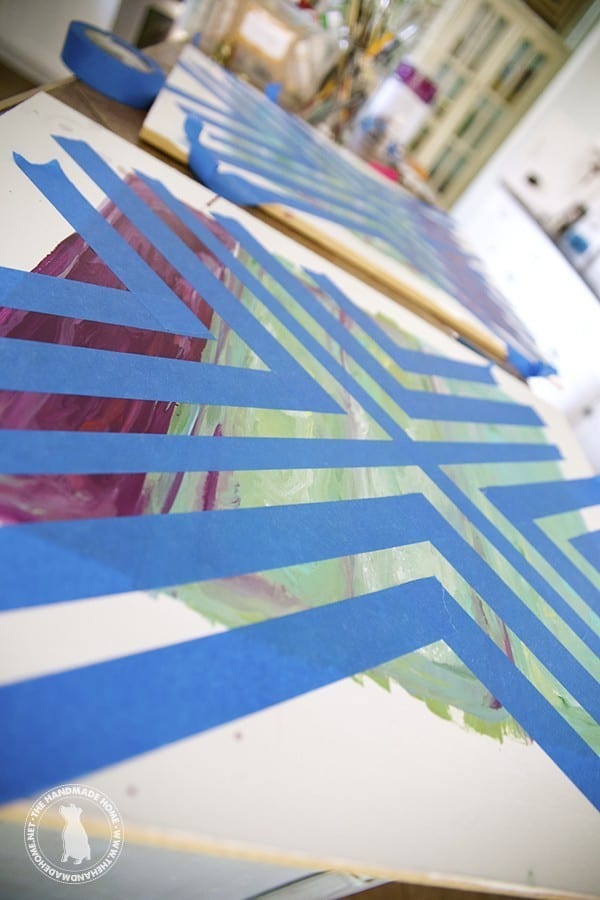
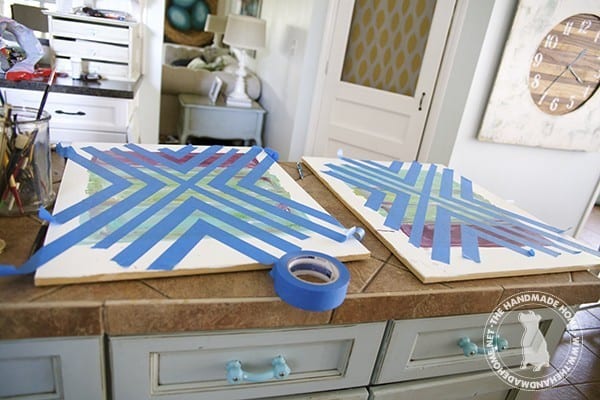
If you’ve repeated the steps, your paintings will look like this when you’re finished.
Tada! A simple, fun pattern with no measuring required.
Make sure all your tape is pressed down securely,
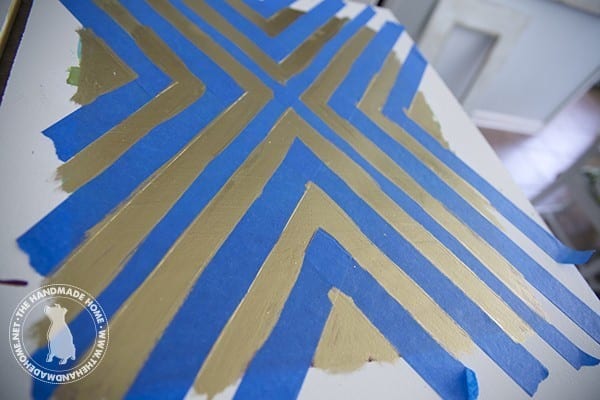
and when you’re ready, add those stripes with your gold leafing paint.
Yes, that is chocolate candy in the back of the shot. A little motivation never hurt anyone. Shhhhh.
Helpful tip: Try to avoid painting toward the tape edges with your brush to insure those sharp sides. This is so that your brush doesn’t push paint under the edge. {That’s the beauty of the tape though, it certainly does it’s job.} It just helps to move in the direction of the stripes.
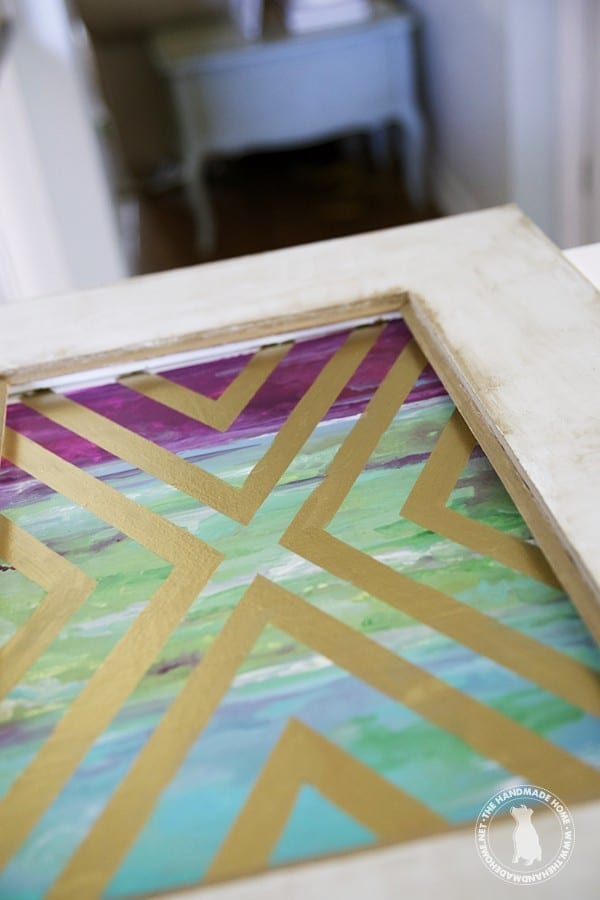
I waited until it was nearly dry {this is a matter of moments} and then pulled away all of the tape.
Tada to the second power: you should have a nice, fun, one of a kind art piece.
Sometimes happy accidents happen with art, since we’re only human. If one of your edges comes up a little funny, you can do small touch ups with a tiny brush to fill it in, and even remove a little by scraping oh so gently with the tip of your X-Acto®.
I embraced one of our {minuscule} rough edges and the only reason you know is because I just told you. ;} Embrace the imperfections. It’s part of the artistic process, and what makes those handmade items so neat.

And there you have it. Fun little flipped abstract pieces for the bedroom, with the help of ScotchBlue™ Painter’s Tape.
As always, let us know if you try it, or have any questions! We’d love to see your work!
Have an inspired day!
I am proud to be a 3M sponsored blogger, and, as part of my responsibilities, I get the opportunity to evaluate products. Opinions are my own and additional product used in the project were selected by me.


You can connect with ScotchBlue™ on Facebook , Twitter and Pinterest . You can also connect with Home Depot on Facebook , Twitter and Pinterest.


This is gorgeous! I’ve been waiting on this how to so perfect timing. Thanks so much
What kind of gold paint did you use? It looks so great! I think I might have to tackle this 🙂 Thanks for the step by step!
Hey Jill! We just used a standard gold leaf paint – you can find it here! http://www.amazon.com/Plaid-6110-Liquid-Leaf-oz-Classic/dp/B000BZX2GS/ref=sr_1_2?ie=UTF8&qid=1412610191&sr=8-2&keywords=gold+leaf+paint I thought we included a photo but just kidding. ;} Hope that helps!
That’s pretty!! We’ve been in our “new” house for over a year and our bedroom walls are still completely bare. I may just make some abstract-metallic art to get that decorating project rolling. I mean, seriously, you had me at “metallic art”!!
HAHA! DO it! It’s lots of fun! ;}
Stunning! I am so making it this weekend. I am not understanding the tape placement though. Anyway you can explain it a little clearer?
Hey Stephany – maybe tell us exactly what you aren’t understanding and I will help you through it. But start with a center section and make an x. From there you will note that you have four sections that make little triangles so that you can work your way out with more tape on the painting. On each little section, using more tape as a spacer, work out. Place some more tape right beside the first section, and then more tape right beside that one. Once you can count three pieces of tape across, pull up the center section. Your outermost area should look like a triangle. It’s basically leap frogging your tape as you go, so you have equal spacing on each section with your tape – no measuring needed if you use it as your guide. I hope that helps – Maybe practice with some tape following our photos as a guide first, and it will make more sense to you!
LOVE this! Thank you for the awesome how to!
This is gorgeous! I imagined it would be more involved than it was! You made it look super easy.