It feels way too early to be breaking out the Christmas stuff. But don’t throw tinsel at me just yet. Because this gives you, my wonderful friends, plenty of time to take a look and plan your own crafting sesh. And also? This can technically work for other times of the year, too. Winning all around. Today we’re sharing how to make your own easy Christmas star garland and gift topper!
We’re here with some of our fabulous blogging friends, so be sure to check out their posts below.
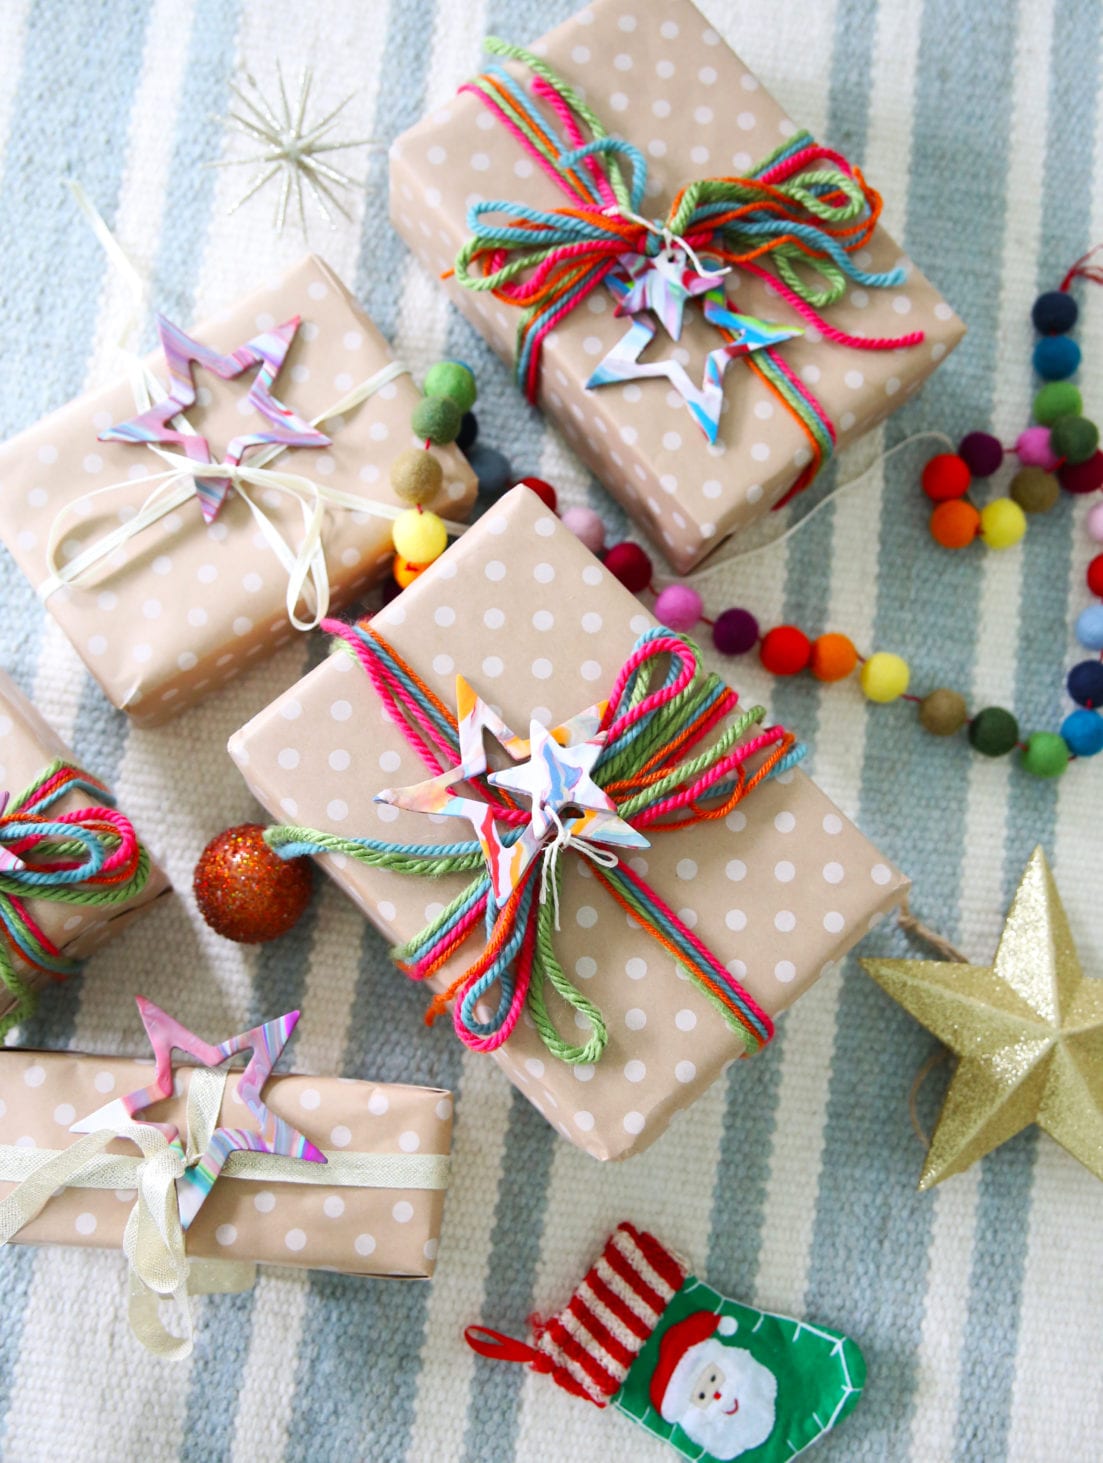
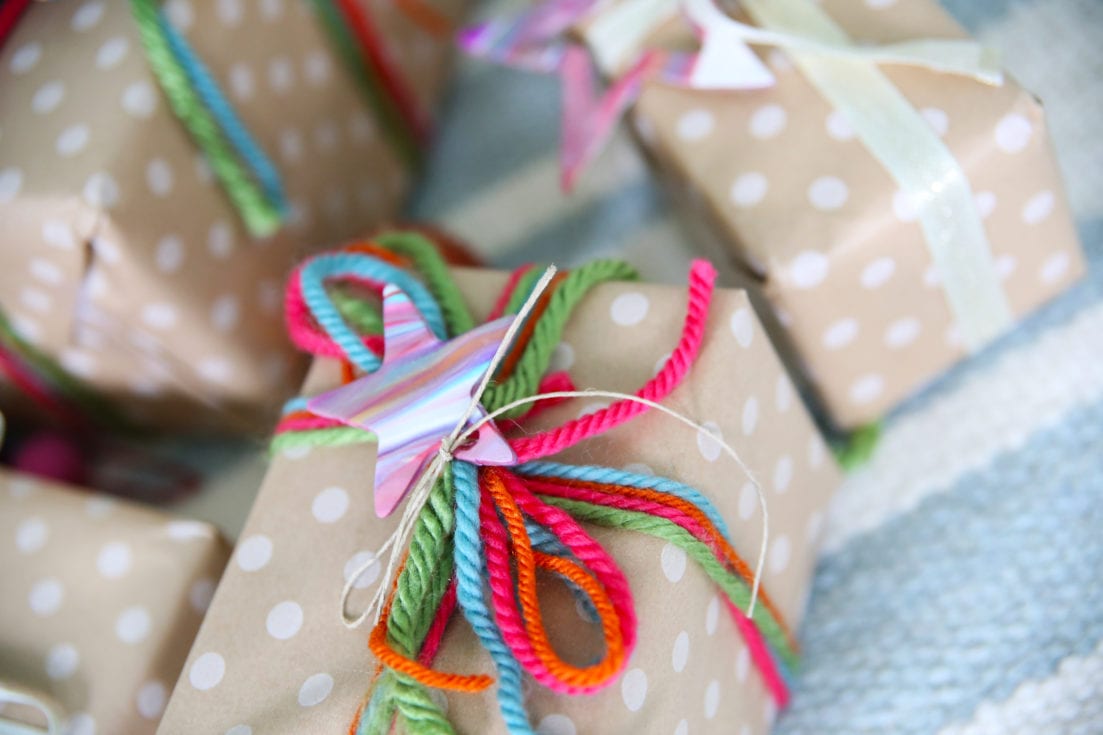
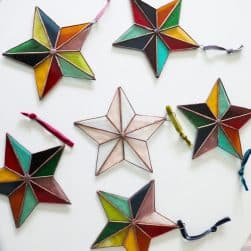
This project is super colorful, fun and versatile. And they can be used as either creative gift toppers, or all things garland!
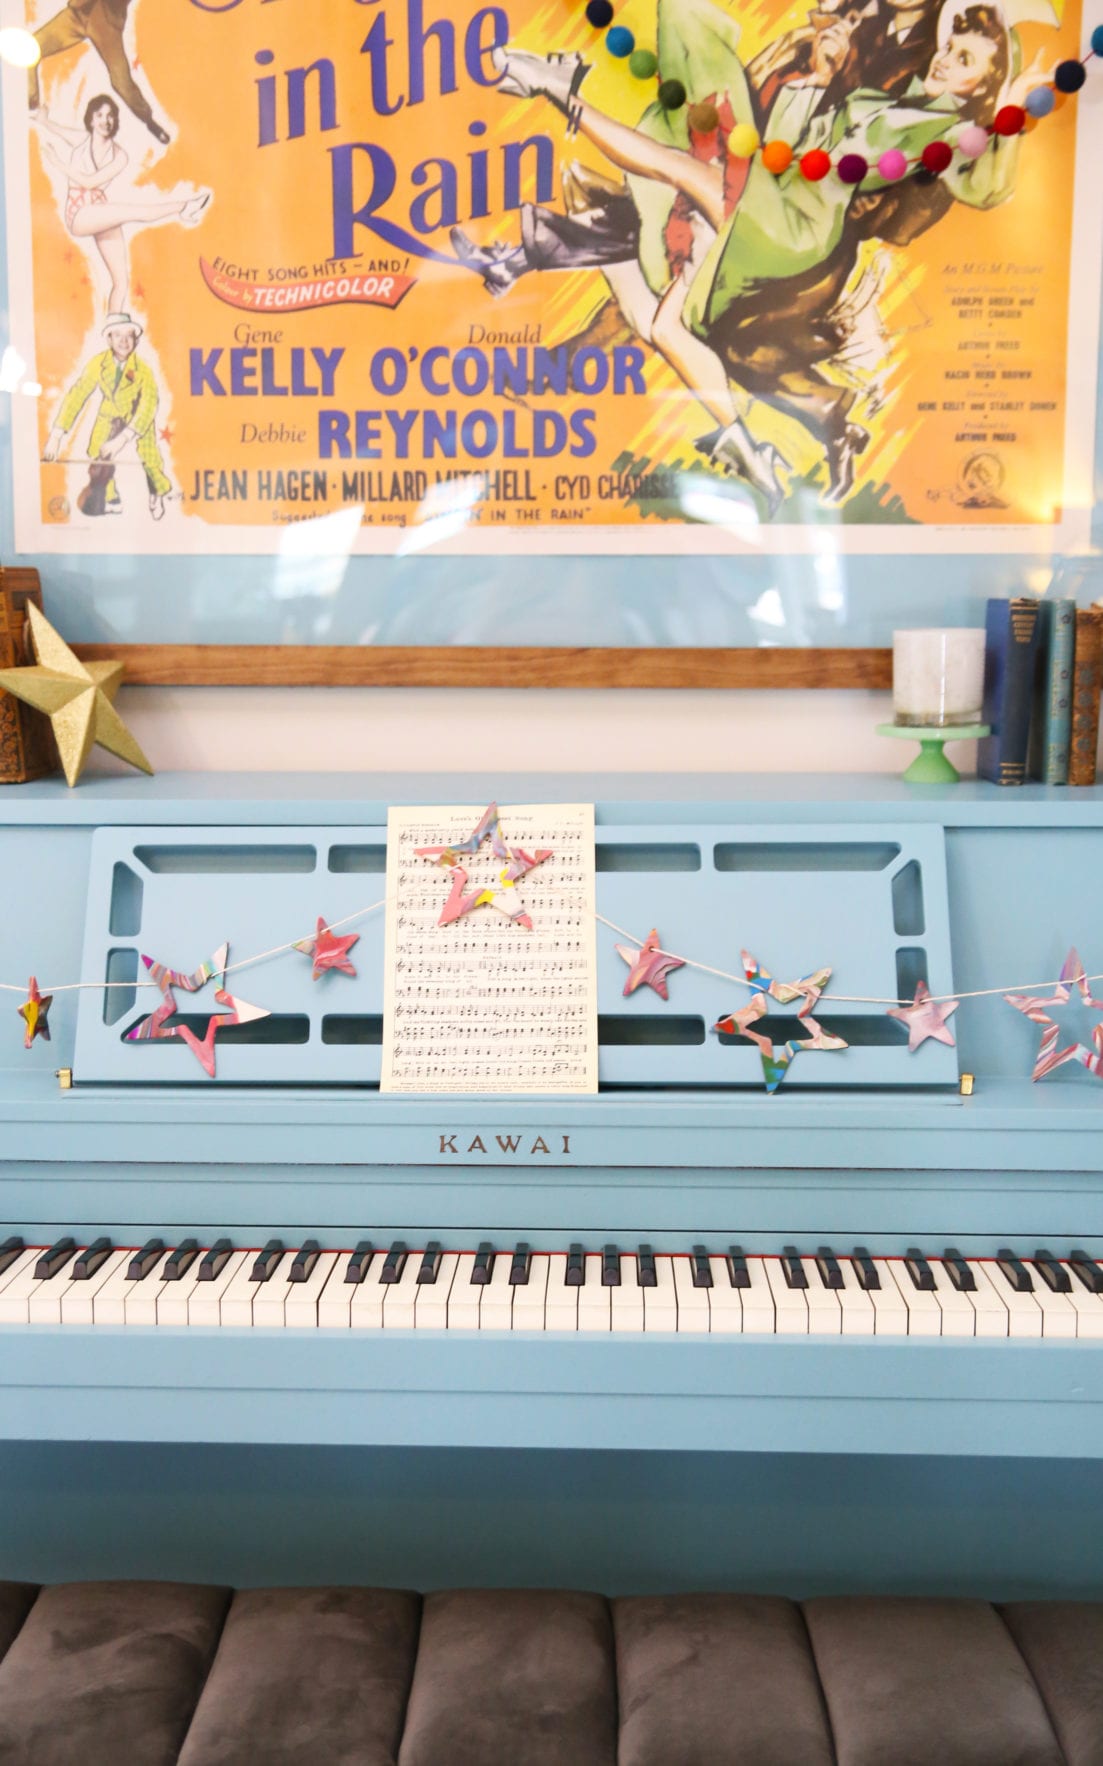
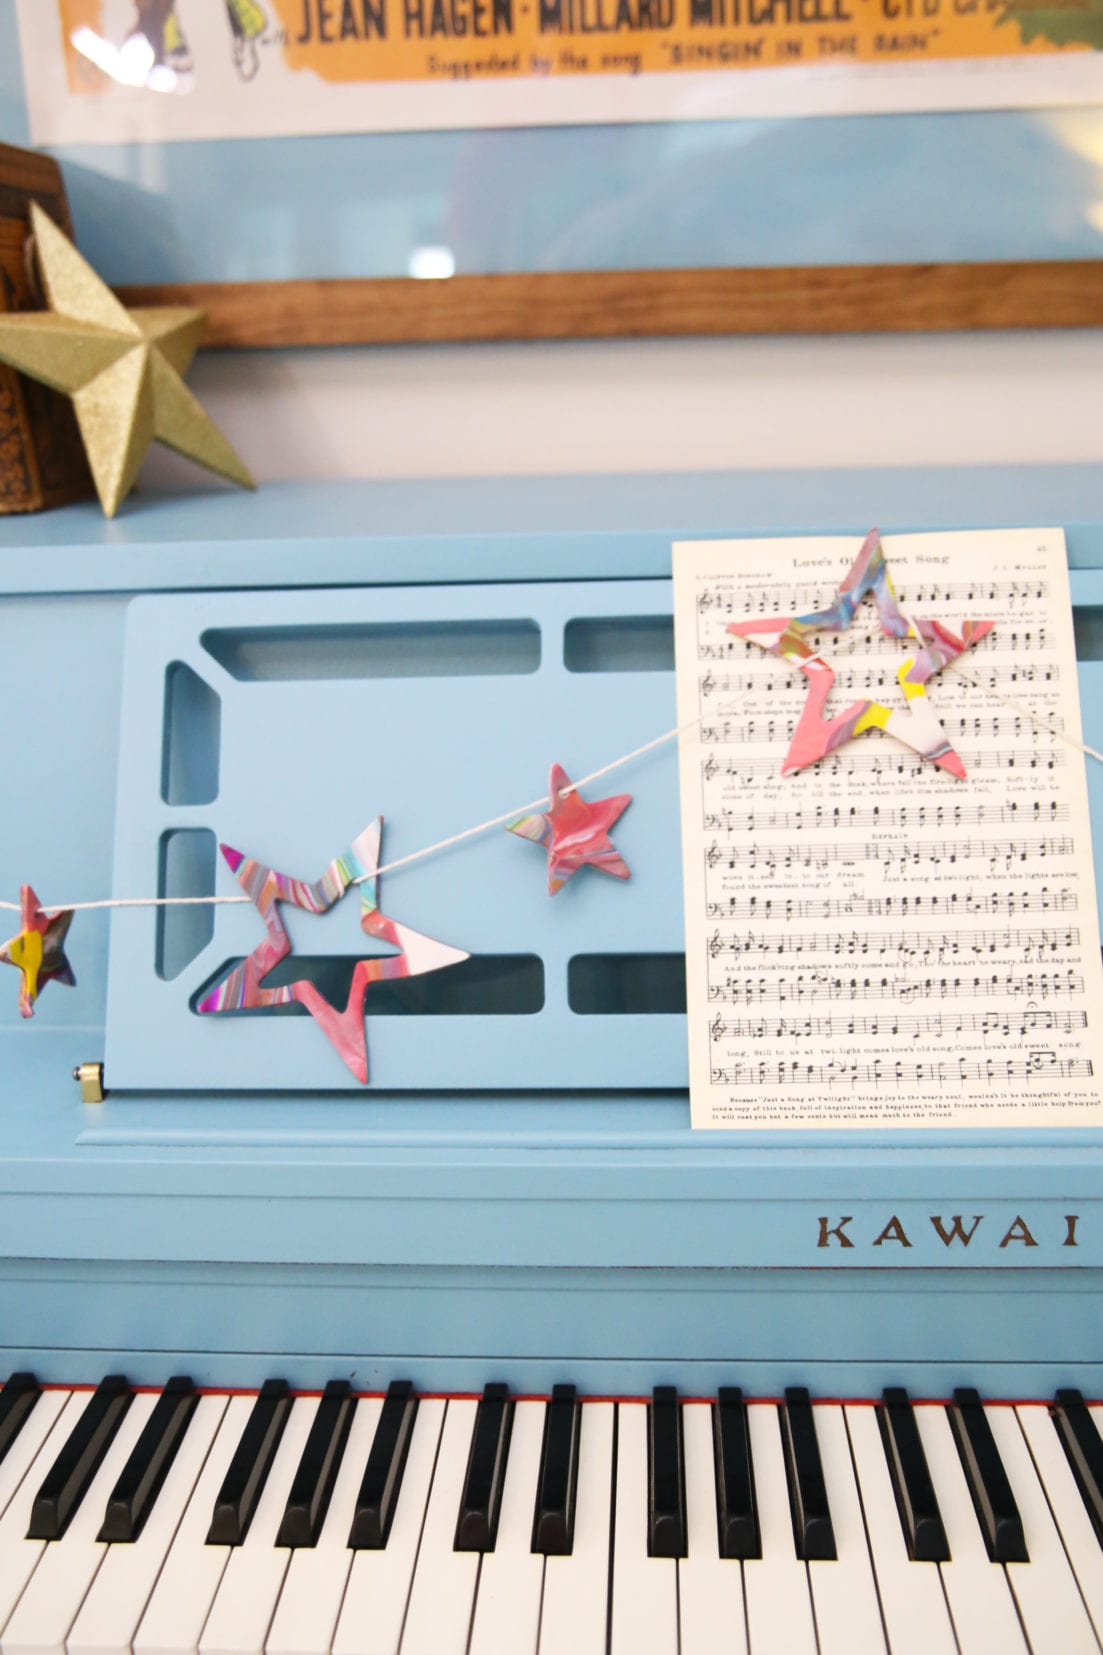
We decided to dress up Murphy the piano with a festive vibes this week, and we loved the way he looks all decked out for the holidays, no matter how early. They’re the perfect little gift toppers, too.
Here’s what you’ll need on your future rainy day kind of afternoon:
• access to an oven + baking sheet {we also use foil}
• multi colored sculpey clay
• rolling pin
• star shaped cookie cutters
• protective surface to work on
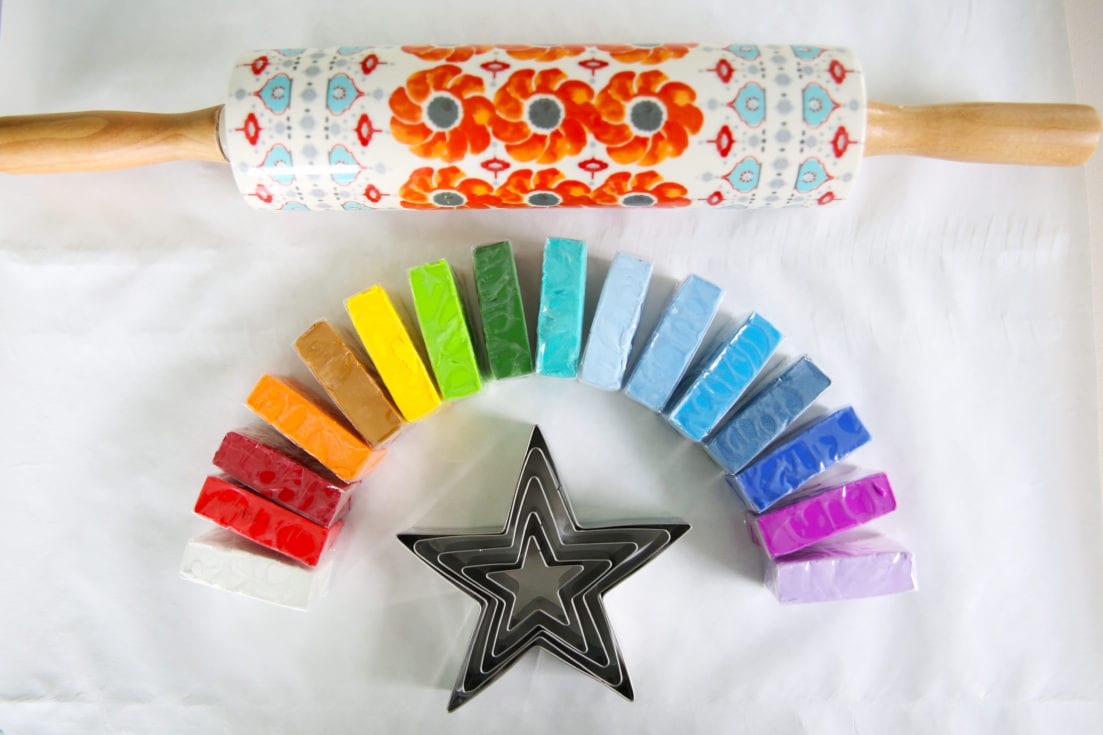
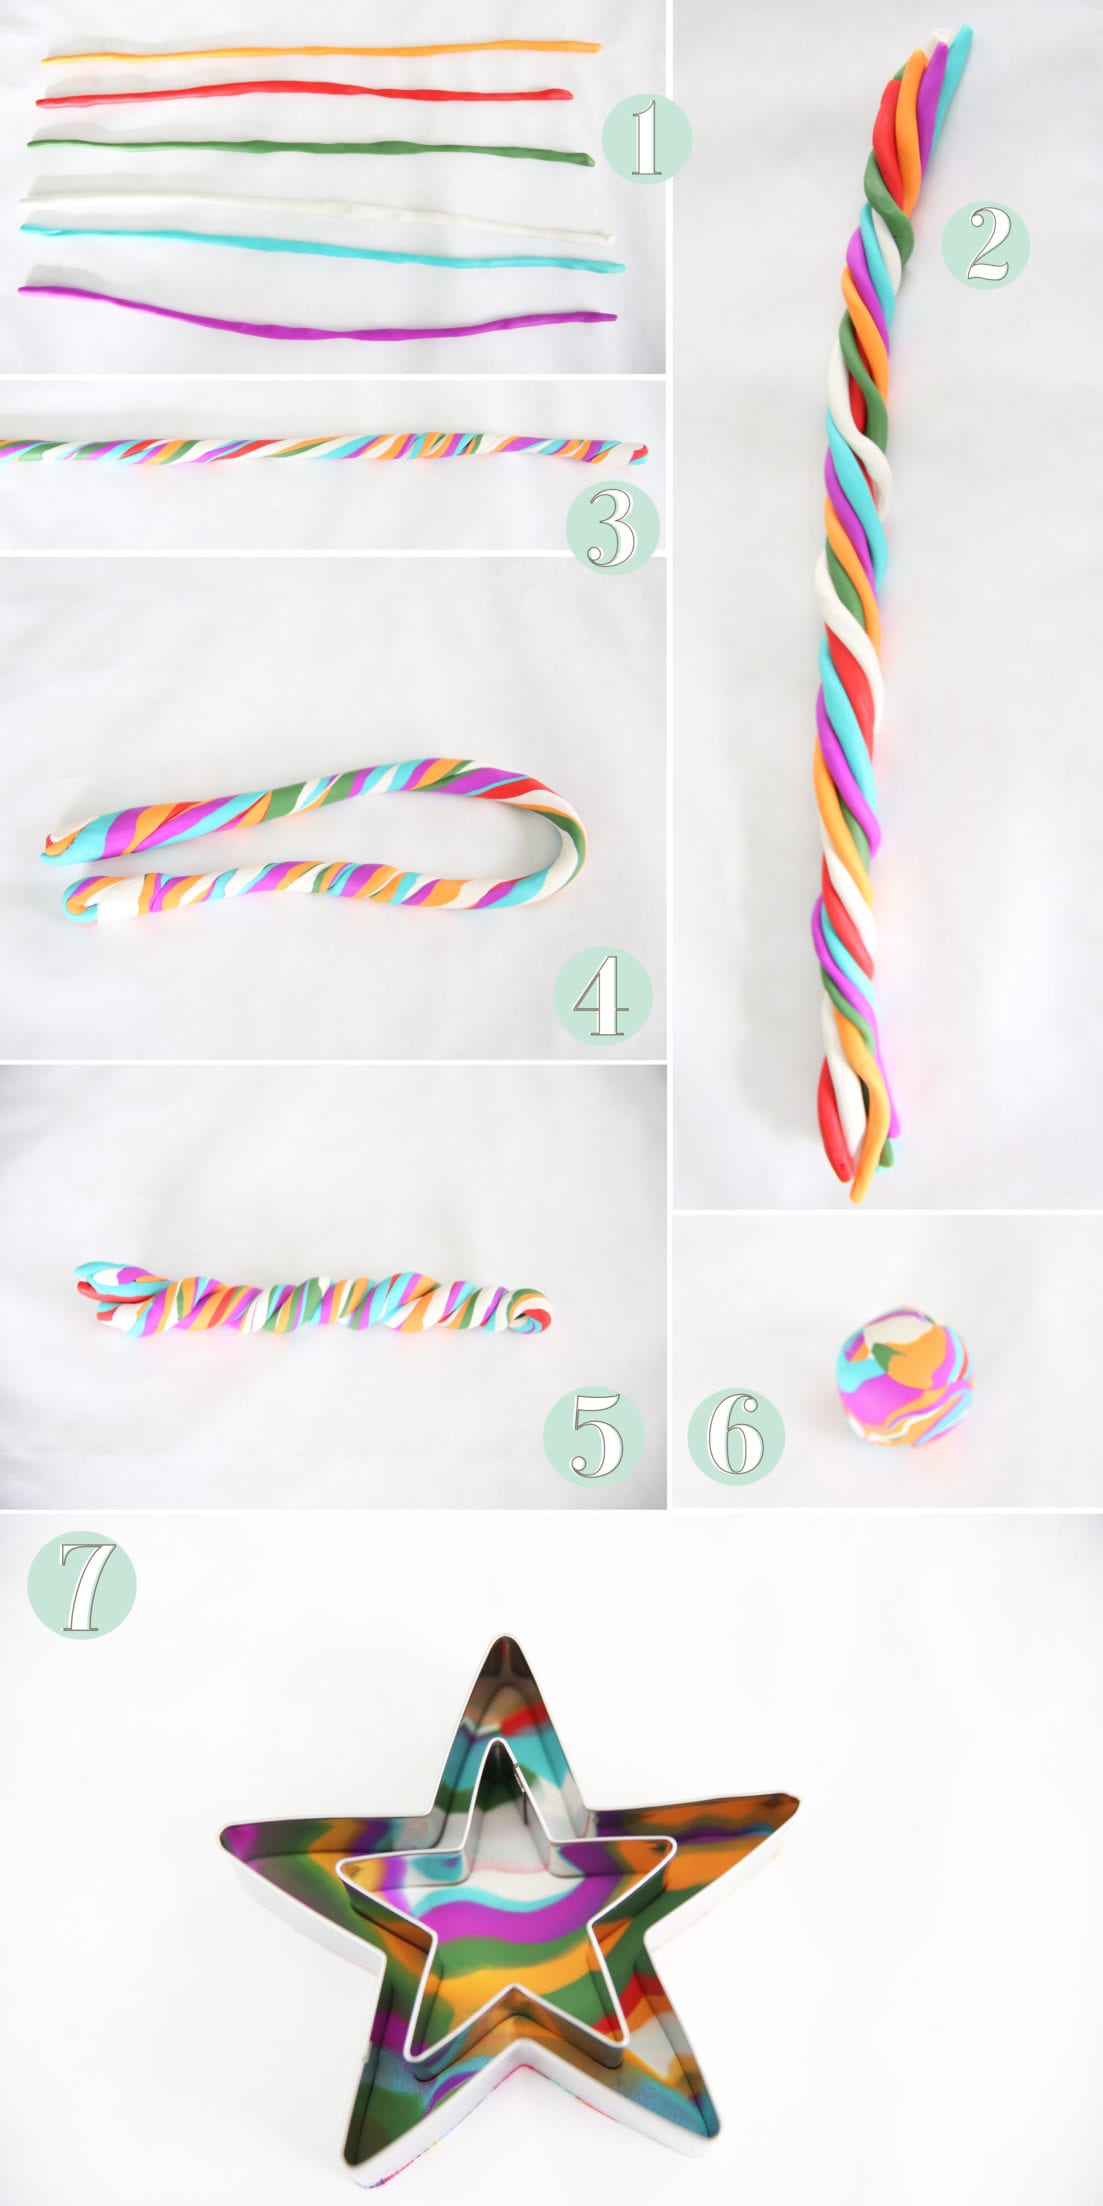
1. First, go a little old school and roll your colors of choice (5-6 work nicely) into little snakes. It’s kind of fun to channel your inner first grader.
2. Twist them around each other.
3. Roll THAT one into another snake. This one should be long, so make a U, and twist it again. Yep. It’s like the inception of your childhood and all the clay snakes.
4. Repeat.
5. – 6. Twist again. Then roll into a ball.
7. Roll out with the rolling pin and use the cookie cutter to cut your shape. We chose two star shapes, so that we could use the inside, too.
Helpful tip: as many times as you decide to roll and twist, is how fine the marbleized results will be. We found that after doing one, we added that to the next batch for a finer look.
Carefully remove your shapes and transfer them to the cookie sheet where you plan to bake. We made a hole in the top of the smaller one with a pencil before even moving it from the cookie cutter. It usually helps to move the clay directly WITH the cookie cutter, so that the shape isn’t disturbed.
Preheat the oven to the instructions on the back, and you’re ready to bake!
Helpful tips:
Make sure they’re lying flat – they tend to curl especially with a pan, so keep an eye out.
DO NOT let these burn. I’d honestly cook them for 7 according to the temp instructions on the back and then check on them. 10 minutes, MAX. If they DO burn, they tend to turn a gross brown color and well, that’s just sad.

Pull them out and let them cool for a while – they may feel a bit pliable to the touch, which is the nature of the clay. If your oven starts to smoke, the clay is DONEZO.

String it up on a string to make the garland look or place them on your favorite gift!
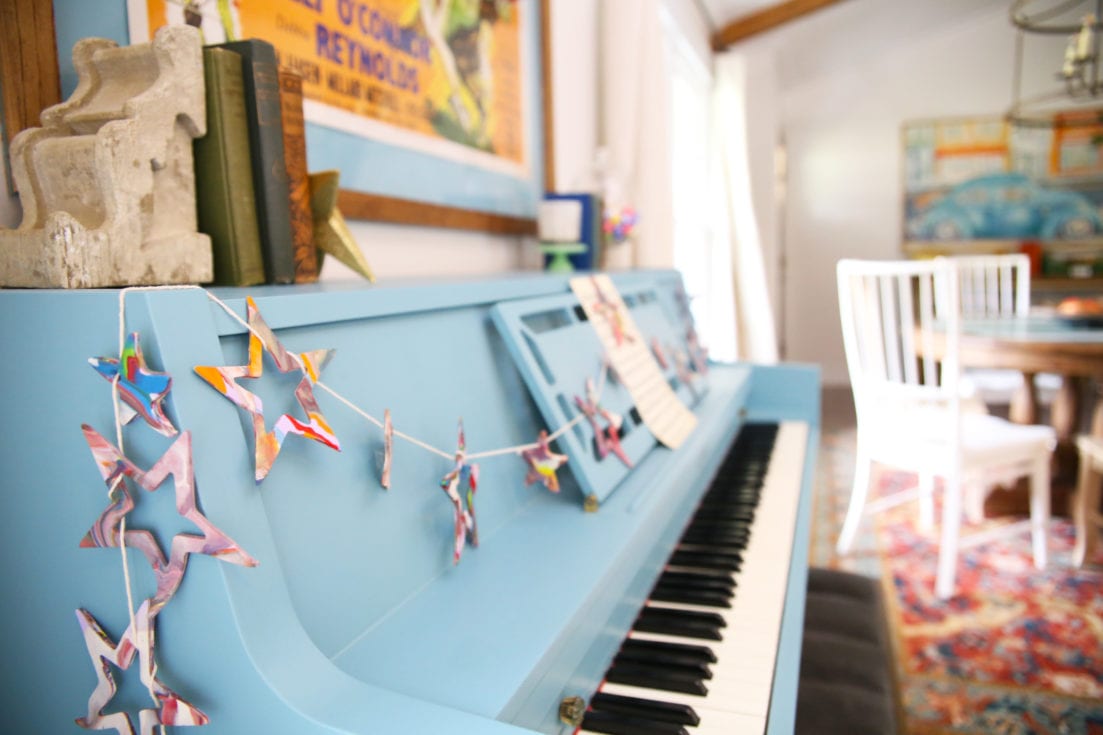
Tada! You’re getting festive up in here!

As always, let us know if you make this.
We’d love to hear!

Such a fun little project coming up for the cooler months and all things festive!
Be sure to check out all our friends participating today!

Welcome to the first week of the Seasonal Simplicity Christmas Series! Today a group of my blogging friends and I are sharing our Christmas DIY orraft projects to help inspire you for the upcoming holiday season. Click on the links below each image to be taken directly to my friends’ posts!
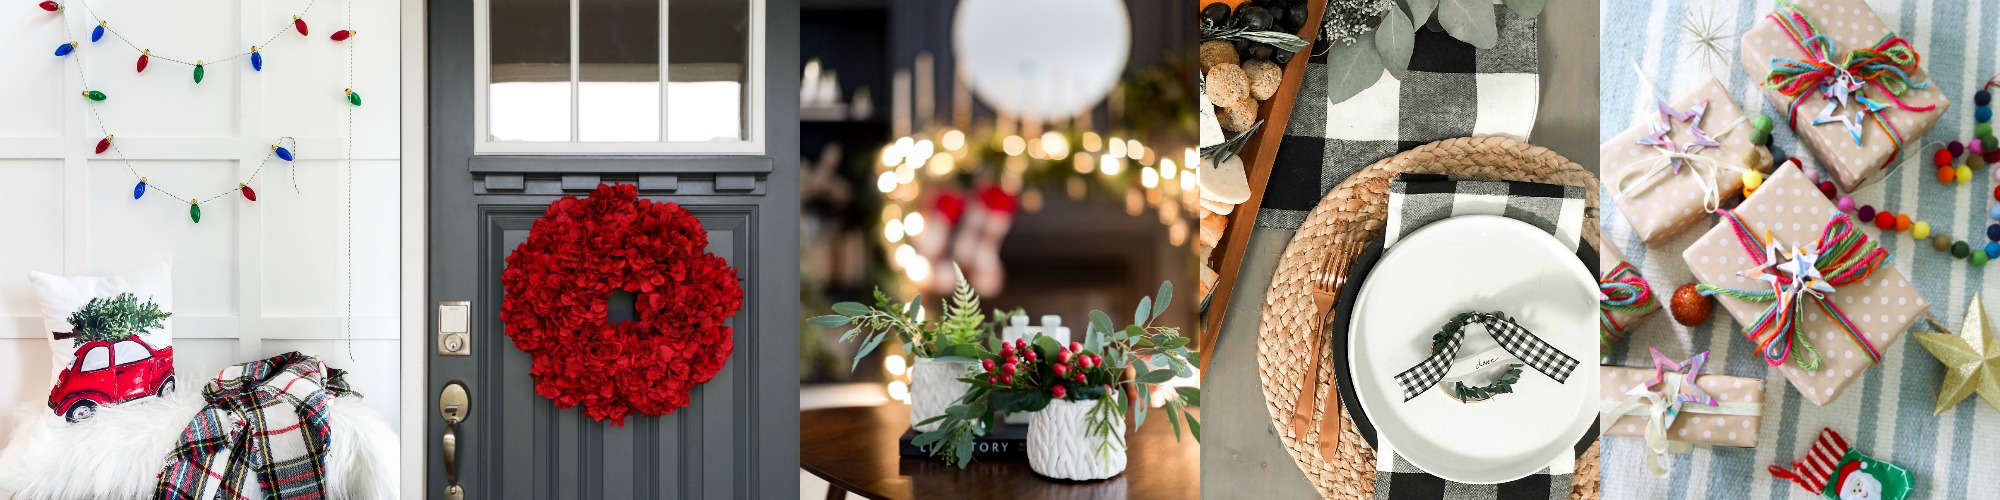
Classic Christmas Light String Garland DIY at The Happy Housie
DIY Hydrangea Christmas Wreath at Two Twenty One
Chunky Knit Vase DIY at Craftberry Bush
Holiday Place Card Wreaths with Printable Tags at Tatertots and Jello
Easy Christmas Star Garland Gift Topper at The Handmade Home
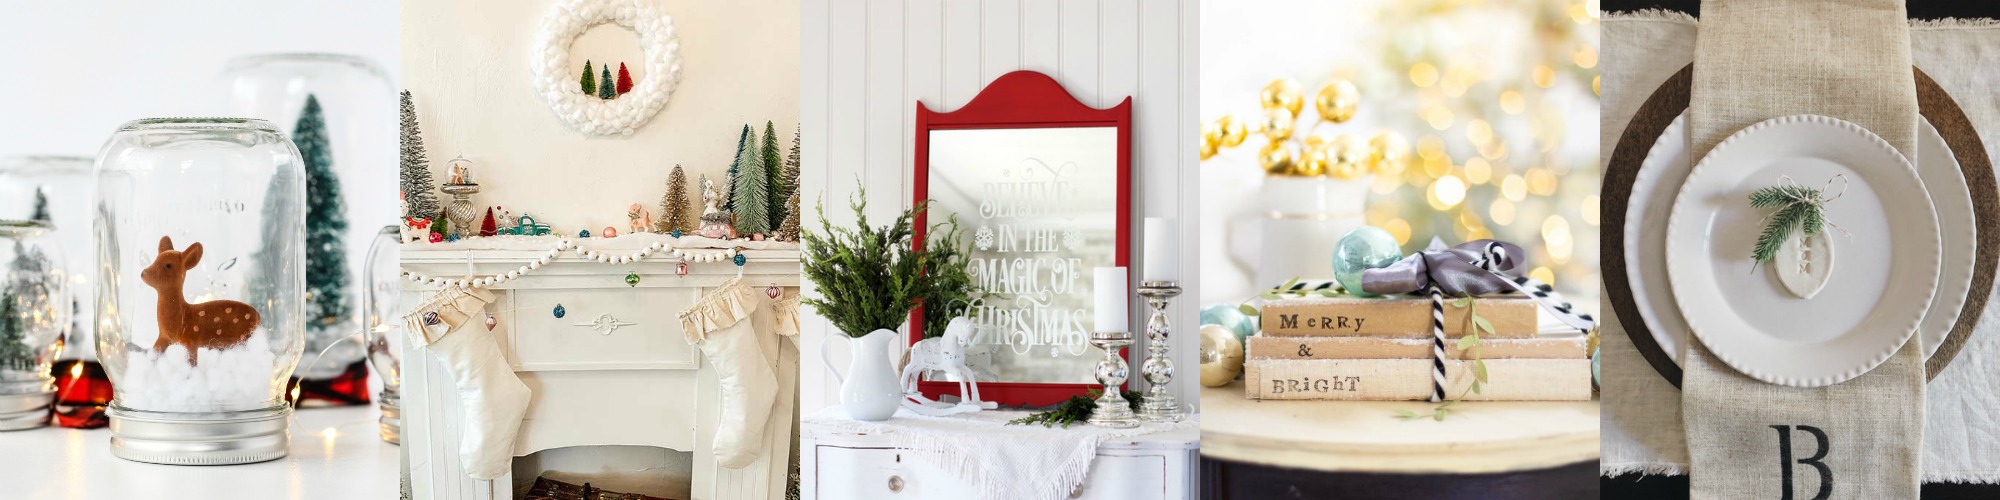
DIY Winter Wonderland Snow Globe Forest at a Pretty Life
DIY Cotton Ball Wreath at Hallstrom Home
DIY Faux Etched Christmas Mirror at Confessions of a Serial DIYer
DIY Christmas Book Craft Project at Happy Happy Nester
DIY Christmas Place Setting Name Tag at She Gave it a Go
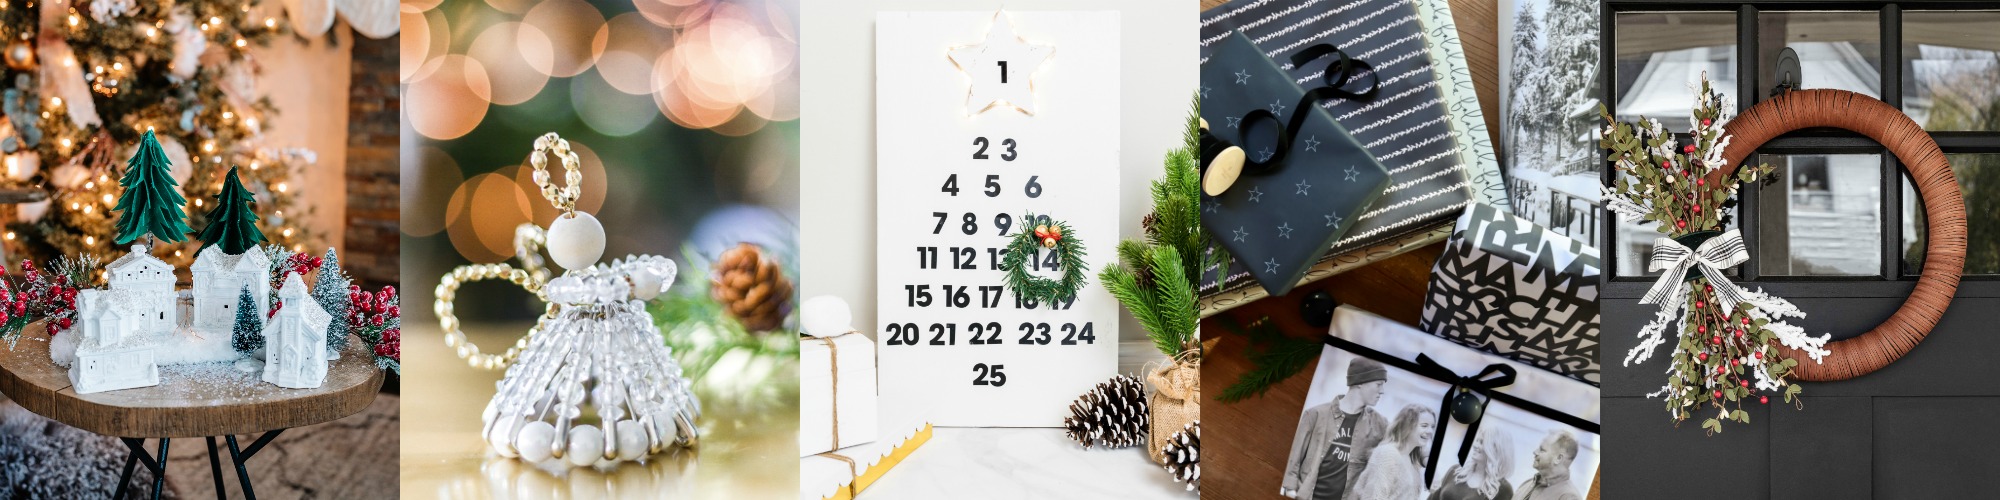
Elegant DIY Dollar Tree Christmas Village at The DIY Mommy
DIY Safety Pin Christmas Angels at Zevy Joy
DIY Wooden Advent Calendar at Jenna Kate at Home
DIY Holiday Gift Wrap at My Sweet Savannah
How to Make a Modern Christmas Wreath at Cherished Bliss
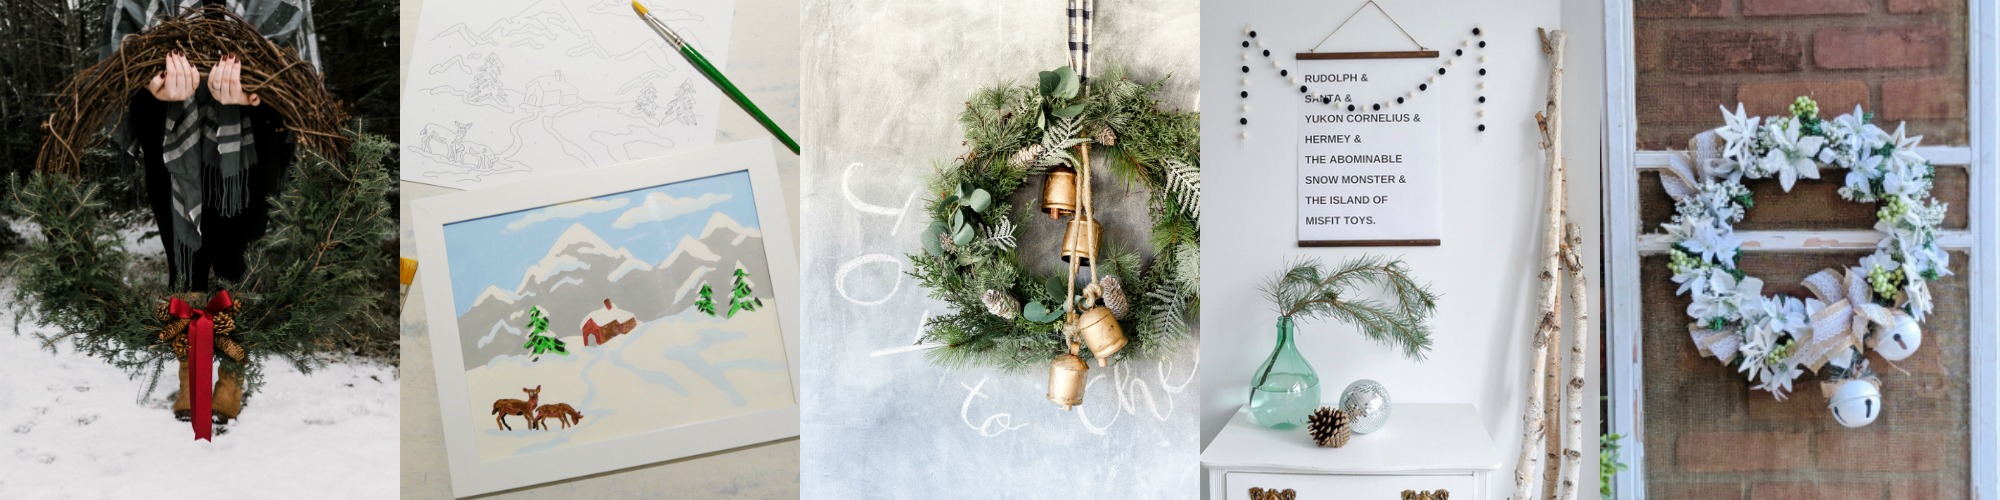
DIY Giant Pine Wreath at Love Create Celebrate
Paint by Numbers Printable Christmas at Rambling Renovators
DIY Winter Wreath at The Turquoise Home
Christmas Art Work at Life is a Party
Dollar Tree Rustic Glam Christmas Wreath at All Things With Purpose
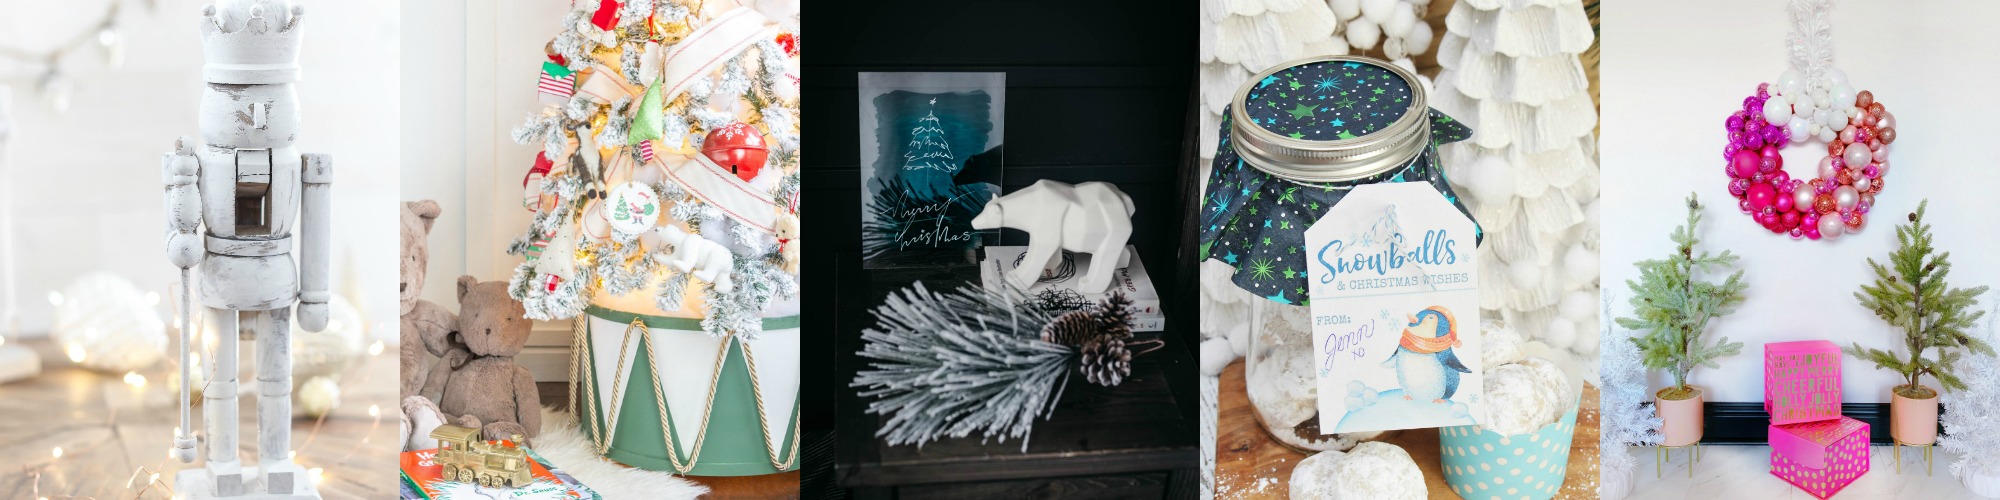
DIY Vintage Whitewashed Nutcracker at Rooms FOR Rent
DIY Drum Tree Collar at Sincerely, Marie Designs
Line Art Christmas Tree DIY Acrylic Sign at Lemon Thistle
Snowball Cookies in a Jar at Clean & Scentsible
DIY Pink Ombre Ornament Wreath at We’re the Joneses
Have an inspired day!


These are so bright and fun! I think I need to make these with my girls, they would love it!!
These are so adorable and festive! I love how you used them with your gift wrapping, so cute!
Thanks so much, Amanda!
I ❤️ these & with 5 grands coming next weekend, this is a perfect project for the little crafters! Question: What surface did you do the rolling on & did it make a mess that was easy to clean? Thanks!
Hey! Yes such a fun project with grans! we worked on wax paper or freezer paper and it keeps all the clay contained. Hope that helps!
Those packages are so happy! Such a cute topper! I pinned it to my holiday board 🙂
xoxo
I always love your colorful ideas! These are so cute!
Super cute Idea!
These are so cute! My kids would LOVE these on their gifts! They would also love helping to make them 🙂 Thanks for sharing!
So cute! I love how they look added to your gifts! So bright and colourful!
How colourful and cute! That is a great project to bring in the kids to help. Thanks for sharing on the blog hop.
These are such a cute way to embellish a gift, no matter the season! xoxo
These are seriously so adorable ❤and look fun to make!! So many use ideas…
Can’t wait to make these with the kiddos! Thanks for sharing!