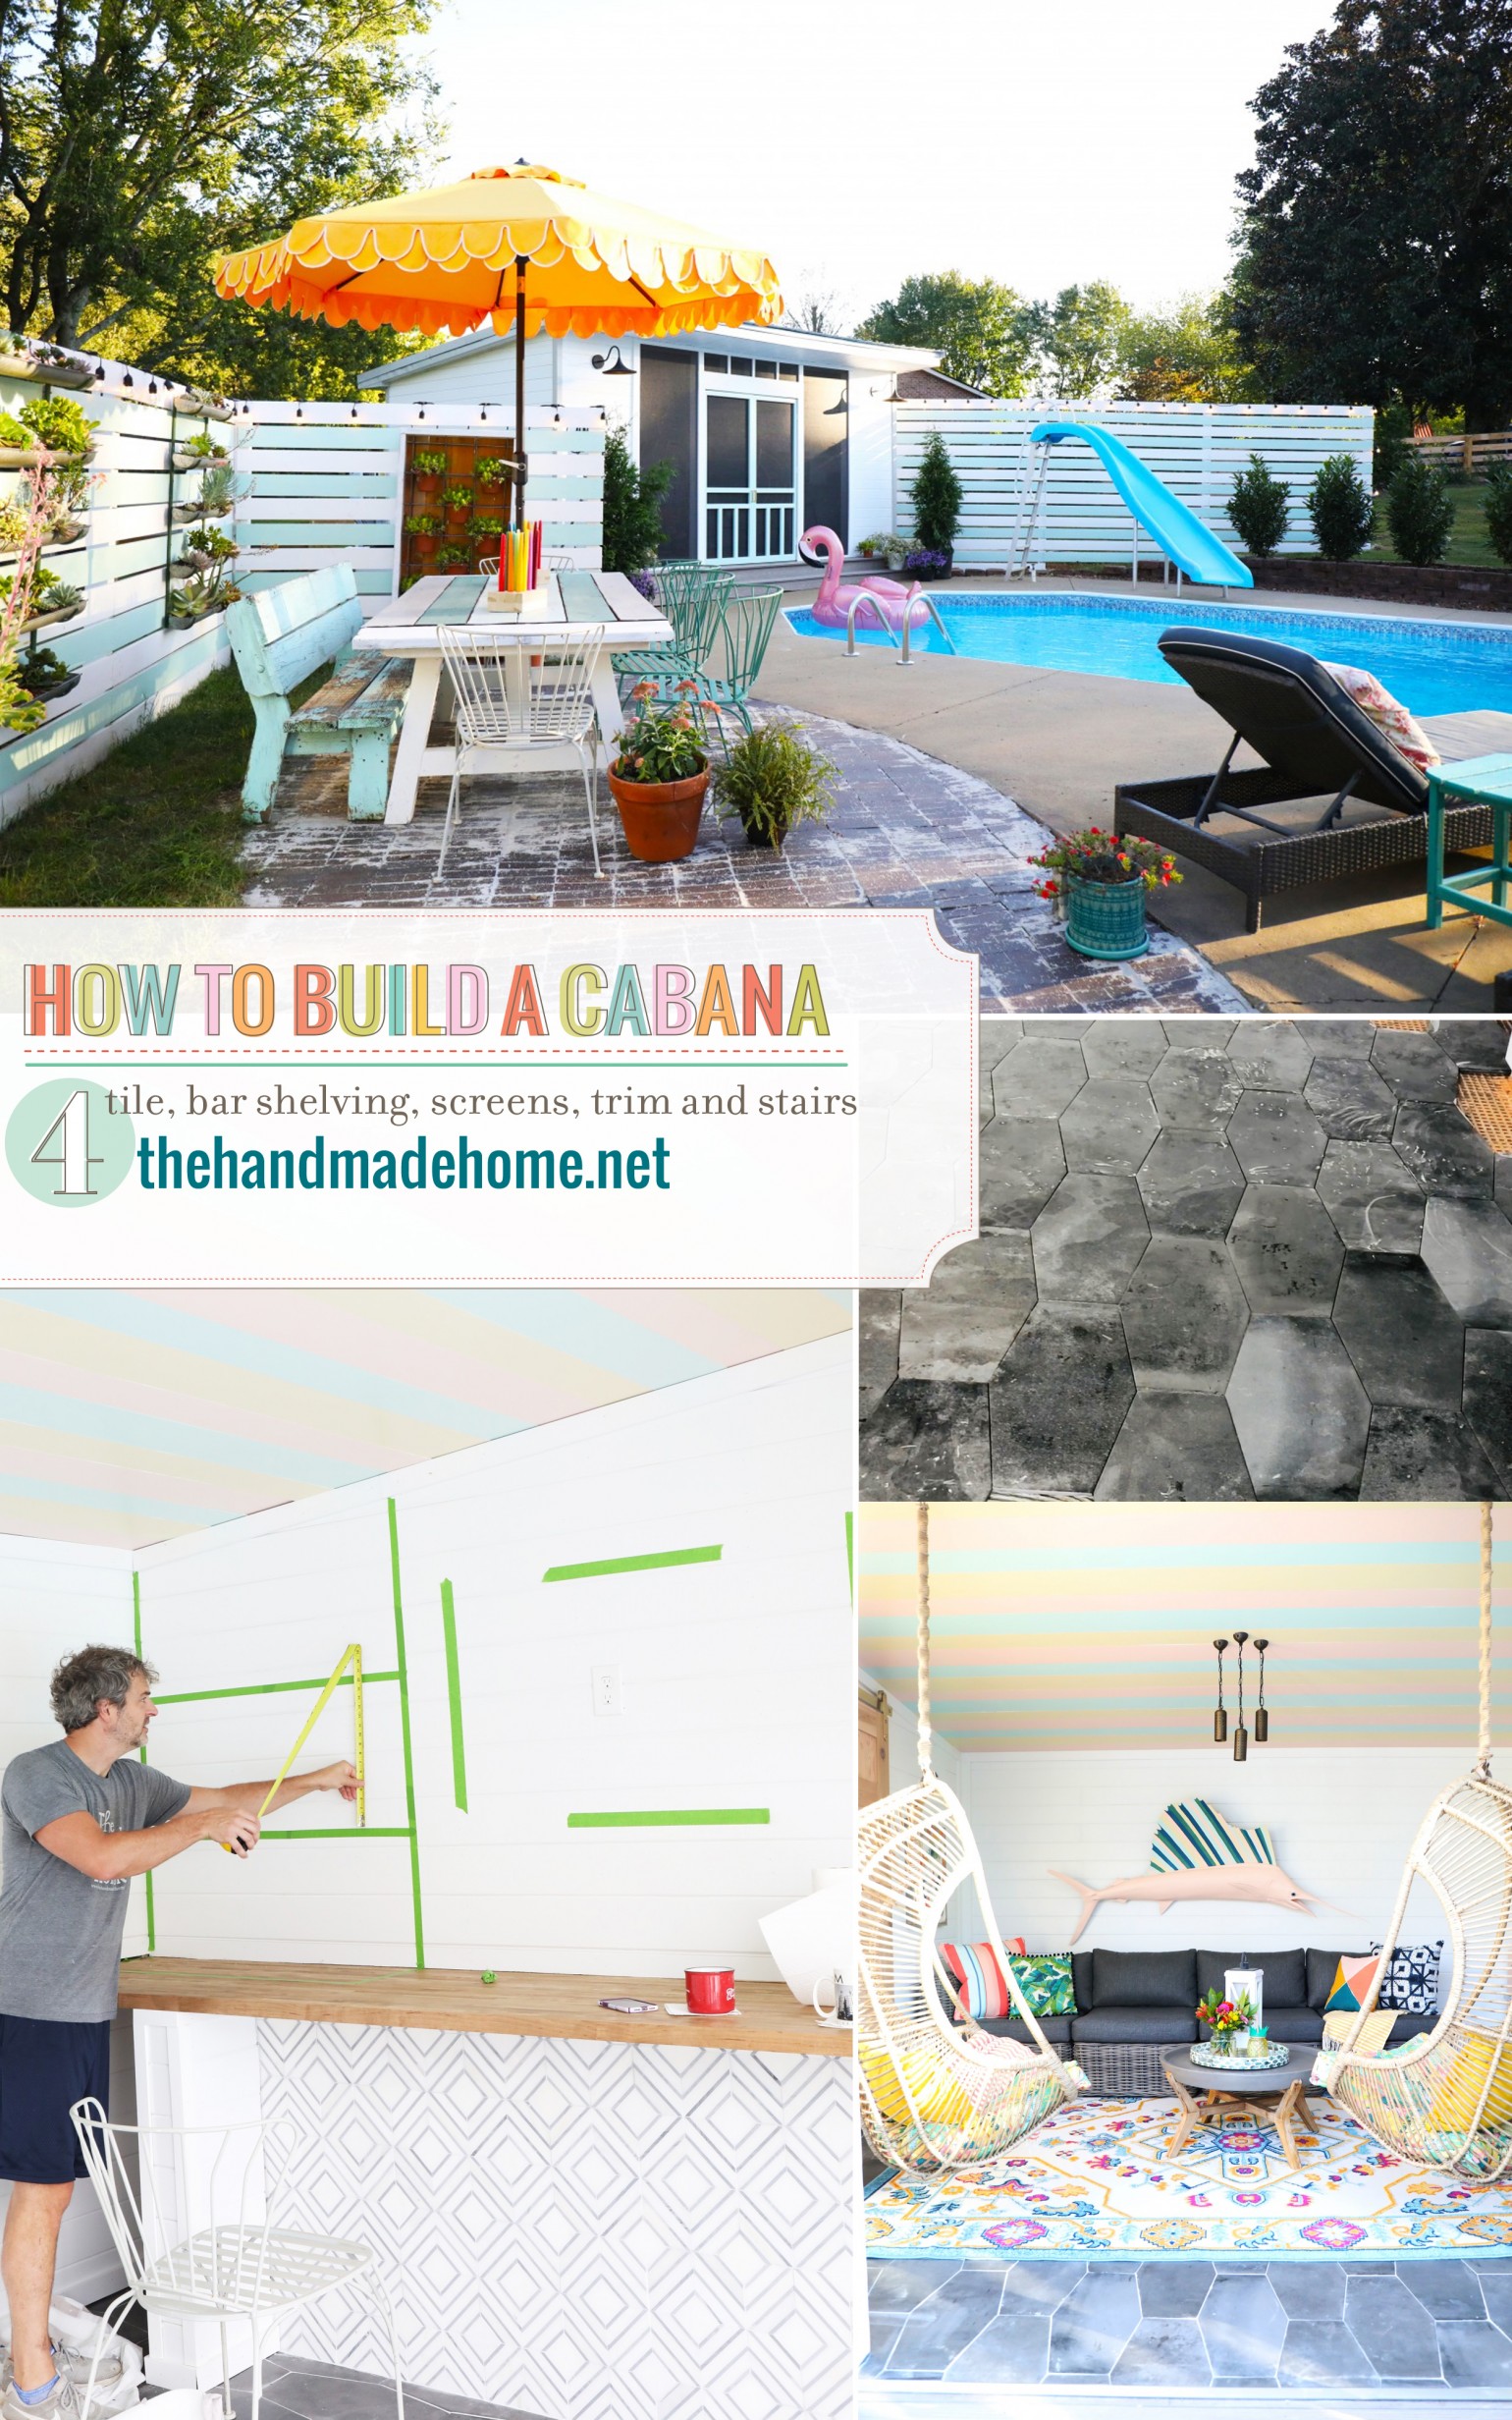
Hello, all you wonderful people!
We’re back with the final addition to our series on building a cabana! Today we are going to look at tiling, building the bar shelves, screens and trim and stairs.
You may have seen our first section {the foundation!} of this little cabana series, and the second in our how to build a cabana series: framing. Or our third installment on electrical, siding, and painting. If you’re not familiar with this project at all, check out the full reveal here. + see all the all the posts on this series here.
Before we dive in… a necessary legal disclaimer:
This is not a small piece of furniture or a simple build, but a real structure. Therefore we will not be providing building plans, but more of a guide. If you’re new to building or do not in any way feel comfortable do not attempt this project without professional guidance. This tutorial is meant to serve as a jumping-off point for someone who feels comfortable with building or has professional guidance. It is not a construction plan, nor is it to be taken as a blueprint to build. We, The Handmade Home, assume no liability if you attempt this project.
Okay. Now that the lawyers are happy, on to the build.
How to tile:
If you’ve never tiled anything before, starting on the floor with something like the Castle Rock tile we used from Jeffrey court is a great place to start. The large format makes it easy to work with and of course there is that gravity thing that you don;t have to worry about when tiling on the floor.

To get started you first want to gather your supplies and tools, listed below.
Supplies:
• tile
• tile saw
• tools: float, sponge, Greenworks drill and paddle mixer, trowel, and margin trowel
• spacers(optional)
• Ditra underlayment
• thin-set
• grout
• a few 5-gallon buckets
• broom
Once everything is gathered, make sure to clean the area on which you’ll be laying tile. It doesn’t have to be “eat off the floor” clean, just clean of any debris or dust. Do scrap up any spilled paint or other construction messes on the floor.
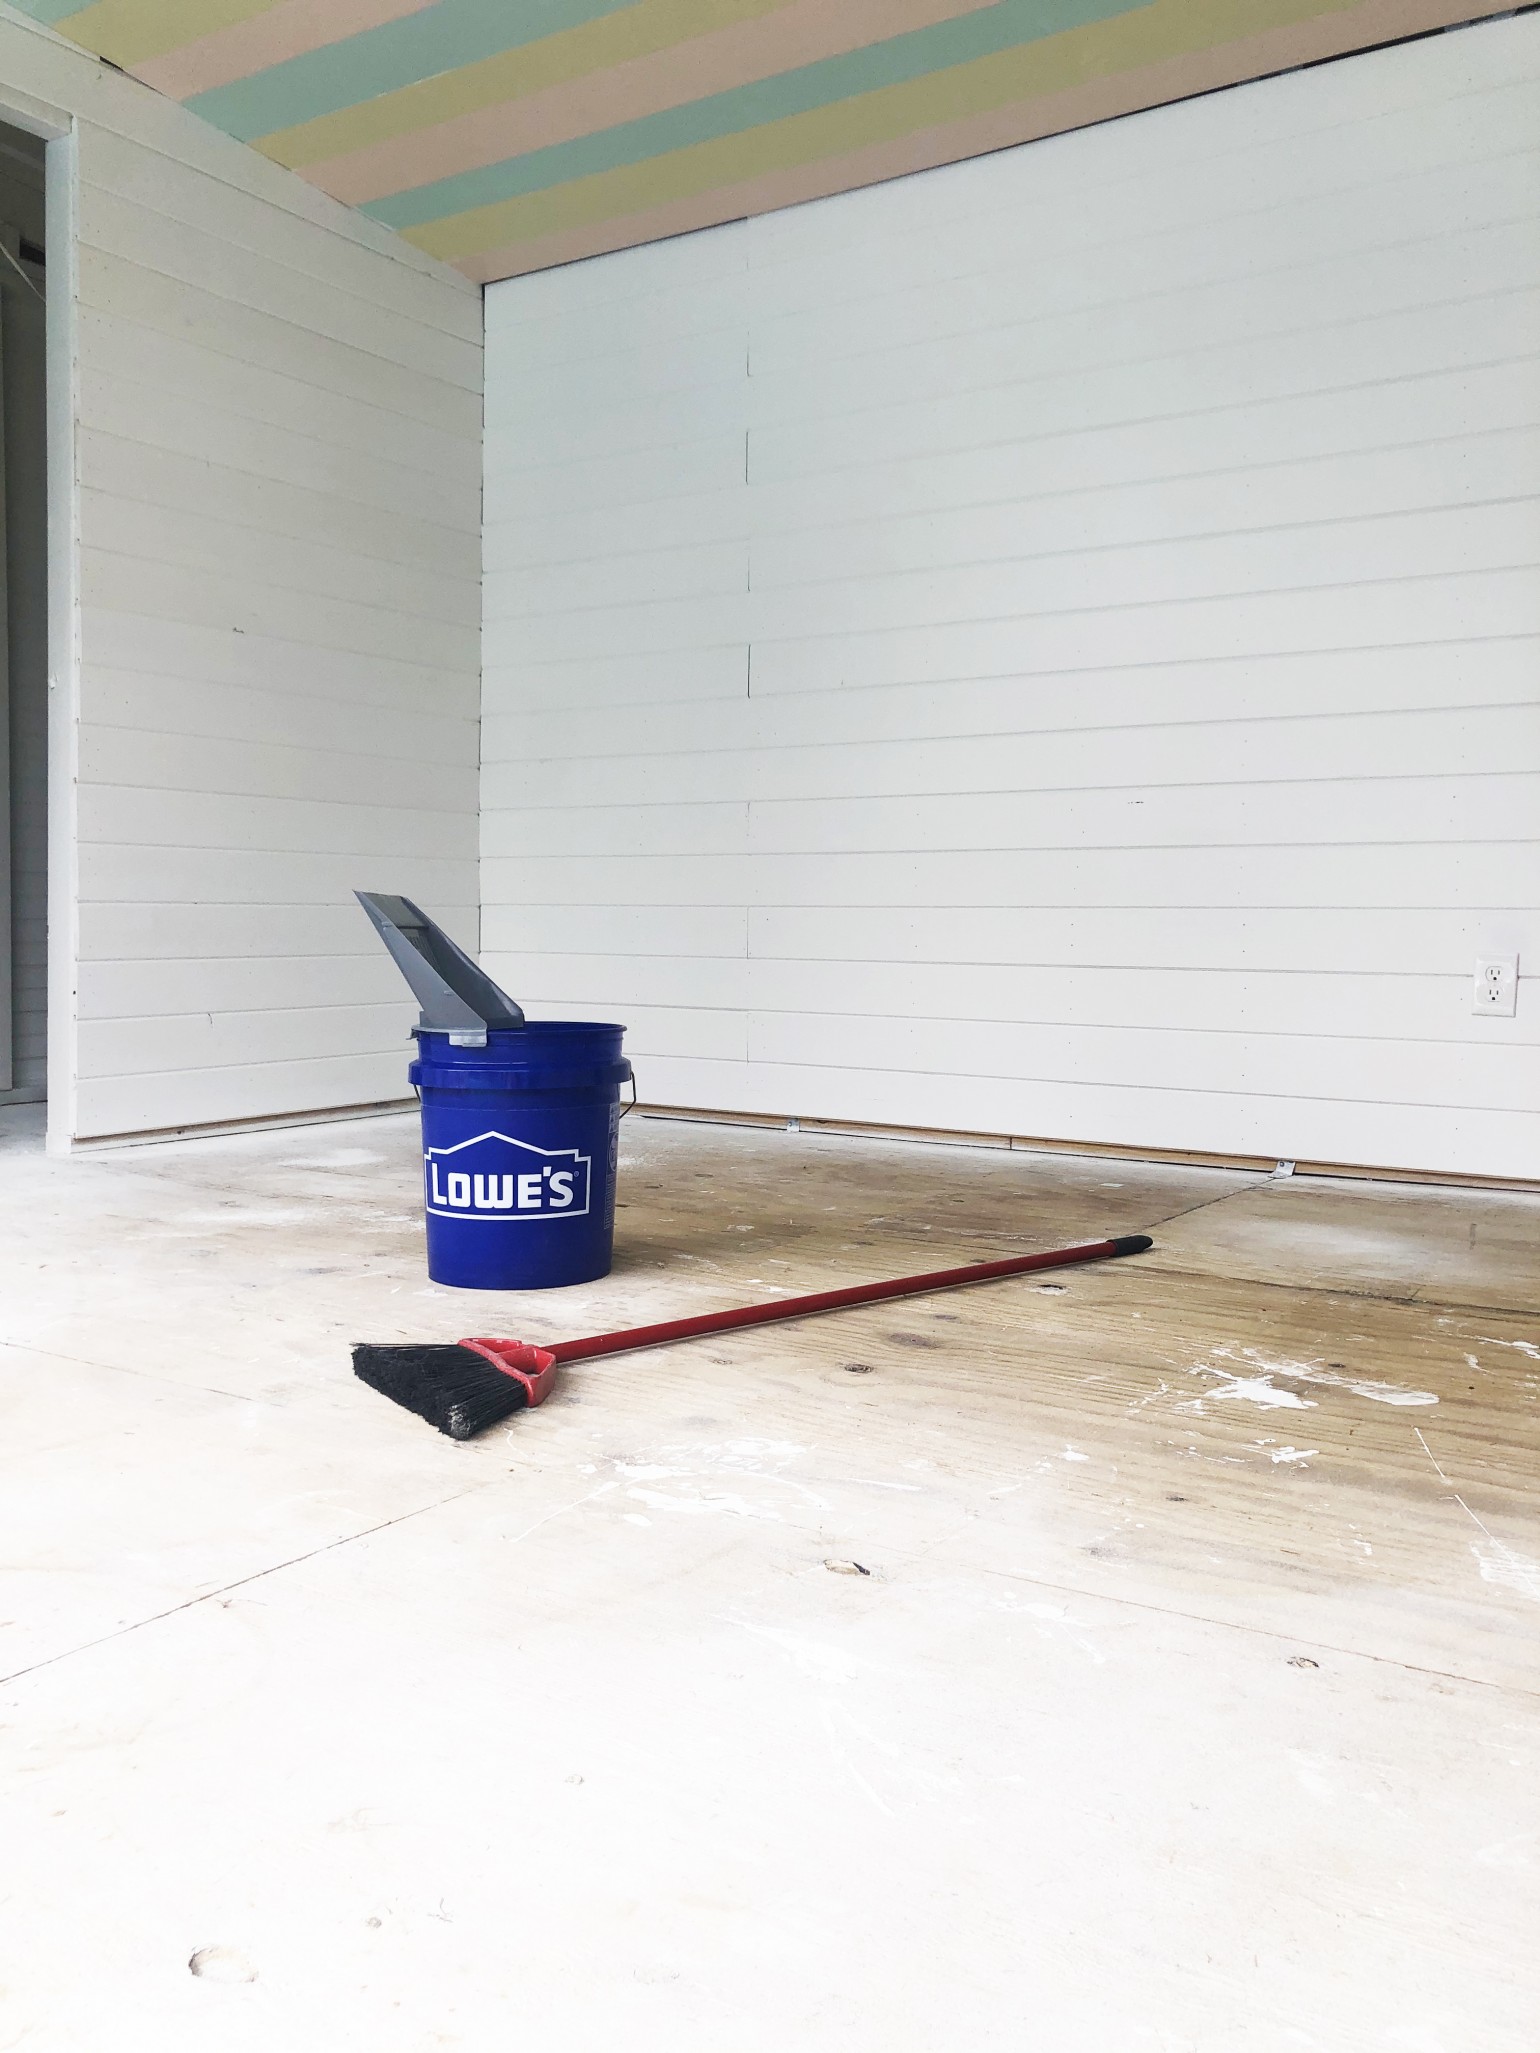
Once it is clean you want to lay down your underlayment.
We use Ditra underlayment, there are other options such as cement board, ect., but we love working with Ditra. It is simply a superior product and has so many advantages over a traditional underlayment. It is easier to work with and carry for sure, but it handles tile movement better and helps prevent cracked tile and grout joints.
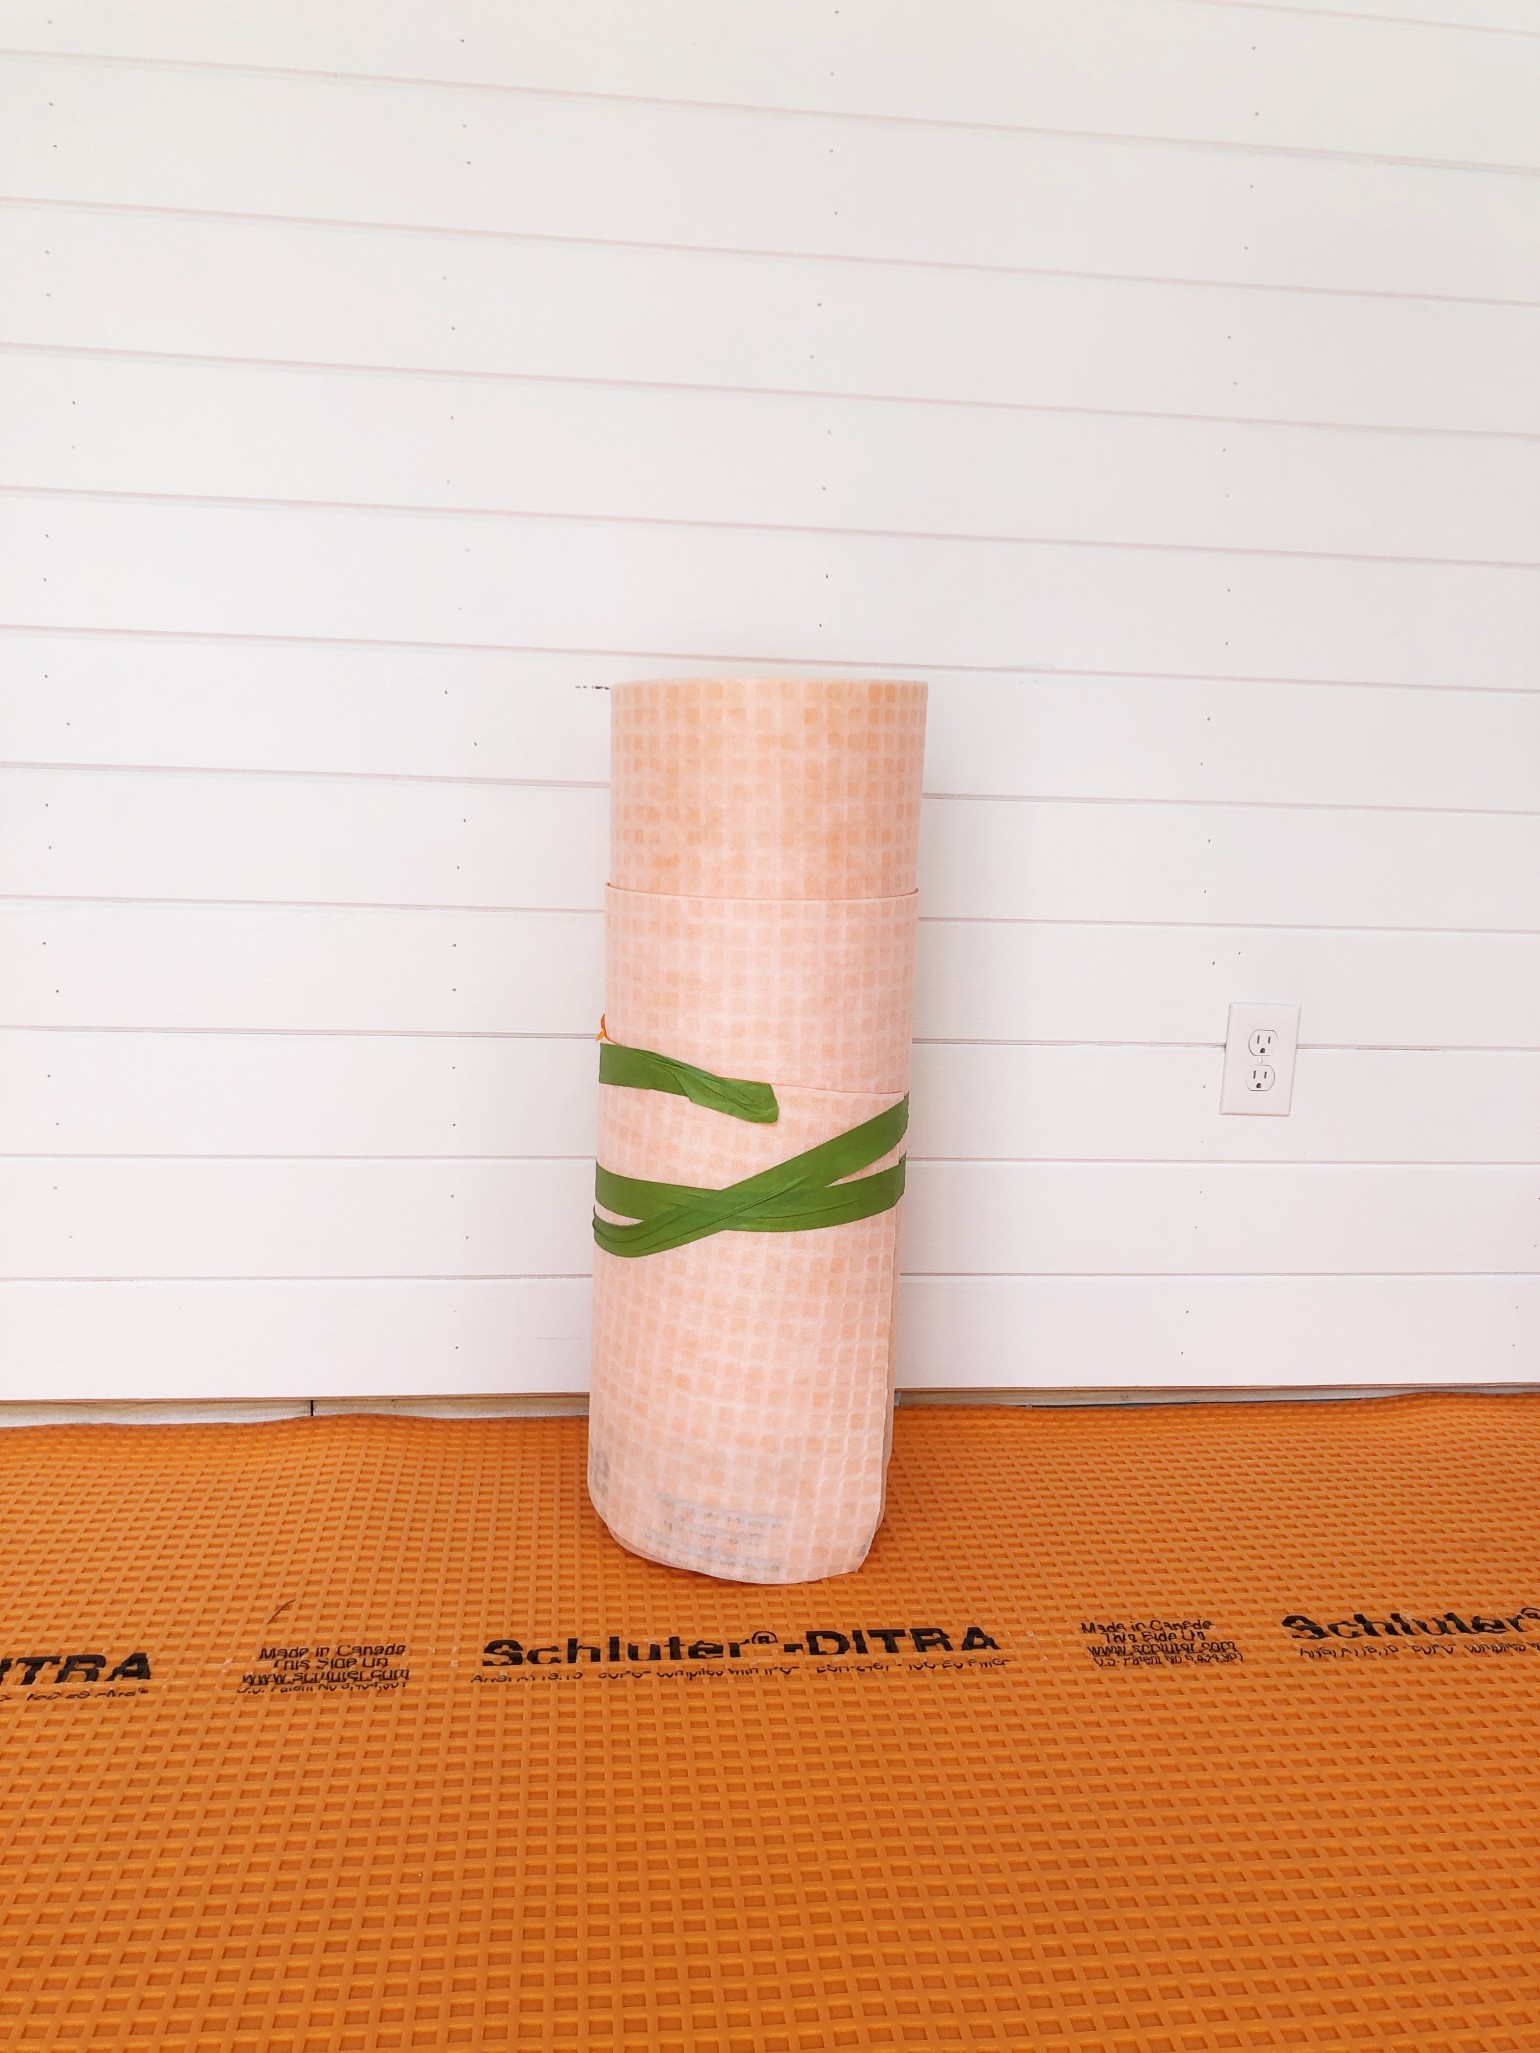
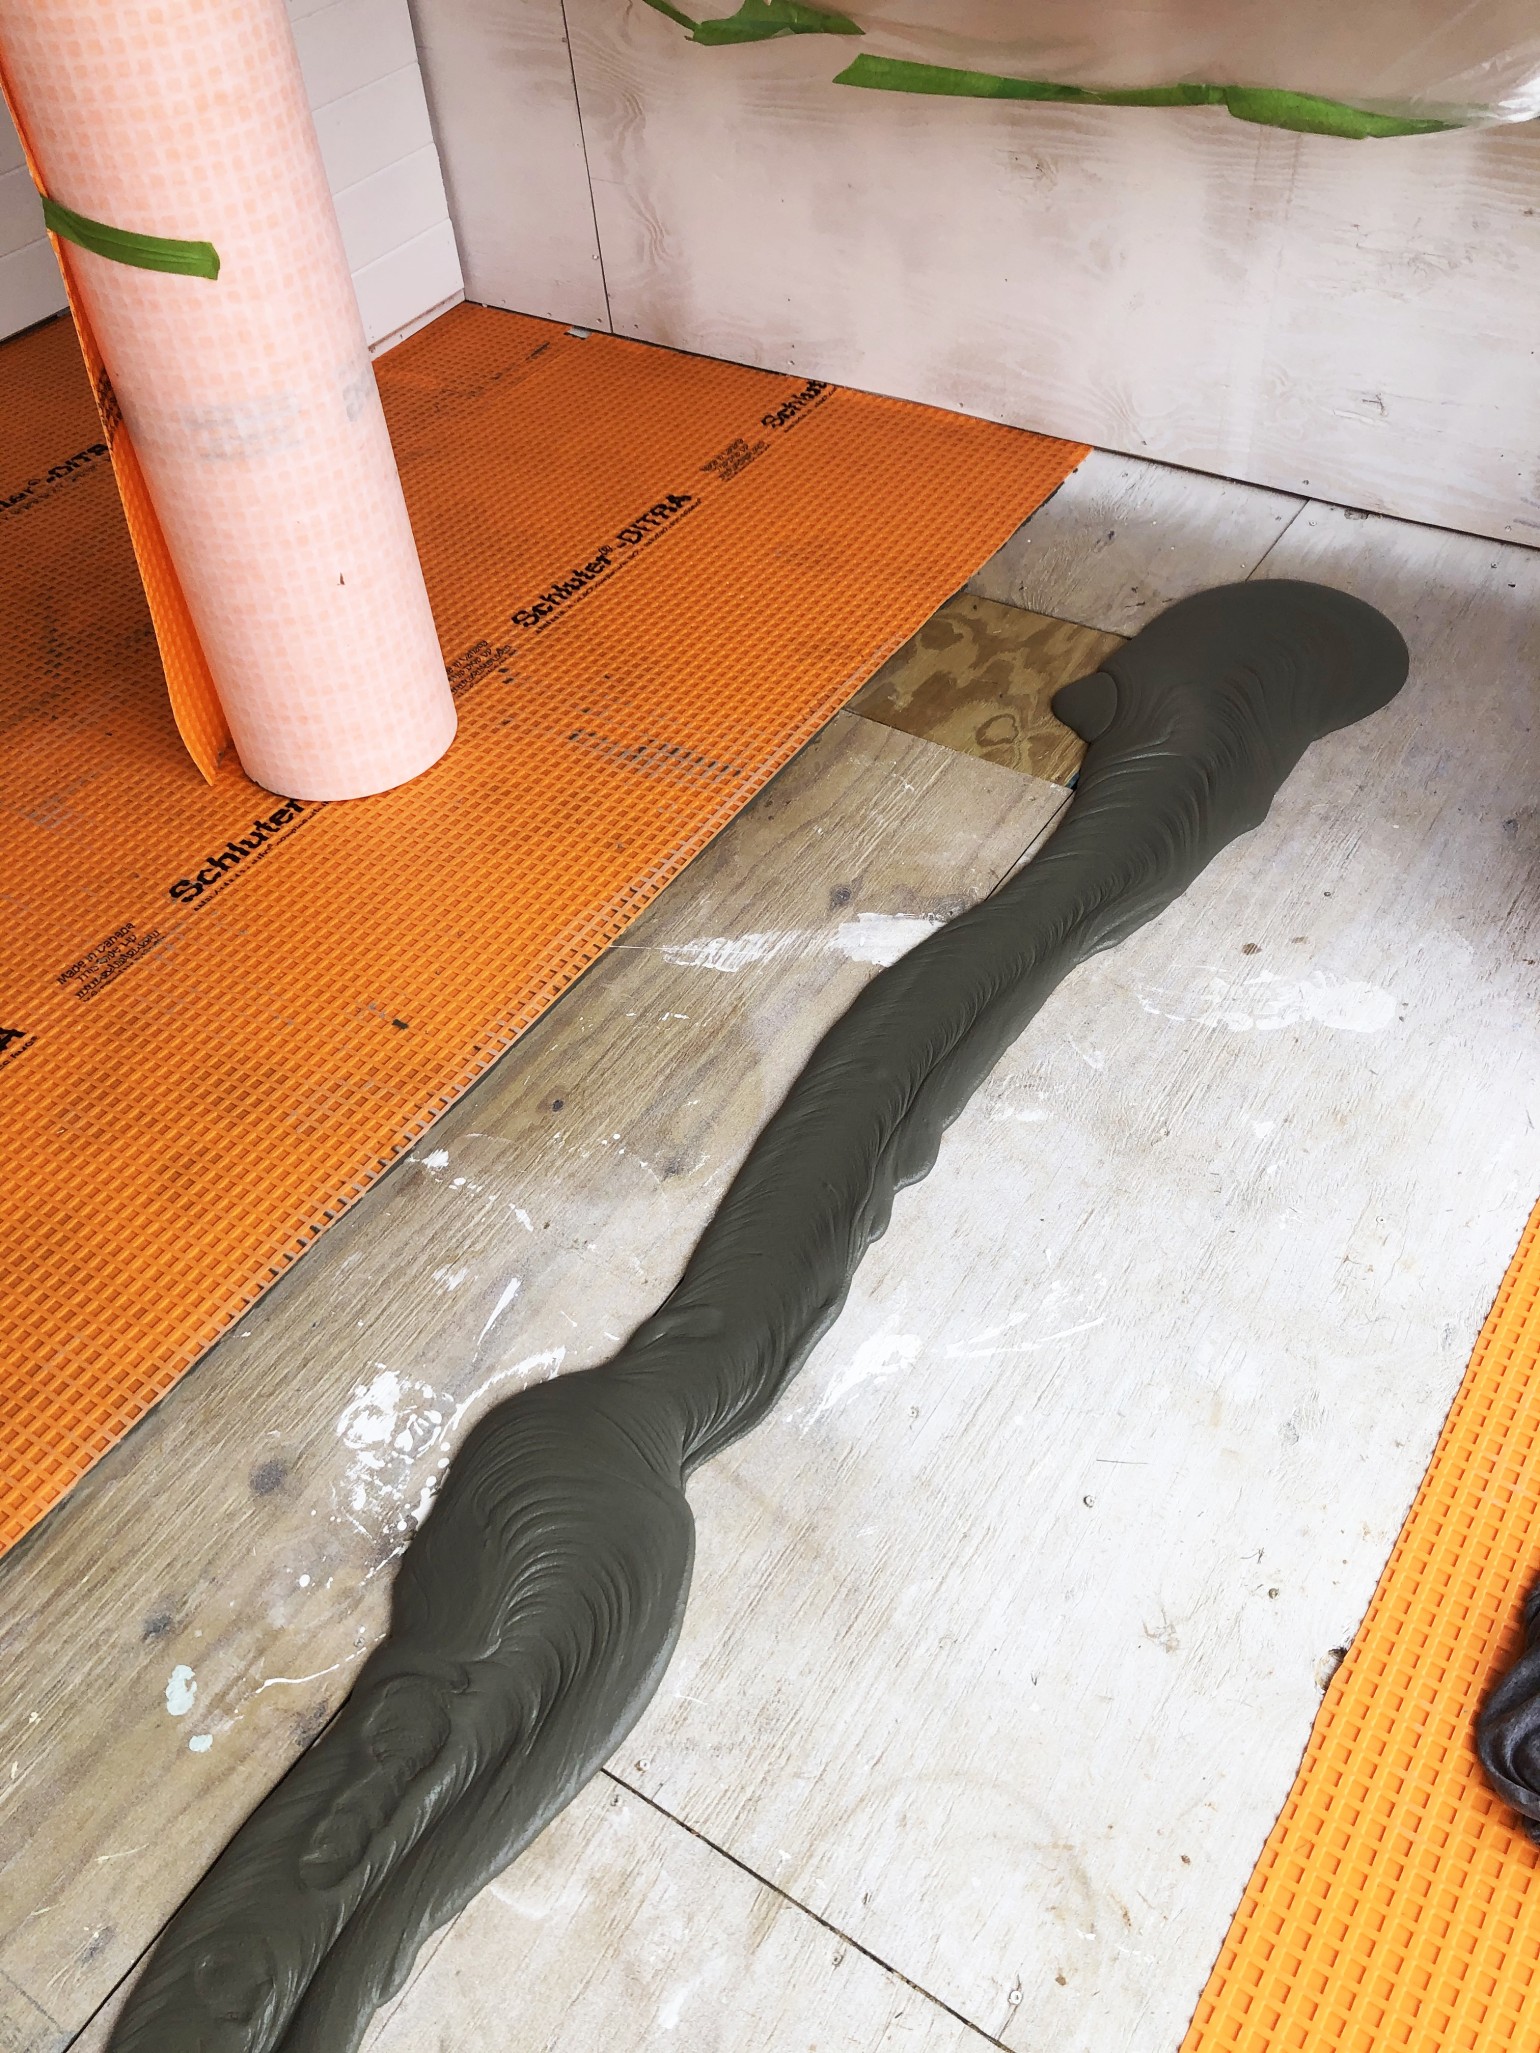
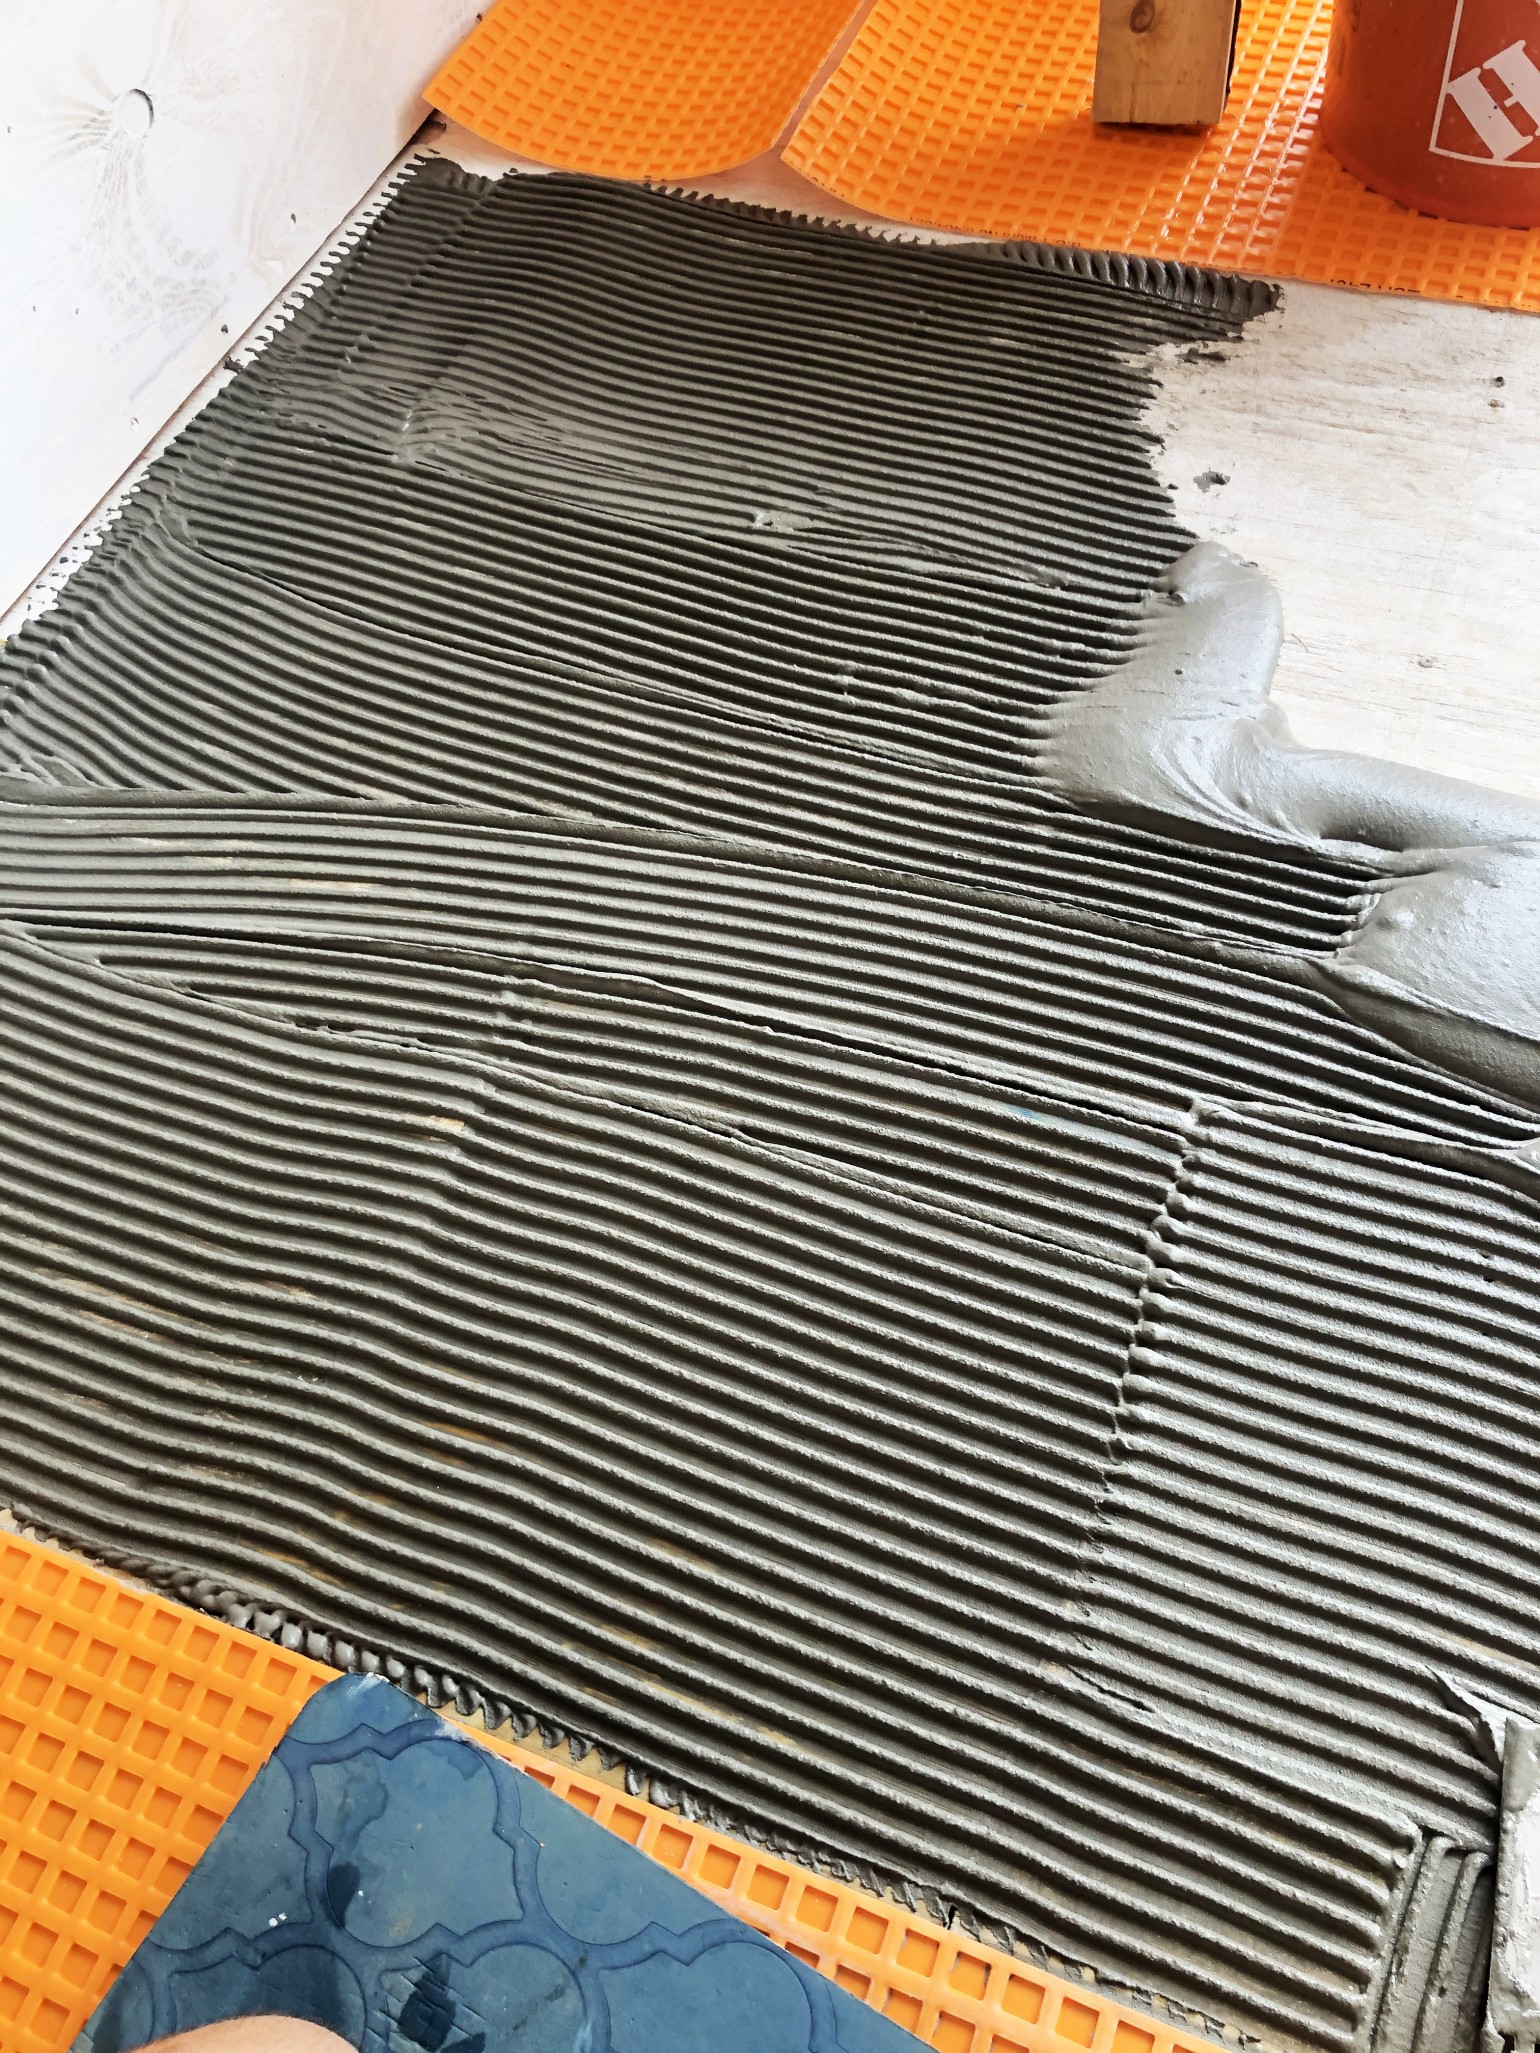
To lay it out, you want to start by drying fitting the Ditra into your space. Once you have it cut to size, simply roll it back up, mix some thin-set. Mixing Thin-set is simple, you’ll simply fill 1/3 of a bucket full with the thin-set add some water. Mix it with your Greenworks drill and paddle mixer. Once you have it mixed to the consistency you want, aim for a pudding type consistency. You simply use your trowel to spread it out and lay the ditra back down into place.
The great thing about Ditra, is that you can begin laying your tile immediately. No need to wait.
One other helpful hint: You want your Ditra to line up next to each other, not overlap.

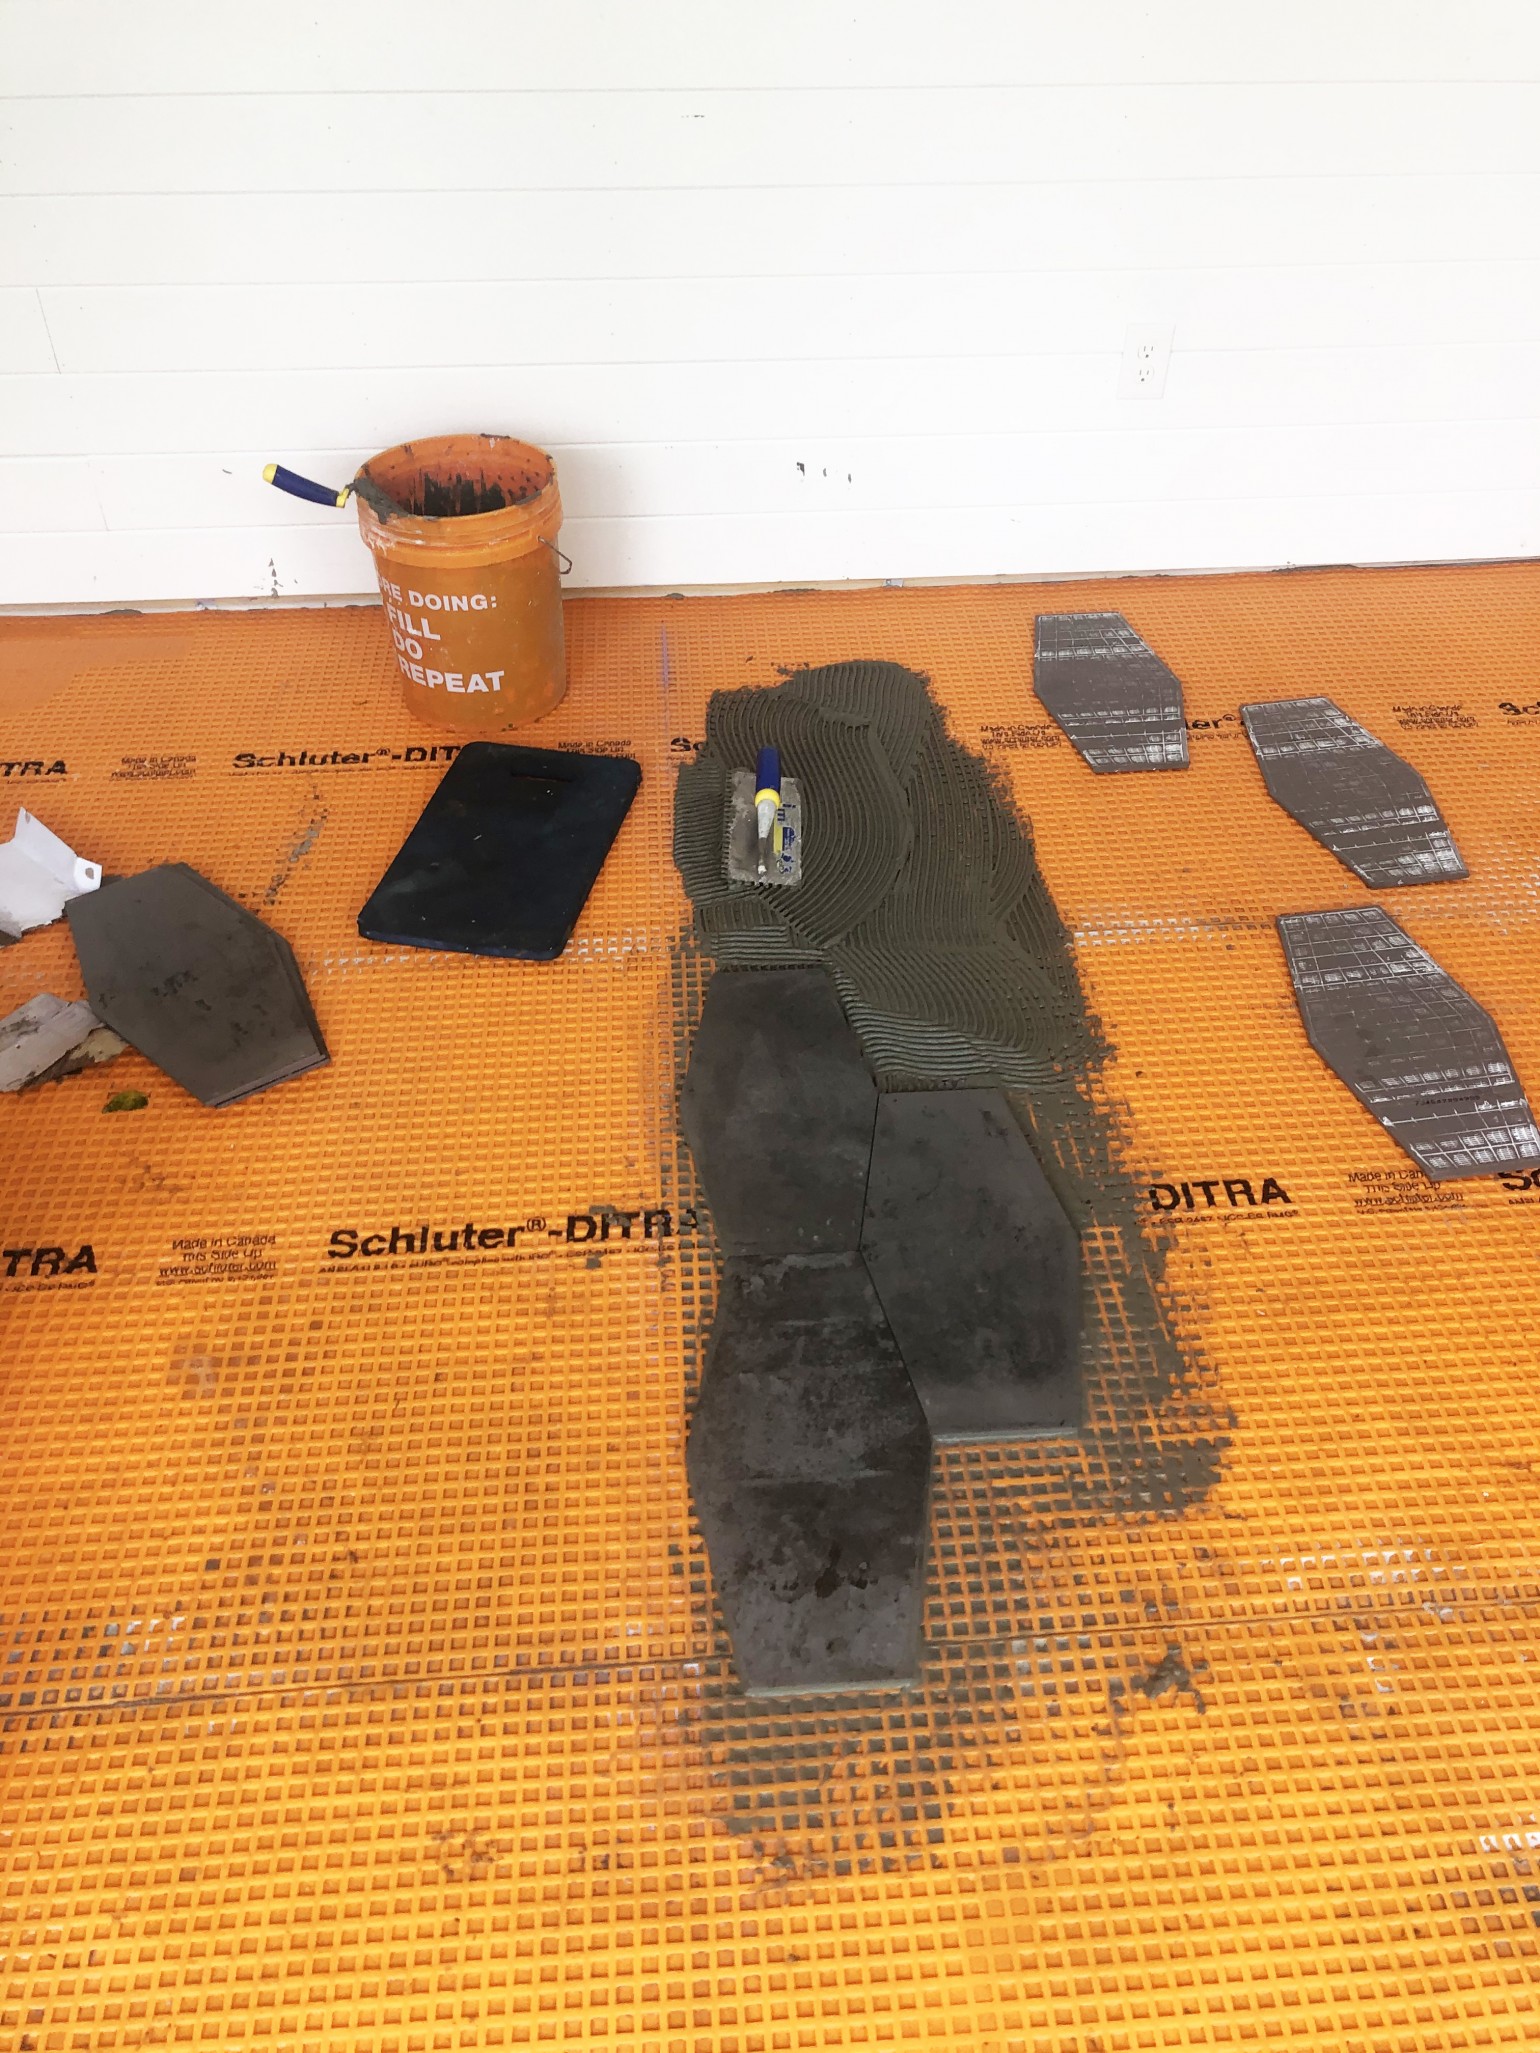
Once your Ditra is down you want to begin with your tile. It’s always best practice to find the center of the room and start laying your tile from there. You’ll also want to decide on the orientation of your tile as well.
Starting in the center helps you achieve a symmetrical look.
In the same way, you laid the Ditra, you’ll want to lay your tile.
Spread some thin-set on top of the Ditra and then begin laying your tile on top. Don’t spread more thin-set than you can manage at a time, start with just a little until you get the hang of it. Also, make sure when you buy your thin-set, it isn’t the rapid set type.
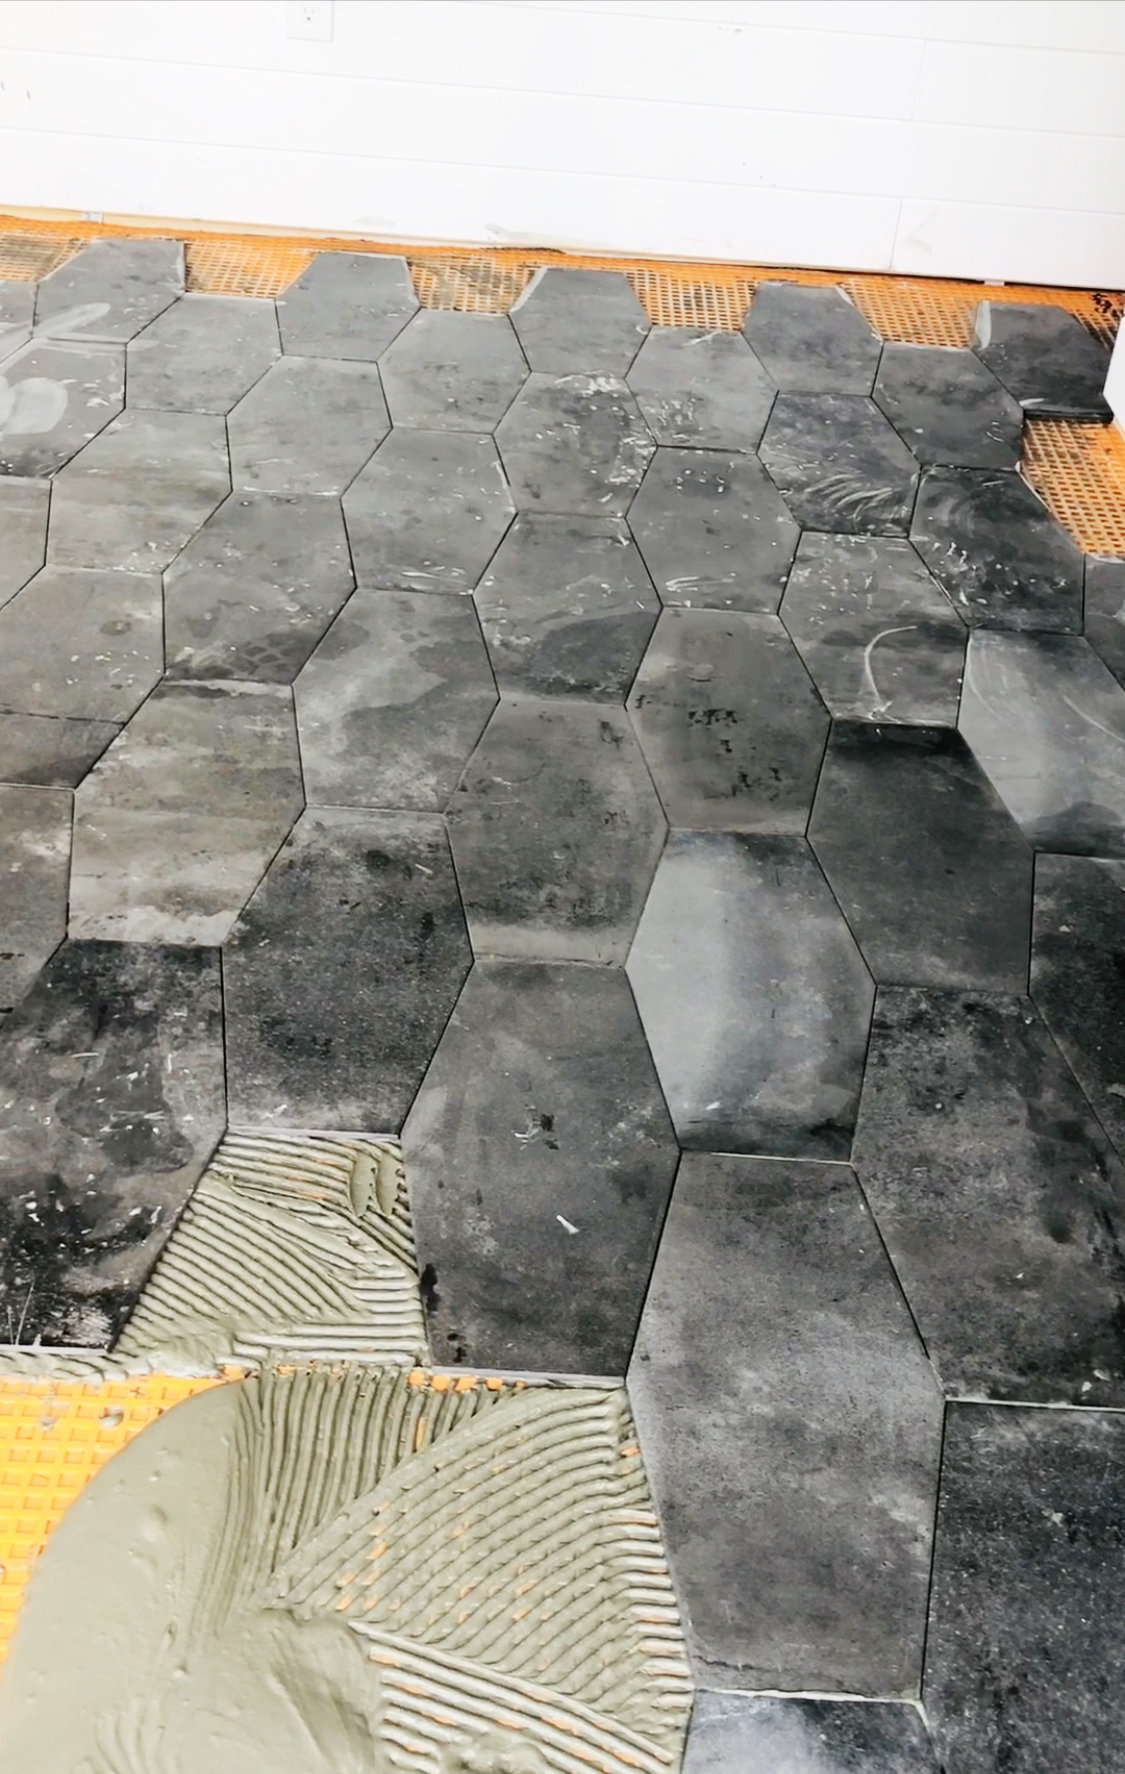
There is always a point in tiling that it becomes hard to use the trowel to grout the surface.
In this case, you’ll want to use a technique called back buttering. This is where you apply the grout to the back of the tile instead of the floor, then lay the tile down on the surface. This is normally used against walls and other tight spaces.
Once you are finished with the floor tile and it’s dried enough for you to walk on, you can begin on the tile for the bar.
If you remember, we started with this simple built out design which we explained in our post here. The left side is space for our mini fridge, and the right is space for barstools.
It’s pretty much the same process as the floor, minus the use of Ditra. We simply laid the tile directly on the plywood.
After finding the center of the space, you’ll start at the bottom and then move your way up and out. A full tile like the balancing act from Jeffrey court is a pretty easy tile to lay on the wall. Some mosaics can be a little more difficult to keep against the way. Also, if you’re tiling over an open space, you’ll want to make sure you think about how you will support the tile while it dries. You might need to build a support wall for it.
Also with both of these tiles, we did not use any spacers, but some tiles need spacers to help maintain grout lines.
Once we had both the bar and floor tile laid, and had given it 24 hours to dry, we were able to grout it.
A week later we sealed the tile as well.
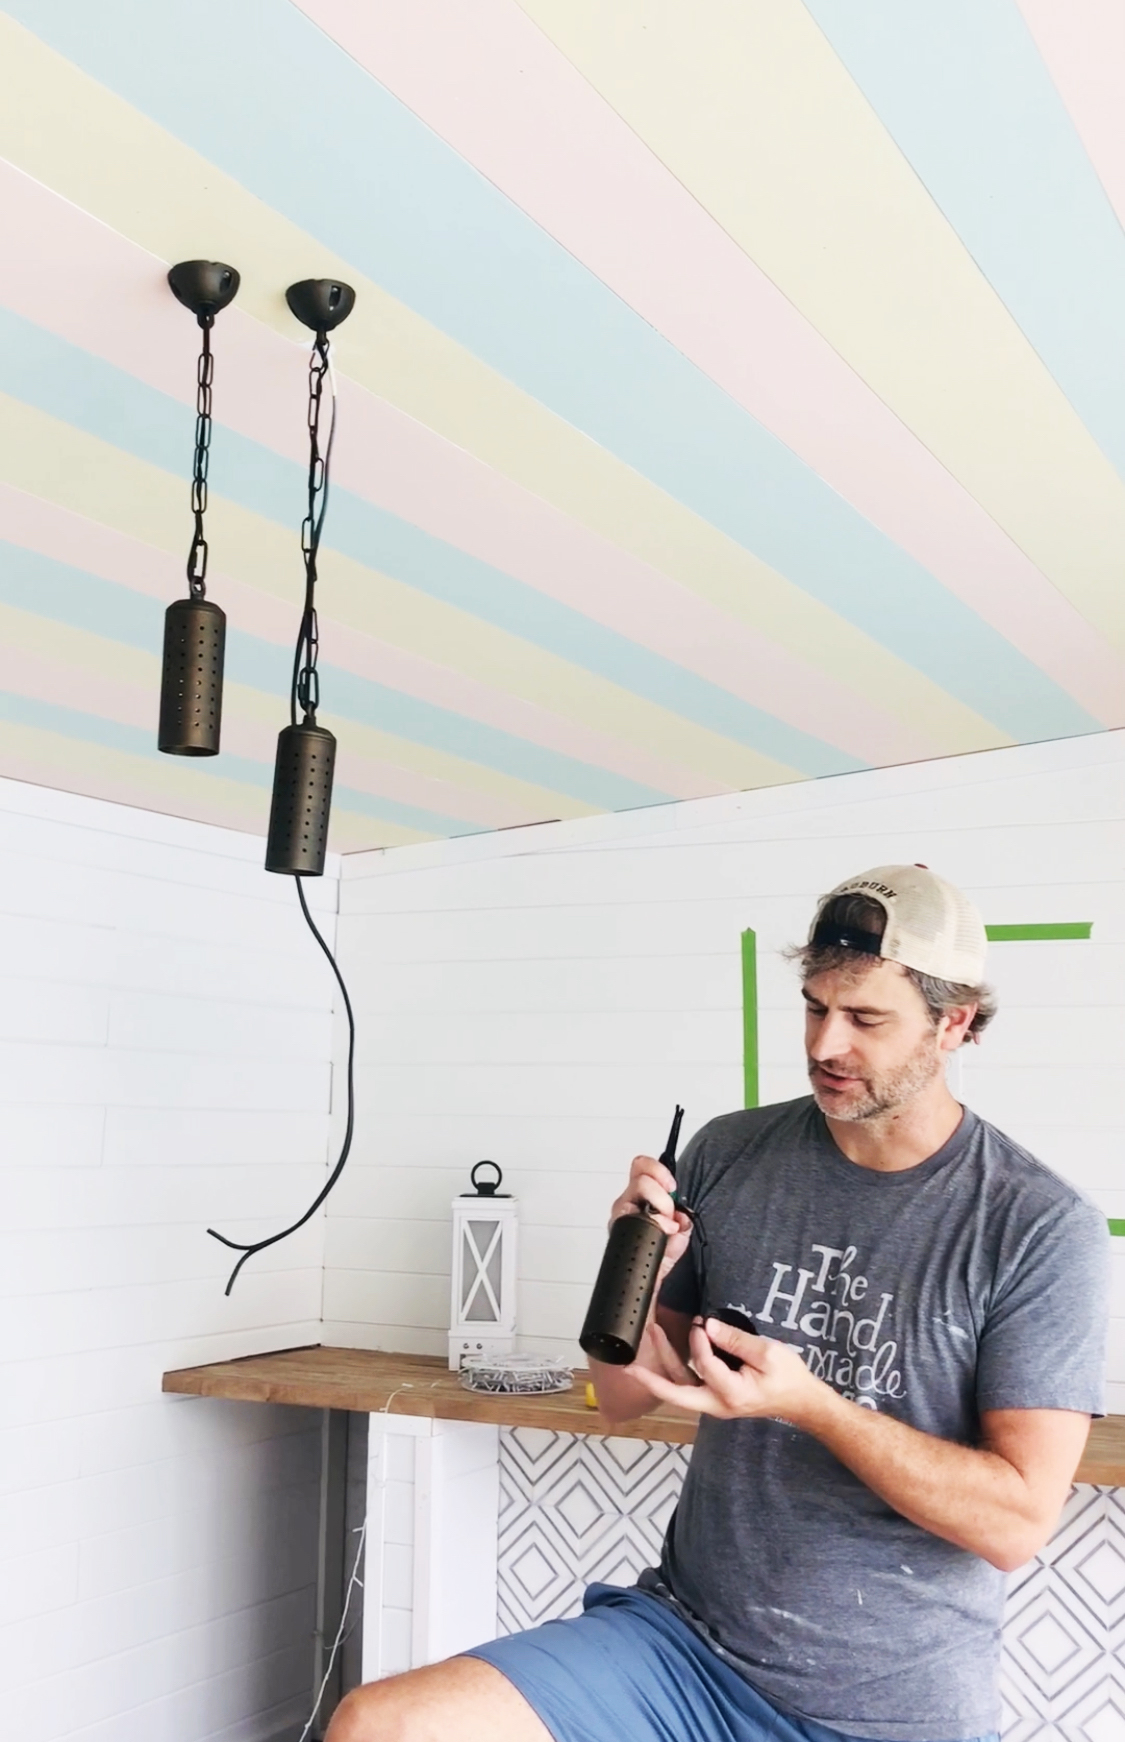
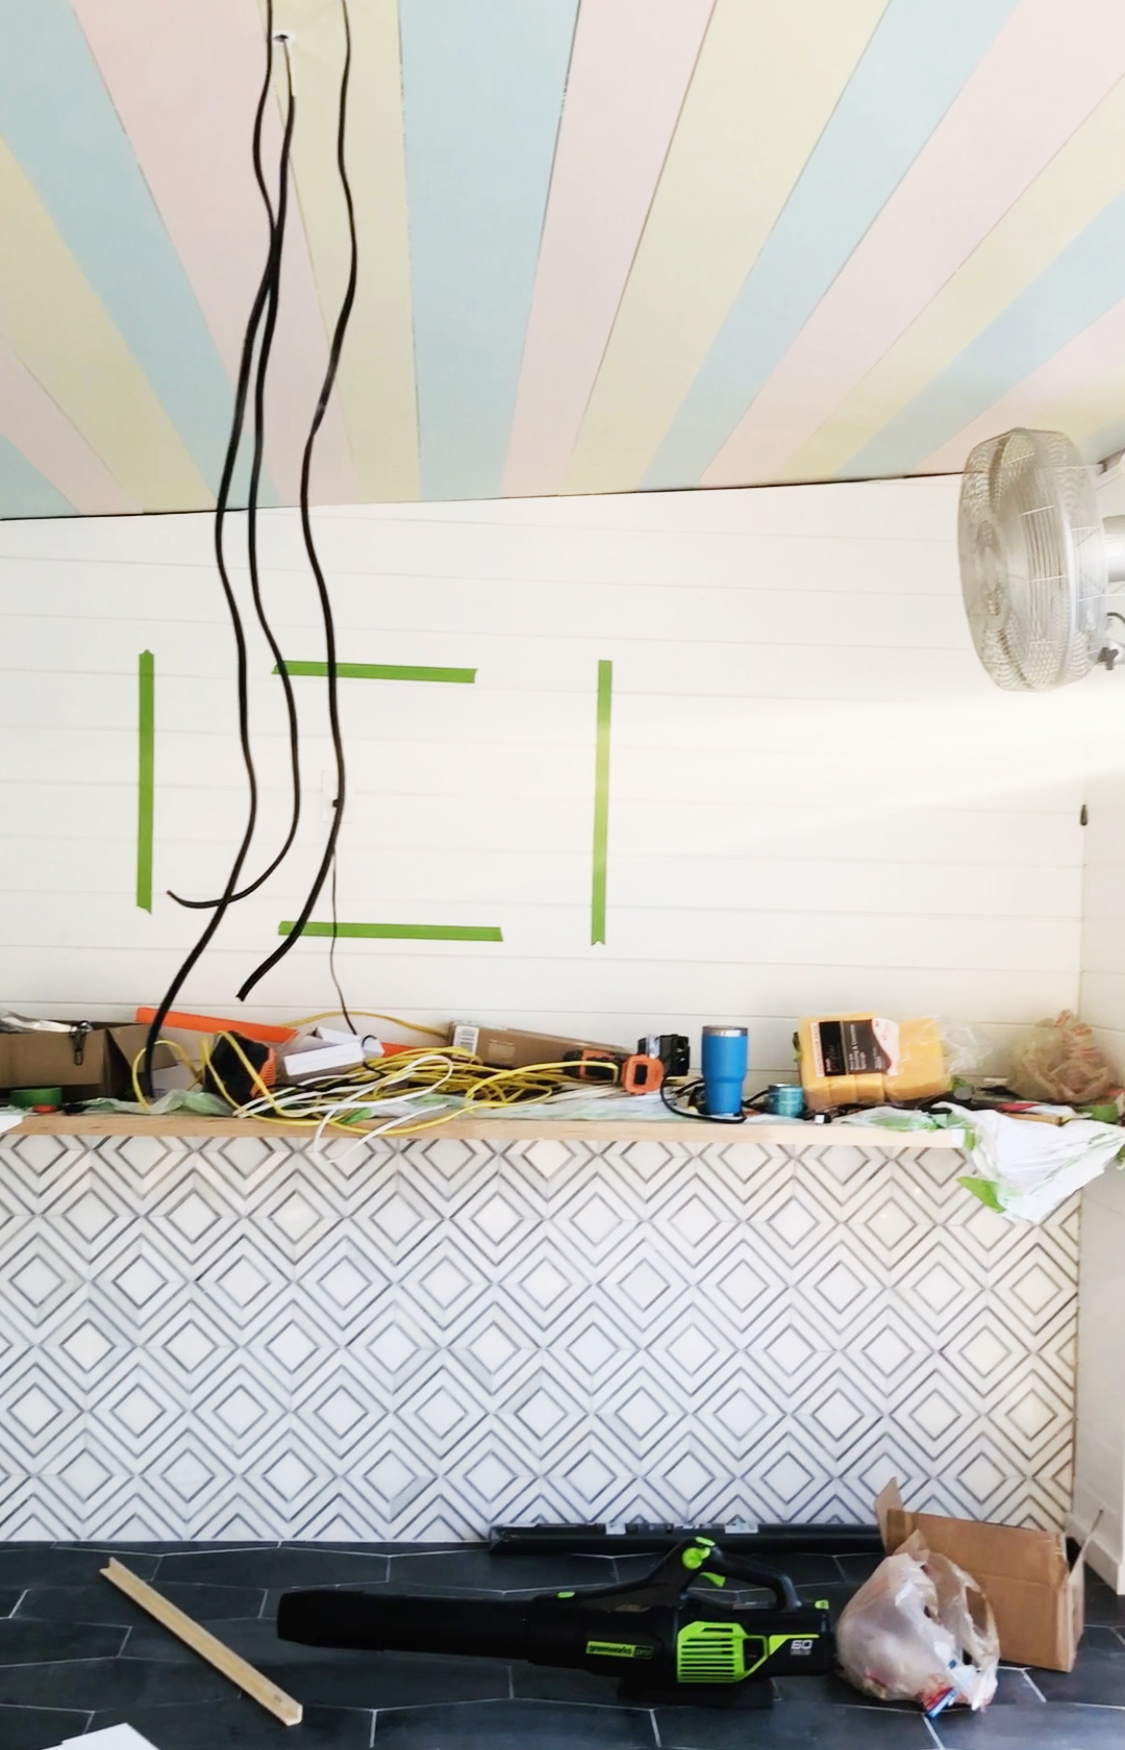
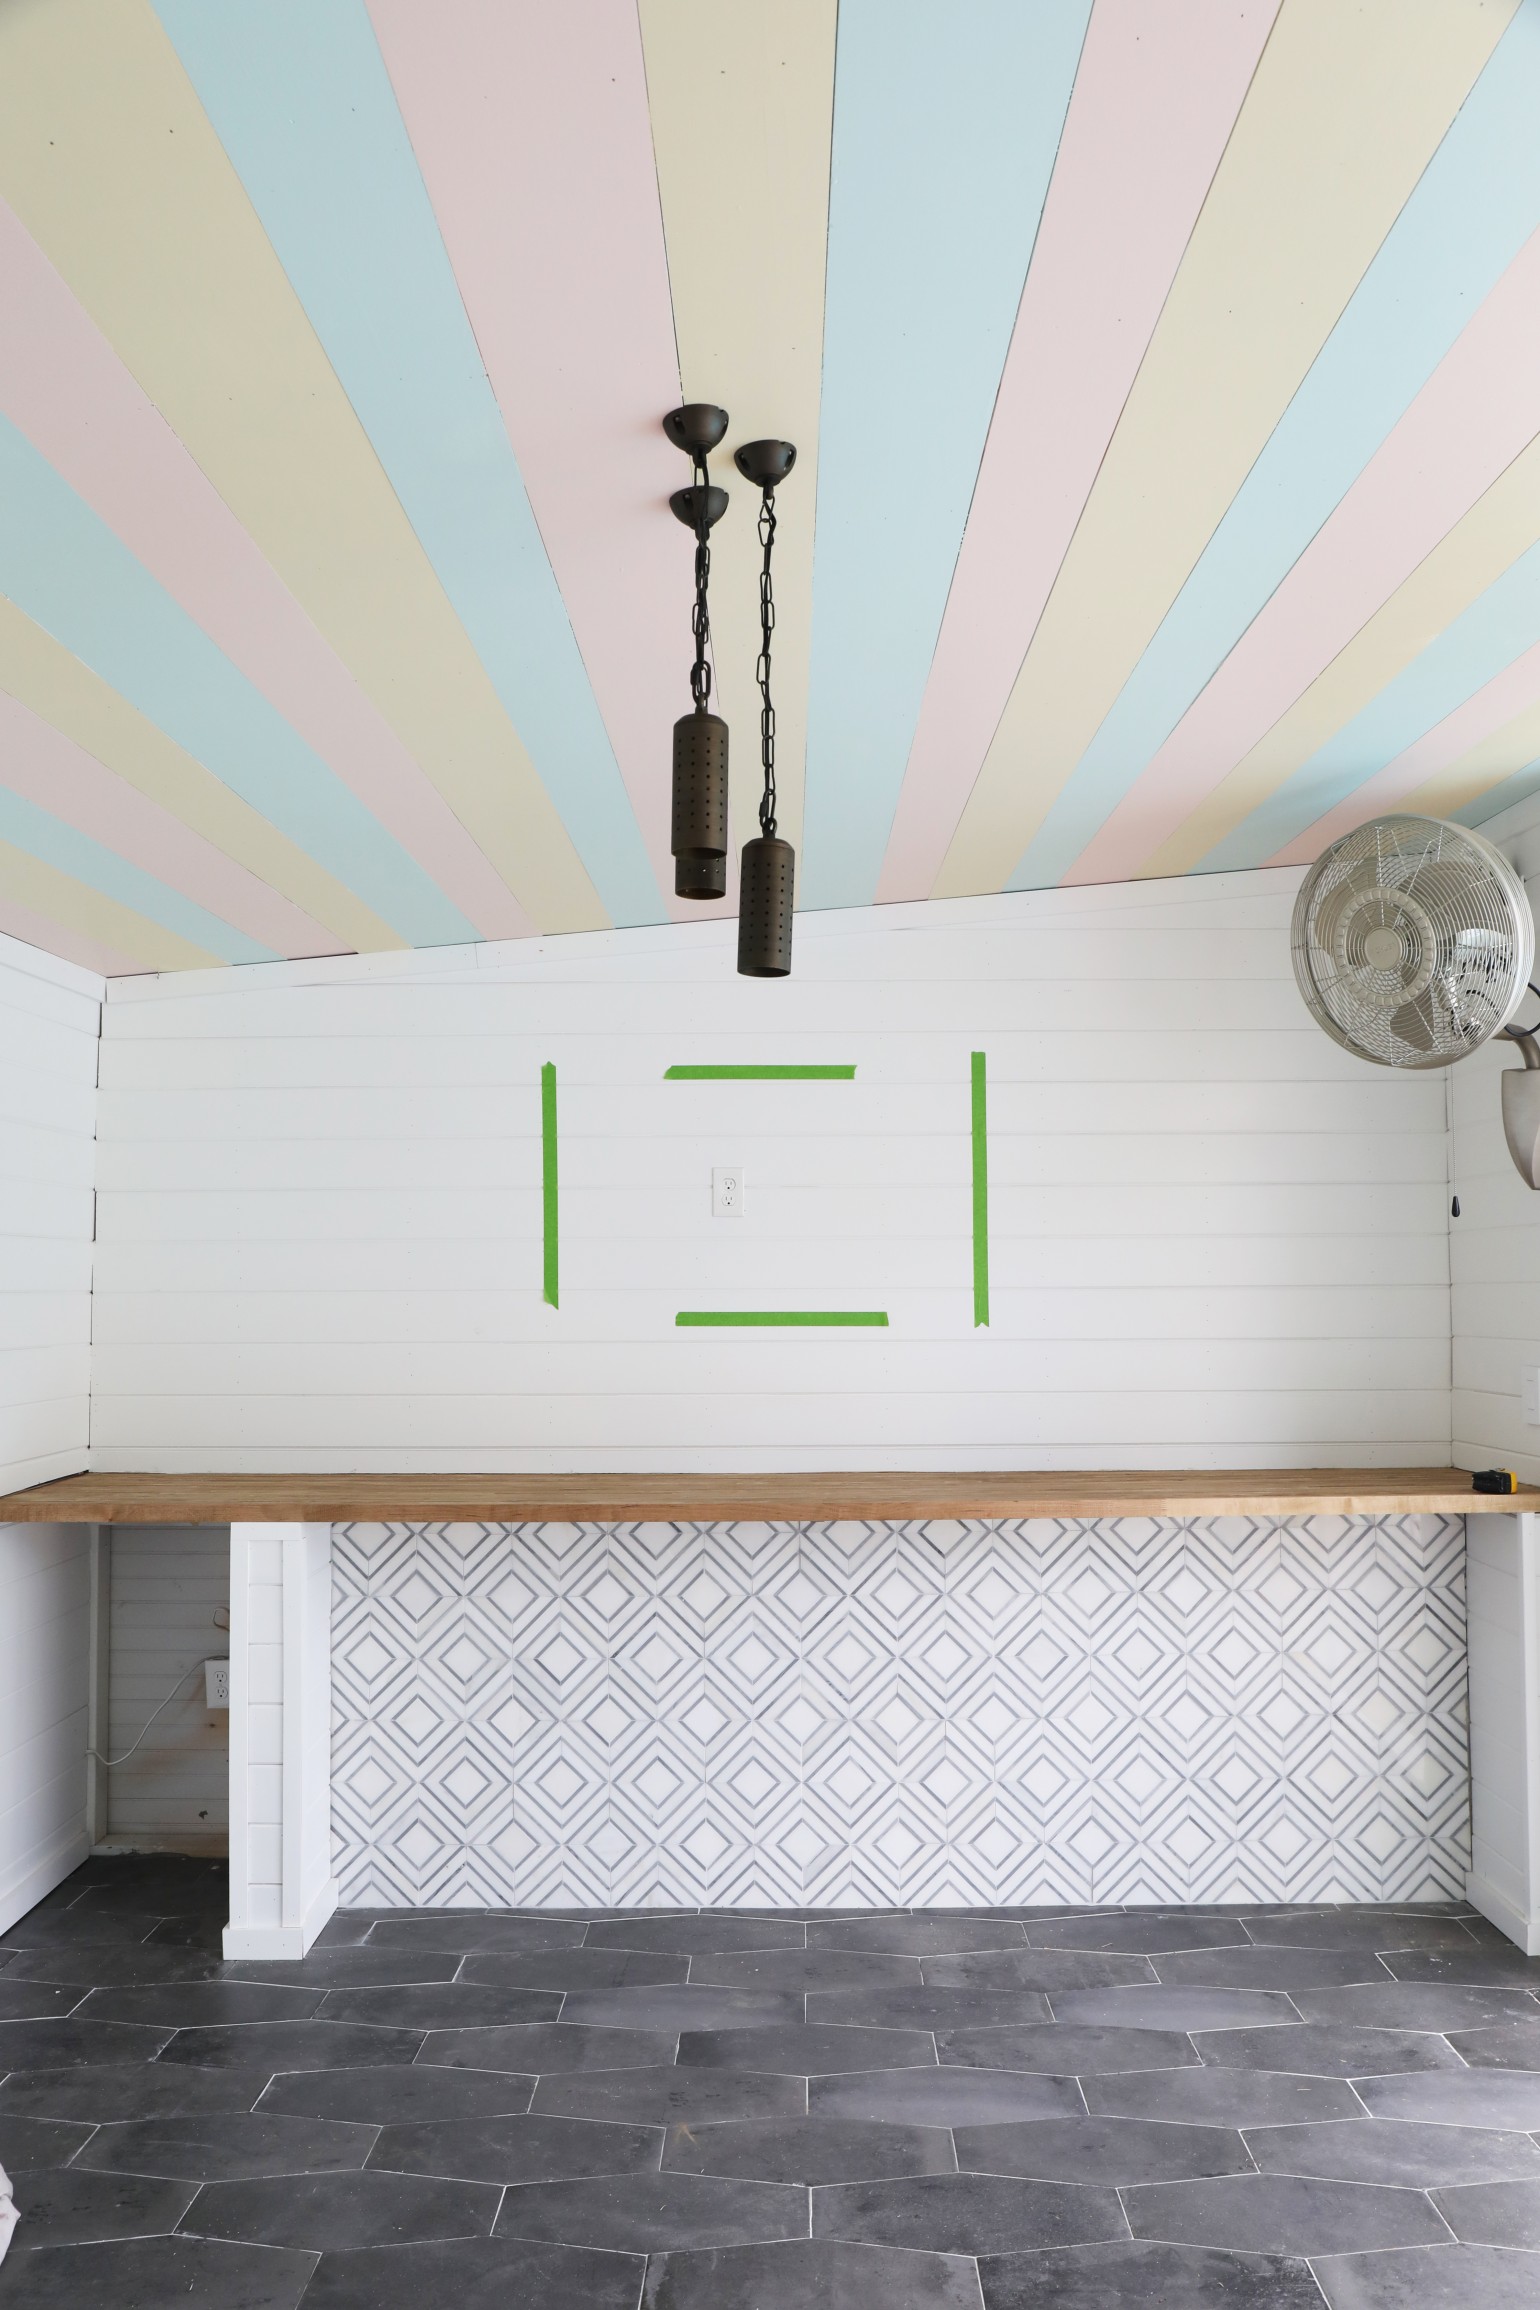
We then moved on to trimming out our Kichler lights so that we could have some light in the space. Added bonus, electricity now means that we can and extend our work day a little.

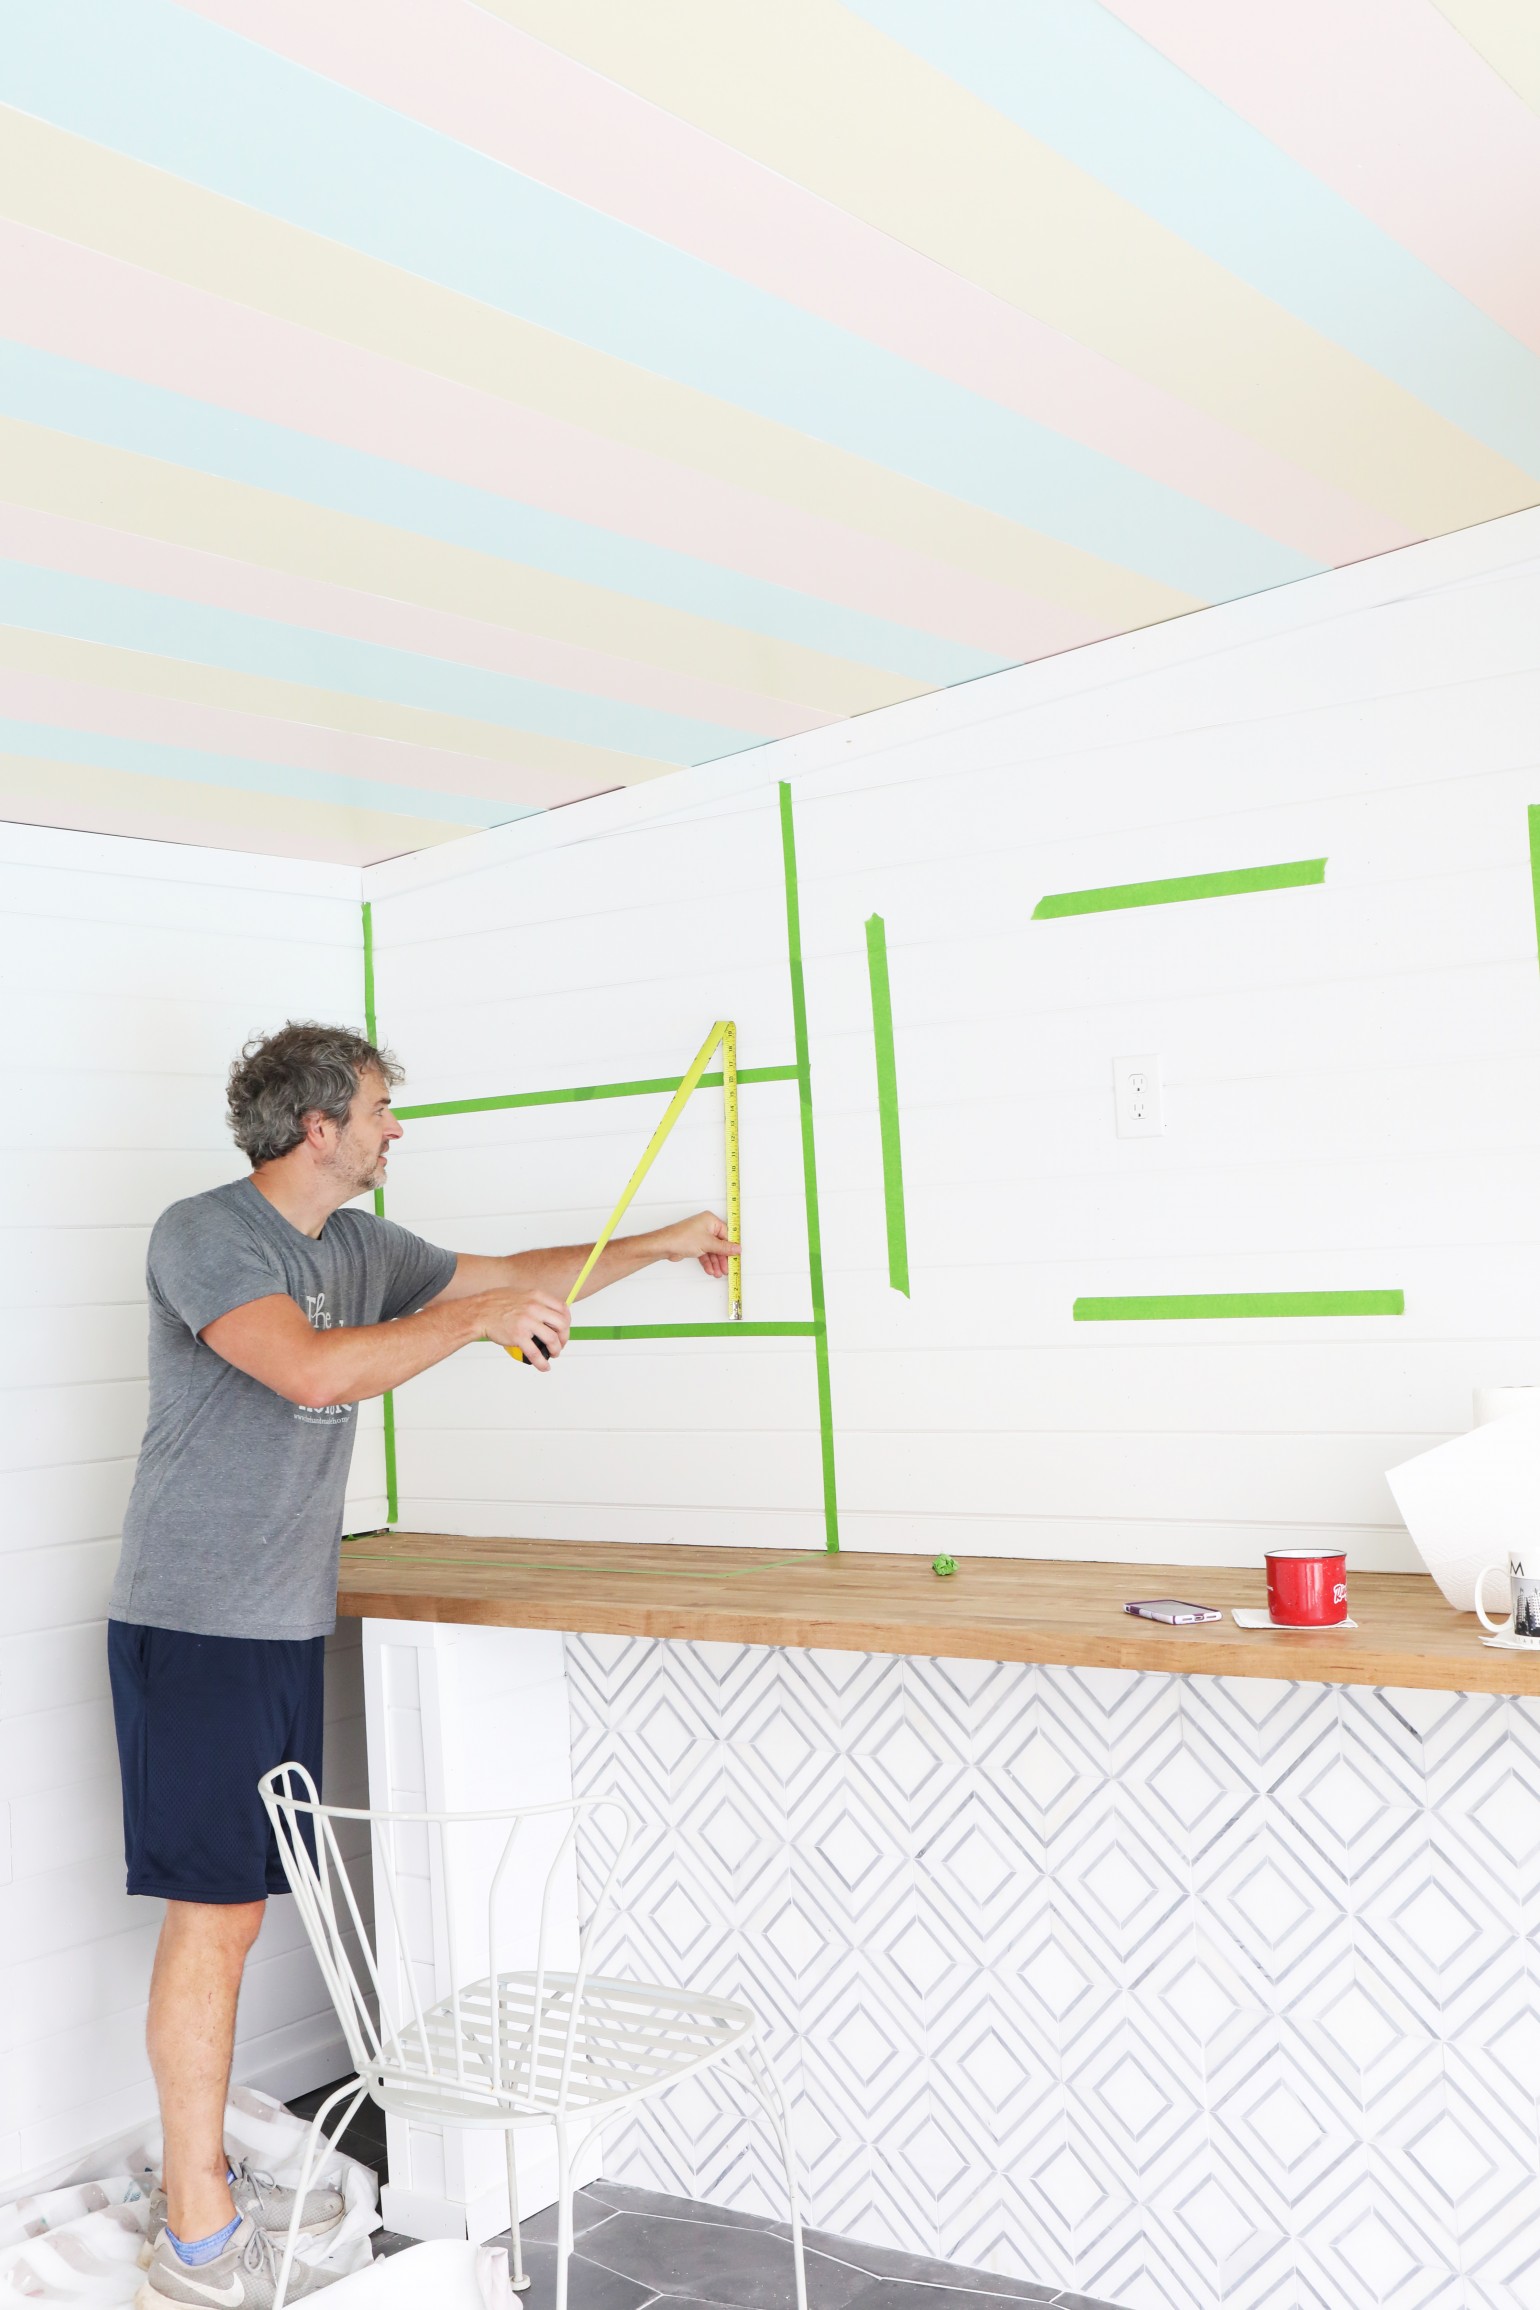
Next up, we began adding trim around the floor, ceilings, walls, and the bar in preparation for building the shelving.
We used primed 1 x 4’s and finish nails.
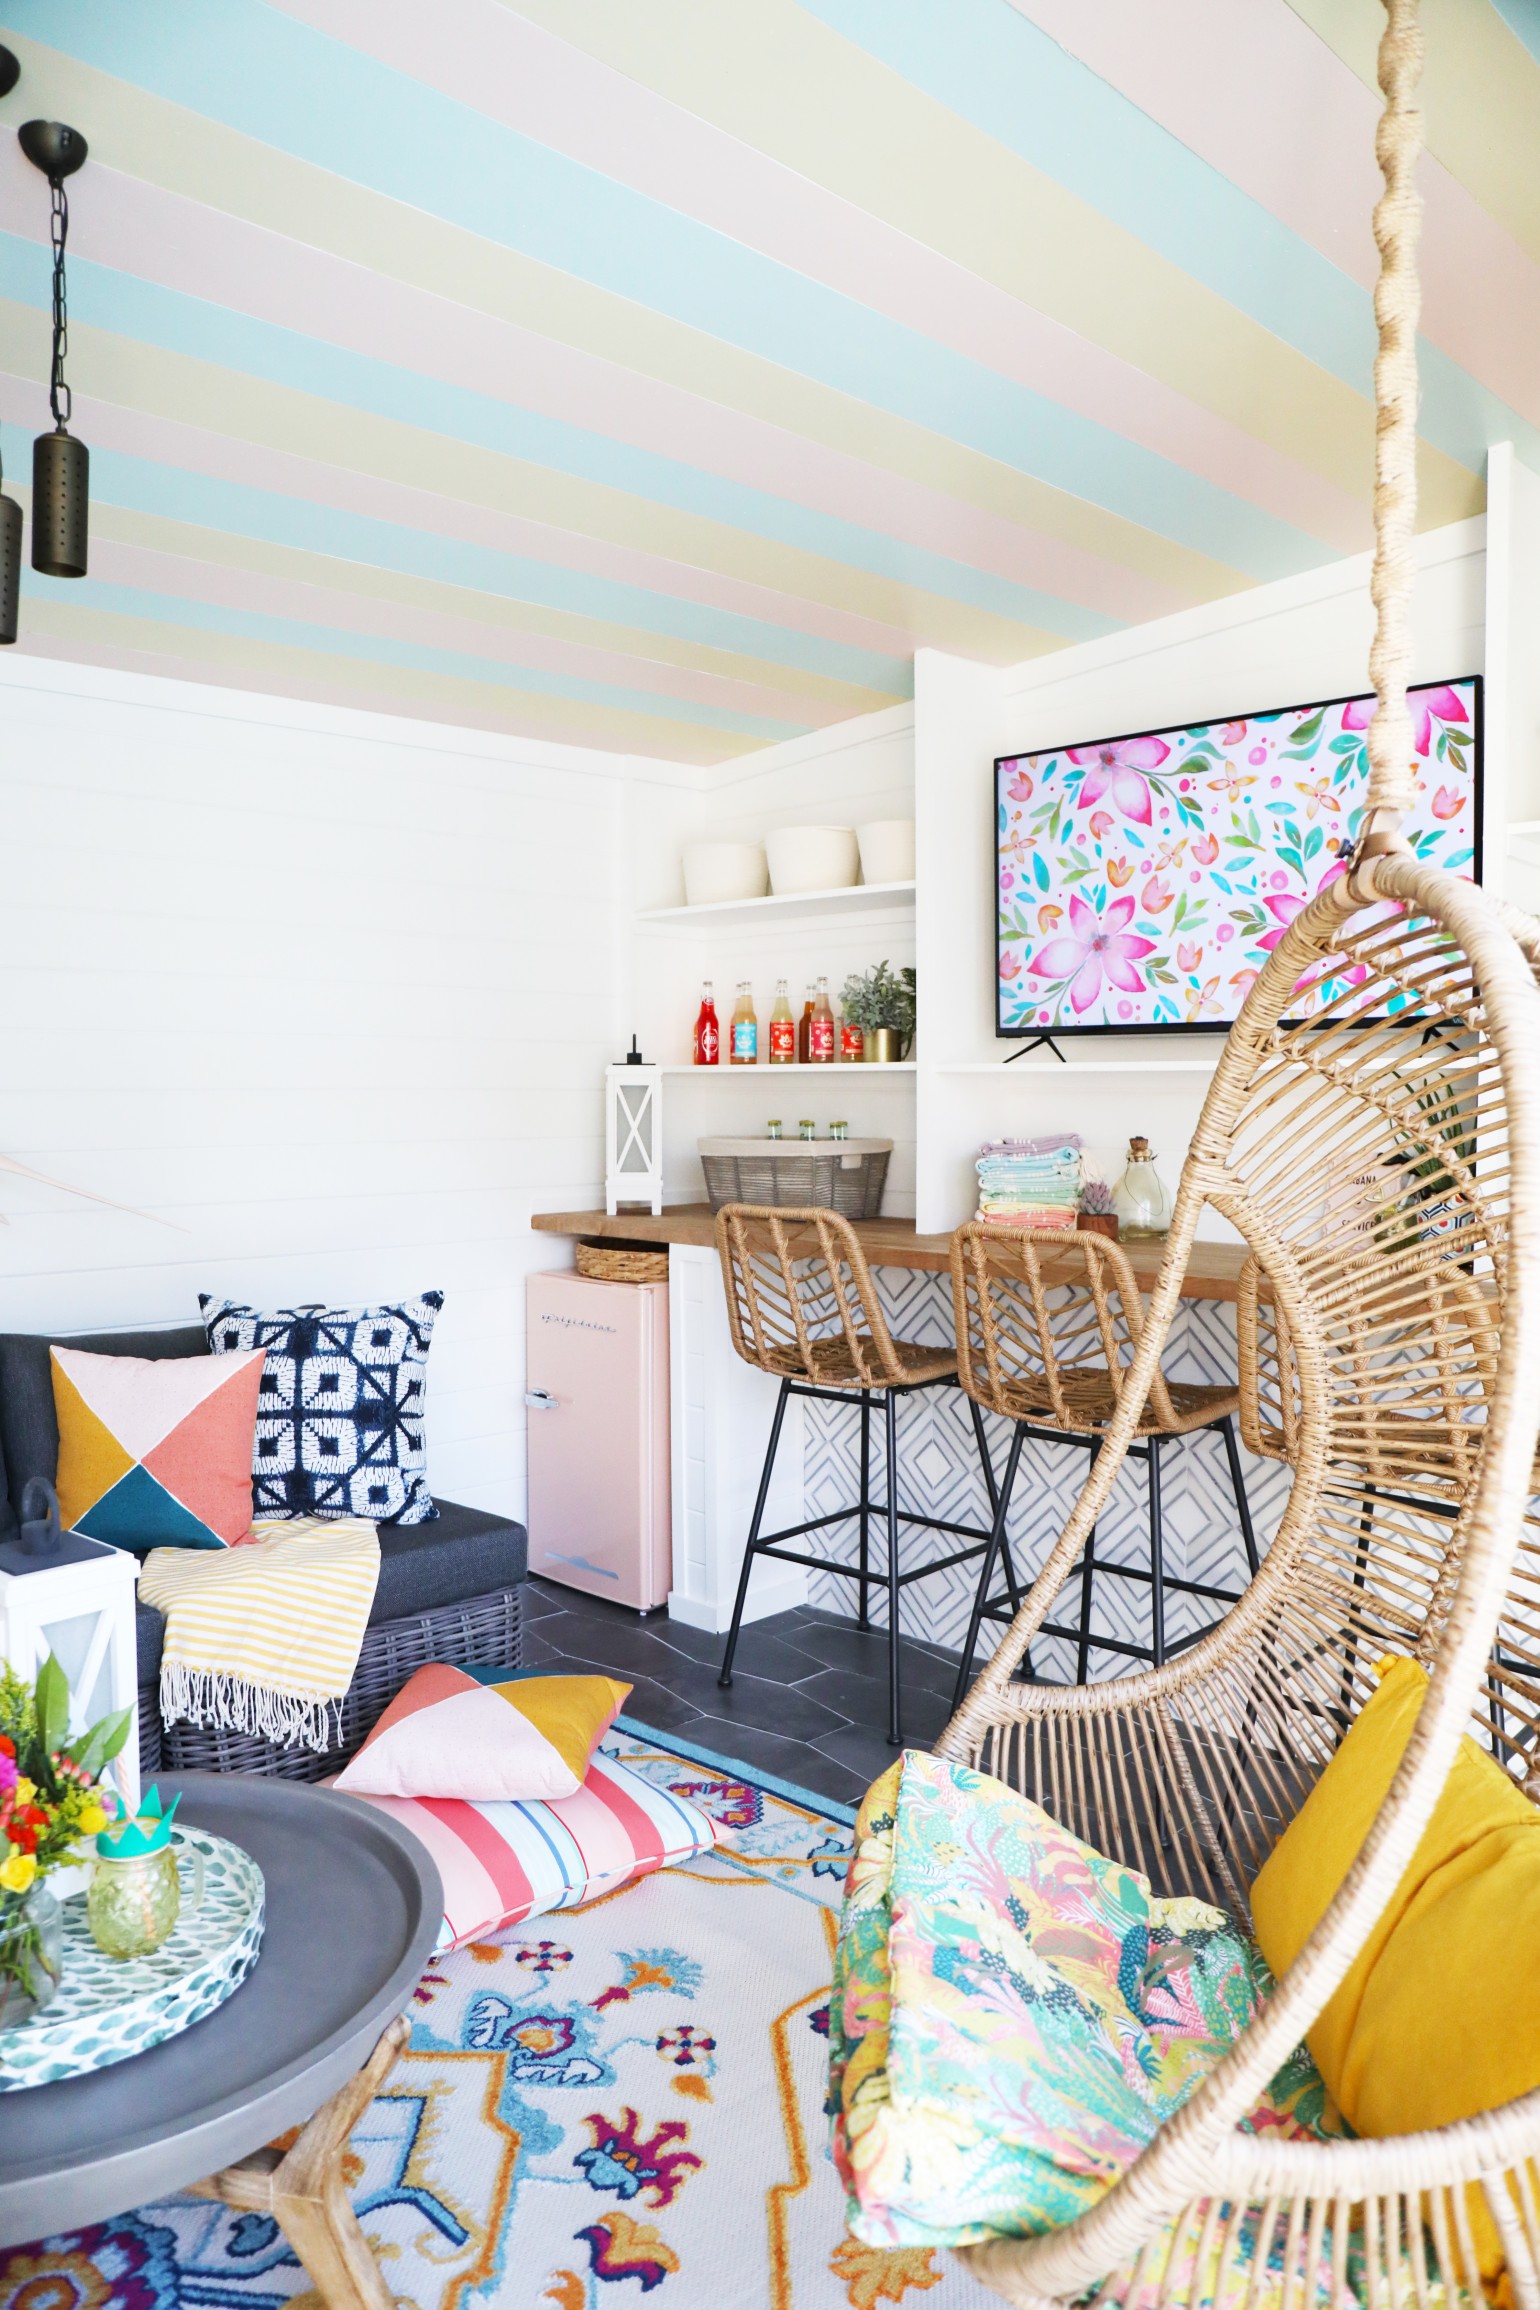
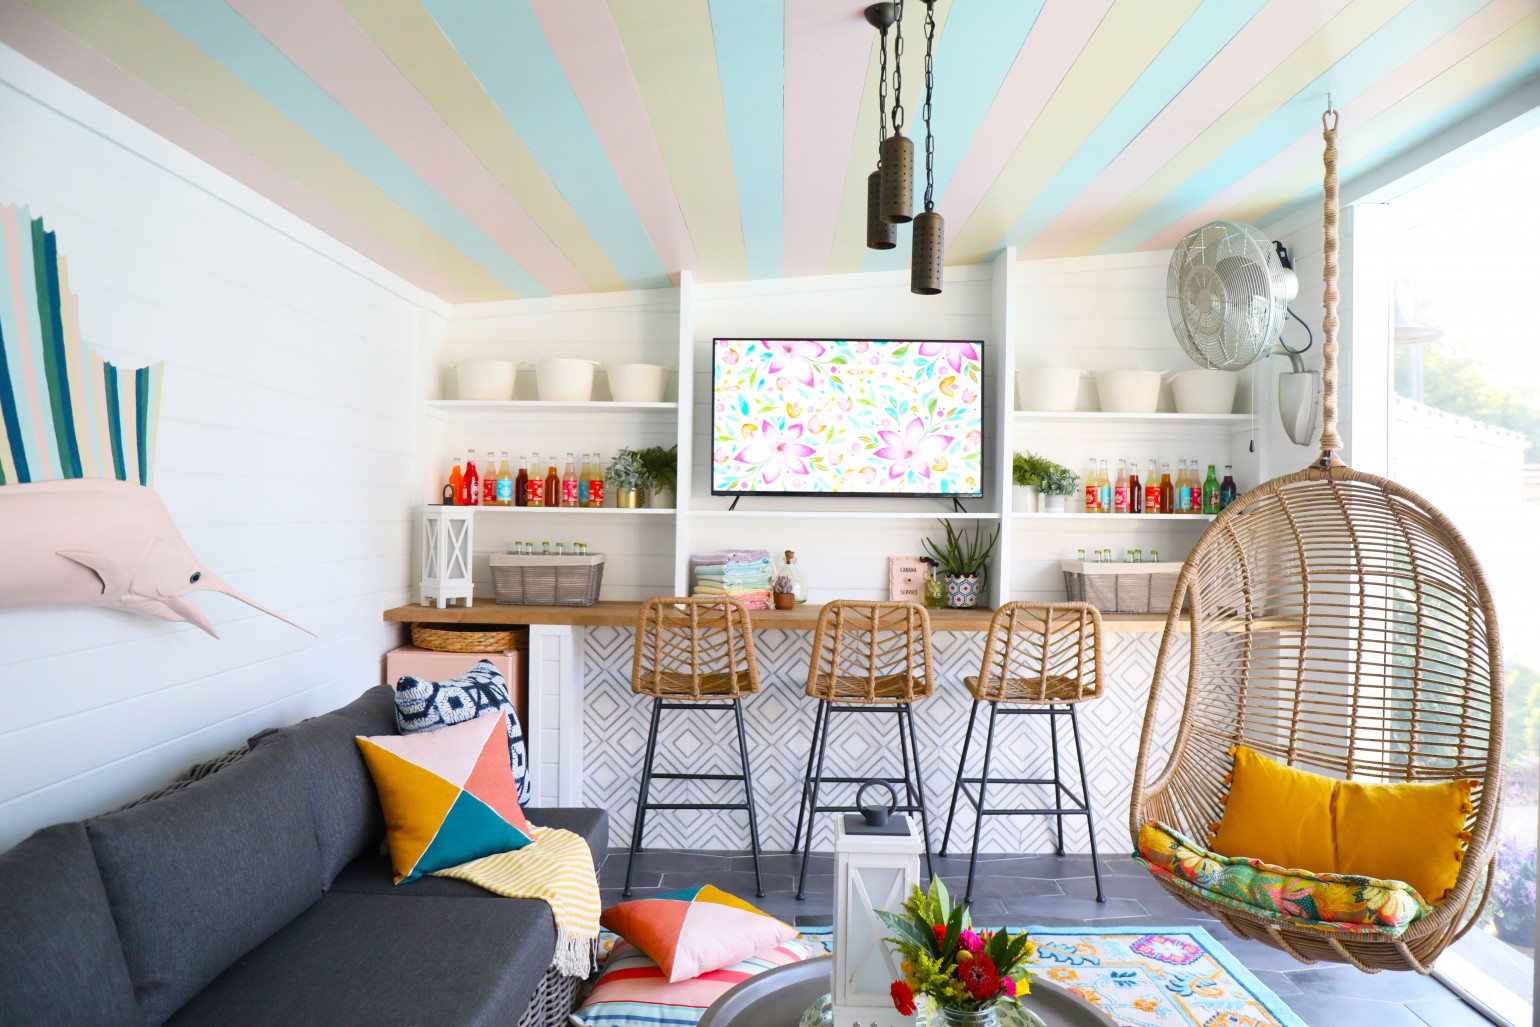
Bar Shelving
Once the grout dried, we moved on to building the bar shelving.
Some things to consider as you plan out your design:
What size TV will you use?
What do you plan to add to this design?
What is going on the shelves?
Will they need to support much weight?
Once you know these things you can begin to sketch it out, this is what we envisioned.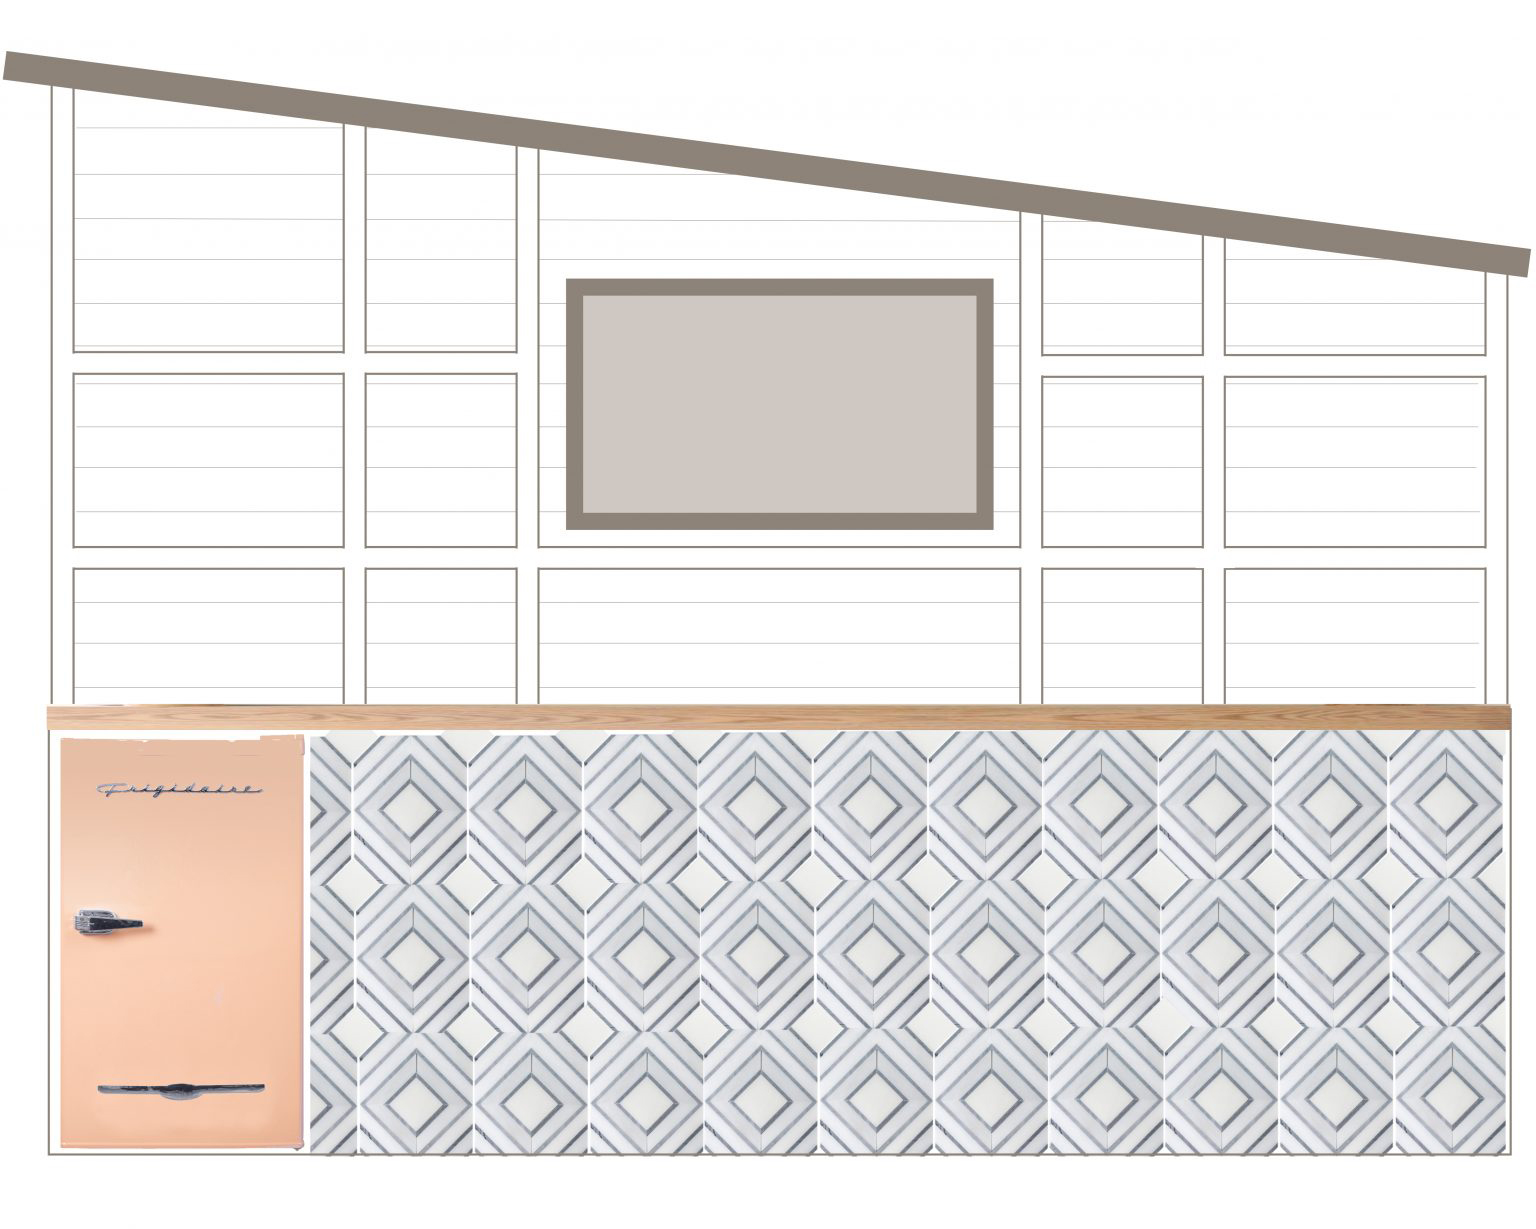
As always, we broke out the frog tape to “live with” our design for a moment before we built it, this is absolutely one of the best “pro tips” we can give you.
We tell our clients all the time to do things like this, with all aspects of their renovations.
The supplies we used were some primed 1 x 12 and 1 x 2 along with some finish nails.
This is a simple process once you have it all laid out and your supplies just depend on how much shelving you build.
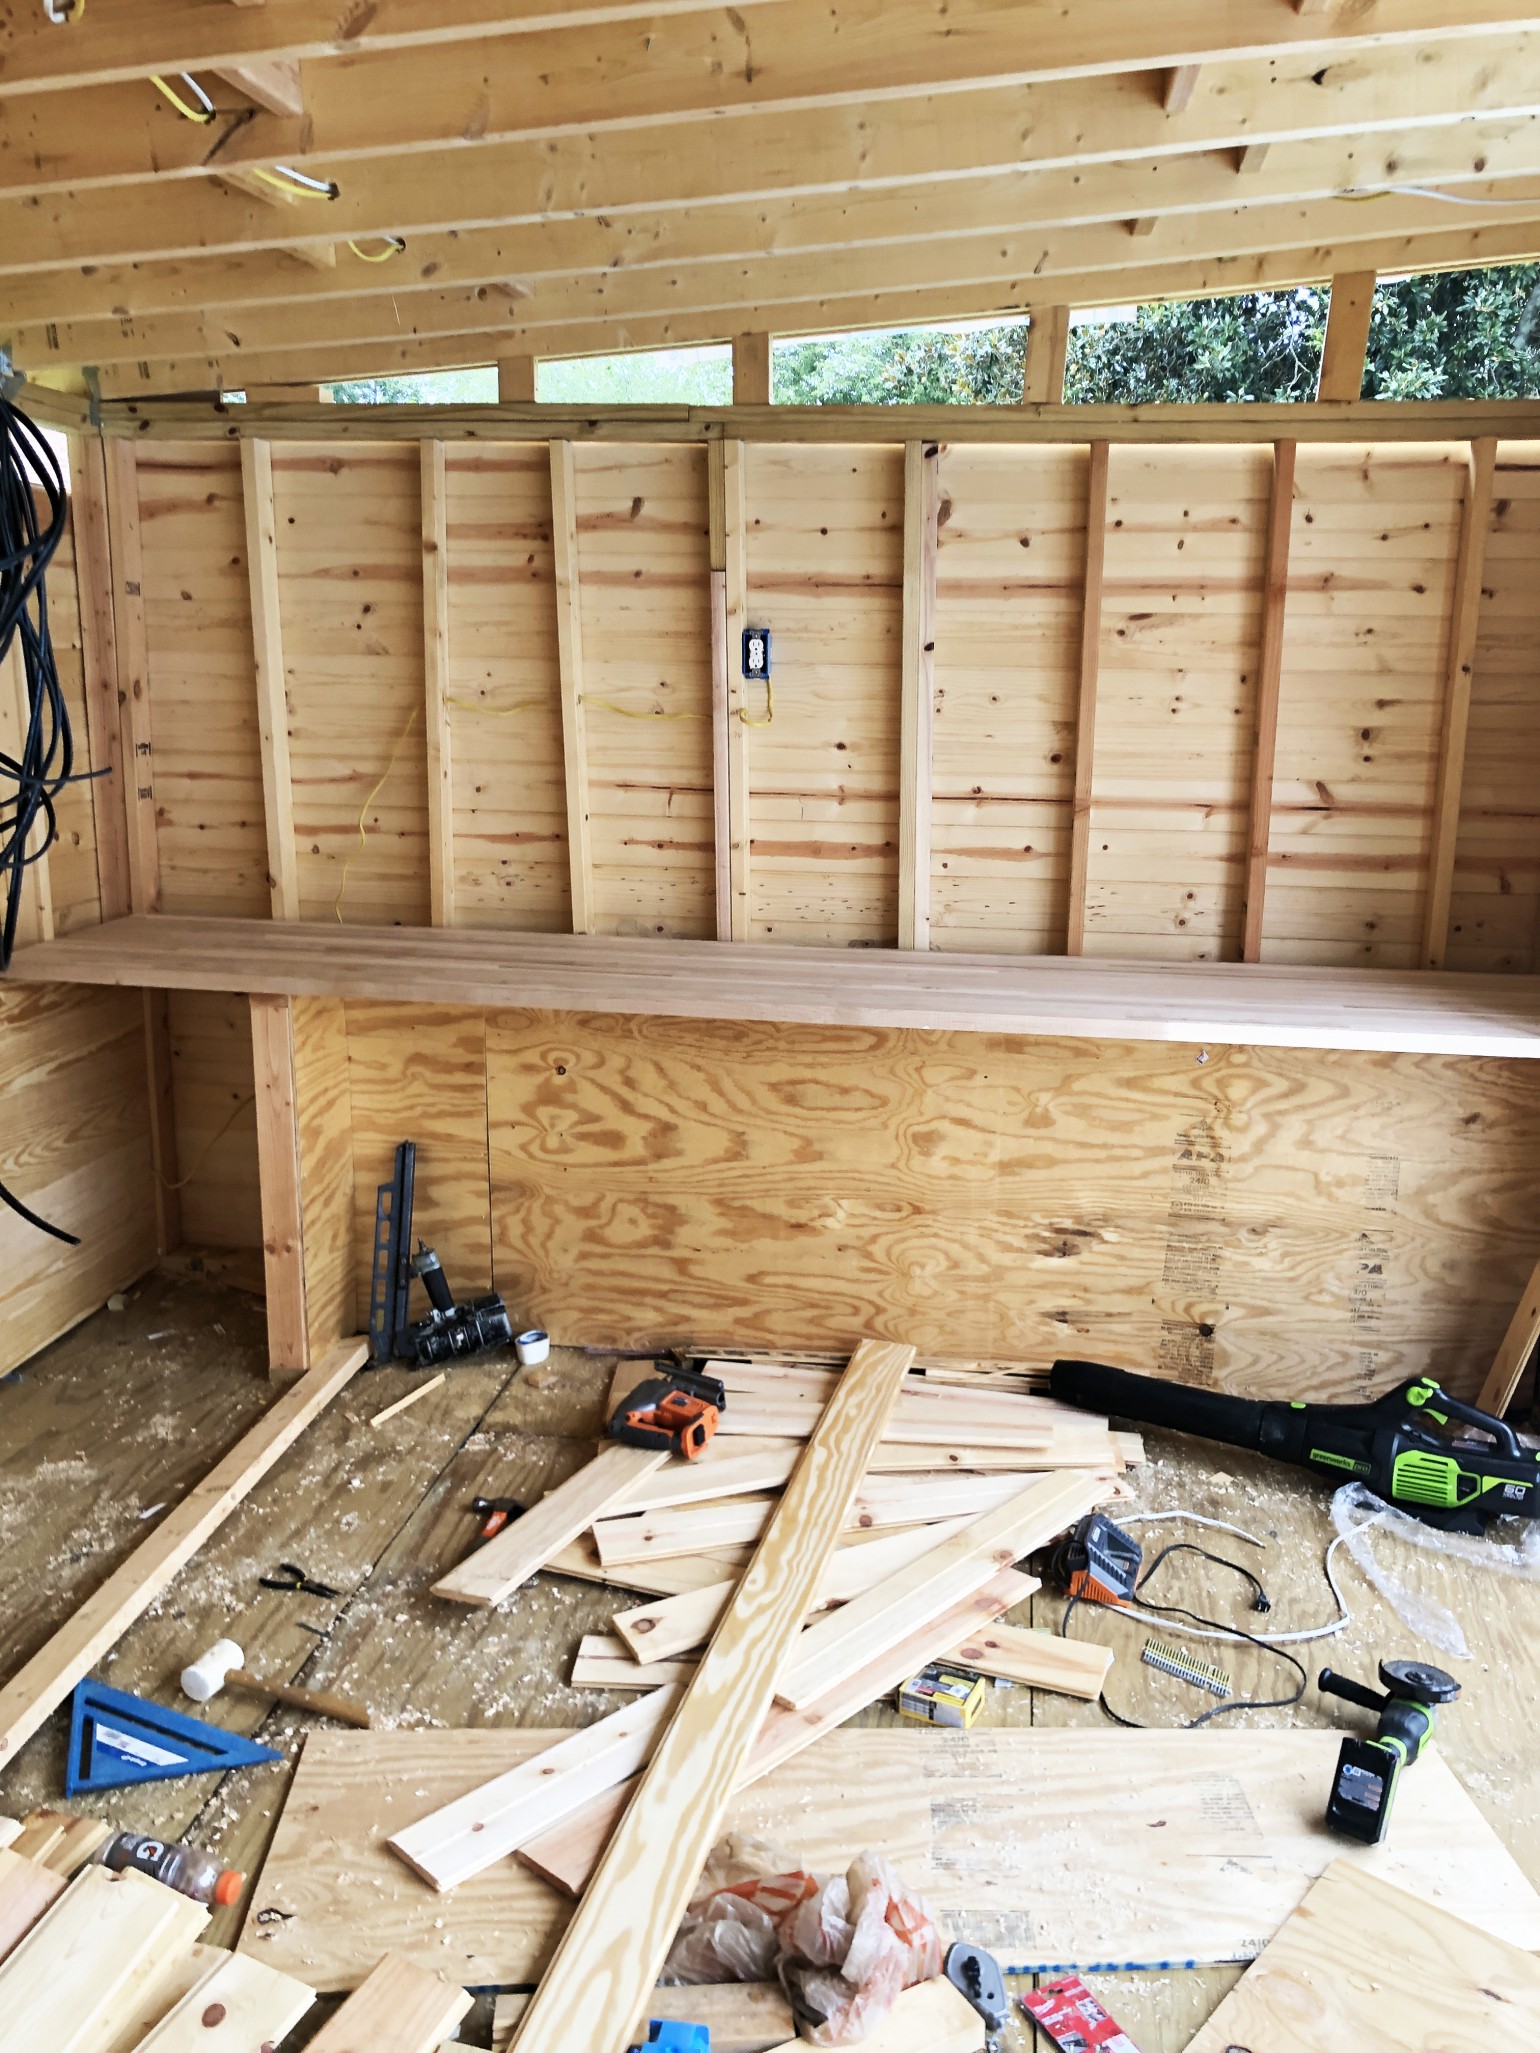
We started on one end, and cut down some 1 x 2’s to for the support for our shelves, and nailed them into the wall, keeping in mind we would lay the 3/4″ thick 1 x 12 on top of it as the shelf. So our support would be 3/4″ lower than what we actually want.
We used the 1 x 12 to form the center walls that would bracket the TV, and as mentioned, the shelves as well. Everything is nailed in using a finish nailer. If you simply build sections as you go, it’s an easy process.
The only thing that is slightly tricky is matching your ceiling slope, but if you remember your roof pitch, ours was a 2/12, then you can follow this handy guide and set your saw to cut at the correct angle.

With the inside finished and painted, we moved on to the stairs.
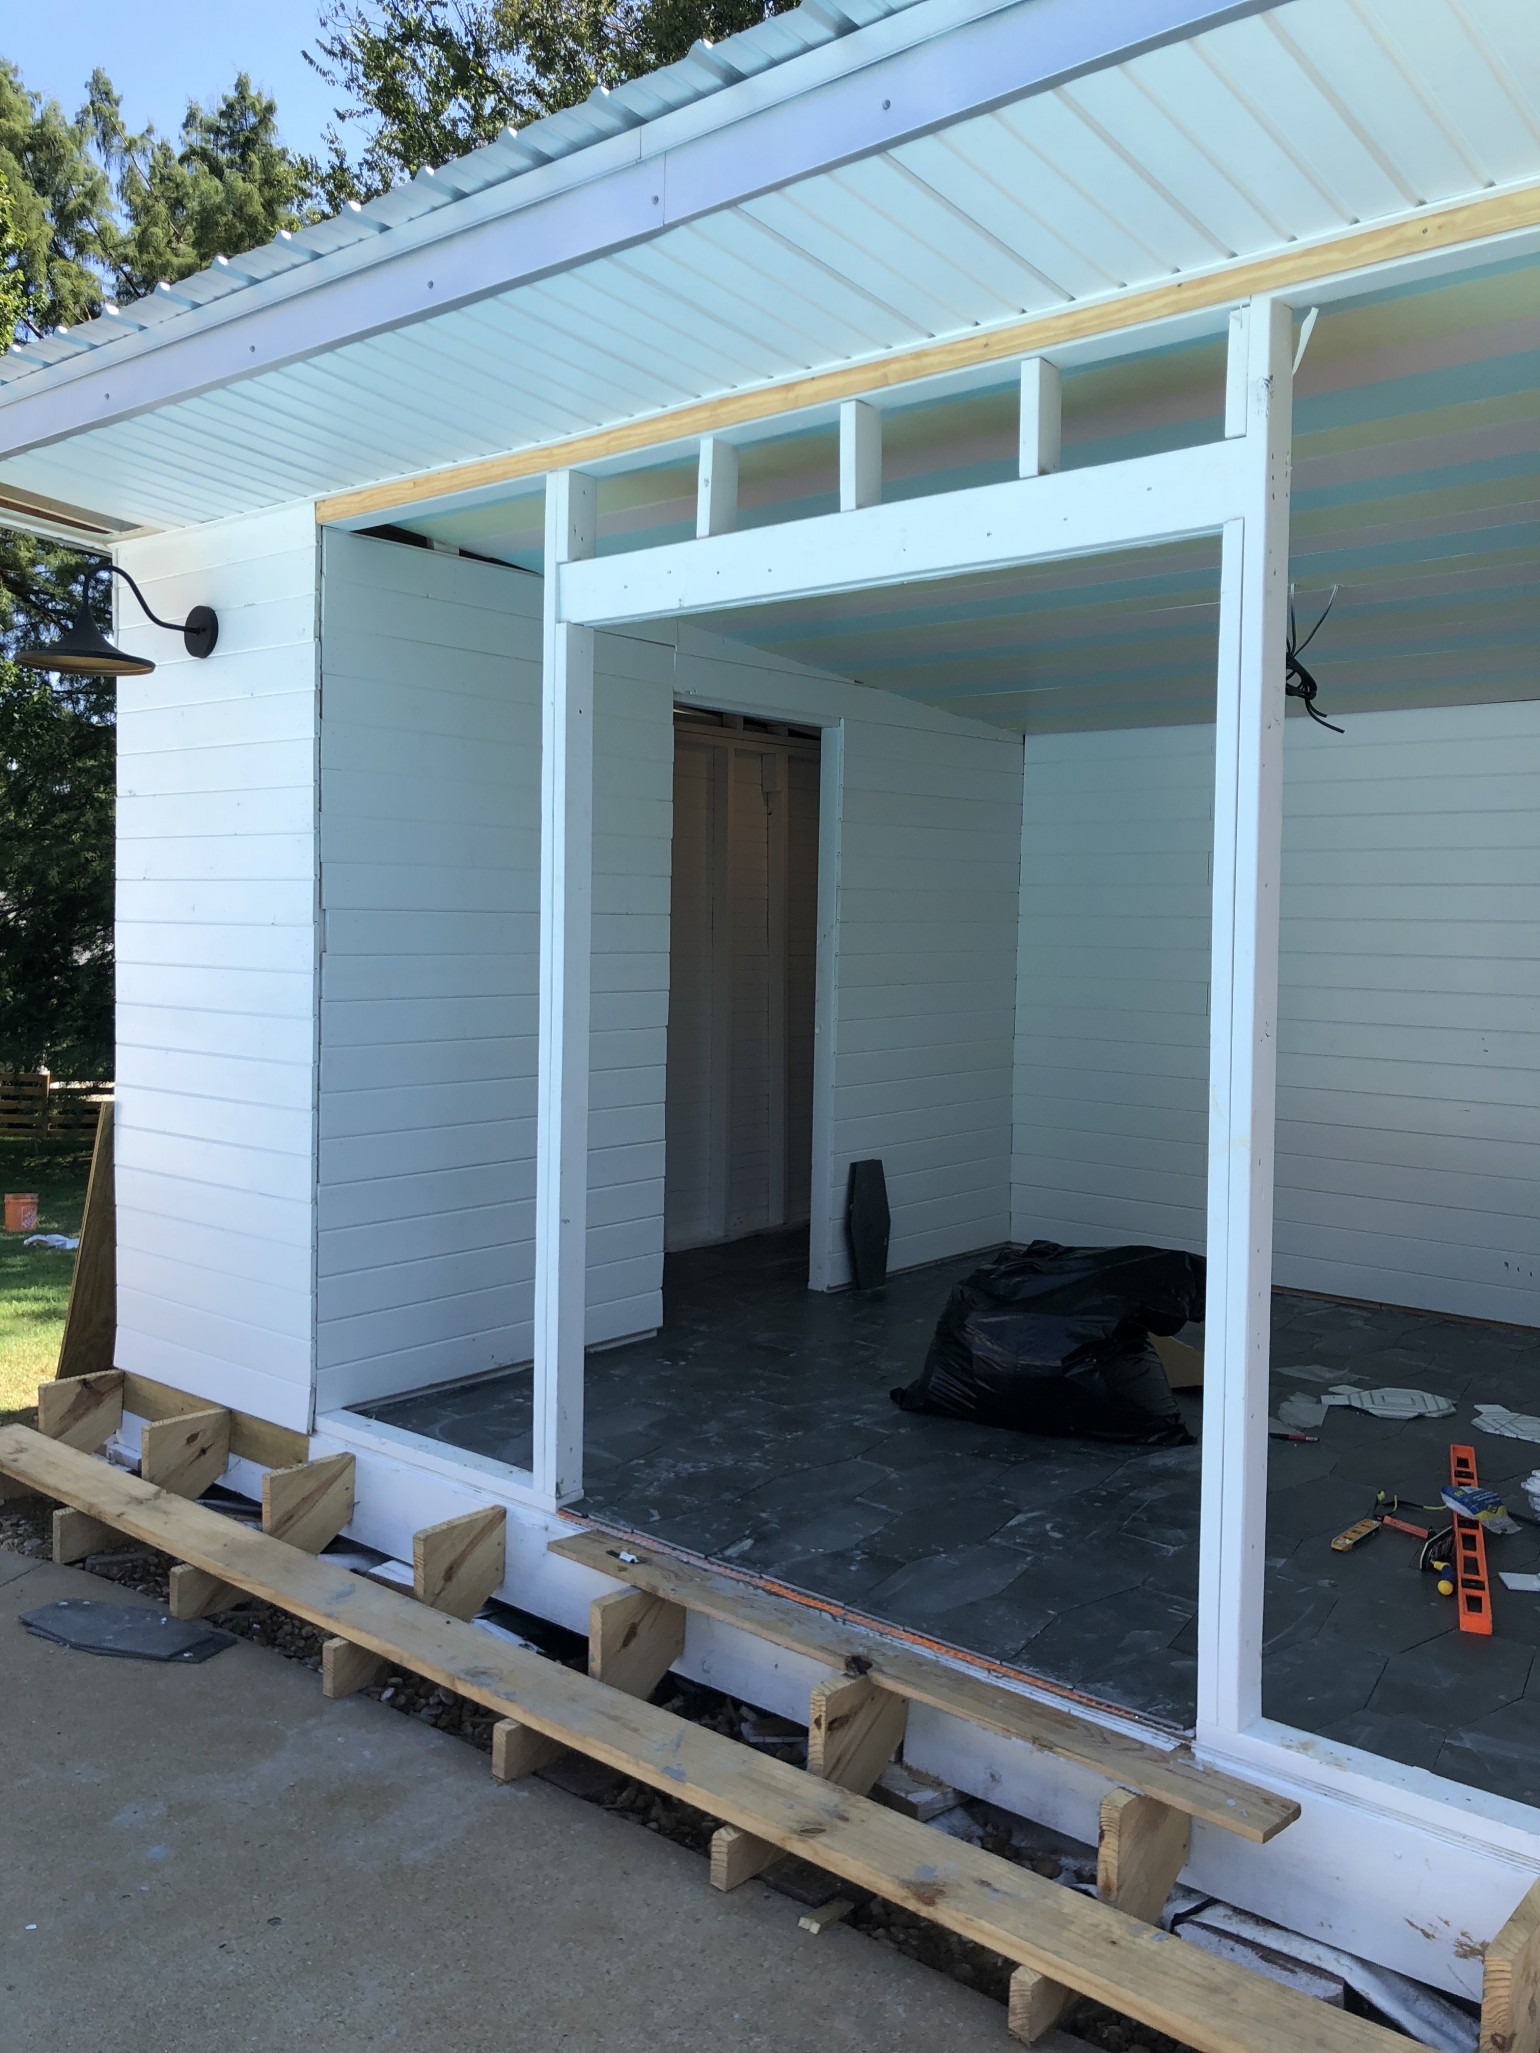
To save time and maybe a little sanity as well, you can buy your stair stringers from Home Depot. Doing this, the only thing you have to do is size and level them, then add the treads and risers.
You’ll want to space your stringers about every 16″ on center.
Once the stairs are in, you’ll want to start on the door and the screens. We built the cabana to fit a 36″ screen width on the front, so that we could simply roll out a standard screen size, stretch it, and then staple it in place. We also added some wood trim on top, for a nice finished look.
If you’ve never hung screens before we talk more about it in our handmade hideaway 2.0 post, so be sure to check it out there!
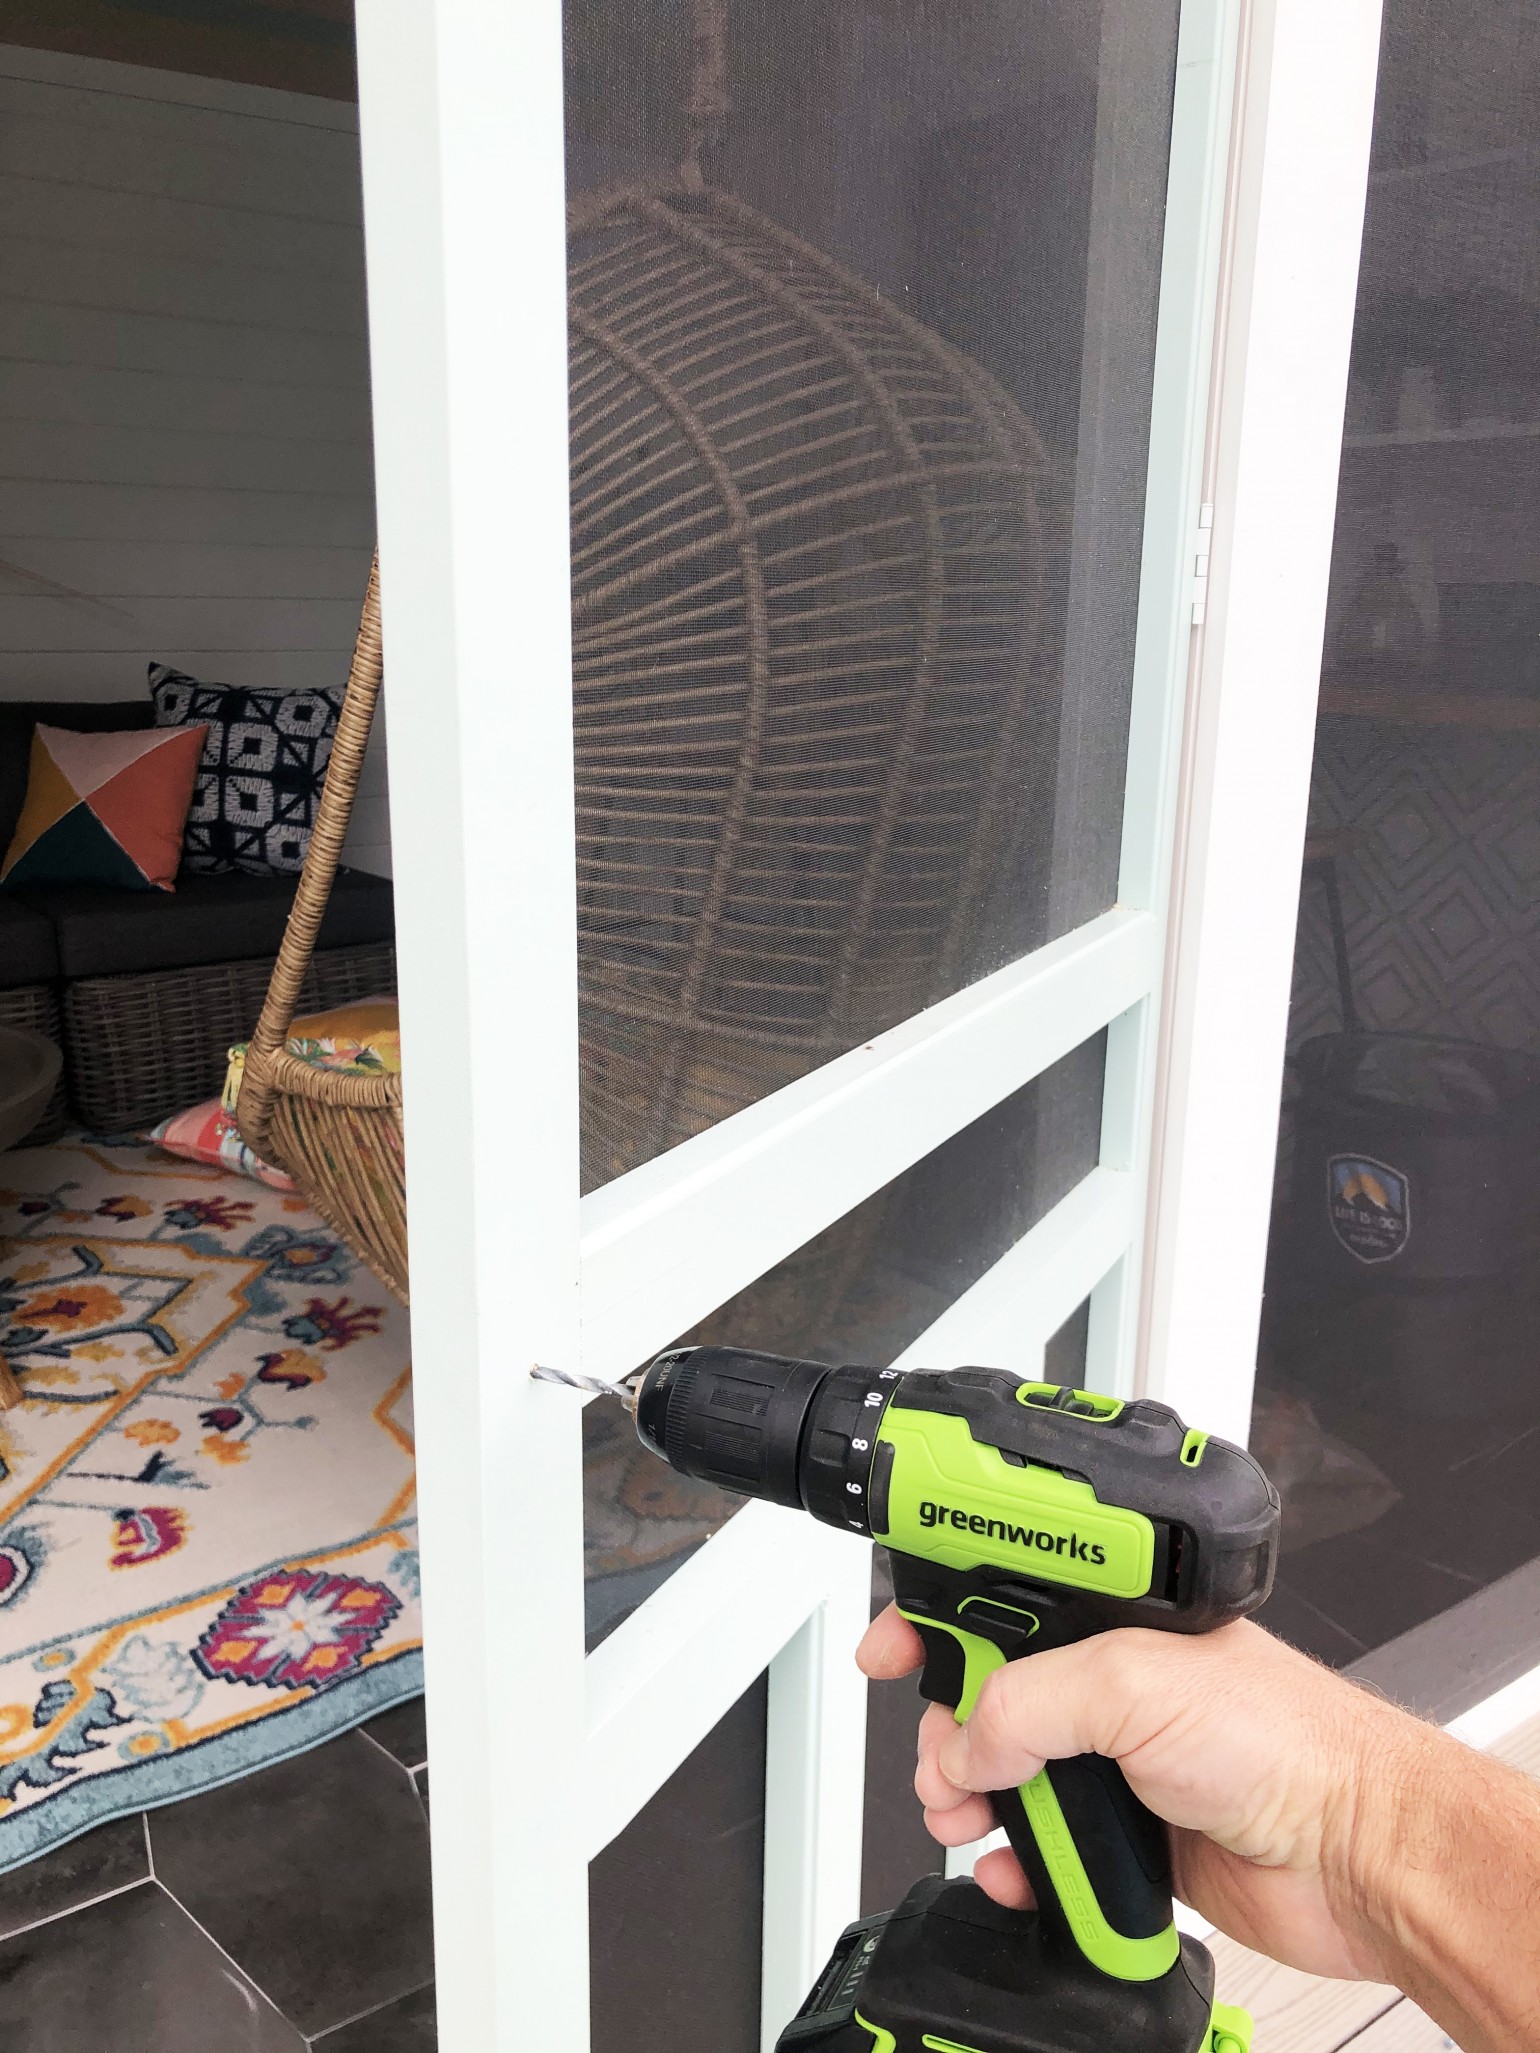
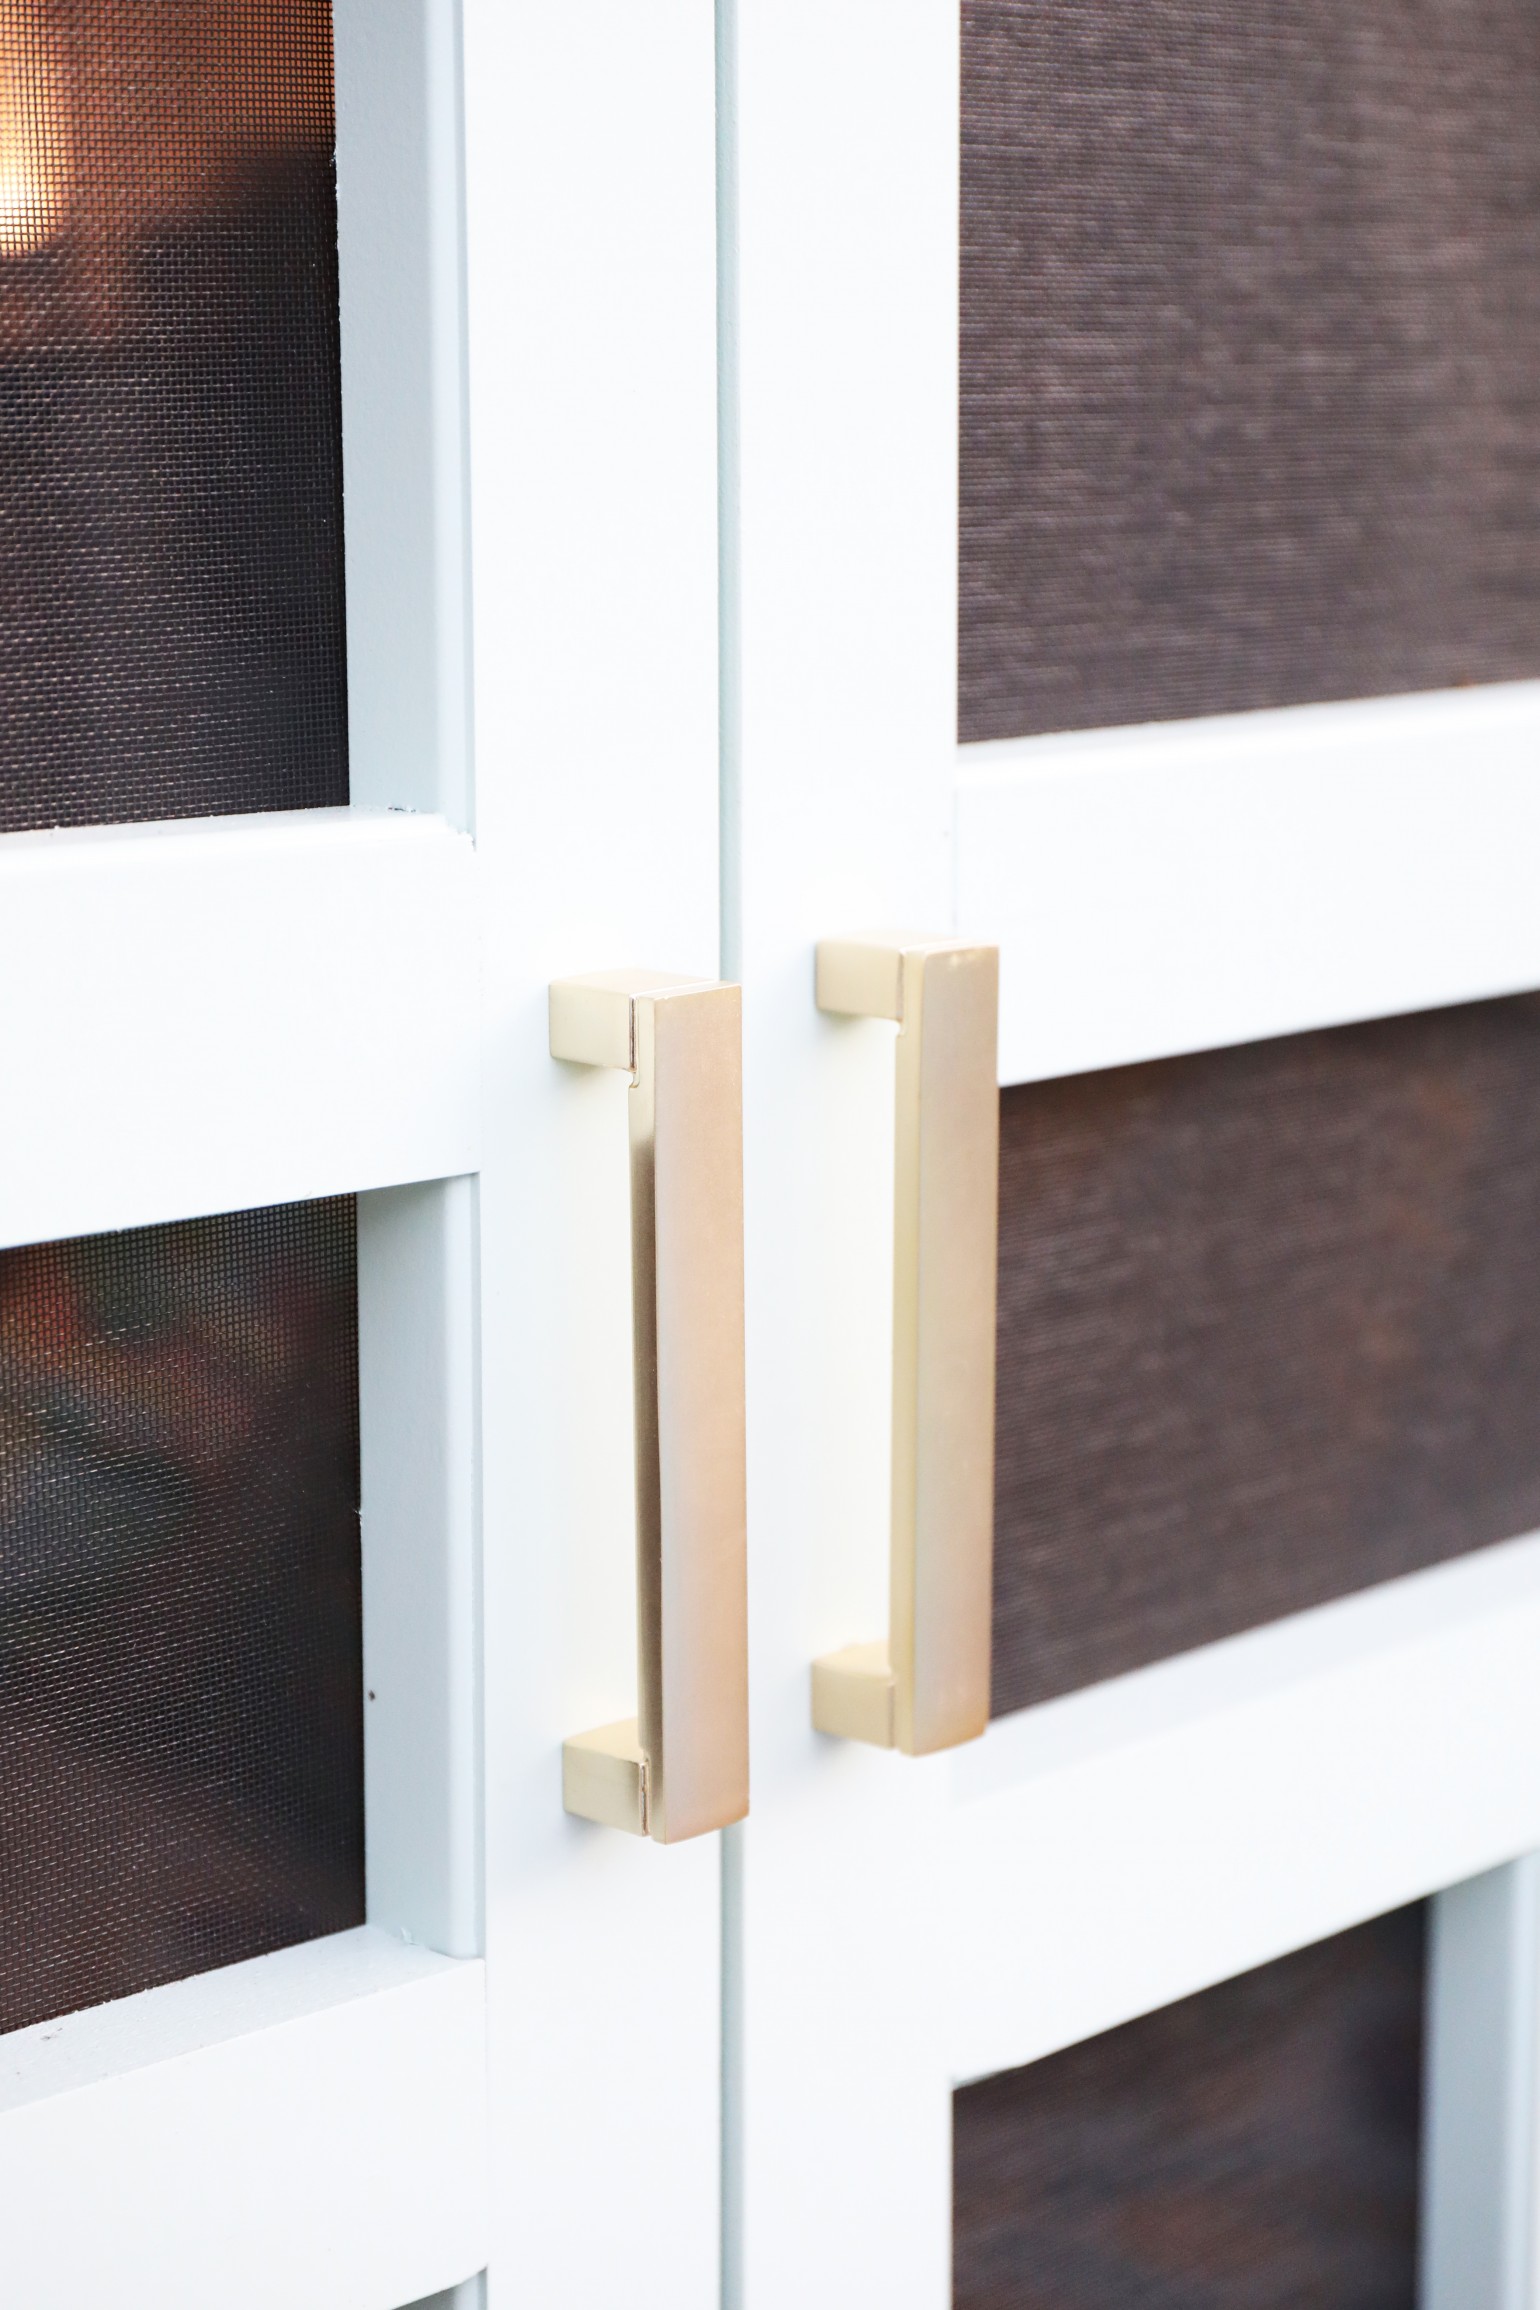
We bought a door from the local hardware store and then framed our opening for it. So if you’ve been following our dimensions, then you’ll be using a standard 32″ door that will simply need hinges and to be hung.
Helpful Hint: You can also add some weather stripping, to help keep the bugs out.
After the door was hung, we used our Greenworks drill to add some hardware to give it a nice, finished touch.
Once the door and screens are added we did any necessary touch-up painting, and moved the furniture in.
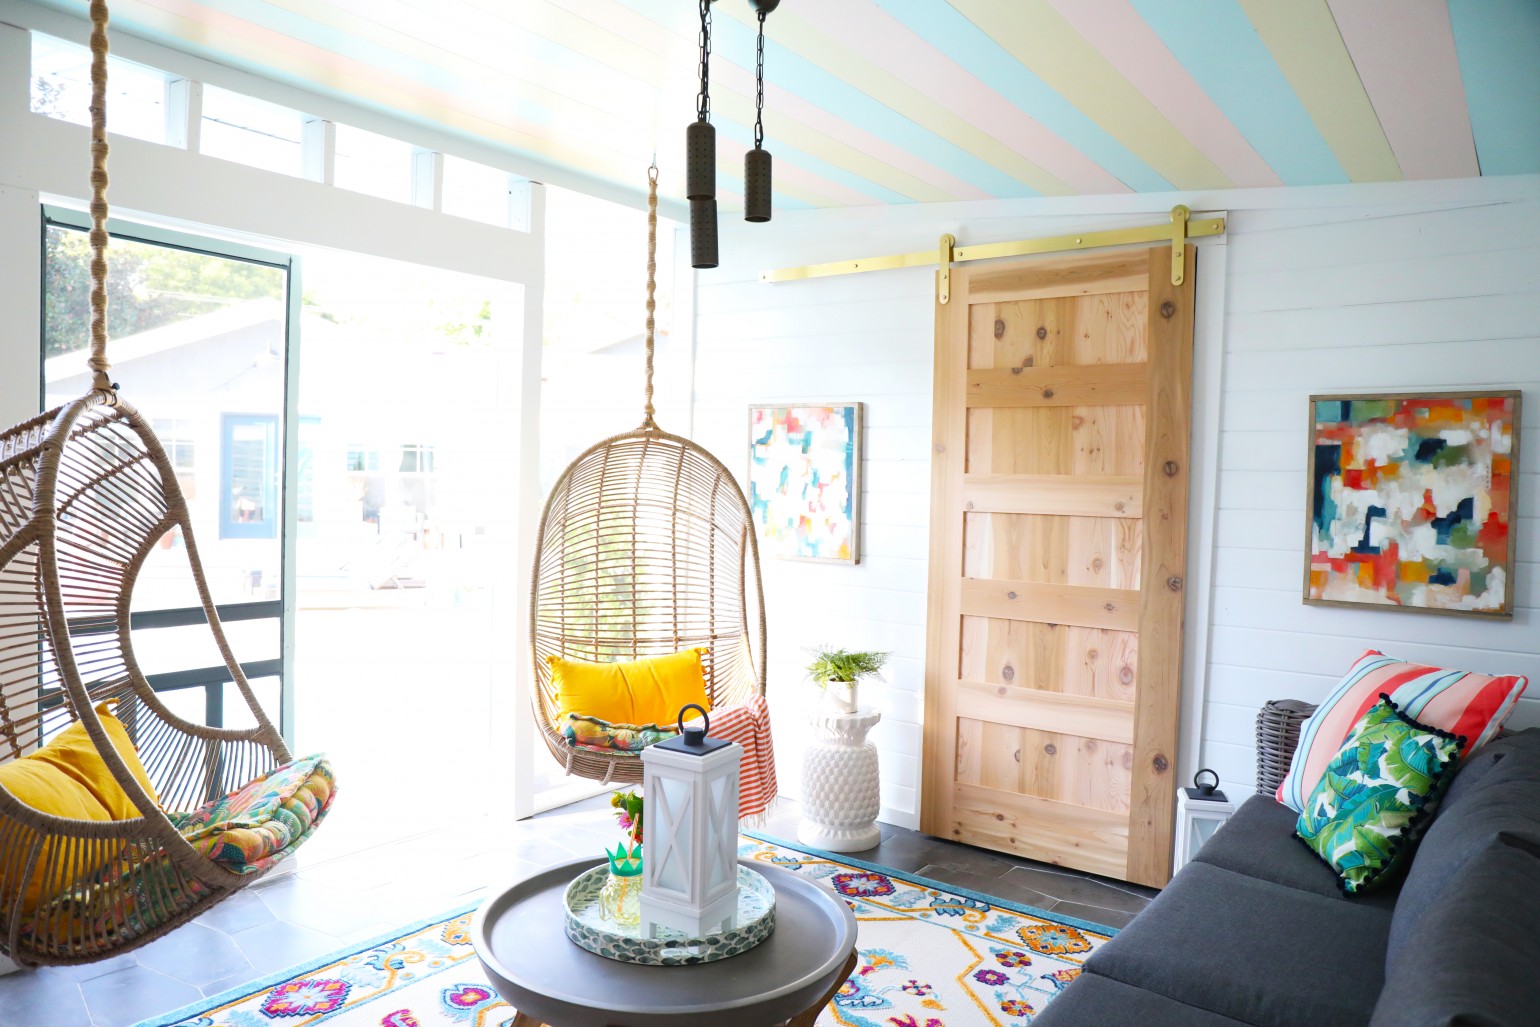
This included hanging our swings.
We used our Greenworks drill to drill a hole and then used an eye bolt to attach it to the ceiling rafters.
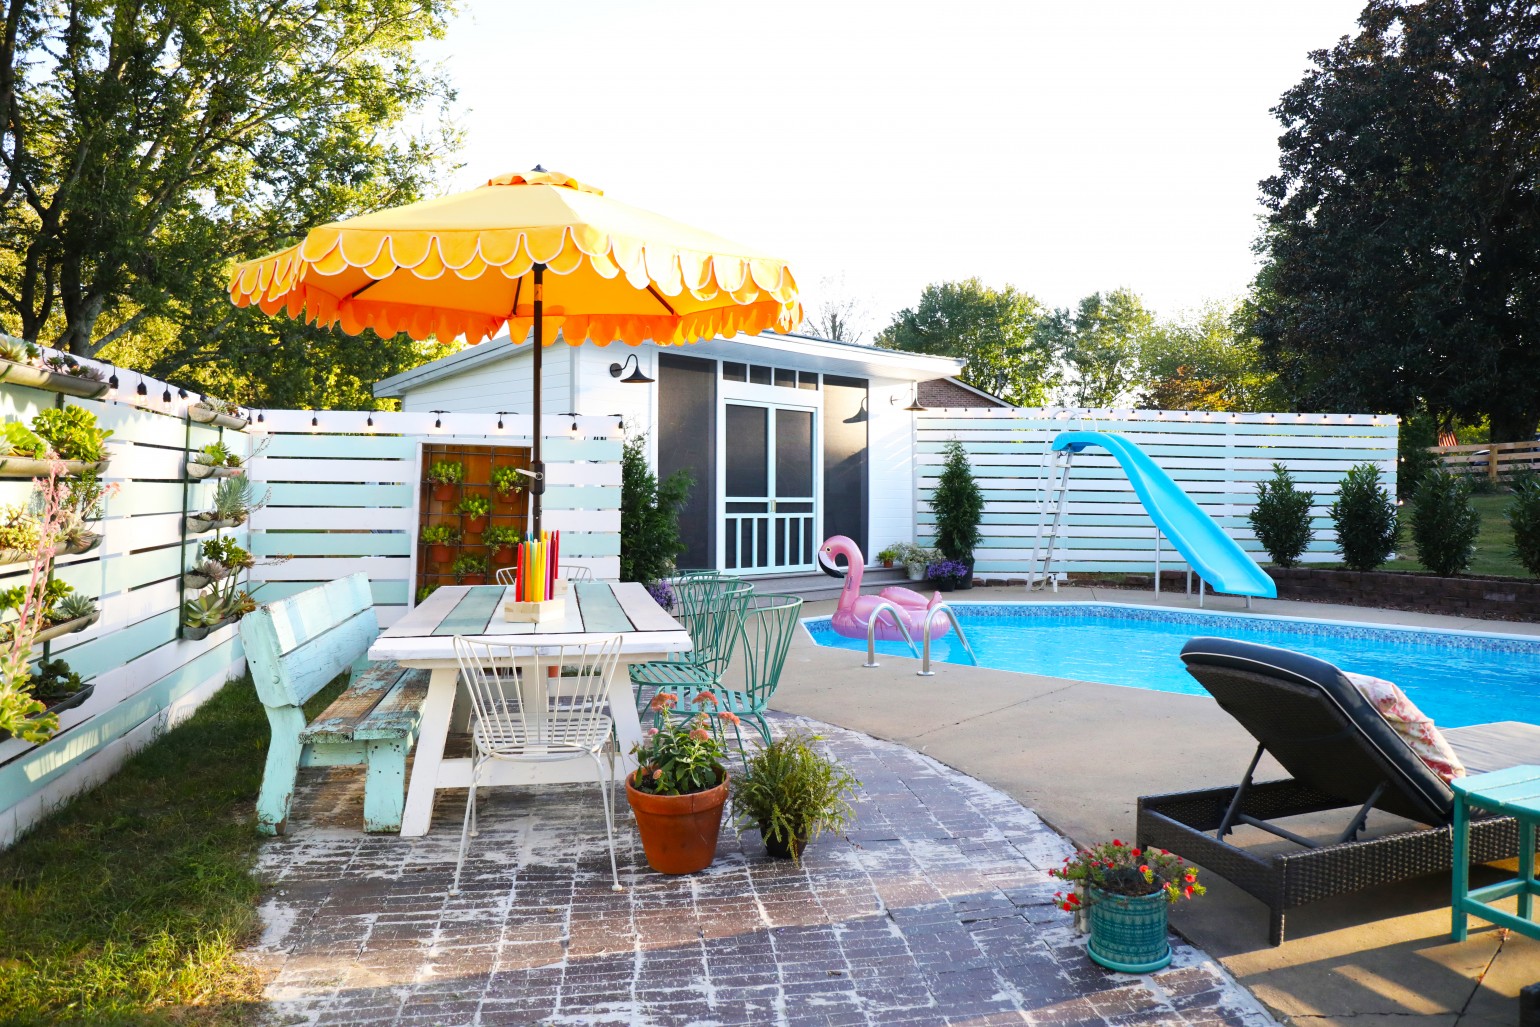
Thanks so much for tuning in on all things cabana building. If you’re planning to take on some of your own this spring, we wish you all the best and can’t wait to see!
It’s amazing how much larger it makes our home feel, when we’re able to enjoy this outdoor space.
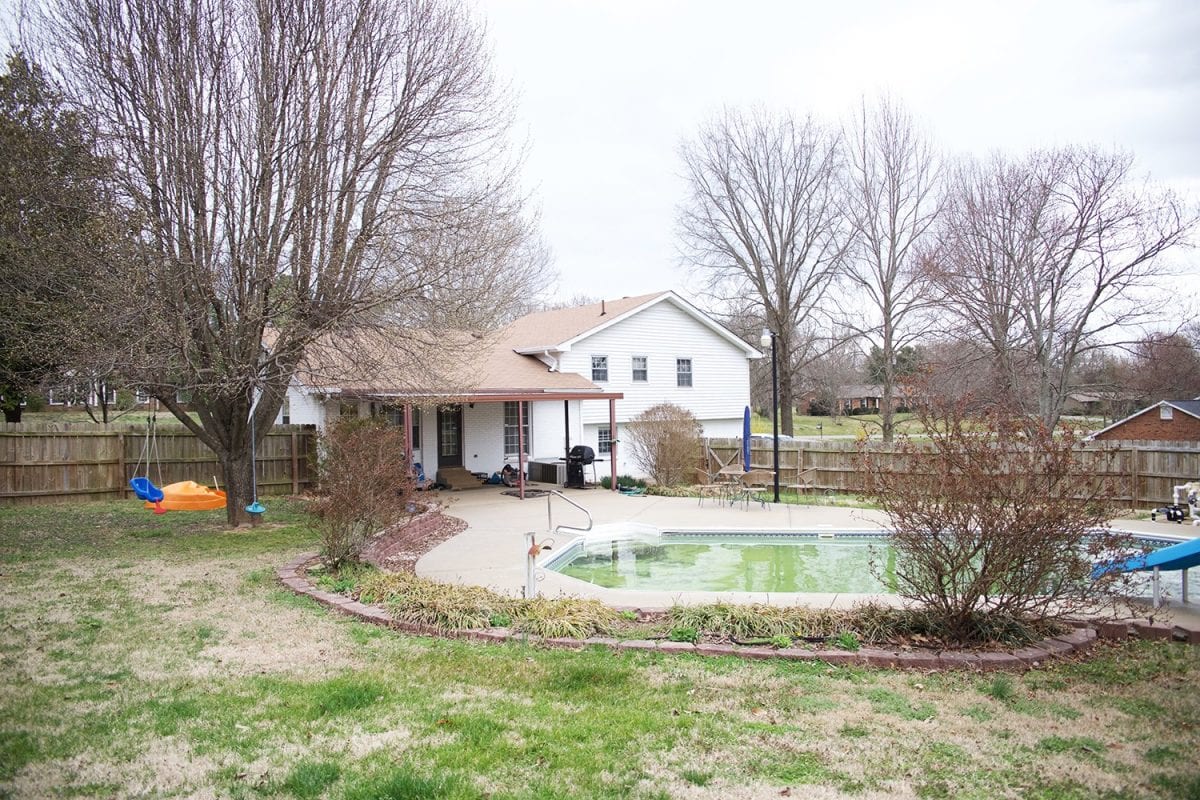
It’s made such a huge difference in our own yard. And it’s still hard to believe that we took it from this…
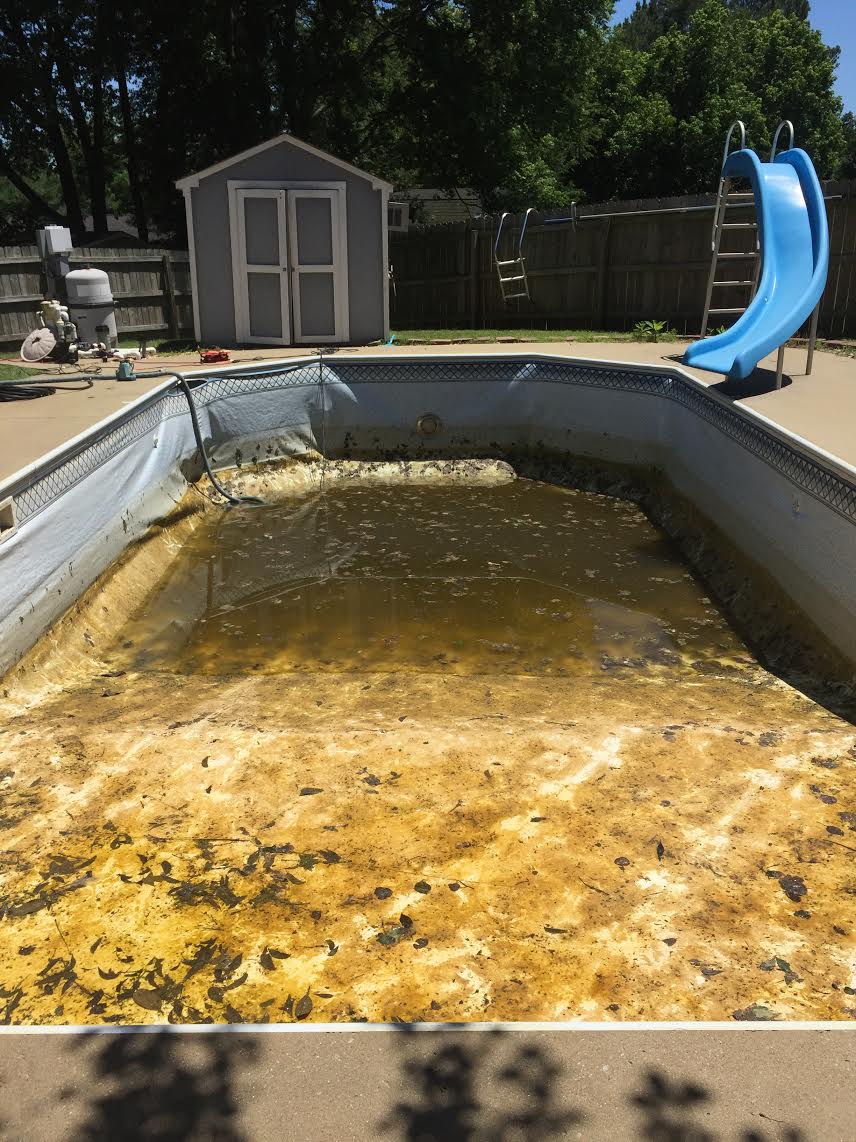
To this!
As always let us know if you have any questions or if we can shoot you in the right direction. And if you build it, you know we’d love to see!
Have an inspired day!


Silly question! Where do you keep the garbage and recycle for the cabana. Also, when in use, do you keep a cooler somewhere? This is so cool.
Not a silly question at all! We have a recycling and gardening center in our back yard – so everything eventually migrates there after we place things in stacks. We also have a collapsable trash can that we pull out when we have meals, entertain, etc. It’s one of those basic camping ones that we use around the pool, too. I don’t like to leave it outside when we don’t need it because of ants. That way when it’s not in use, we just fold it back up. As far as the cooler, we have a mini fridge we keep outside, with cold drinks. So unless we just want ice, we don’t need a cooler. Otherwise we will haul out the cooler. ;}