We’ve had a blast sharing this living room redo, and all the how-tos with you guys. And several of you have asked how to make a magnetic chalkboard, when we revealed this room.
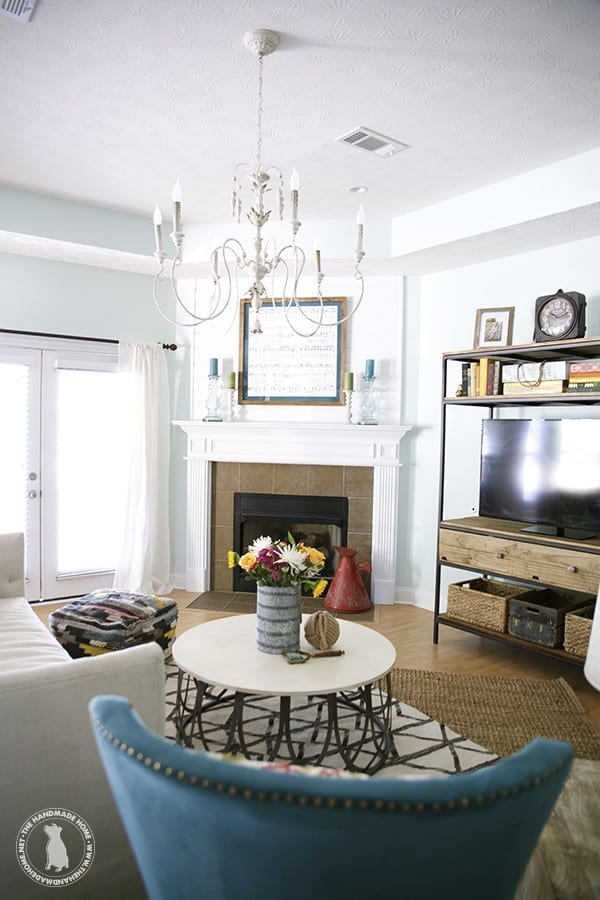
This tired living room was big on lightening and brightening and adding some great personality.
It was tough to pick a fave in this space. But our very favorite element to add, is meaningful, functional wall art.
And today, we wanted to share a little bit on how to make a magnetic chalkboard.
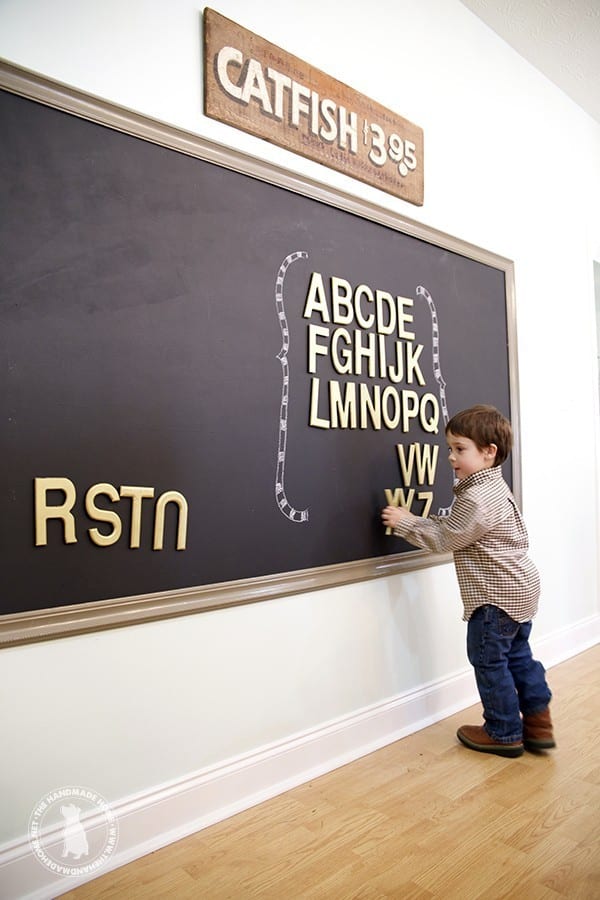
It was a big hit with the littles, and we love the way that it brought in something special just for them, along with an educational element to the space.
How to make a magnetic chalkboard – here’s how we did it:
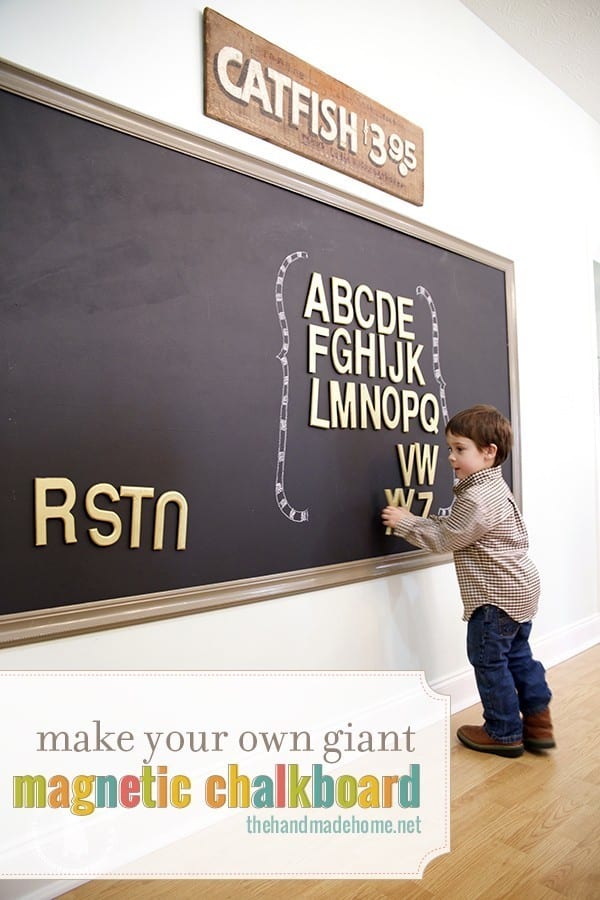
We originally started with MDF, {our final size was 4 x 8 for a large and in charge finished piece on their wall} magnetic primer, and chalkboard paint. We used the same treatment when we painted our refrigerator, and thought this would give it a good magnetic base to work with.
We used a roller, and after applying two coats of the primer, decided to give its strength a go before deciding 100% on what materials to use. We realized that we weren’t comfortable with the level of magnetic bond it was offering in the dried piece. This primer is great, but mainly when going over another magnetic surface to strengthen it. Not to turn a piece of wood wholly into something that attracts magnets. It would work fine with stronger magnets {of the neodymium variety} and I wasn’t comfortable using the super strong ones and young kids.
Obviously, they always need to be supervised with magnets, regardless. But we felt that option 2 was safer: Weaker magnets, {bonded with strong glue – more on that below} and a piece of metal, instead.
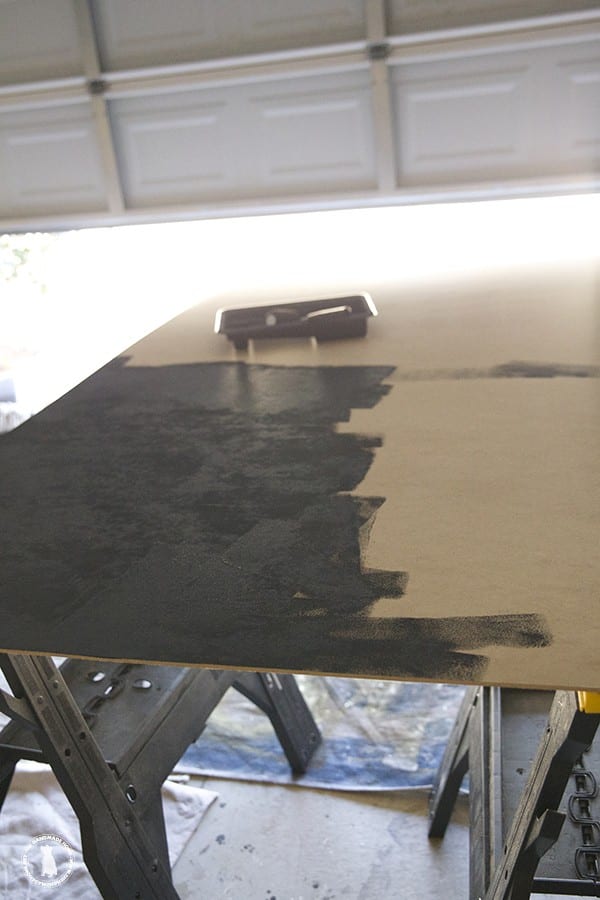
So after falling flat on our faces and deciding to oust the MDF for another day, we purchased a piece of 18 gauge 4 x 8 sheet metal at our local roofing supply company. {Also try metal supply companies to compare prices}. It made a great base. (You can add a coat of magnetic primer to help the chalkboard paint stick.) We covered it with chalkboard paint to give it a workable surface, and tada! A magnetic chalkboard was born.
How to make a magnetic chalkboard – the magnets
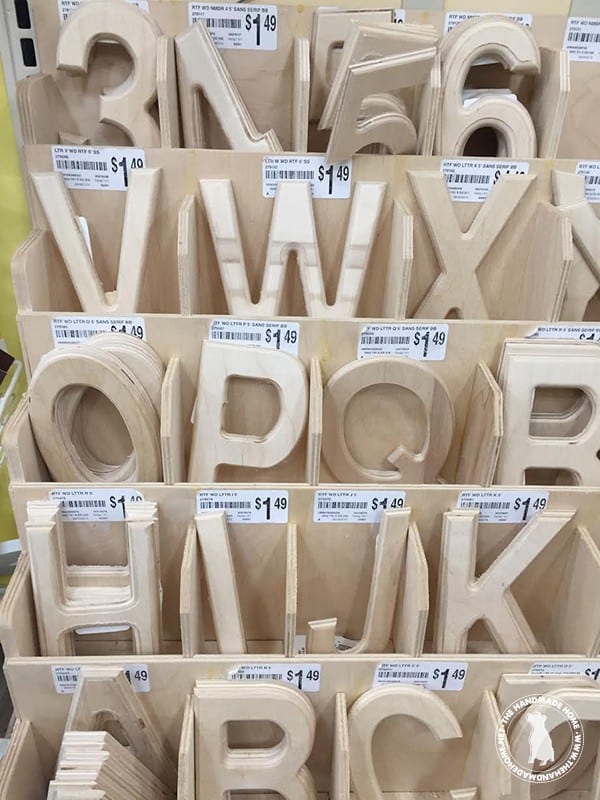
For the magnets, I knew we wanted something fun, large and in charge, so we purchased these 5 inch wooden letters from our local Michael’s.
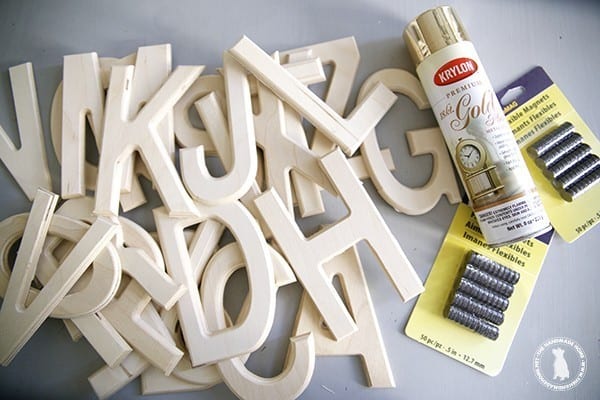
Using our favorite go-to for gold spray paints {Krylon 18 K gold} we made a little spray booth from an old box, and gave each one a quick coat.
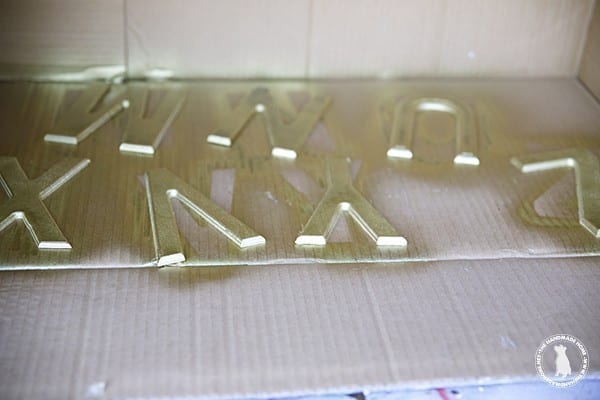
Then we bonded the magnets to the back with some heavy duty wood glue {We used Gorilla brand} and when they were dry, they were ready to go.
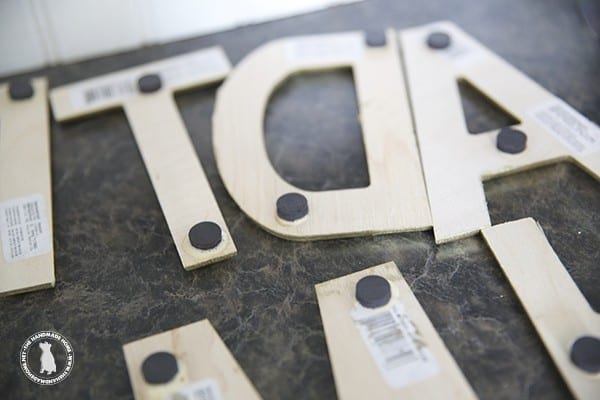
These giant, simple letter magnets make a great way to learn the alphabet!
How to make a magnetic chalkboard – mounting
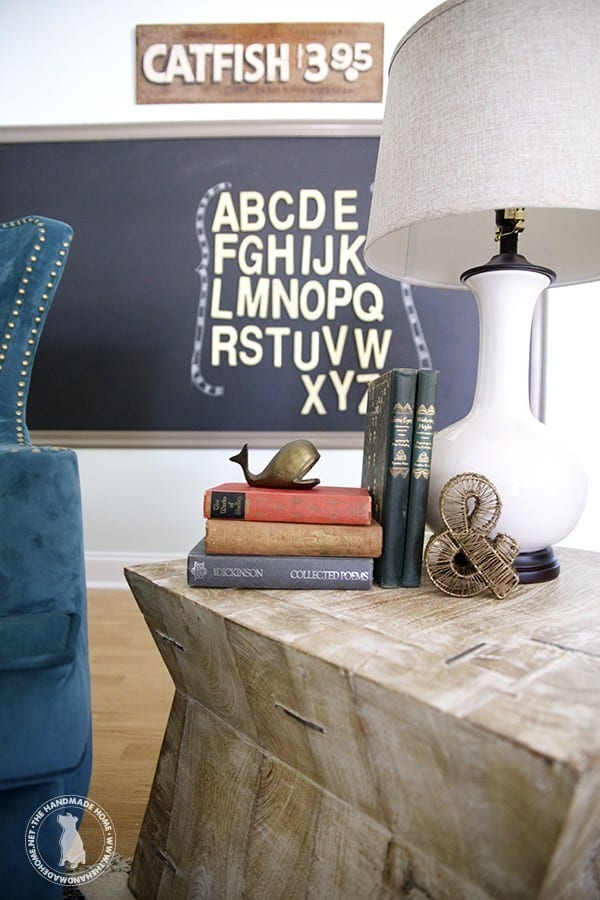
Then we mounted the metal to the wall by drilling right through for an extra safe installment. (We suggest drilling it into studs in your wall.) Then take some basic wall trim, cut it at 45 degree angles to make a simple frame. We added it to the wall on top of the chalkboard, covering the screws, with a strip of liquid nails glue and a few daps of hot glue for an immediate hold.
Painted with a nice coat of grey, the entire piece came together for a lot of great character on their walls!
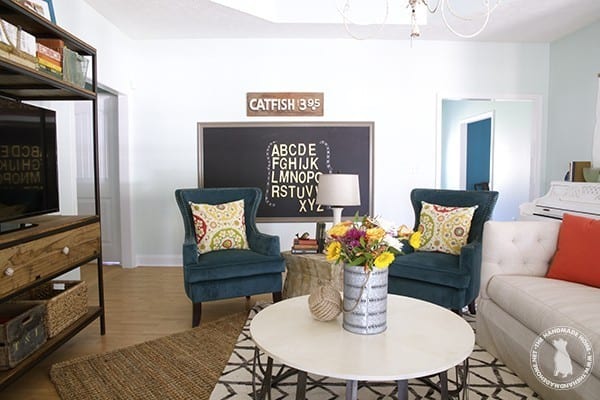
They now use this wall for some learning sessions with their littles.
I’d love to see what awesome combinations people can use for fun educational spaces like this!
To see more of the details, and the before and afters, be sure to check out our original post!
And as always, if you try it let us know. Have an inspired day!


We built a giant magnetic board for our kitchen last year. I wish we had just screwed the sheet metal to the wall instead of gluing it to mdf first. It’s awesome for displaying works of art and keeping lists! Love the chalkboard version you did!
Adore this! Thank you so much for the how to!
What a great idea! LOVE it! Thanks for sharing Ü