Hey guys! We hope this Monday finds you ready to hit the ground running and that you had a fabulous weekend.
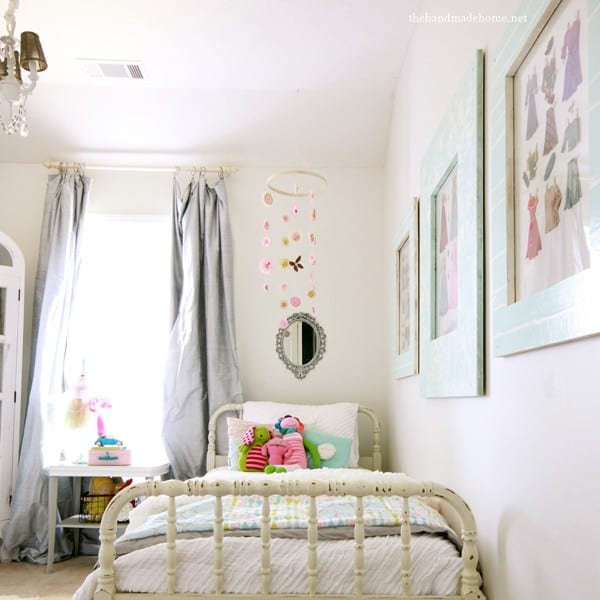
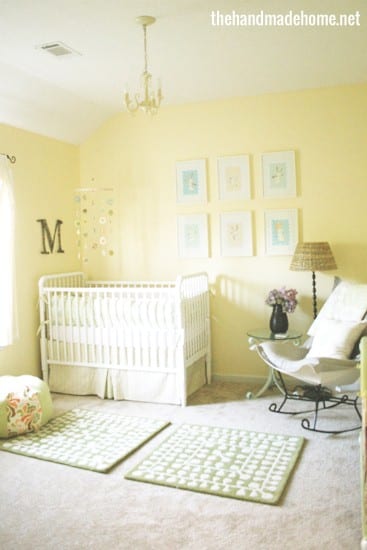
I had a few messages recently from a few of you asking how I made our mobiles in our home. You may have spied them in a few of the spaces I’ve featured and in my own children’s rooms.

I even had a few tutorials on different versions over the last few years, and thought that today was a great day for a round up/reminder/revamp kinda post on the topic. Mobiles can get expensive, and sometimes their options are limited. These are one of a kind, and make for a fun trick to have in your back pocket, when it comes to all things babies and children’s rooms.
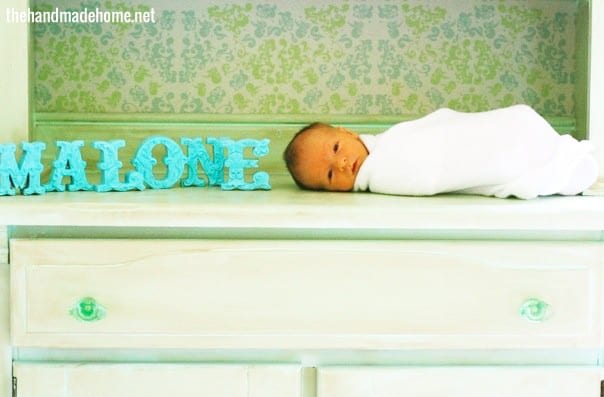
Malone, our youngest, is now three. {3.75, if we’re getting technical} but my point is, don’t blink. This may surprise you, but… wait for it… (and insert sarcasm here) I was a big time nester while waiting for my little ones to grow and arrive, and those are some memories I will never forget with each pregnancy. But one of my very favorite projects I made for each child, was a handmade mobile.
And I loved them so much, that I even made a few for some friends. They were quite detailed, but I think that was part of what made them so special. That idea of something fun I could create.
It kept my hands busy and my body still in times when I needed to rest but my mind was freaking out. So if you’re expecting, know someone who is, doing a child’s room, or even just want one for yourself (I totally would} It’s something special you can create. And today, I thought I’d recap on a little how to.

Here’s what you’ll need: (and you can alter this in any way you like, of course)
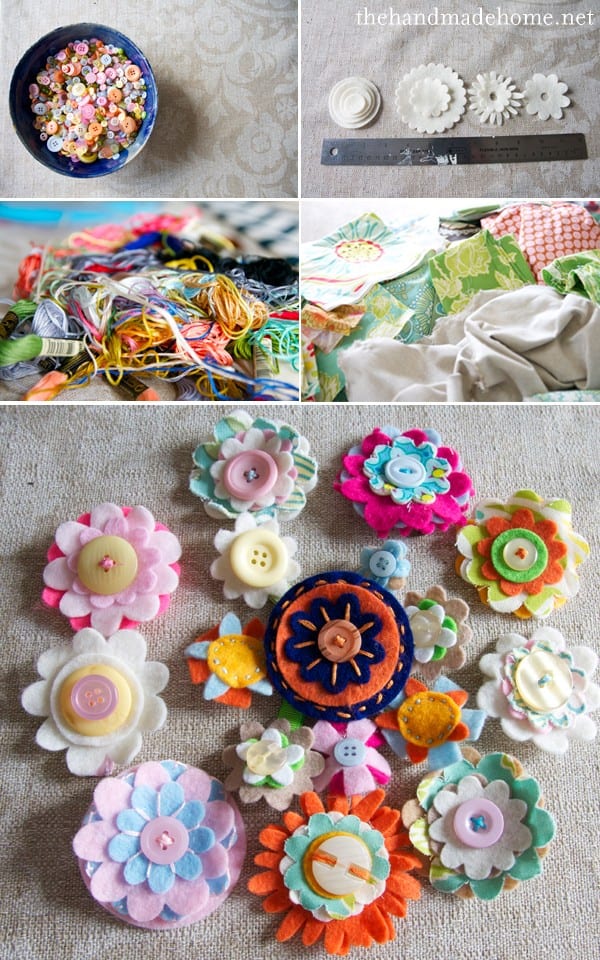
• a selection of buttons. {You can grab up a fun assorted colorful pack at your local craft store}
• felt colors of your choice (I choose cream, and mix it up from there)
• scissors
• embroidery thread in different colors & needle {I use the embroidery needle (the bigger kind=easier to thread)
• fabrics with various patterns (whichever color theme you decide upon, this is the main way I bring in color) I recommend ordering a heap of fabric scraps from etsy. This keeps it super colorful and affordable.
• a thread or baker’s twine slightly heavier than the embroidery you’ll be working with (almost yarn-like, but more silky) from where your mobile will hang
• glue gun
• a wooden embroidery hoop (take out the part on the inside-this will serve as your main circle-I usually choose one around 14-15 inches)
• If you decide to do pom poms (seen below) make sure to get varying colors of yarn for that, as well.
There are two options for cutting the fabric and felt :
a. You can make a basic template and hand cut from there
b. Or if you have a few kiddos and think you might make a few of these (these little die cuts make great hair bows, garlands, etc.-mine paid for itself after my first project) an easier way would be with a die cutter. I have a love affair with my Sizzix, and no, they didn’t pay me to say that. ;} (Helpful hint = ebay)
Shapes : {Here’s in inches, what you’re seeing in the photo above.}
Circles (2.5, 2. 1.5, 1) Scallops (3.5, 1.5) Floral (2.5, 1.5, 2.5)
You can make your own size, of course, I just thought the reference would help in the layering process.
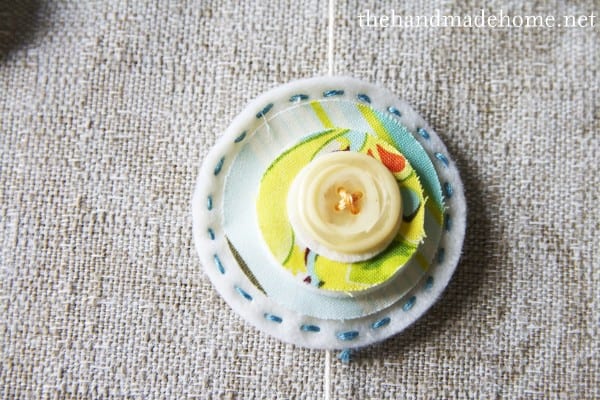
This is a basic example of how all the shapes are layered. Cut your shapes, and when you think you have enough, lay them all out on the table (and the fun part) layer them. Alternate them. They look like decorative little cookies, all lined up and ready to go.
Then break out the embroidery thread, and get creative with the stitching.
Helpful hint: Don’t feel like to have to stitch each and every piece. I do the majority, because of the additional layer of interest it brings. This project is truly a labor of love, and it’s all about personal preference but this is the most time consuming part. They will be sandwiched together when you assemble the mobile, and if you plan ahead, you can layer them so that the embroidery shows through on both sides. (More on that below.)
For pom poms: In one version you see here, we included alternating versions of super fluffy fun pom poms.
Begin by using a template {the top of a coffee mug, a small bowl, etc.} to create your circle on a piece of cardboard. This is how large your pom pom will be. Create an inner circle, and cut both out. Repeat this step on another piece of cardboard. Enlarge your slit on one side, to the shape of a small ‘V’ for easier yarn management. Your two cardboard pieces will look like a C. Place them together.
Wrap your yarn all the way around the letter “C” you’ve now created. Sometimes I do it twice for extra fluffiness. Side note: the thicker your yarn, the fluffier your pom pom will be…I noticed a huge relationship in the thickness of my yarn vs. the fluffiness of the pom pom they created.
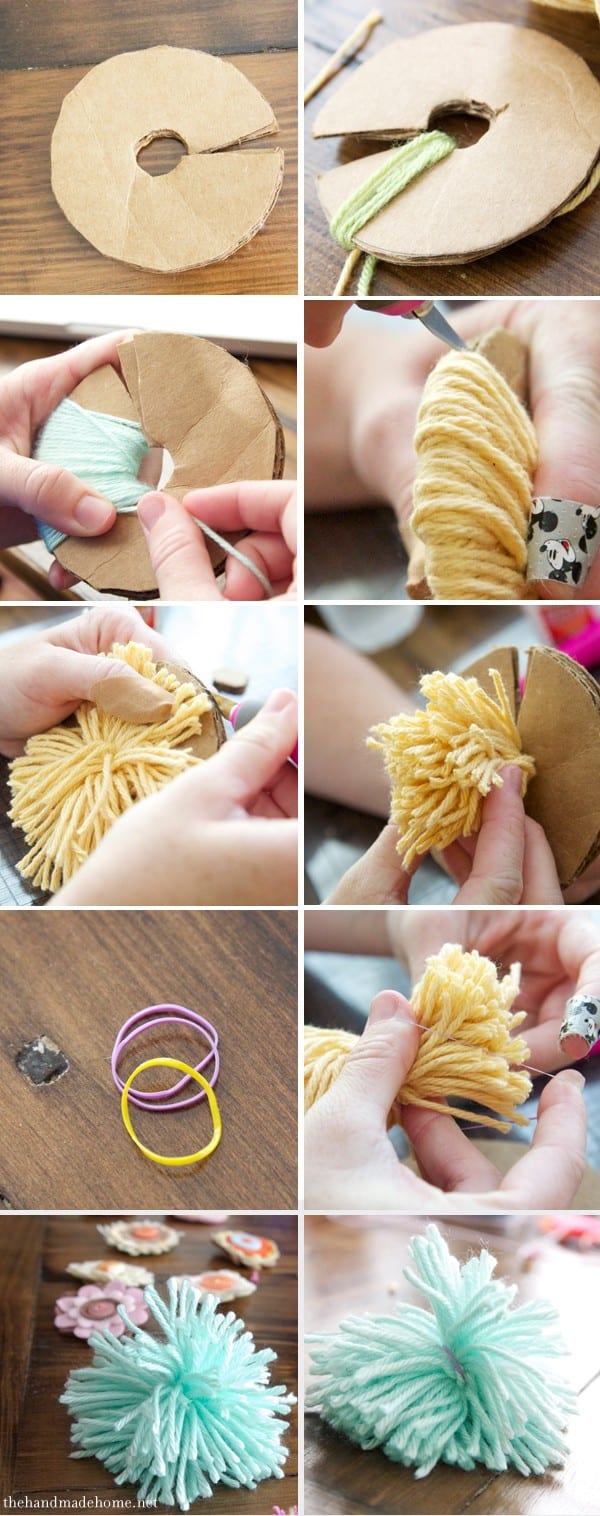
Once you have it wrapped, go back with scissors (or an xacto) and cut the yarn loose that wraps around the edges.
Once it’s free, pull it through the “v” of the “c” and secure it by either tying it, or with a small rubber hair tie. {You can totally score containers of these in the baby section of Walmart} I prefer the hair ties because they’re easier to control, and come in handy when I string the twine through the pom pom to put it on the mobile.
Tada! You have your pom poms.

I basically lay all of my pieces out, and eyeball them as I go, to see which pieces form a better pattern together. Small, big, small big, etc. along with the spacing. Each little piece is back to back with a dab of glue, and yarn through each one. If you didn’t embroider every piece {cheater’s alert} you can always group one with a large piece together with a smaller one so that the embroidery shows on the edge of both sides once it’s hanging. Just a little thought that makes a little more sense once you’ve laid them all out.
To join the mobile together : I make the center strand longer than the other four, then I make two shorter, and two longer, so that they hang symmetrically, and the pieces alternate in length once the mobile has been hung.
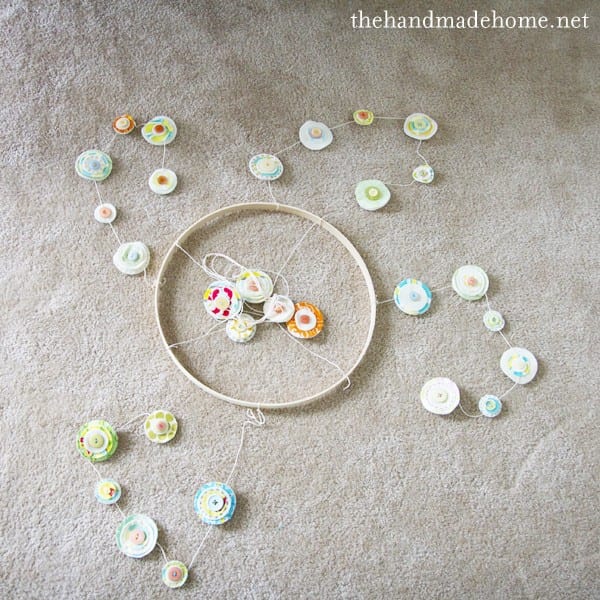
Once they’re joined to the string, tie each one to the embroidery hoop. Then join in the center, and hang them from the ceiling with a hook.
Adjust as needed.
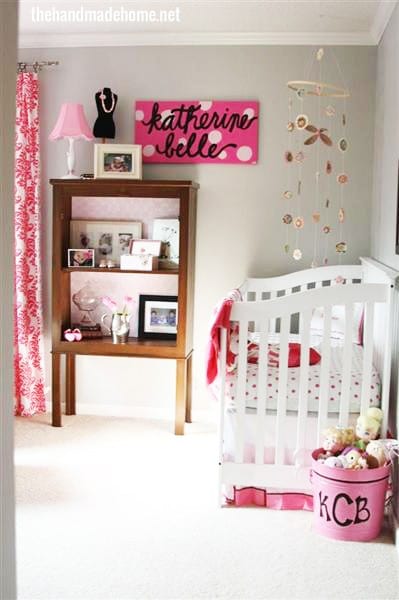
Tada! A super fun mobile – the crowning touch to any awesome cool nursery! Kids love it.

* Obligatory disclaimer: (because I have to say it) As always, please use common sense and caution. Never hang this mobile low enough for the baby to grasp, and be cautious of smaller pieces that can be choking items. Adjust in height as baby grows! It’s always good to be cautious.
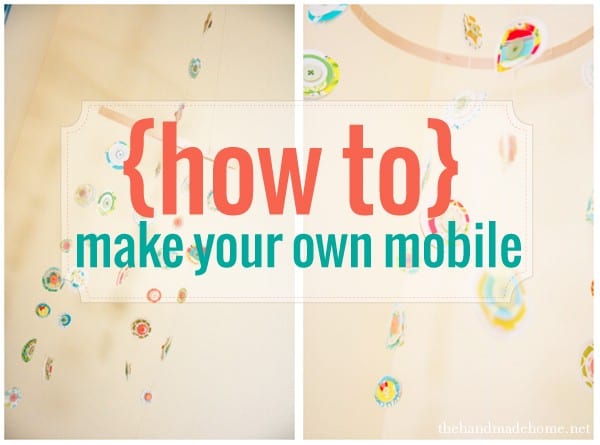
 I hope this helps clarify any questions you guys had, and kept it in one place. Happy mobile making! Have an inspired day, friends!


Love this! Especially all the bright colors, which I’m sure baby would really enjoying looking at. 🙂
Those are cute. I love mobiles.
Is it sad that I want to make one for my 5 year old? 🙂 I love these… Thanks for sharing 🙂
Hah! Is it sad I want to make one for myself? :-/
NOT at all. ;}
HA! No. Emerson’s is still hanging in her room. That’s why I love these so much… you don’t really out grow them! ;}
Love this! Totally going to make one for my wee boy to put above his cot. Thanks 🙂
I love this! It’s inspired me to make my own mobile for my 11 month old. How does this Sizzix machine work? Do you buy the machine and then shapes separately? Tell me more, please! 🙂
Thank you!
Hey Tiffany! It’s basically like a crank, that uses pressure, with blades that cut when you push it through. It’s hard to describe, but that’s the basics of it. You buy the machine and then the shapes, separately. I would definitely look on Ebay for some great deals! ;} I hope that helps.
I was looking for a mobile, something different for me (the Nana) and my granddaughter to put together. I just did her room over in teal, lime green, baby blue, royal blue & white and she just turned 13. Windchime, just something different. I enjoyed your ideas and how to make a mobile, thank you ever so much, this will be fun.!!!
Yay! I’d love to see how they turn out! ;}
How brilliant! Thanks for posting, I shall try to make one soon!
I love this mobile, it’s super sweet and charming. I am linking your page to my blog post because it’s so cute and well explained. Thank you!
i can’t wait to get started making the mobile for our first grandchild!! What string do you sue to hang it to the ceiling? How can you tie it to the cot?
Thanks for this useful site!!
Annina
Hey Annina – we used a little hook in the ceiling and tied it from some twine. I hope that helps!