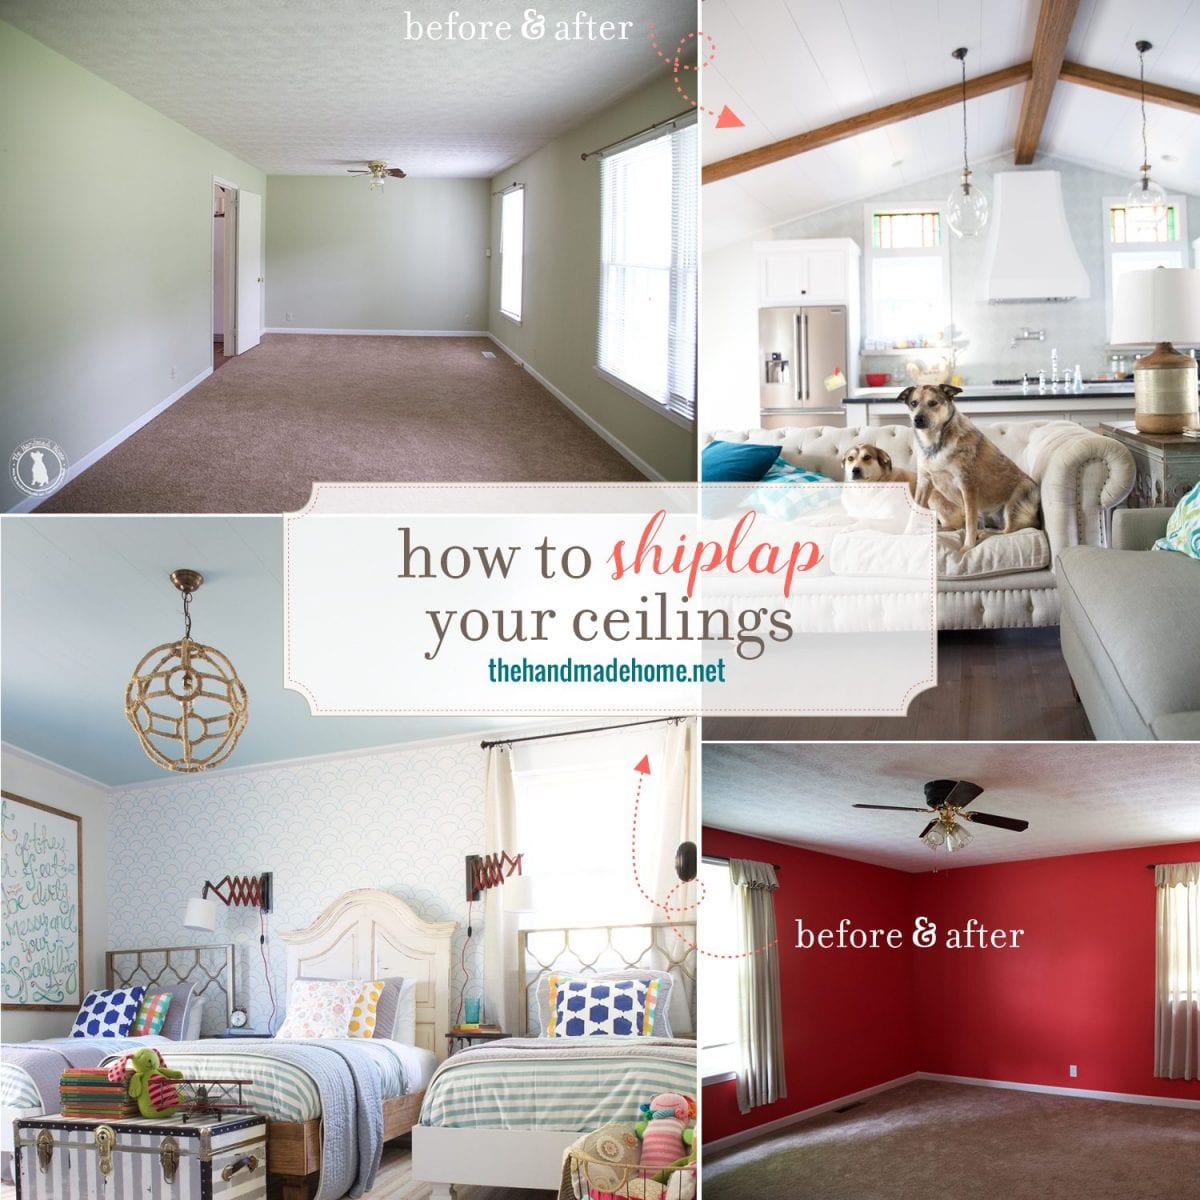
So you want to know how to shiplap your ceilings. Shiplapping your ceilings… in your entire house… when you have 1 kazillion other projects to tackle aaaall on a deadline so that your family can be settled because you’re driving 45 minutes to school every morning… is a lot like having a baby. Not that I really know anything about having a baby, but I did survive three pregnancies and never slept on the couch, so that counts for something right?
I deserve a medal or something.

how to shiplap your ceilings – Worth it.
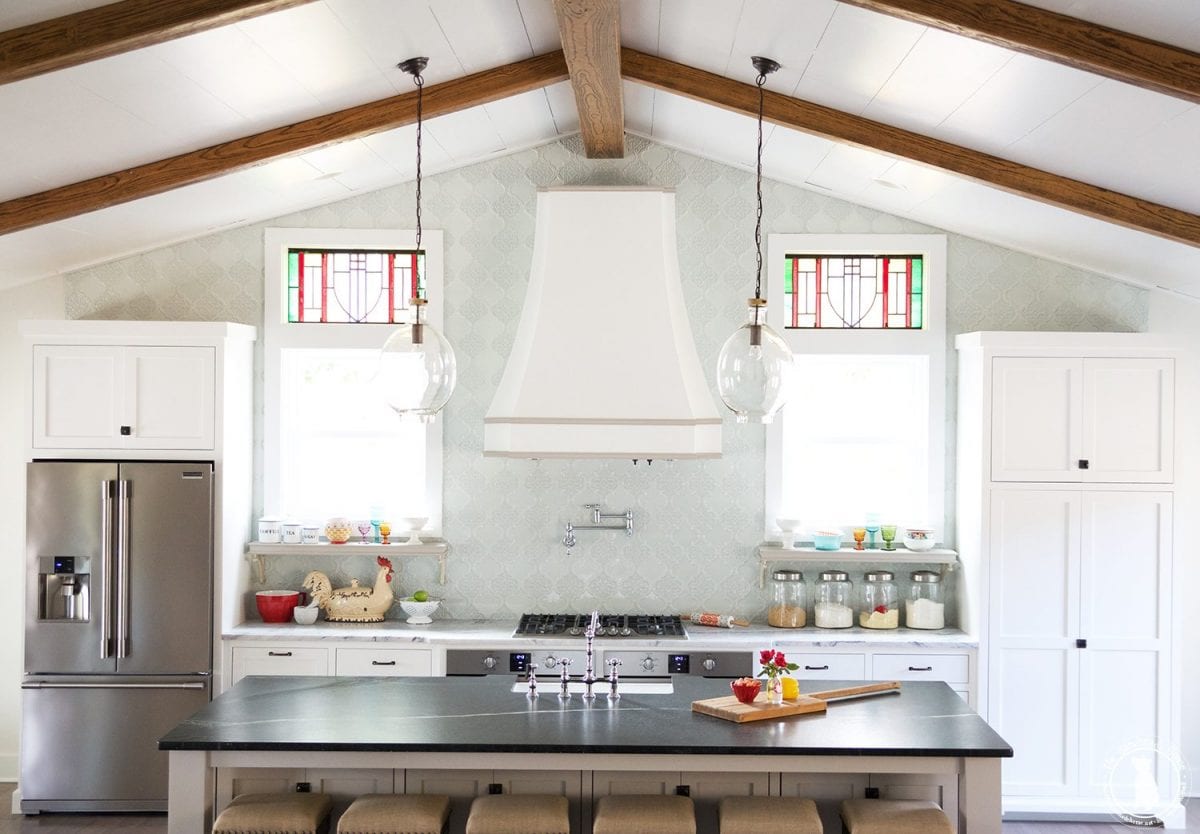
Right now, we sit back and enjoy the fruits of our labor. We wake up in the morning with the golden sunlight literally glistening through those stained glass windows. We pad around in bare feet and take a deep breath as we enjoy our coffee and the quiet morning moment. Then, we sigh to ourselves with things like “Isn’t it beautiful?” and “This was so worth it” and “This is everything we wanted it to be,” all while we gaze at our ceilings.
And the reality is… Oh how quickly we forget.
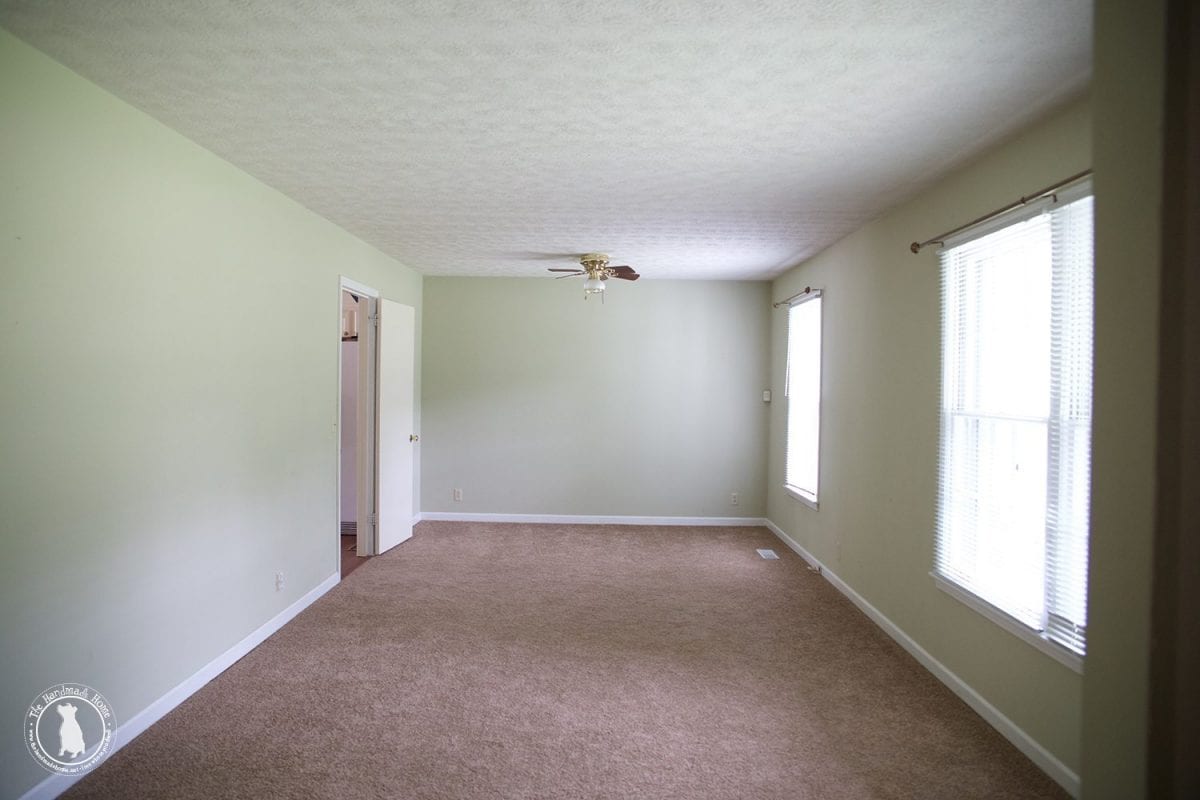
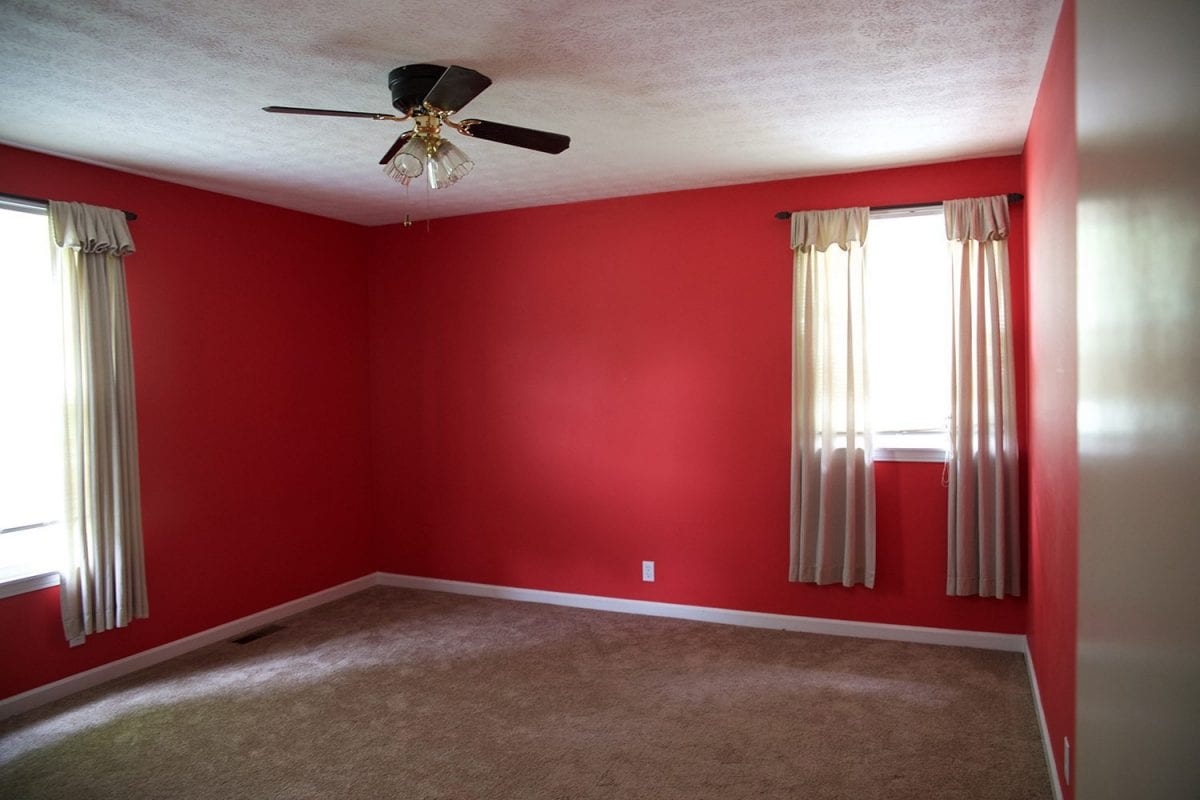
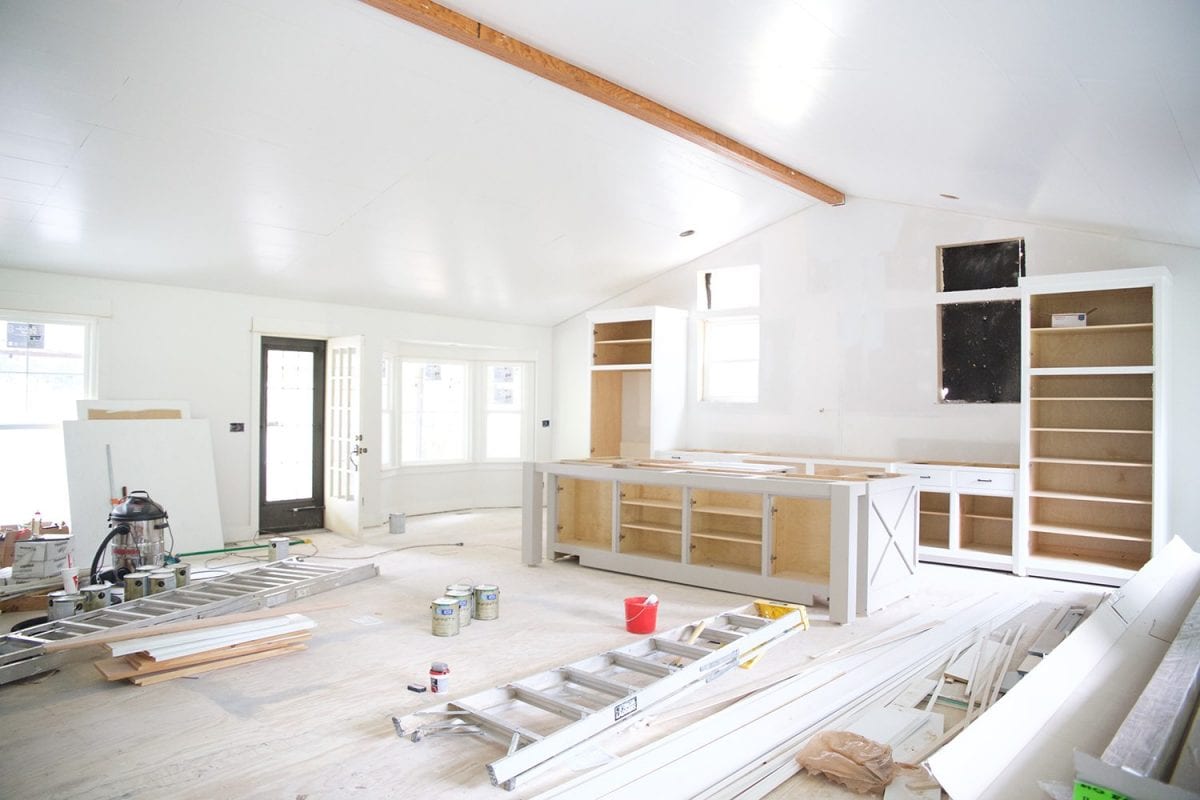
That just over 2 short months ago, when we started this not-so-little project… that we thought we were going to DIE.
Or one of us might die.
D. I. E.
Our calves were sore. Our deltoids were screaming. We said bad words under our breath and let’s be honest… out loud.
Sometimes in other languages.
Sometimes the more they echoed in other languages in the big empty house, {no worries, the kids weren’t around} the better we felt.
Because we were in labor.
This was a lot to take on at once.

And I needed like ten epidurals. Just enough to render me unconscious until it was all over. I’ve never had one, but I’ve had one of those leg block drug things when I fell through that ceramic stool and if they are anything like that… I digress.
On to how to shiplap your ceilings.
Because it’s not that bad.
If I’m painting a picture for you that doesn’t seem too wonderful, just remember that we tackled the entire house at once, then patched all of the holes. All of them. Then trimmed it out. Then painted it. Painted aaaaaalllllll the things. Then installed hardwoods.
Add in other things like running a business and taking care of a family… stuff normal people do… and we were done. We were signing off.
Hasta lasagna don’t get any on ya.
Also remember, we love a good flair for the dramatic, and it really wasn’t that bad.
Oh, And septic. Really it was all their fault: at this point, everything is.
We still say it was worth of it. All of it, in the end. Clearly, I think so now.

diy – how to shiplap your ceilings
So today we wanted to talk about how we tackled these ceilings… and two different types, at that.
We’re amazed at what a transformation it brought to the entire feel of our home, and if we had our way, yes… we would do it all over again.
So without further ado, how to shiplap your ceilings!
What you’ll need:
Planks and lots of them. We will talk how many below.
Glue (we used wood glue)
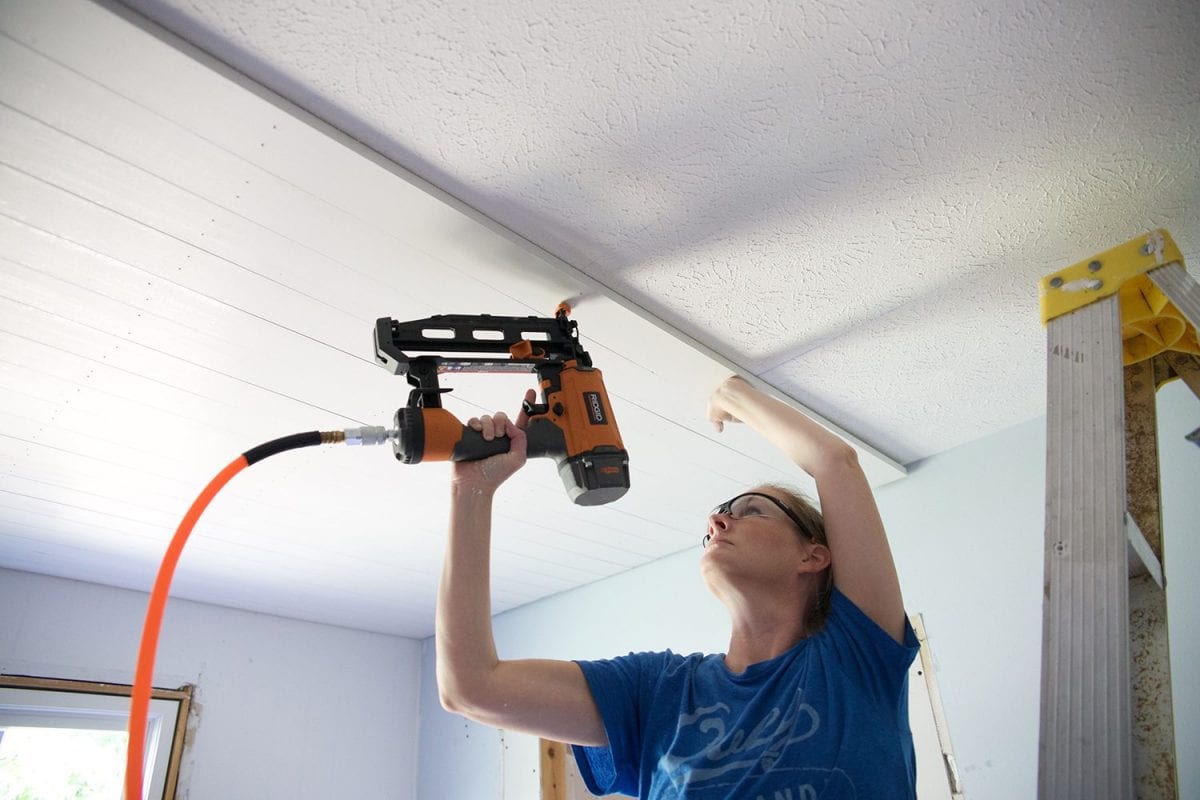
Nail gun (I recommend a 16 ga finish nailer using a compressor. My experience with that battery powered one’s is that they just don’t drive nails well.)
Nails: buy more than you think you’ll need and then one more box. (we used 16 ga nails)
Jig saw
Measuring tape and chalk line
Stud finder or common nail and hammer
Safety glasses
2 ladders, or step stools.
How to shiplap your ceilings – First step
The first step will be deciding how many planks {how much shiplap} do you need, and what material you want to use. Material choice can vary from tongue and groove board to common boards to MDF. Some people even opt to use beadboard – {which we at first considered, and then decided we wanted a different look}. You can even buy sheets of MDF and cut them down to the size strips you want.
Really, it all comes down to money: how much you want to spend, and are you staining, or painting?
If you’re staining, you’ll want to go with a pure wood like tongue and groove board or common board, but if you want to show off some color like we did with a beautiful blue on your ceilings (HGTV HOME by Sherwin-Williams Swimming (HGSW1327)) then MDF might be your best bet. We also didn’t want any breaks in our ceiling lines, so the shorter tongue and groove or common board didn’t work for us. You can get strips of MDF at 16 ft, which were long enough to allow us to make runs without breaks.
To figure out how much you need, simply measure the length and width of the room in inches.
Then, divide the board size into the width.
Our room was 13 feet and 4 inches, and our board size upstairs was 3 1/2 inches.
So I divided 3.5 into 160 which gave me 45.71. I know I need 46 rows of boards. The length of our room was 13 1/2 feet. Since I wanted complete runs this part was easy: my 16-foot boards would cover each run. So I would need 46 to cover the room, and I’d also want 4 extra boards for my trim.
If you plan on staggering the boards in your room, then you would want to multiply the length of the room times the number of rows divided by the length of your boards. So ours would have been 46 x 13.5 / 16 = 38.81 boards. With this method, I would need 39 boards and I would add an extra for waste, so 40 total.
Helpful hint: look into your local millworks at the lumberyard. You have more options in product, and typically better prices than what you will see at your local hardware store.
mark your rafters
Once you have your materials in hand, the first thing you’ll need to do is find mark your rafters. If you don’t nail into the rafters, your boards won’t hold. You’ll be nailing perpendicular to the rafters. So if you’re wanting your boards to run parallel to your rafters, you’ll need to consider furring out your ceiling first. (We will discuss that in a minute.)
You can either look for the rafters with a stud finder, or do it the old fashioned way and measure off a known rafter 16 inches to the next one.
I do recommend hammering in a test nail on each end of the rafter in the room, then running a chalk line from one nail to the other to create your lines. This is where you will nail the boards.
If you need to fur out the room to run your planks parallel to the rafters, simply nail in furring strips to the rafters in a perpendicular fashion about every 16 inches.

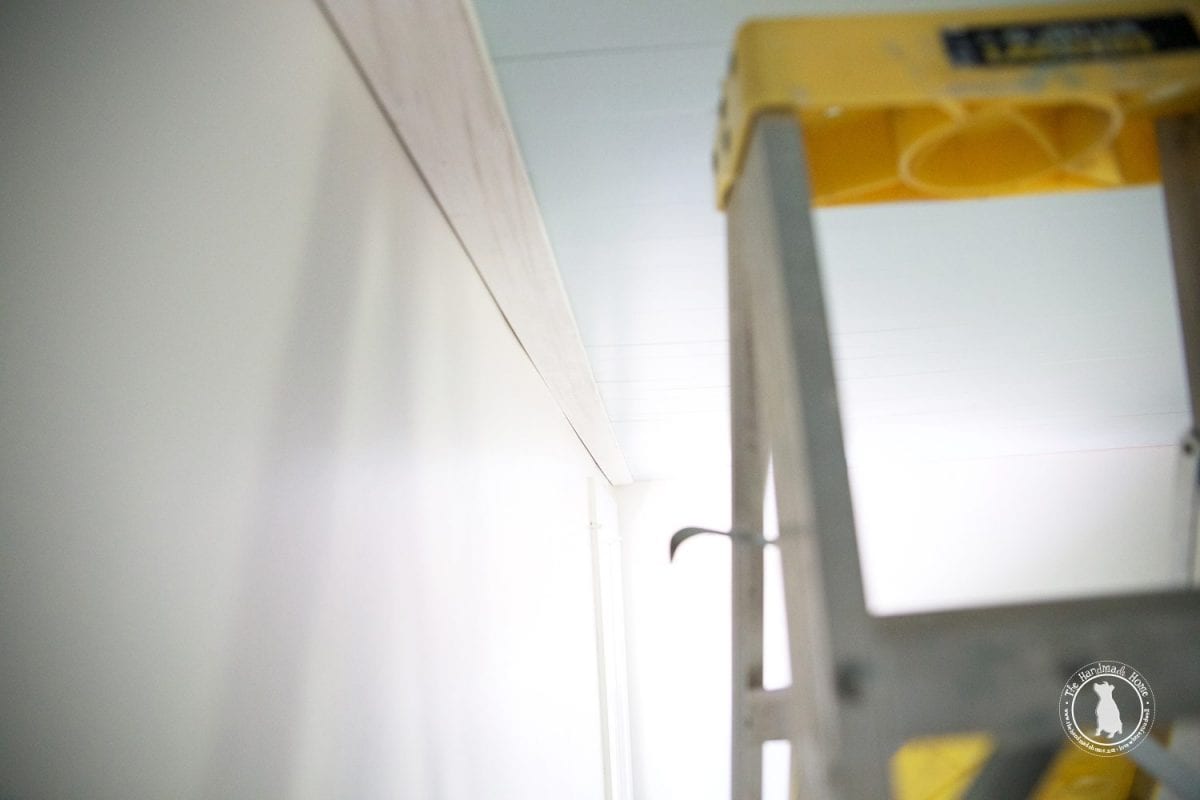
placing boards
Now you’re ready to start placing your boards.
First, you’ll measure and cut the boards. For us, that was one length of the room, which left us with some waste but we liked the look better. If you’re staggering the boards, either predetermine your lengths or cut as you go, but it’s better to make sure you start and stop a board on a rafter or furring strip.
If you aren’t using tongue and groove board you’ll also want to decide if you want a slight gap between the boards or if you want them butted together. For the upstairs, we butted ours together. I’ll explain how to get the perfect gap below.
Just like with hardwood flooring, placing your first board is the most important thing you will do.
You’ll want to measure both ends of the room from side to side to make sure they are the same distance or square. If not, you can correct this with expansion gaps.
Regardless if the room is square or not, you’ll want to have 1/8-1/4 inch between the wall and the first board. If the room is not square, you can correct it by making one expansion gap slightly larger. We simply used leftover boards to make our expansion gap pieces. You’ll place these cut pieces next to the wall you are starting on, with the pieces you cut between the wall and the board to hold your gap. You’ll want one at each end of the board.
Once you’re ready to hang the boards, run a couple strands of glue up and down the boards on the side that will attach to the ceiling.
Then begin driving nails into the boards on every rafter.

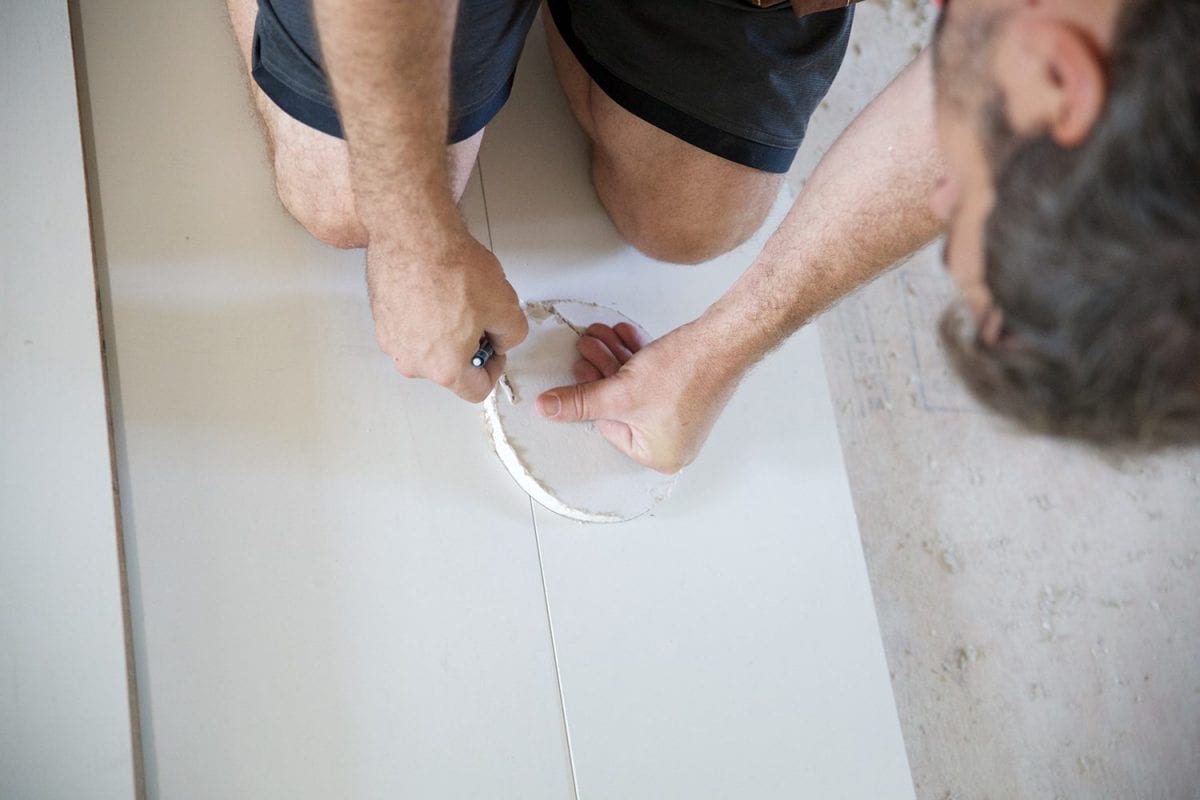
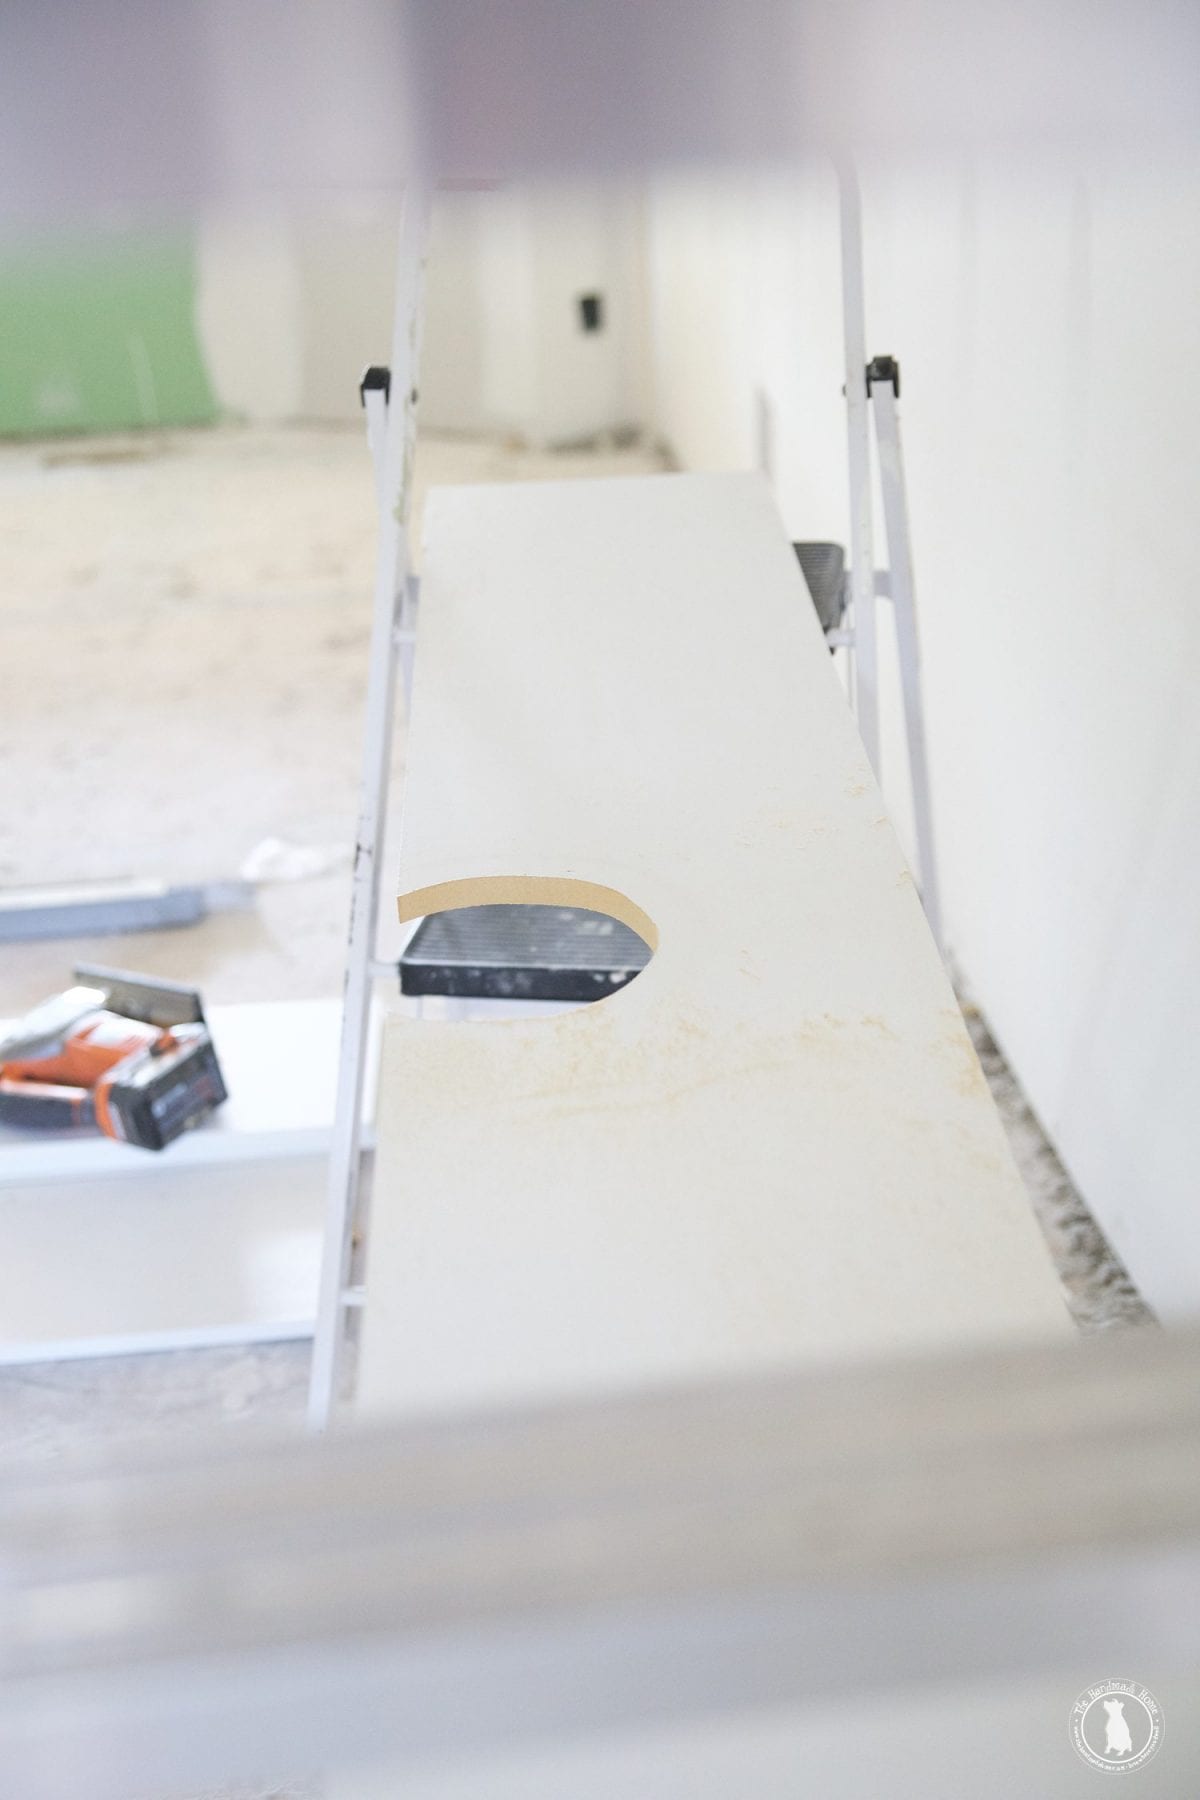
cut arounds
Keep working your way across the room, cutting around any ceiling light or other obstacles you encounter.
A jigsaw is great for this.

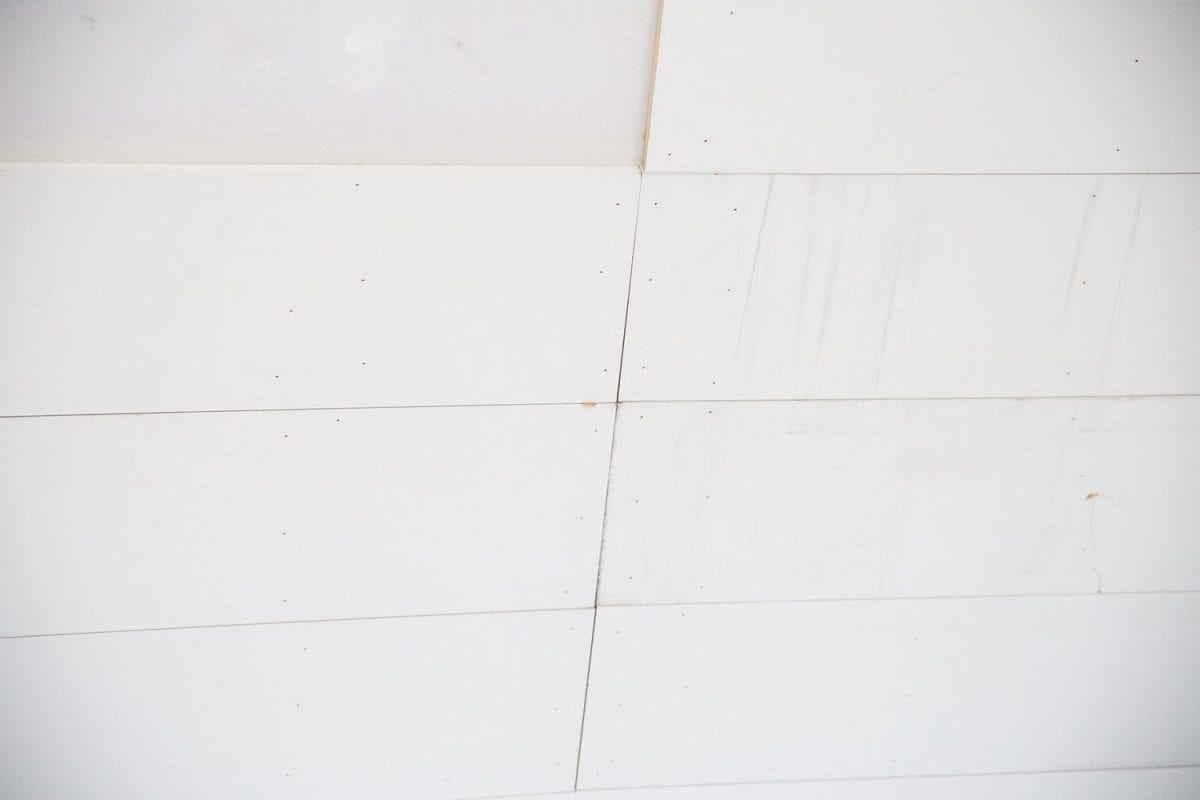
putty those holes
After all the planks are up, you’ll want to fill those nail holes. There are several products you can use but painter’s putty is by far our favorite and seems to work the best. {We tried everything from caulk to wood filler} We grabbed ours in the paint section while we were picking up our paint at Lowe’s.
paint
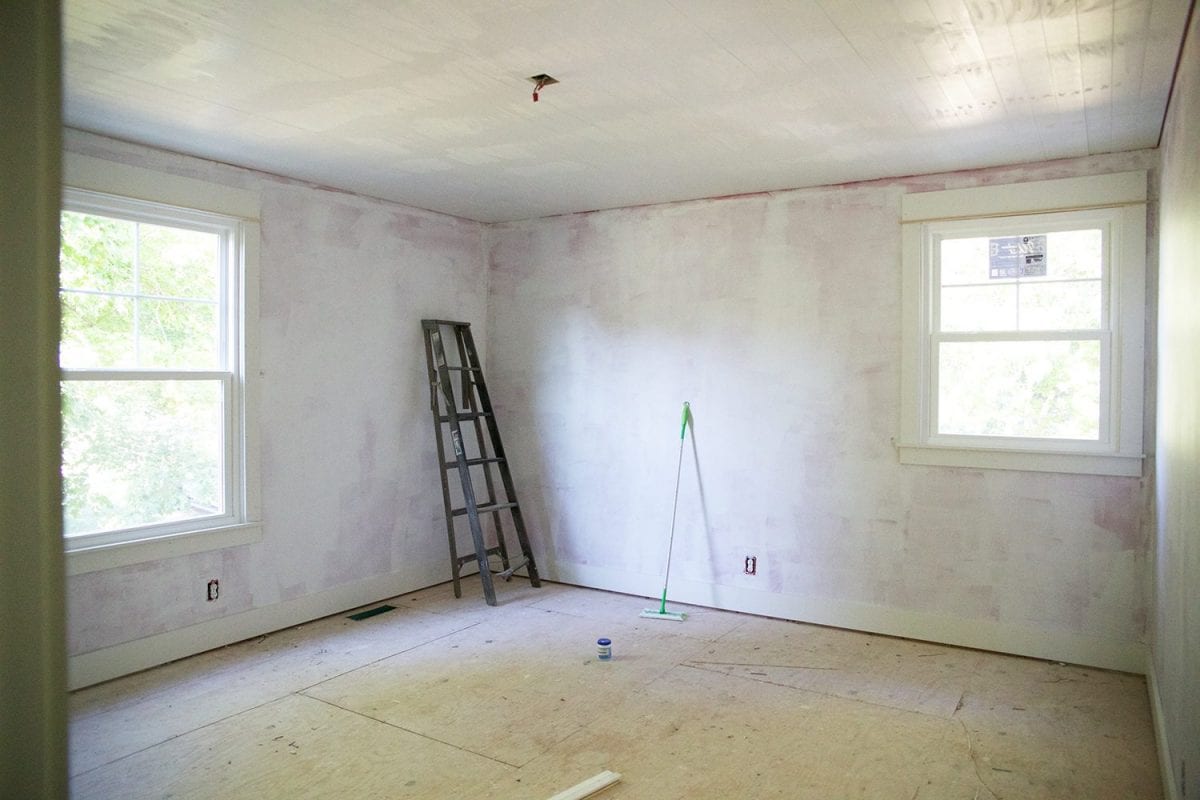
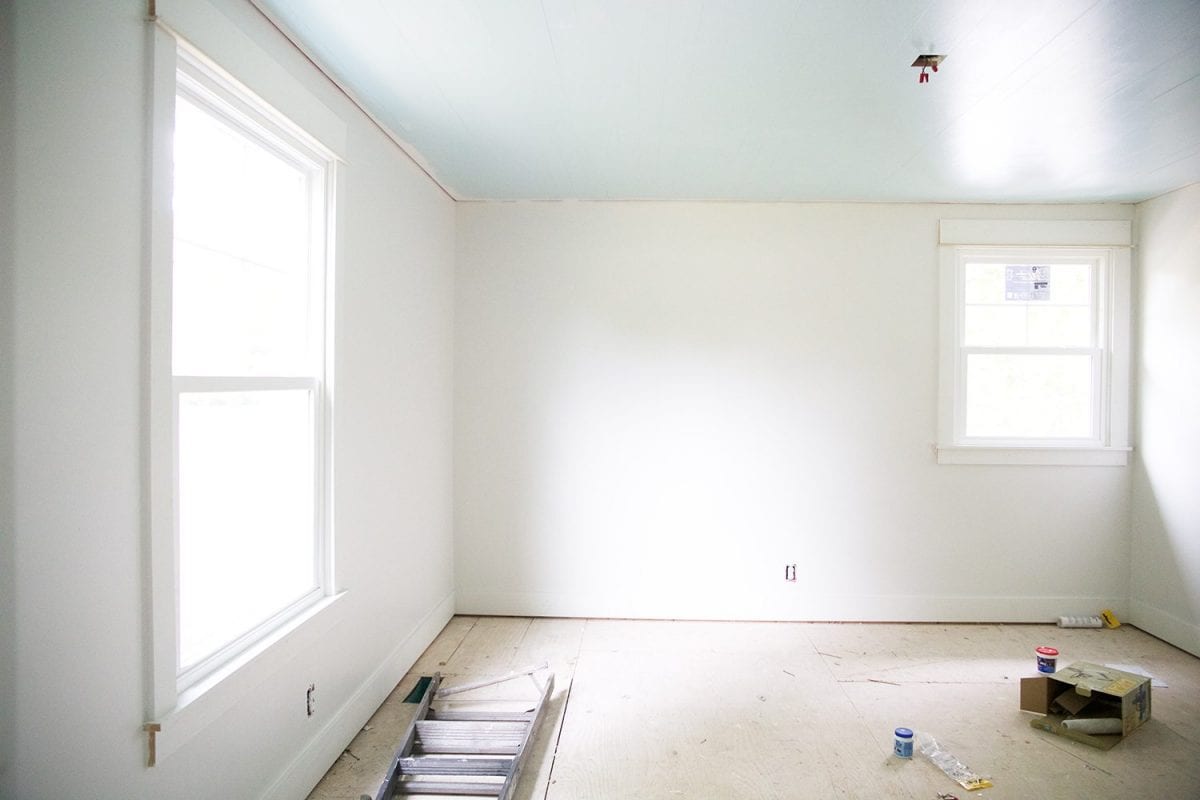
Once the room has had all the holes filled, you’re ready to paint. {Good bye red, hello blue.}
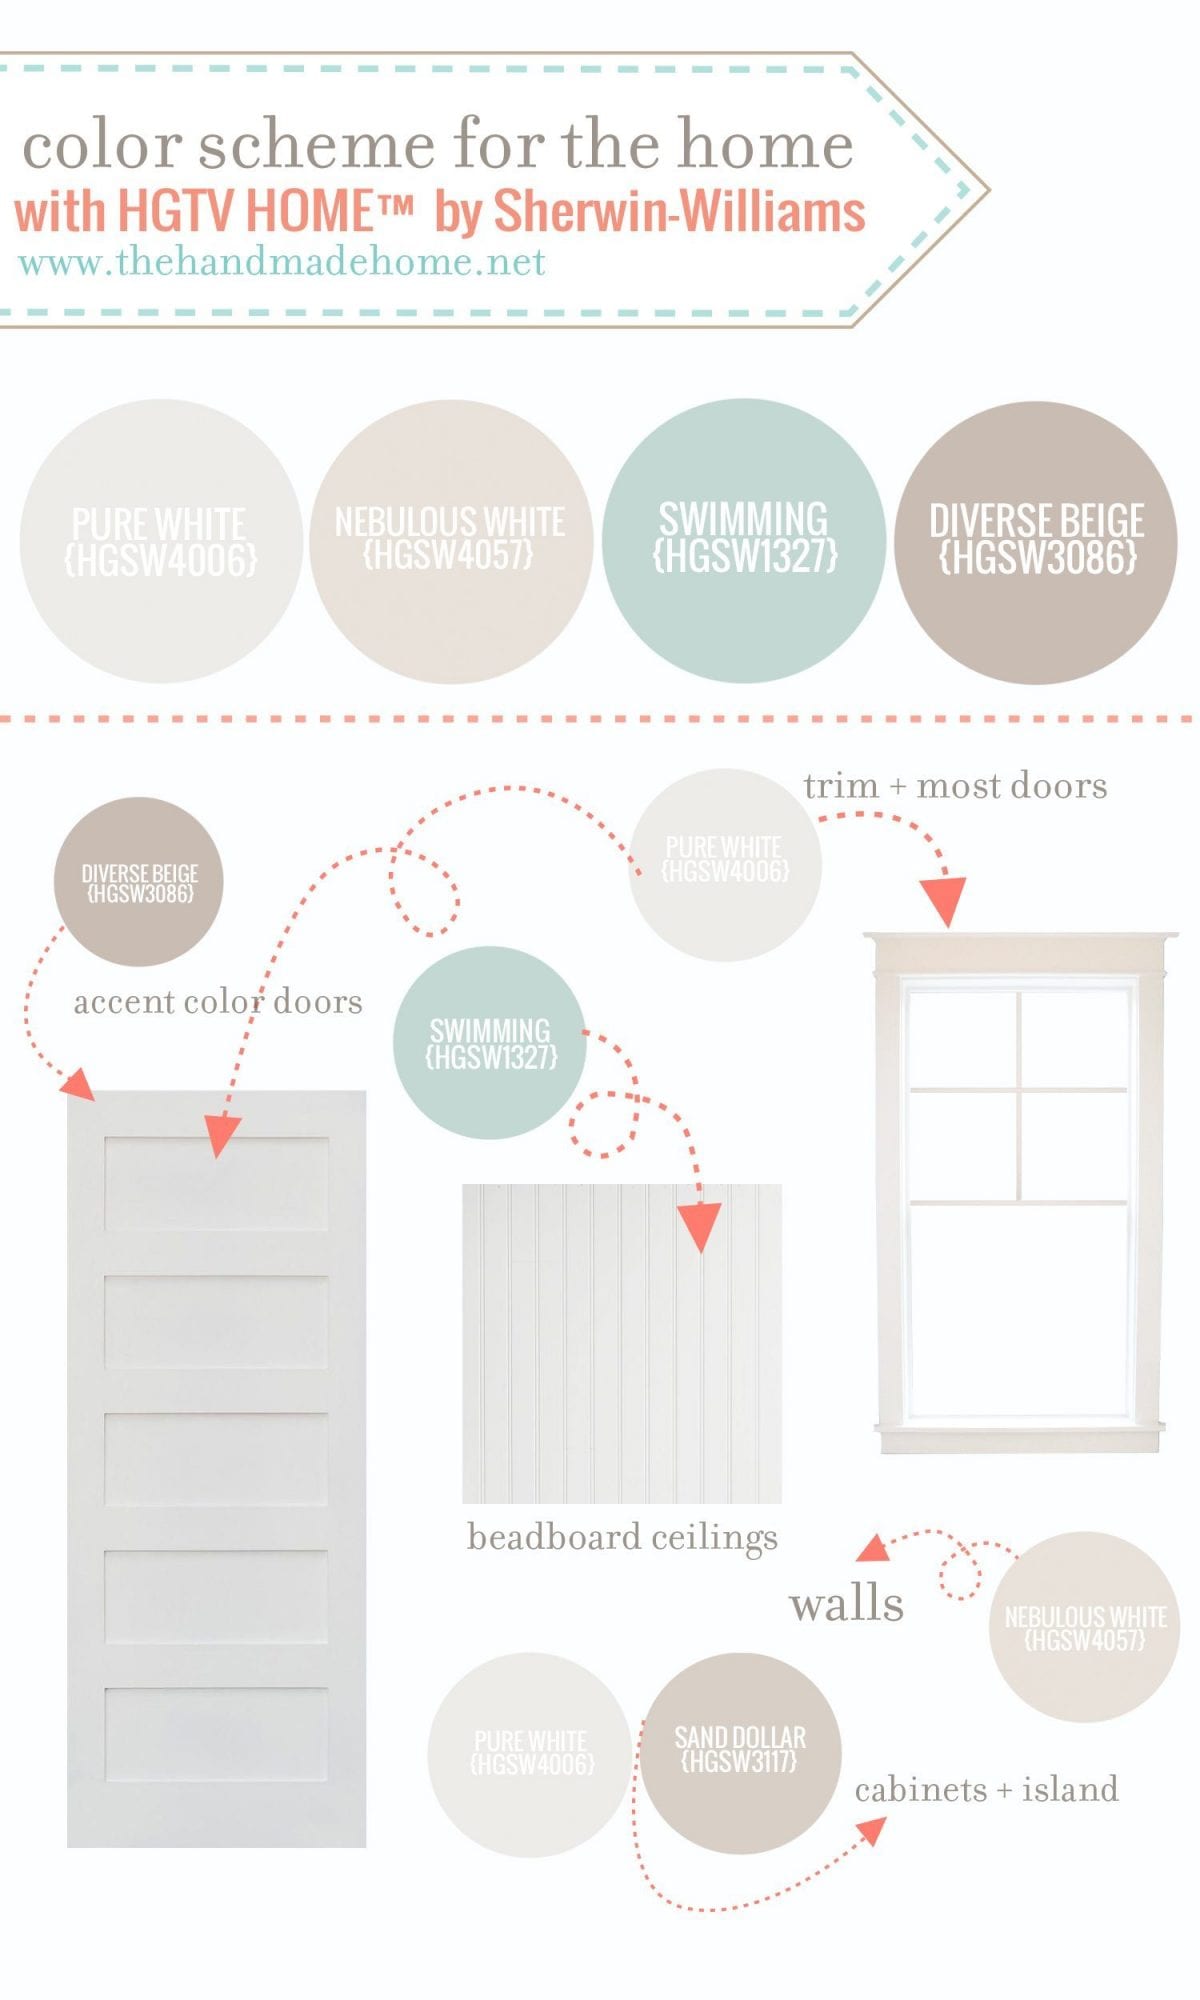
We had developed a plan early on in the project using colors from HGTV HOME by Sherwin-Williams Perfectly Polished Color Collection, because they work together in harmony to help us create a cohesive look throughout the home, but as you can see we deviated from the whole beadboard thing slightly. And we love HGTV HOME by Sherwin Williams Swimming (HGSW1327). This blue is the perfect shade for adding a pop of color to the room.
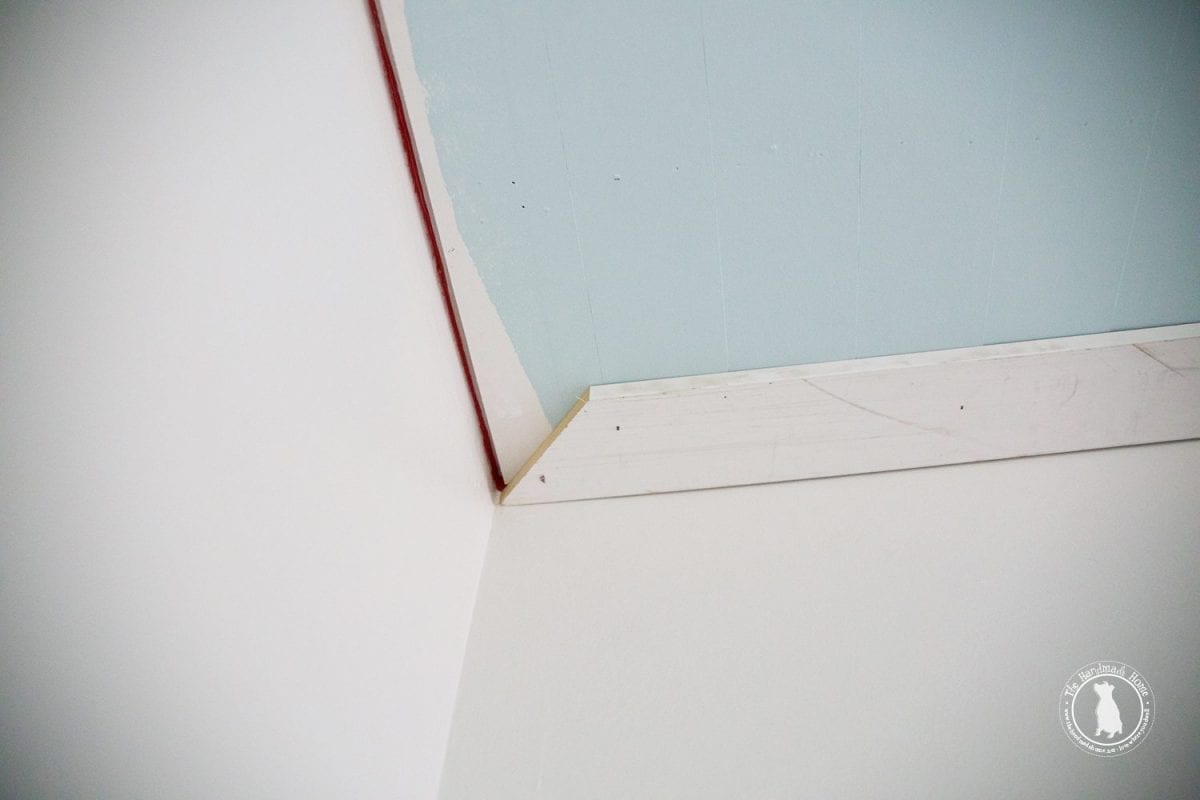
the trim
Once the boards are painted, you’ll want to trim out the room to give it a better finish and to cover those expansion gaps. You’ll simply cut boards to length and miter the ends to make a smooth transition.
If you’re lucky, you’re working with a square or rectangle room, and can cut everything at 45 degrees.
If not, well, here’s to hoping you paid attention in geometry class.
We have an older home, so not all ours were perfect. The walls were all different in some rooms. We only kind of paid attention in geometry class. Good times.
paint again
When we finished trimming out the ceilings, we painted the trim differently for a bit of a pop. A little extra work but well worth the effort.
You can see all of our colors here.
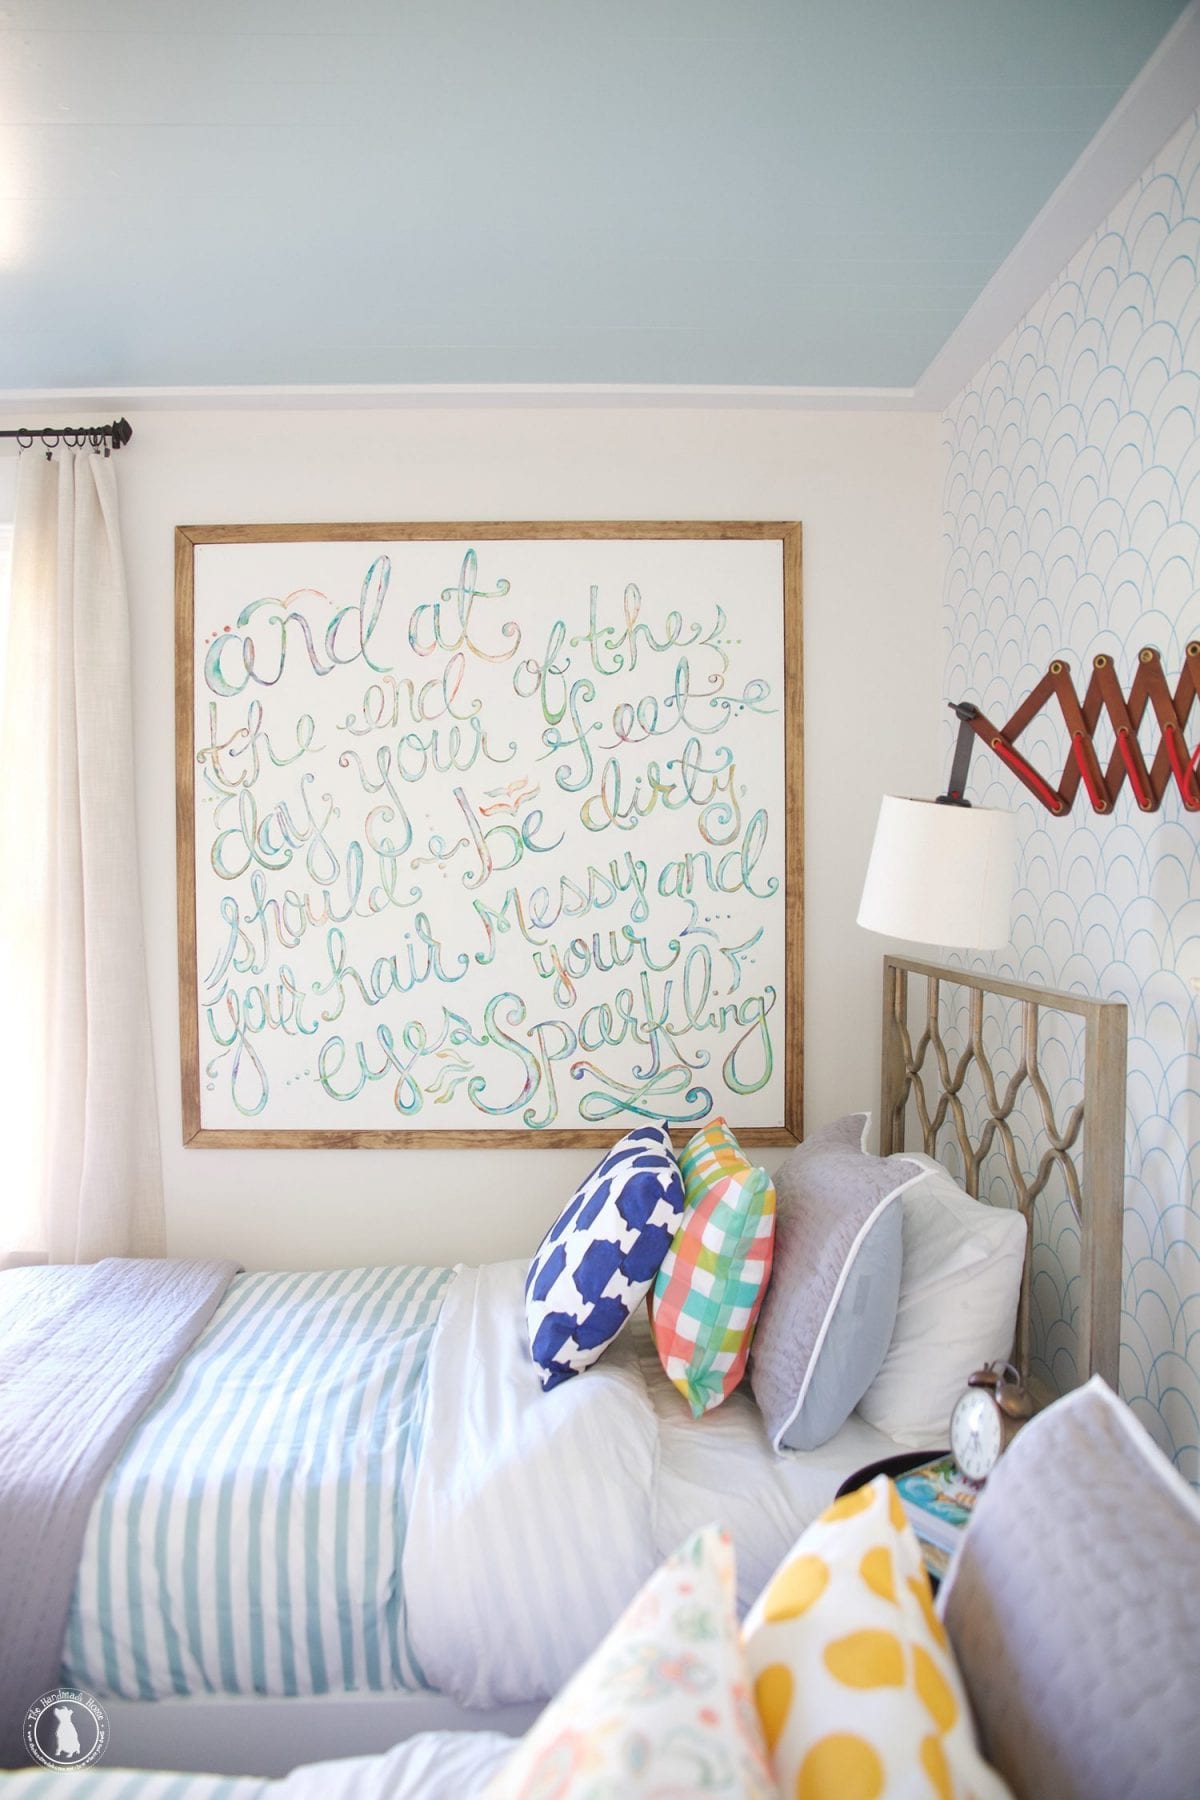
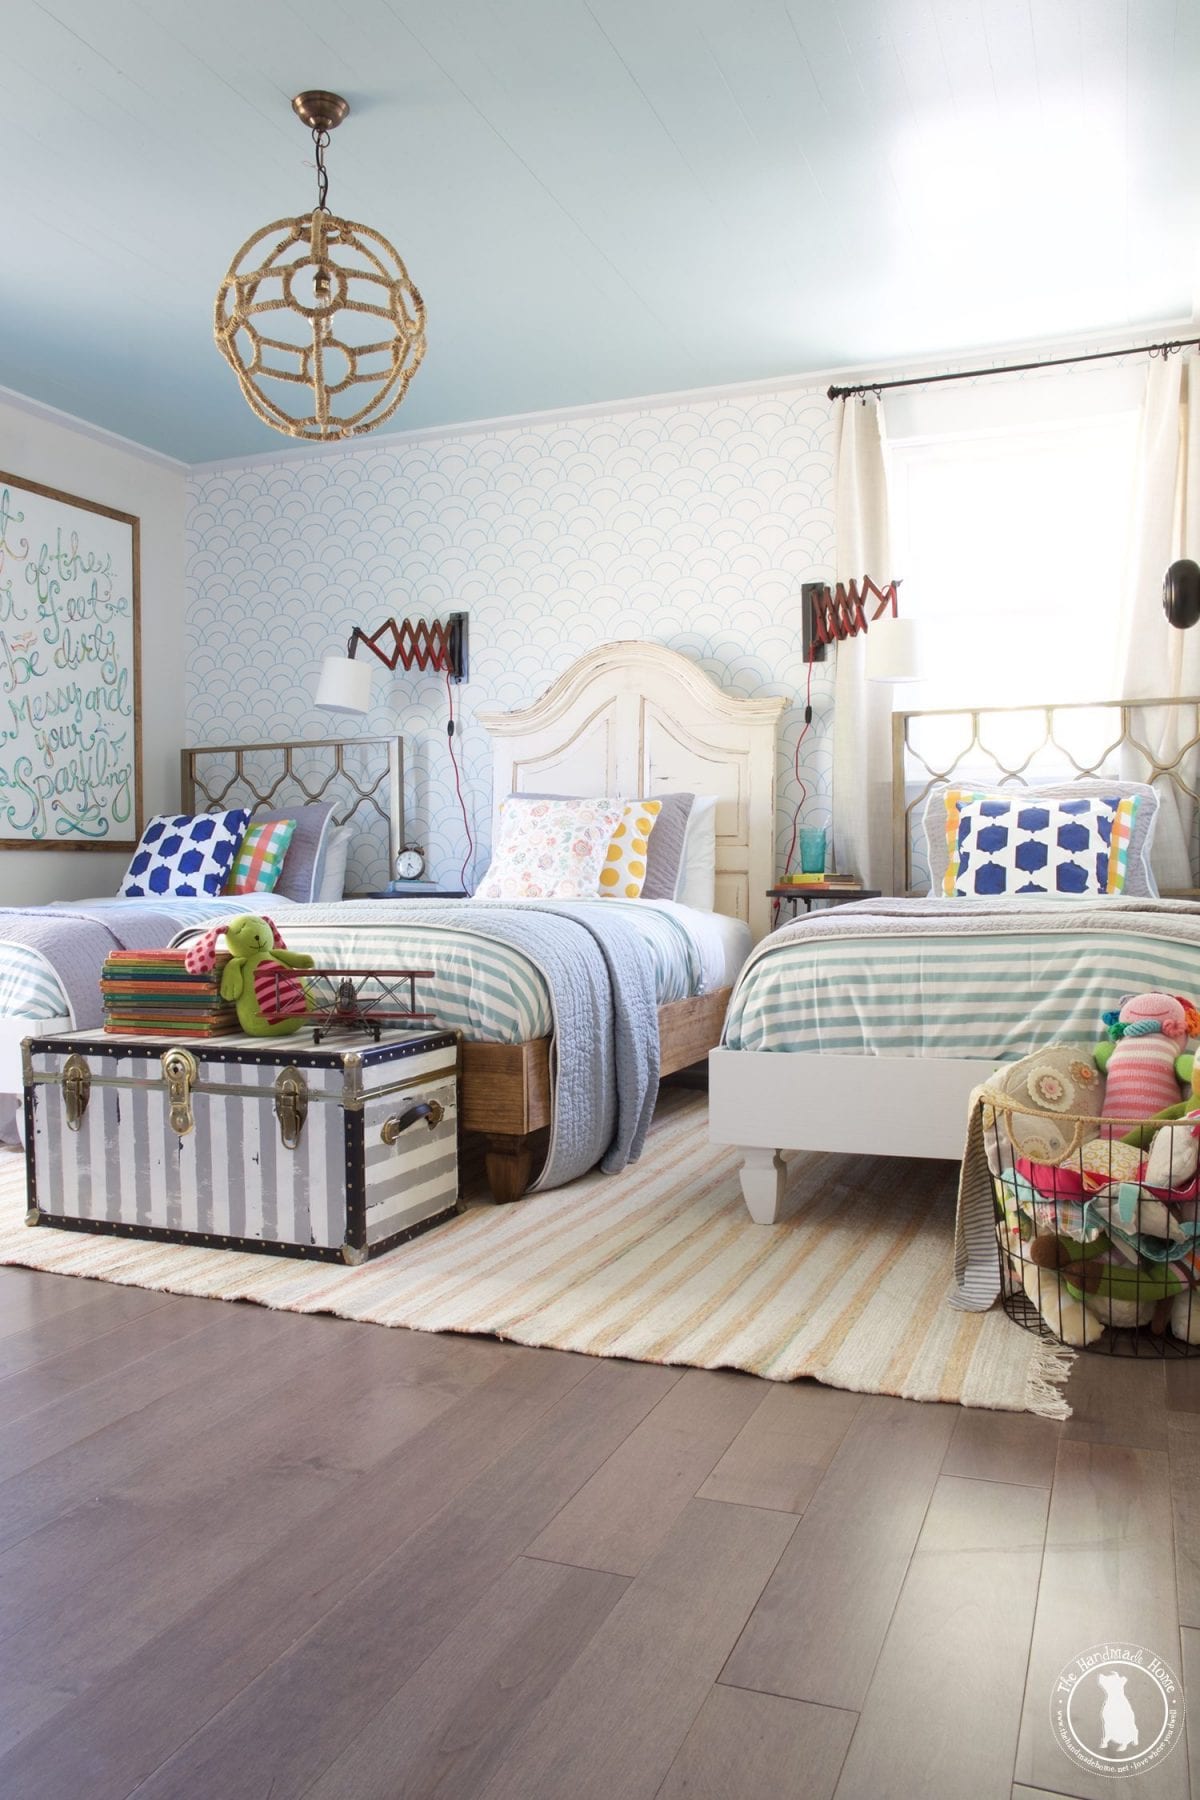
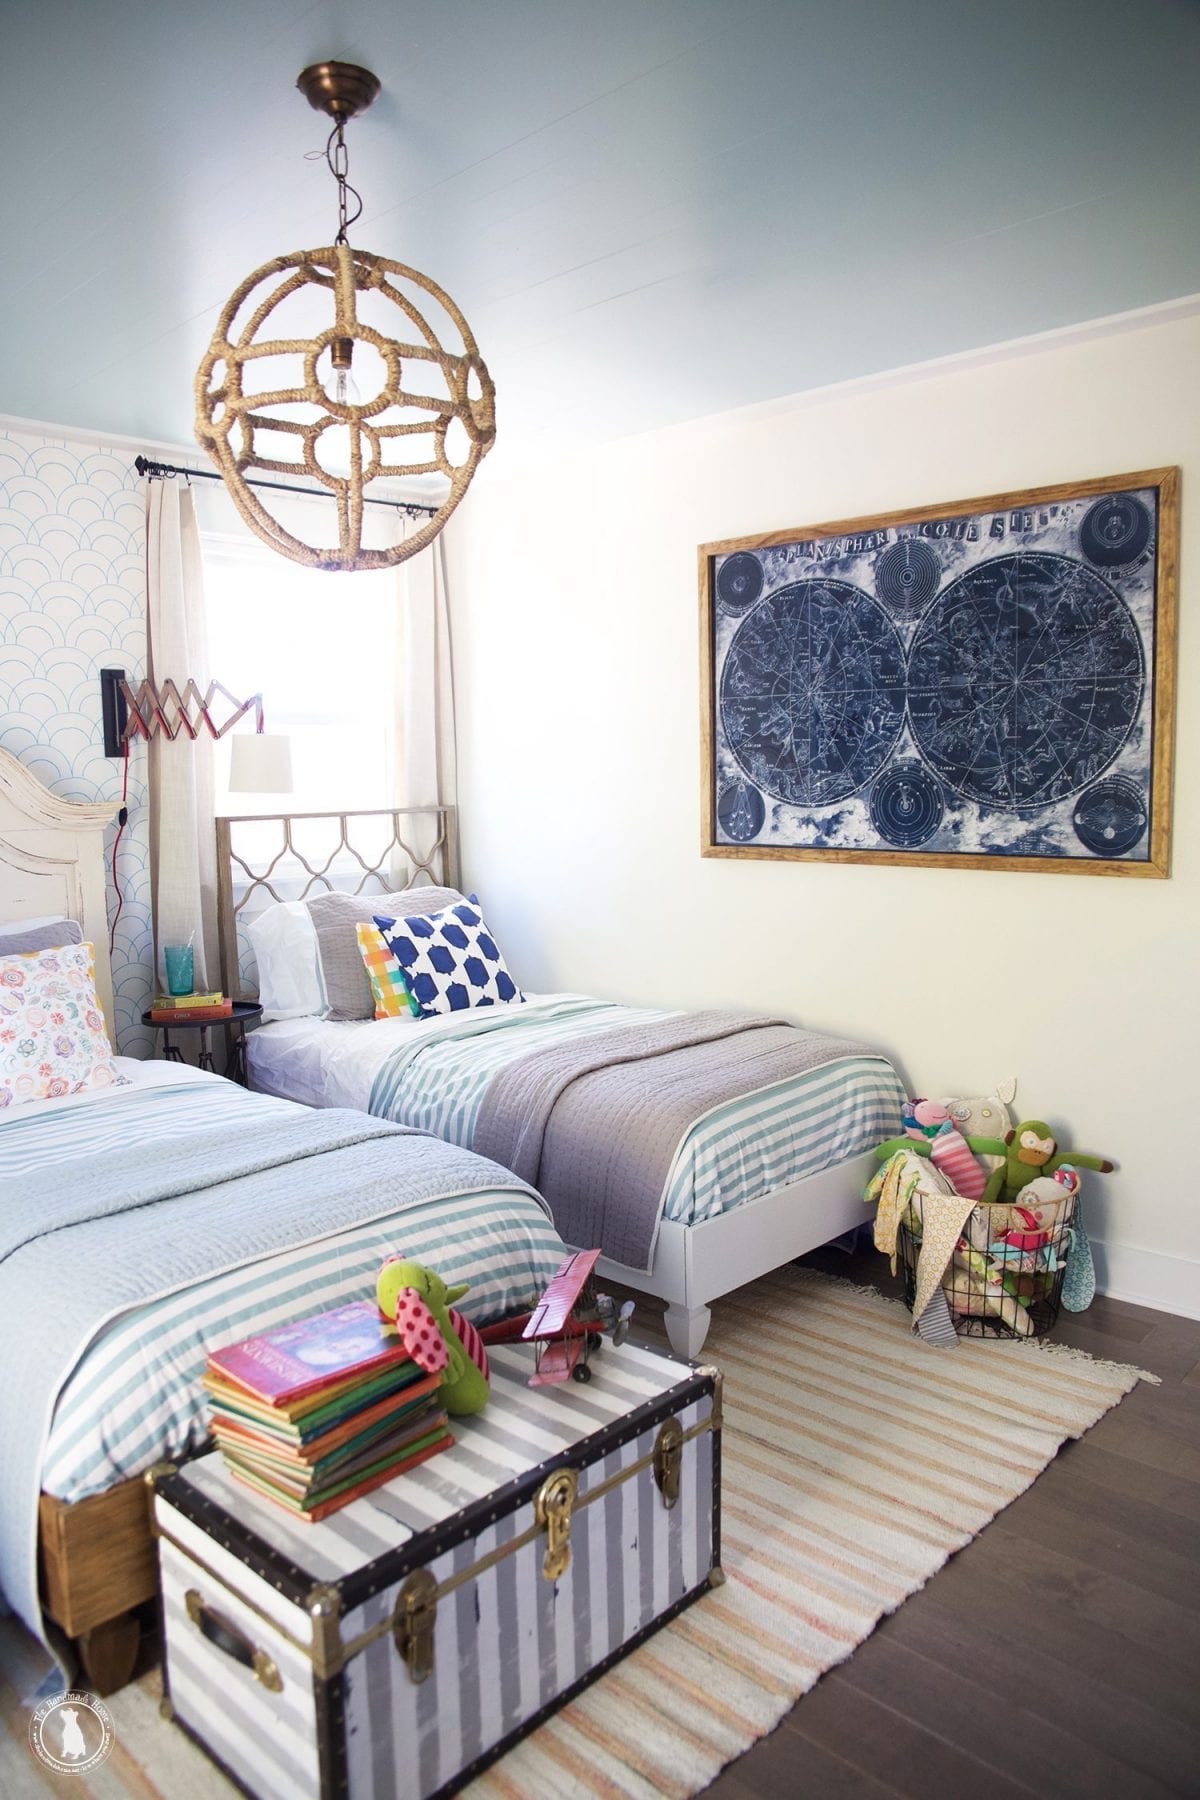
decorate with light fixtures!
Now, you’re ready to decorate and hang your light fixtures.

Or what Ashley refers to as the fun part after her deltoids recovered.
Yes, it was absolutely worth every second of deltoid/calf/thigh burn.
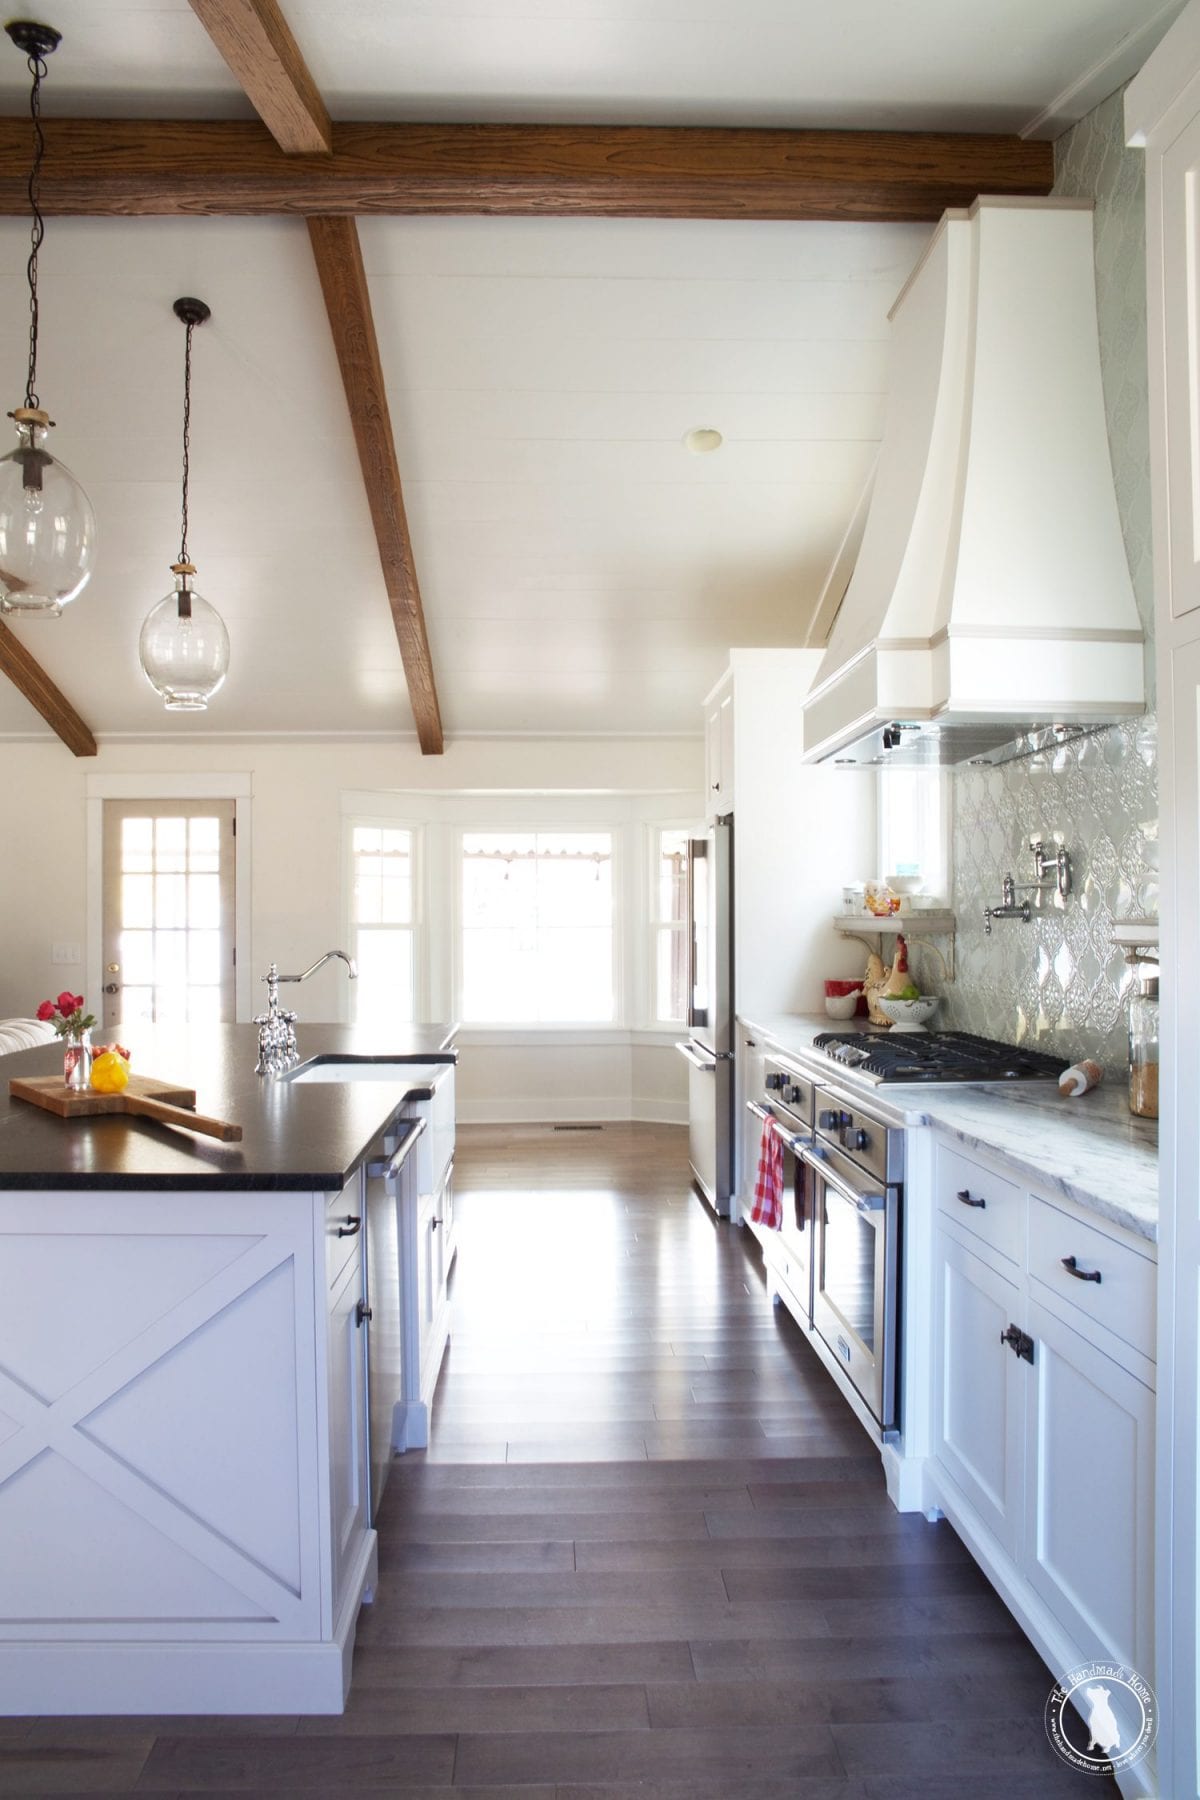
downstairs
For downstairs, it was the same story, but a different technique.
For this room, we opted to use larger planks (12 inch boards), since the room is very spacious, and we wanted a simpler feel.
Once we got to this point in the rehab process, we had hit our groove and were really enjoying it.
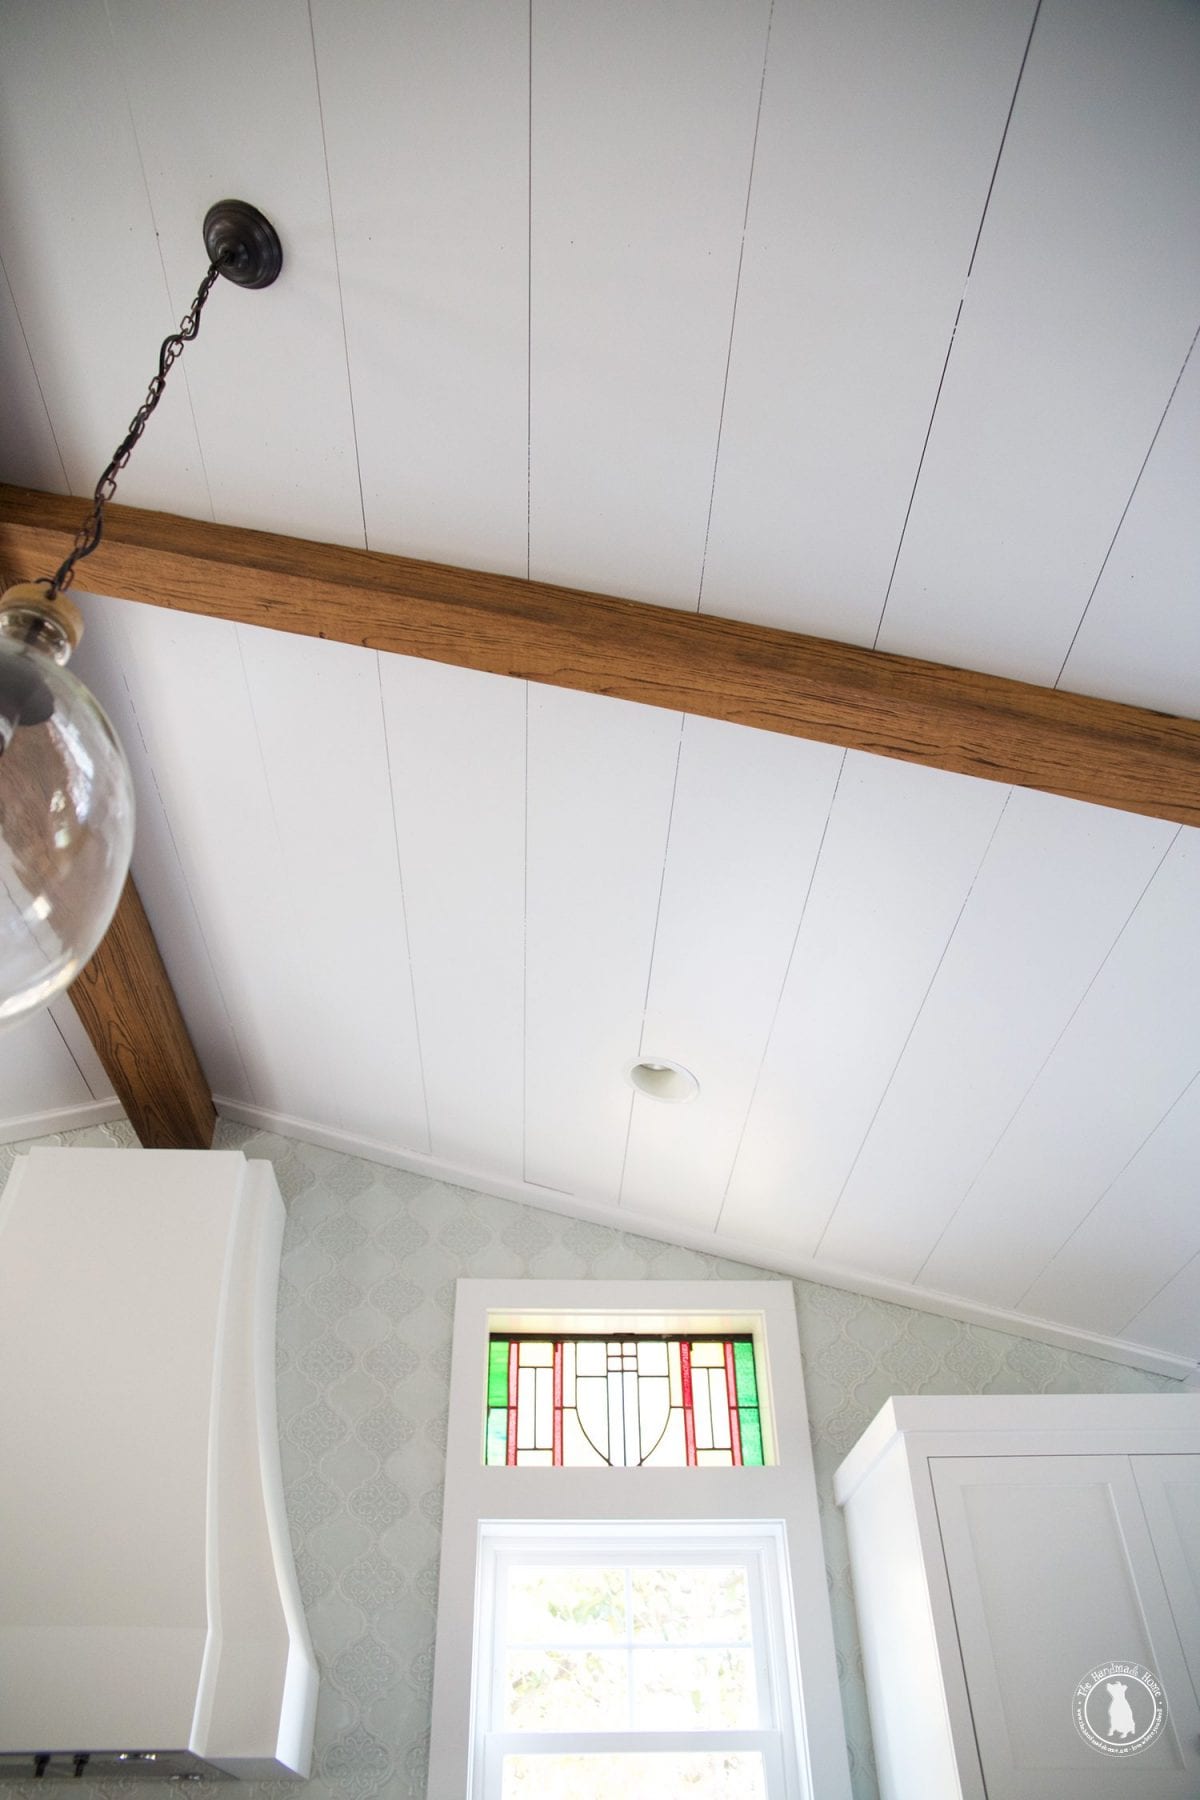
Bonus tip: We didn’t cover the nail holes here, and the ones that you can see, give it a little more character.

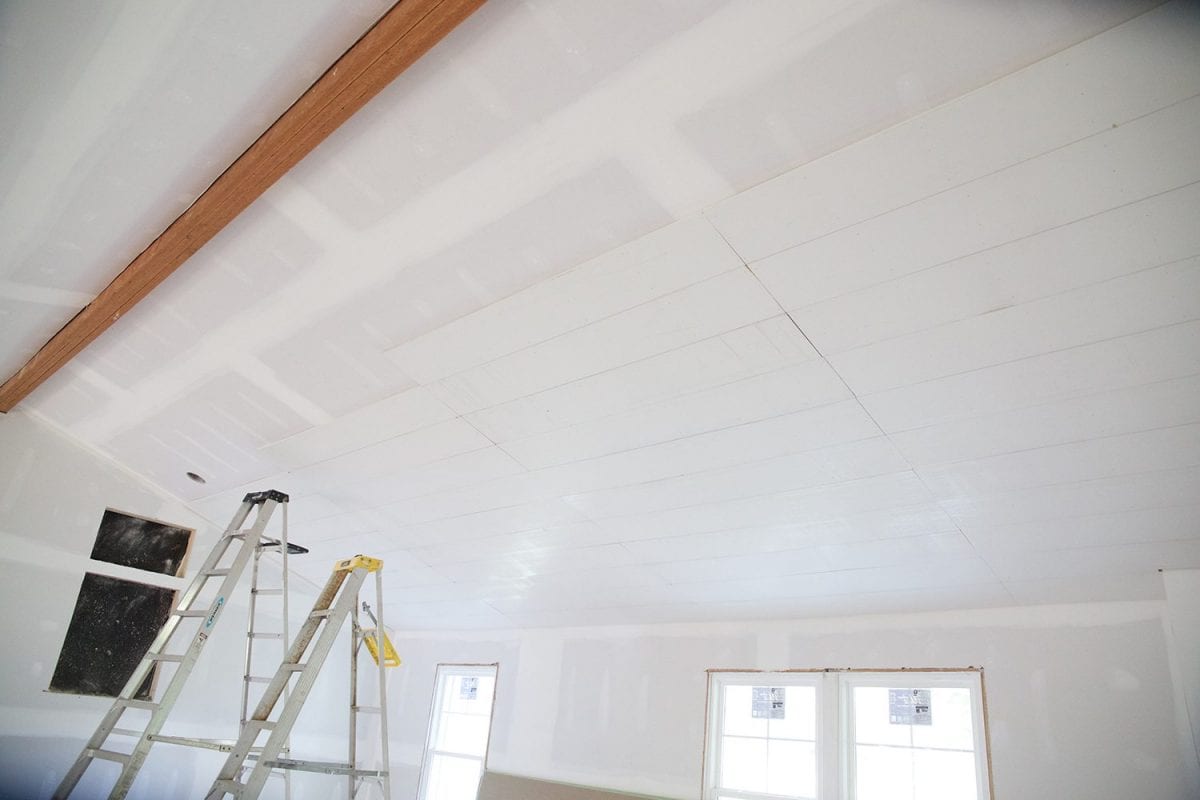
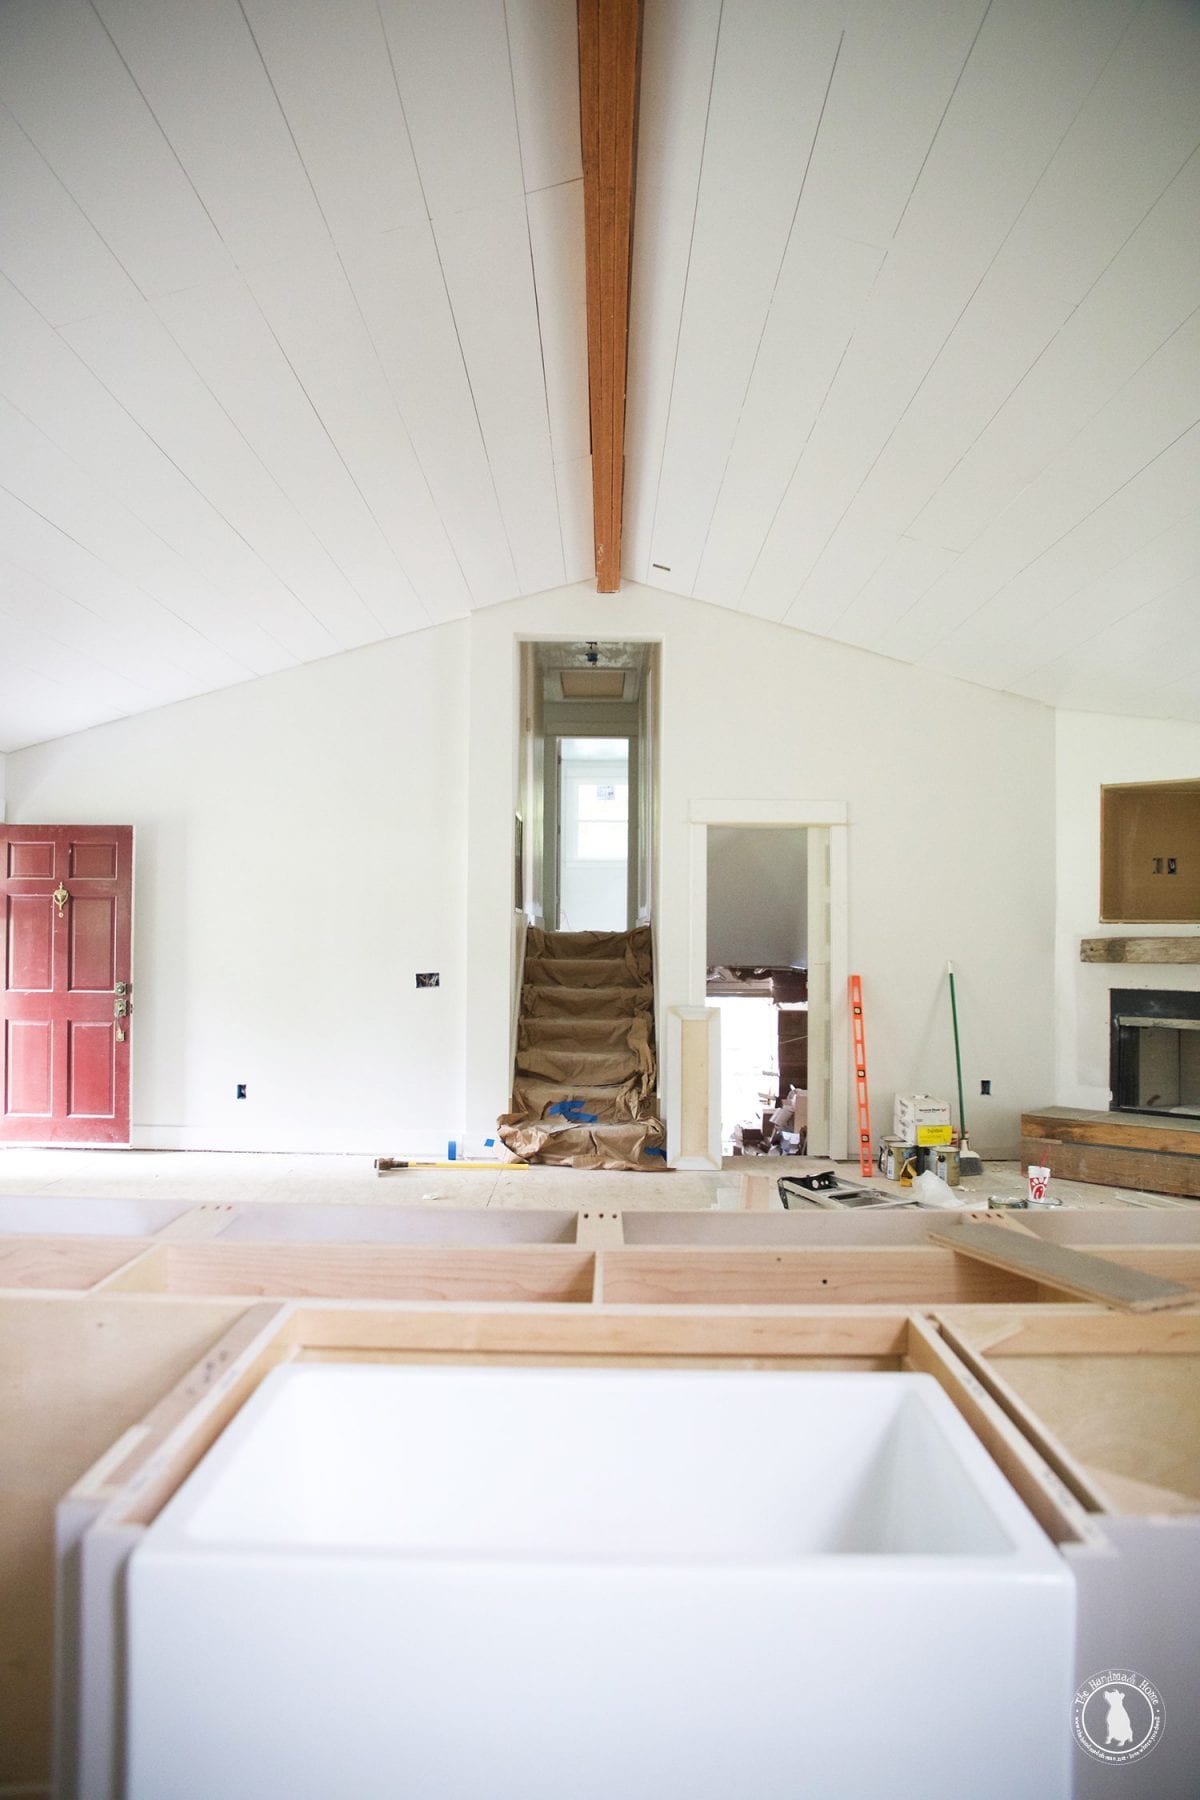
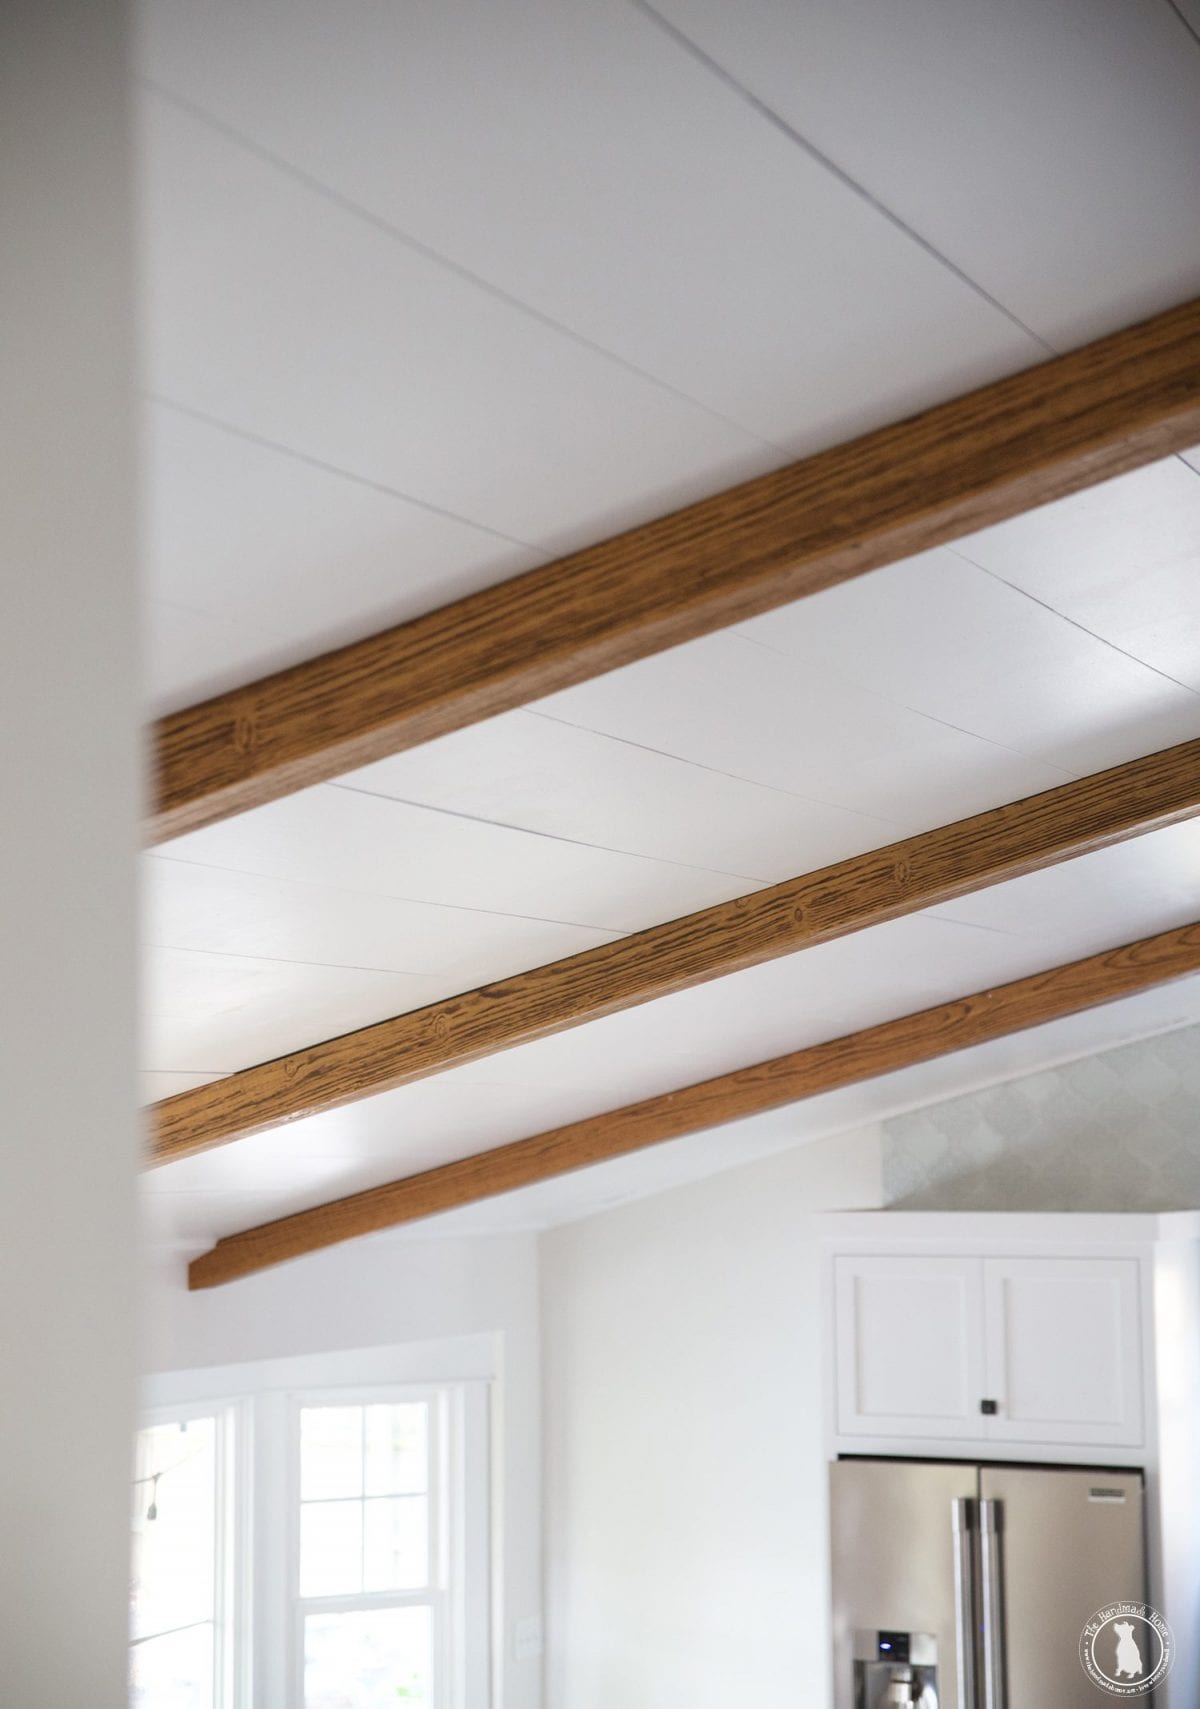
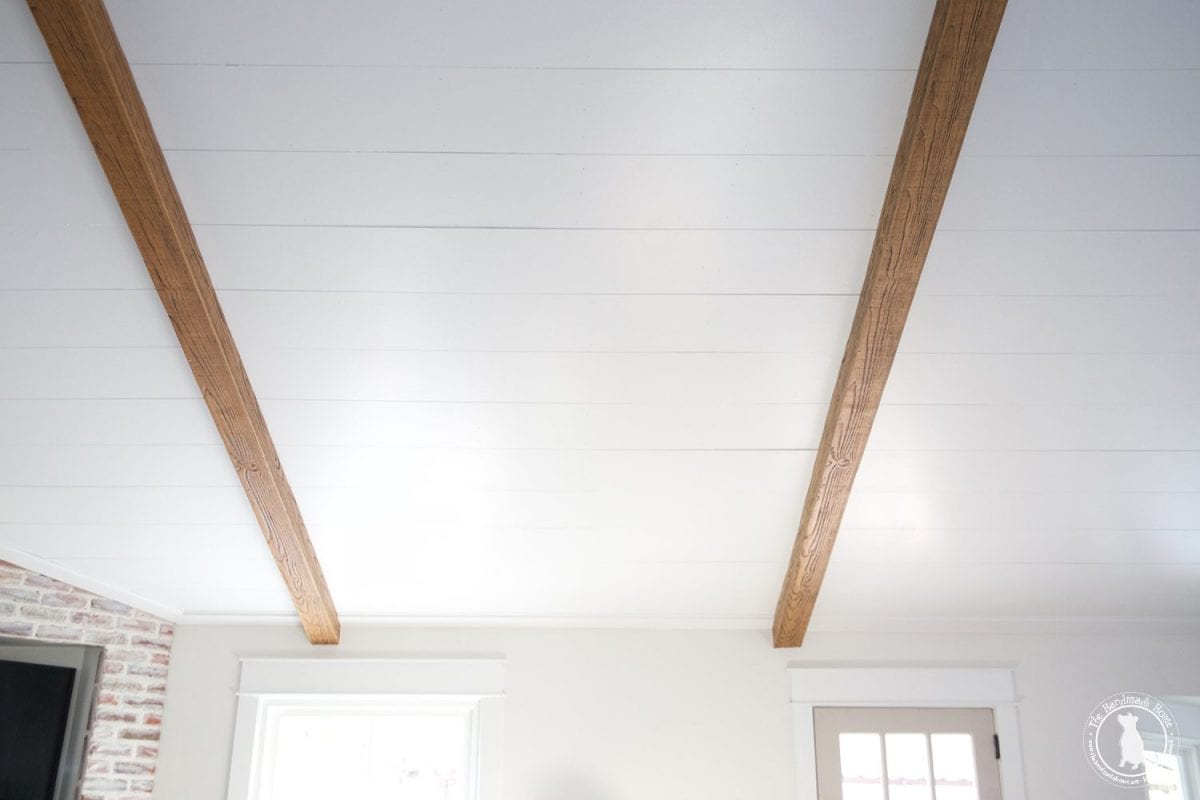
We knew we wanted beams, one running down the center and some running up to the center beam.
We also knew we didn’t want to stagger boards, but wanted it to appear as one long run. So we cut our boards (again using MDF boards) so that they would start and stop underneath where we would later hang beams.
{We have more on the amazing beams we used, coming up in a separate post!}
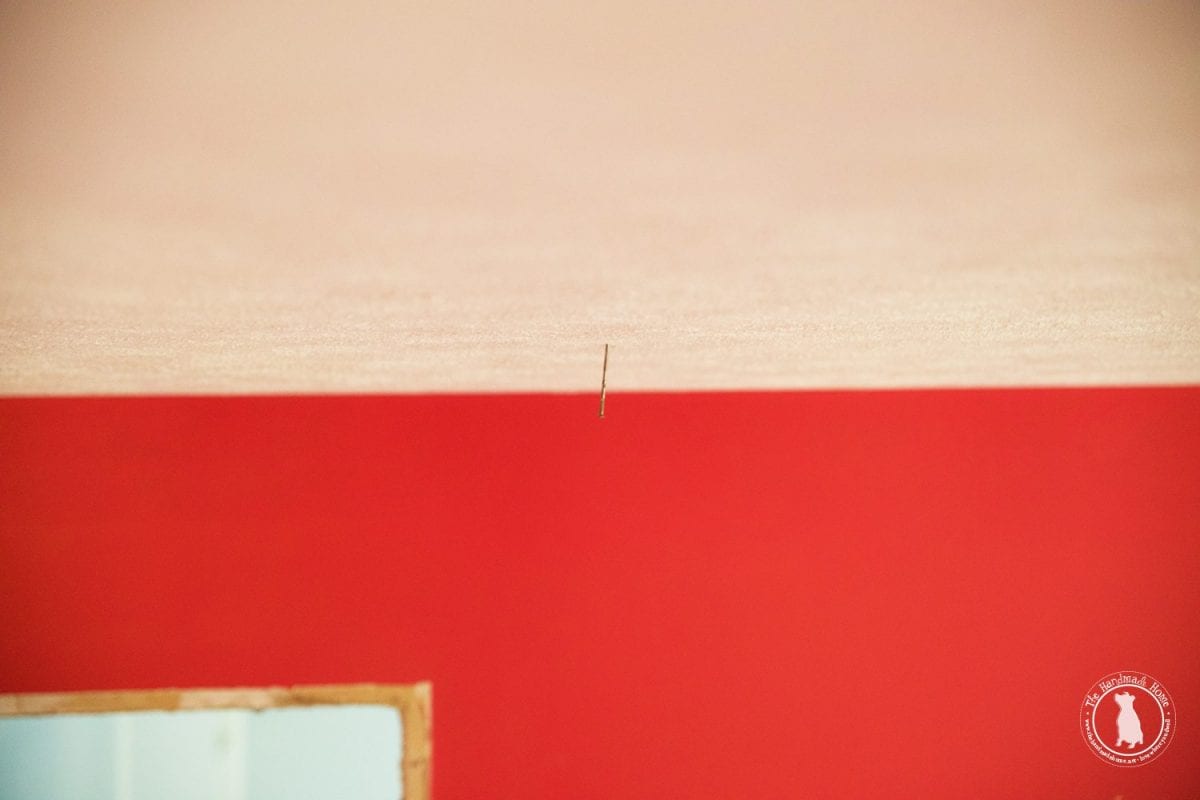
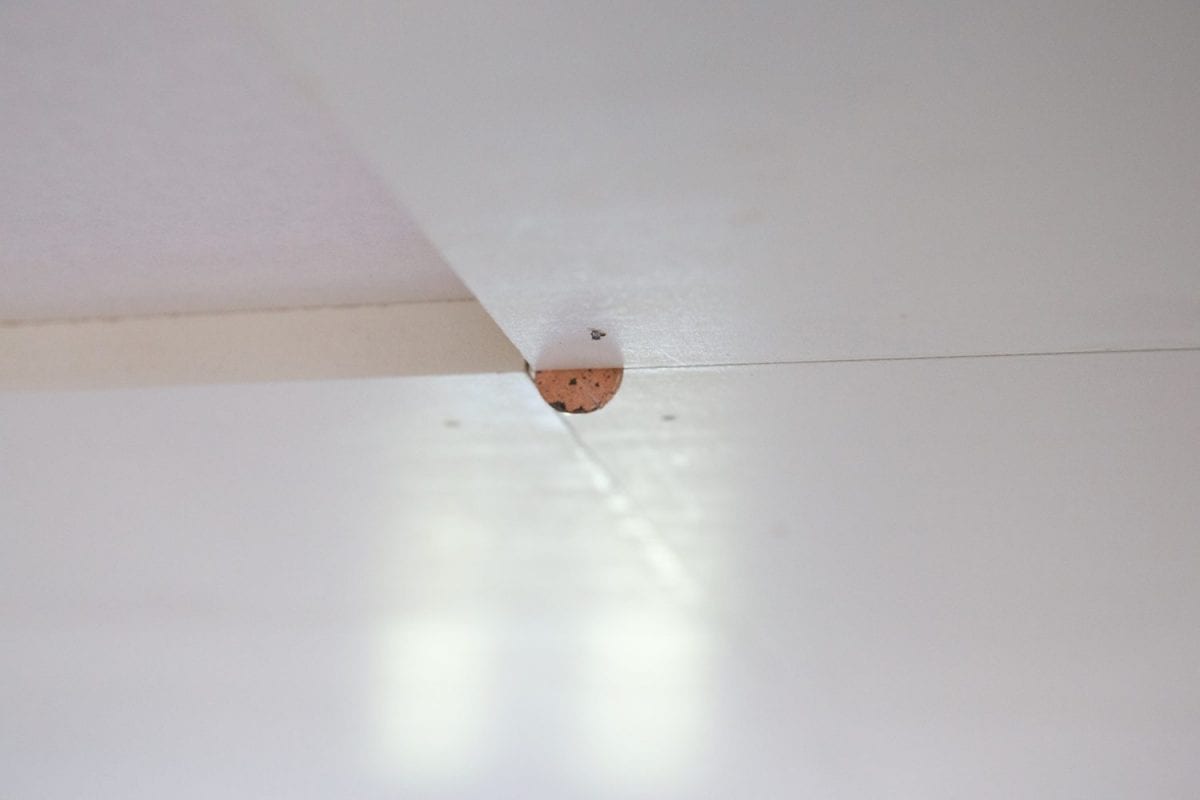
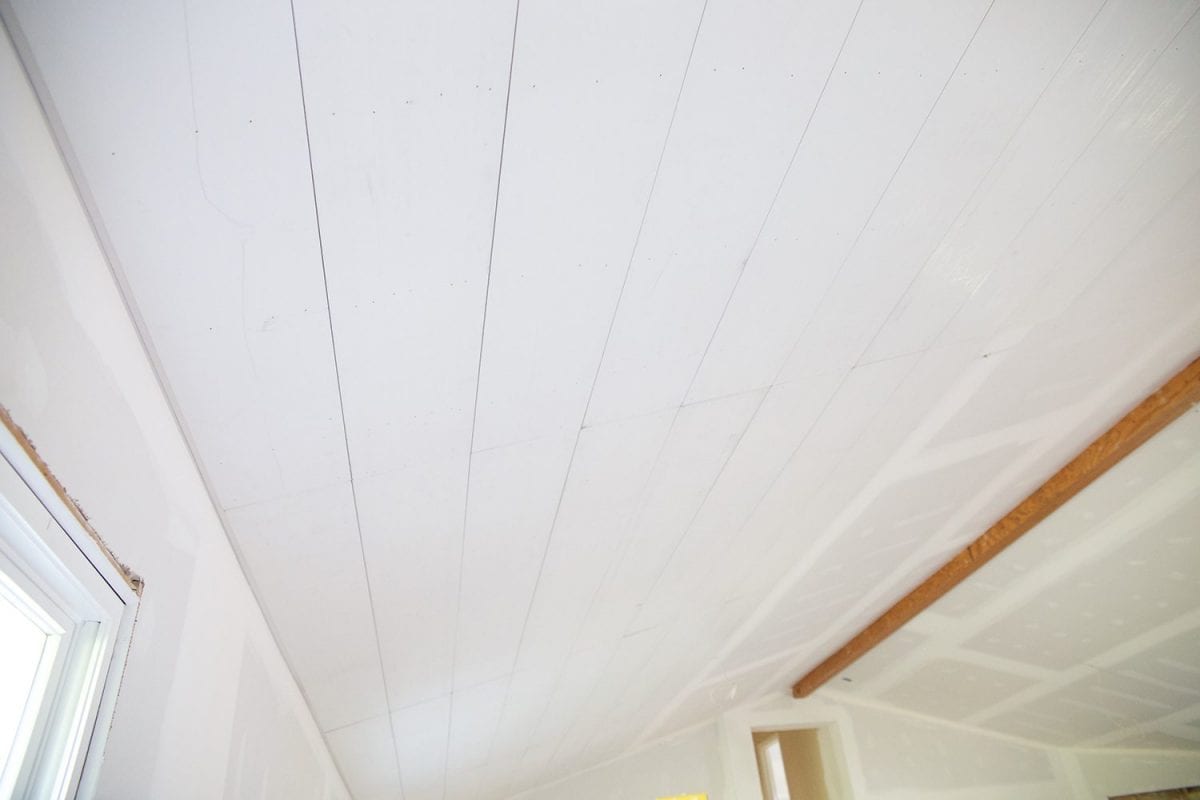
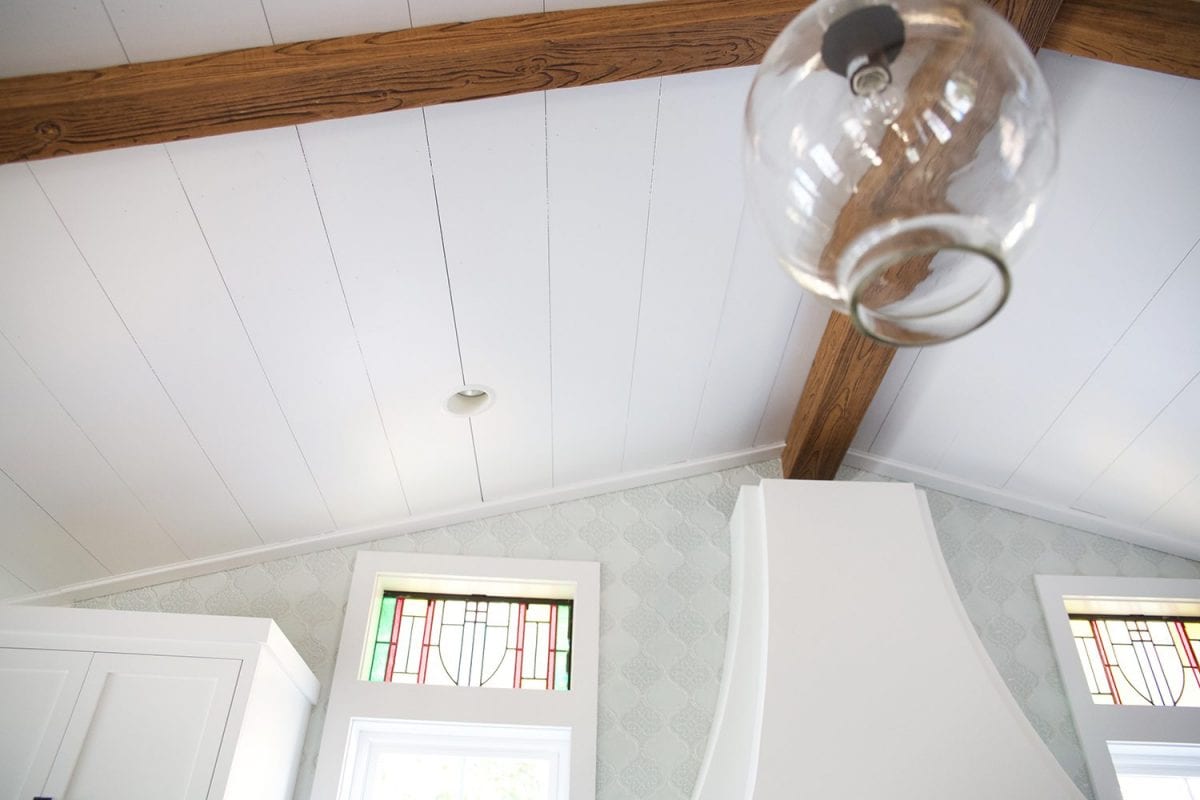
penny gapping
You’ll follow the same process here with one exception: to get that perfect gap, you’ll insert a penny between each board – one on each end. We found that the wider boards had the potential for more of a modern look, and with an A-frame ceiling, we wanted to ensure you could see the seams. I mean what’s the point if you can’t see the seams? This will give you a perfect gap and ensure it is the same on each end.
I do suggest having several pennies on hand as they seem to get lost. we glanced up the other day and saw one, still hanging out up there. (Also, I think a tool belt is essential for this project, to help you keep up with everything and make working on a ladder easier.)
Don’t forget to cut out for your light fixtures.
how to shiplap your ceilings – paint again
Then we continued with the color harmony of our HGTV Home by Sherwin Williams color collection. Then we painted, and added our accessories.
Yep. Worth every second.
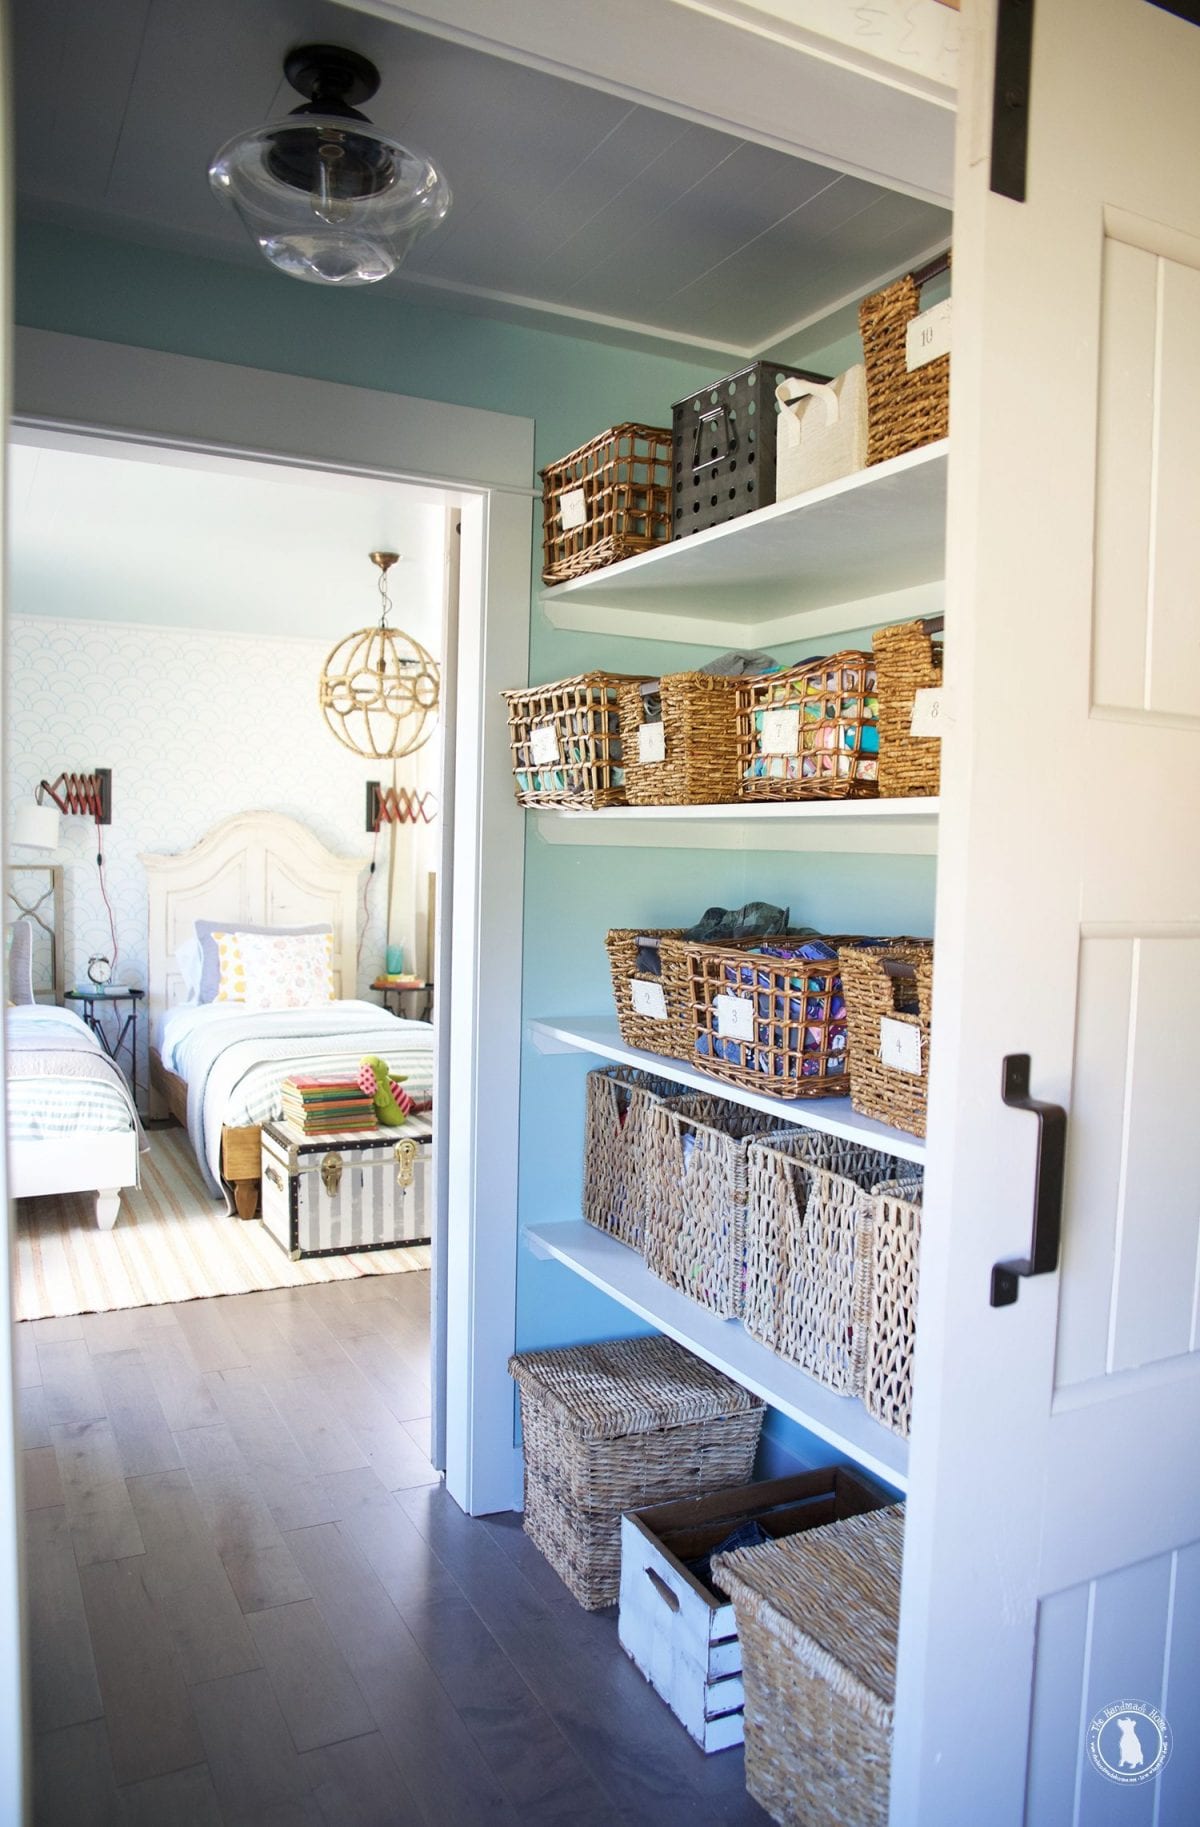
Just to give you an idea, we saved around 12k on our own house by doing this labor {planking and painting} ourselves.
So trust use when we say it is worth learning how to shiplap your ceilings
how to shiplap your ceilings – finished!
We finished off the space with paint and trim. It polished off nicely!
And when painting a high ceiling, it’s always an amazing choice to use a paint that covers well with just one coat, which is one of the reasons why we love HGTV HOME BY Sherwin-Williams INFINITY paint.
This is probably our favorite element we added to the house.
It really brings a lot of character to your home.
As always, let us know if you try it, or have any questions …and have an inspired day!
:: This post was brought to you in partnership HGTVHOME™ by Sherwin-Williams. All opinions are 100% ours. Please read our full disclosure pertaining to partnerships here ::


I absolutely love and am inspired by the shiplap. Would love to do that sometime if we build a (small) house (that we hope to) but would have to do real wood probably or something other than MDF as I am horribly allergic to the VOC’s in particle board. I love the colors and the look and thank you for sharing!!!
The planed walls are so beautiful and I love the beams that you added also. I didn’t do any of the work but I certainly enjoy looking at them – HA!
Awe thanks so much, Bonnie! ;} Your comments are always too kind.
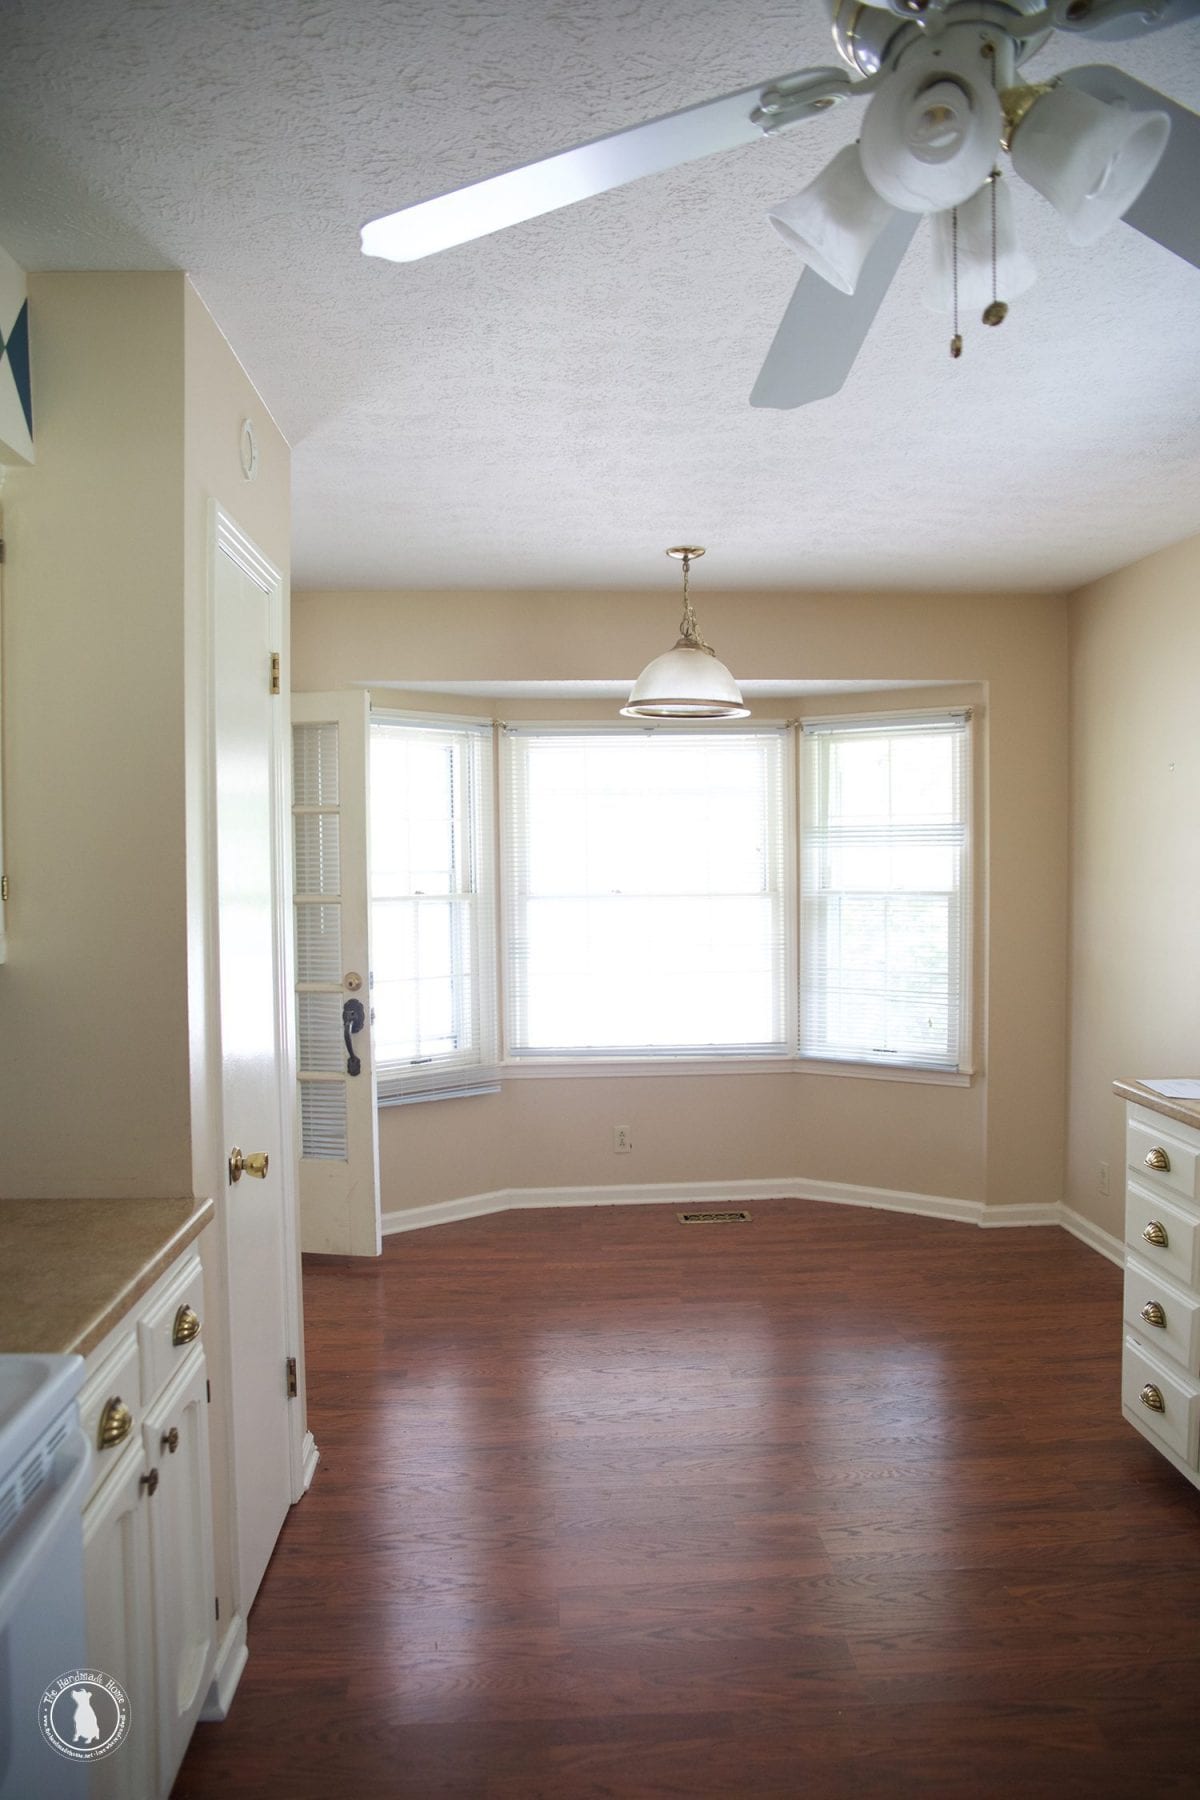
This is lovely!!! Congrats! Can you share the source for the pendant lights in the kitchen and the ceiling light in the hallway? Thanks
Hey Debra! Thanks so much. You can read all about our kitchen sources here https://www.thehandmadehome.net/2016/12/kitchen-sources-2/ but I believe they are currently sold out. The hallway light is from Lamps plus. ;}
I love the idea of doing this in my own home! I currently have vaulted popcorn ceilings in my kitchen and living room. Do you think it is possible to just cover up the popcorn with shiplap or would I need to scrape and prep the ceiling first? Also do all your beams cover your (vertical) seams or are some showing? Thanks so much, I love following the progress of your home 🙂
Hey Karlie! You should be able to just cover it right up! We had stamped and it’s pretty much the same, yours will just have more texture. We planned it out so that none of our vertical lines are showing, and the beams cover each one. That way we have a cleaner look. It all depends on what you’re going for! Hope that helps. ;}
love this so much!!! It add so much character and charm. good choice! Where did you get your planks? we have beam and want to run them up to the beams with out a break – span of about 10′ and 2 beams. lots of planks. lol
Our entire garage was filled to the top with all the planks we used – I know the feeling! We ordered them at the local lumber yard – hope that helps!
Hi! I love the look
On the ceiling with the beams. We are wanting to do something very similar. I just have a few questions
1. Is it still
Holding up well?
2. What thickness MDF did you use? Because I have found really
Thing stuff but that doesn’t look like it would
Hold up.
Hey! Yes, it is holding up very well and we love it! We used 1/2 inch board. I hope that helps!
Hi,
It looks like you put the shiplap up with a continuous seam between individual boards (end to end). Is there a reason you do this instead of staggering the boards on purpose like you would do a wood floor?
Can you see the seam between boards or do you fill it with putty and sand it out?
If you can see the seams, do you like it to look continuous or do you think it would look better staggered?
Thanks.
Hey Luis.
In the main living area, we did lay it with one seam because we knew we would use a beam to cover the seam. The idea was to make the finished product look as one long piece with the beams running to the center covering any seams. Hope that helps.
Also I have to add, Luis, we were going for the neatest look possible. So we were able to cover the seams with beams in the main great room, and run them long enough in the bedrooms. But if the room will not allow for that because of size, then stagger just like you would hardwood floors. I hope that helps! ;}
We had our 3 bedroom ceilings done with the tongue and groove boards so we could cover our popcorn ceilings. We bought the boards in the lengths we needed for each room so there were no staggered lengths. We would like to do the rest of the house with plank boards. With the tongue and groove, we sealed and painted them before putting them up and even though we used kilz to keep the knots from bleeding through, they still bled through. Your plank boards do not appear to have knots. If this is so, exactly what did you use for boards, if not, what do you recommend to keep knots from bleeding through? Thank you.
Hey Lorri! We used MDF for ours so there were no knots. But I know that you have to go back and sand and then use a shellac based primer. And then paint again. Sorry I am not much help in this department. It has happened to us before in other projects, and going back for a second time helped. Good luck!
What finish paint did you use on the ceilings? Did you use ceiling paint/flat or something else and why did you choose what you chose?
Hey! They were something close to a semi-gloss but a step below that. These are SW colors so cashmere pearl is the exact finish. We wanted some contrast between the walls and trim elements, and it brightened the ceiling while providing a subtle sheen. Hope that helps!
We have a vaulted ceiling very similar to yours that we just planked but there is a big gap at the joint where the vaulted ceiling meets the vertical wall. We’ll need some sort of trim piece to cover that expansion gap. I see you had something similar, what is it that you guys used?
Hey, Zach.
We simply used a piece of 1 x 4 and some cove molding to act as a trim piece for it. I hope that helps and good luck with it.
Hey, I’m fairly new to DIY, so I hope this isnt a strange question. But I cant think of a single reason why one wouldn’t paint the MDF and trim before installing it on the ceiling. Am I missing something?
Secondly, my ceiling is concrete. Do you have any tips about the best way to attach the MDF?
Thanks!
Hey, Dan. You can paint it before adding it, but it will simply take longer, that is the main reason why people don’t paint it before. You have to remember there will be nail holes to fill and paint, plus painting stuff individually v. in one big piece always takes longer. And of course, nothing ever cuts cut and installed without a few bumps and bruises.
As far as the concrete issue. I would first put down a moisture barrier before putting up the wood, that would be my biggest tip.
I hope that helps some.
Hi There,
Where did you guys get the beams from?
Hi! They’re AZ Faux Beams. We still love them years later. Hope that helps!
We are doing this exact project in our house, only we will not be adding the beams. We have an existing center beam like yours though. What can we do for the trim? I read you used a piece of 1×4 wood and cove molding for your trim. Do you think it would look bad/wrong/cheap if we just did a piece of 1×4 only and no molding? Similar to what you did in the kids’ bedroom and bathroom? Are living space is pretty large like yours as well. Thanks!!
**I should have added that our ceiling looks nearly identical to your pool room, only white paint instead of blue!! 🙂
Hey, when it comes down to it is obviously a personal preference and our preference would be to add it in a living space. But that doesn’t mean you can’t skip it either. You could always forgo it for now and if it does bother you add it later. On a side note, cove molding is pretty inexpensive and easy to put up.
Thanks so much for the feedback no the trim question!! Last thing, do you know what kind/type of molding you used? I am not sure what would look right or where to begin there. Thanks!!!
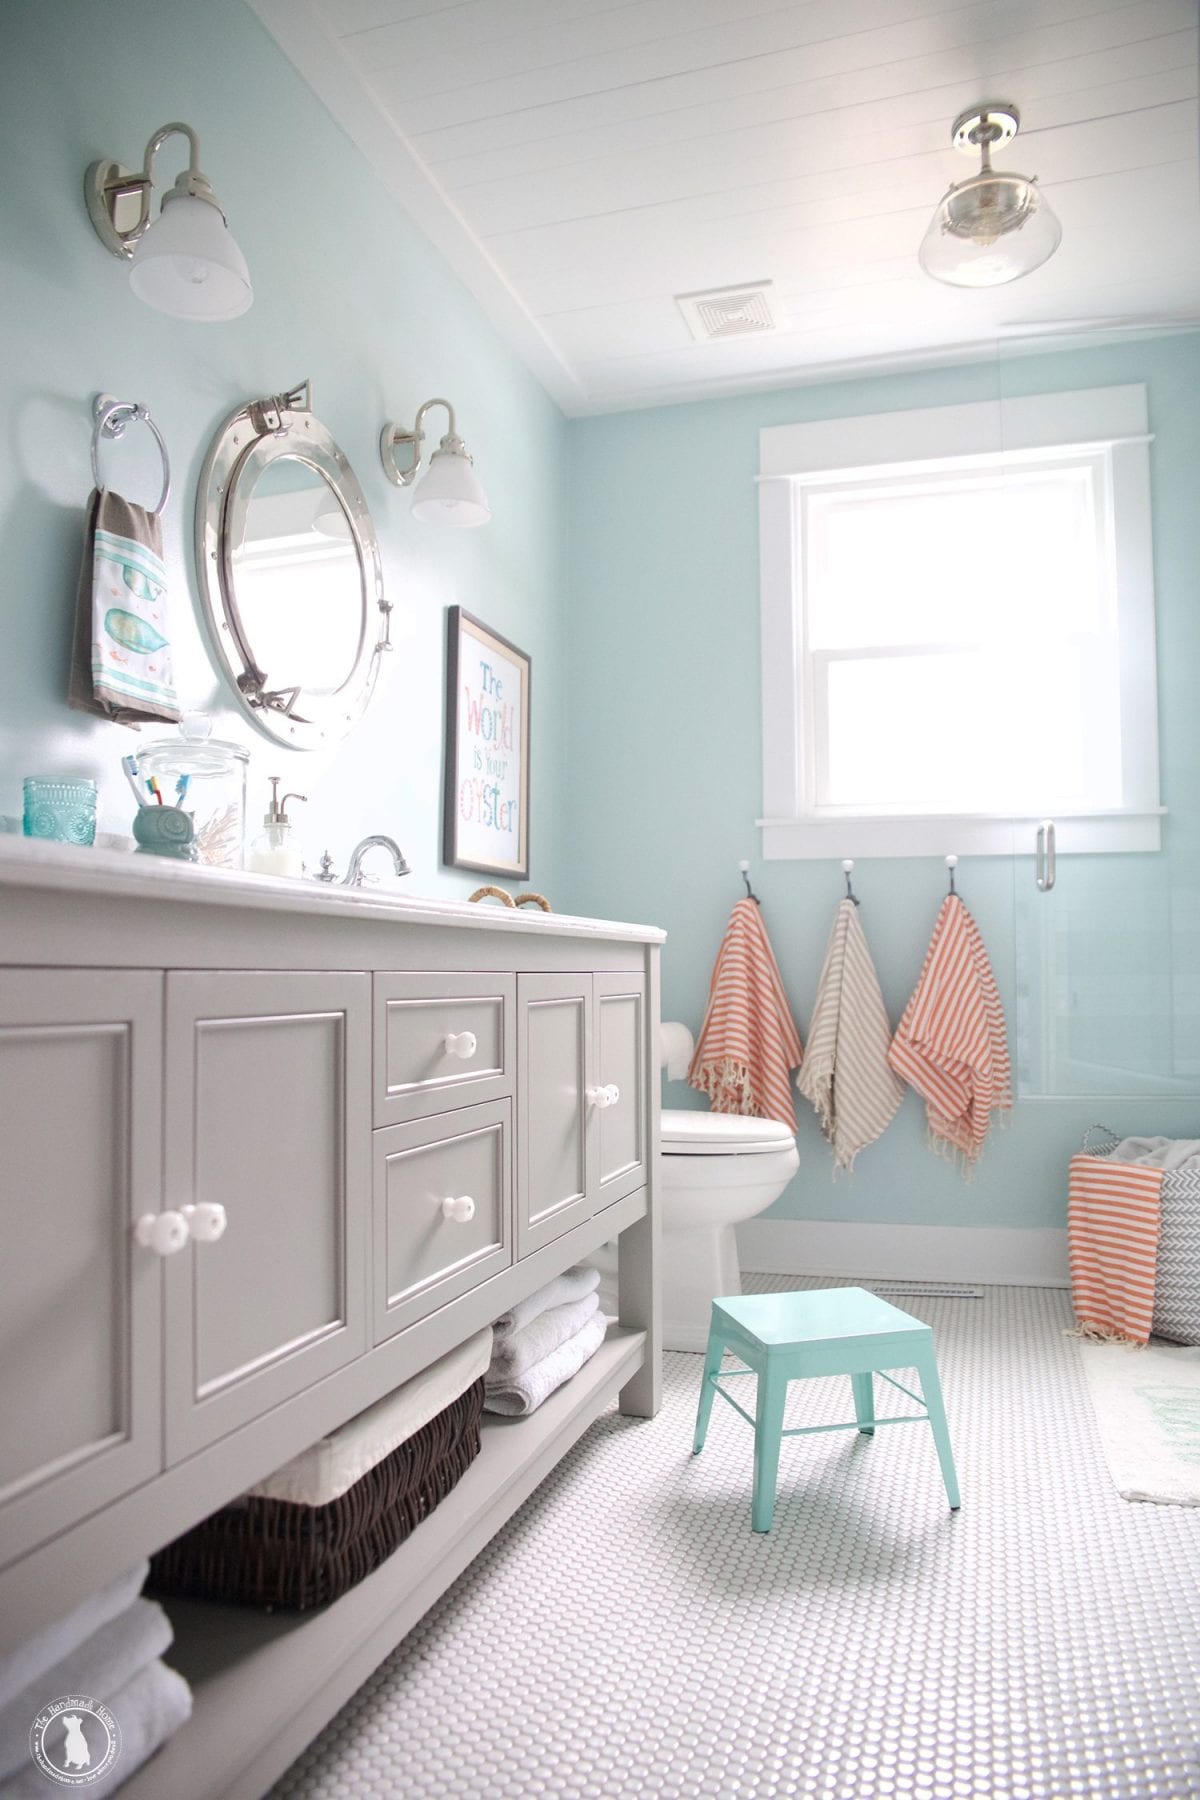
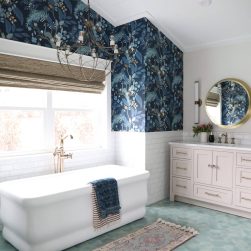
I am a huge fan of shiplap and love what you have done. Can you please tell me the color of the walls in the bathroom, the light teal color.
Hey! Thanks so much. It’s the same that you see on our ceilings – SW Tidewater – I hope that helps
Hi Ashley,
Nice work, thank you. I have an 8’ flat ceiling and am putting up nickel gap to cover a mopped plaster/texture, ick. I don’t want the farm look, per se, I just want better than ick, and something that will look good with classical furnishings. I’m painting the ceiling BM Simply White but don’t know whether to go with satin, like the trim, or something flatter and how much flatter. Whatcha thinkin?
Thank you.
Hey, Most people will use an eggshell or flat paint. Satin, might give it too much of a sheen, but it is really all a personal preference and what style you are looking for.