Remember last week when we did the whole resin jewelry thing, which is a great idea for all things crafting right now, and mother’s day?
We just kicked it up a notch with maybe my favorite project ever: resin monogram keychains. Apologies in advance for the resin influx, y’all. It’s addictive.
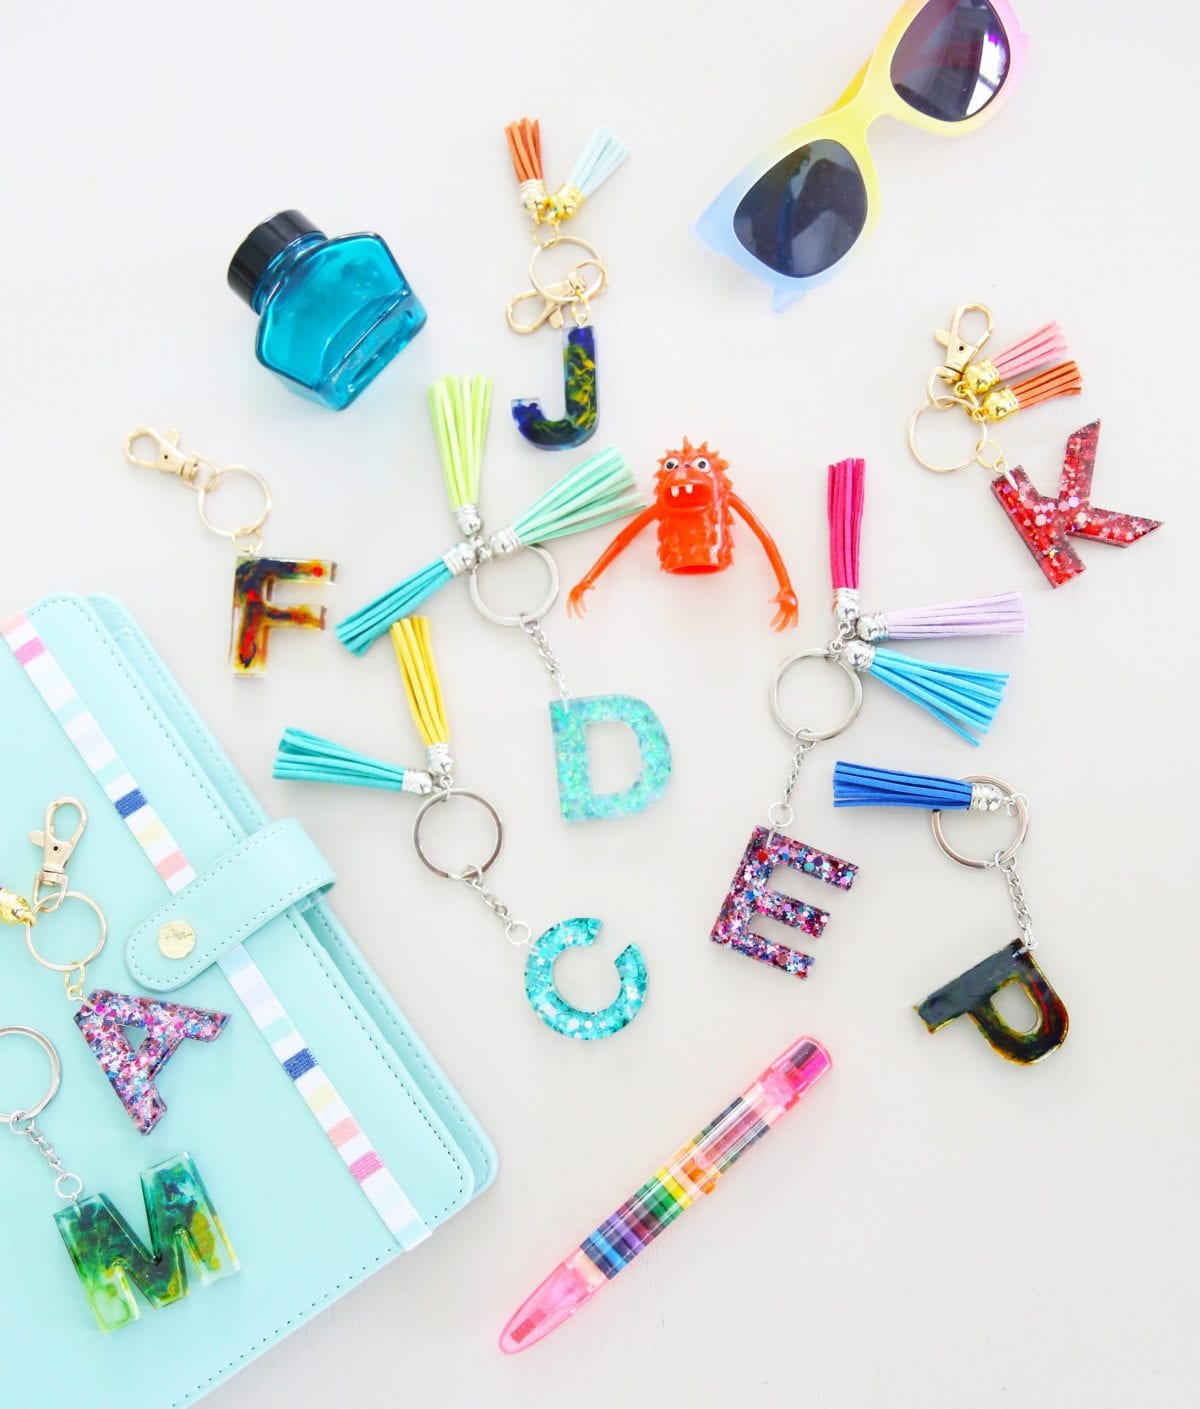
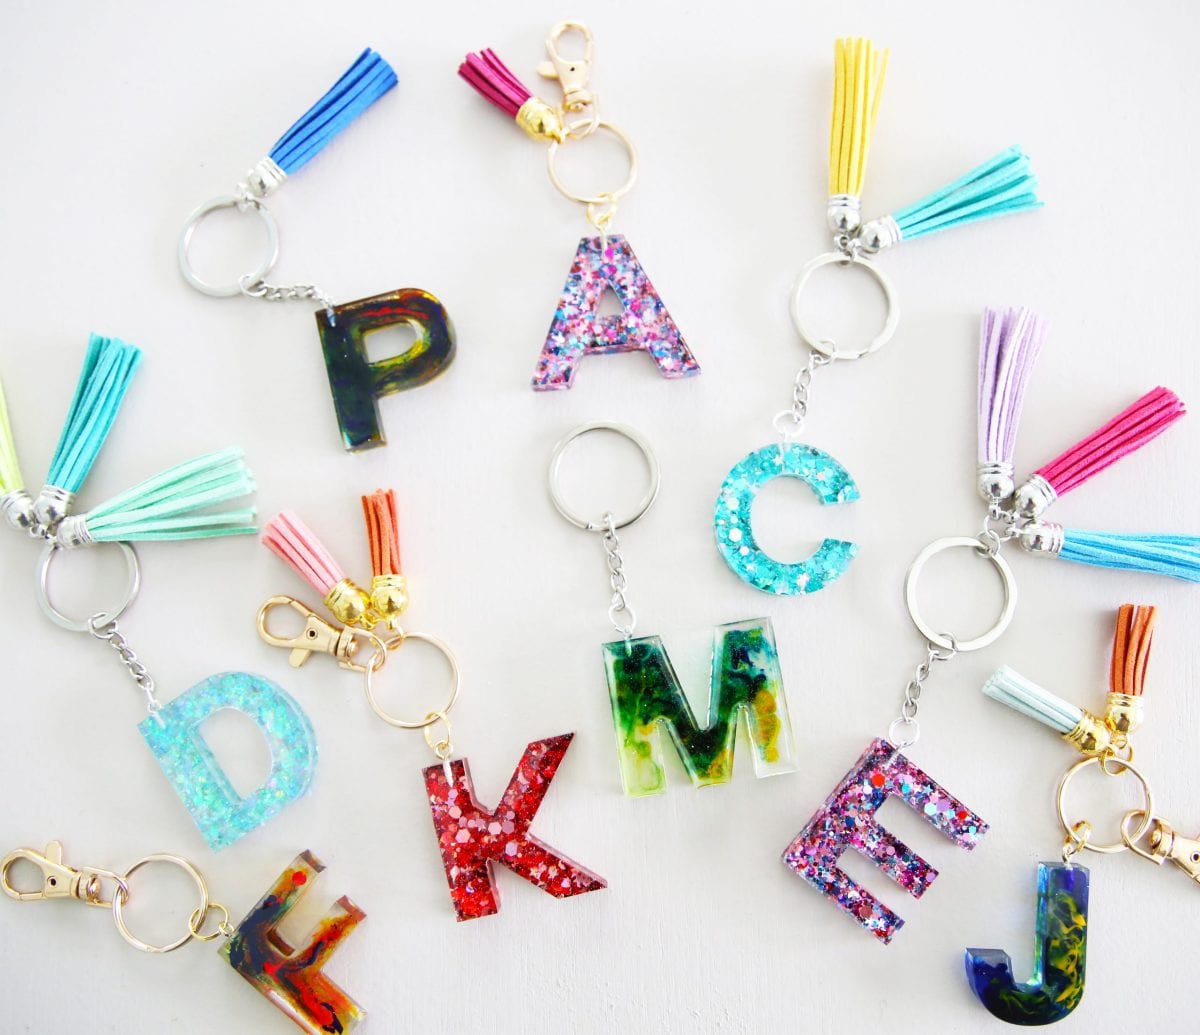
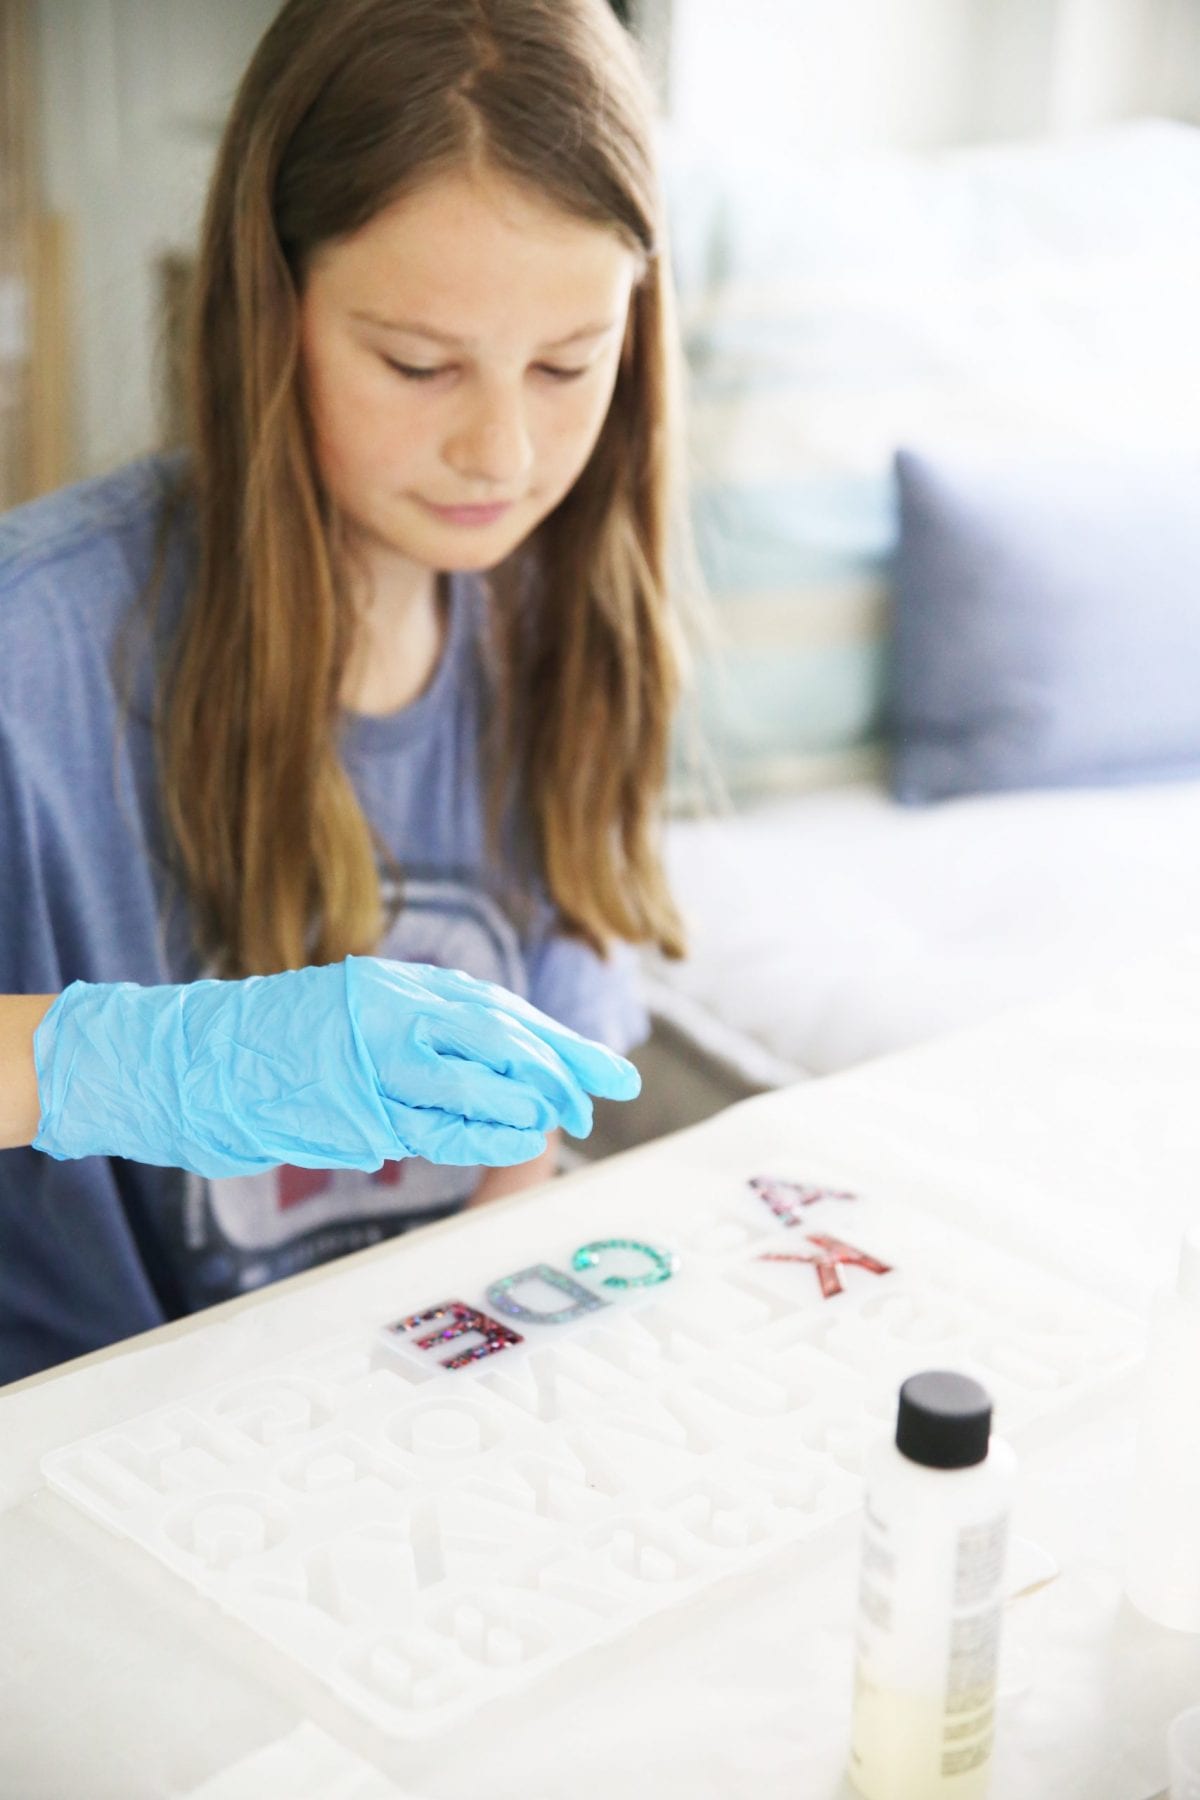
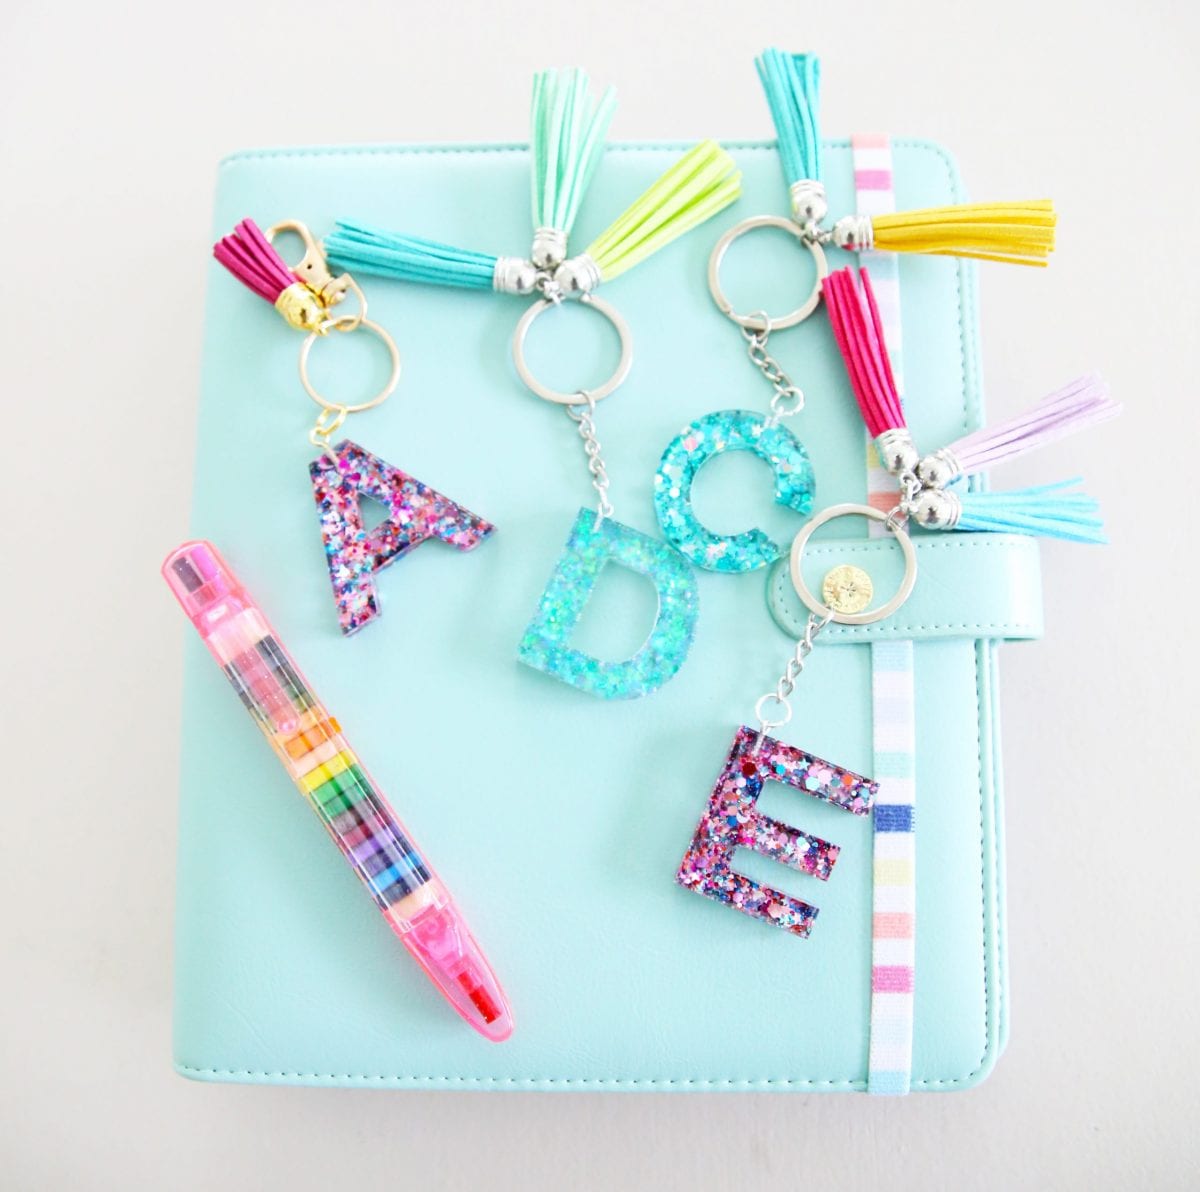
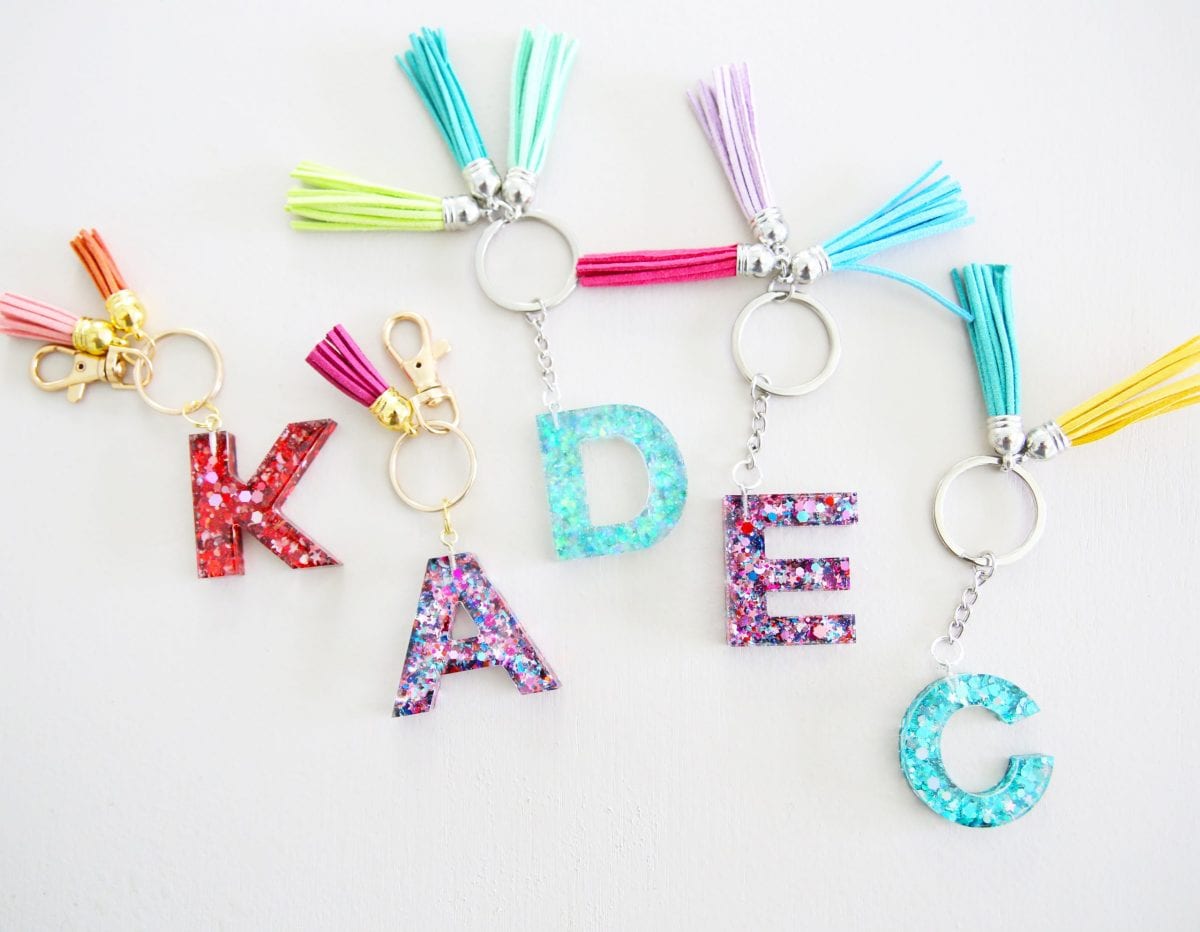
WOOT WOOT! No really… look how adorable these are!? The kids were actually thrilled to make one of these, and we’re mailing them to friends. I’m making one for my friend/neighbor because apparently I’m twelve again, and who wouldn’t love these sweet little additions?
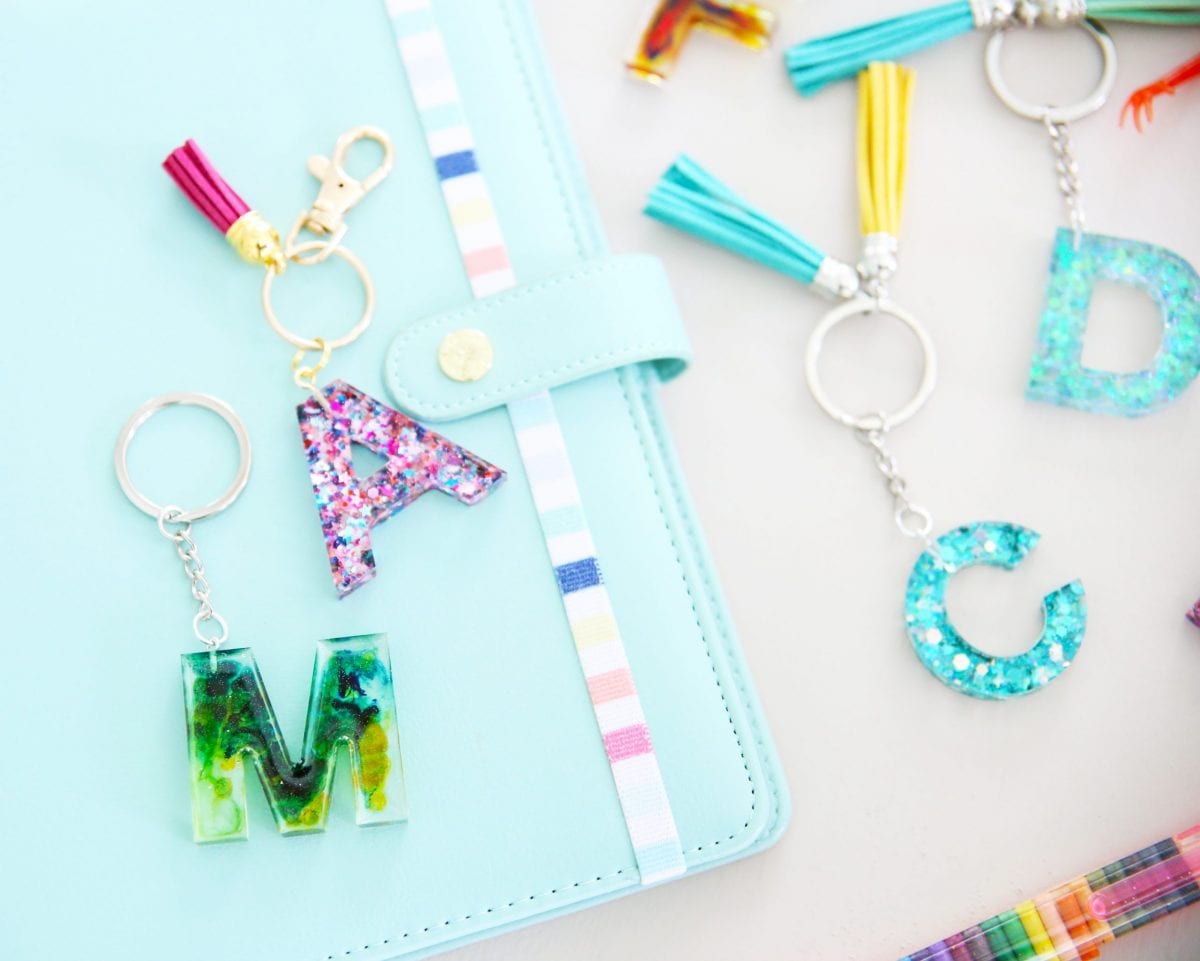
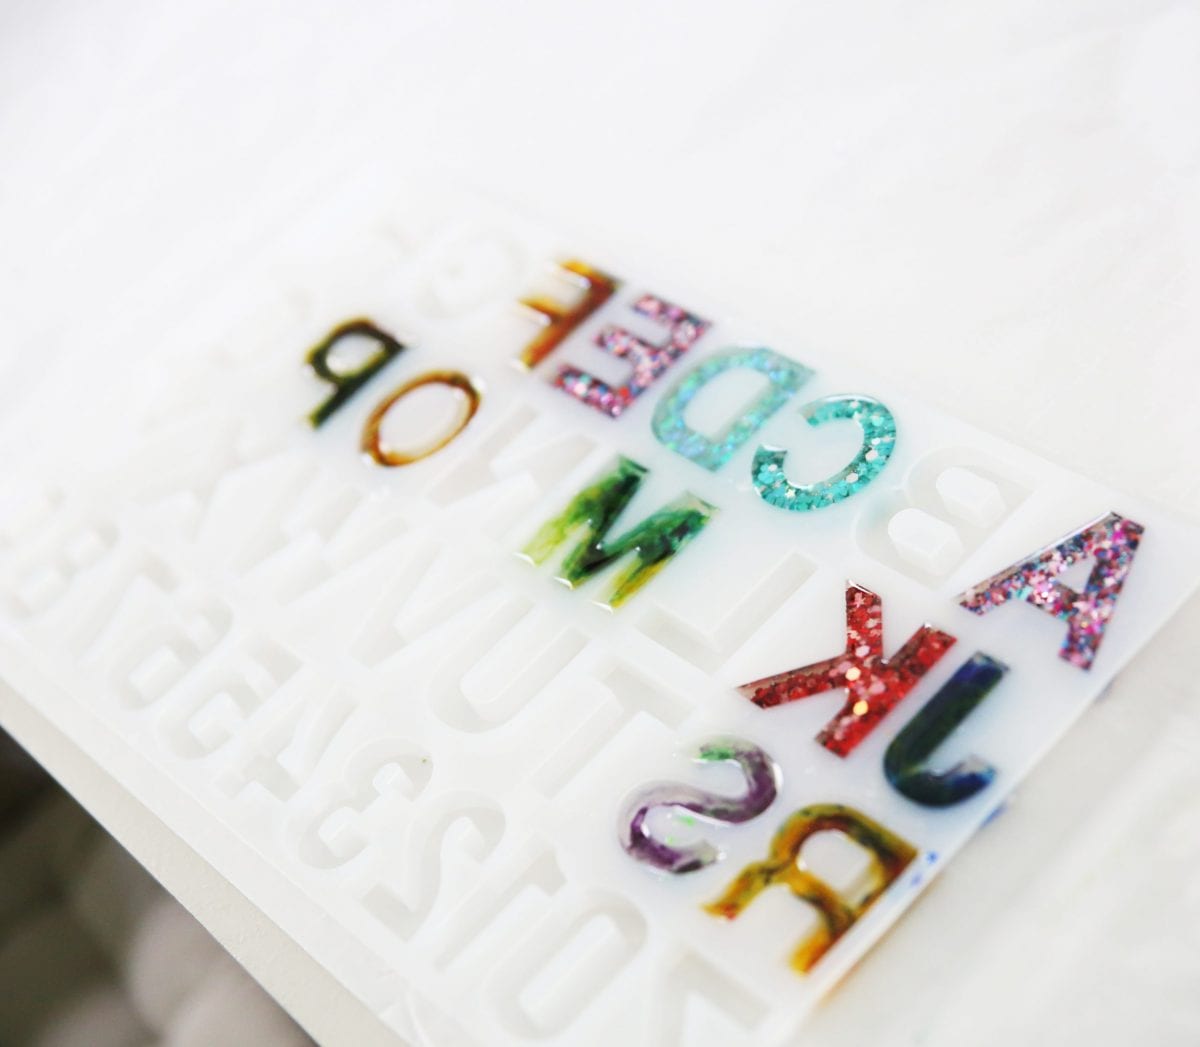
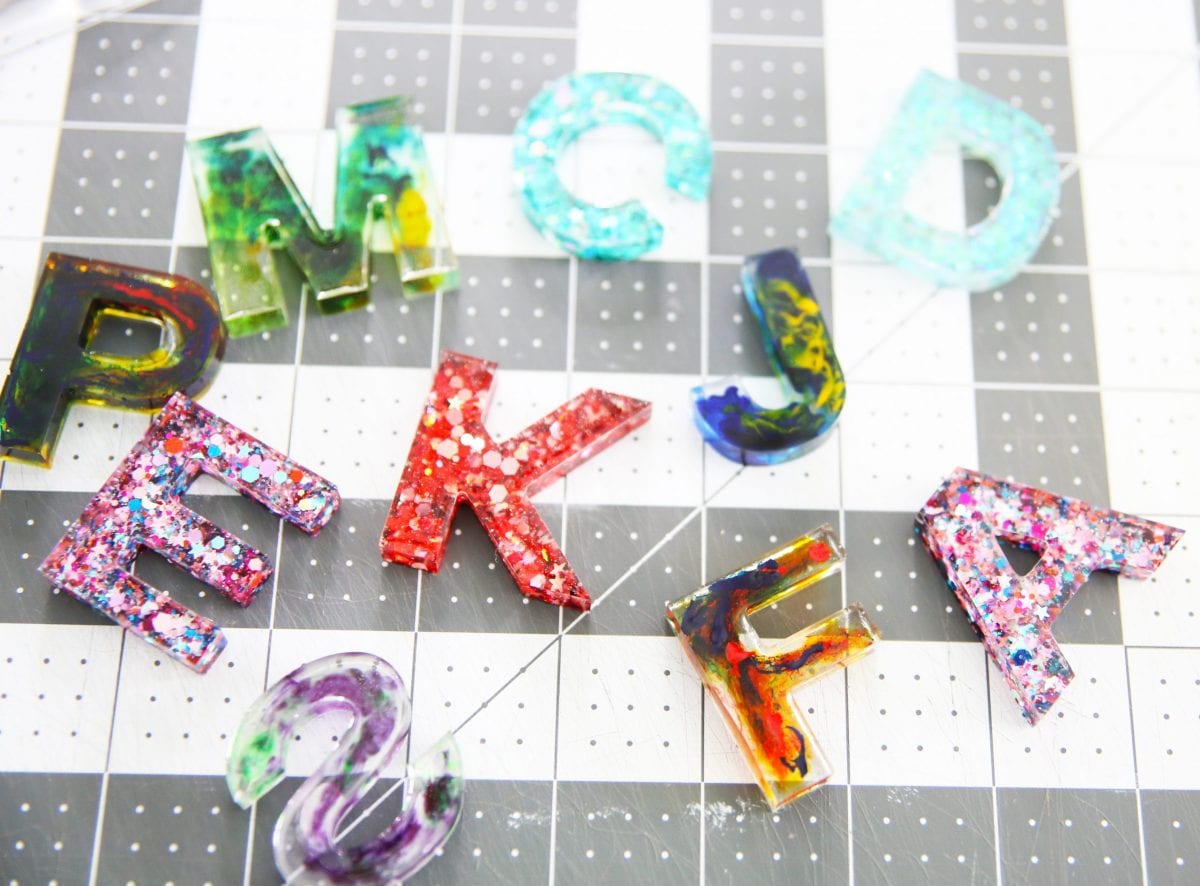
So fun and colorful, and sparkly!
But really, the color swirls are some of my favorites, too.
Want to make some of your own?

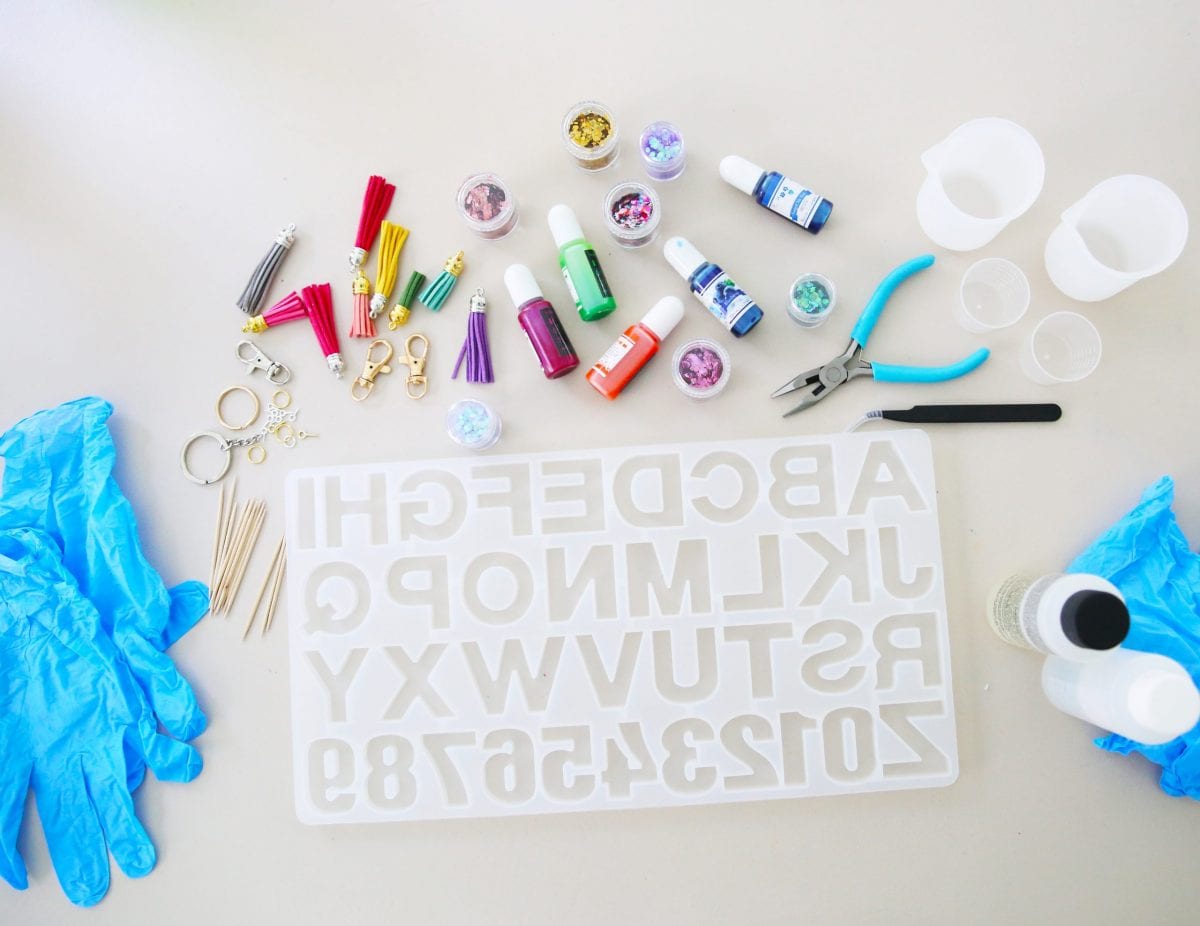
Here’s what you’ll need:
• resin kit – I like the easy cast because it comes with thorough instructions. Read them all, but I’ll cover more of that below.
• measuring cups {the kind you give your kids medicine with} – A good place to start will be two smaller ones and then one larger one for each pour.
– make sure they are marked for measuring.
• toothpicks or popsicle sticks {aka that pink thing above that came with another kit
• this adorable mold
• glitter or other fillers – it’s fun to get creative with this one
• other keychain accessories – the mold above comes with some cool keychains of their own.
• these little tools are helpful if you plan on making more
• tiny screw driver
• wax paper or another way to work on a protective surface – resin doesn’t come out, so make sure you’re covered + gloves
Note: Work off a protective surface, and in an area that is well-ventilated. Also work on an area that can be left that way to give the resin plenty of time to cure. This takes about 24 hours, give or take, so be flexible with wait time and the area being able to be left alone. {AKA the family dinner table is probably not a good option}
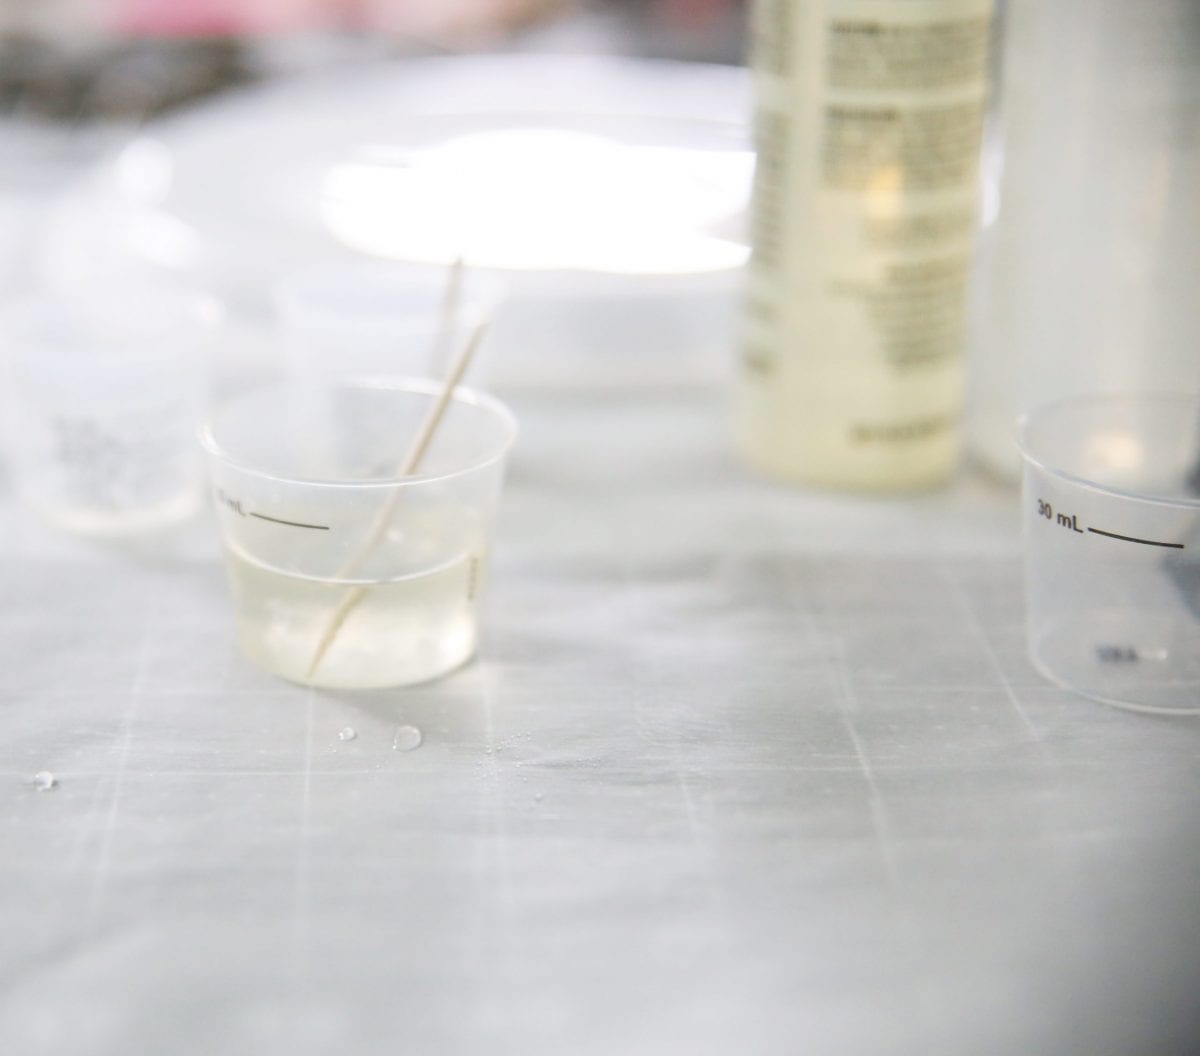
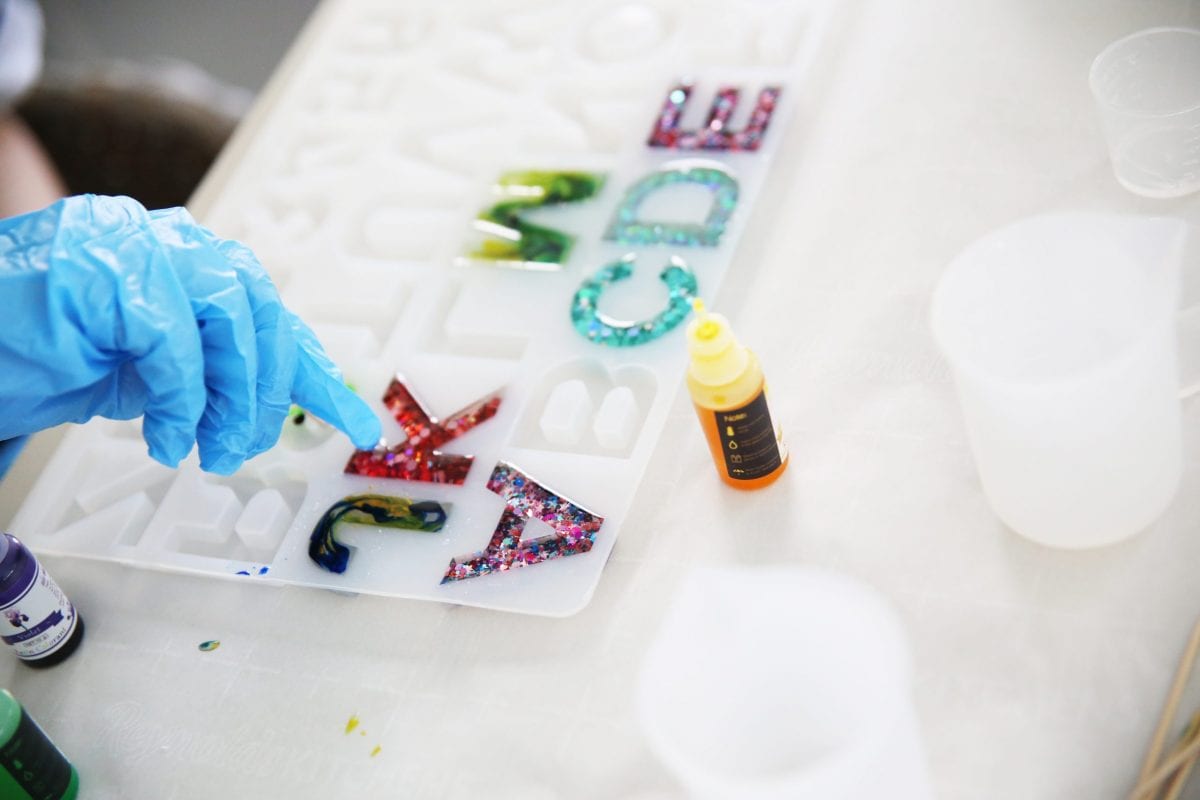
Measure out your resin according to the instructions.
Before I began, I read the directions about three times over, because it’s a very temperamental substance.
What I learned:
• Work in small amounts. This keeps it easier to deal with- It can get away from you quickly, so this is important.
• Use two different medicine cups to measure out your resin + hardener precisely. It’s a 1:1 ratio so make sure you have it right.
• If you don’t get the measurements right, you can have cloudy, sticky mixtures that never dry. So pay attention.
• Pour one into the other after you’ve measured, and stir in a figure 8 motion, with a toothpick. Work the sides, too.
• The instructions will be more precise, but stir for 2 minutes.
• Do not remove your toothpick, when stirring. This reduces air bubbles.
• After two minutes, pour it into another measuring cup, with a fresh stick.
Stir for 1 minute.
Your resin will go from liquid to soft gel in about 15 minutes. Now you can add filler, or whatever else you wanted to add to your resin.
You have that period of time to work with it. Stir again and you’re ready to pour.
The clear cast resin is a great one to work with, because it domes beautifully in simple projects like this.
You let it dry, for about 24 hours until it’s no longer tacky, and you’re done!
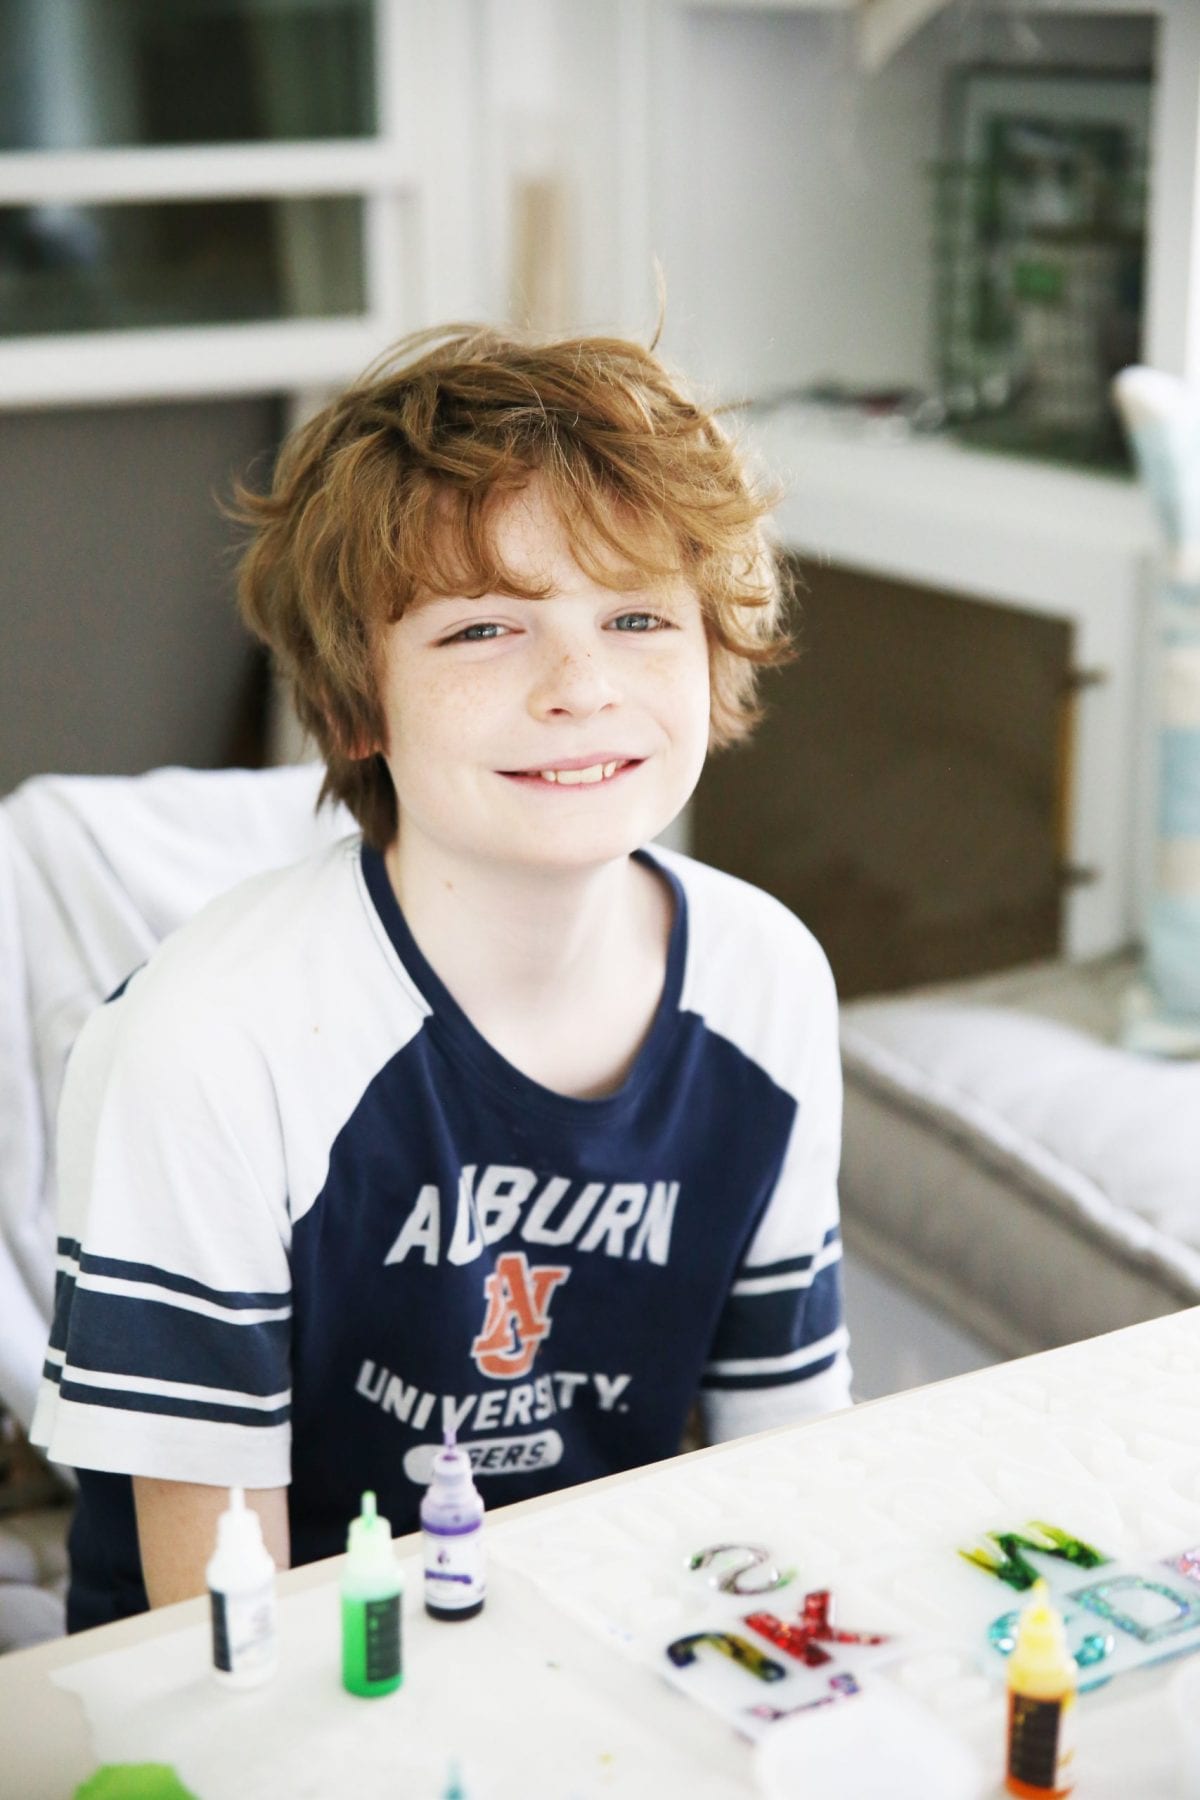
Because this guy wasn’t necessarily interested in glitter, we decided to do dye.
We simply poured the clear resin into a mold {instead of resin with glitter for the other options} and then lightly dropped a little dye into each letter.
Note: Not too much dye, or the resin will always be too tacky and never dry completely. We recommend only a few drops.
Then he stirred each one lightly with a toothpick once in the mold, to let it spread around.
Clean up: you can use alcohol on your measuring cups while the resin still wet. I just clean them out with paper towels and some alcohol at the table. This probably goes without saying, but don’t use your measuring cups for medicine again after using with resin, since it’s not safe. And don’t pour it down the sink when cleaning – thus the paper towels. Also, if you get some on your skin, baking soda + salt are a good option for removal.
We waited 24 hours and then our little molds were ready to pop out! Easy peasy rice and cheesy… if you can just get those measurements right. It tends to take a little practice.
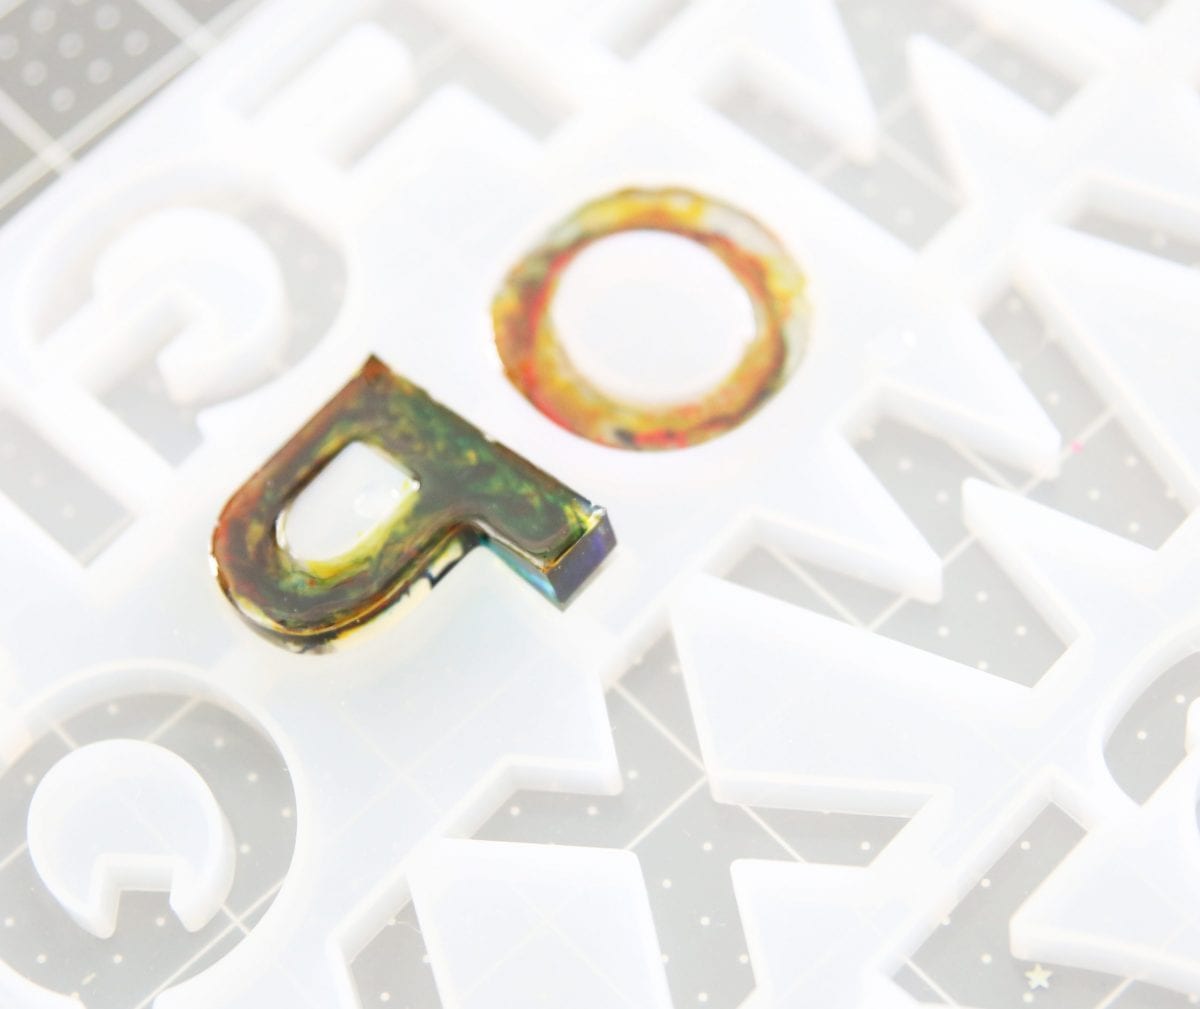
Tada! Now you’re ready to add those accessories.
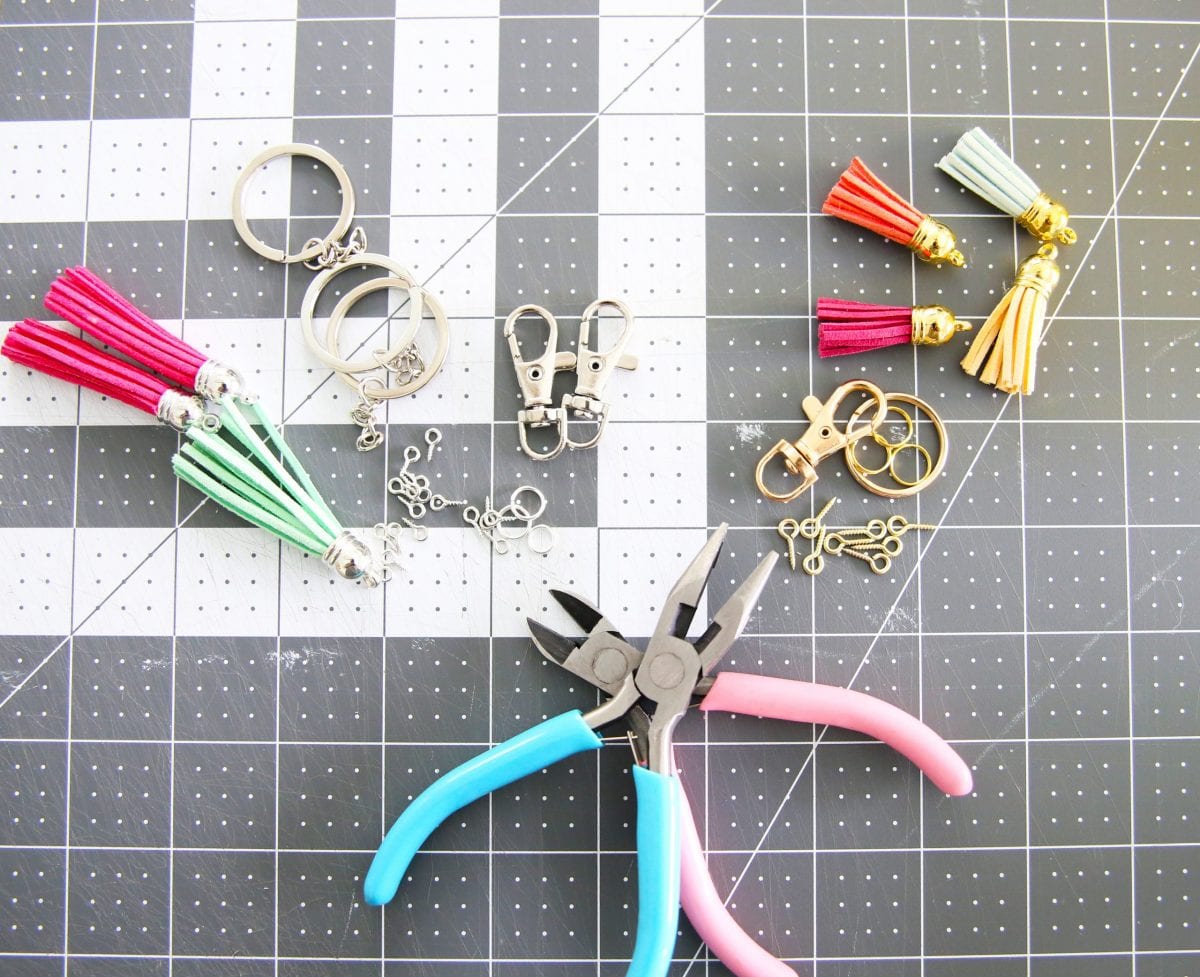
The key here is an eye hook + jump link. The kit already comes with some keychains, but I’d recommend matching up whatever metals you plan to use with your tassels. We used both brass and silver.
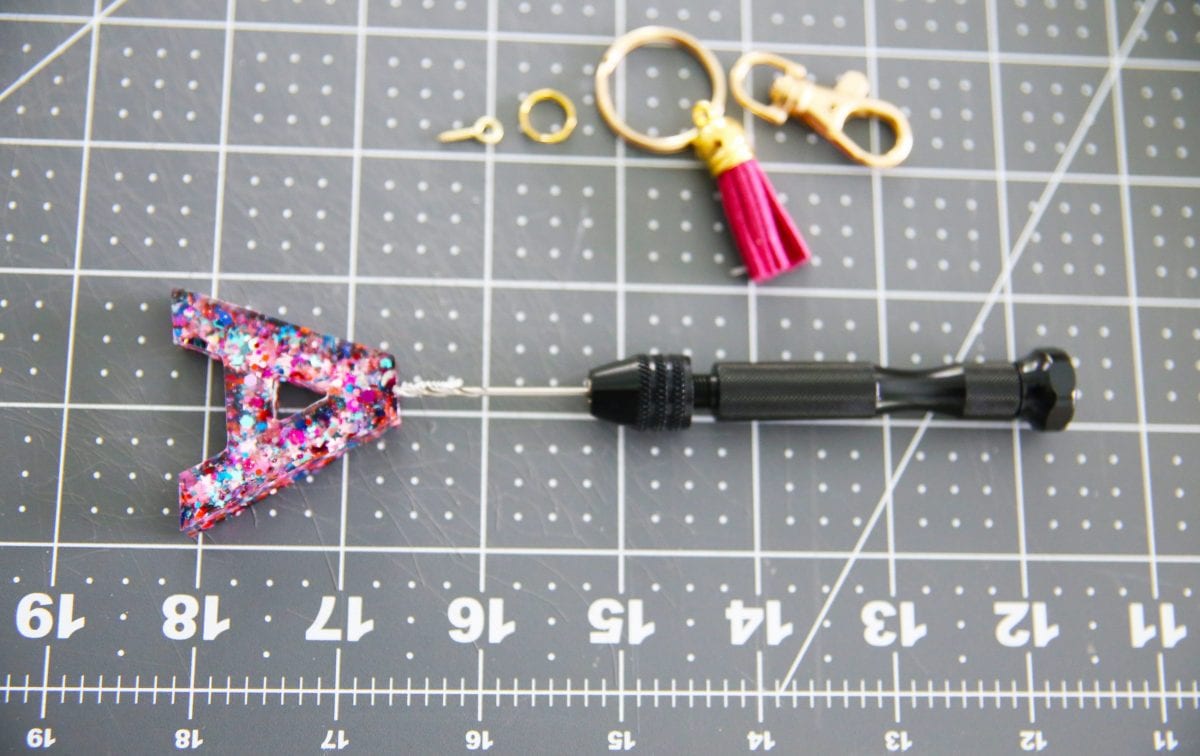
To drill your hole at the top, you’ll need your tiny screw driver. Be sure to check your width with whatever the width of your eye hook is, by lining it up with your eye hook. We also had some glue on hand, but it wasn’t necessary if the hole is the right size.
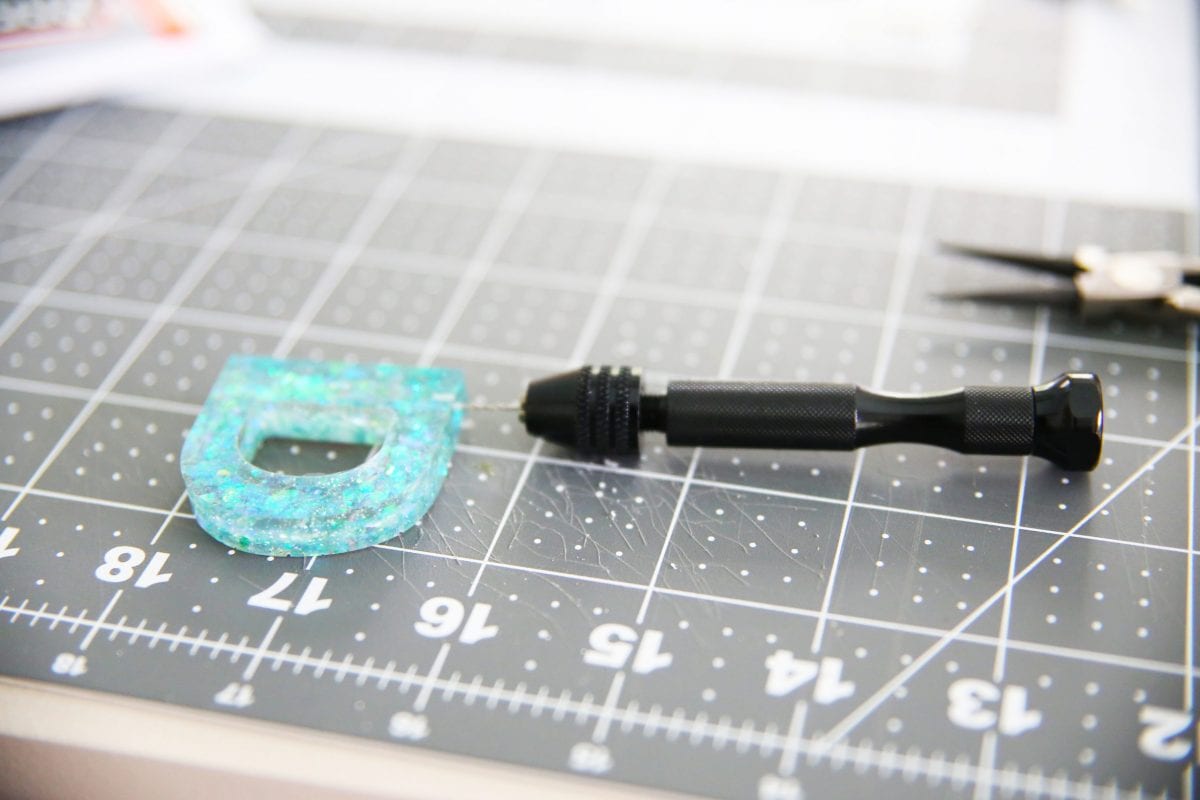
Drill your hole, apply your eye hook, then your jump link.
Attach the rest, however you want.
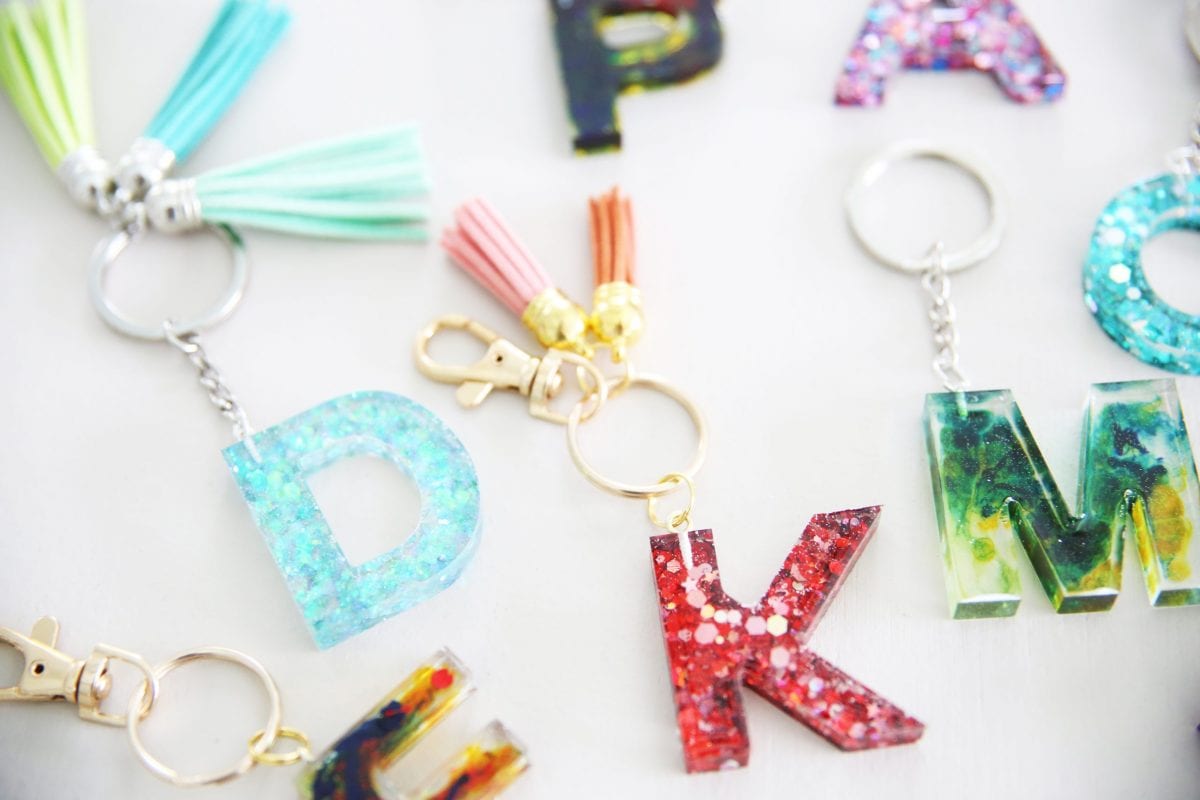
We had a lot of fun bringing out different colors with our tassel choices. So much fun!
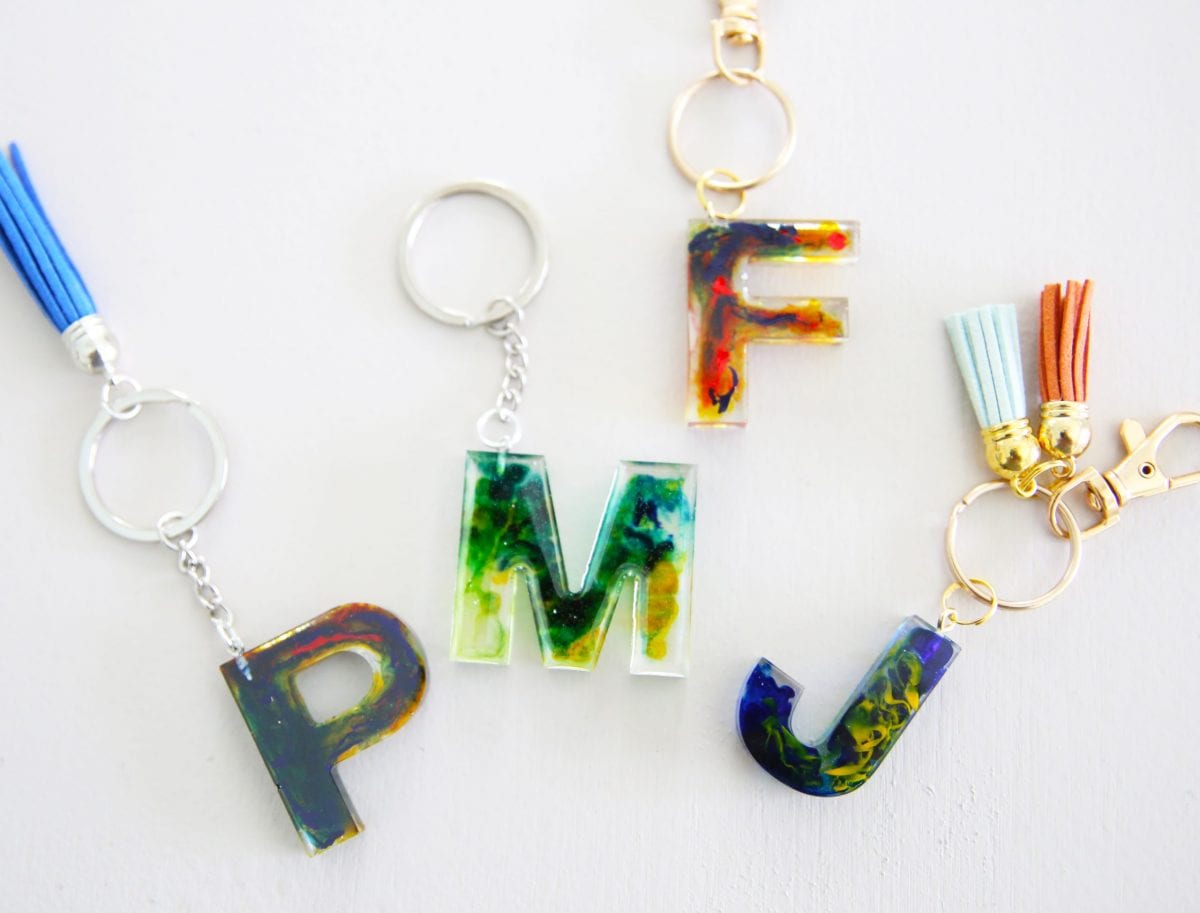
I think I love the swirls as much as the glitter options. They were so different, with unexpected finishes. Malone definitely wants to put that M on his backpack as soon as he goes back to school. That is, if I don’t steal it first.
As always, let us know if you try it. We’d love to hear!
And be sure to check out our first dive into resin with this fun jewelry idea here + free downloads to create your own!
Another fun little therapeutic crafting idea, just in time for Mother’s Day!

Have an inspired day!


OMG, can you sell me a few of these? These are sooooo adorable!
haha! I wish I had the time! I’m tackling too much at once right now. But I promise they’re so fun to make ;}
Great post Thanks for sharing a very powerful post.