{We partnered with the with our good friends at Frog Tape to build this project. For more on our partnerships please visit here.)
It’s no secret around here, that we absolutely love creating our own art.
We think that it brings so much personality and joy into a space. It’s also no secret that we love a lot of color in our rooms. Original creations for one of a kind looks are our very favorite additions for a ton of character!

We get quite a few questions pretty regularly from fabulous readers, asking us if we can share any tips for creatin art.
One of our very favorite must-have tools for one of a kind art, is wait for it… Frog Tape.
So today, we wanted to share some of our very favorite tips and tricks for creating art with Frog Tape.
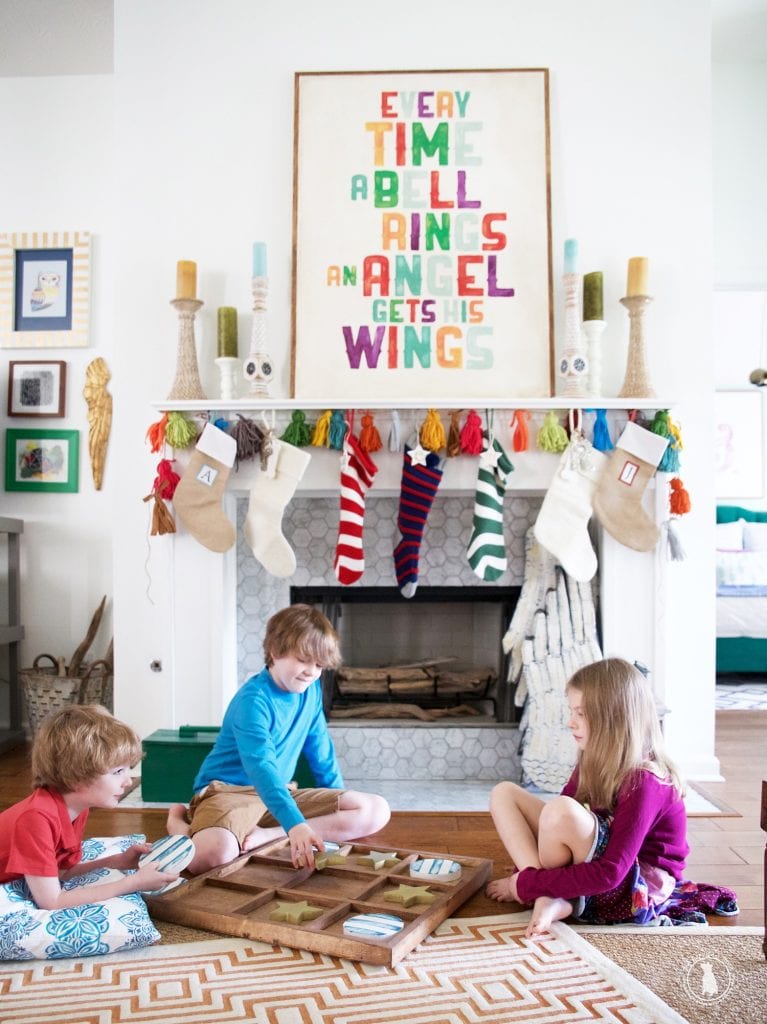
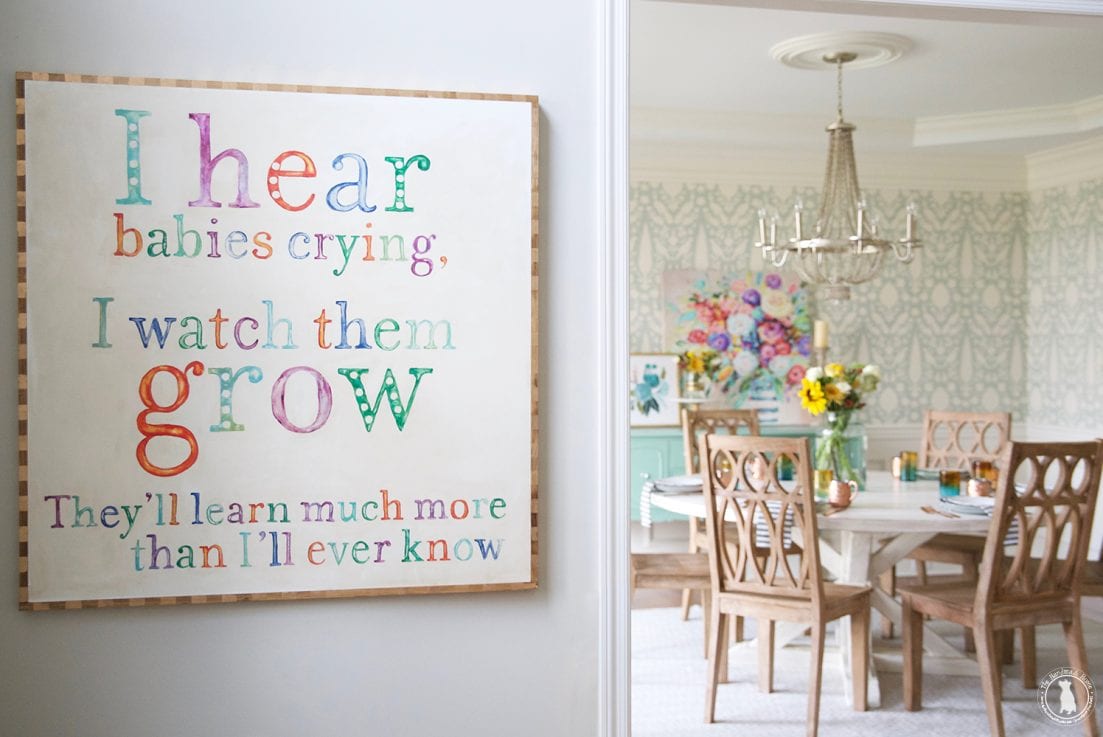
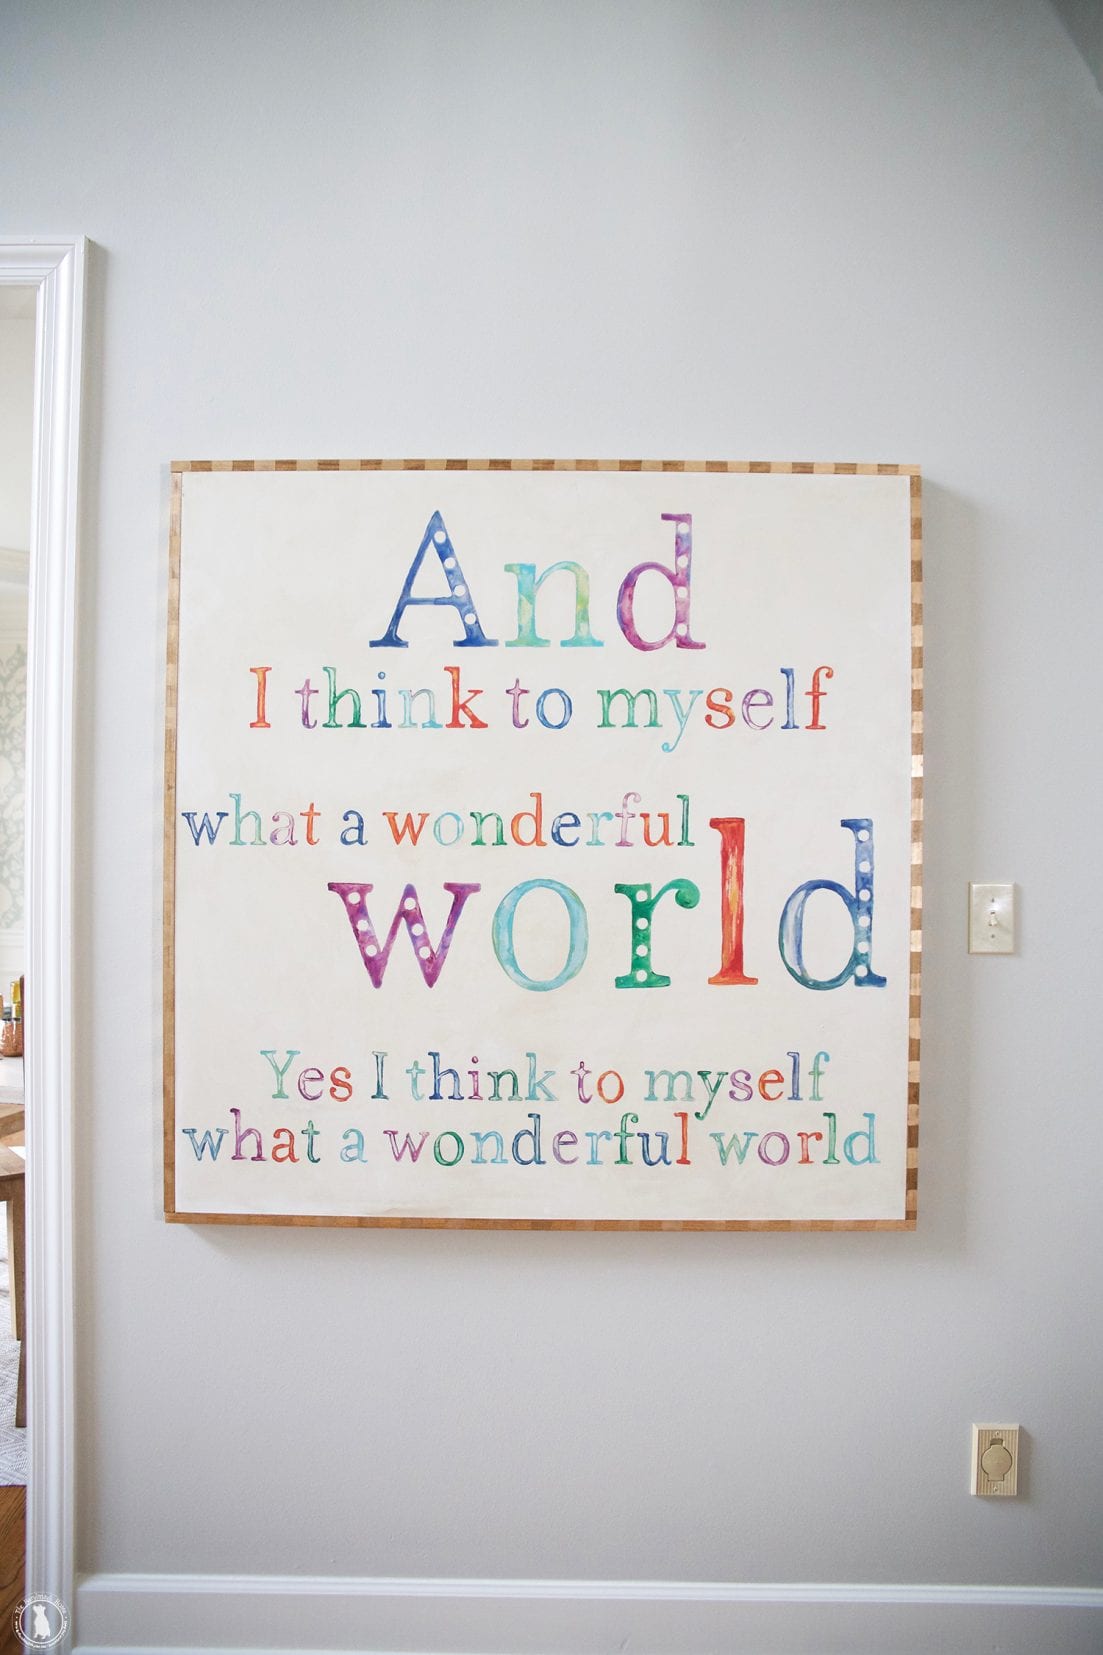
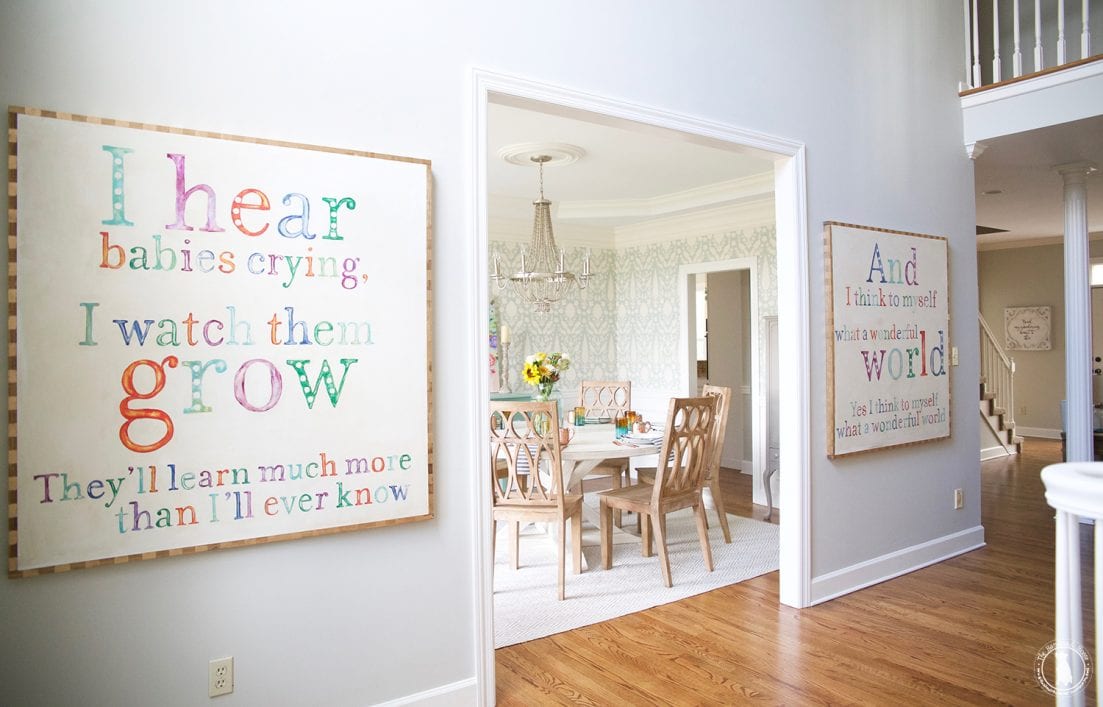
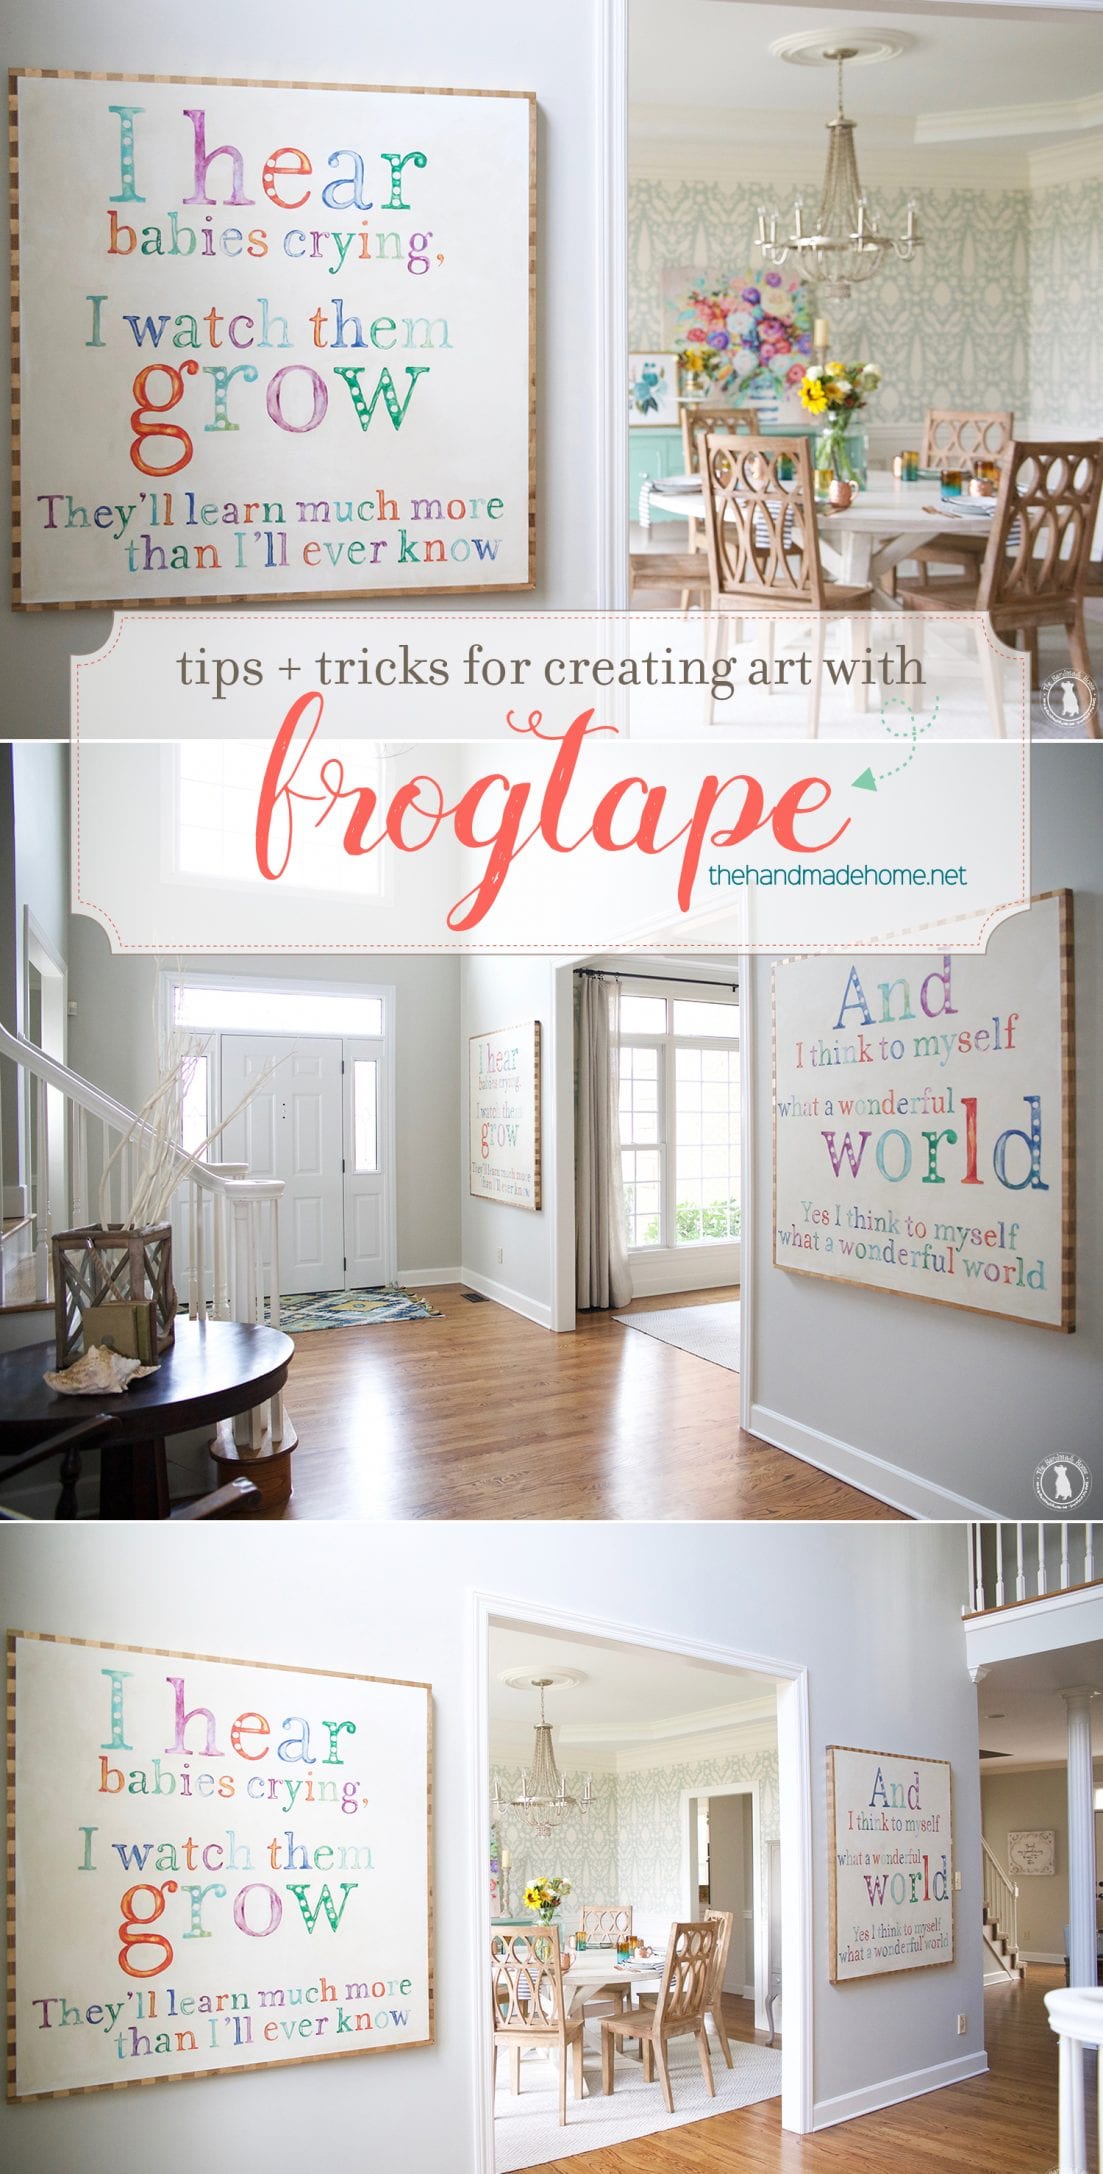
We recently created this space for some of our favorite clients, and along with it, we were able to surprise her with these pieces. It had a special meaning to her – a song she grew up hearing her grandfather sing, and something that reminded her of her own children.
It was also the song they played at their wedding – a true classic.
So without further ado, we’re breaking it down today for creating with Frog Tape.
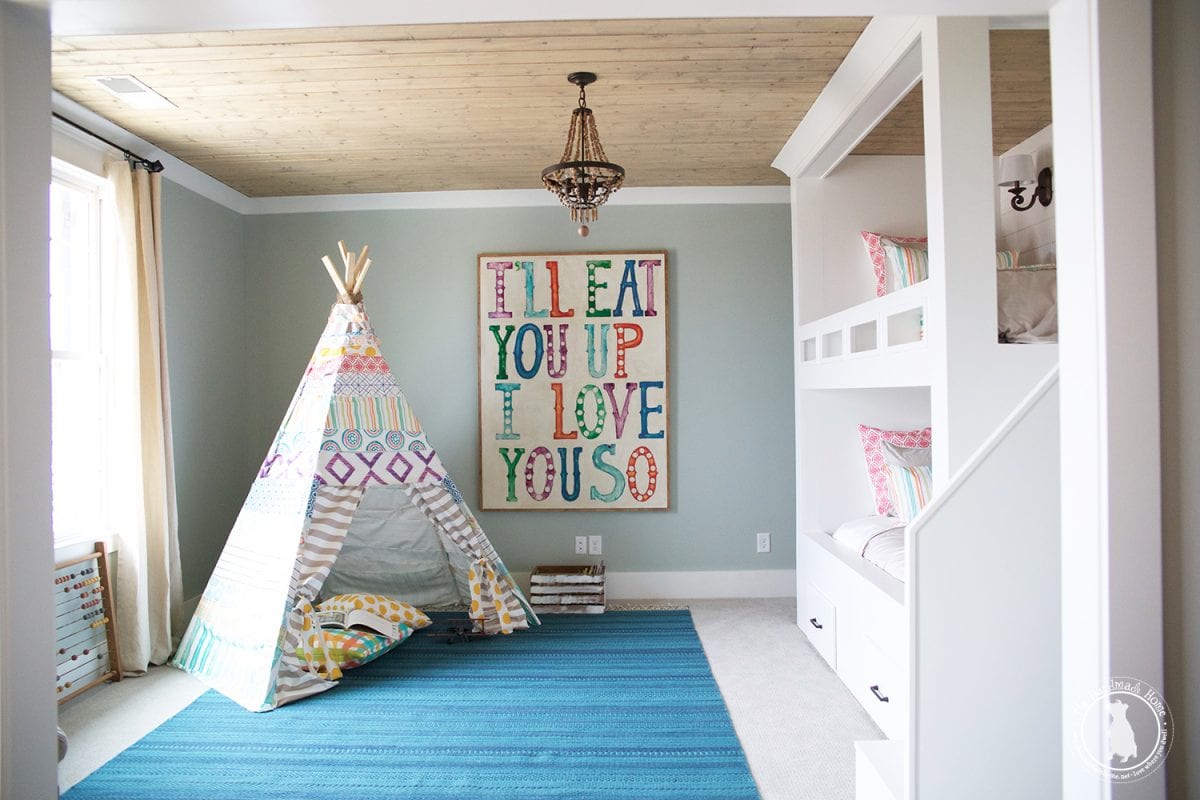
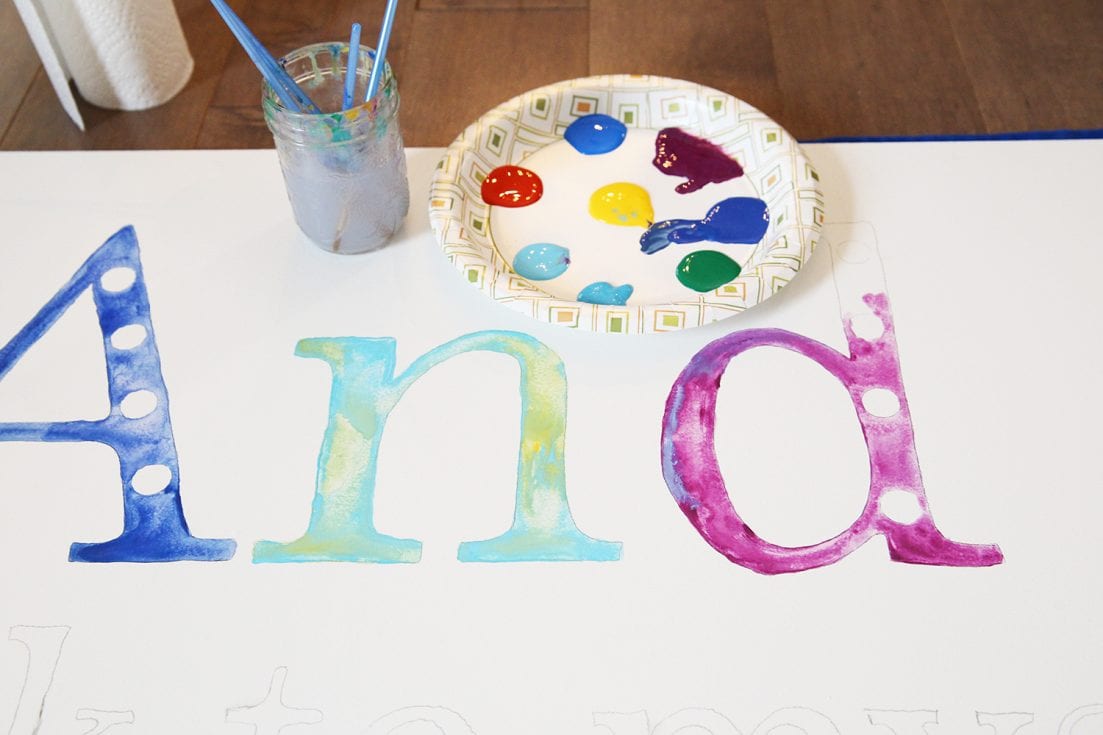
1. Sharper Lines for Lettering
It’s no surprise that Frog Tape makes the best lines when it comes to painting. But they’re actually key for all things typography and the awesome colors they can bring into your home. Here’s how we use them with our hand lettering:
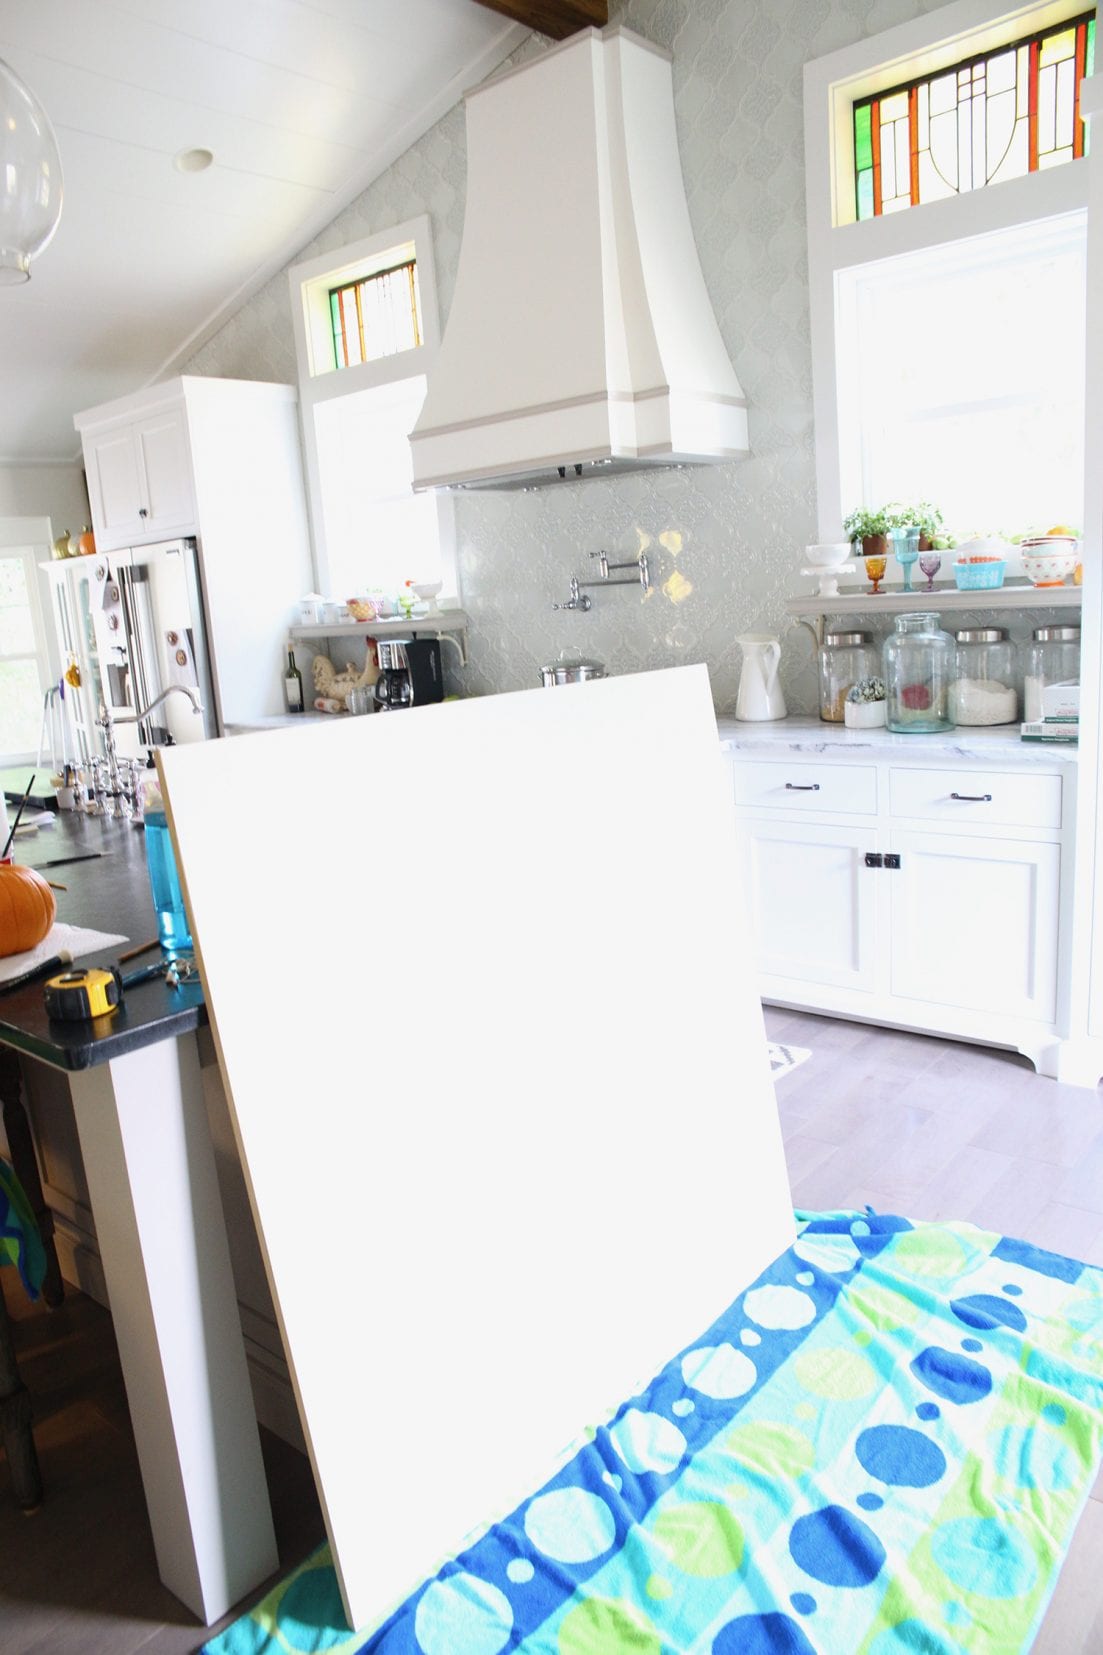
Once we’ve decided on the general sizing for the canvas or MDF that we wish to use, we prep it for painting with the first coat of paint.
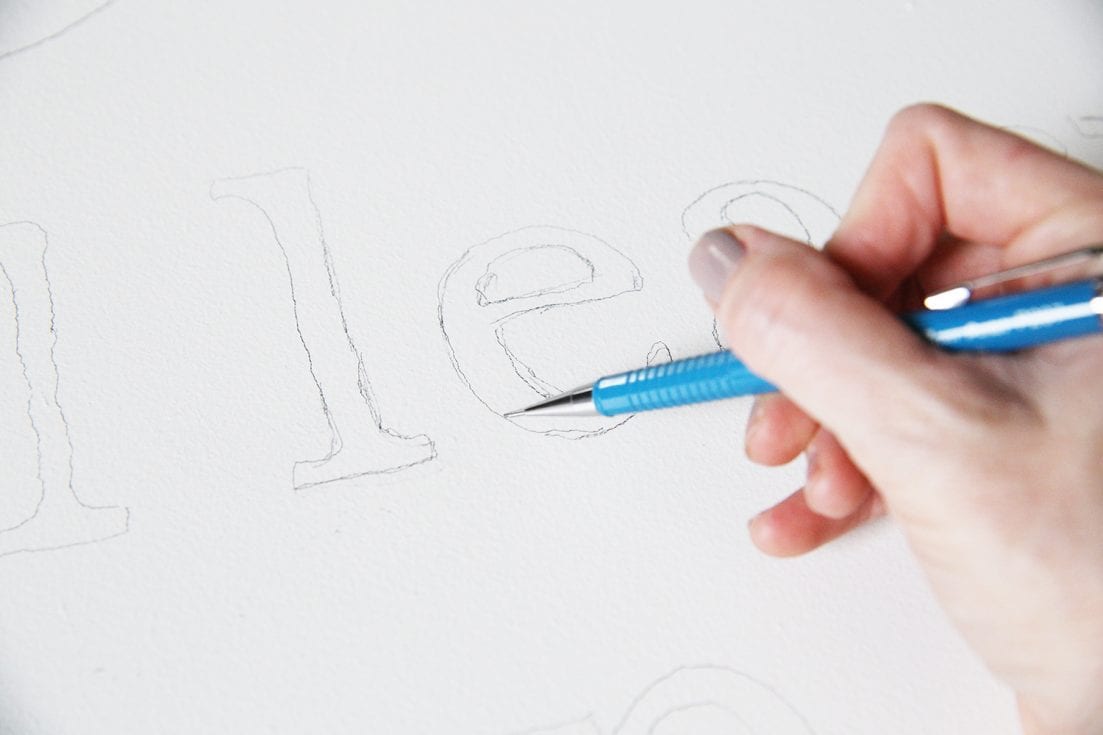
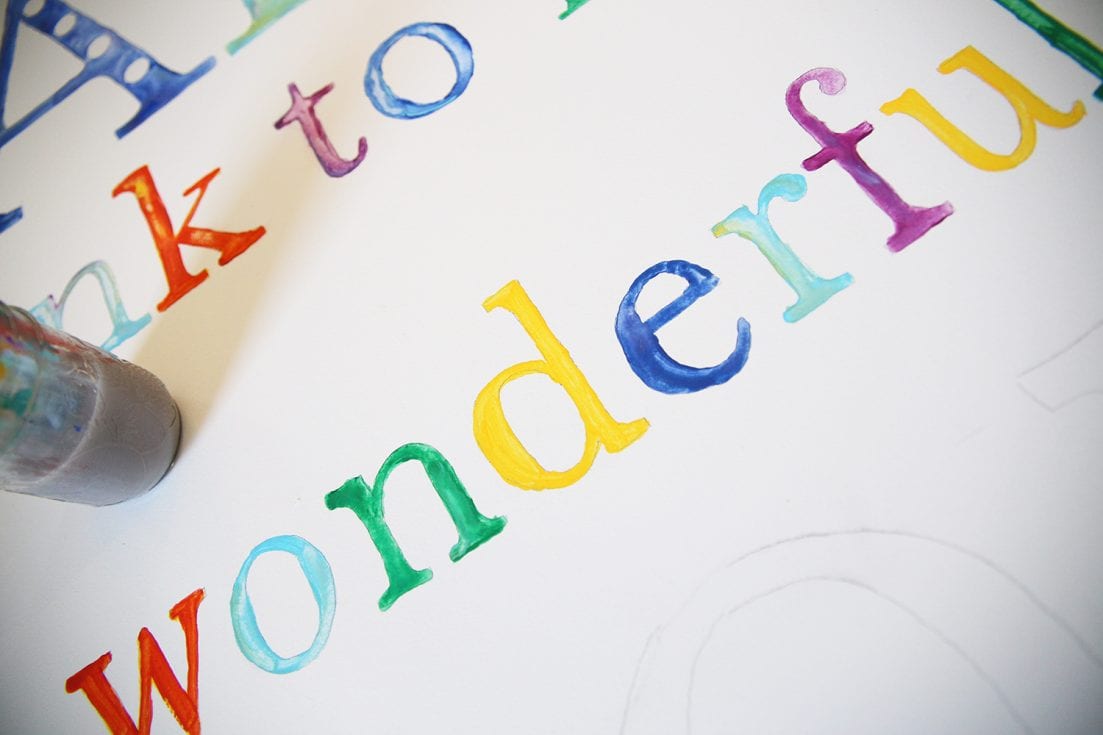
When that’s dry, we’re able to map out how we want it to look, and then hand letter everything. We touch it up before adding paint, so that we’re ready to fill it in.
We choose each color as we go, and fill them in with different styles of painting- from watercolor to textured layers, depending on what we’re going for.
Sometimes, we like to keep the lines easy and natural. But to prevent them from bleeding onto the background {which touch up painting is needed to correct, and it’s really nice when you can totally skip this step in the end} we use Frog Tape.
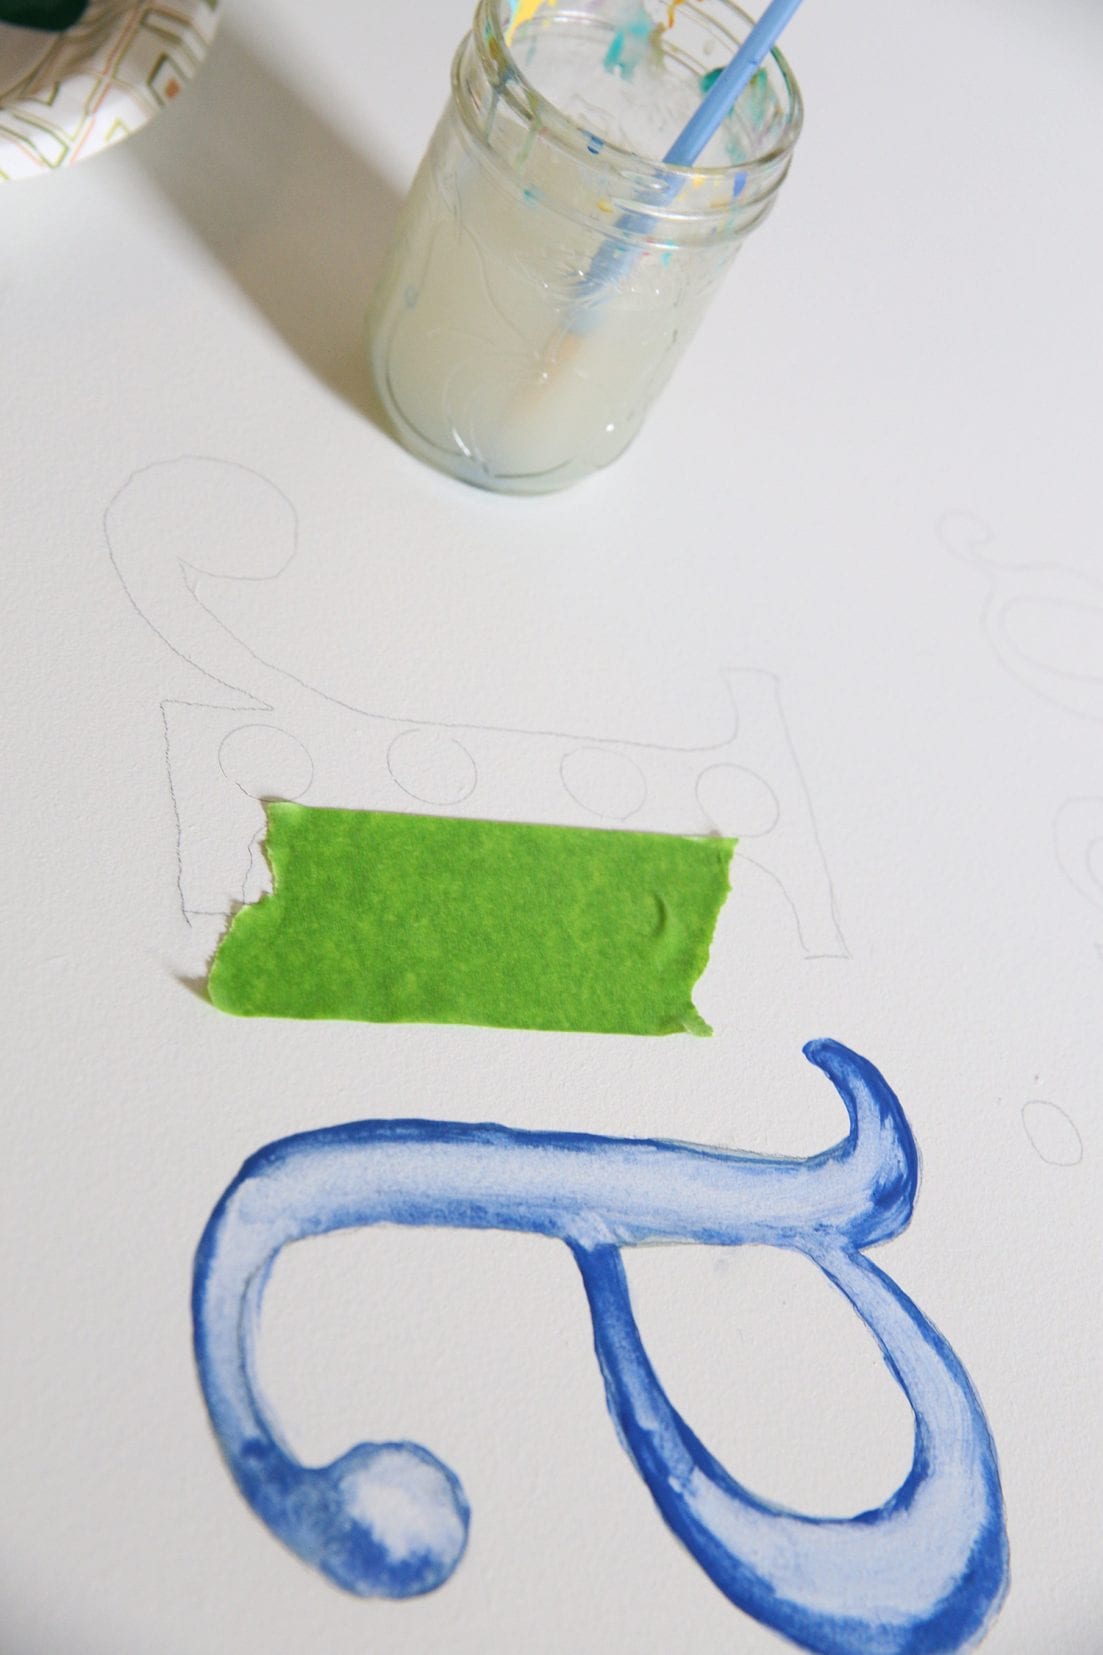
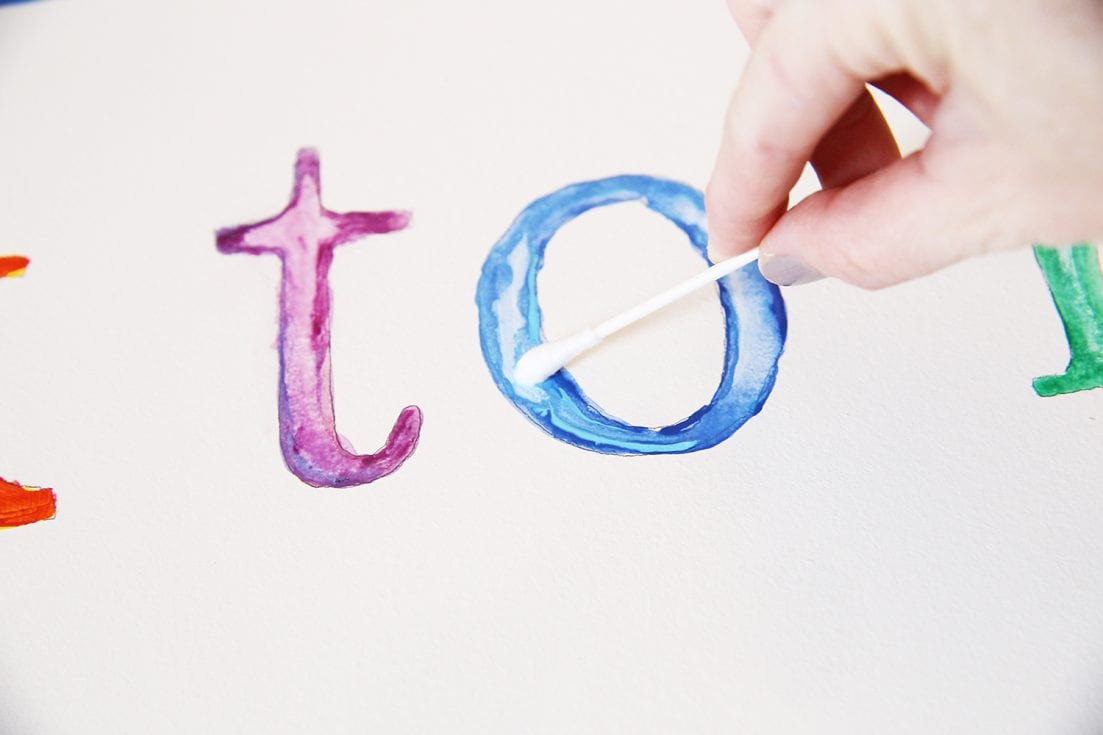
In these photos, you can see one part of the ‘r’ where I used Frog Tape, and another where I didn’t. The colors bled over and I had to go back, and touch it up.
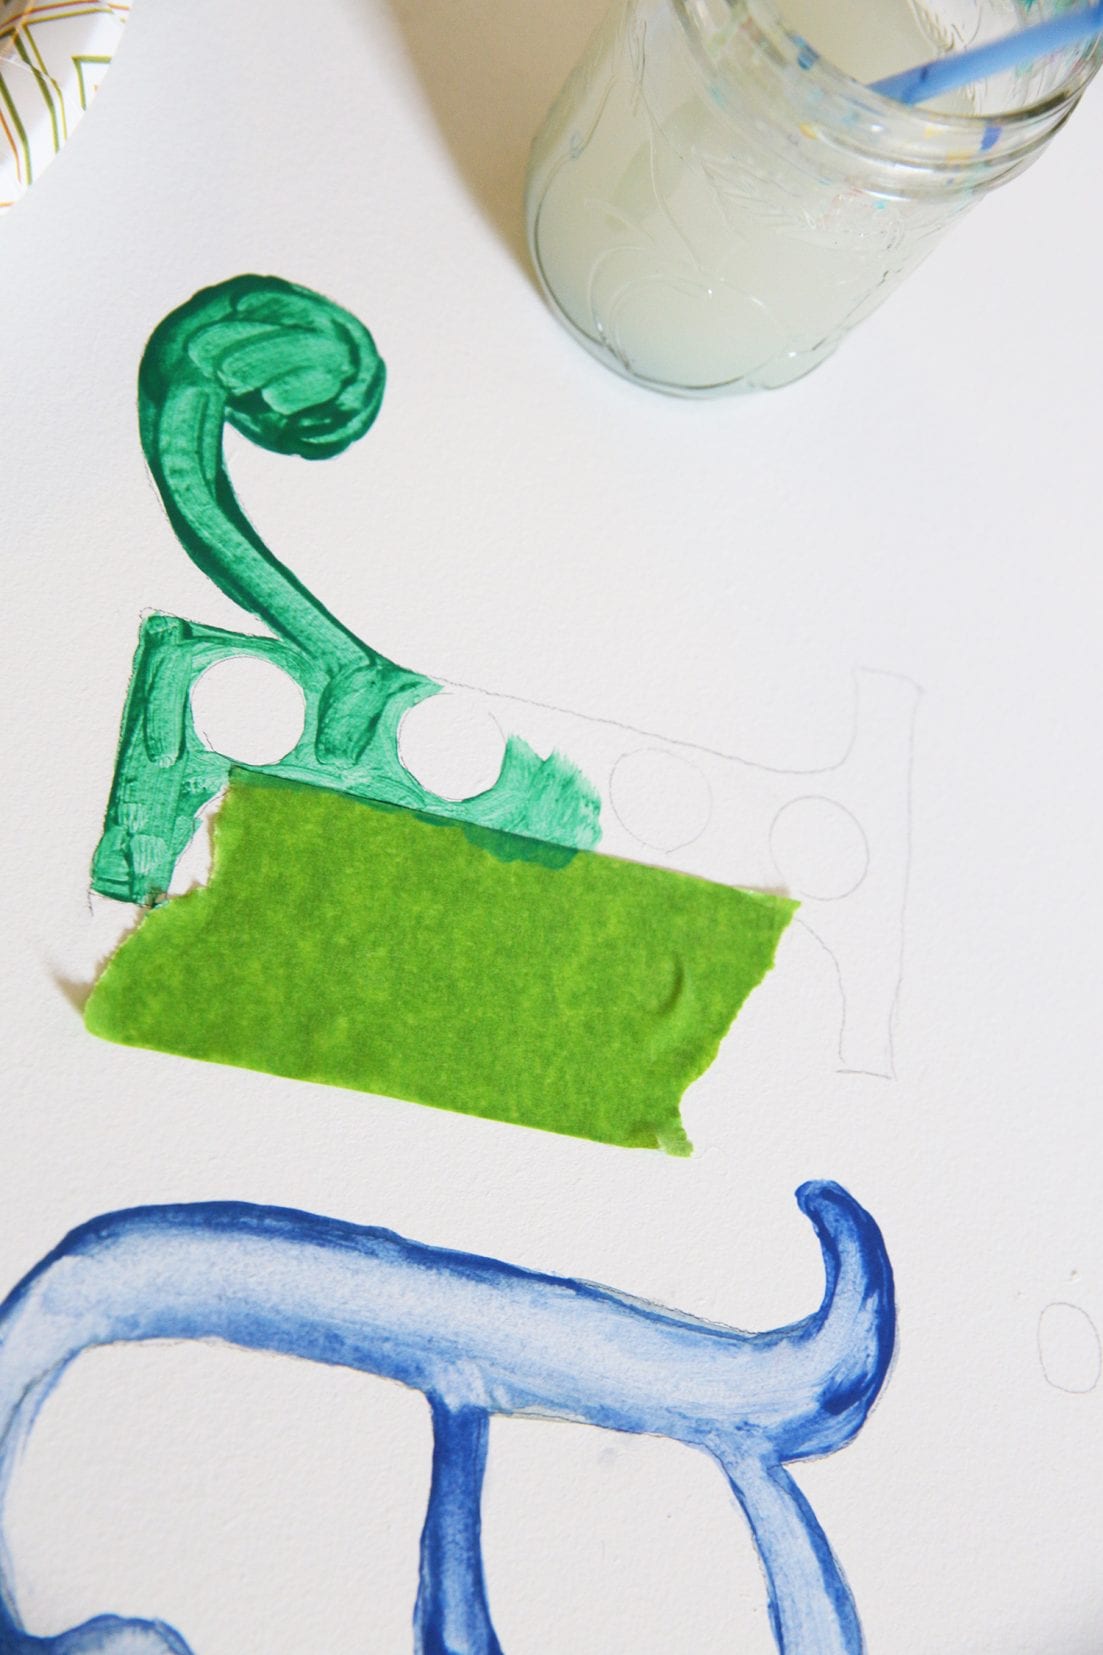
It takes a little extra step in the beginning, but using frog tape on big solid areas for sharper lines rather than just free handing them all, actually saves time.
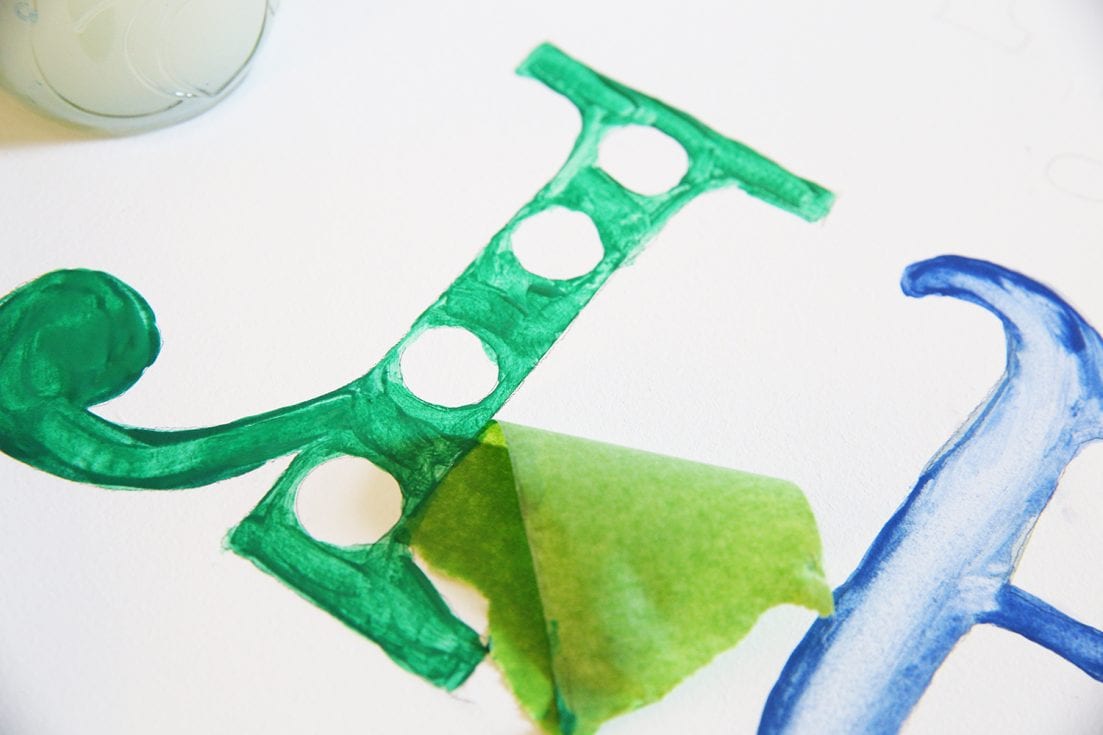
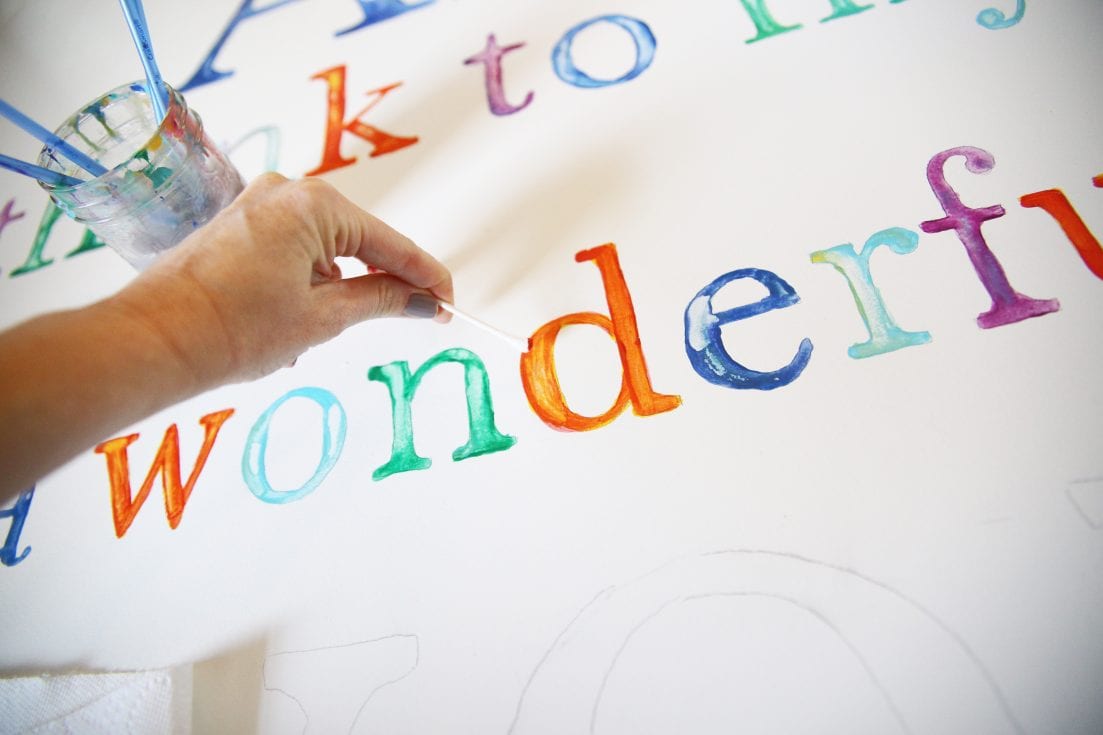
We place the tape, paint, and remove.
Call me obsessive, but there’s nothing more satisfying than pulling that tape off to reveal sharp, clean edges.
We love treating each little letter as its own separate but important part. It’s amazing how much character each little letter can bring into the piece. So we use them with the little letters, too.
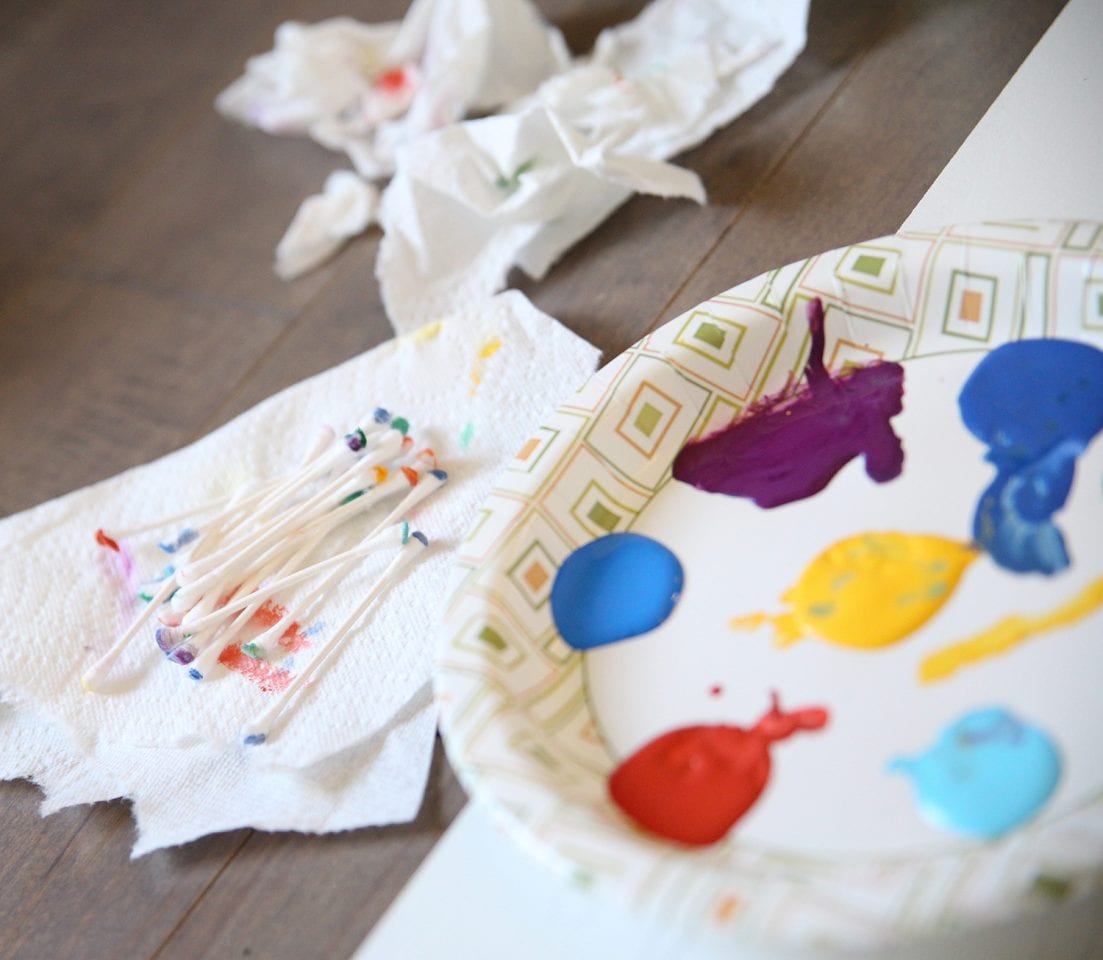
Bonus round: We also love to clean up messes and create layers by adding and then taking away the paint with smaller pieces like q-tips to get into those tiny edges.
This helps bring your own special, organic touch to the art as we go.

2. Creating the Perfect Stripes
Stripes have been our go-to pattern on frames and walls and fabrics for years. I even use Frog Tape to create awesome patterns in our fabric collection, but that’s another topic for another day. Here’s how to get that excellent {and easy peasy} stripe pattern on your frames.
First up, be sure to check out our tutorial for creating a great border frame here. -This is our first and foremost best little secret for polishing off your work, without dropping thousands at a custom frame store. But for this piece, we took it one step further, and really upped the ante in the polished department with some fun stripes to show it off.
This how-to is how we always get our stripes just right without the pain of measuring. Because math is hard.
Cut each piece of your frame to size, per our tutorial above. When you’re ready, add the stain. This should only take a small bit {depending on the temperature} to dry. Next up, you’re ready for the perfect stripe with the help of Frog Tape.
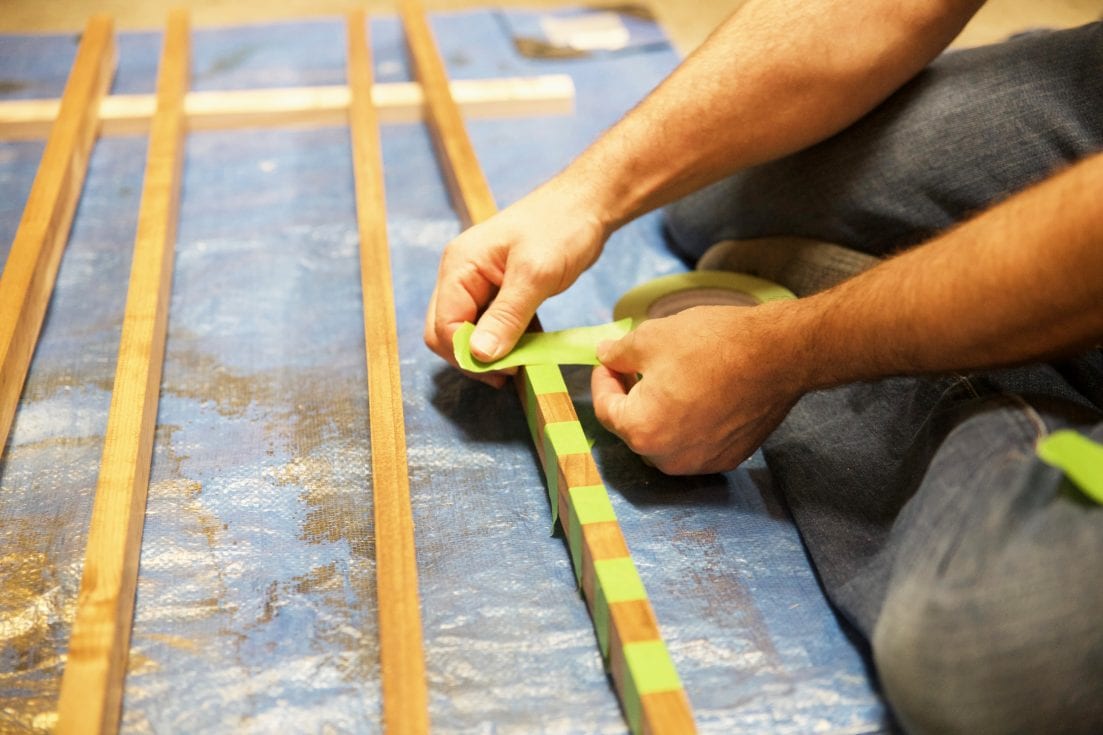
a. Place your first piece of Frog Tape. Wrap it around the sides you intend to paint.
b. Next, place your second piece of Frog tape. Side by side, as evenly as you can possibly get it.
c. Third, place your third piece of Frog Tape. The same way, butted up against one another as shown.
d. Remove the center piece, and leap frog it over your third piece, then place it again, next to the last piece. Keep repeating as you go, placing them side by side.
e. Then remove and leapfrog the third piece, over and over again until your tape is evenly spaced apart, all the way across your piece.
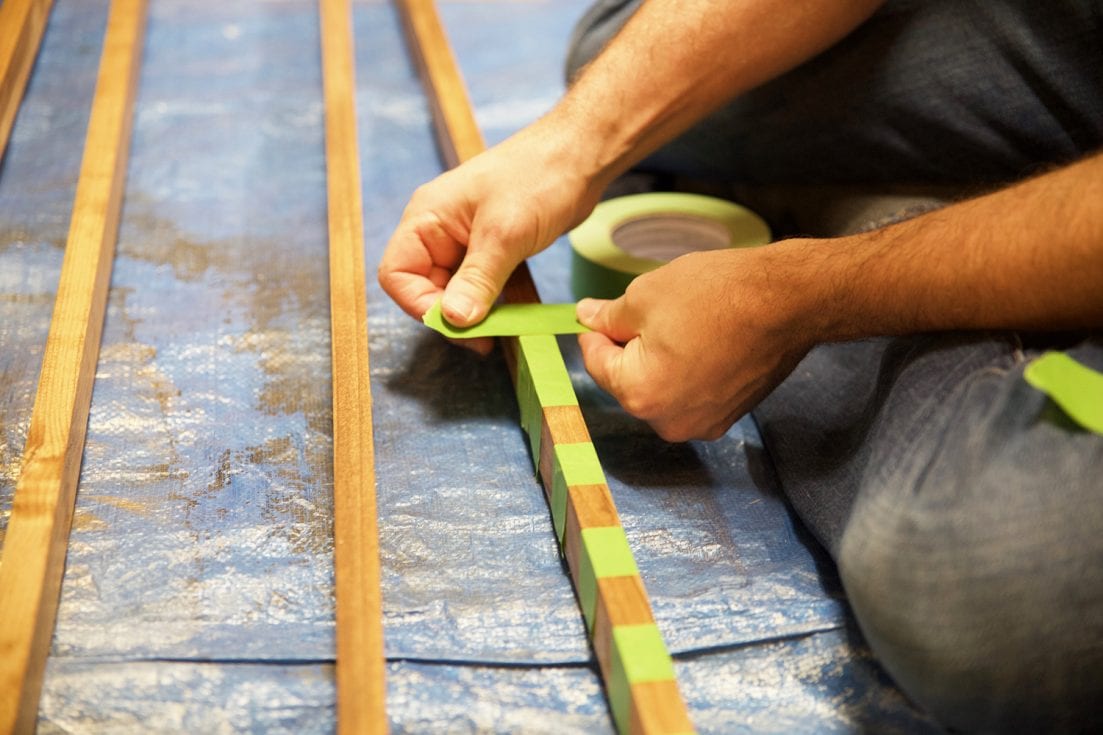
Tada! When you’re done, your tape should be in place, and you’re ready to paint your stripes.
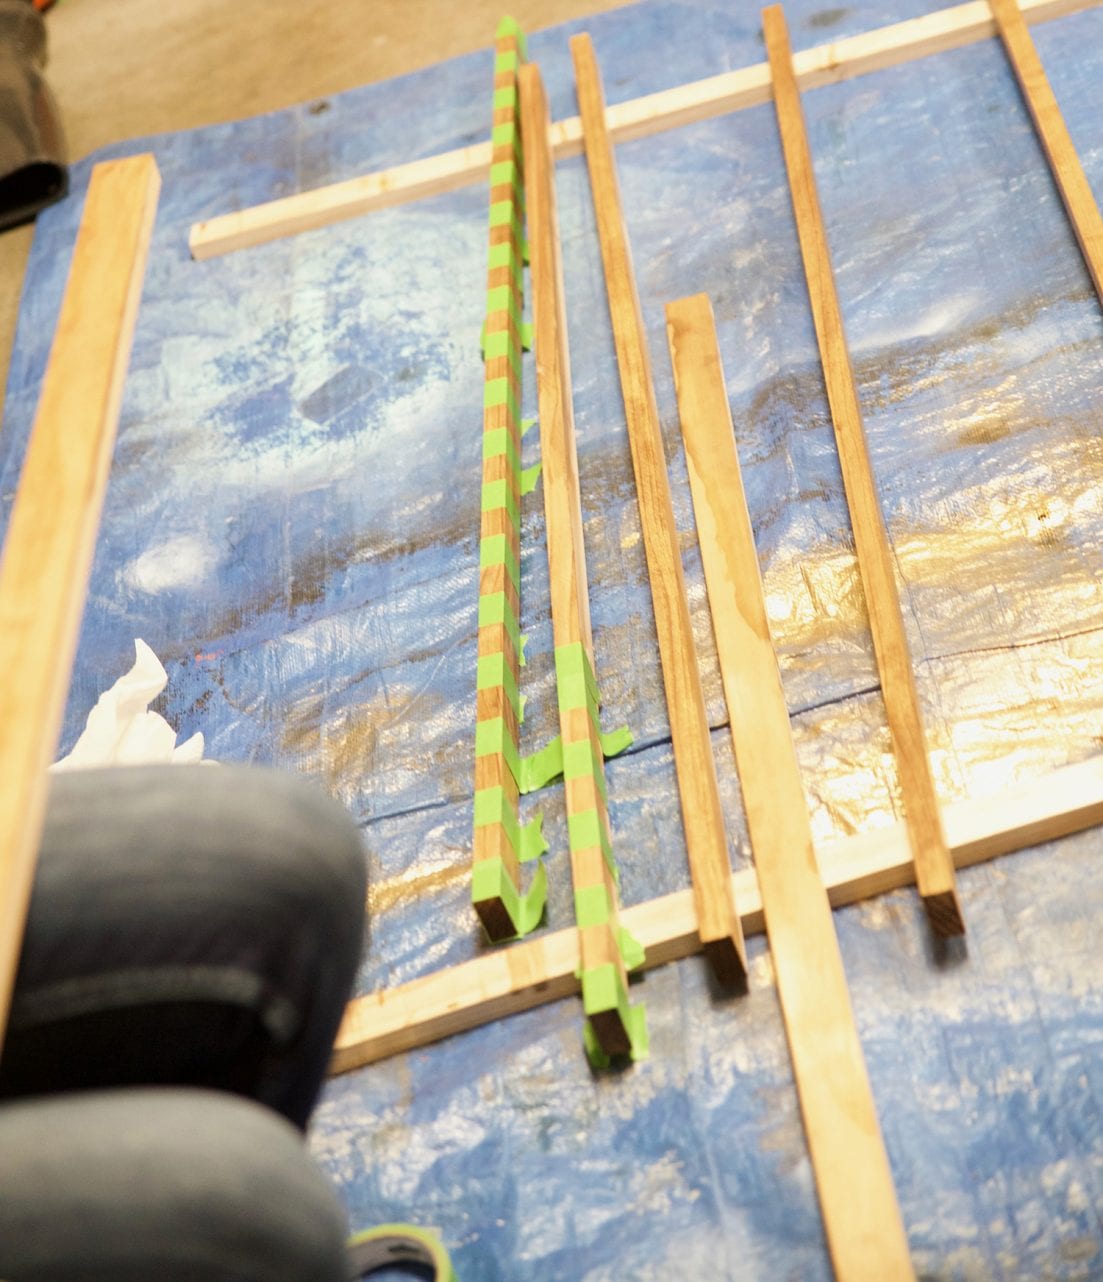
No measuring needed – this is an easy peasy approach to adding major character to your frames.
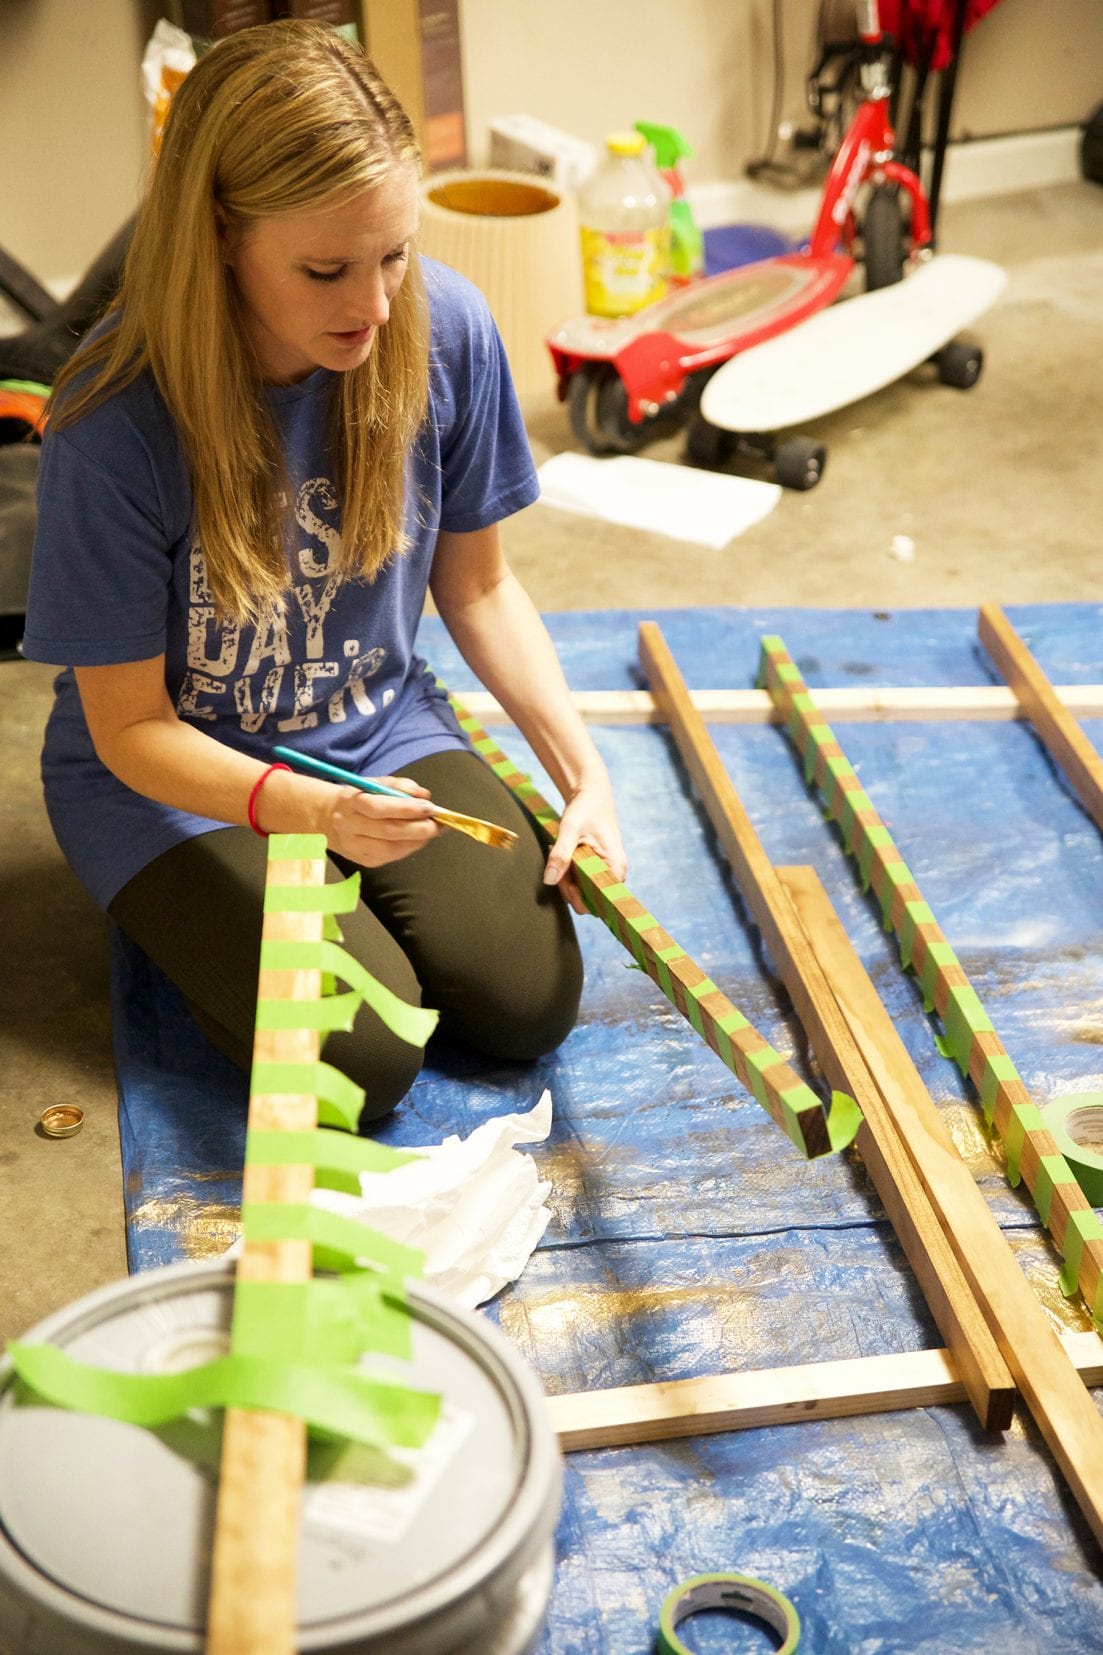
Paint away from each edge of tape, moving down the piece, turning the wood as you go on the sides that will be exposed for your frame.
In no time at all, you should have all four pieces painted with stripes, and ready to assemble on your piece per the instructions in our border frame tutorial.
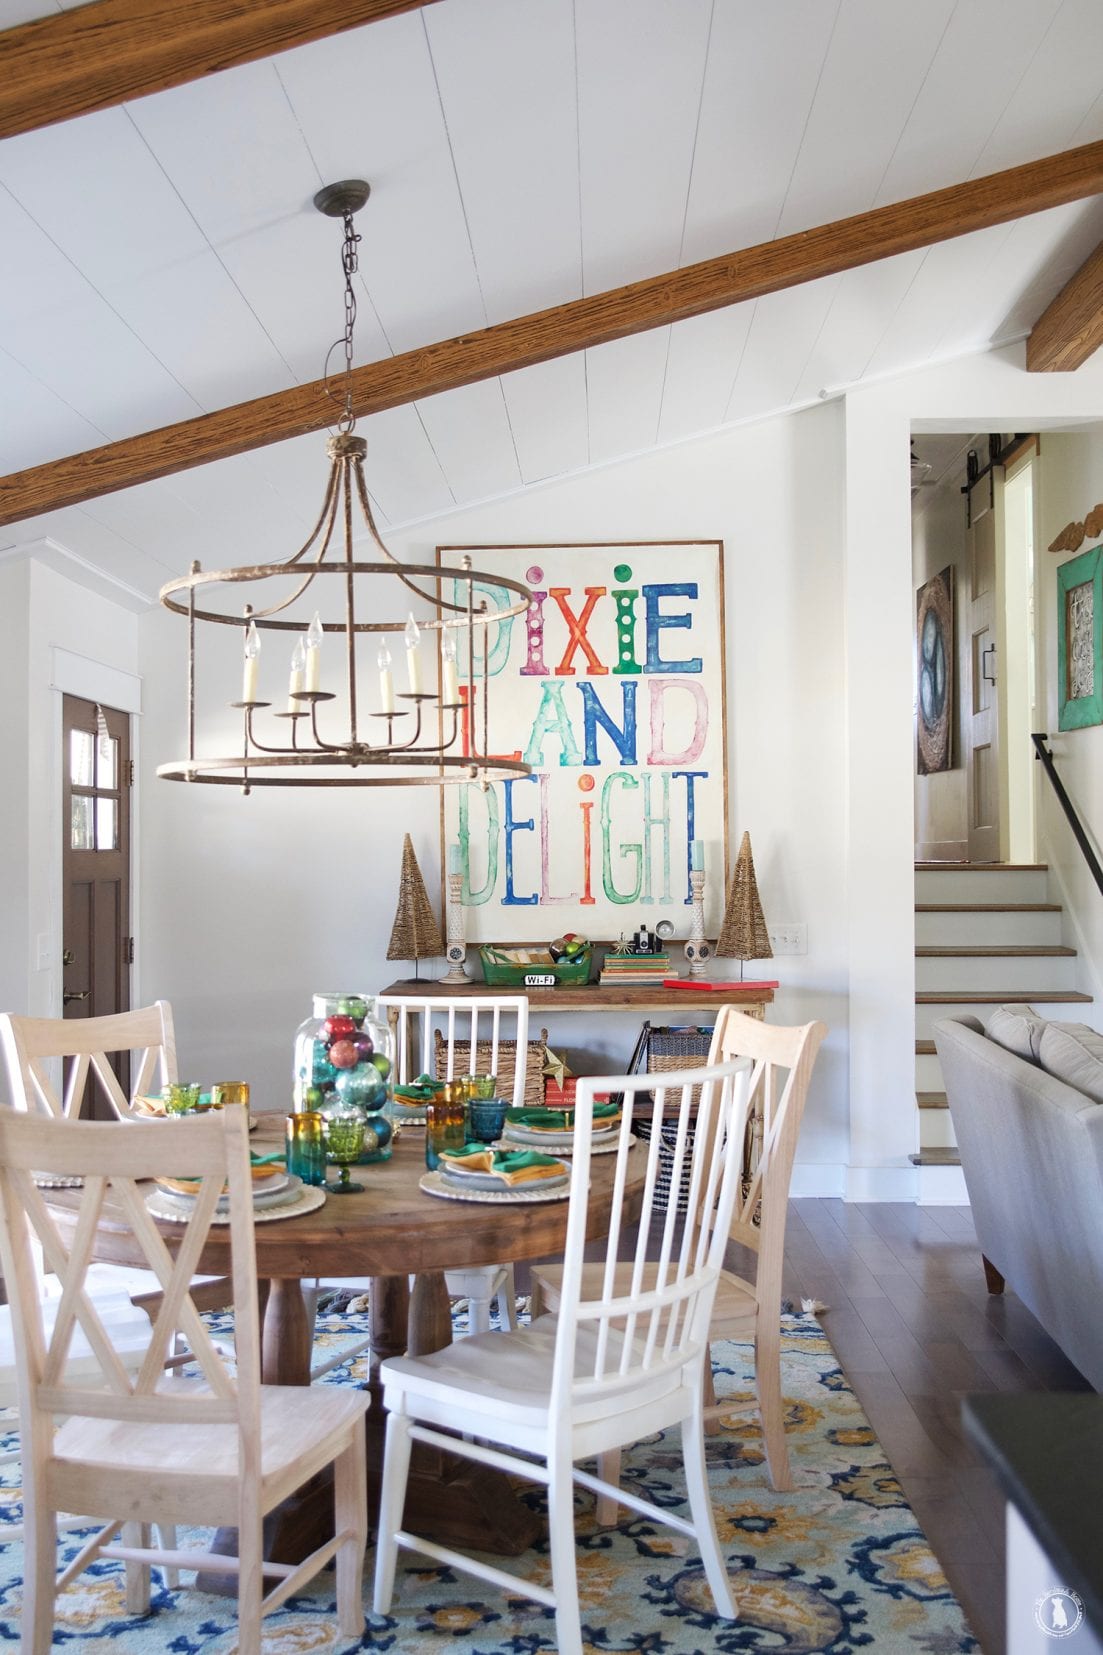
When it was ready to hang, the stripes made a huge difference in the feel of the piece. We love the way Frog Tape enhanced it with all those stripes. You can use any color, but this metallic paint brought in a sophisticated feel with the contrasting stained wood.
3. Hanging your Art
Once your piece has been assembled and put together, you’re ready to show it off in your home!
To make sure that we have an equal and straight application, we always add a couple of small pieces of wood to the back of our painting, first. Just measure to ensure that you’re placing it straight. You’ll thank us for that one later.
We always laugh that hanging things in our home are the fastest way to have a fallout. I have no idea why this can be the most intense activity to take on with your significant other in the world of DIY, but next to hanging wallpaper, this is probably the second highest on the list.
We should probably start a list. Feel free to do so below in the comments. 😀
For placement, we eyeball where exactly we would want the piece. So one person holds the painting up until we have it at about eye level. Then we place the tape on the wall to avoid markings, and we know from there, the top of the frame should hit when we actually hang it.
Side note: One of the biggest mistakes we see in homes, are people hanging their art too high, and too far apart. This step helps avoid that, so you can preview the placement before messing up the walls. But when in doubt, go a little lower. The average height of a male in the U.S. is 5’6″, and the average height of a female is 5’2″. – I had no idea and totally had to Google that.
The art should be placed somewhere in the average eye level, rather than higher around the home. I’m precisely 5’4″ and have never found my eye level to fail me when it comes to freely placed art on a wall, and feeling good about where it sits.
Guess I was just born with lucky eye line hanging skillz.
Total side note: When placing over a sofa err on the side of lower, and when hanging a gallery wall, see some of our tips here {with more Frog Tape!}
From there, we measure the difference on the back of the frame, where the piece of the wood sits on the art. We mark that on the wall.
We know where the plank is on the back of the art that ensures straight hanging, so we place the piece of wood on the wall once we measure from the Frog Tape (the edge of where we wish our frame to actually hit) to the place on the back of the frame (the place where it will actually hang on the wall).
Make sure that this lines up with a stud, for heavier pieces.
Place your next piece of wood with a level on the wall, to make sure it’s straight, and you’re ready to hang.
We used this approach, and it lined up perfectly with the initial placement of tape.
This was a large and in charge piece, so it took two to get it placed.
Tada! You’re ready for some fool-proof hanging.
When we were finished, these were ready to go.
These are the ways we love and use Frog Tape with art in our home. We hope this helps with creating your own!
Have an inspired day!
SaveSaveSaveSaveSaveSaveSaveSave

WOOOOOOOOOOOW!
Beautiful tips!
I LOVE these paintings. Please tell us that you will make them available as a print because I have no artistic talent!
Thanks so much Erin! Yes of course – they are available here! https://www.thehandmadehome.net/product/wonderful-world-painting-set/
Thanks so much for explaining all of that!
Also… 10,000 bonus points to you guys for using the term “leap frog” in a post about frog tape. He,he
Thank you for sharing this. You know I’d never tried frog tape until recently. I’d always been a blue tape girl. Then I saw your post awhile back about using it on your basketball goal and I decided to give it a whirl. I loved it, it was better than the blue. Seemed to leave crisper lines and not damage already painted surfaces. Not sure why I hadn’t tried it before but thank you for the push to try it. Now to finish talking my husband into making your hideaway.
Yay! Yes, we were converts a few years ago and the difference is striking! So glad we could help you cross over ;} You tell him that Hideaway is worth every moment of labor – We didn’t think we would finish, but when we did, it was so worth it! Let us know if you build one ;}
Those 2 pictures are beautiful and I love it that they were in the hallway outside that gorgeous dining room that you both redid to perfection.