Hello all you wonderful people!
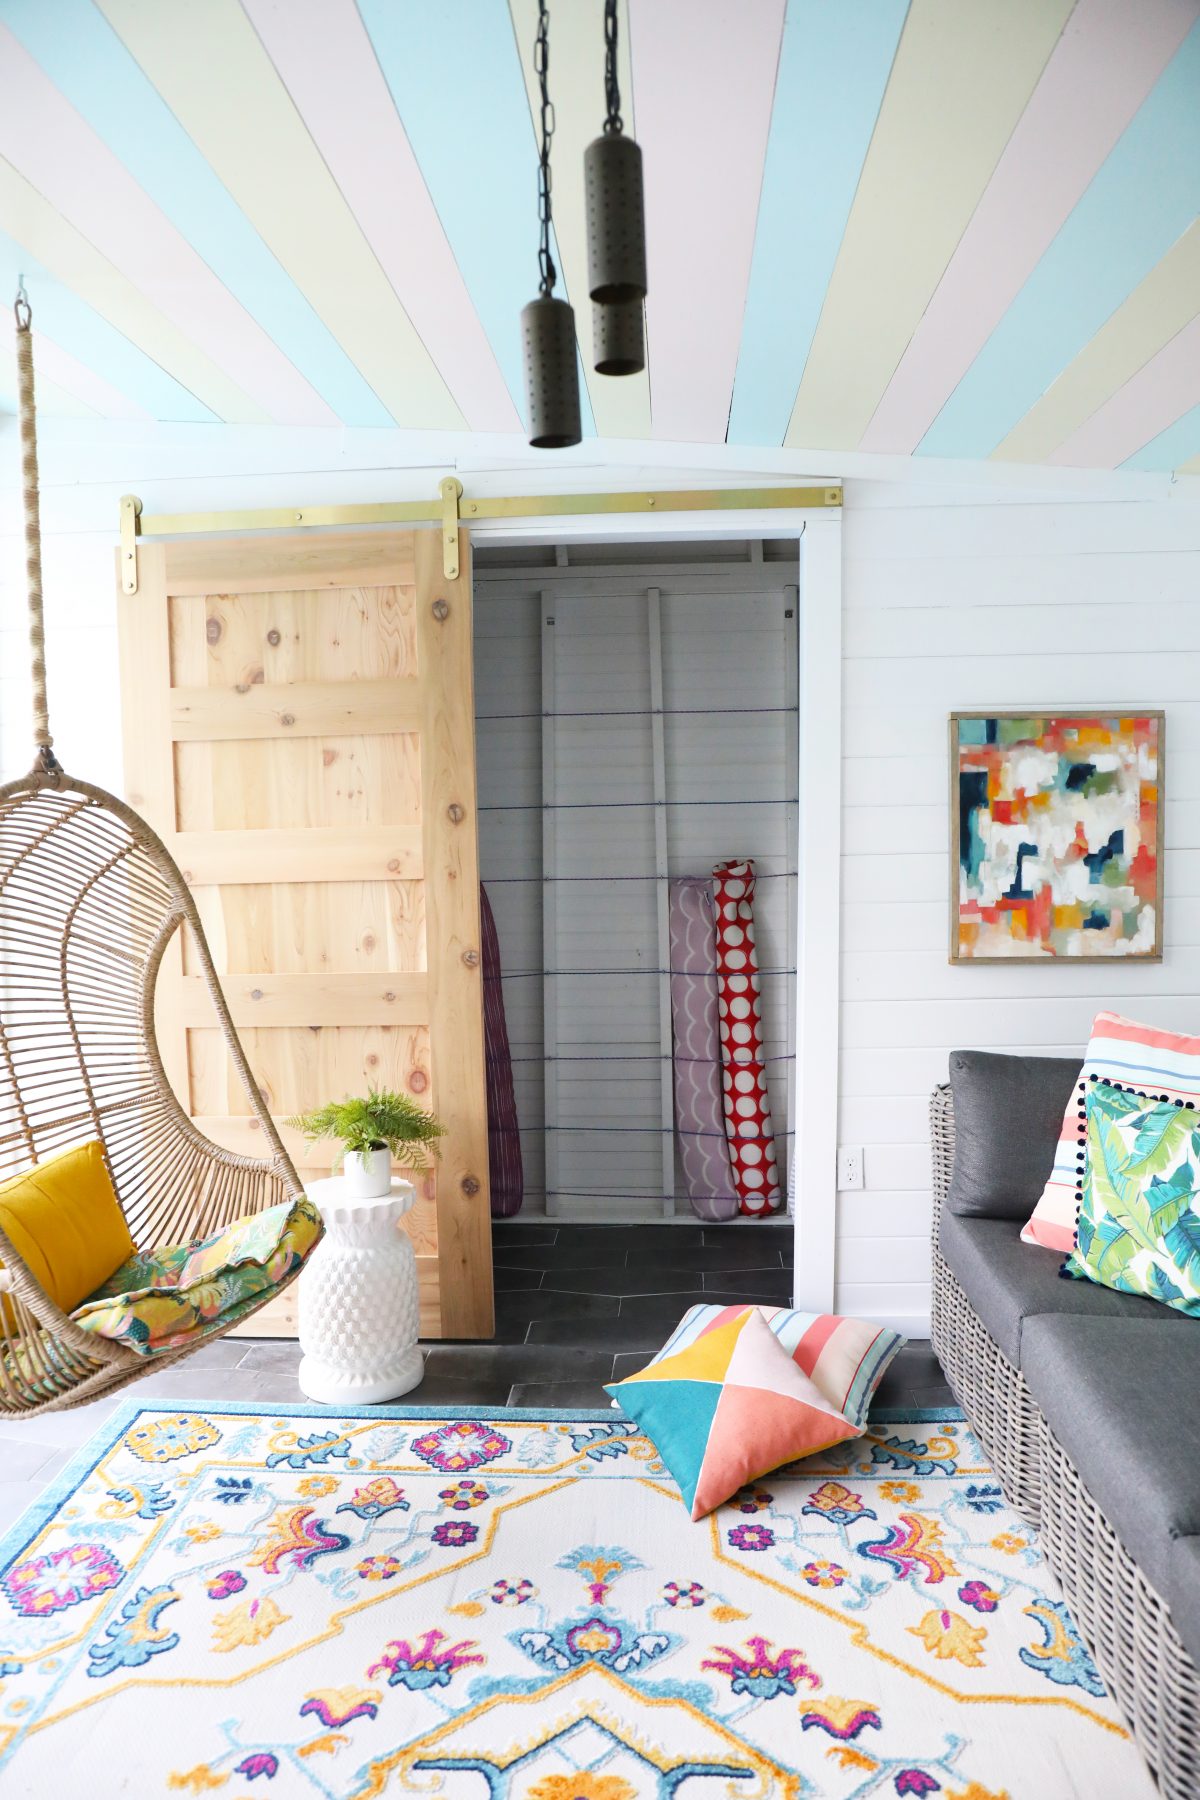
If you’re familiar with our cabana, then you probably know we’ve had a lot of fun with all things spring and celebrating this warmer weather! While we’ve enjoyed it a ton, we’ve really loved organizing our closet for so much more space.

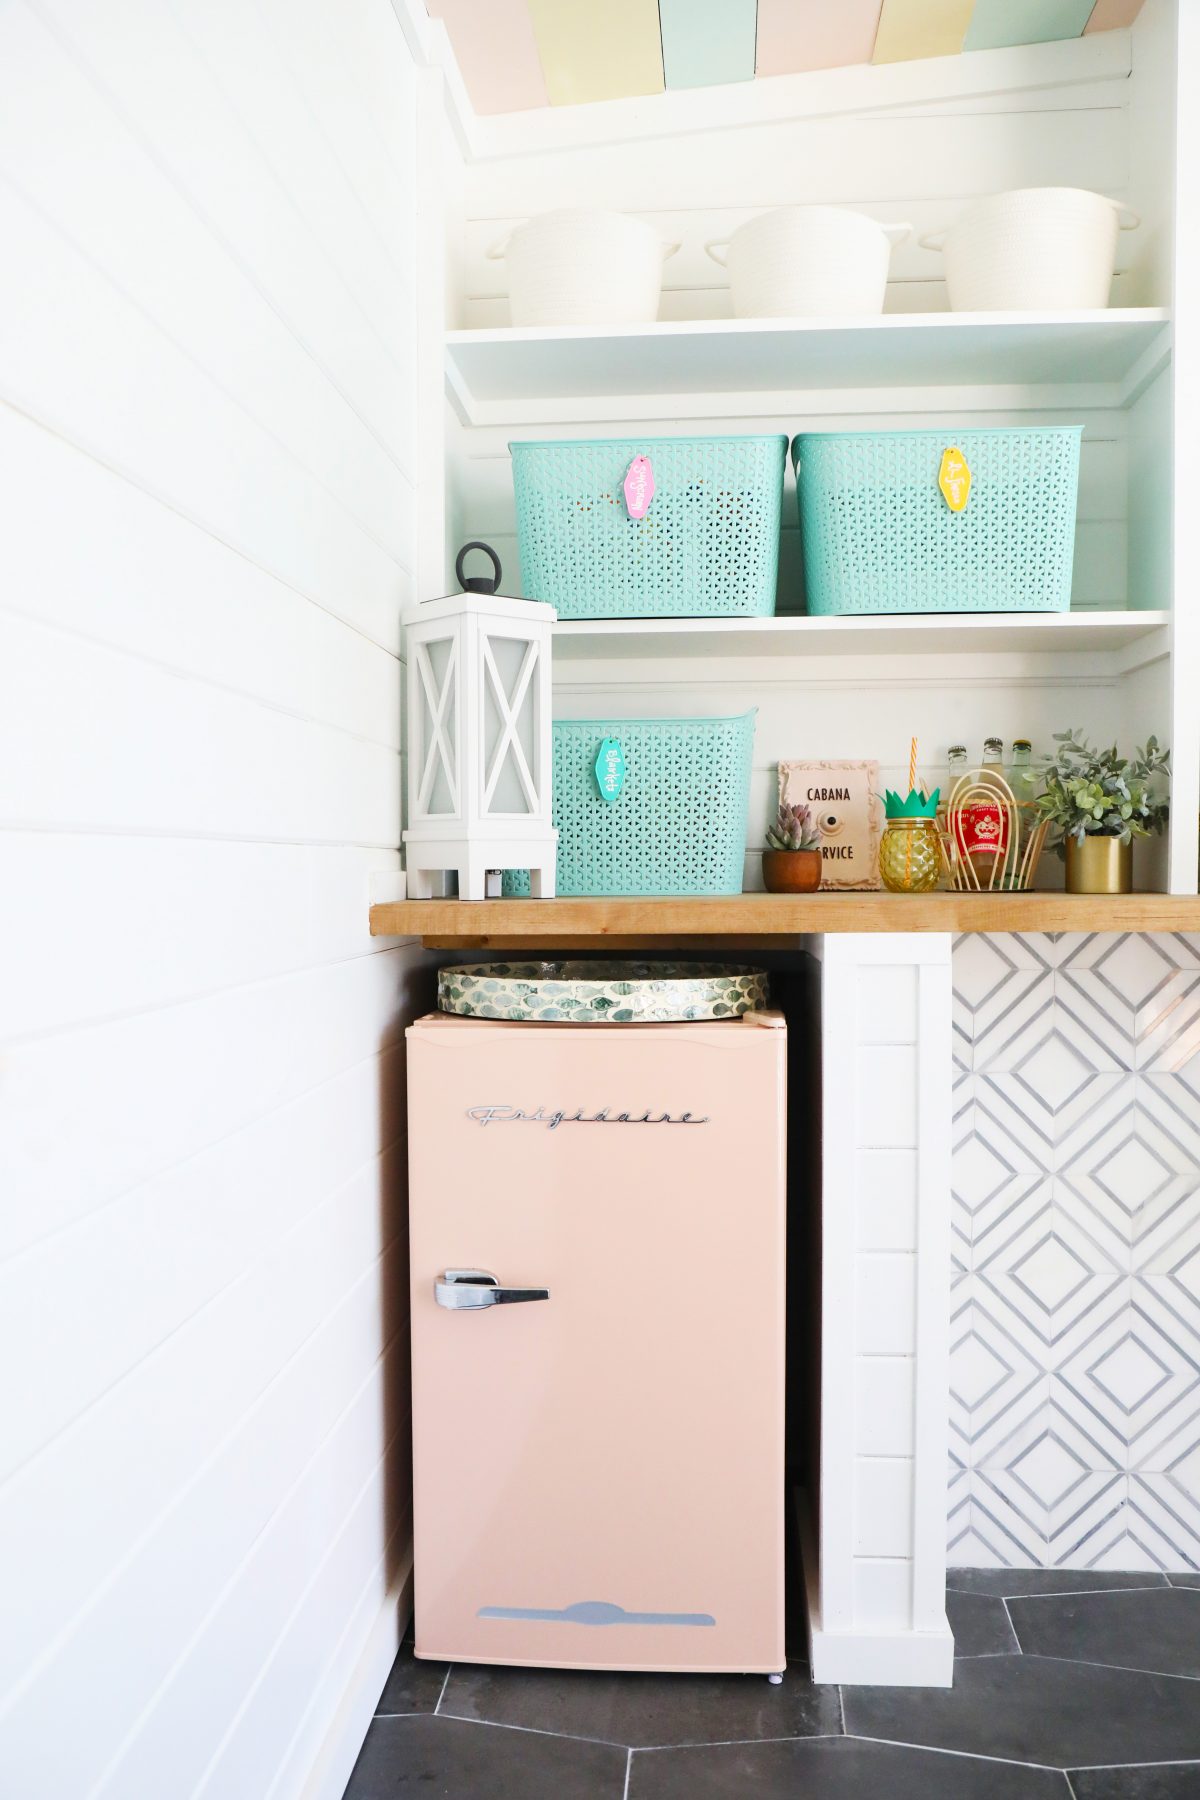
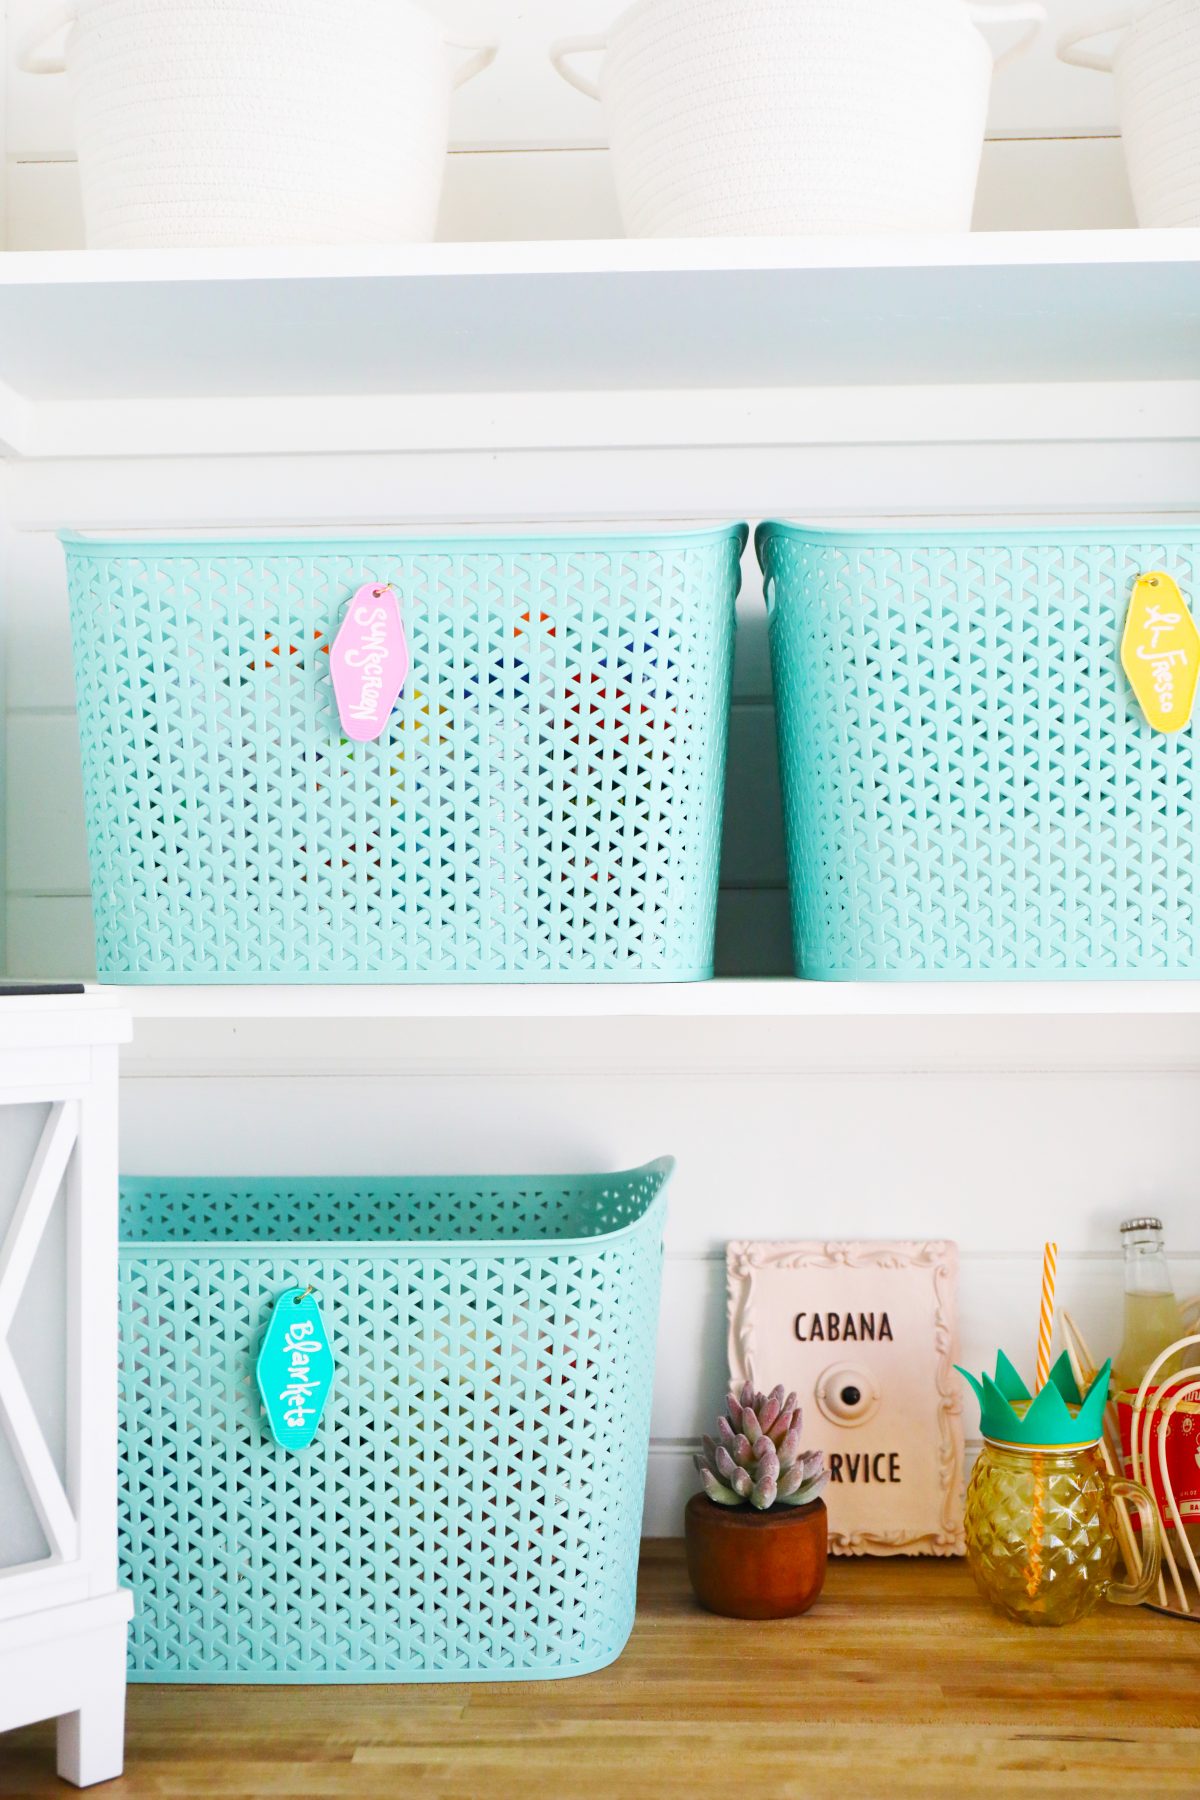
This closet we just put together with Greenworks Tools, has been a game changer for all things pool supplies, charging stations, and more! We love having a go-to space for sunscreen, dining al-fresco, floats, pool chemicals… you name it.
It’s a great storage area with practical applications!
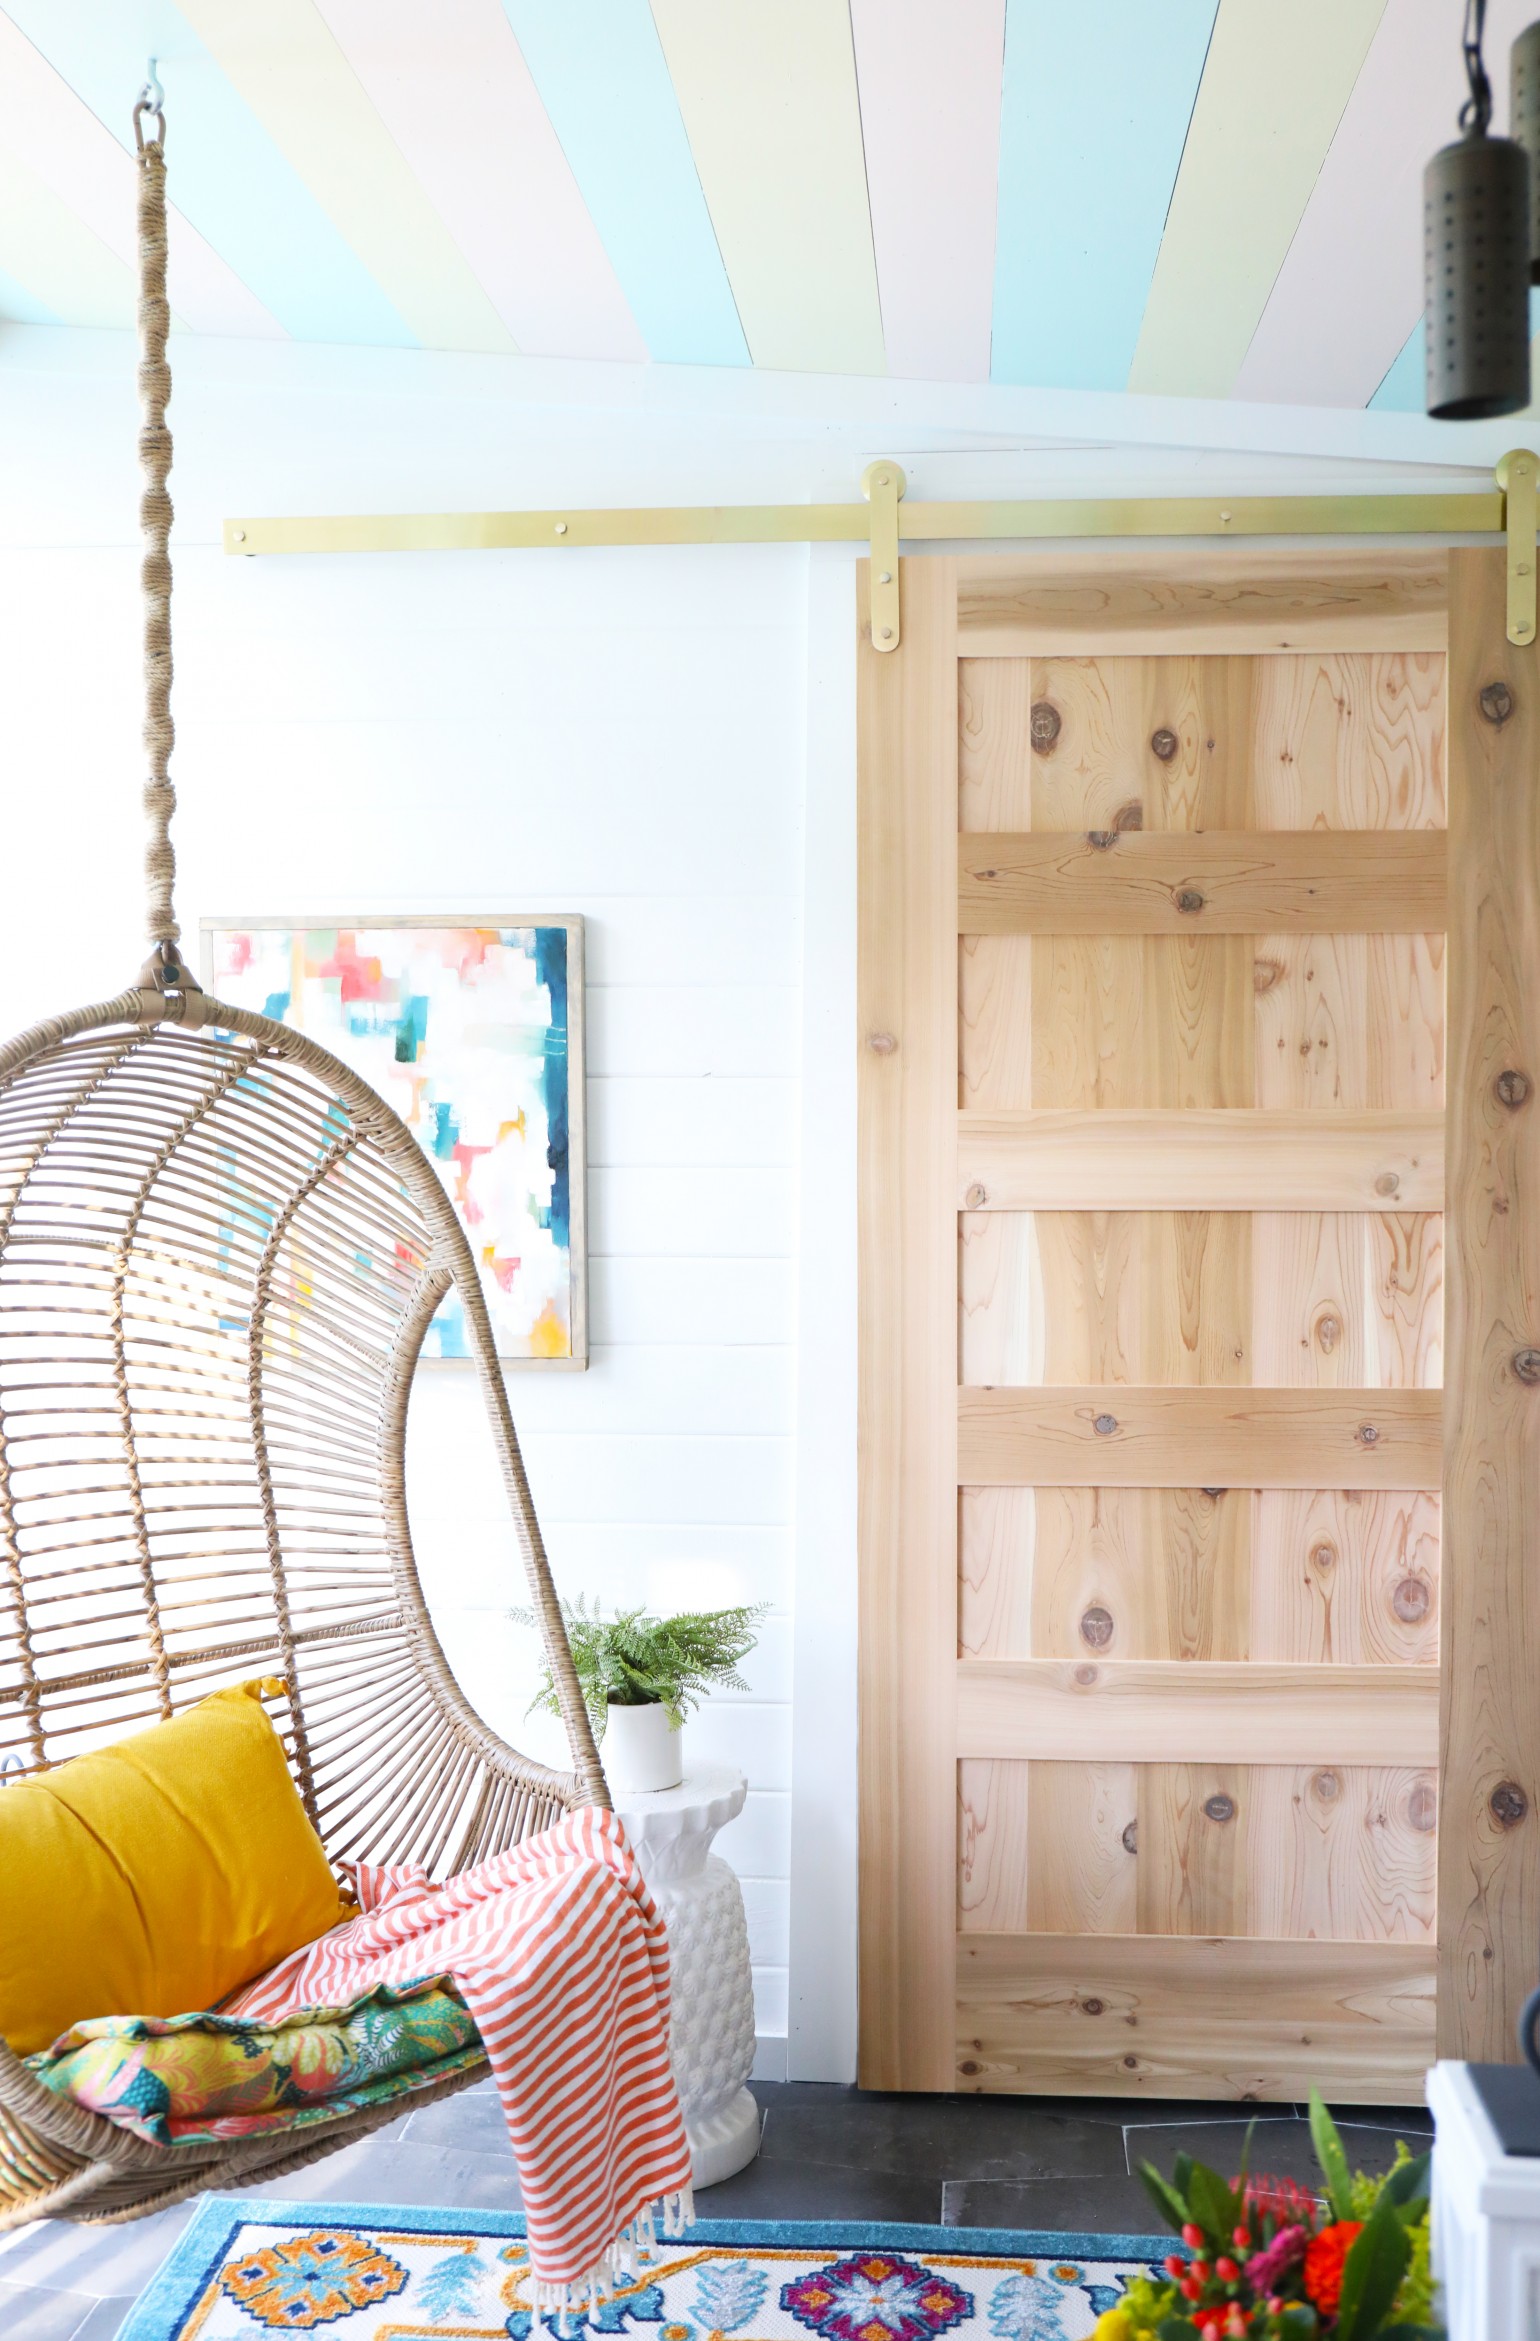
{Still obsessed with all the finishing touches, like this gawgeous barn door from artisan hardware + tile from Jeffrey Court + lights from Kichler}
We even did a little rope inside, to hold those sometimes-awkward shapes like pool noodles, and outdoor rugs.
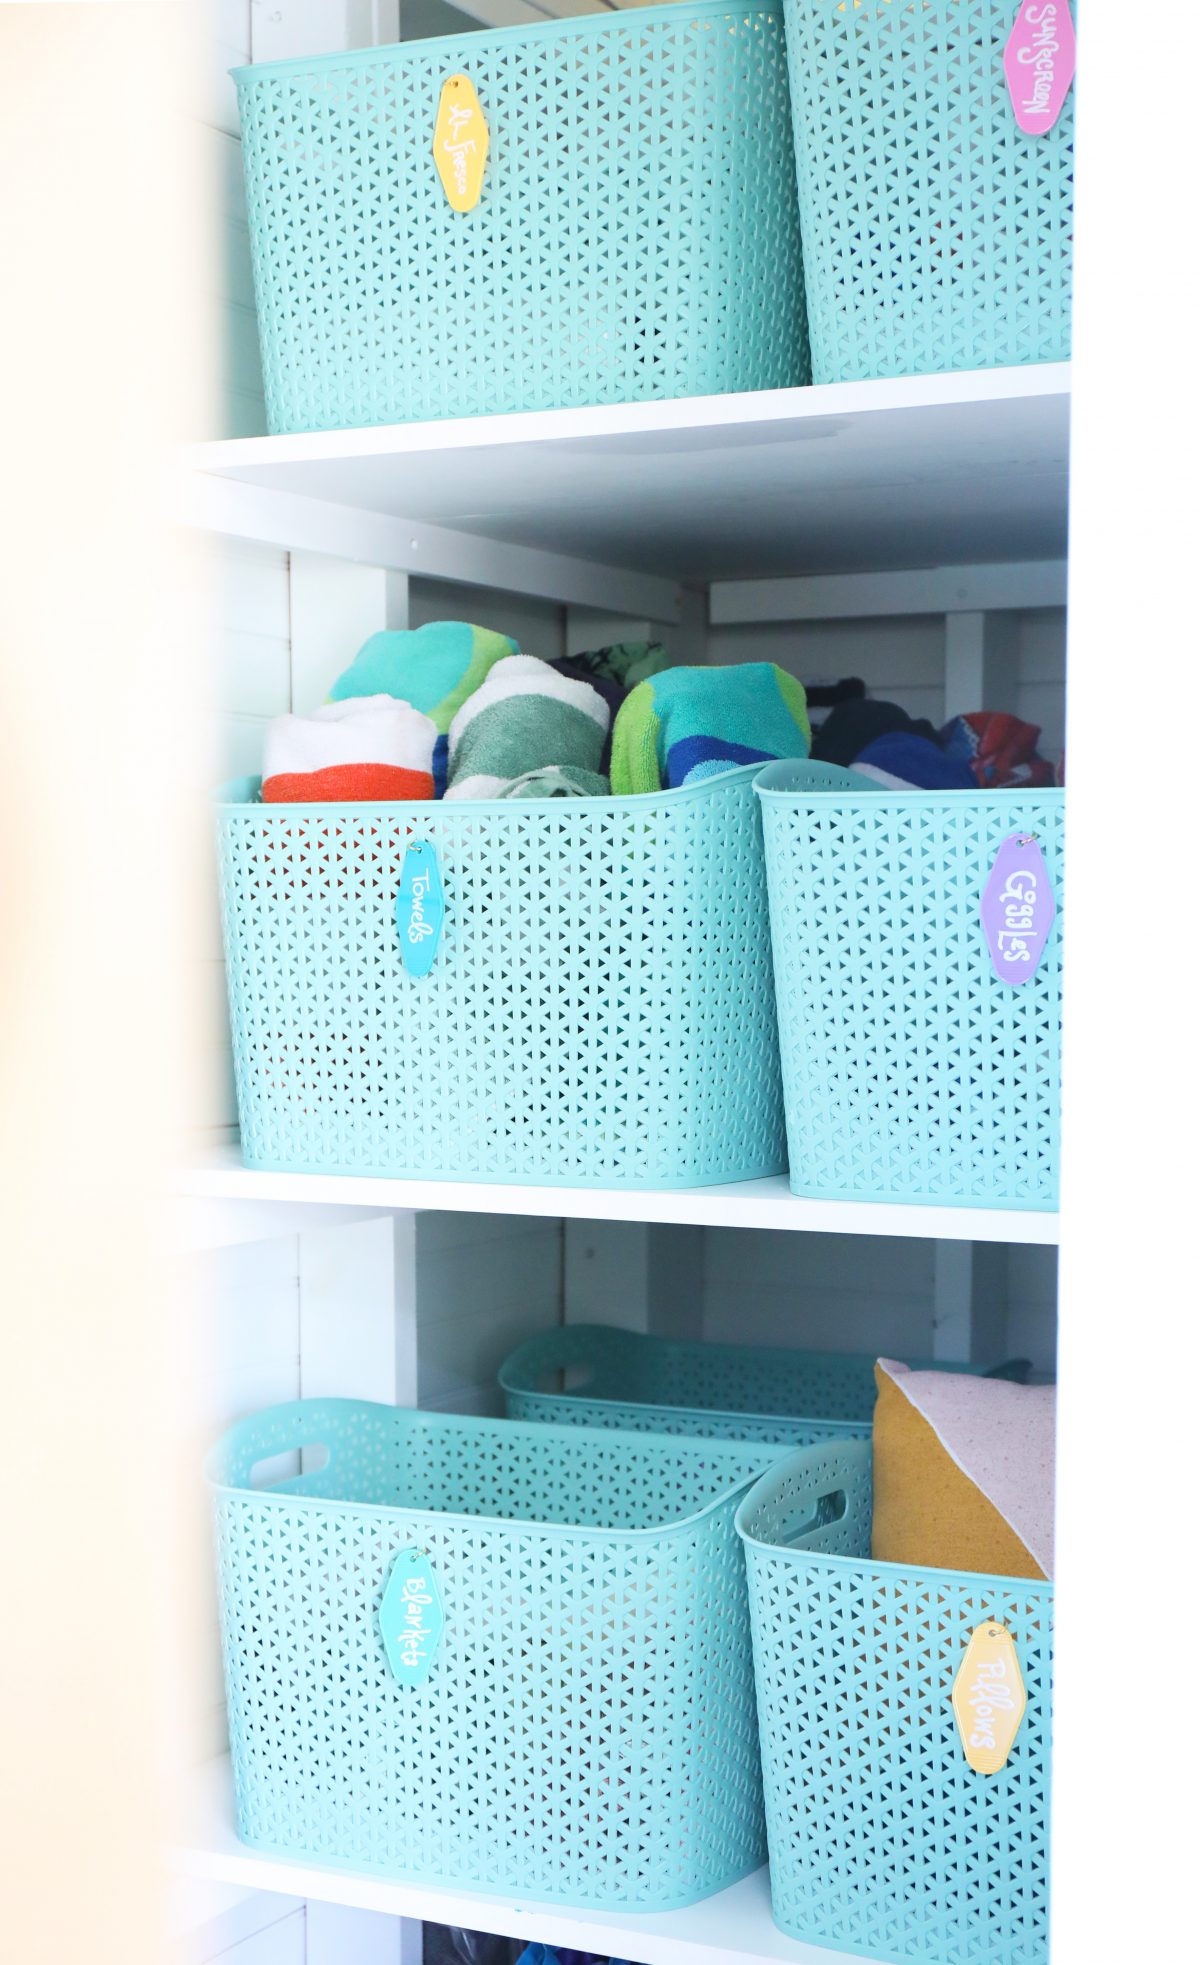
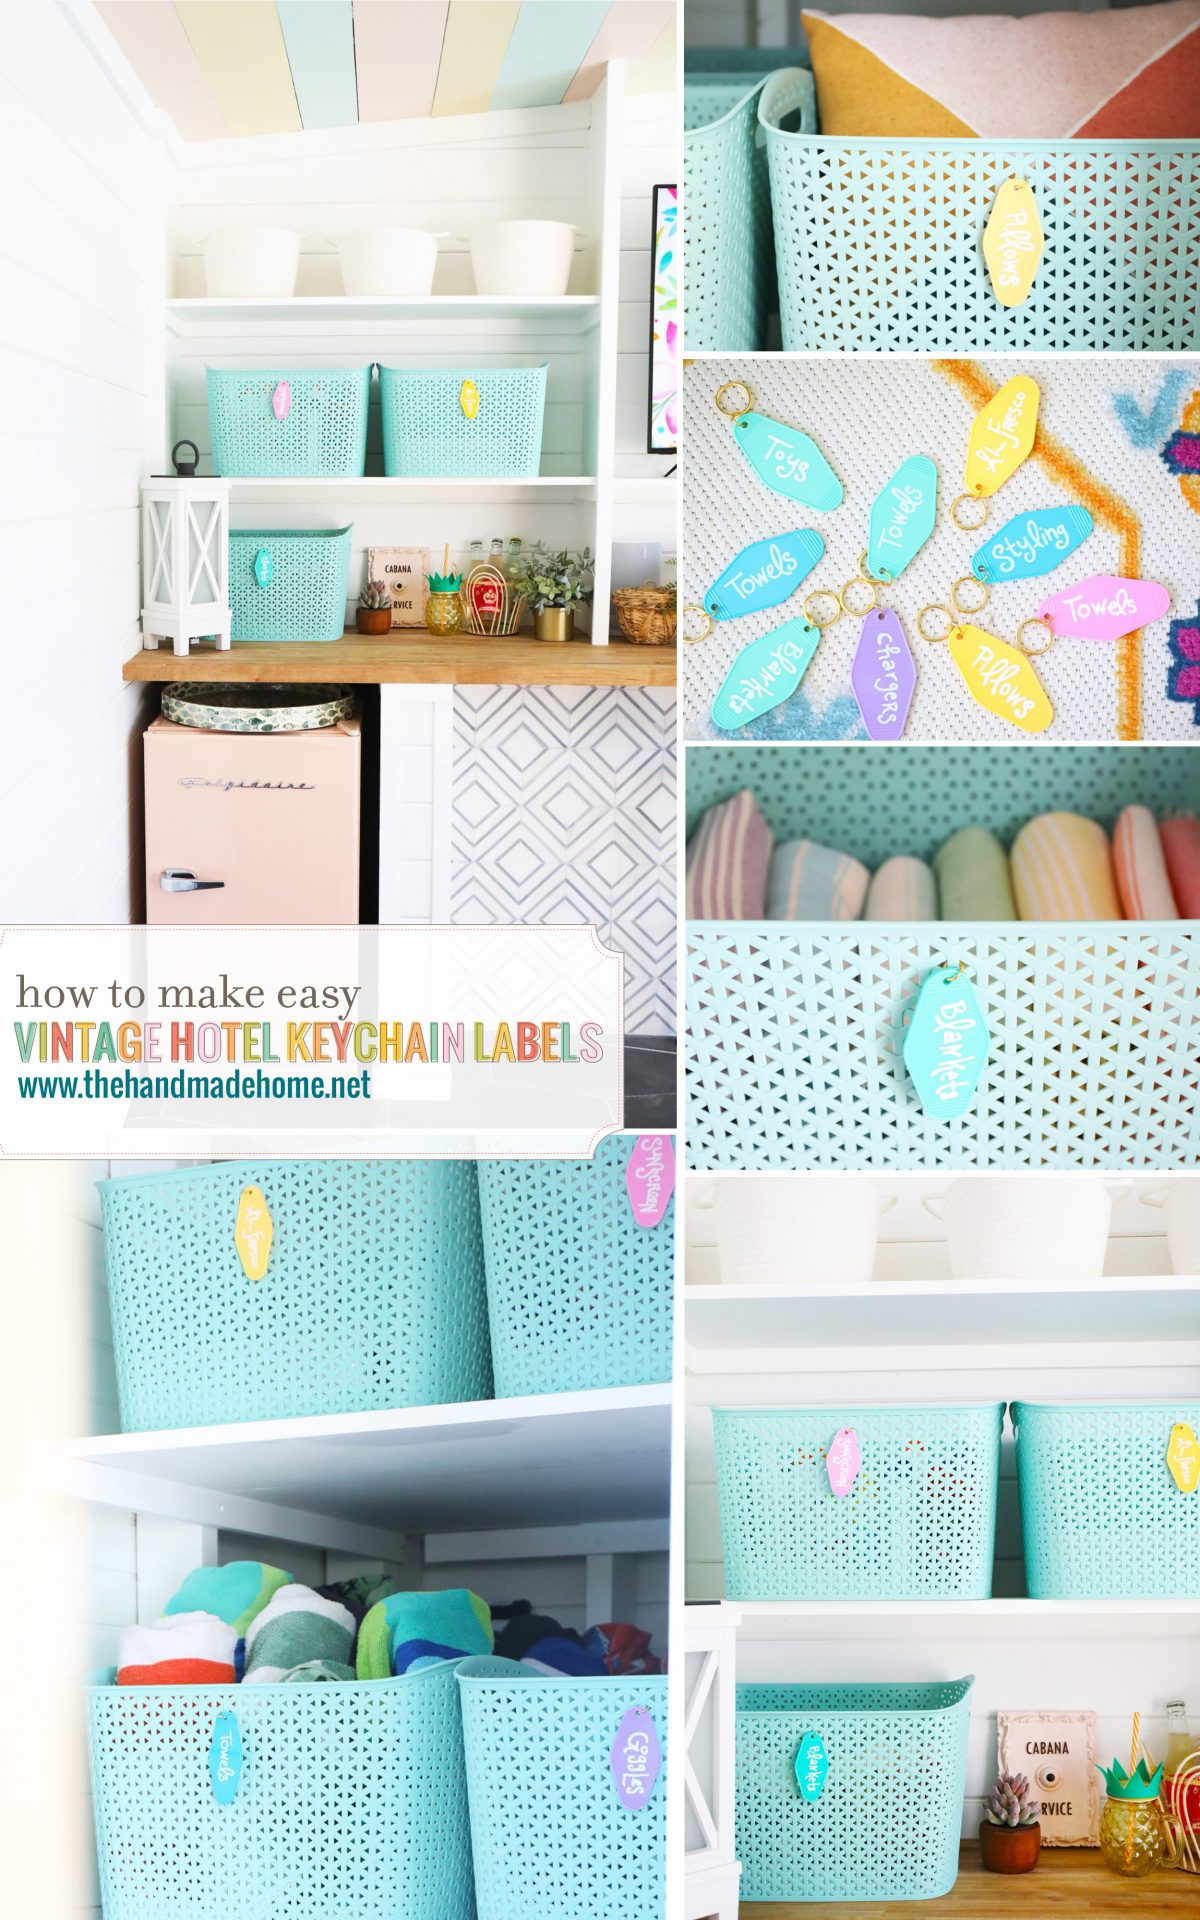
Last week we were thrilled to share how we corralled everything into the space, but this week, I wanted to share our labeling system. Because they’re just the cutest thing ever. If we do say so ourselves.
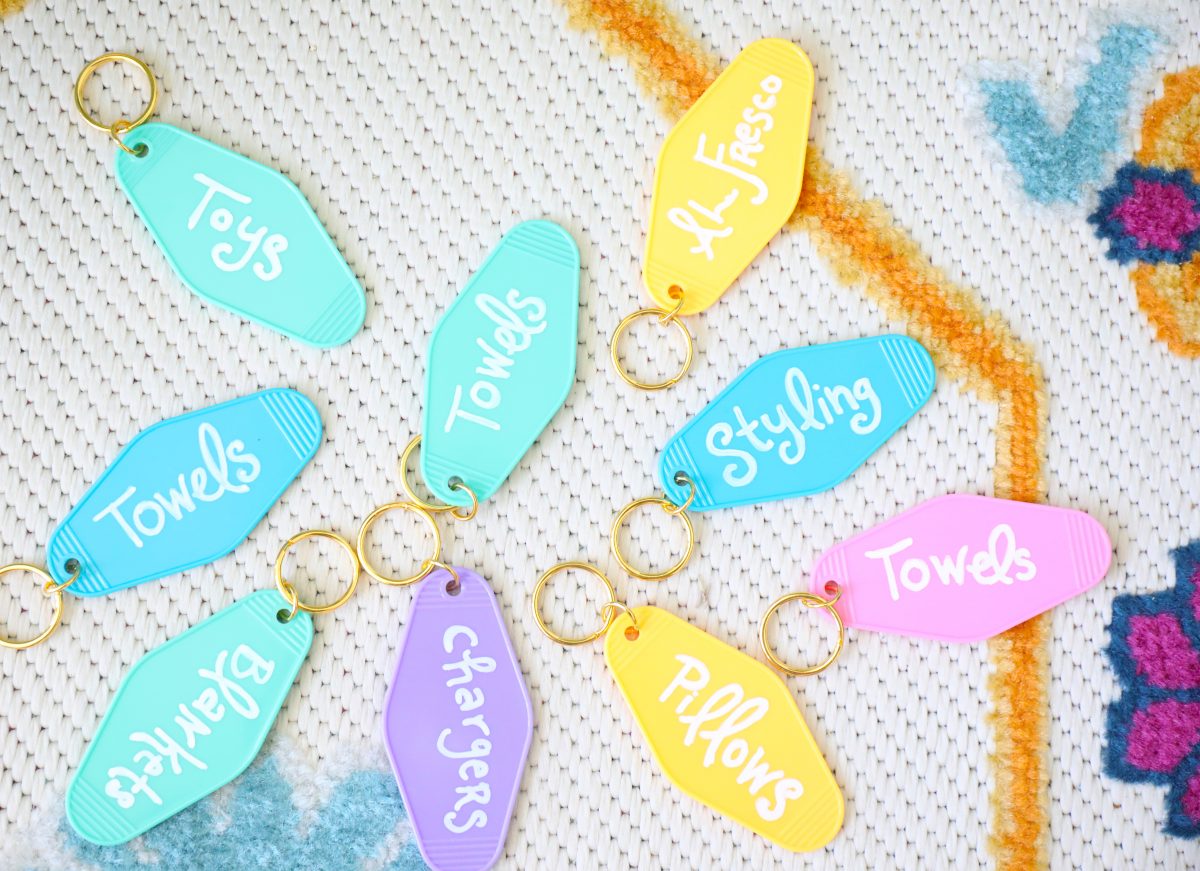
Does anything beat 1. having a space put together, but also 2. finding the perfect vintage hotel key tags to do so? because when I spied these, I just knew they were the perfect thing for the space. And this post is so ridiculously easy, it’s a little embarrassing I’m sharing it.
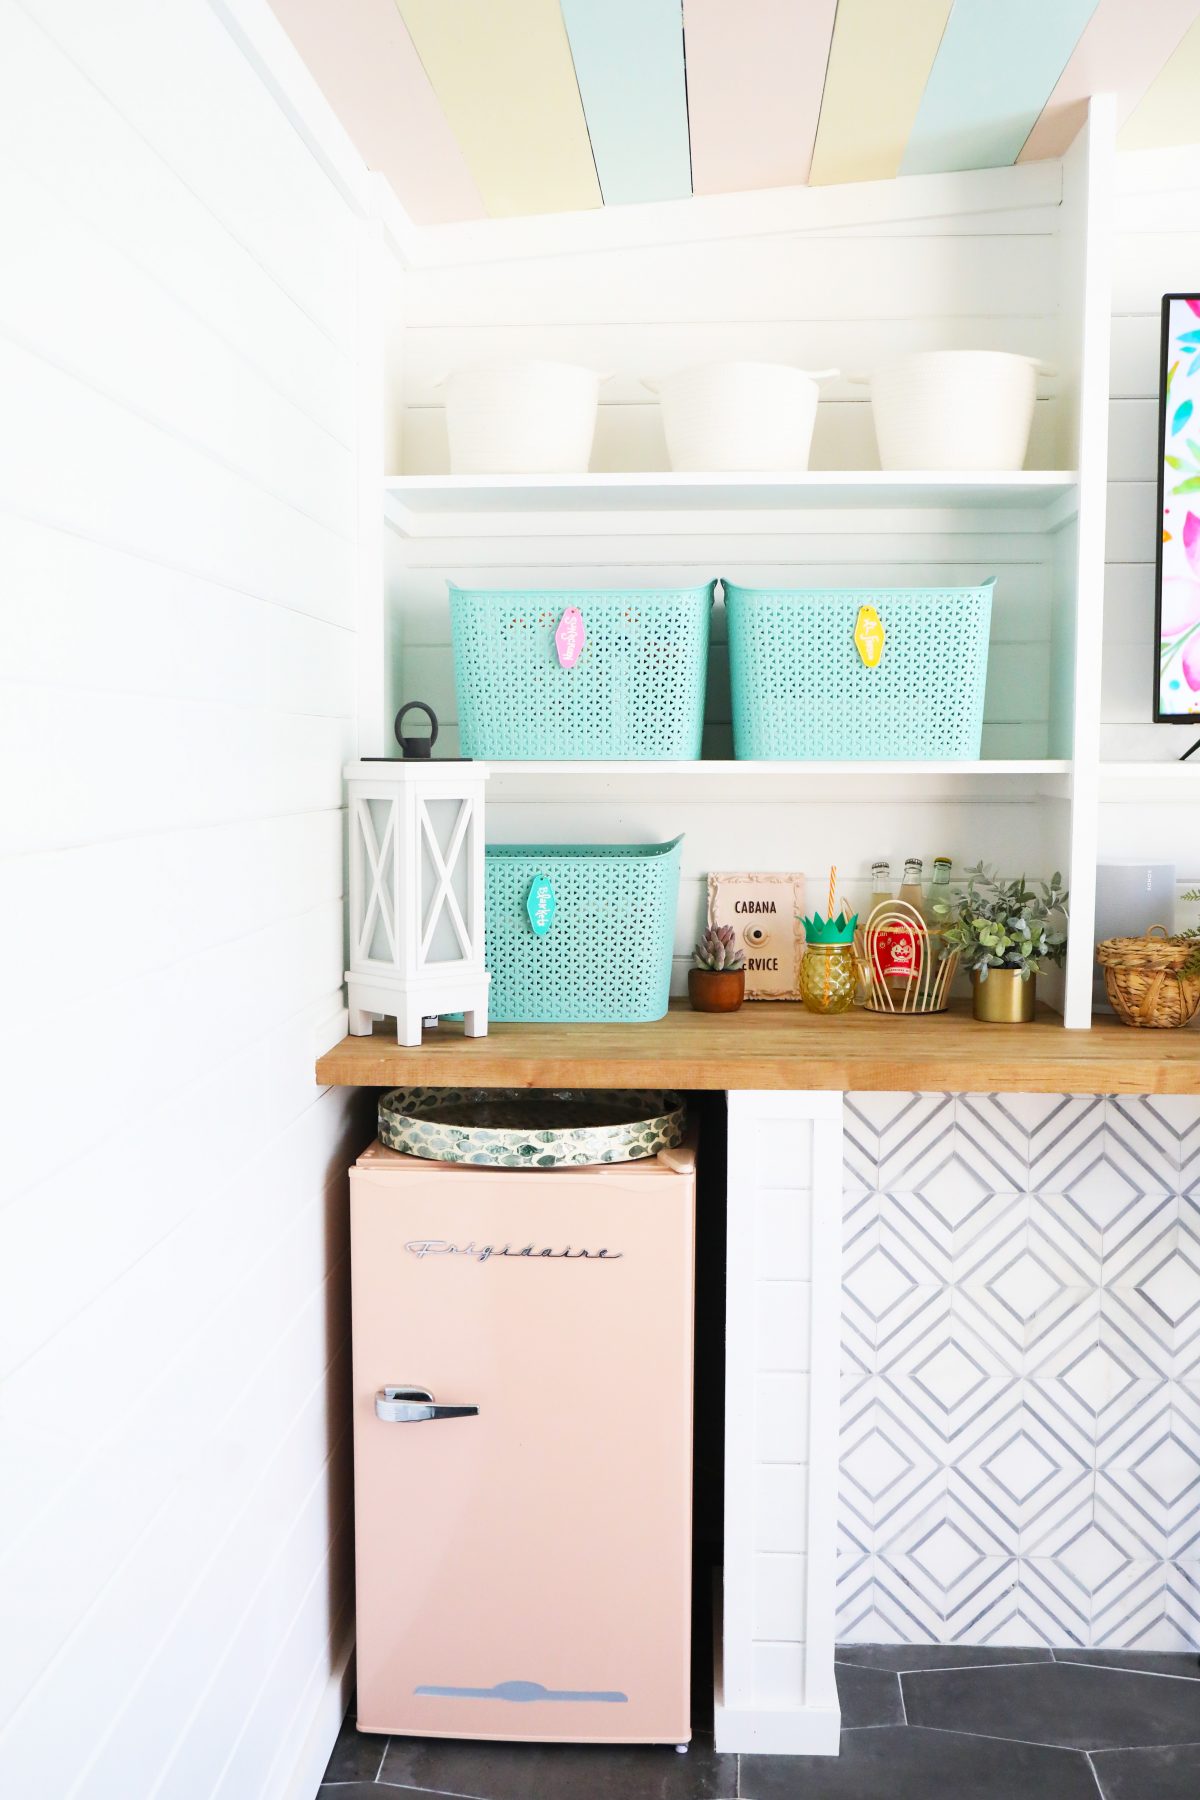
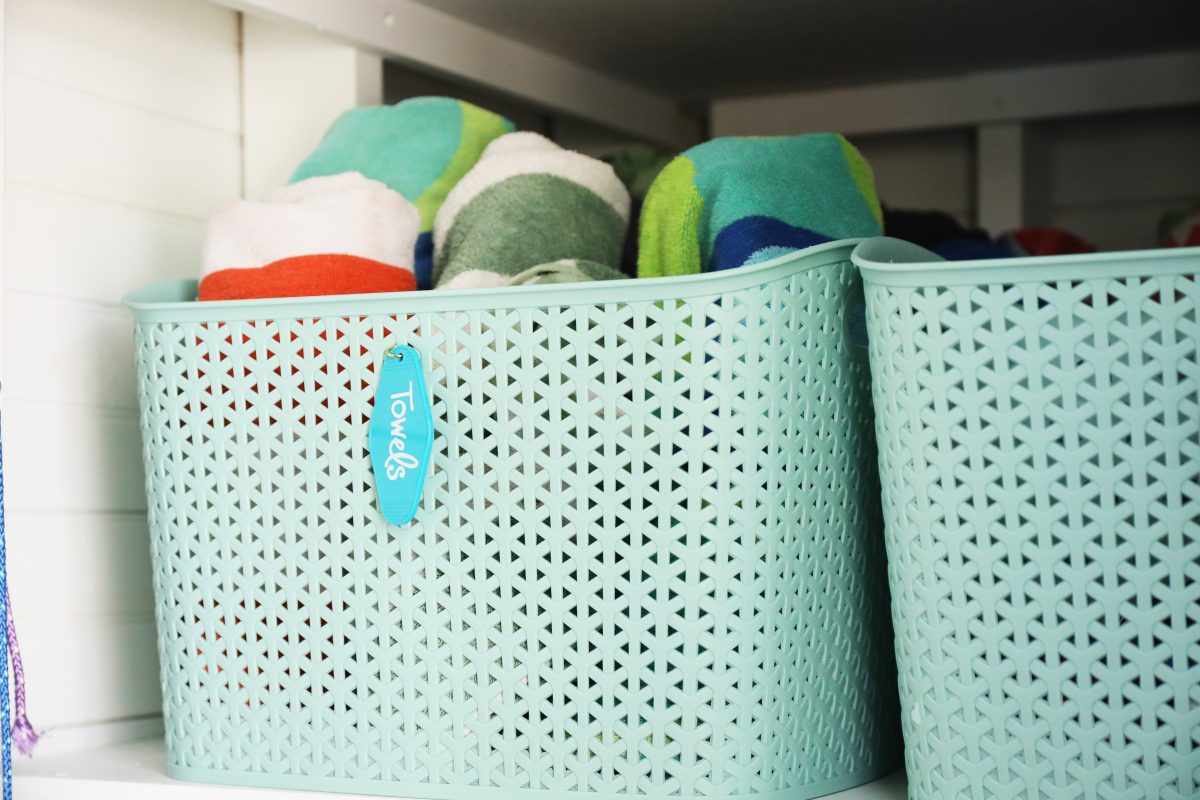
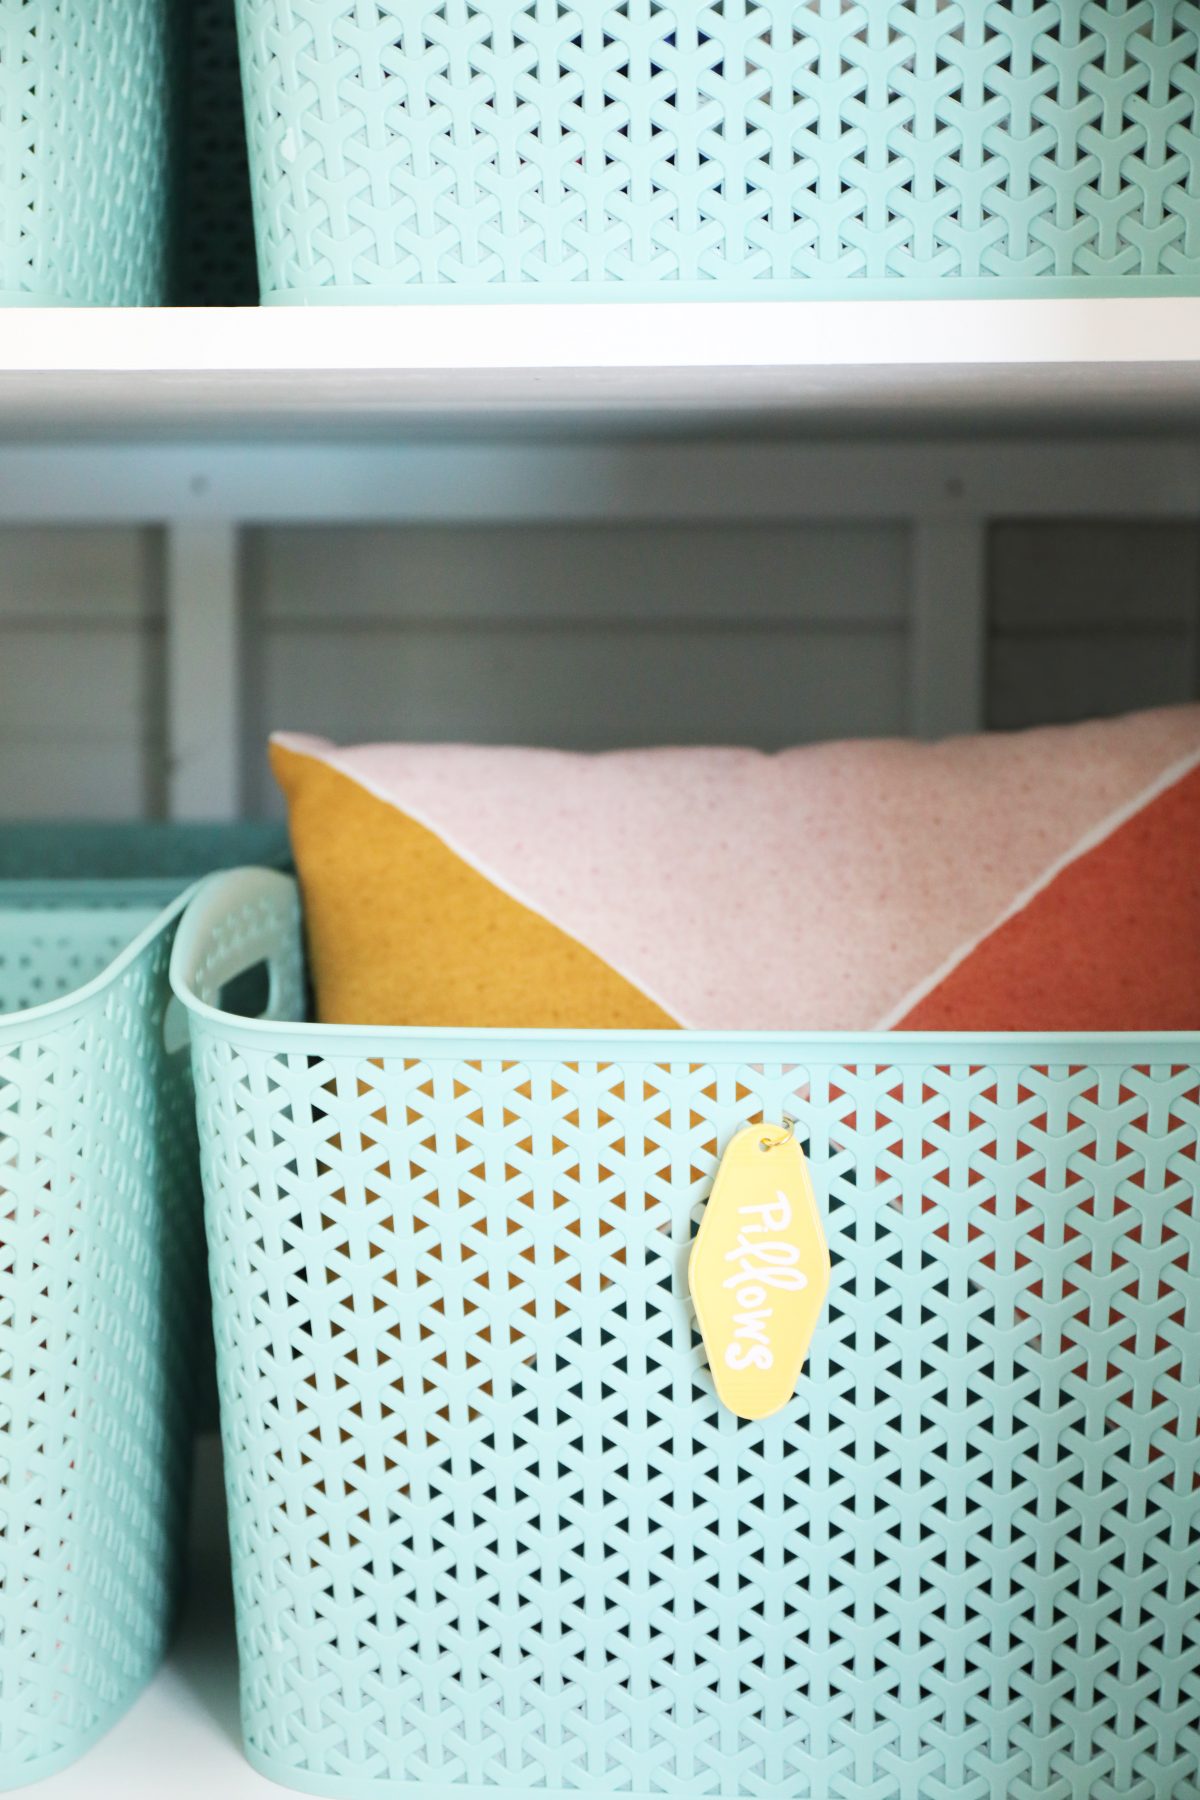
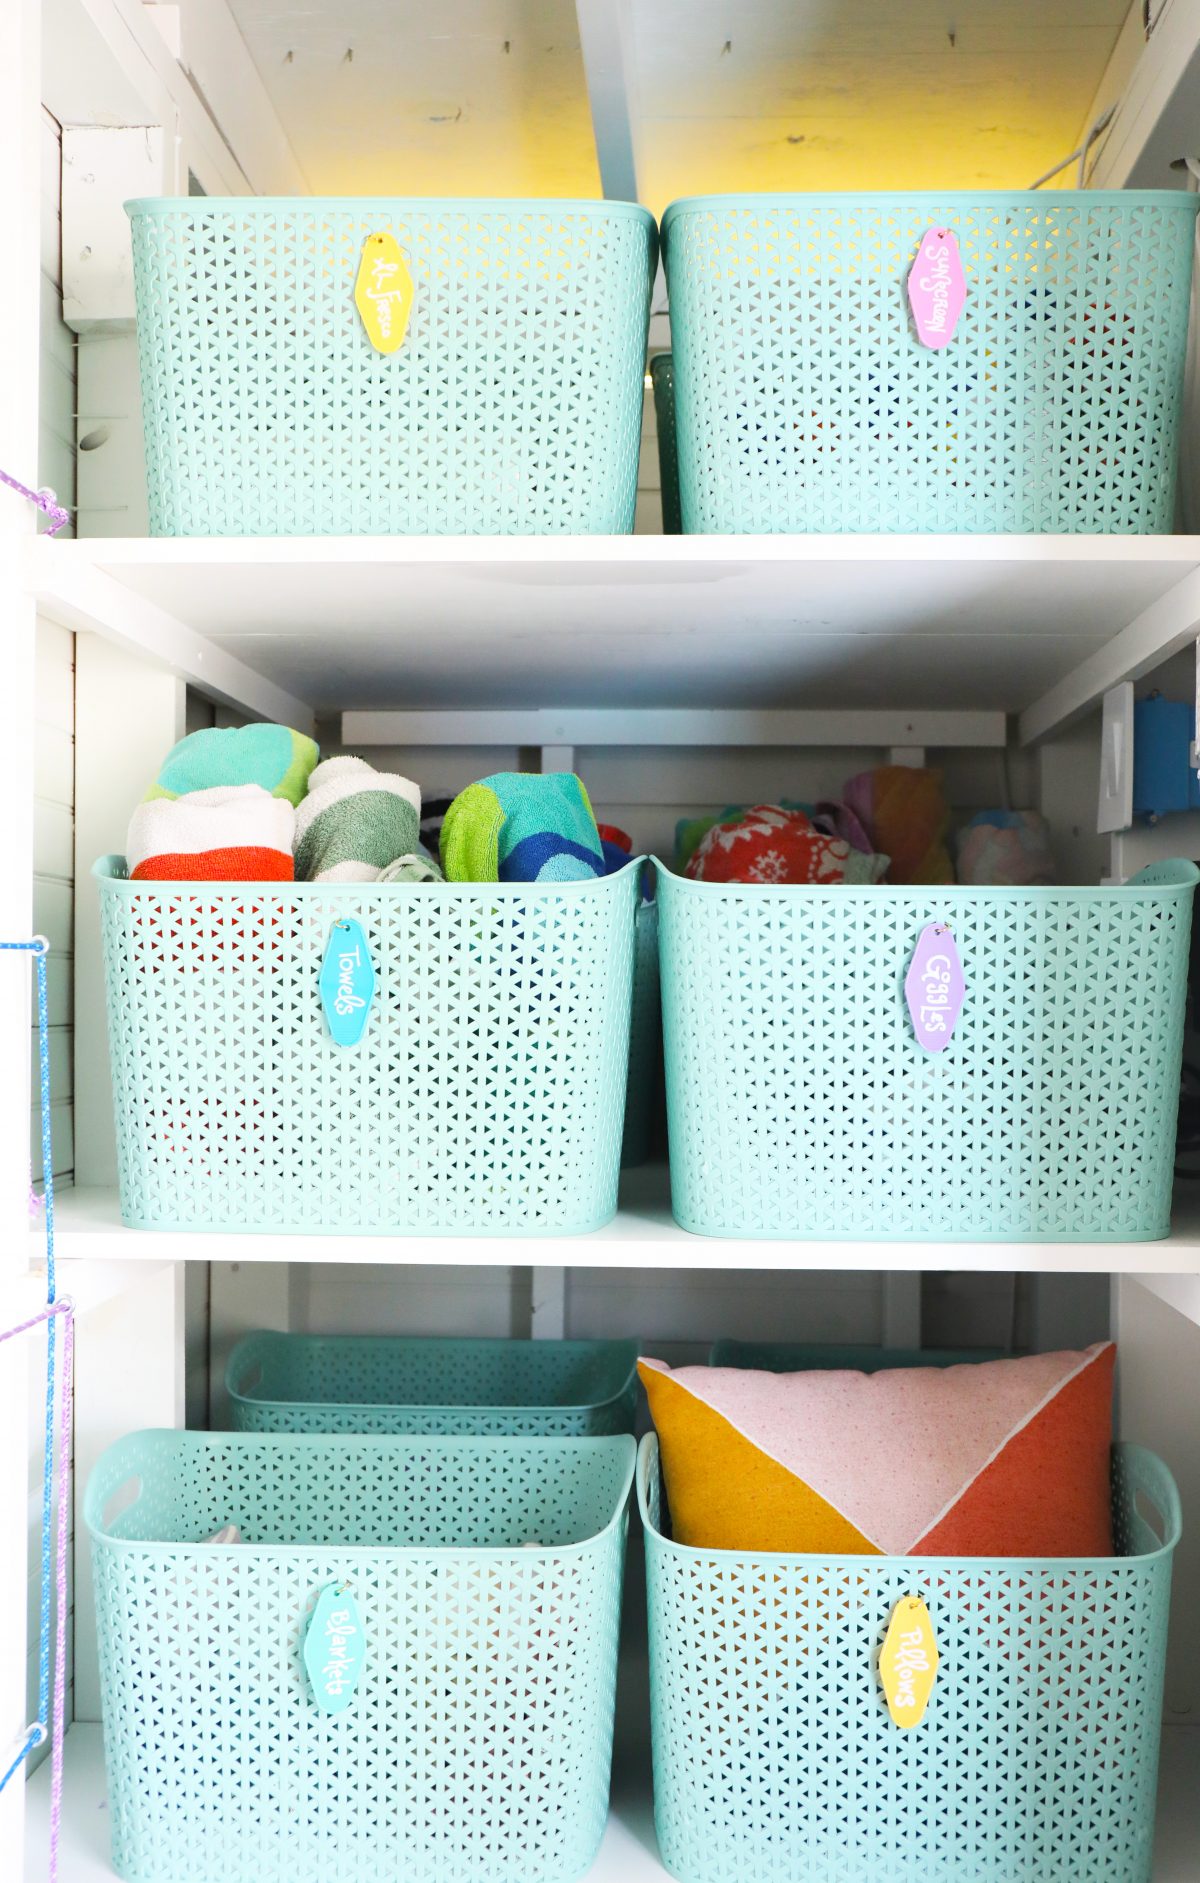
But our closet is so deep, I can pull out baskets as needed, from towels to sunscreen and pool toys and so much more. They sit two deep and hold a little bit of everything, so this makes it easy to spy what I need, and pull them out. Not only are they cute, but waterproof in the process. So here’s what you’ll need if you’d like to try it.
What you’ll need:
1. vintage hotel keychains
{I found ours via etsy} – I knew these needed to work hard for us and it’s something we’ll use regularly and I love them and don’t judge me. I saved so much on the baskets, I went boujee on the tags.
2. white sharpie
3. pliers or jewelry cutters of some sort
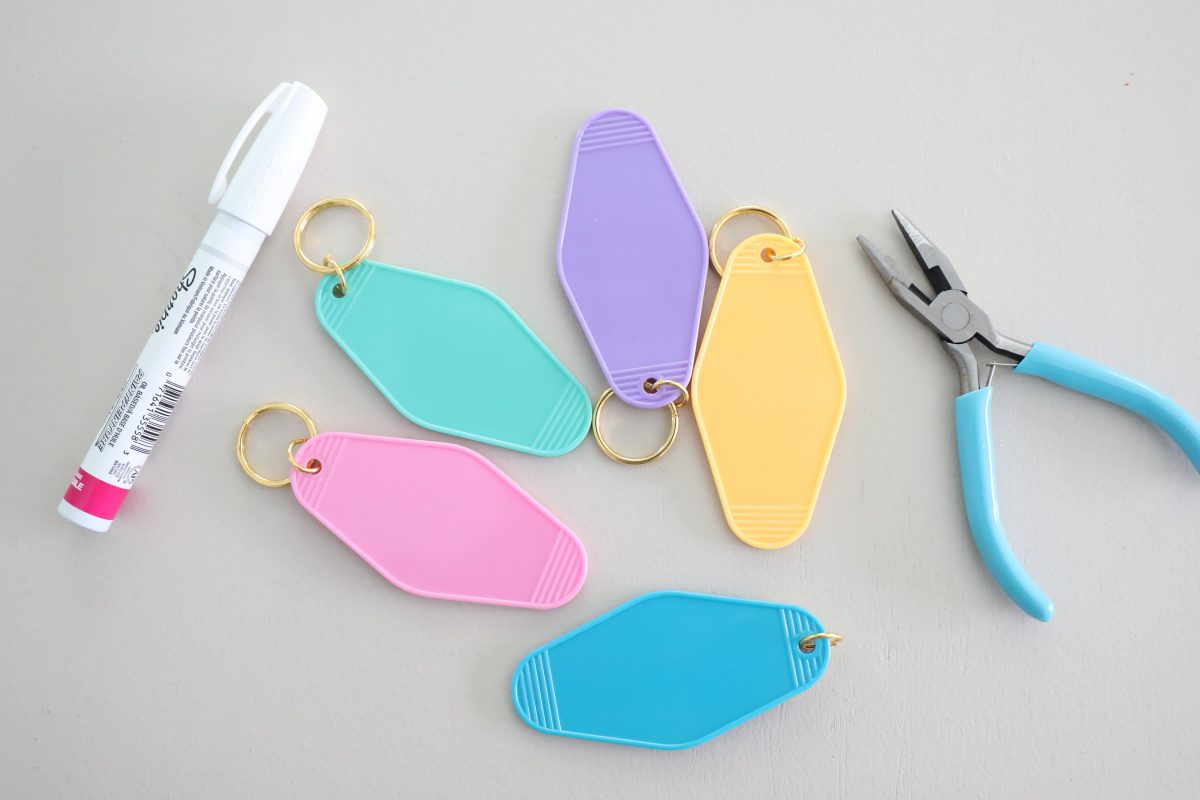
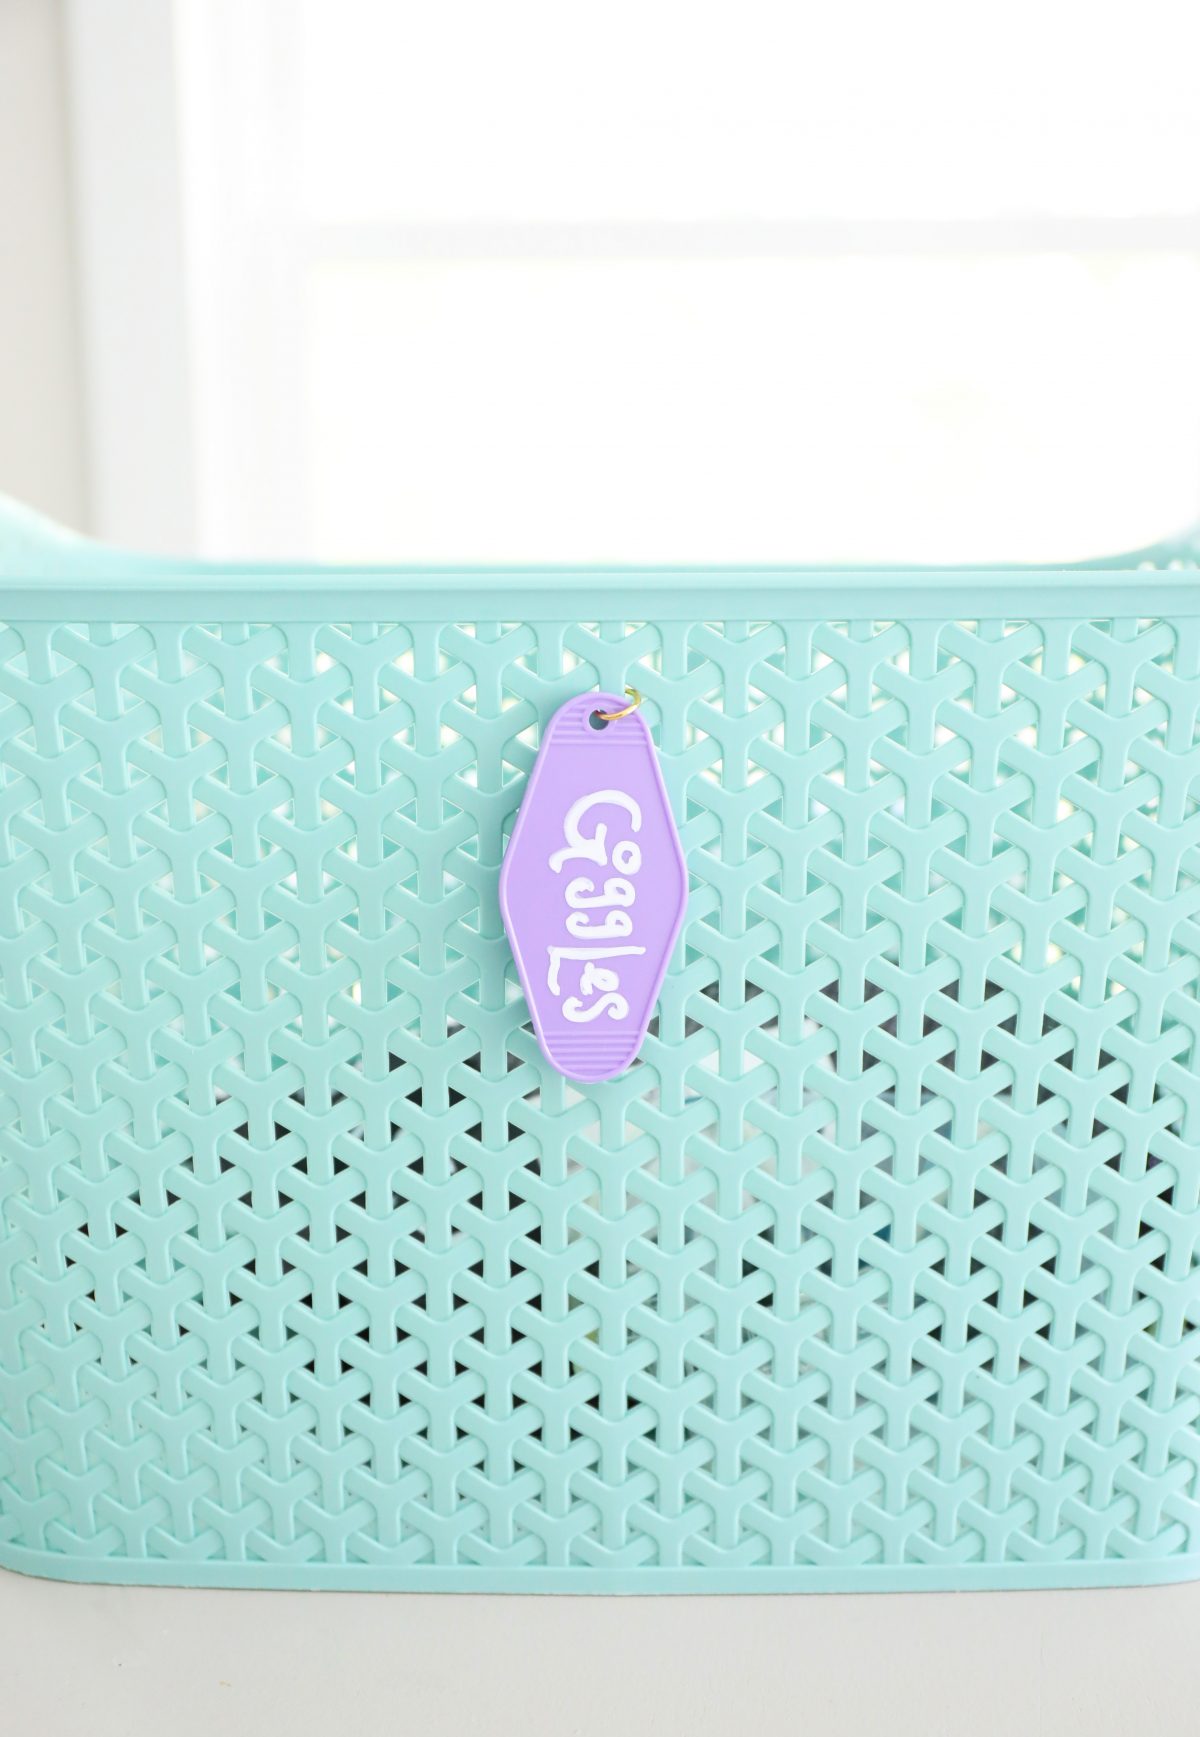
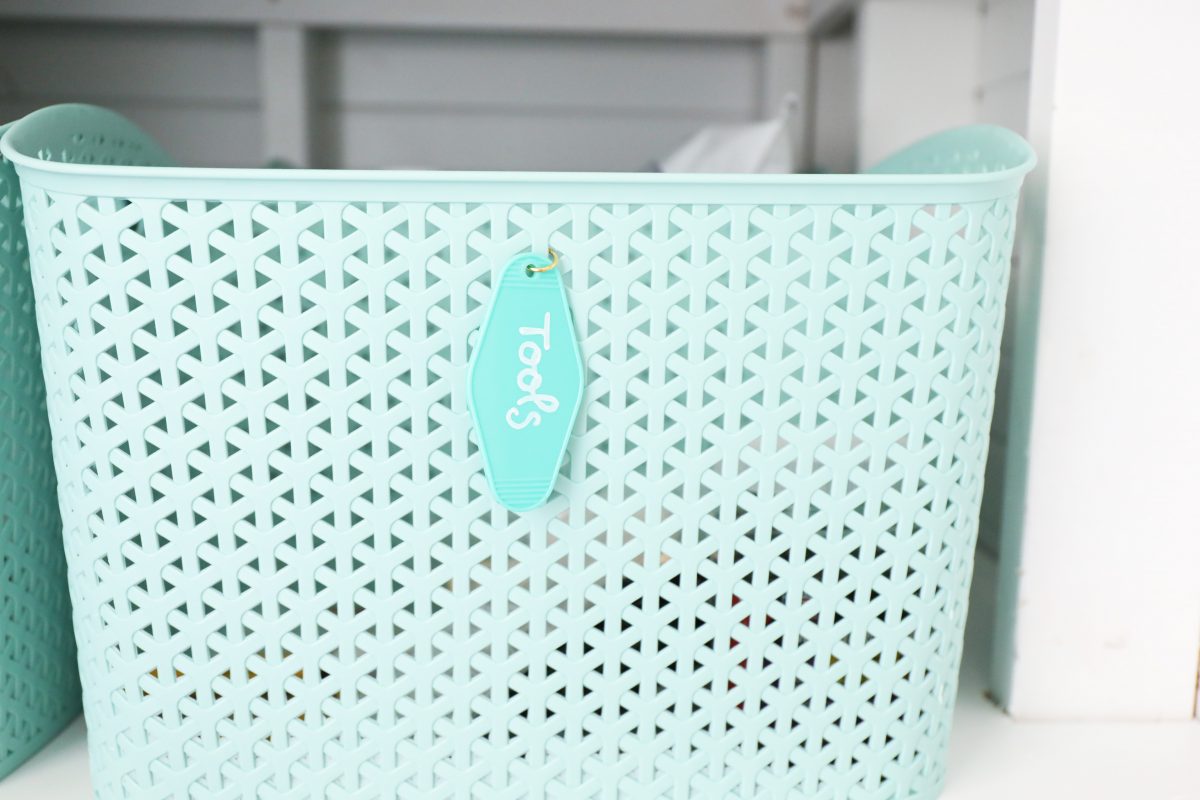
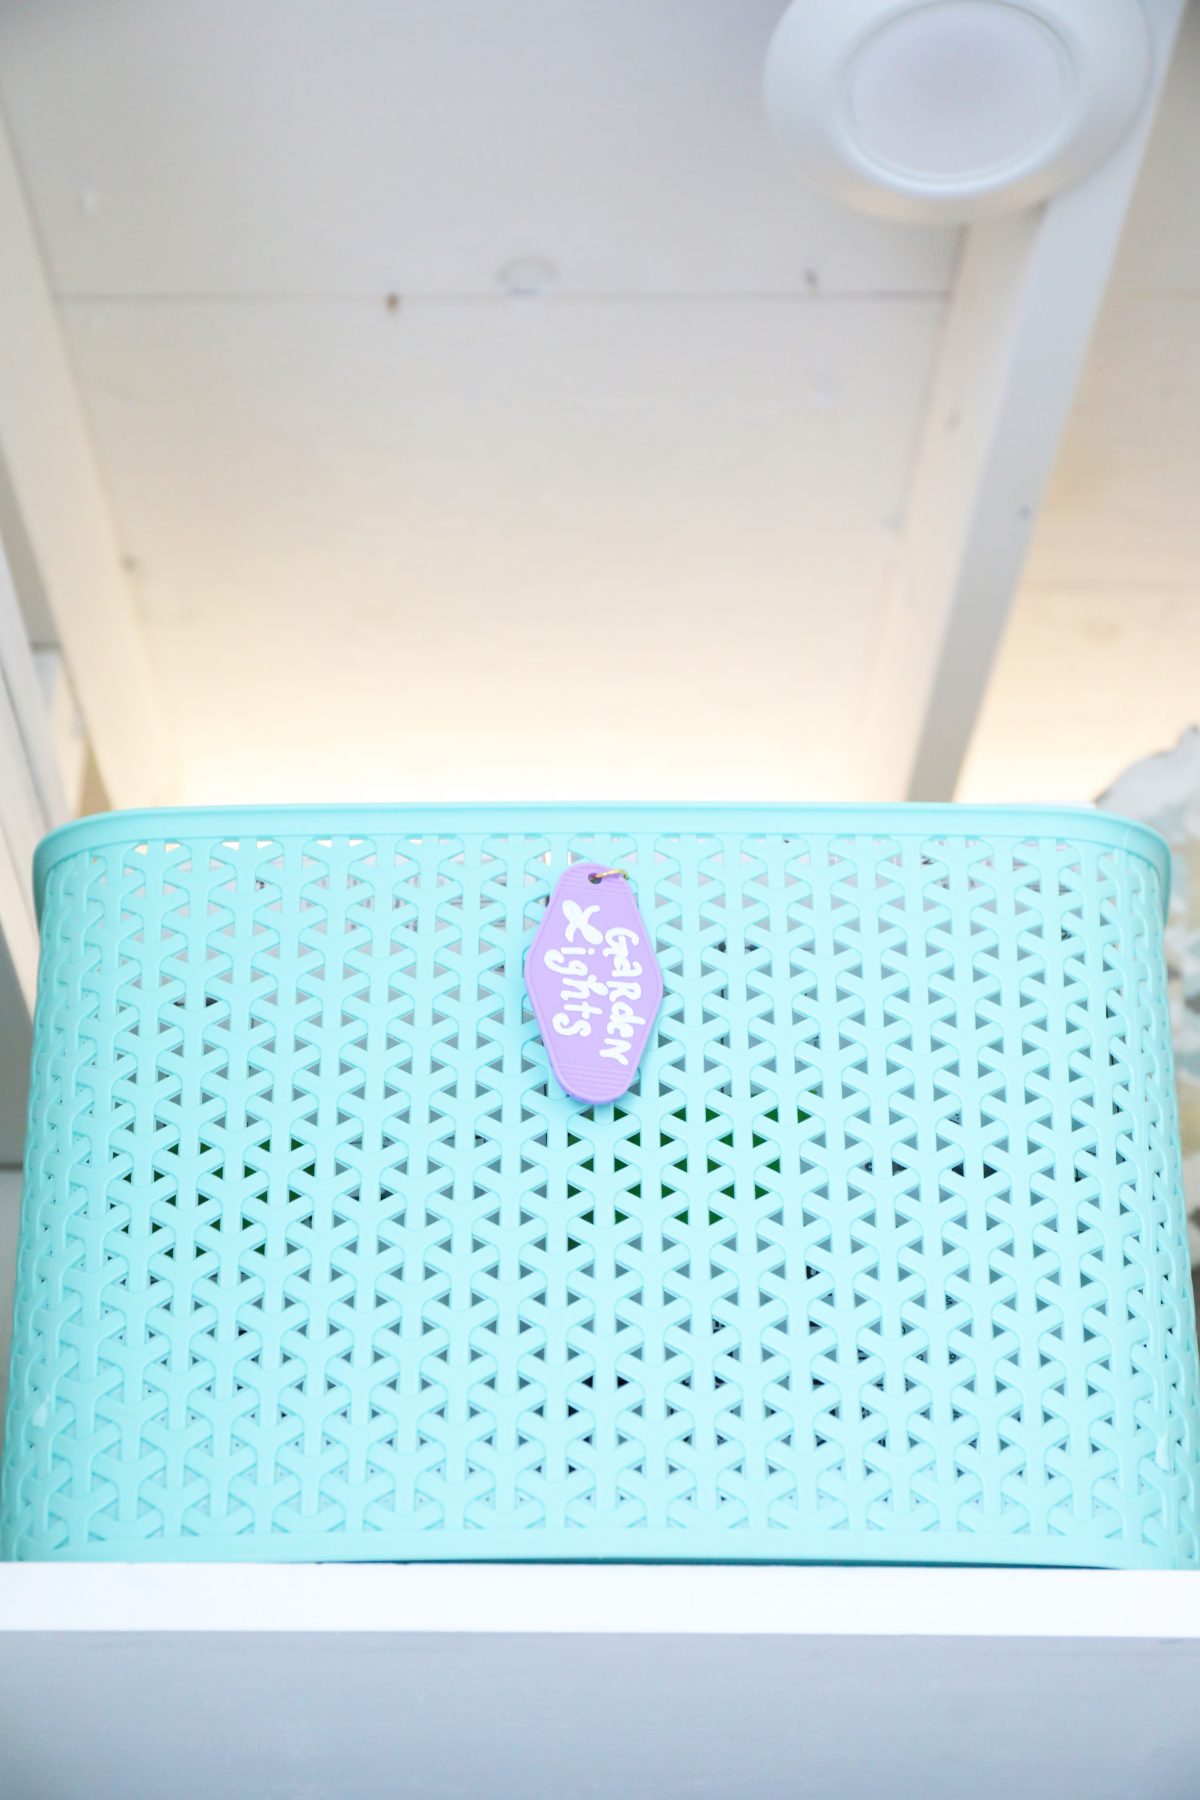
I simply wrote what I wanted on each one, and added them to these blue baskets.
Tip: Sharpie isn’t permanent right away… you can wipe them down while still wet if you have any mistakes, so no stress.
When they were dry, I loosened the jump rings in between the keychain part, and the actual keychain loop.
Removing the keychain loop, I found the same space on each basket to attach them.
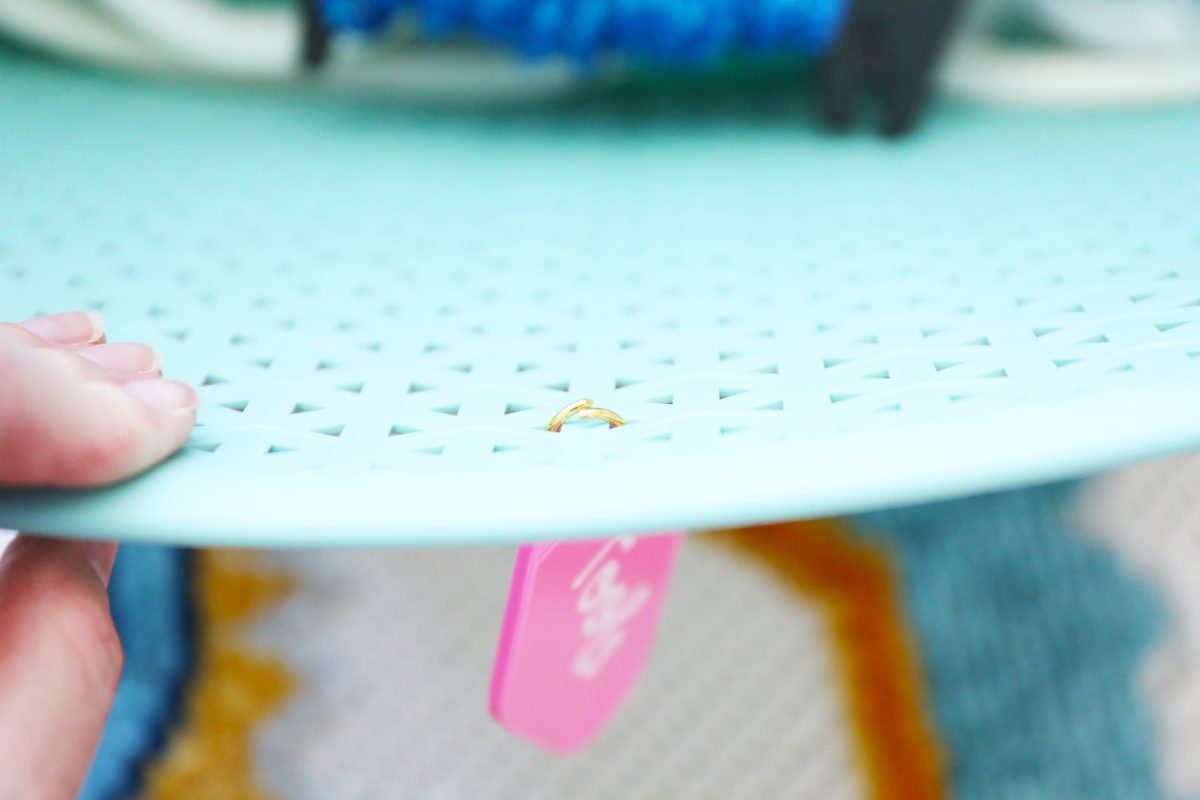
Once the jump loop was through, I simply tightened it on the back end. The perfect baskets for the job!
![]()
From there, it was really just the issue of making sure everything was organized, and labeled accordingly.
I think the hardest part was, now that we have all that storage, deciding for what it needed to be used.
Once that was complete, this was a one hour project at best. Done!
And it’s so satisfying to have extra space now.
I love that I can find everything at a glance, and move things around accordingly!
We even have a space for those gloves to wear with pool chemicals. I’m so proud.
![]()
It’s just a fun little set up. I love that they’re so versatile to move around the cabana for parties and more, too.
We hope you found this simple idea helpful today!
We’re thrilled to have a little organization up in the cabana.
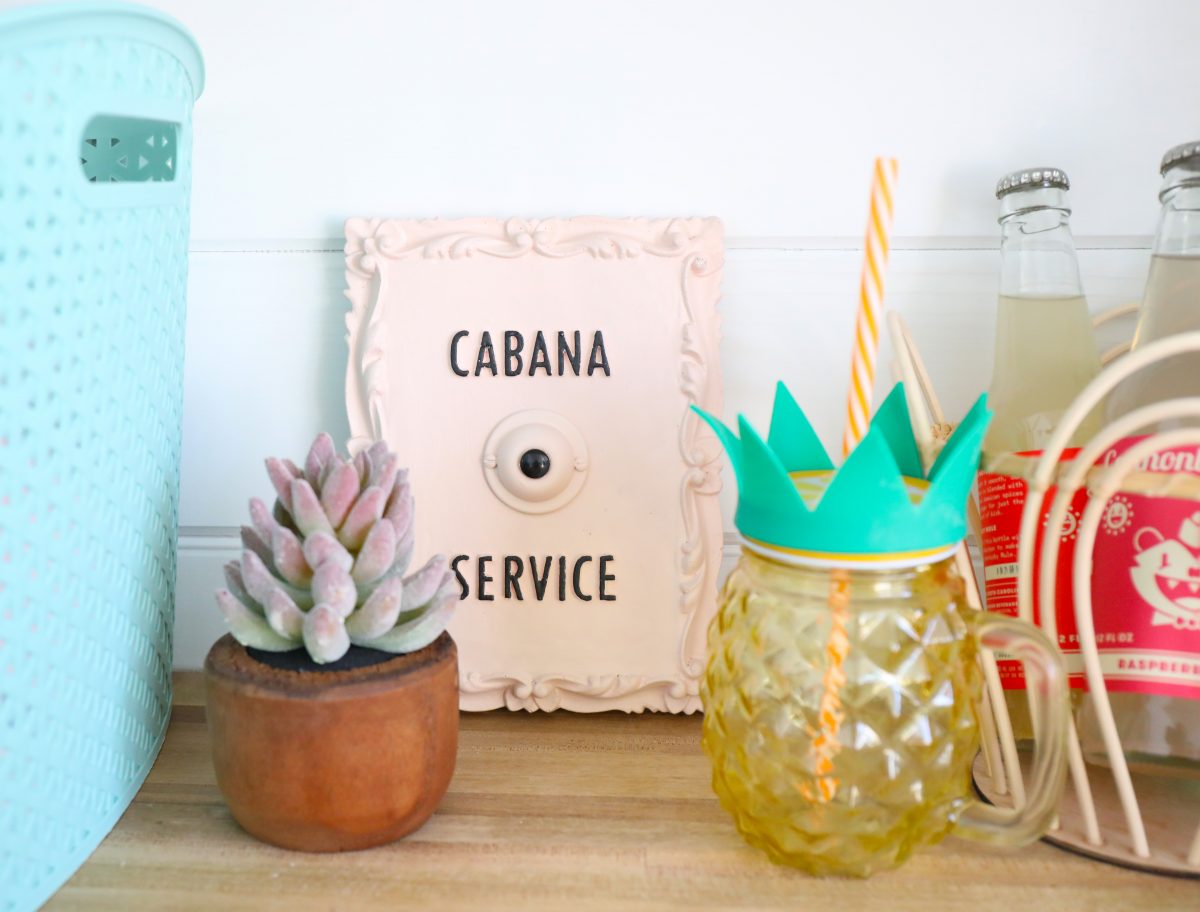
Of course I’m still loving our cabana service button from house of go lightly!
If you create something like it, you know we’d love to see.
Let us know if you have any questions.
Have an inspired day!


Now, that’s what called Perfection. Keep up!!