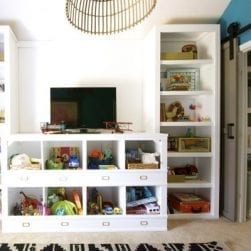
As promised, we’re finally getting around to a few of these how-to’s for some of the spaces that we recently wrapped up. Today, we’re taking a look at the process behind our barn wood built ins we used for the dining room.
 Our previous arrangement wasn’t really working out. The room is snug, and that back wall was a bit awkward with the furniture that we owned. I’d never invested in a large china cabinet {let alone china} so that wall was just… lacking. It worked, and I liked it, but it wasn’t what I wanted to see happen with that space. I’m over settling, remember? Keeping the table turned the other way, limited the space. I had visions of vintage industrial shelving dancing in my head. So we got to it with designing our idea.
Remember this coffee table? I knew it was time to enlist the help of our Welderman friend {John} again. I wanted the shelves to be adjustable, and removable. I also loved the idea of a reclaimed look, combined with industrial. Yeah. I had a pretty high list of demands, didn’t I? But I had to find just the right wood, before I could have the metal welded. If we did the metal first, it would be a lot like trying to fit back into my senior prom dress. {It probably wouldn’t fit…You get the picture.} This process could potentially take months, but I was willing to wait.

Most of you know, Reclaimed wood can be hard to come by. And expensive. The ideal situation to recover reclaimed wood, at cost, would be to discover a barn or old home on your own, as it’s being torn down. This would include cutting out the middle man who scoops it up and immediately amps up that price before you can find it. Which is just what happened to us.
A short week later, in one serendipitous moment, John literally stumbled upon a barn as it was being dismantled. A peanut barn full of heart pine, aged around 70 + years old, the wood was simply sitting there for the picking. Luckily, John happened to know the man in charge, and struck up a deal. This rough cut wood measures 12″ w x 12′ l by 3″ thick. This thickness enabled the wood to stretch across the entire room and still hold steadily with zero sagging. We went in with our friends, John and Kay, {she may be cooking up something of her own, soon} and purchased in bulk. Jamin and I then went with a not-so-giant trailer, and hauled it home like this:

I may or may not have anxiously watched the back as it dangled over the edge, praying it didn’t hit the concrete… or worse: fall off and hit someone. Any time Jamin went over twenty miles an hour I was all, “WATCH IT!” from the back. It was a bit nerve-wracking to say the least.
 In the meantime, with wood now available, I drew up these {slightly vague} plans, after measuring out again in our dining room, and took the metal to Welderman.
Jamin and I purchased:
6 pieces @ 1.5 inch by 12 foot 16 gauge square tubing
It was pretty basic, the whole idea, and As long as I could adjust them at will, the rest would work wonderfully. {In my head.}

John and Kay. See John? He’s all, loving husband and father by day…
Rocketeer uh, I mean Welderman by night.

Anyway, while Welderman did his thing, Jamin and I got to work on the wood. How on earth do you prepare dirty, reclaimed wood for use in your home? First things first, Jamin gathered some minions {a little help was the only way we would have finished anything this summer, since he was away for two months} and removed all the nails.

Woot! These nails were a mere 6 inches long.

 I searched the intranets, but to no avail, only found information on flooring. Some articles said one thing, and some said another. So finally I said to heck with it, and tested out one {quite dirty} piece of wood. We pressure washed them on the lightest setting. We had to be careful, as it was rough cut, so we washed it WITH the grain.

 Our neighbors think we’re so weird. Make sure you let each side dry out completely, before you move them indoors again.
  Once the metal was finito, it was time to paint it. But before we could do that…we had to degrease the metal. Metal comes coated in this black stuff, to protect it from the elements, as it rusts quickly. So, in order to paint it, you must remove all the grease, first.


If you remember from our coffee table post, we treated the metal with three different layers: 1. The primer. {dark.} 2. the darker metallic finish, and 3. a light third layer of textured touches, for a natural look.
 John left holes in the corners {as requested by my vague plans} and Jamin secured them into the walls with bolts. I simply touched them up later, to camouflage.

This wood is old. So, these beams were a bit of a snug fit. There was no exact science, and despite my attempts to measure, and triple check, the wood {the design called for two deep on the bottom two levels of the built in-I wanted it to remain versatile and serve as both a buffet, and a display} was a bit snug, and needed a little trimming in some places to make it fit.} This process was very touch and go. These beams are also SUPER heavy, so who did we call?
 Welderman!
 And slowly…

But surely…via trial and error…

The giant puzzle piece was assembled.

And then we had another problem…

We had to move that frame, as it now looked like a gargantuan flag on a flag pole. And we may or may not have not painted behind it, when we changed the color of our dining room. See how dark that original brown was? Literally night and day: Benjamin Moore’s Grandfather Clock vs. Behr’s Irish Mist. It took us about two hours, to move it a mere five inches, as one single nail was stuck in a stud. Nice. We may or may not have placed the frame back over said brown hole, and re-painted the grey area. YAY us!

The rest was like putting together a puzzle….by process of elimination and figuring out what worked.

I totally stole this photo from Layla. I liked hers better. {thanks guys! ;)}

Want to know the grand total of this project?
10 beams of reclaimed rough cut heart pine @ 25 each + 6 pieces of metal @ 18.36 + tax, + spray paint = 389.00. It wasn’t super cheap, but think it’s safe to say we got some bang for our buck. 😉 Compare this to typical shelving from the big PB at half the size, and certainly not custom…and well, the advantage is clear.
So that concludes our {slightly tedious but totally doable} how-to on installing reclaimed wood! Got any questions? Be sure to ask below and we’ll do our best to answer! If you’d like to take a closer look at the finished space, clickety on over here. Thanks for stopping by!


Very creative. I love your painting.
Man.. I need a Welderman friend to the rescue!!!
Absolutely LOVE!!! It looks awesome.
Great Room makeover and great price on everything! You’re lucky to have Welderman and Stud around!
So pretty and creative! I love the natural wood look, with the painted wood of the large picture frame. Have you done a “how to” on the frame? I would love to see that!
Renee
Really beautiful and amazing, love the room!
LOVE these great shelves!!! The room looks great!!! (=
What, what! So awesome, and I do me awe-some. I drive around our town with my eyes glued to the side (not good, right?). What luck…umm, I mean Providence! So inspired.
Absolutely beautiful! Thanks for the tutorial.
Love the reclaimed wood! Could you do a tutorial on how you did the huge turquoise frame on the wall – absolutely amazing! Also where did you find (or another tutorial?!!!) the picture frames in the background of the picture of your favoritest peoples 🙂 Just discovered your blog and LOVE it!
Hi,
I love your shelves so much that I have decided to model some in my home after them. I’ve yet to figure out a way to secure them to a wall though. The place we’ve chosen to put them is in our living room/family room and there is a doorway in the way so we can’t do the ladders on either side. Any ideas? I’ve thought of standard L-brackets that I could paint the same color as the wall, but I’m not totally settled on that. It seems like there could be a better option out there….. 🙂
Also, I noticed that you didn’t mention anything about sanding the boards. Did you do anything to the “frayed edges?” I’ve tried sanding the edges with some rough sand paper on a rotary electric sander, but it’s not doing the job. I thought that maybe after I applied the wax it would help to blend in the uneven surface on the face of the boards, but I’m not sure.
Any tips or suggestions would be greatly appreciated!
hey annie,
I think I would need to see your boards {the size of them} and your space before making that call, but if they’re as big as ours, I wouldn’t attempt anything BUT the metal on both ends-ours are bone crushing beams. so it just depends on how large yours are. Also, I did not treat the wood, as I wanted to keep the original integrity of it. However, if I ever change it to something else, I will cut down, sand, seal, etc. For now, it works for us as it is. I hope that helps!
LOVE these! Beautiful. I’d love you link them up at my Reclaimed Wood themed link party!
http://BurlapAndDenim.com/2012/03/party-on-mondays-3-reclaimed-wood
I love this!I also love love love the painting of the birds nest!Did you paint this?
I am trying my own version of it,but wondered if you had any tips on how you painted it?Thanks so much!I really enjoy your website!
Thank you Lynsey! So sweet. This is a tough question to answer…I’m sad oil painting doesn’t come with a few quick tips a-la bob ross…I’m afraid that would be a little too detailed ;} I actually do oils when I have time on the side-I majored in Art + design in college. Thanks so much-maybe I’ll share something like that in the future!
LOVE your transformation. Especially the blue egg painting. Where did you find the painting?
Hey Melissa! I do all of our paintings. I was an art major. ;} Thank you so much!!!
Very clever, beautiful, and efficient!
Using reclaimed wood is an excellent concept. Great post, loved the photo’s and comments. Thanks for sharing.