
diy halloween totes
:: This post was brought to you in partnership with Waverly Inspirations and its parent company, Iconix. While we were paid for our expertise, all opinions and ideas are 100% ours. Please read our full disclosure pertaining to partnerships here ::
It’s round four, y’all!
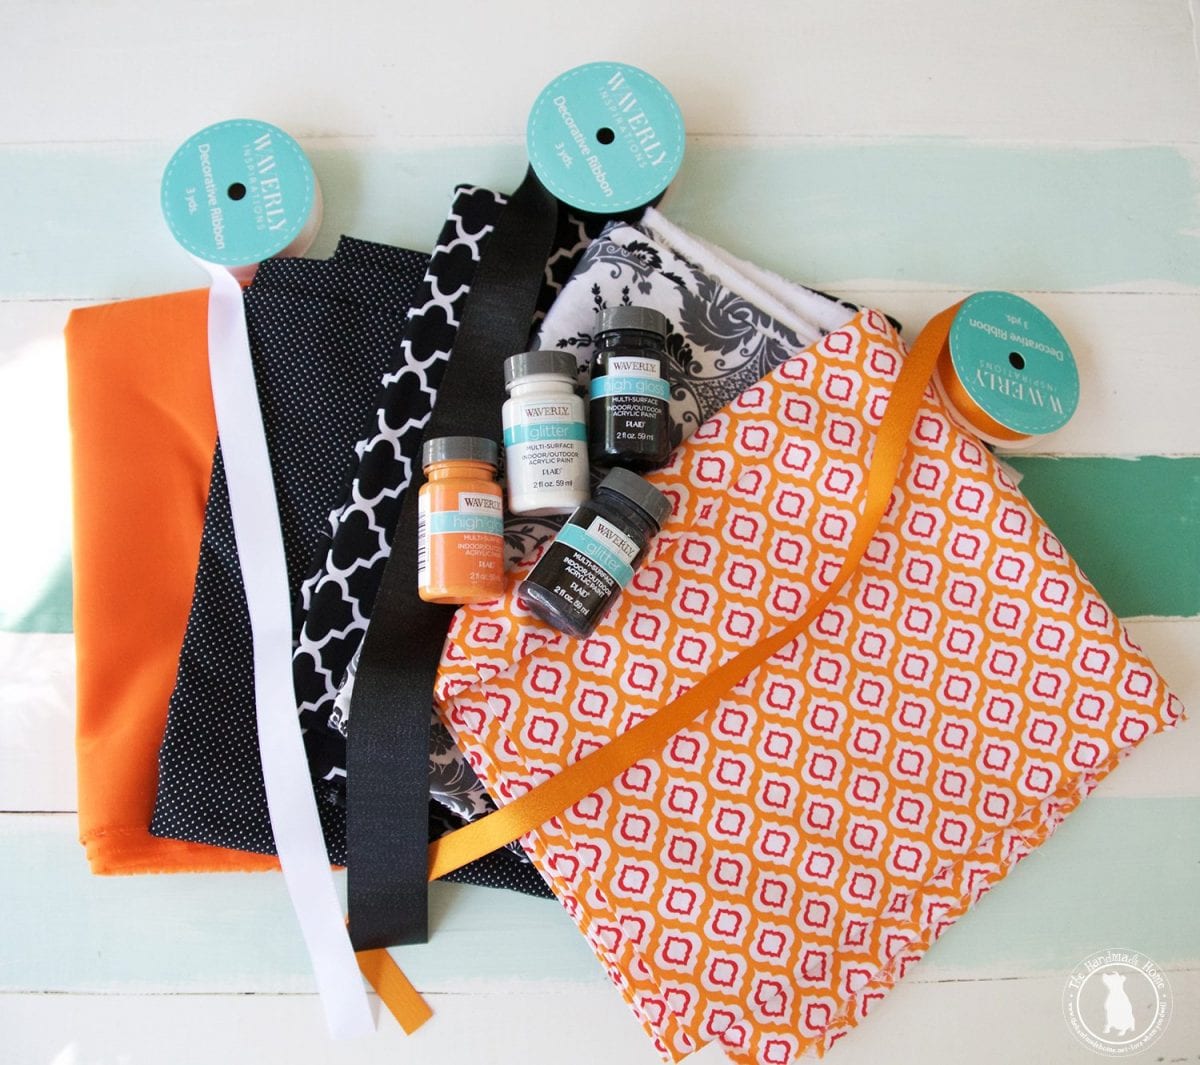
If you’ve been tuning in for a while now, then you know we’ve been a part of the Waverly inspirations challenge, where every month we get some more goodies in the mail. And from those goodies, we create something with their fabulous products.
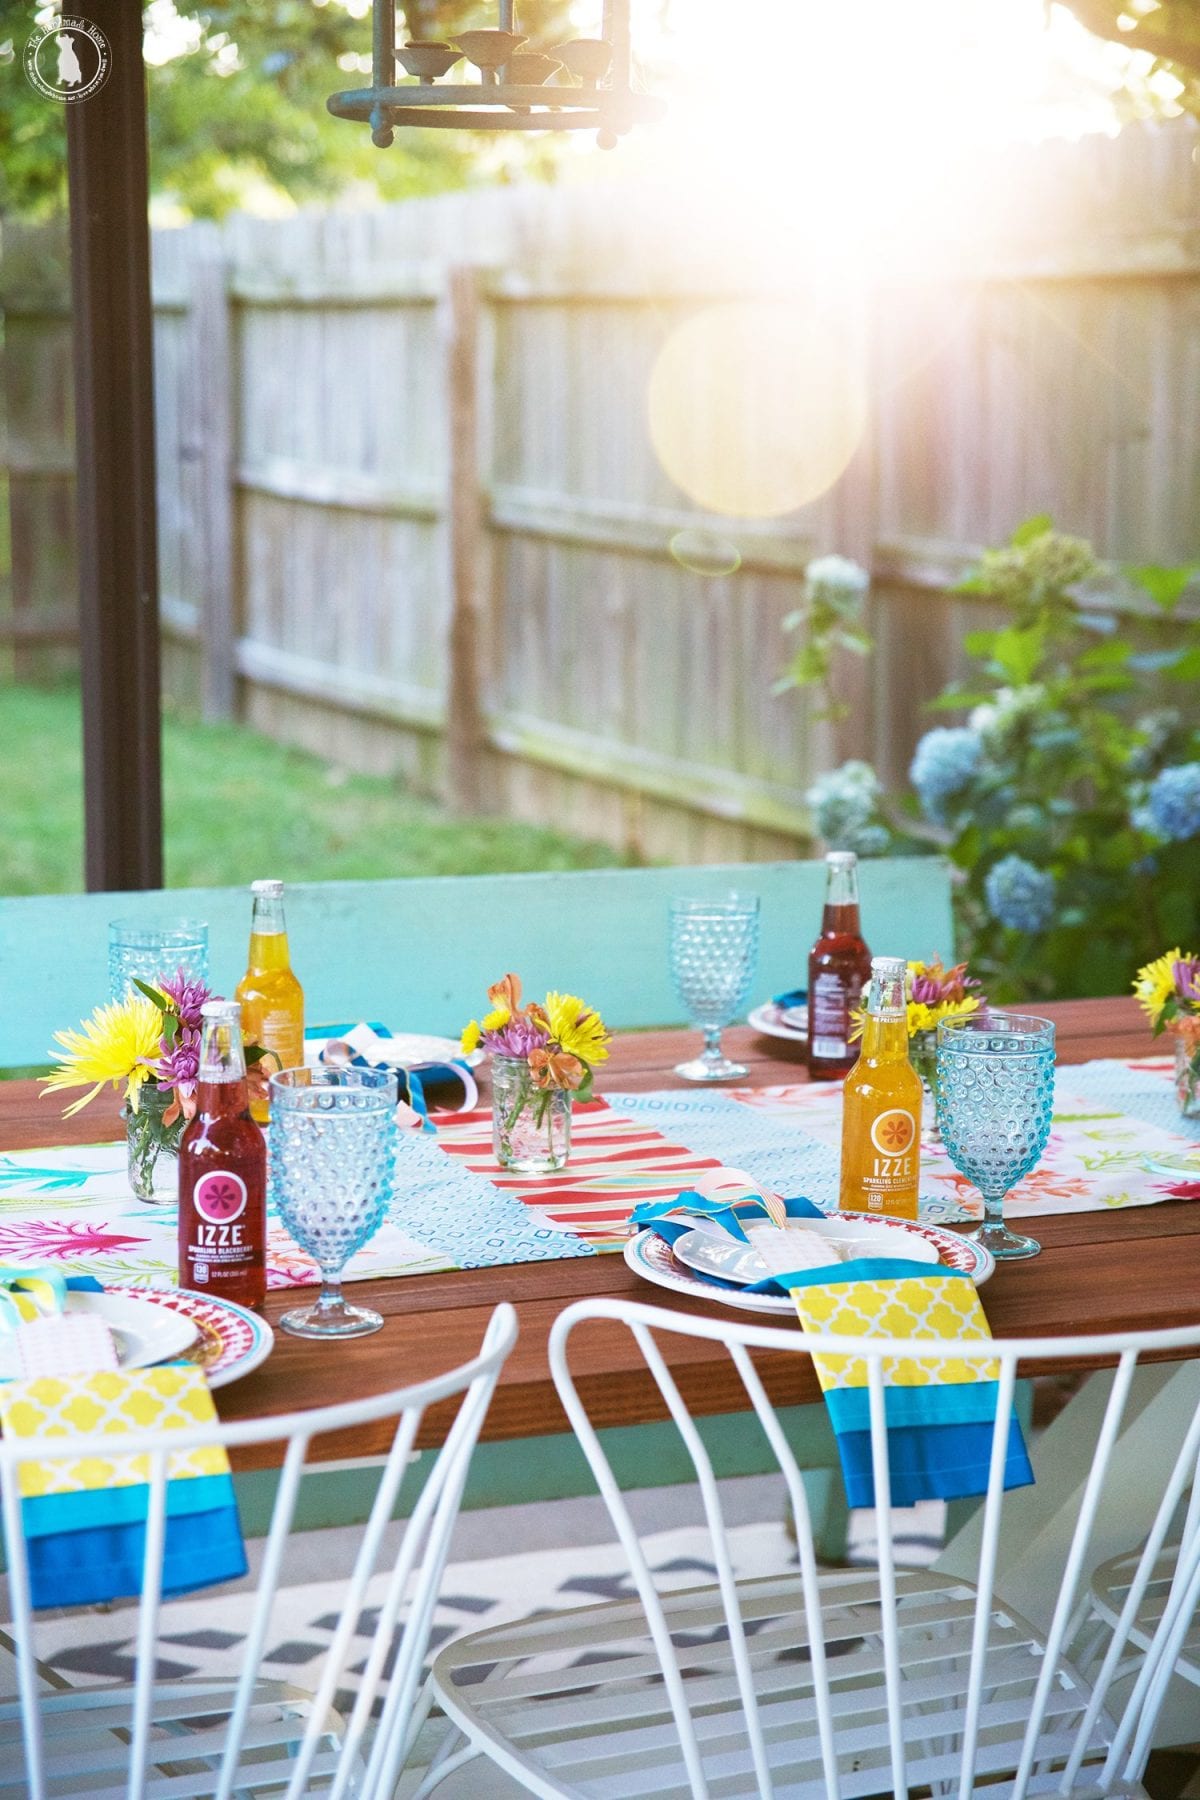
So for our first round, we decided to tackle a fun summer tablescape.
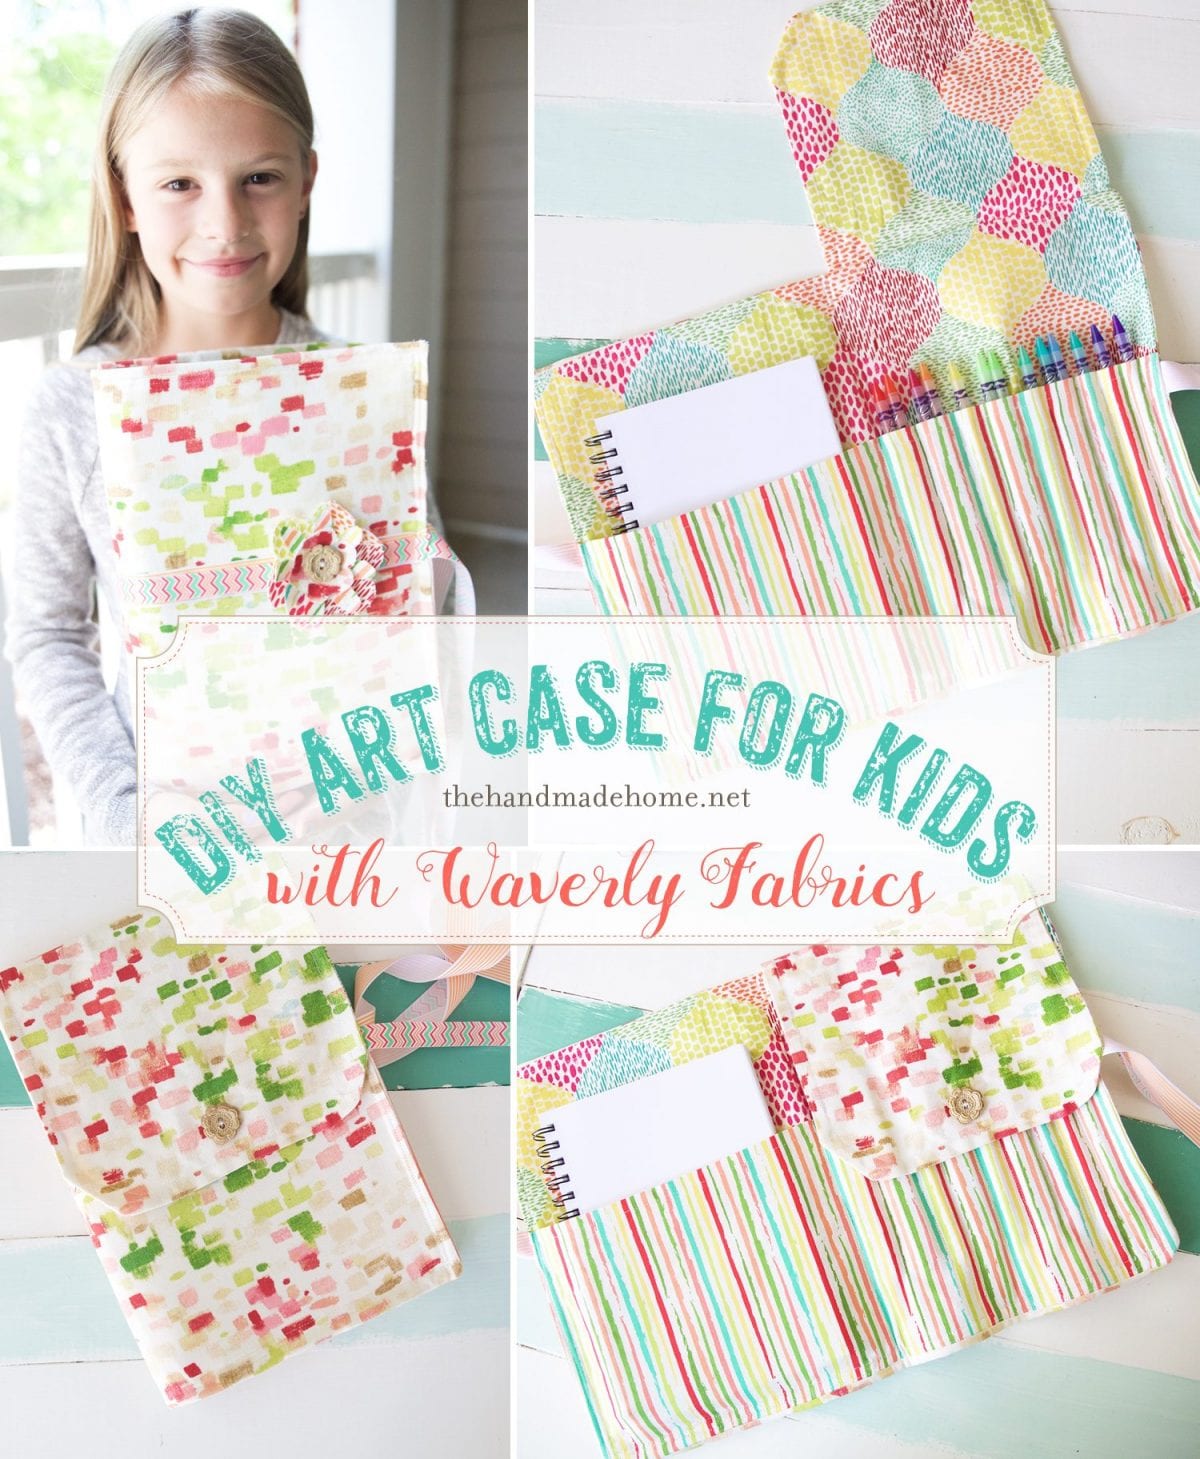
With round two, a diy art case for back to school!
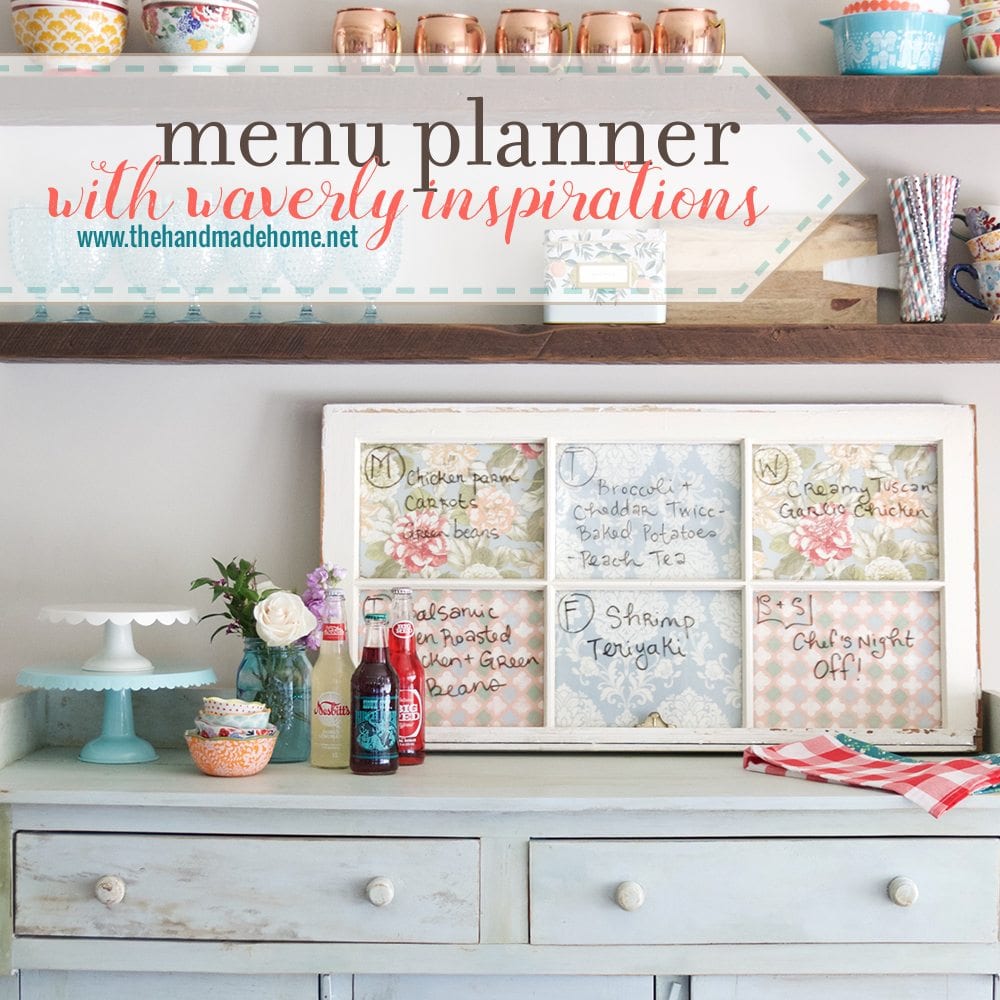
And this awesome menu planner {If we do say so ourselves} for round three.
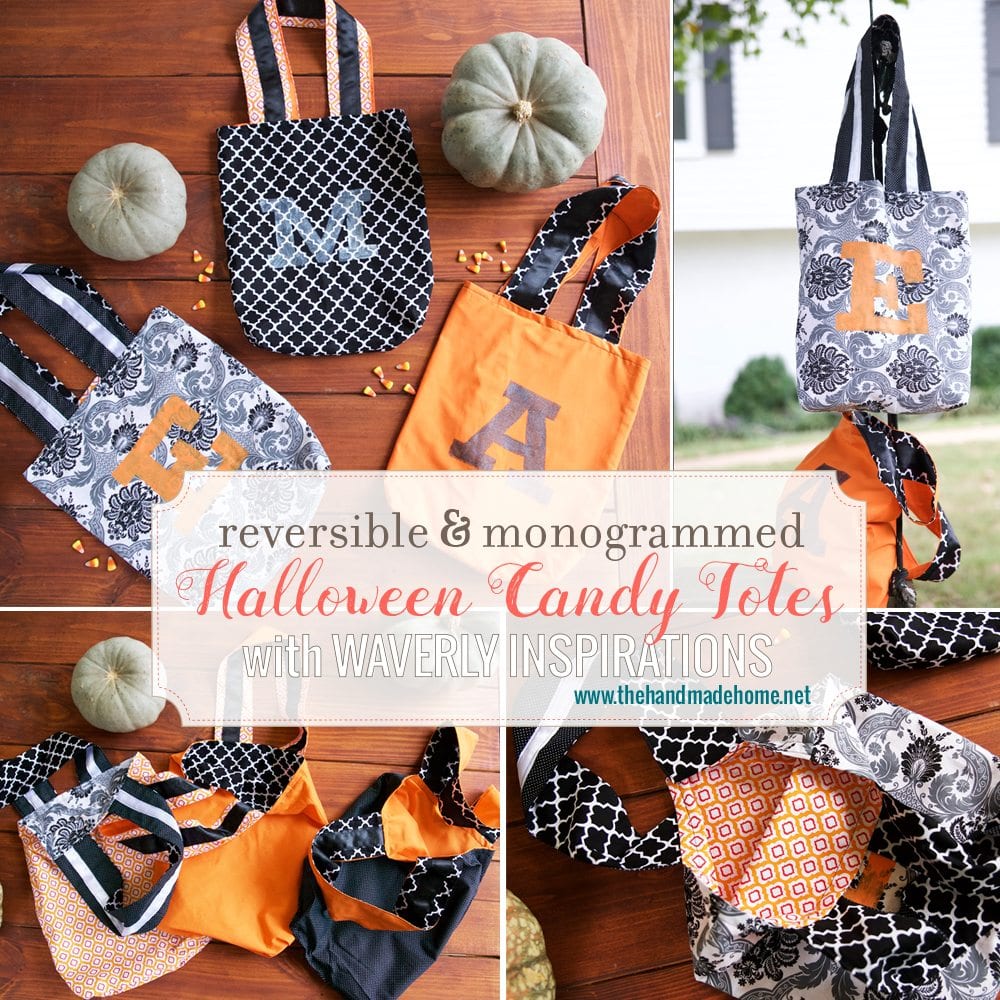
This time, it’s all about Halloween.
This has always been funny to me, but it may be our children’s favorite holiday. They absolutely adore dressing up, and trick-or-treating. And since we absolutely adore stealing their candy when they aren’t looking… it too, we thought we’d help them do it in style.
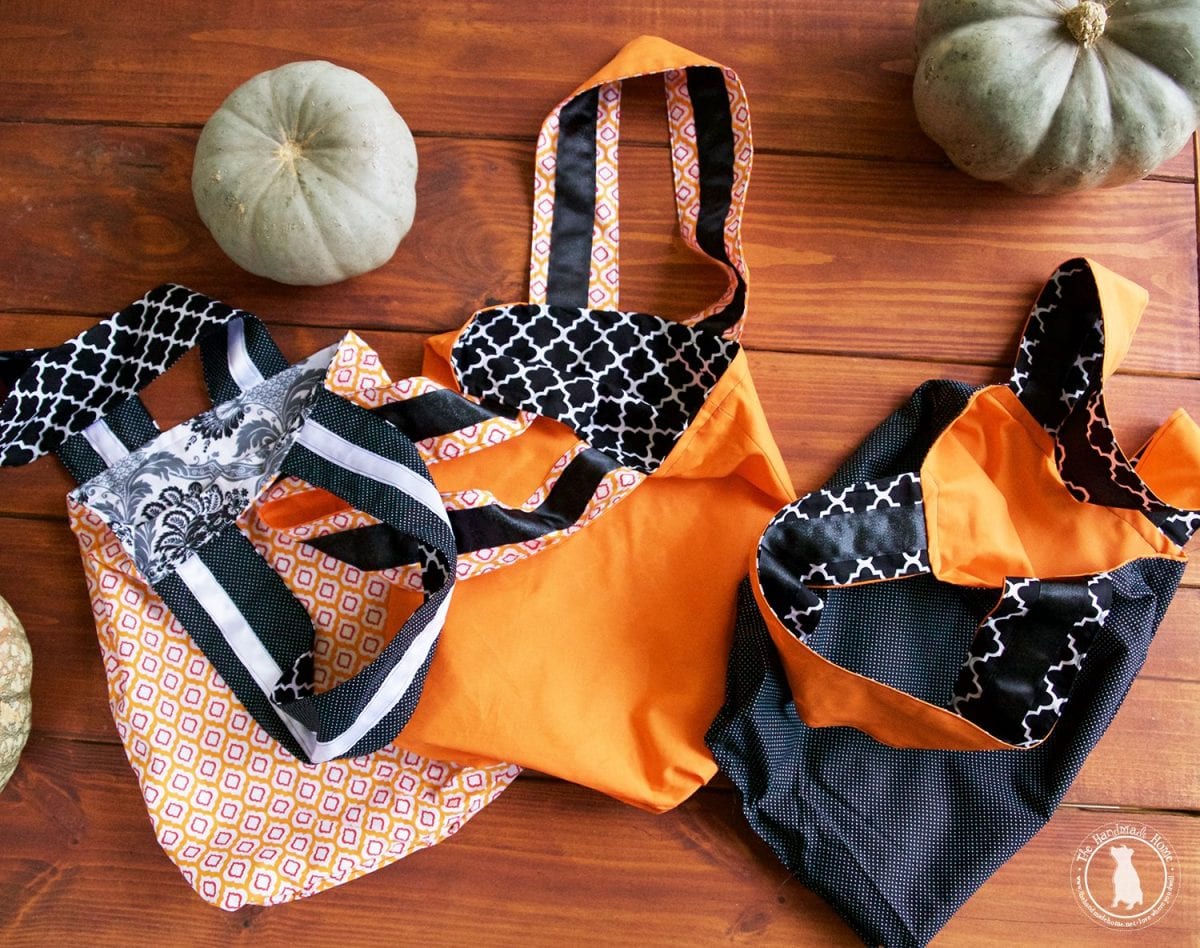
I mean, they’d kind of outgrown their little monogrammed felt pumpkins they’ve always used. These are like pillow cases with straps. For the serious candy connoisseur.
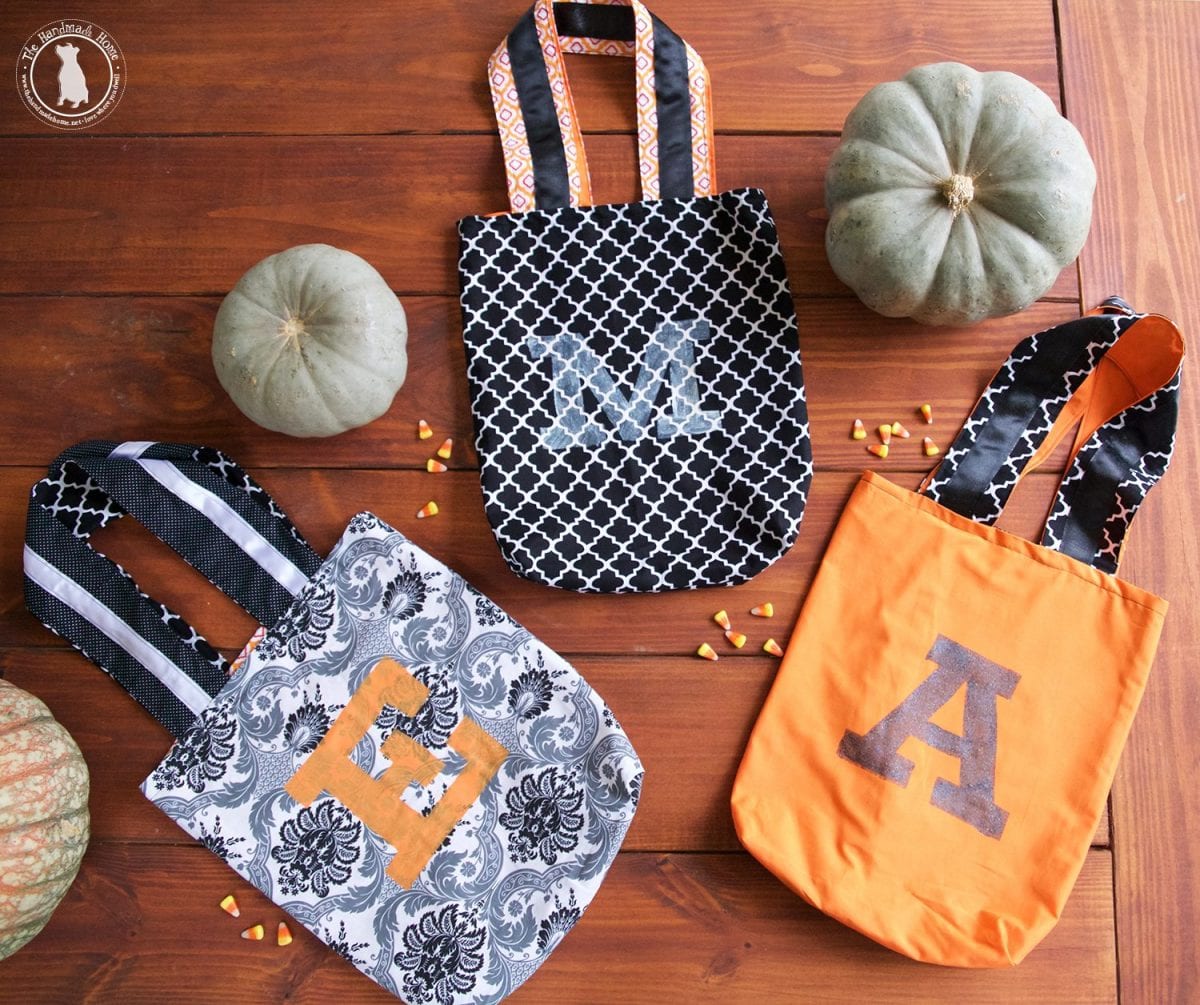
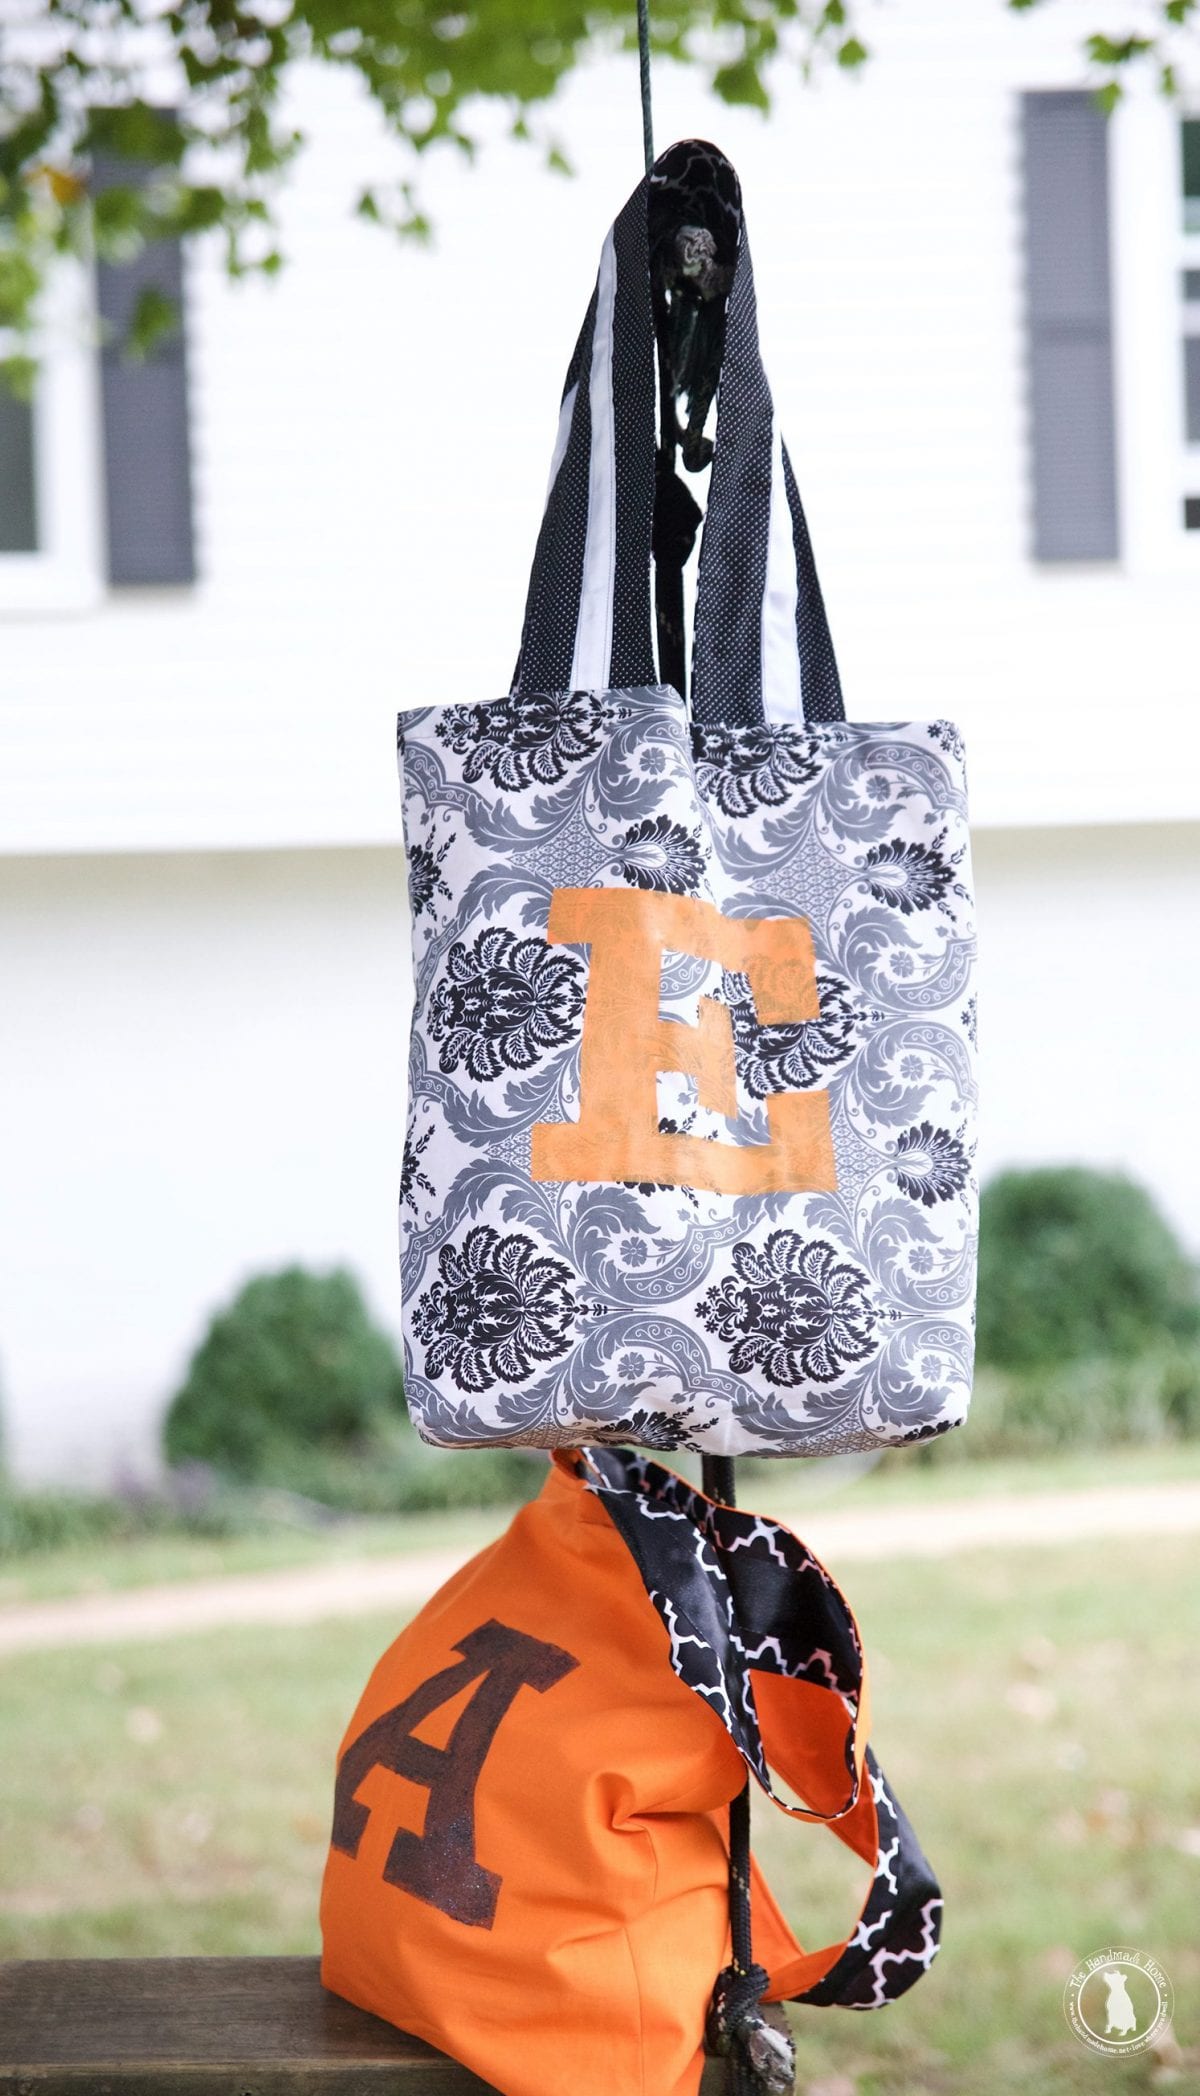
So we decided to cook up a little something that the kids could help design and love: reversible monogrammed diy halloween candy totes. Say it five times fast.
Or, just DIY Halloween Totes.
With super powers. Because they have other fab features.
We let each kiddo pick their combo from the pile that they wanted this year… and pieced them together. TADA! Their very own DIY totes they’re sure to love for years to come… with a little more room for the serious collector.
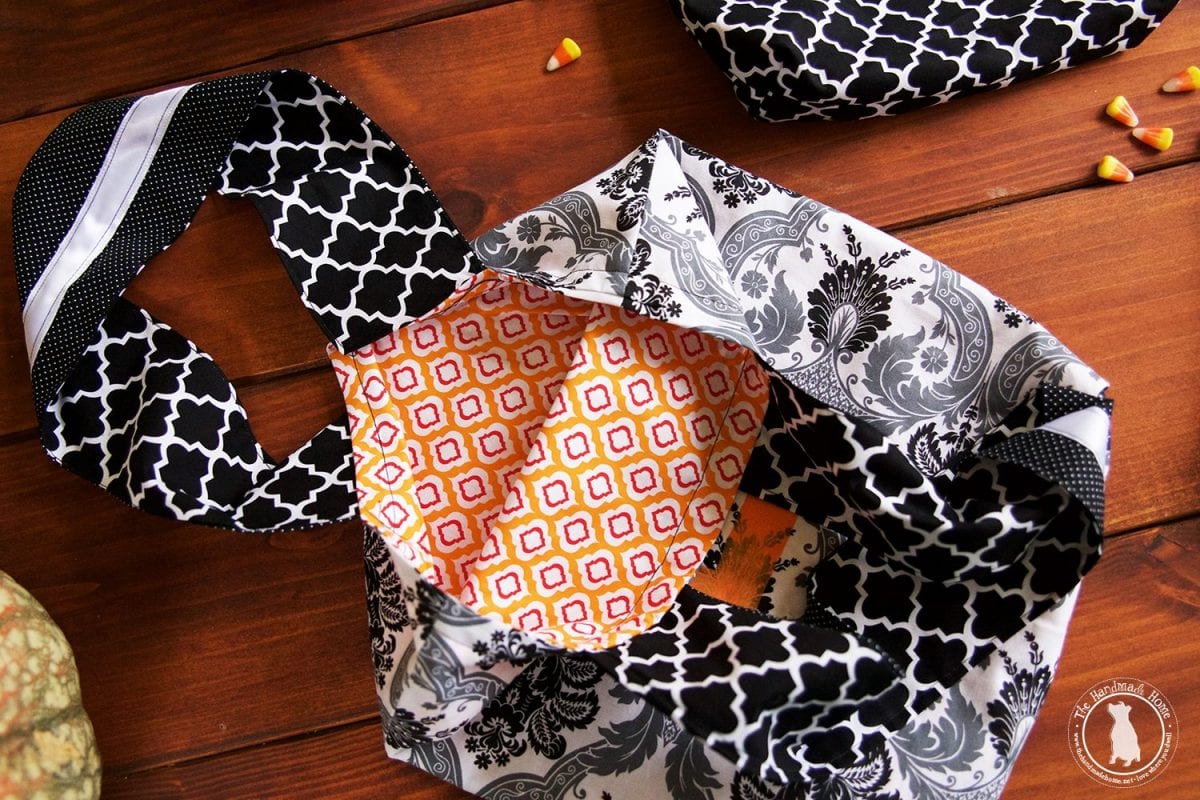
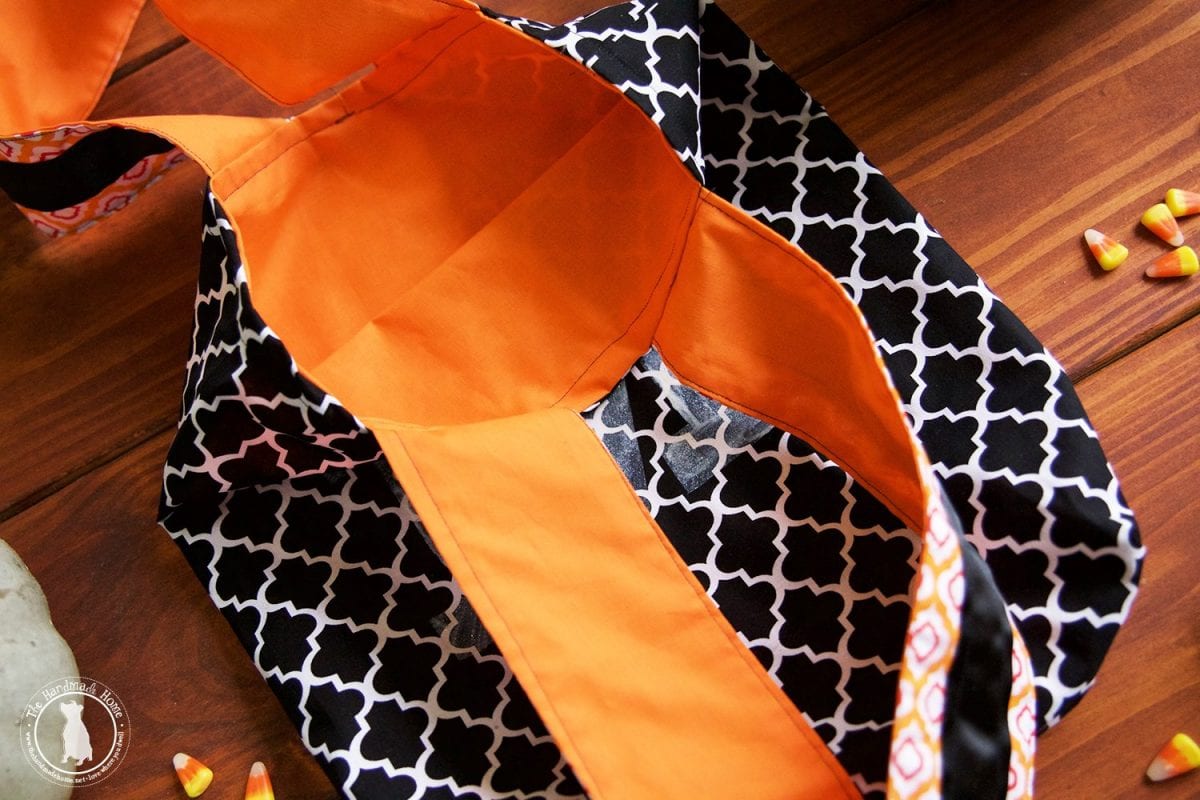
We do think that the reversible part makes it fun for sure!
Just simply turn it inside out for a great pattern on the inside as well.
Winning.
Want to make one? Here’s what you’ll need:
• Fabric of choice • Paper to create your little pattern • A sewing machine, and all that usual stuff + an iron and ironing board {I always find that ironing in between really helps me get neater edges – does that make me a total dork?}
For the screen printing section, we kept it separate in this little tutorial. See below on how to do your monogram.
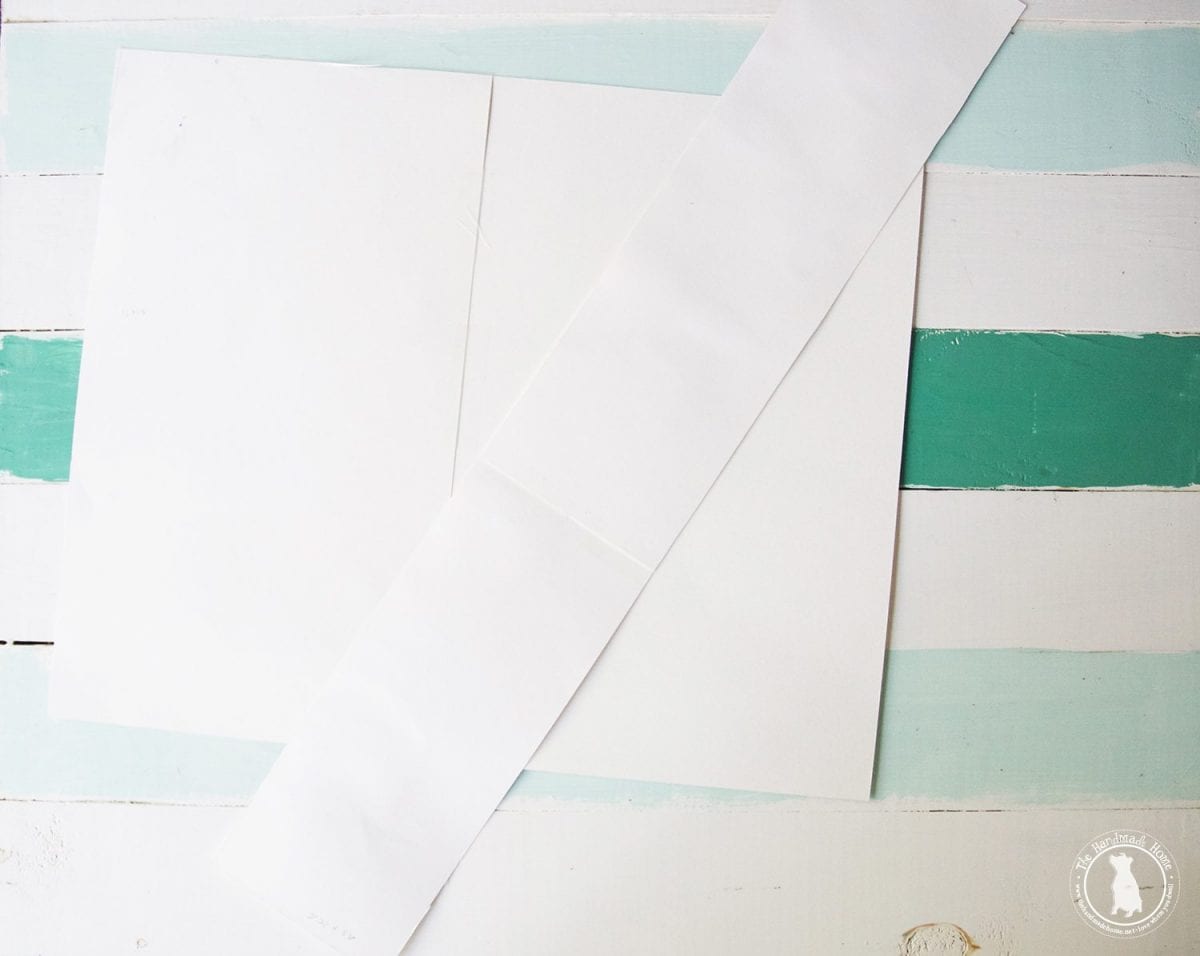
I made a rough template from some thicker paper we had lying around the house, and pieced it together to make our fabric that we plan to cut.
The sizes were 4.5 x 25.5 – for thicker straps + 15 x 18 for the body.
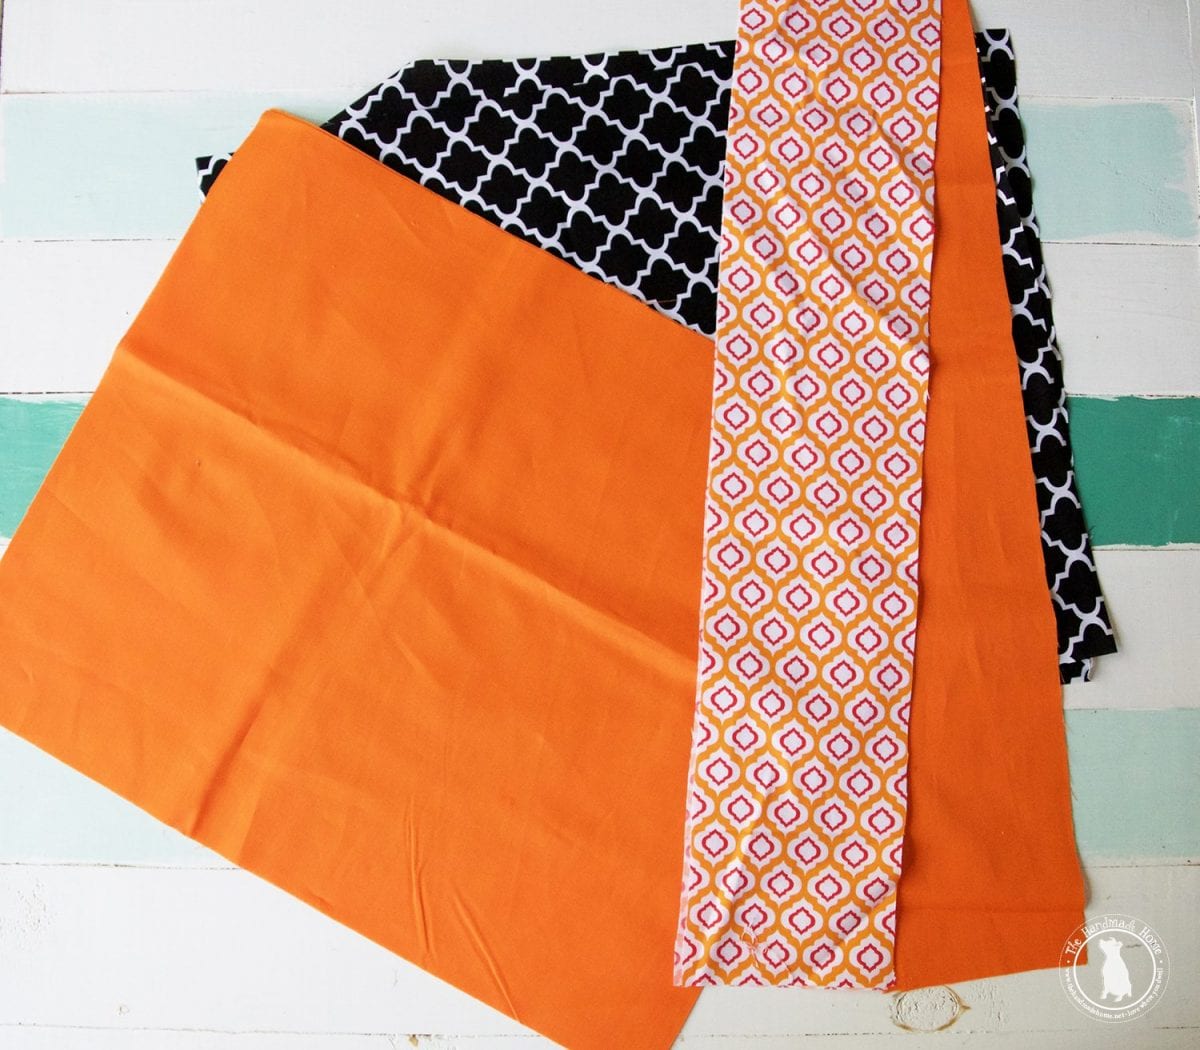
For various patterns and the reversed look, cut:
- Two pieces each for the outside pattern straps,
- Two pieces for the inside pattern straps {you can embellish with ribbon if you wish, like we did}
- Two pieces for the outside of the tote’s body
- Two pieces for the inside.
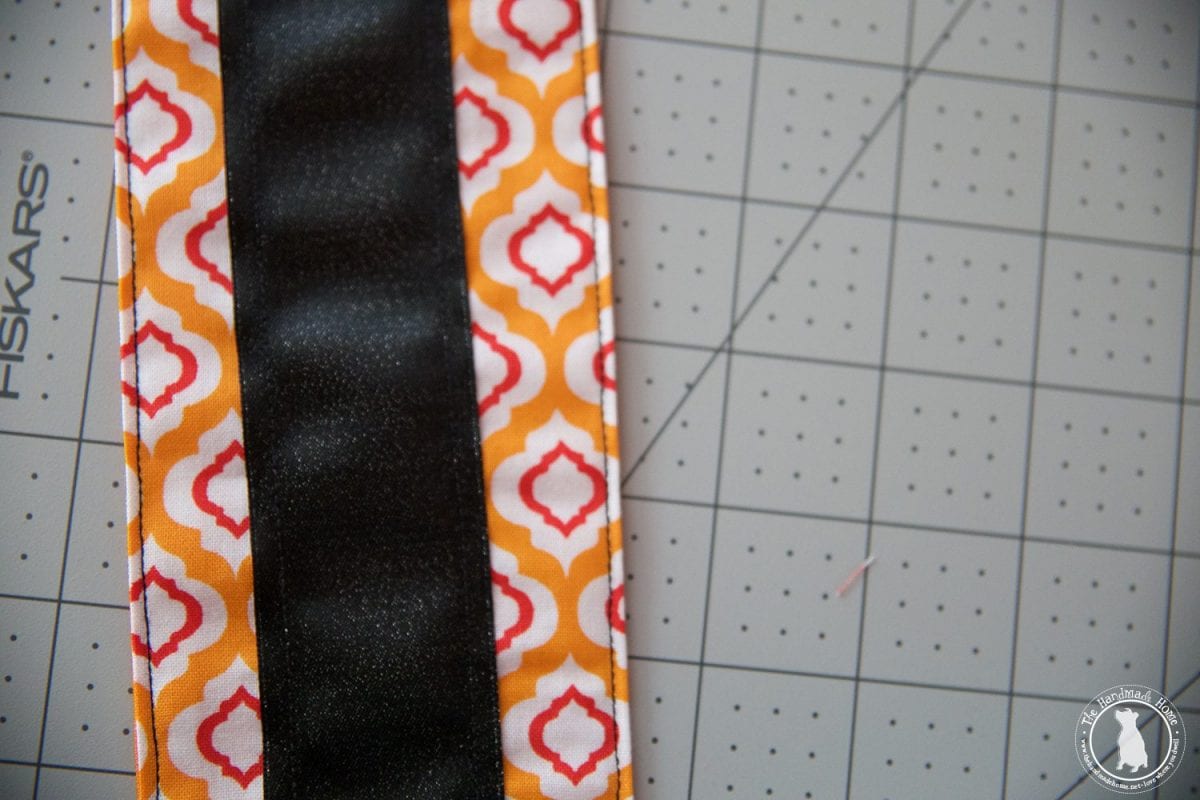
First up, the straps:
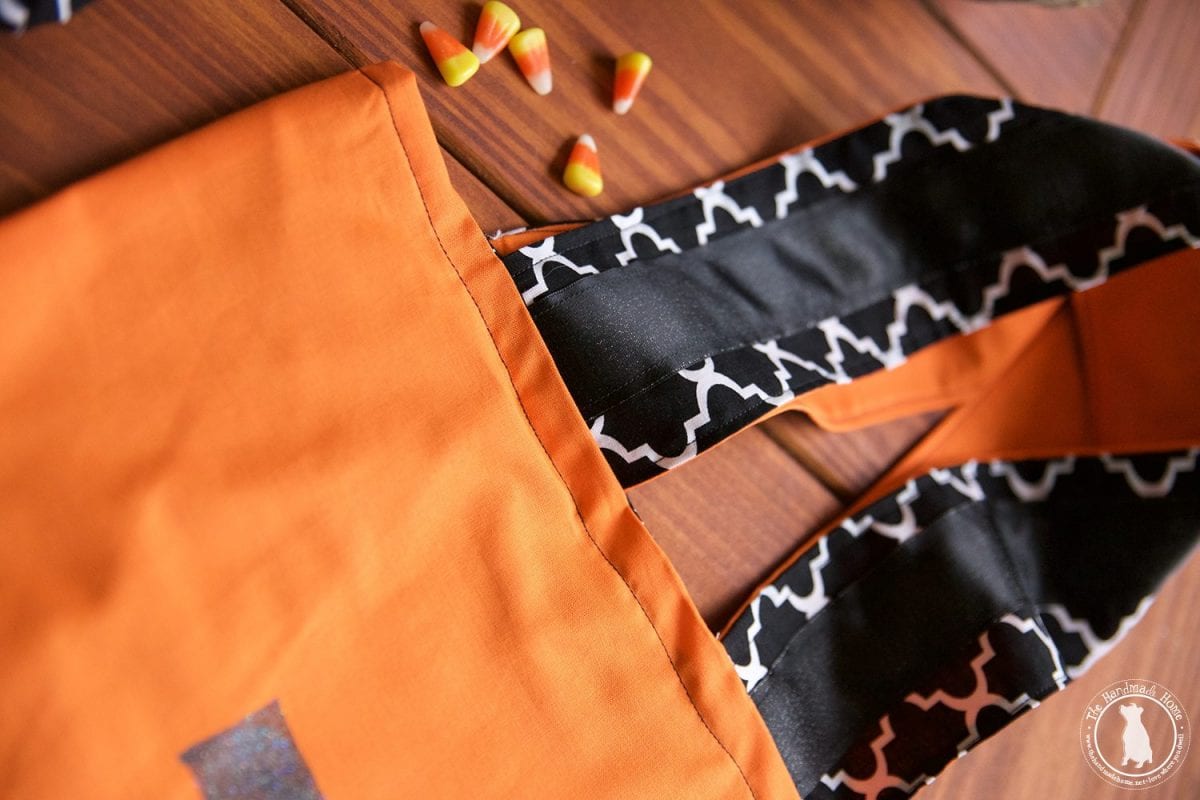
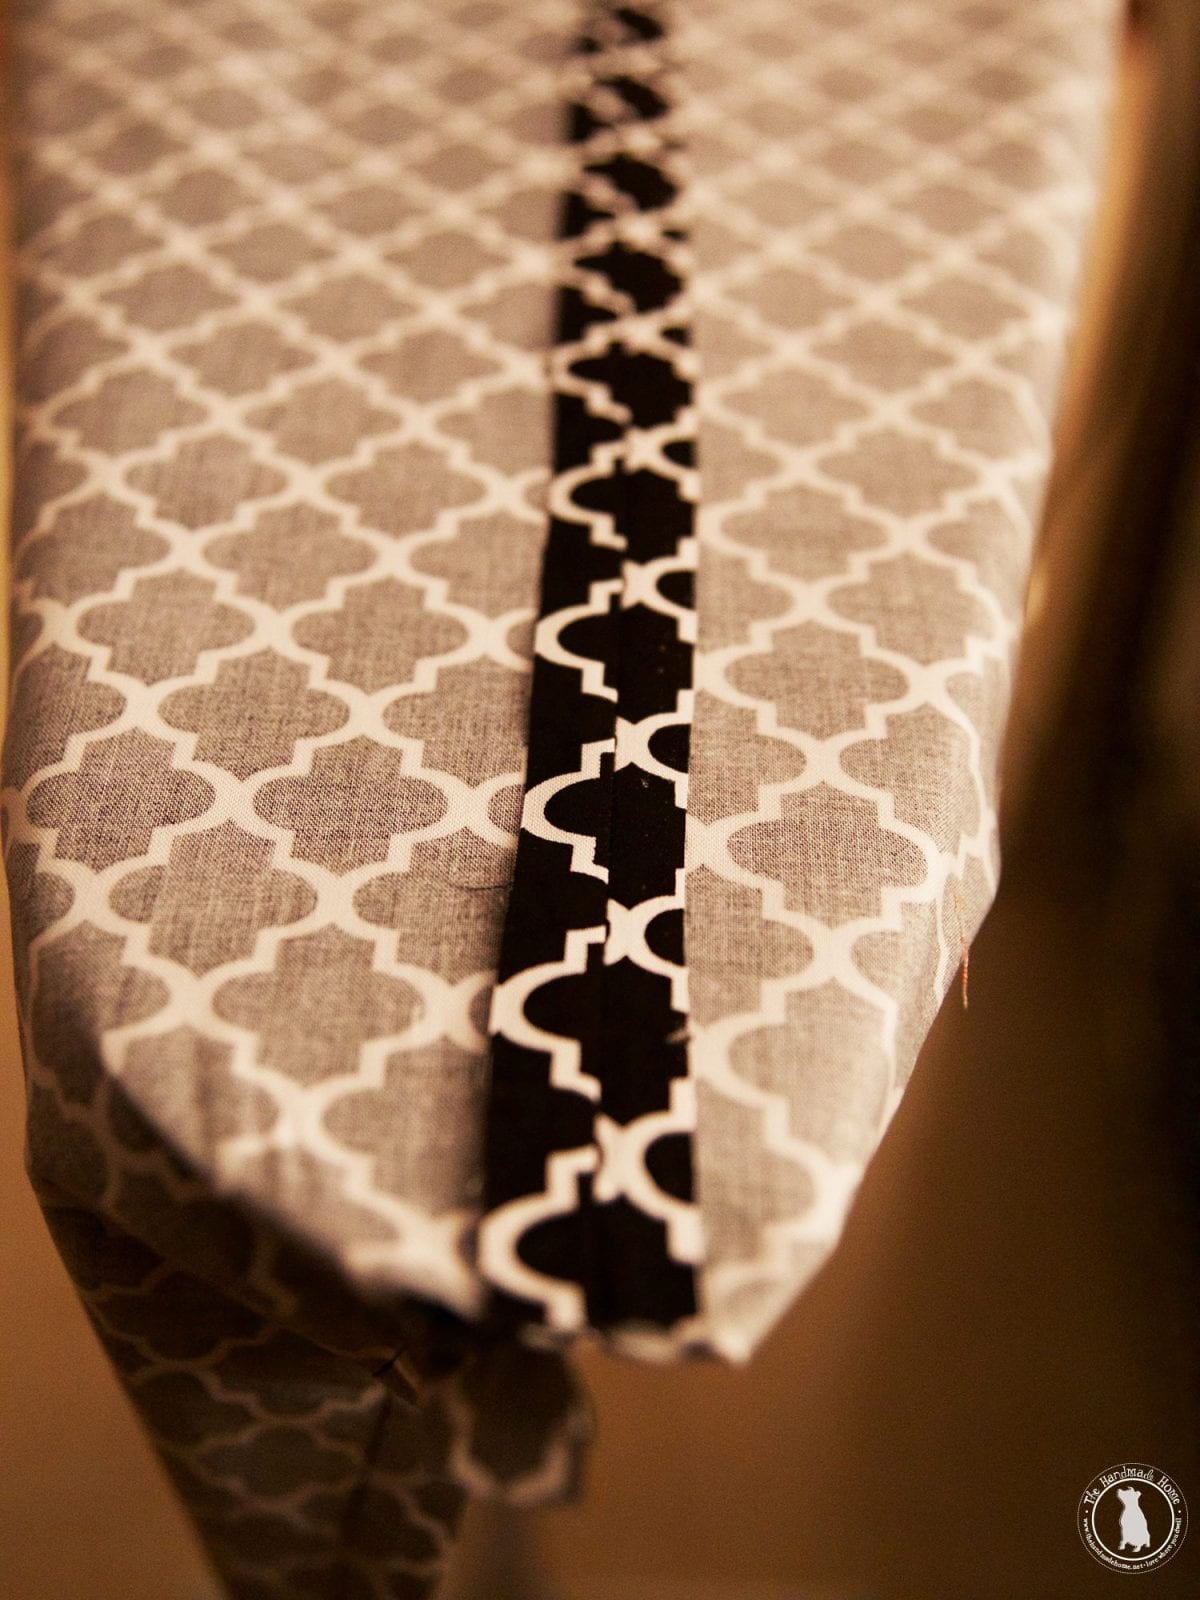
I took the outside pice, and added a ribbon down the middle. Tacked it down, and top stitched. {The kids loved this for a little something special.}
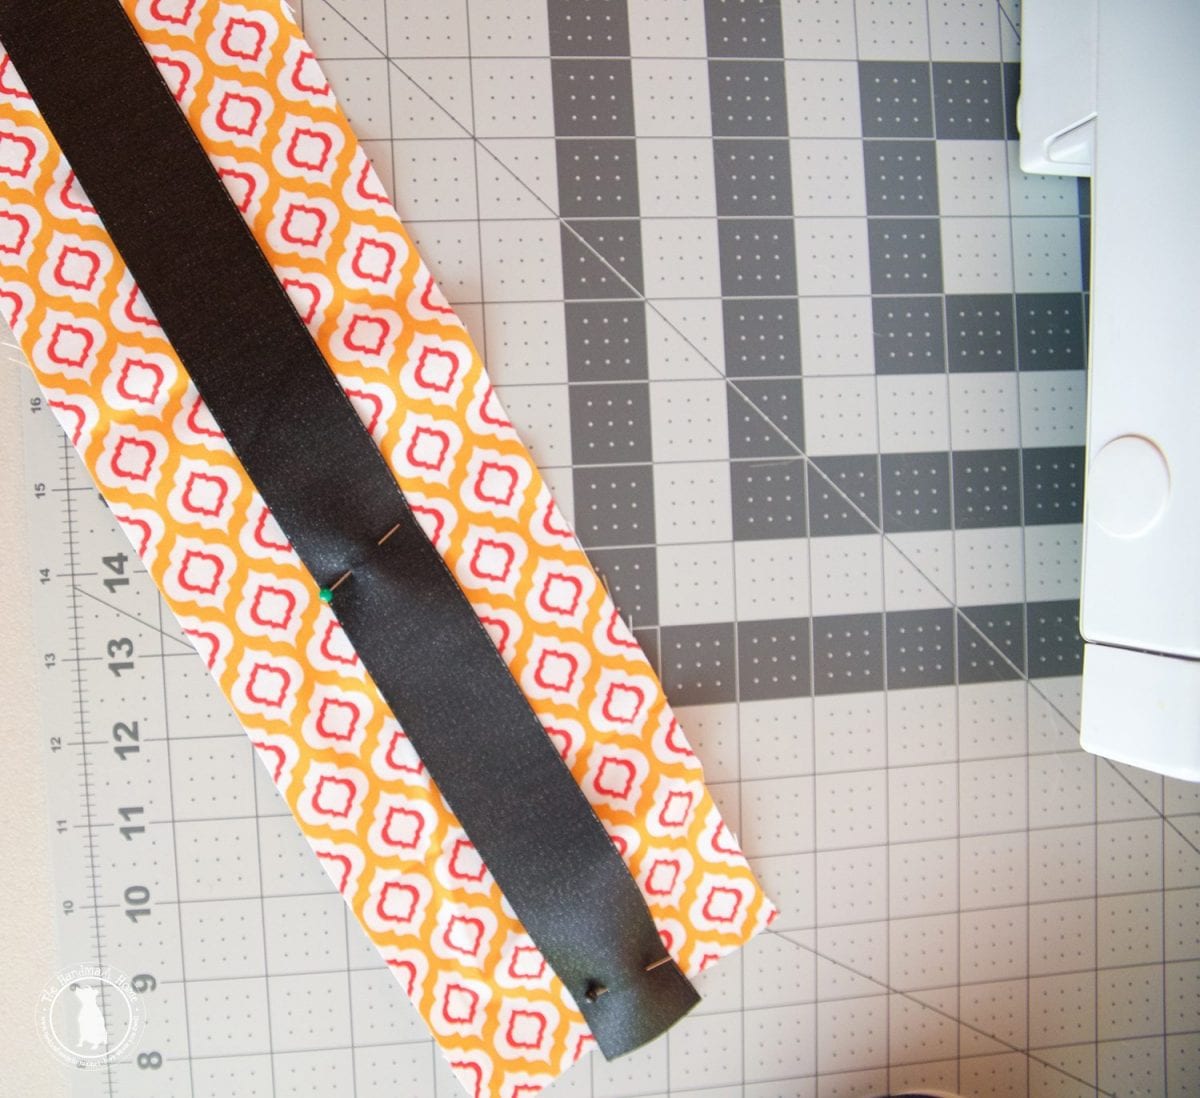
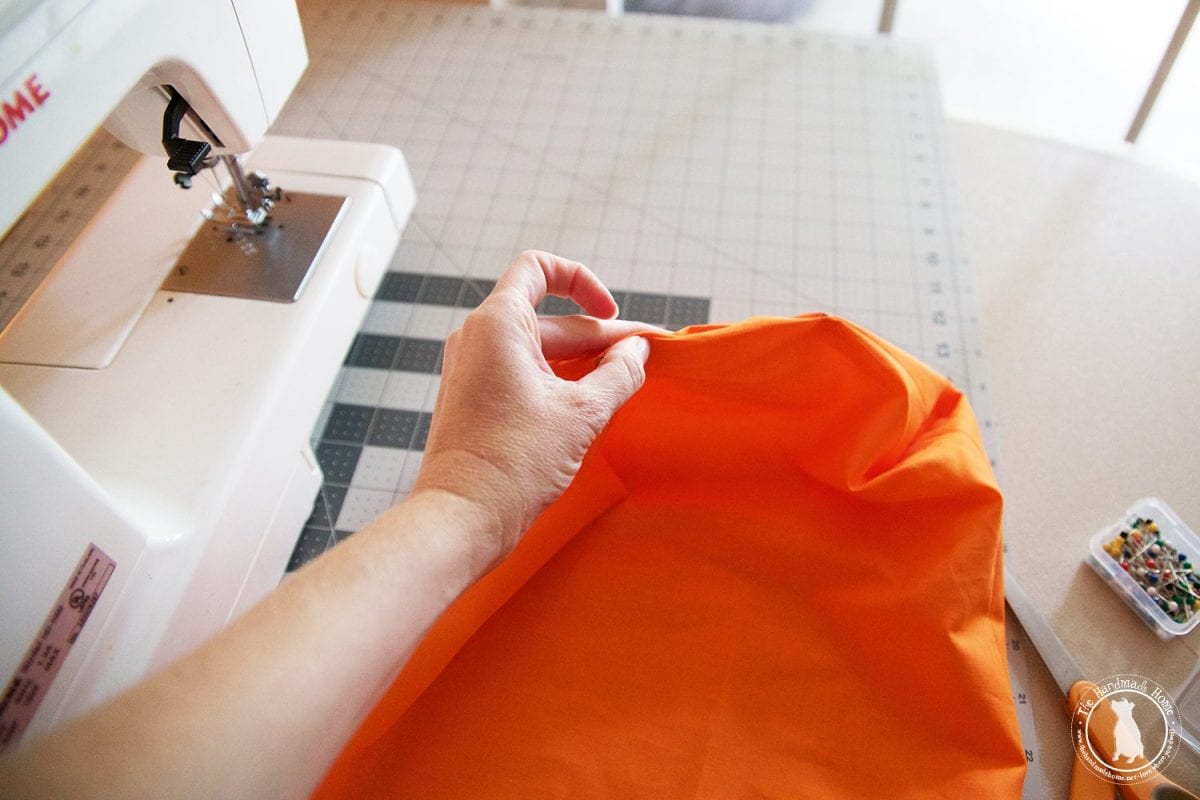
Then take your first two pieces: The outside of your strap, with the inside, right sides facing in. {Just like a pillow} Sew the sides, and trim any major excess.
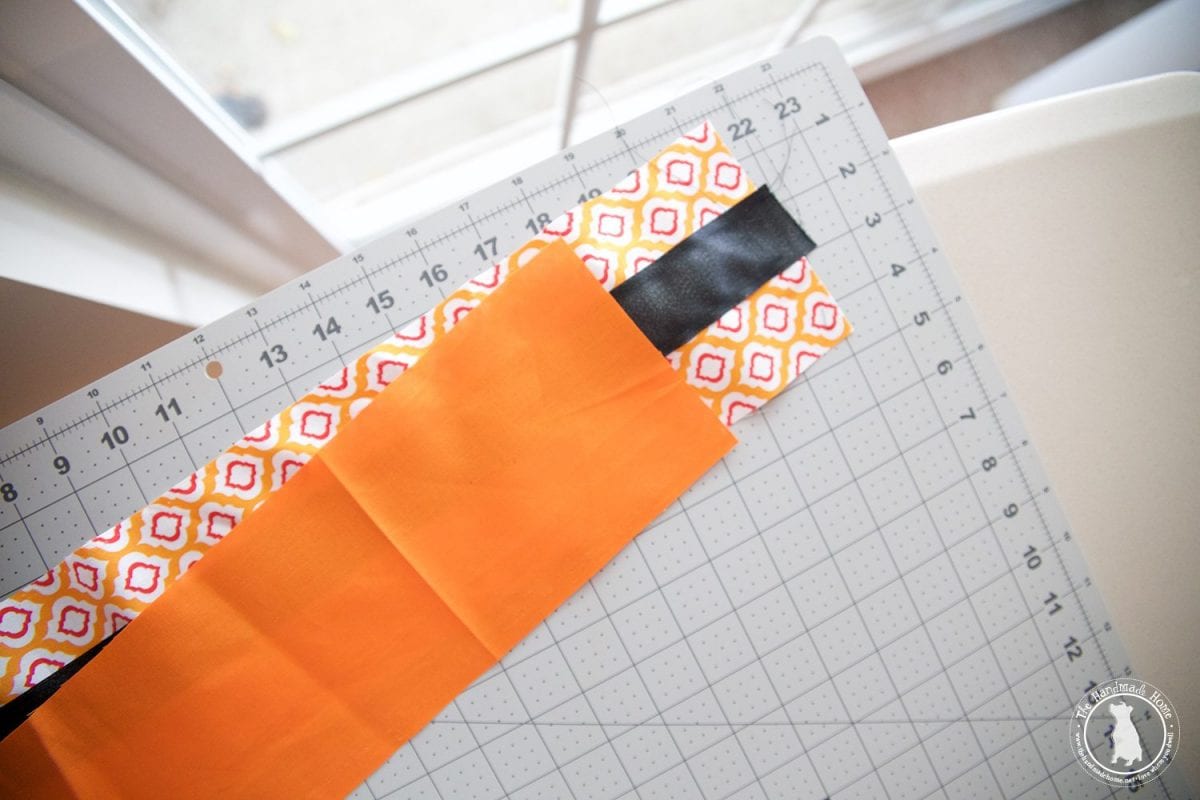
Turn it right side out.
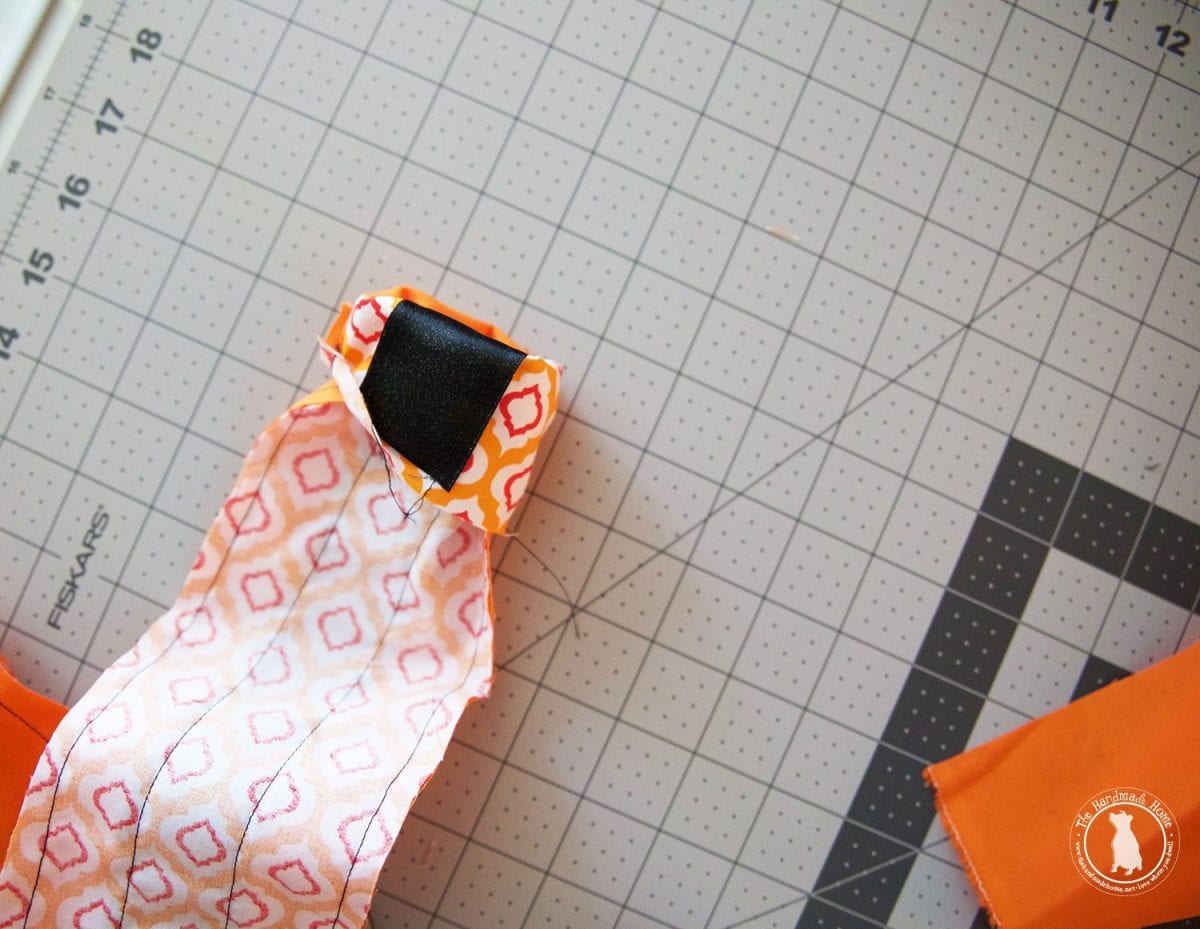
Iron it down, and add a top stitch on the top, for a neater, finished feel. We used black thread because Halloween.
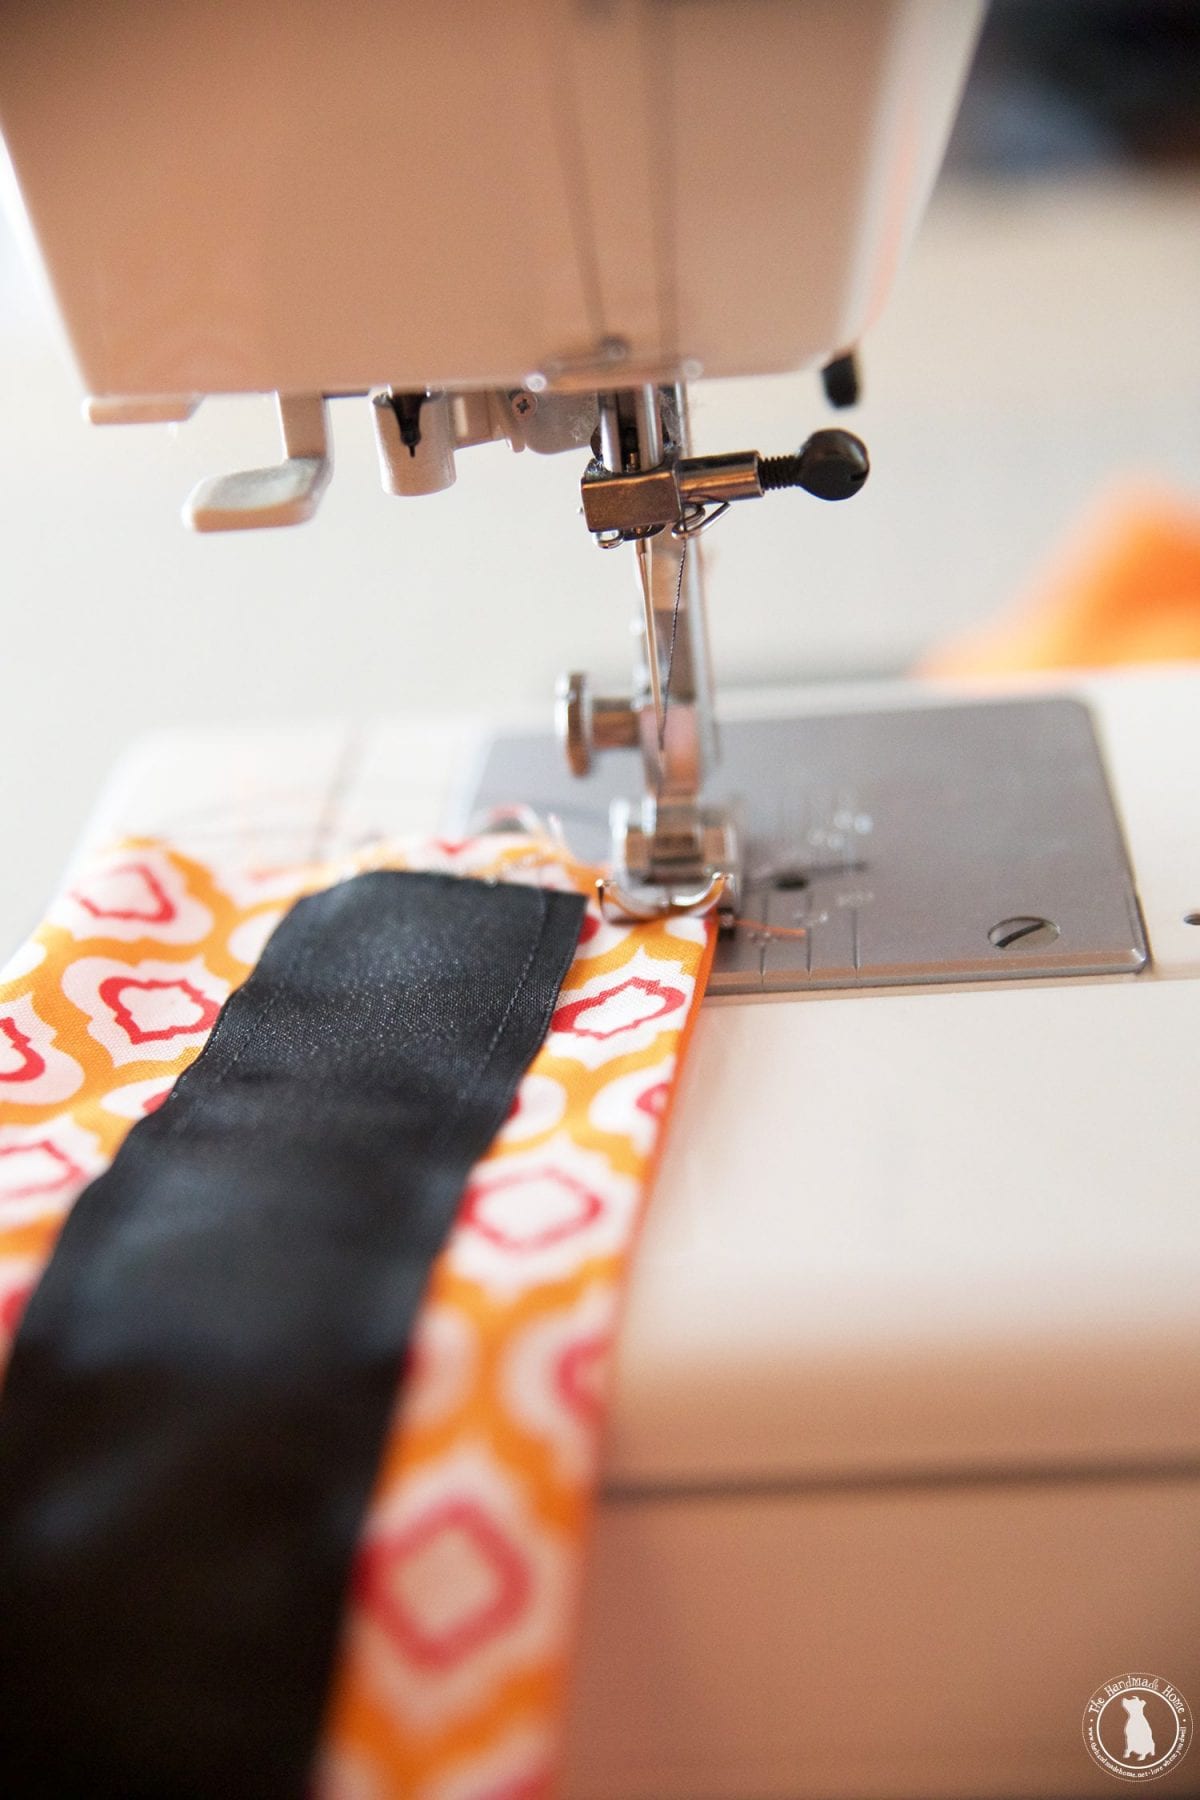
Your first strap is done! Repeat the exact same thing for the second.
And for the body:
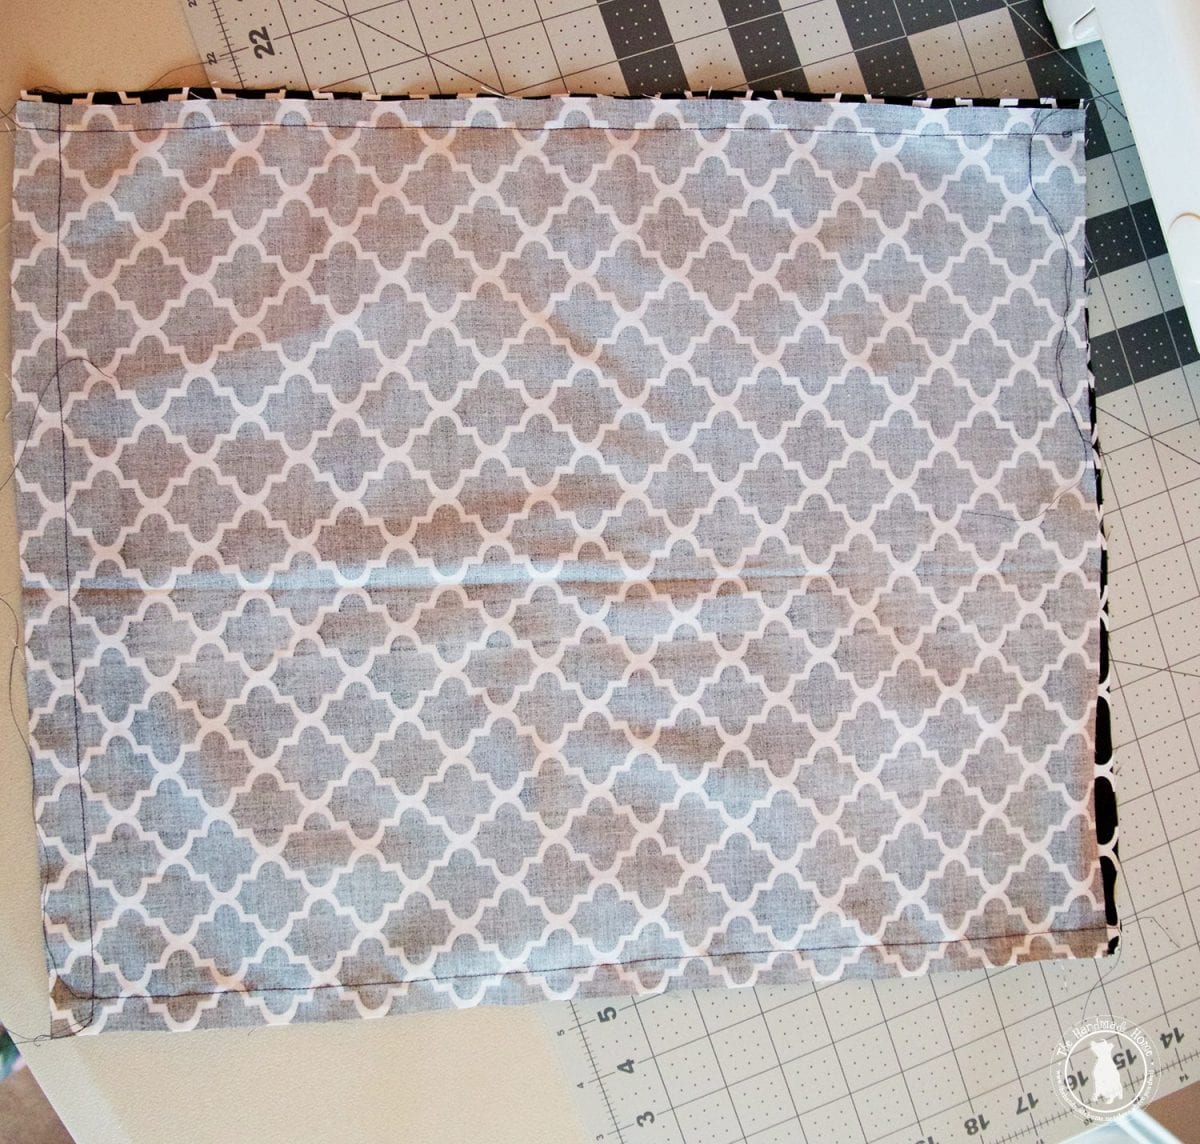
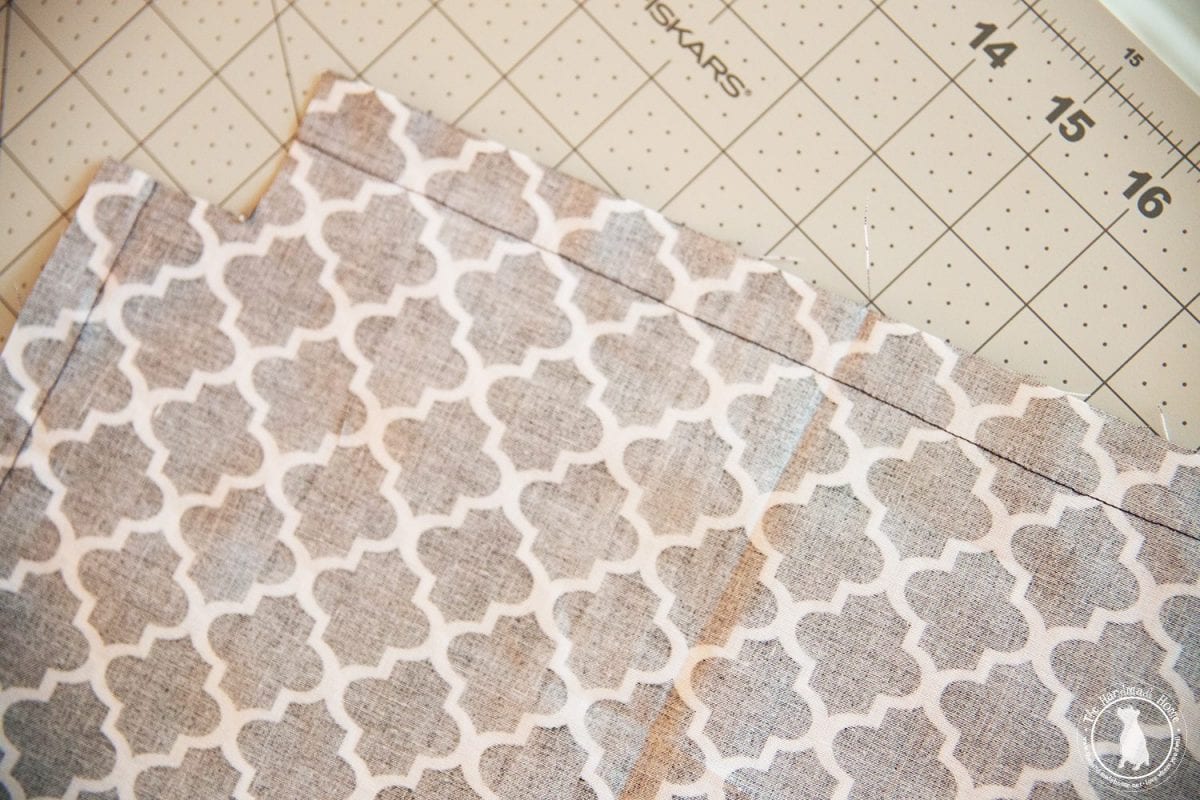
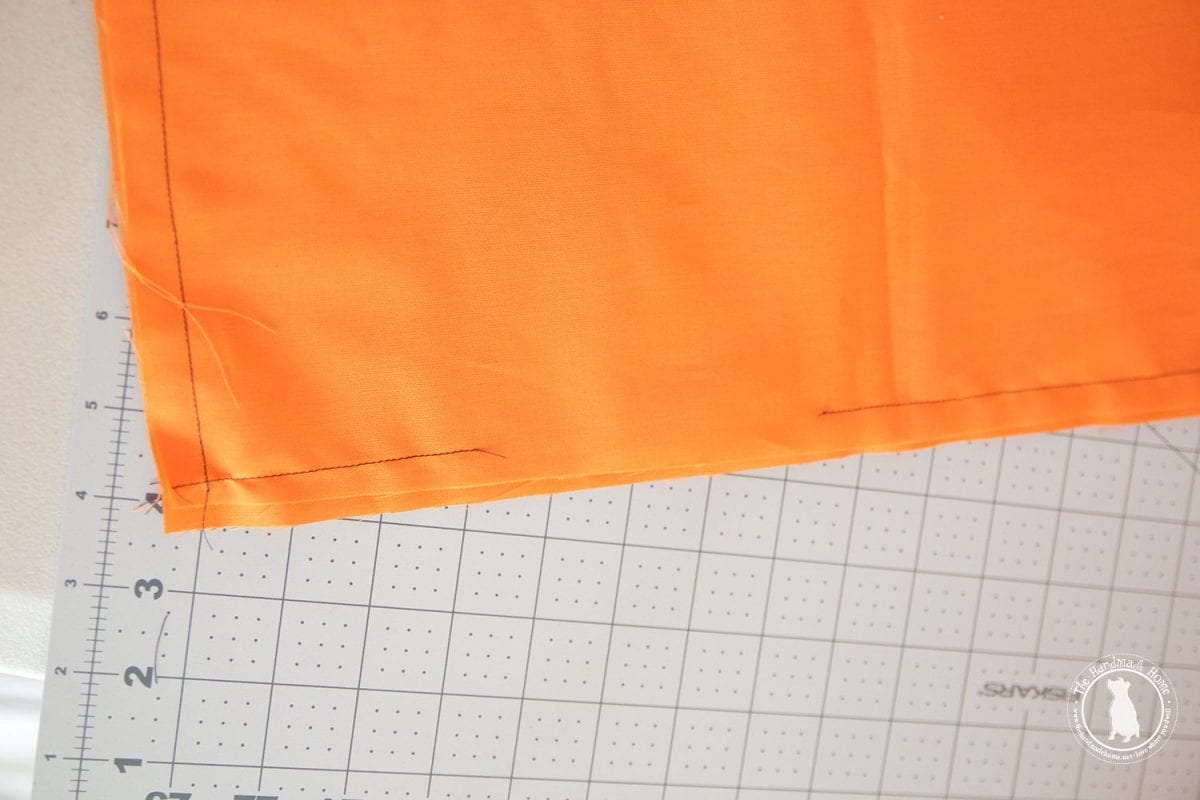
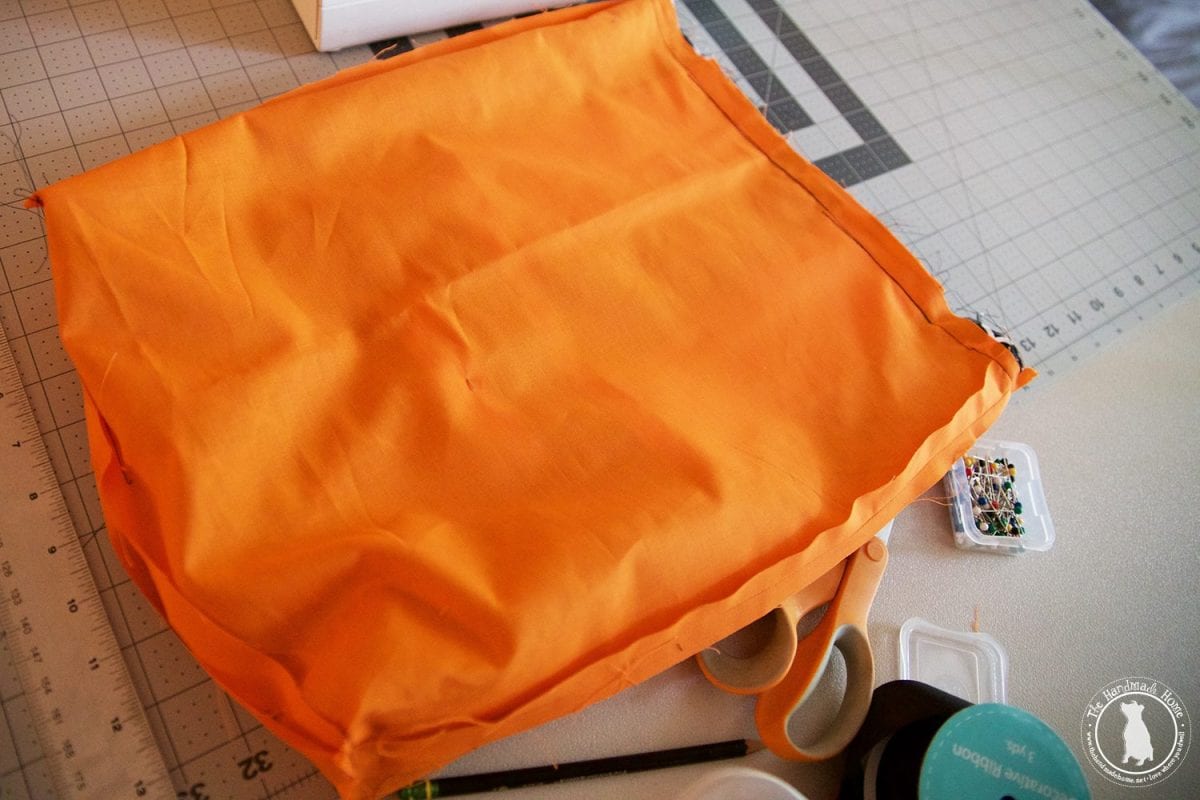
Take your two outside pieces, and place them together: right sides in, wrong sides out. Leaving the top edge open, sew three sides.
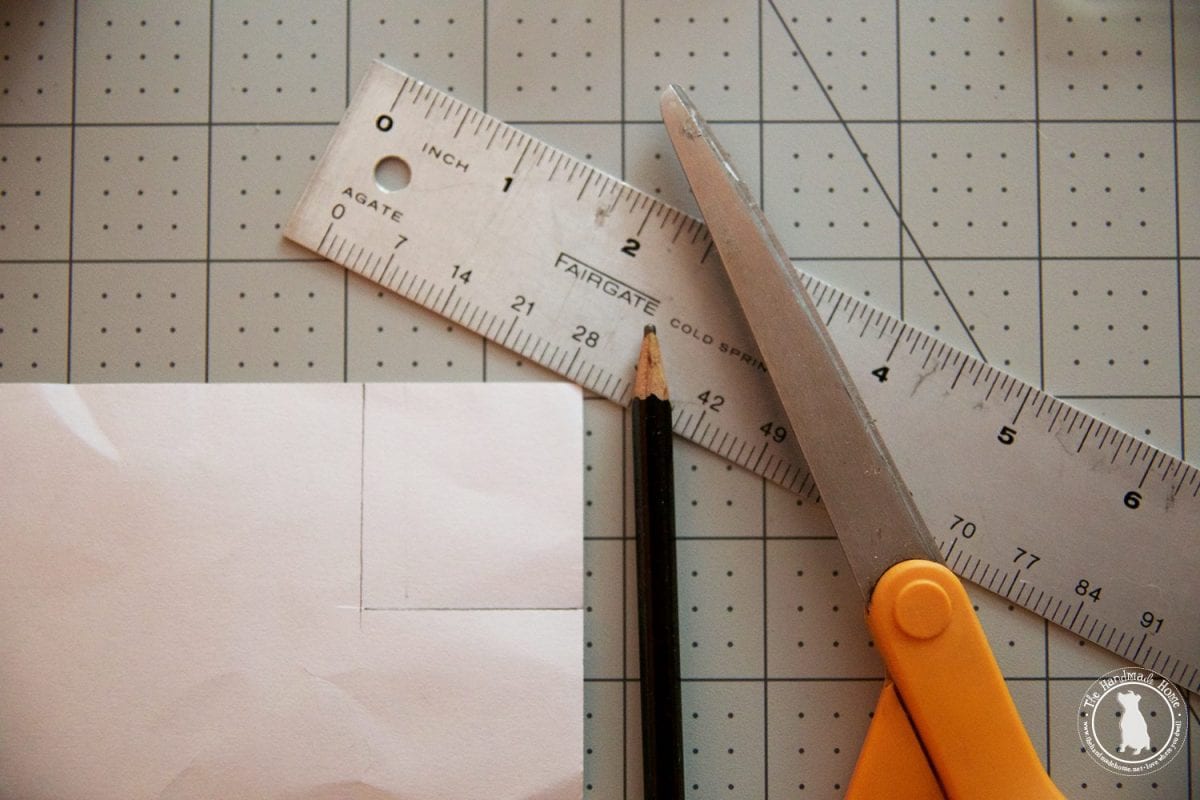
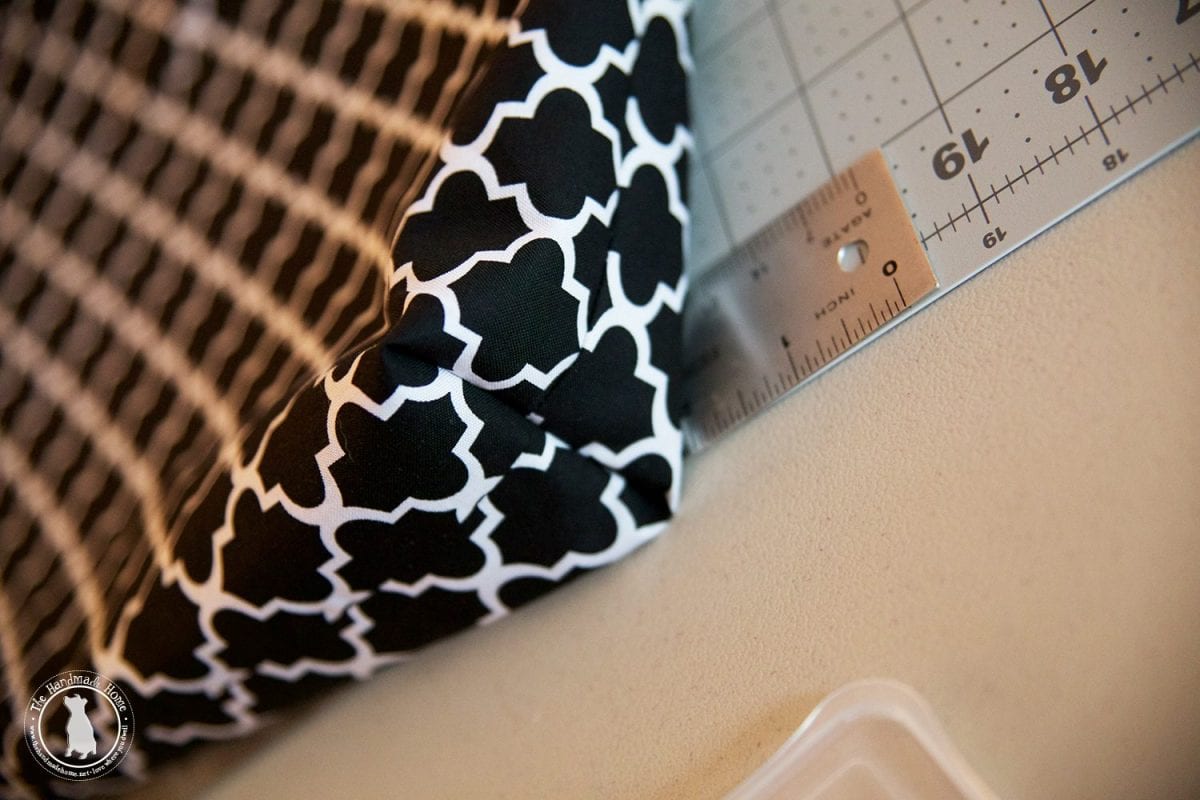
Then, make a small template {I made mine from a notecard} 1.5 ” square, {If you stare at this too long, it’s probably not really a square but I tried} and placing the template at the two bottom corners, trim them off.

This is going to help you get those neat, sewn corners so that your bag can sit better when it’s full of all that candy.
Yes, please.
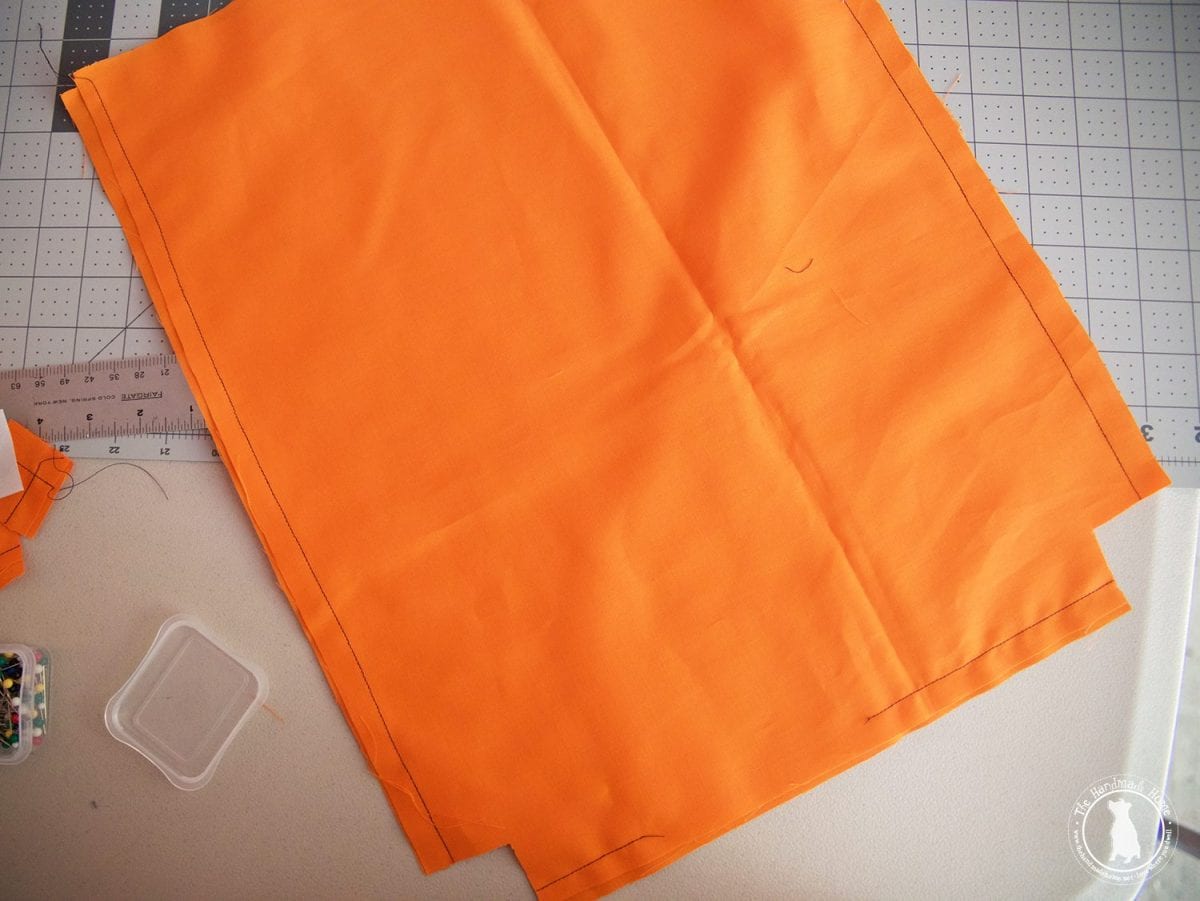
When you’re done with that, take all the seams, and iron them down, flat.
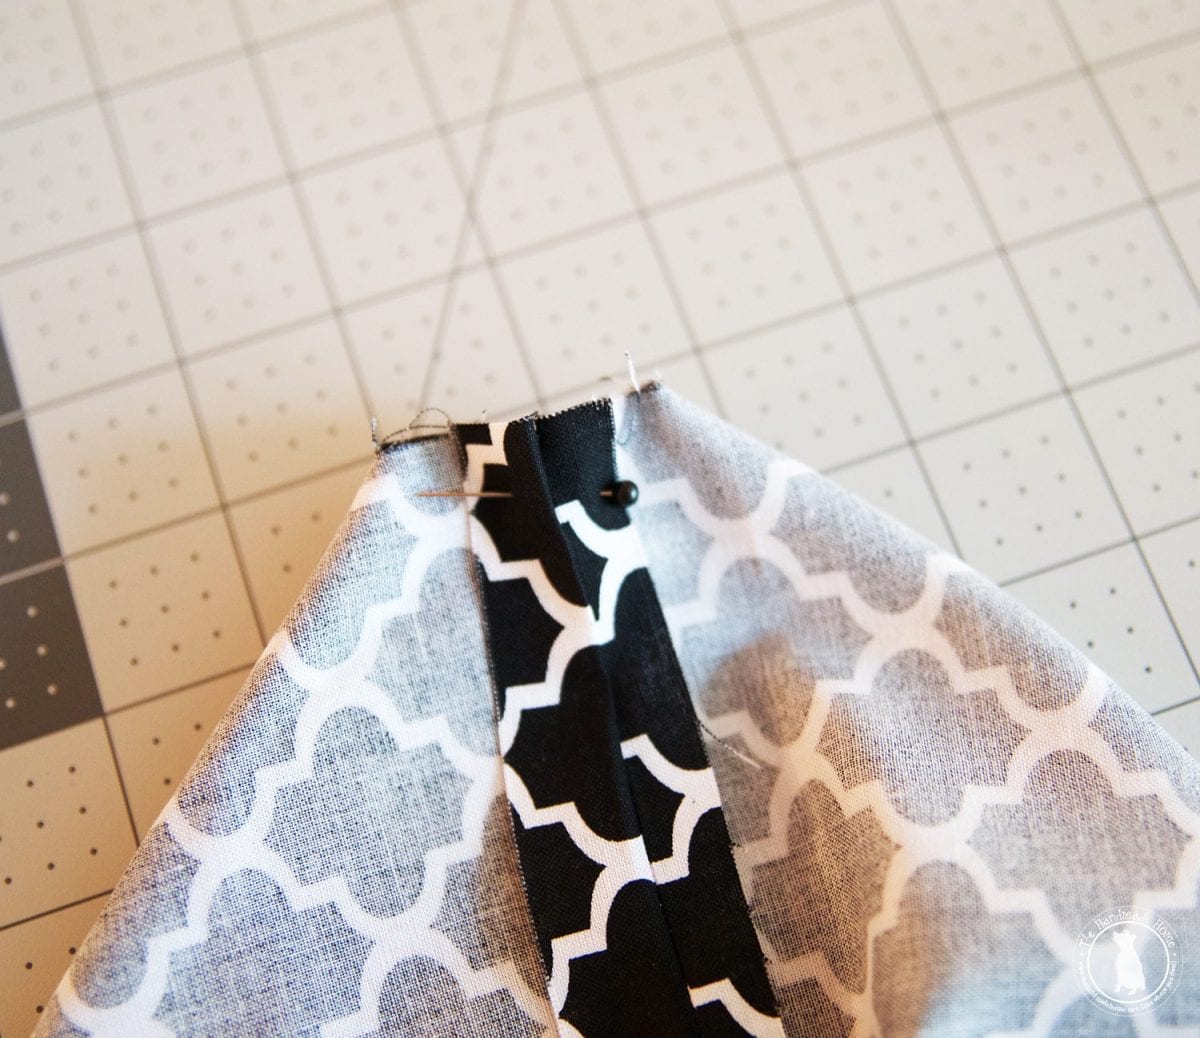
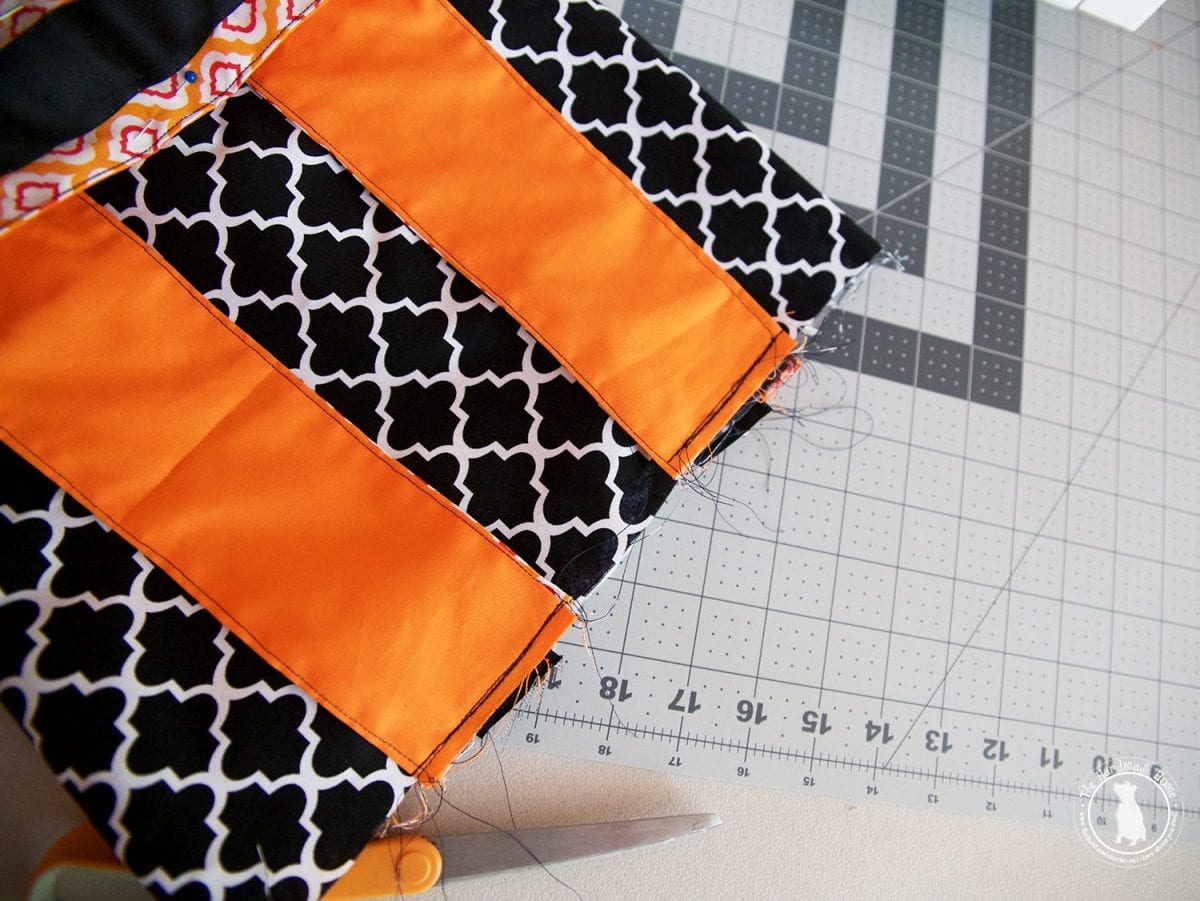
Then take each bottom corner that you just cut with the template, and fold it down, so that the seams meet on each side. As shown below.
Pin it.
Sew it across, straight… a couple of times to reinforce. Then trim again, any excess. This removes a lot of the bulk in the finished bag.
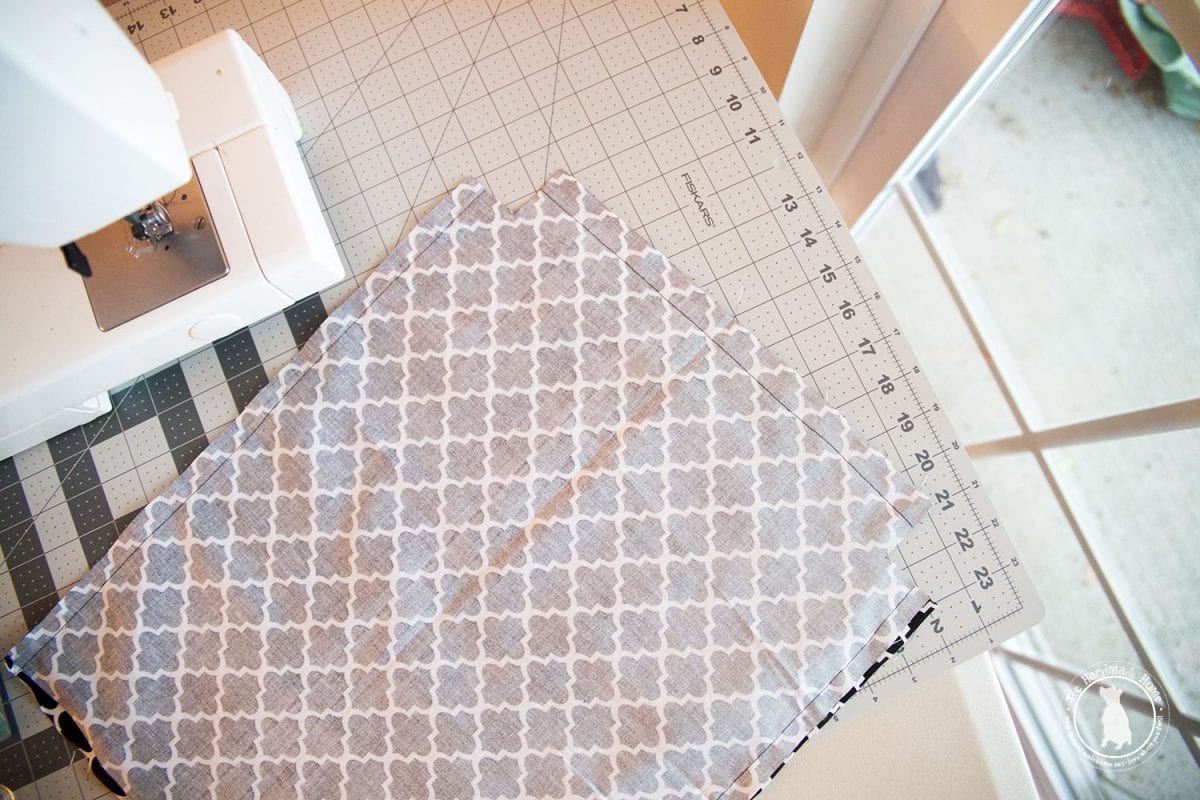
Turn it right side, out, and set it aside. Admire your awesome corners.
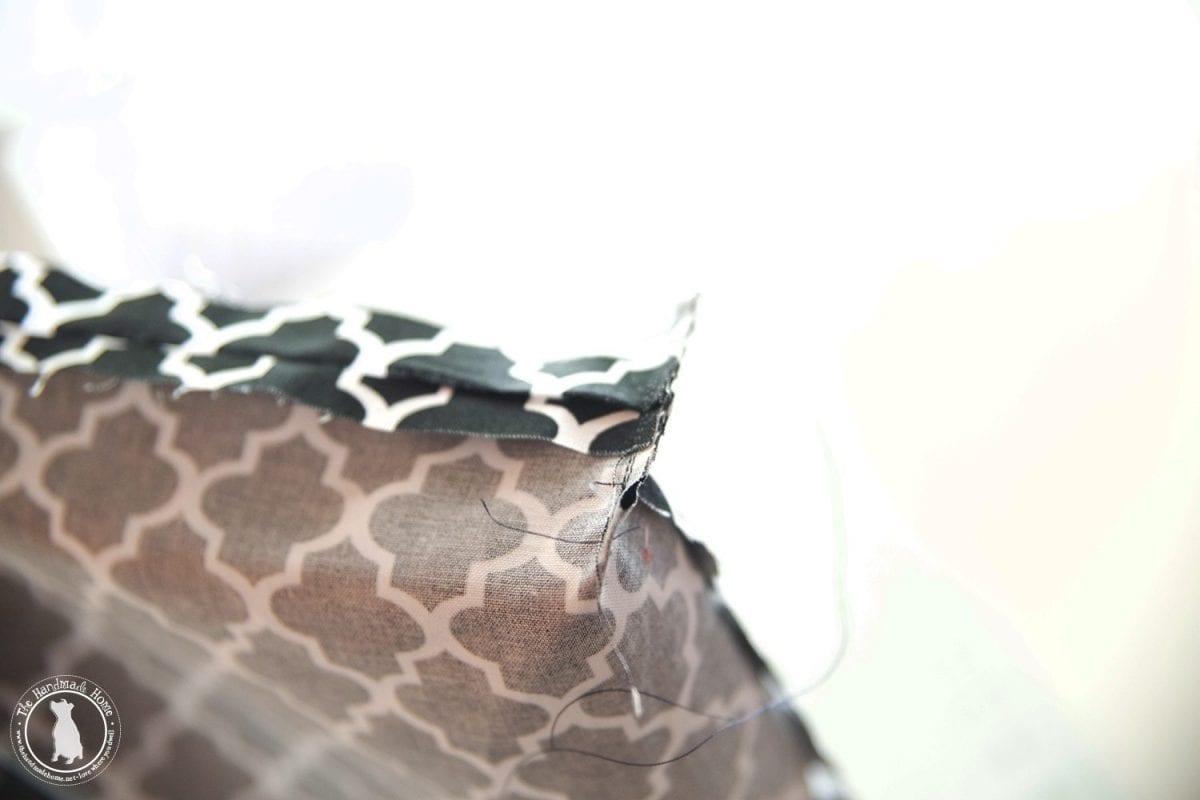
Repeat these steps for the inner fabric. But this time, when you place the two pieces together, leave a 3-ish inch gap on the bottom. This is going to help you in the end with what I like to call, the moment of truth…
No pressure. Stay tuned.
When you’ve sewn them together [leaving the top part open again] take the 1.5″ square template, and cut off the corners.
Iron the hems down, and join the corners again, to make a straight sewing edge across. Again, trim any excess.
Leave this one wrong side out. Set it aside.
Take your outer piece, and it’s time to join those straps.
Line it up with a ruler, and at 2.5 inches from each outer edge, line up your straps, and pin them down.
I would even pin down the top part of the handle as well, so it doesn’t get twisted in the following steps.
Tip: match up each side if the bag, making sure that the handles basically mirror each other and you’re not placing them crookedly for the finished product.

Baste/secure them by running them through your machine a few times. This way you won’t be dealing with so many needles.
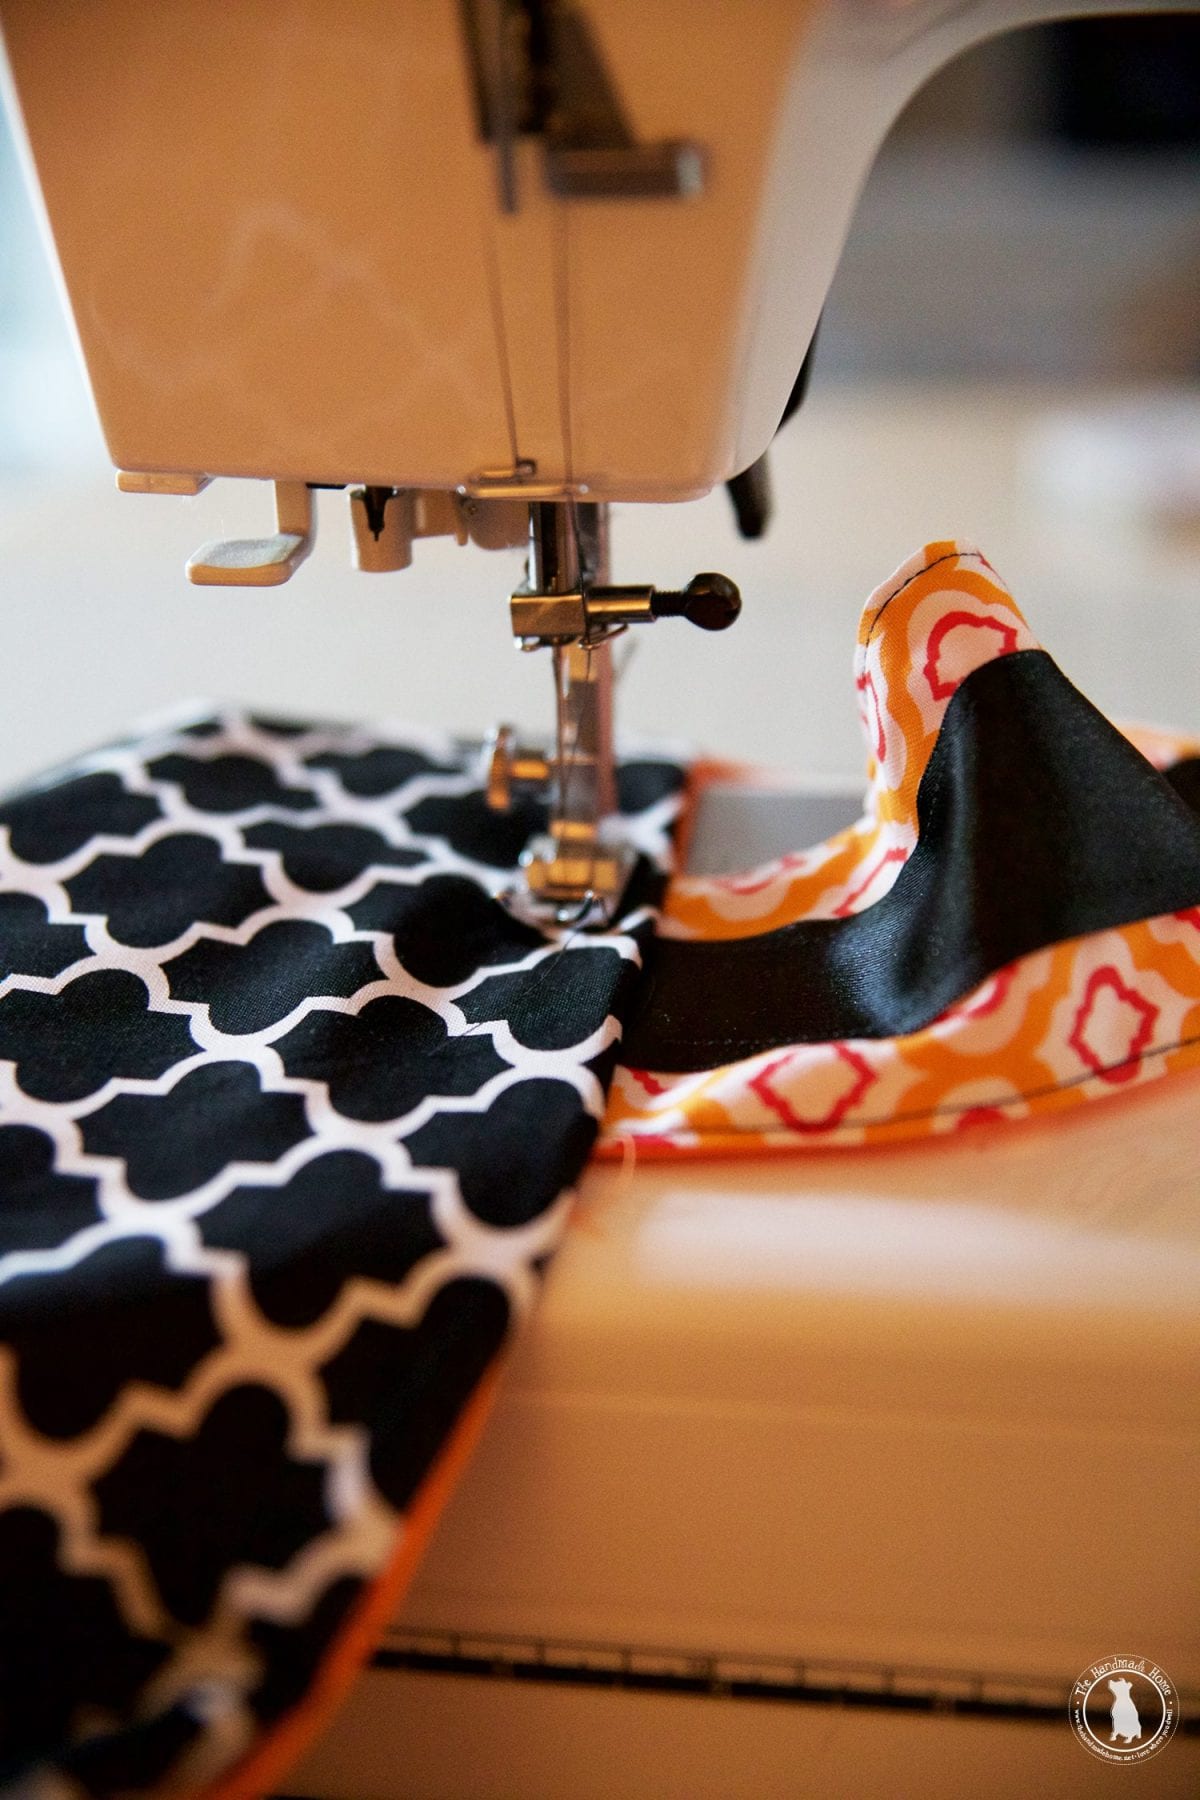
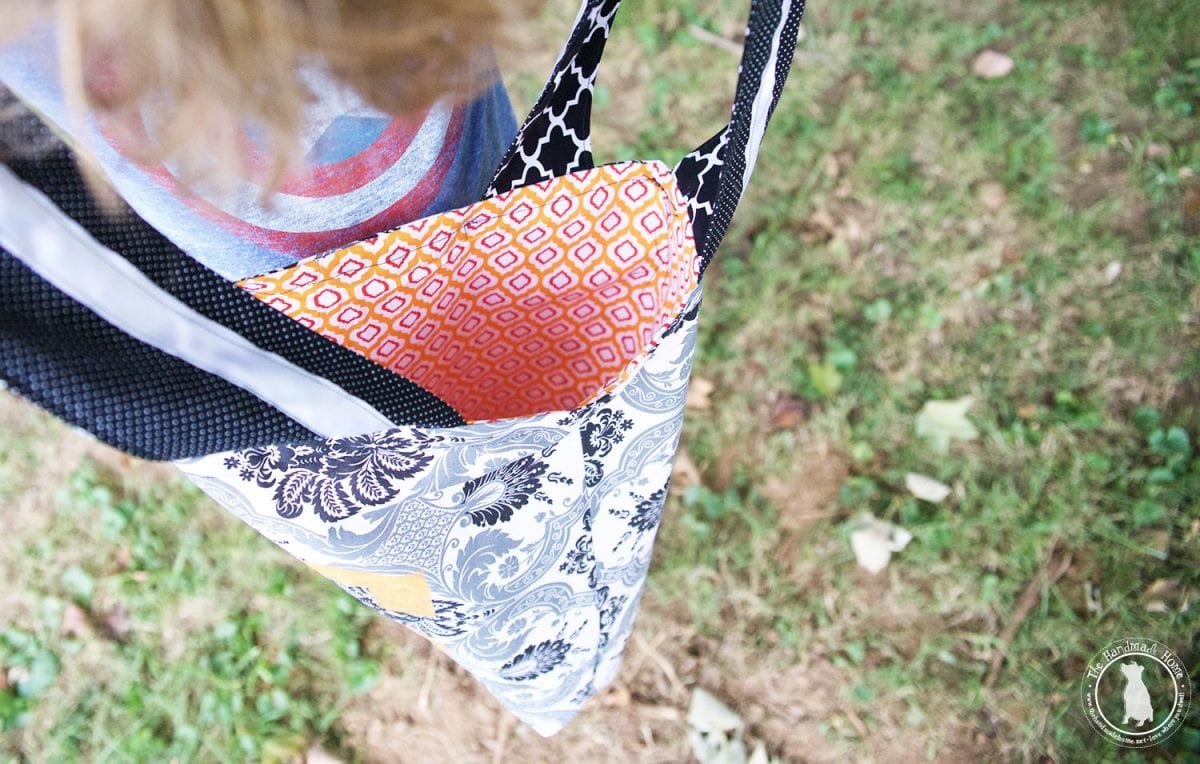
Take your right side out, outer fabric, and place it inside your inside out, inner fabric.
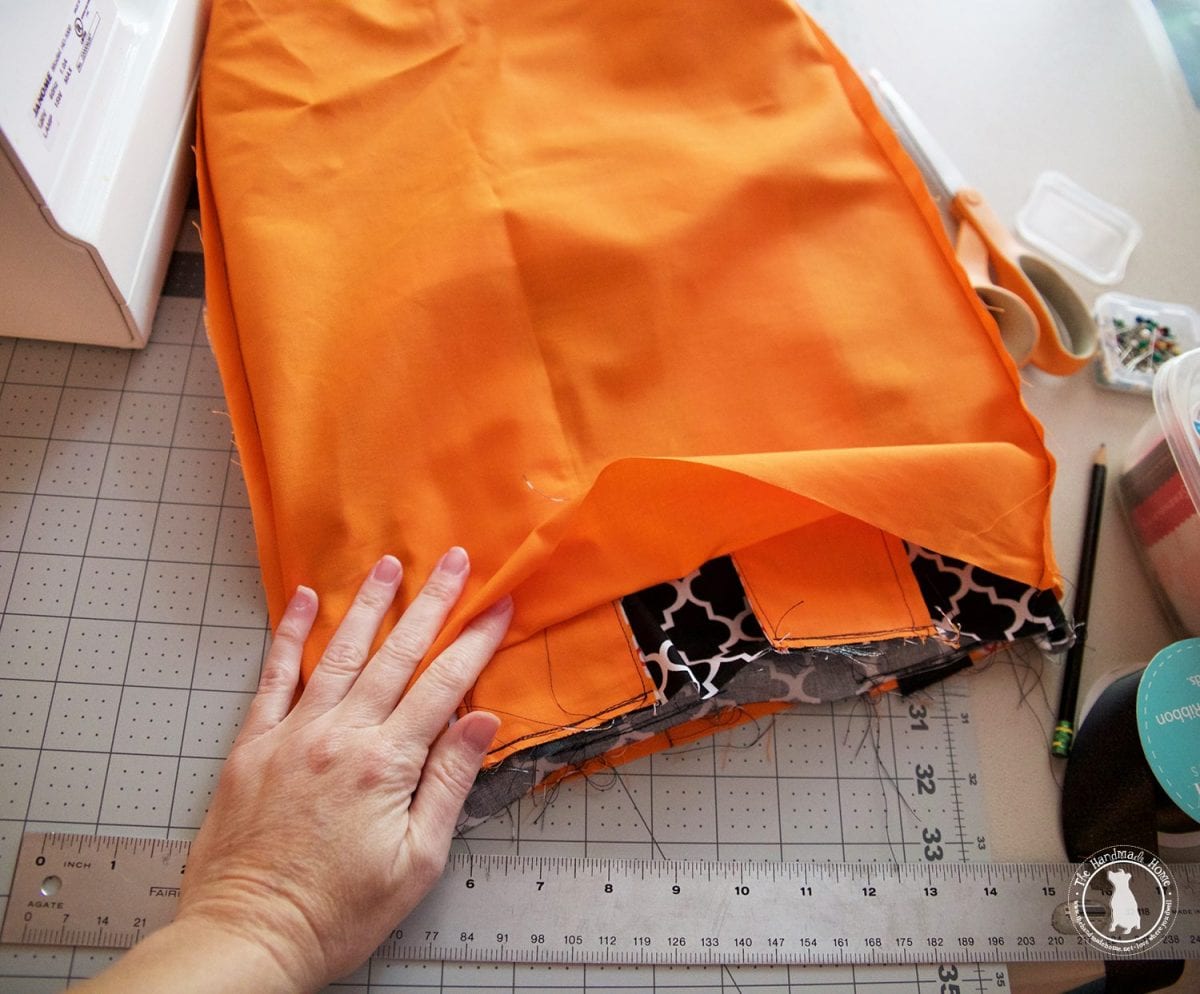
Double check to make sure they’re pretty straight, and line up your seams. Then, pinning into place so it doesn’t get twisted up, run it through your sewing machine on the top edge to attach the two sides together.

Now for the moment of truth.
This is what I announce every time I have a big move to pull off. With a drum roll, especially when I’m making something with the kiddos. You know that little gap you left at the bottom? Take your bag and pull the outside part, through.
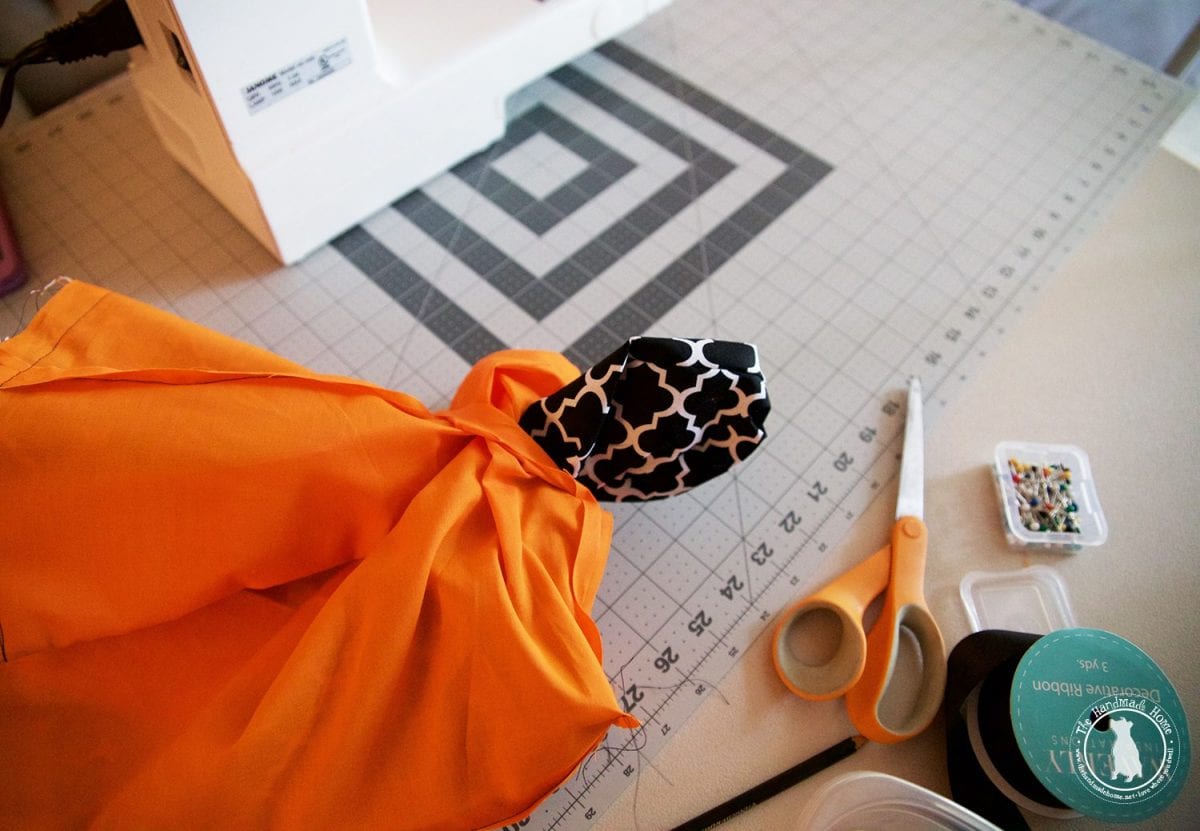
Your bag should look right at this point, when it’s pulled all the way.
Almost like you pulled out the lining.
Secure the hole that was left at the bottom of the bag, by doing some fancy hand stitch I know nothing about, or running it quickly through the machine {which is more my speed}.
Tuck the inside part back into your correctly finito bag, and do one more finishing top stitch on the top edge.
Your bag is ready to go, yo!
Seriously, you’re amazing.
And I can honestly say, this is my favorite crafting magic trick…
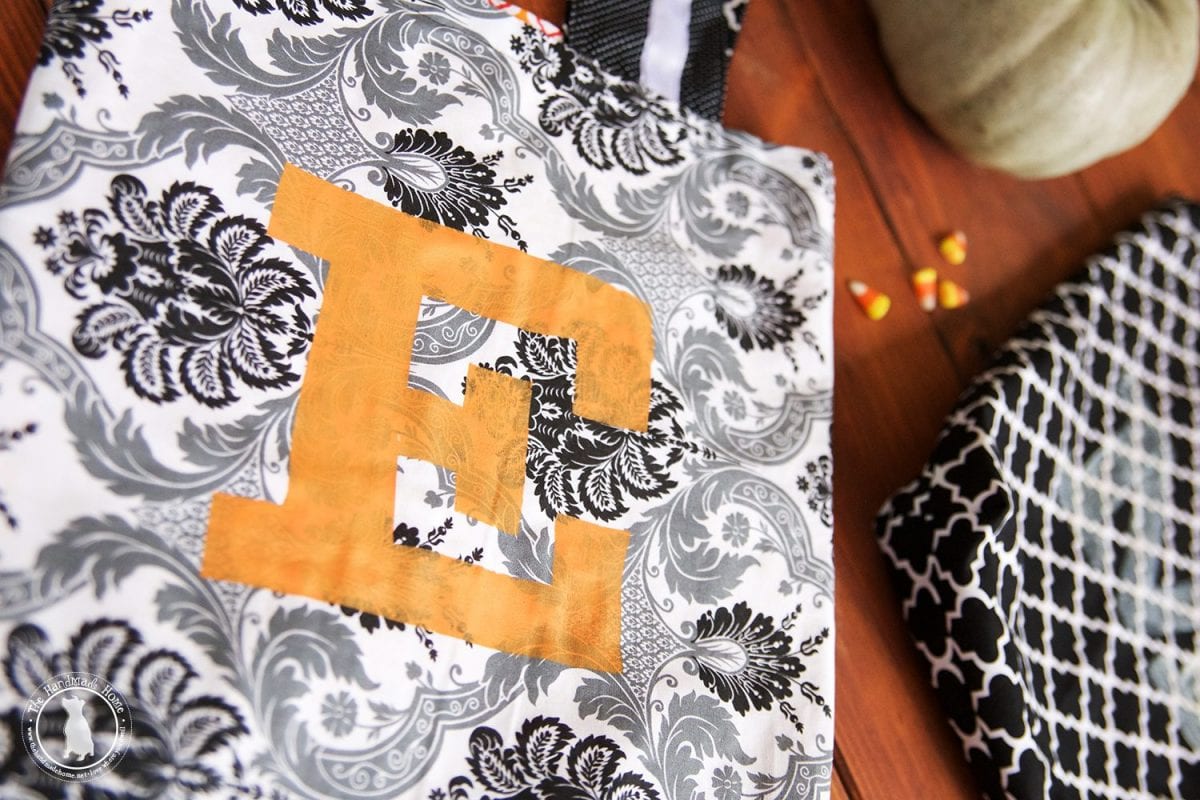
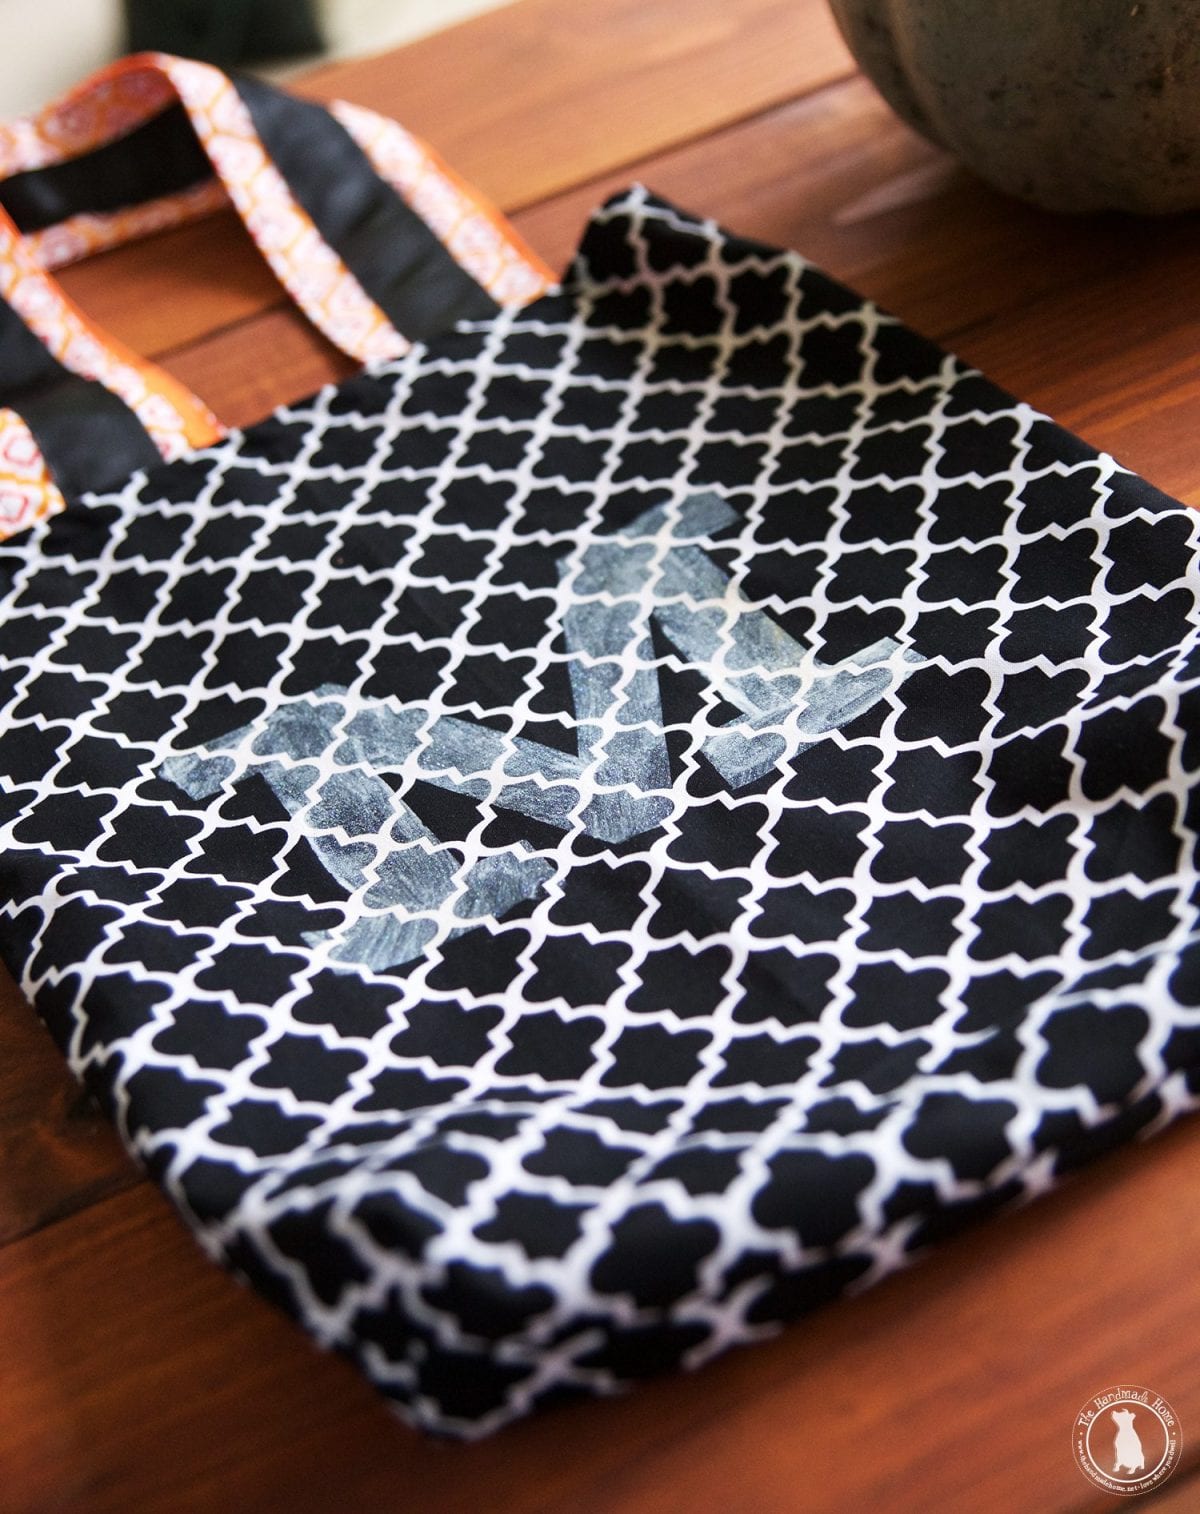
For the monogrammed portion, you’ll need this:
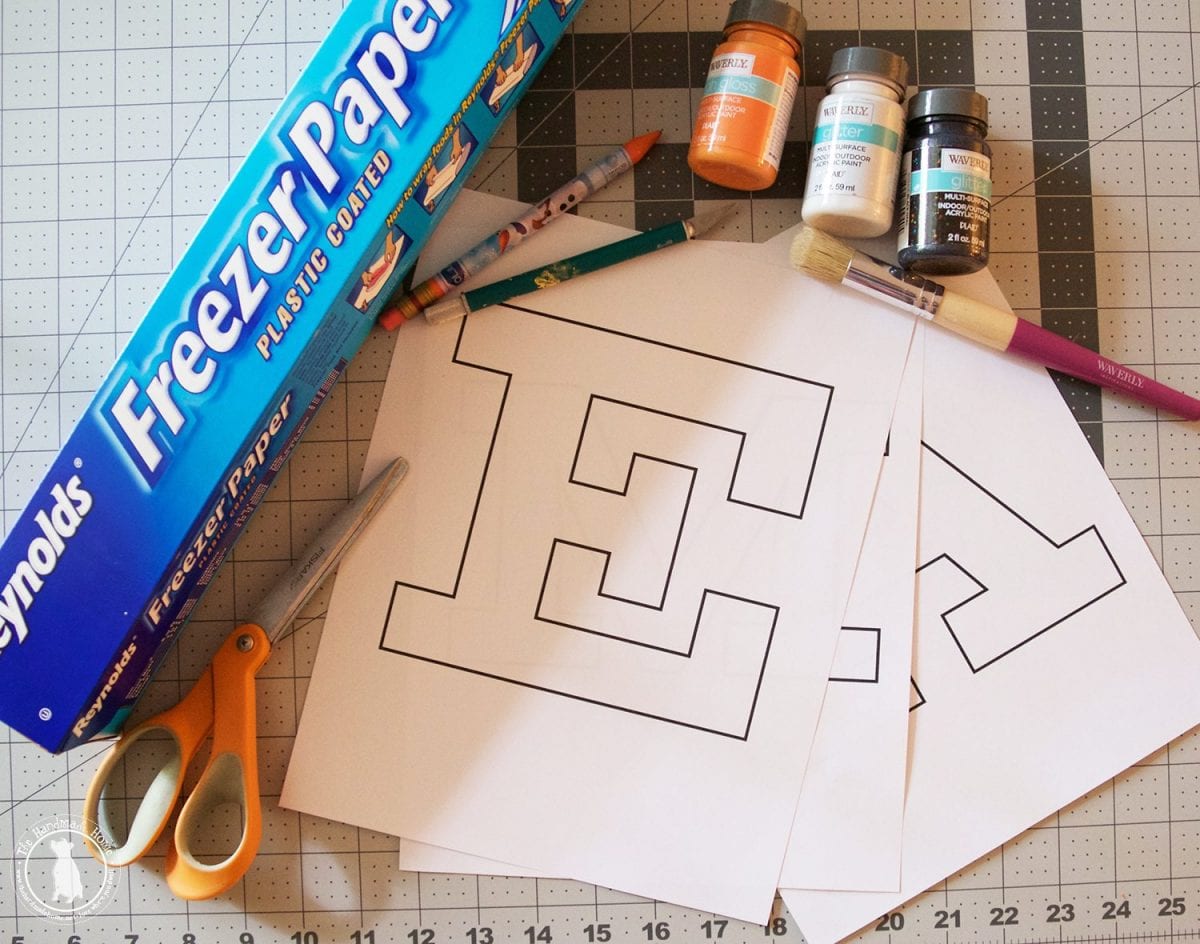
• Freezer paper • a printed letter or monogram • paint • stencil brush • X-Acto Blade • Pencil • Cutting surface like a self healing mat
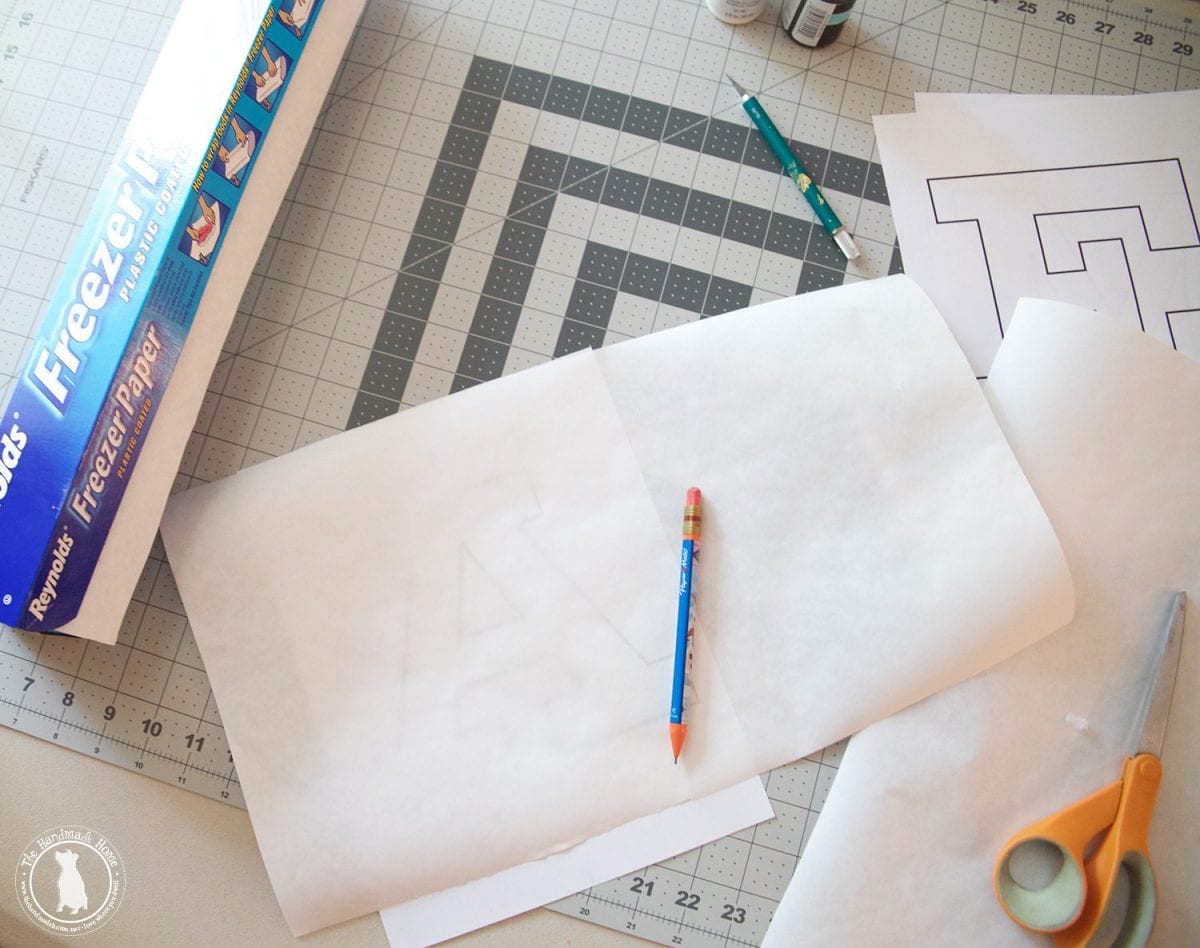
Once you’ve decided which embellishment you want on our bag {the possibilities are endless here!} print it out, and place some freezer paper on top, shiny side down. Trace it.
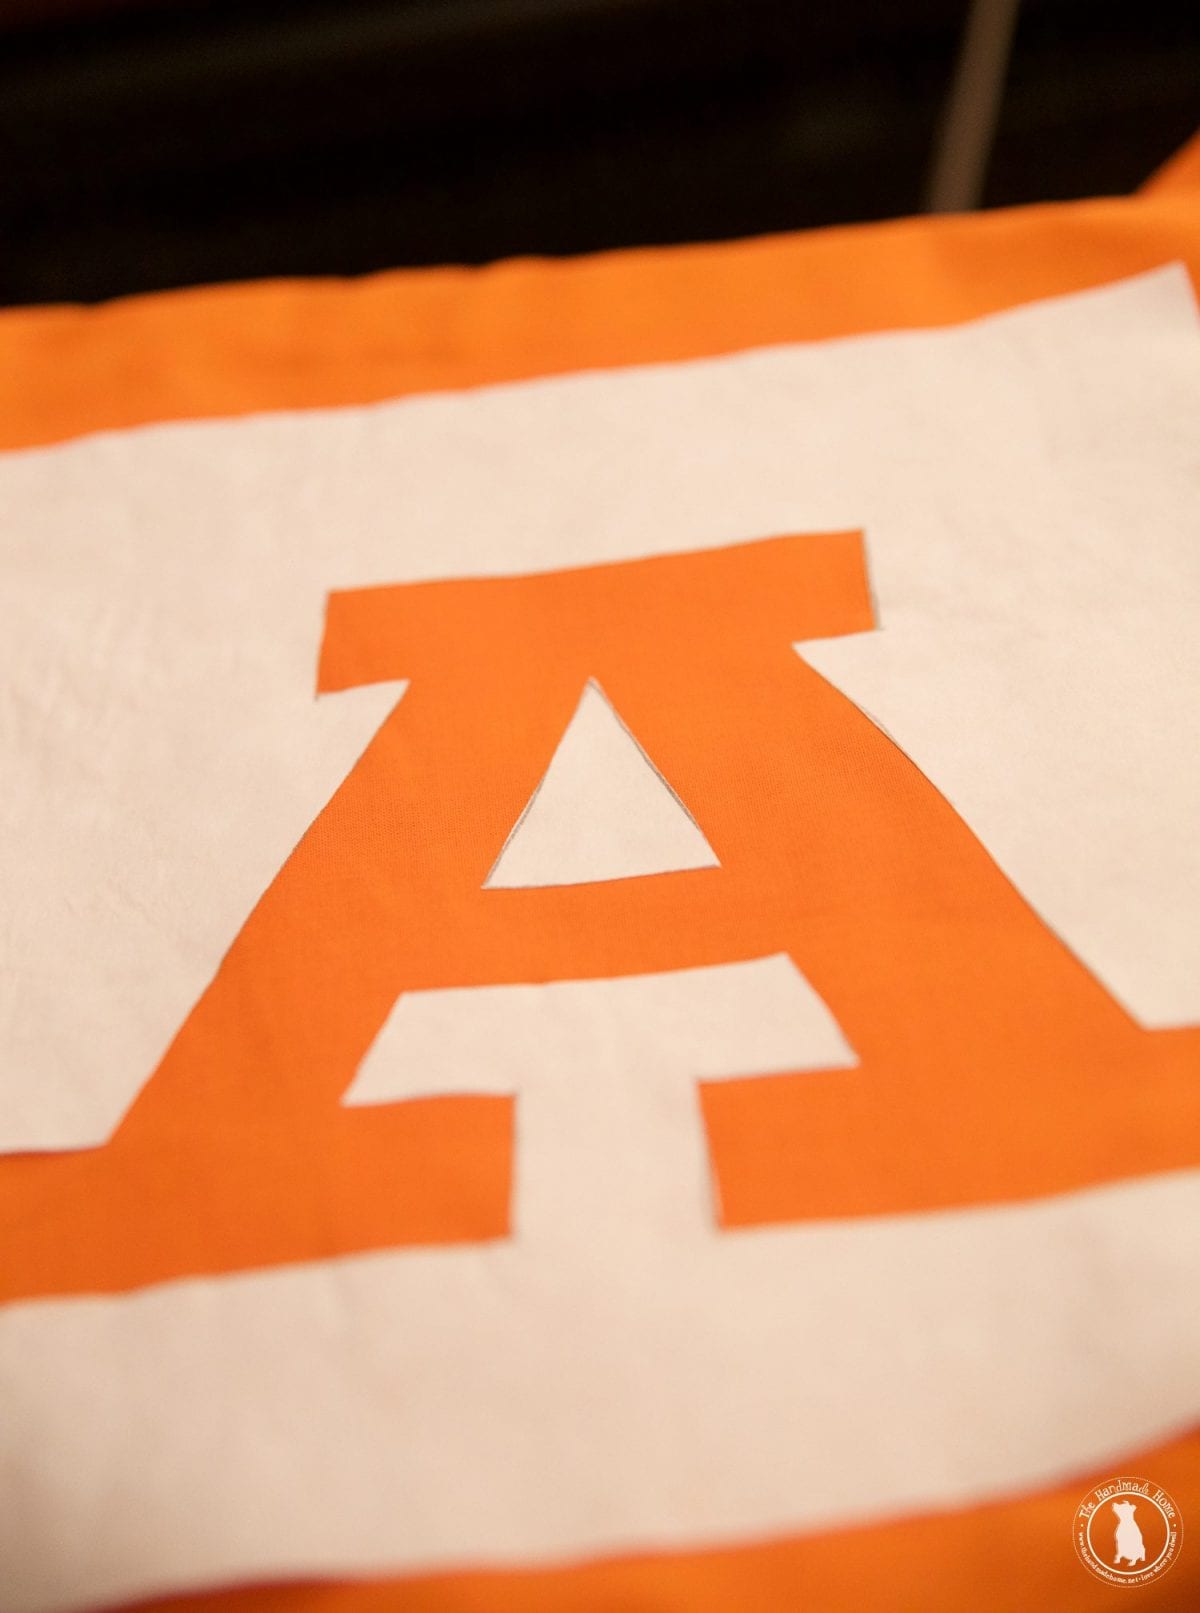
Then cut it out with an X-Acto {save your middle parts for any letters like A or O} and placing the shiny side down where you wish for it to be placed on your bag, and iron it to your fabric.
It won’t be a perfect stick, but close enough.
Break out your paint, and brushing away from the edges, apply the paint of your choice. If you want a thicker application, wait for the first layer, and apply again.
Remove when dry.
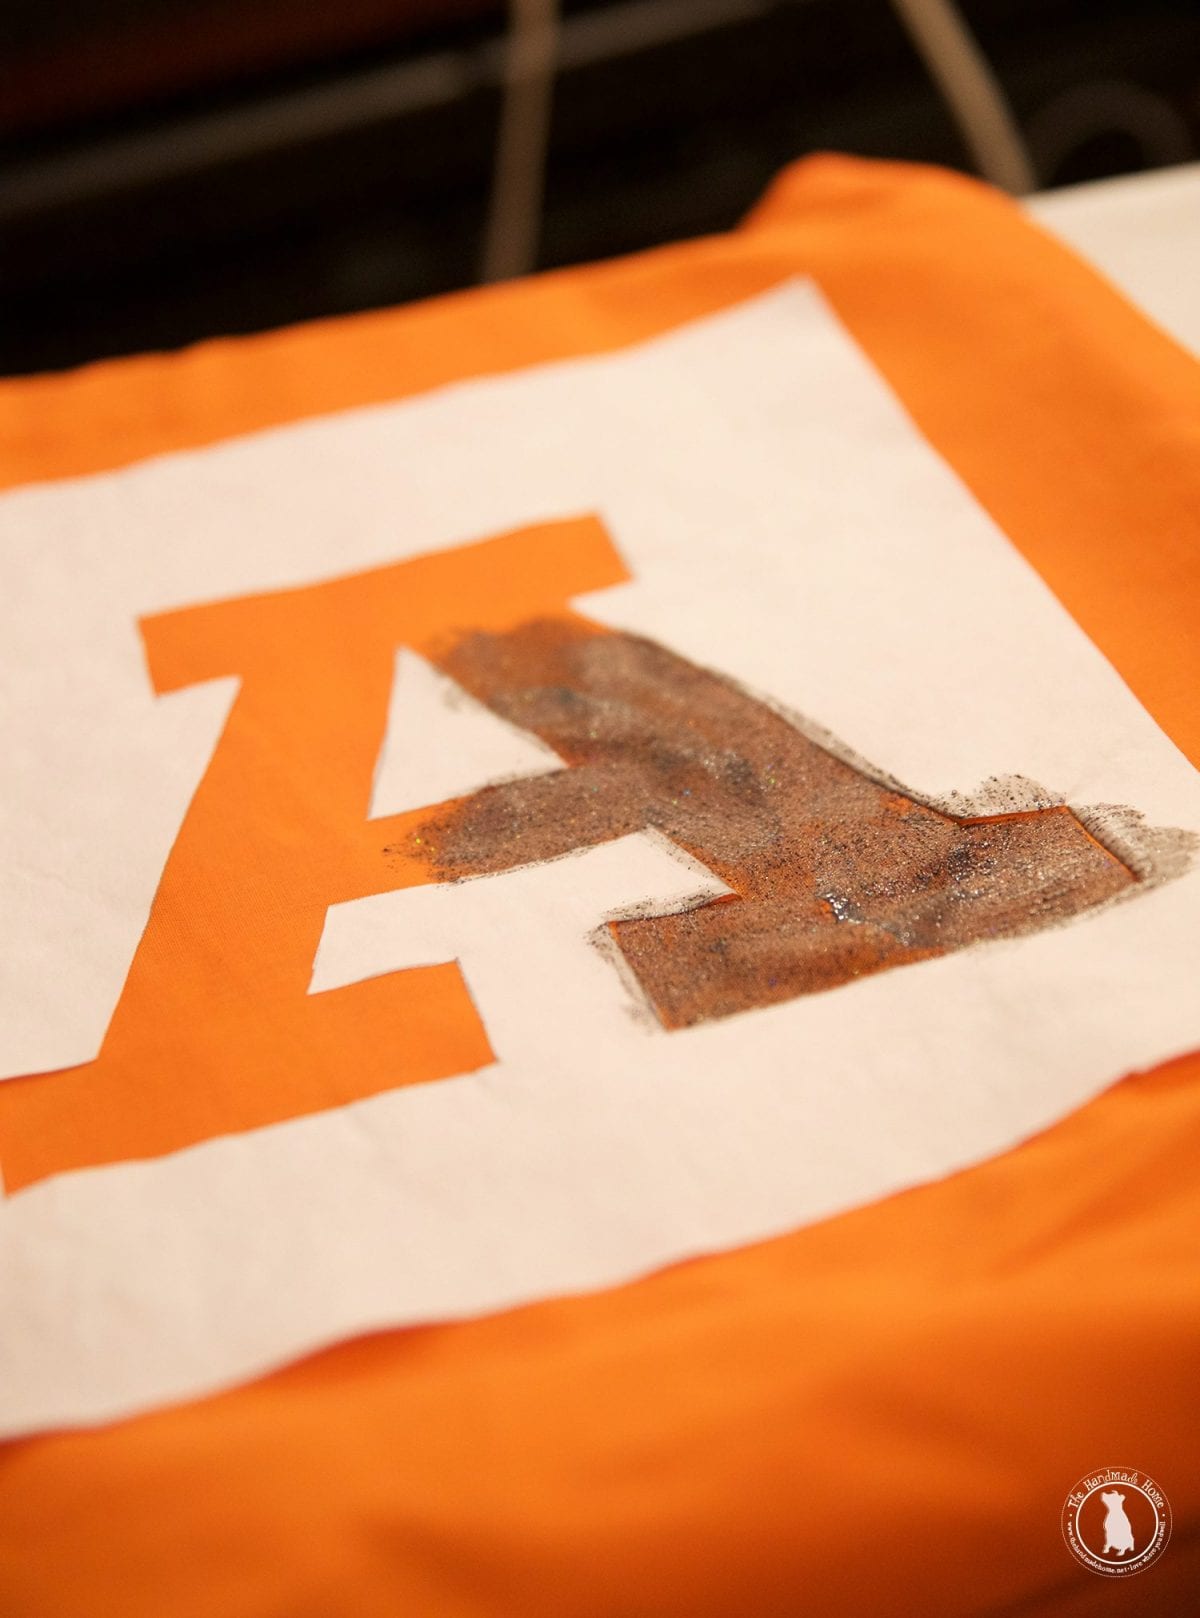
Tada! You so fancy.
We adore the way these bags turned out.
The kids loved designing their own, and we love the fact that they’re so durable.
As always, let us know if you decide to try it. We’d love to hear!
GET IN MAH BELLY, CANDY!
Have an inspired day!
This is so cute!!!