
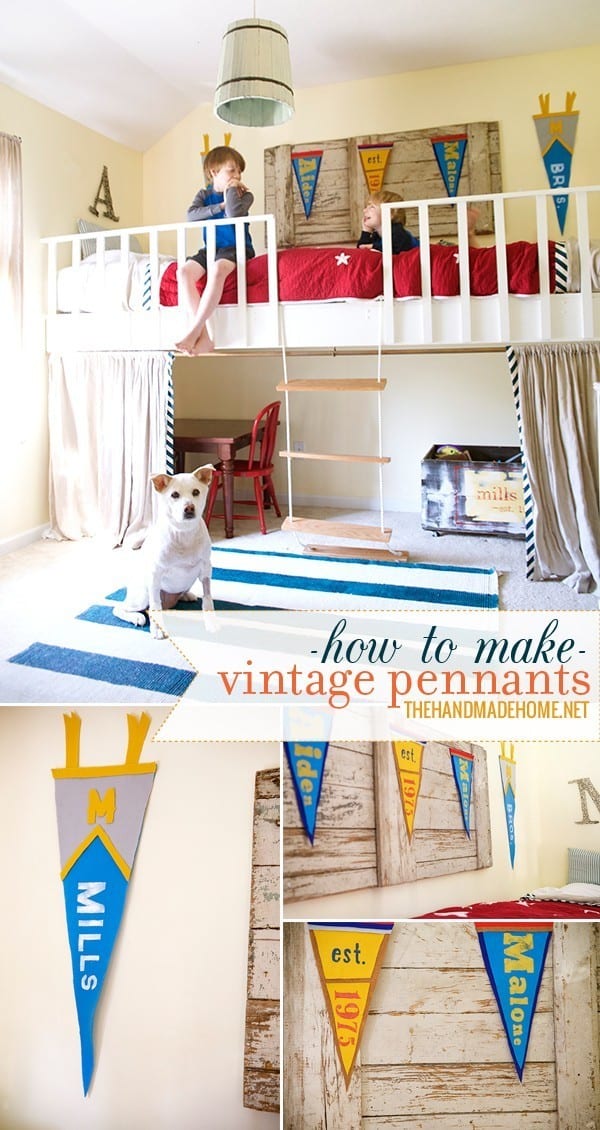
make your own vintage pennants
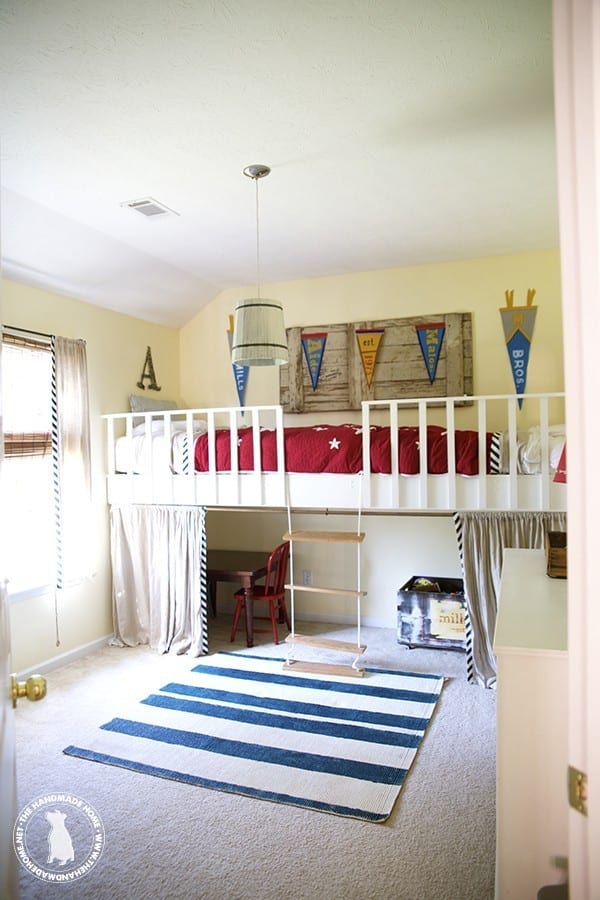
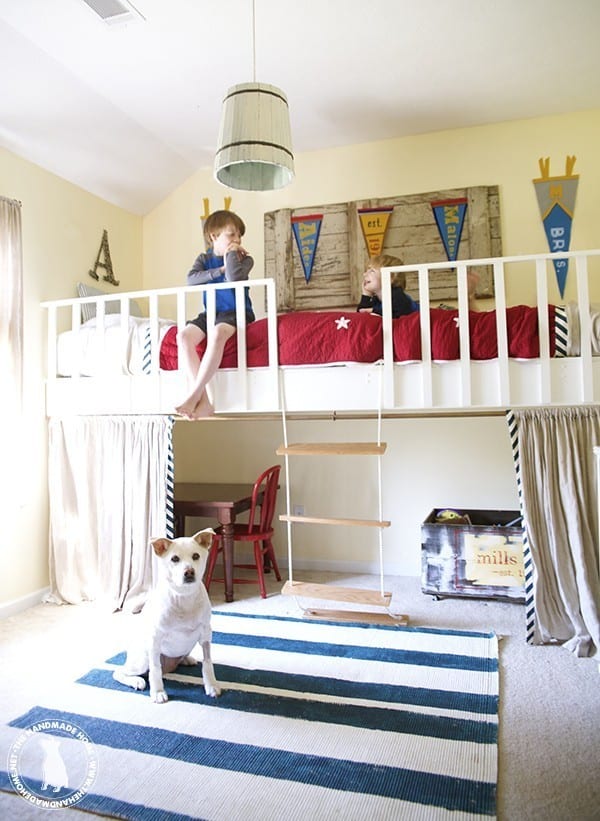
Hey guys! We’re back today with a little craft we decided to try out with the boys’ room this last weekend. We love the vintage look of pennants, and thought that it was time to liven up their over-the-bed-area with a little fun, alongside something meaningful.
It’s simple art for their walls with a colorful punch, and it only took a few supplies and a little time. Oh, and I almost forgot to mention, it’s no-sew! Everyone deserves to be celebrated with pennants – The boys love it.
Here’s how to make your own vintage pennants:
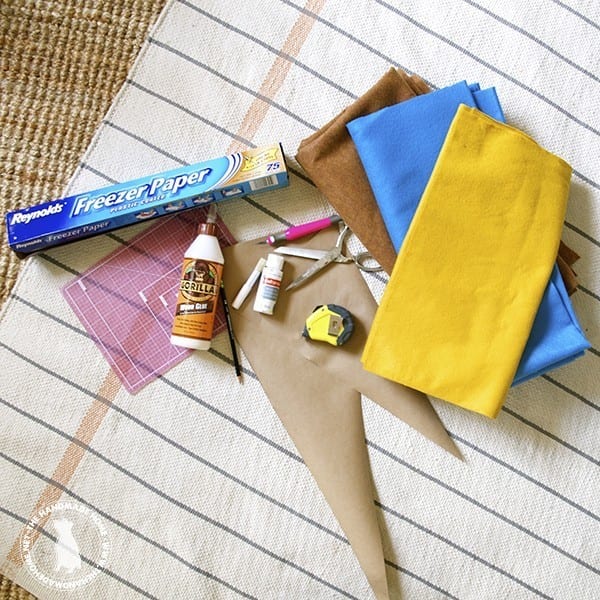
Gather up your supplies:
• Fabric – for this, we used a nice collection of quilting felt in various colors with a fun sort of older vibe. We picked ours up at the local store, and there’s a great selection, here. Depending on how much you’ll make, you won’t need much and we love that this fabric is super affordable.
• scissors • X-Acto blade + cutting mat • freezer paper • fabric paint in various colors {any basic craft paint will also work} • fabric glue {we had wood glue and rolled with it} • chalk {to mark on your felt} • pencil • access to a computer and printer
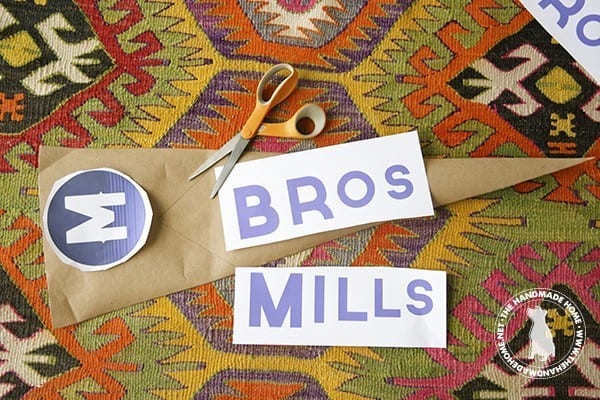
• Template – butcher or wrapping paper or cardboard cut to the size you wish your template to be. Ours were two sizes after we researched the general size of actual vintage pennants, we just drew out a triangle with a straight edge and pencil: 9″ x 18″ + 10″ x 29″ It’s an easy cheat for accurate triangles.
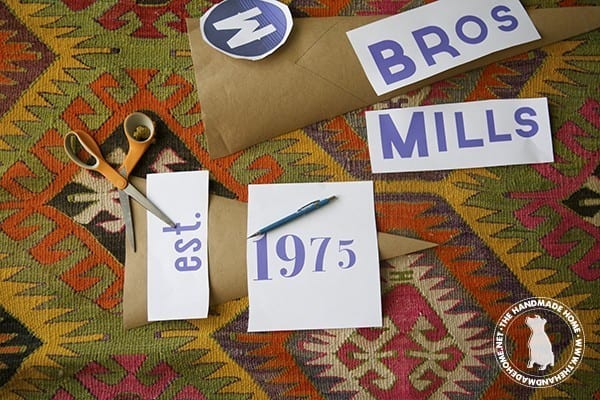
Then we took to the computer, after looking up vintage pennants. I’m showing you my screen, because it was literally a fun trial and error process, and you don’t need any fancy programs {don’t let my pic of illustrator freak you out} as long as you can enlarge your fonts on your screen. Word should work just fine.
Another alternative to this, would be the felt sticky letters you can totally scoop up at your local craft store, or you can peruse the scrapbooking aisle for other easier fixes – we ended up going the template route to get the words just right, and have more control over the end product.
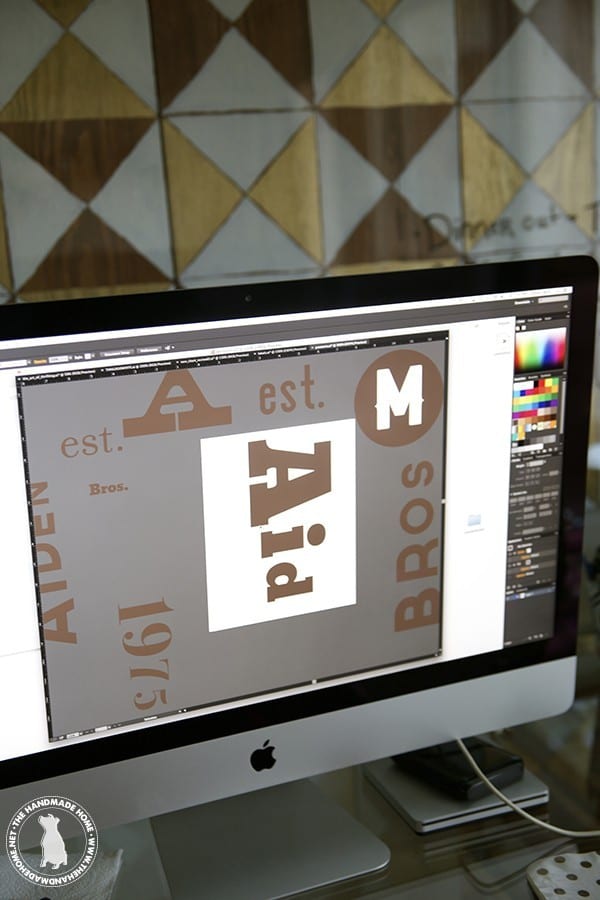
The fonts we used were: Governor, Bevan, Ranger, Airplane + Otama
If you’re looking for more font options, be sure to check out our entire font snob series, here!
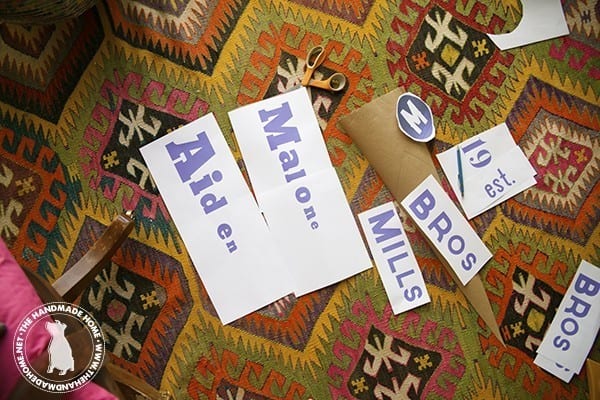
But I’m showing you these photos, because we literally took our templates, and printed out words at various sizes, sometimes combining sheets until we got the letters just right. They ended up making a bit of a triangle in their positioning, so they worked with the pennants just like the real vintage ones.
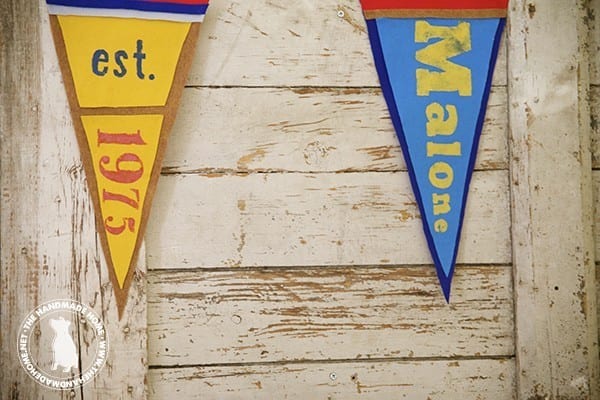
We wanted ours to say something about brothers, so the end product had both boys’ names, their last initial, and the date it was established {Jamin was born in 1975 and was a little brother – cue cheesy reference}
We just kept playing until it felt right, and then took it to the next step!
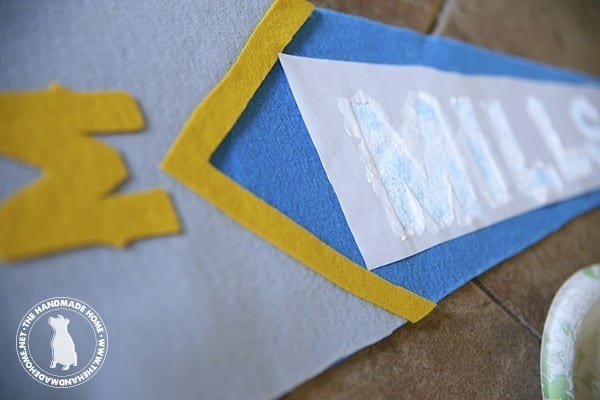
We then used our templates to trace {with a piece of chalk – if you’re an experienced seamstress, you probably have something fancier} and cut our base felt out, and then embellished with different colors as we went. We even ended up cutting out our big printed M, and using it outside a circle (instead of the way it’s shown, printed) on top of a grey piece for an extra vintage ‘pop’ in that finished piece. It just goes to show that even when you plan, you’ll be making adjustments as you go with whatever floats your boat.
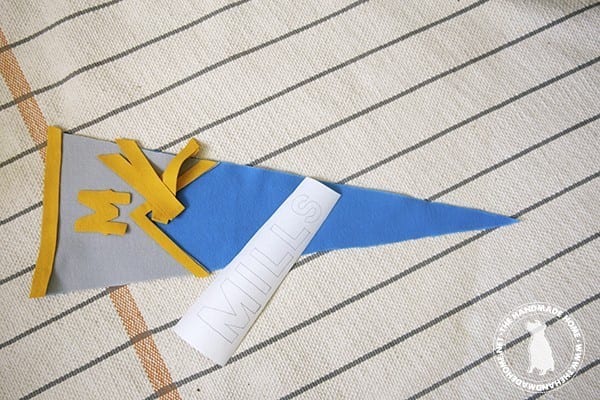
Next, we glued all the pieces that we wanted to use down.
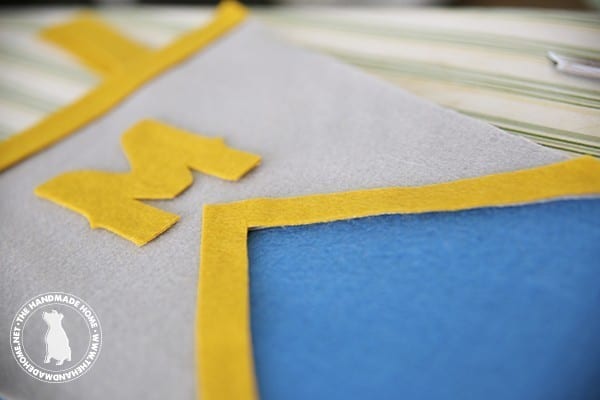
Then, we decided to use a bit of an old fashioned {cheap} screen printing technique for the final lettering. You could always cut out all your letters if you wanted, {any sillhouette/sizzix users out there?} but this was by far a quicker method.
There’s more detailed instructions in these posts here and here, but here’s what we did:
Take your letters of choice and place them underneath a sheet of freezer paper, glossy side down. {The top side should be more matte and easier to write on}. Trace your letters on top from your printed piece, and using your X-Acto knife, cut them out, one by one. {Be sure to save those little middle pieces {the loops you’ll find in a lowercase e or an o, as you cut, you’ll need them in a moment}
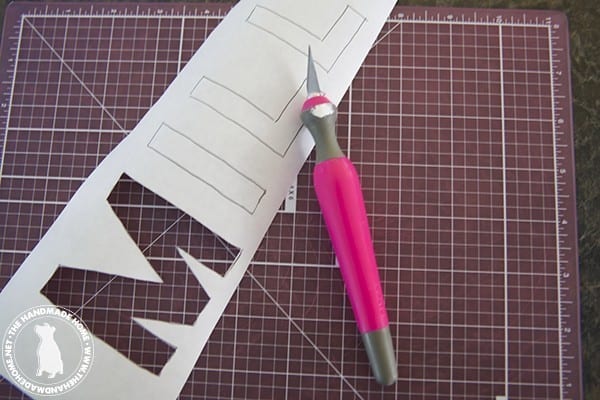
When you’re finished, place the freezer paper with all the cut pieces glossy side down, matte side up, and with your iron setting on low to medium heat, iron it down on top of the felt. {Make sure you include those little pieces I was talking about so the screen printing will read correctly, if you have letters like a, b, d, e, g, etc.} Be sure the edges look securely stuck on, and then it’s time to paint.

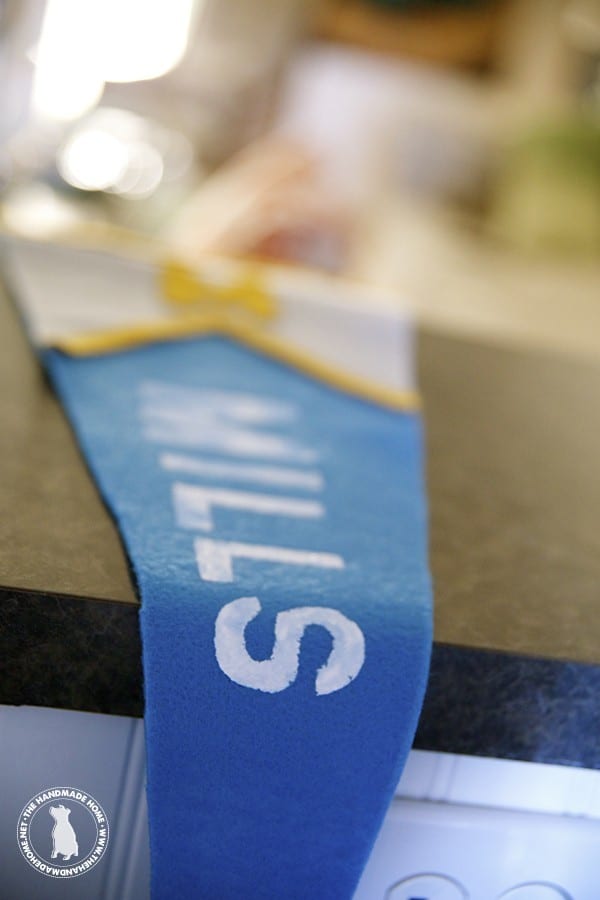
Breaking out the paint {make sure you’re working on a surface where it doesn’t matter} fill in those letters. Just a few tips:
• This fabric will absorb the paint, so I found it quicker to use my finger and move it along.
• Pull the paint away from the edges, never push it toward them. This way you don’t get your paint under the paper, and you’ll have those sharper edges.
• Because of the nature of this fabric, and depending on the paint you use, either give it a second round with the paint, or leave it as is. We found it looked more “aged” this way.
When the paint is dry, pull up that paper, and… all done. Any little mess-ups on the outsides, and we found that the felt worked well for a little gentle trimming off the top with the scissors. Just a good as new cheater’s tip.

And there we have it. No sewing required.
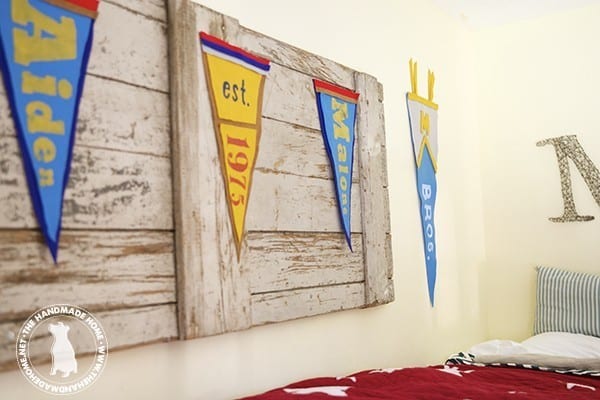
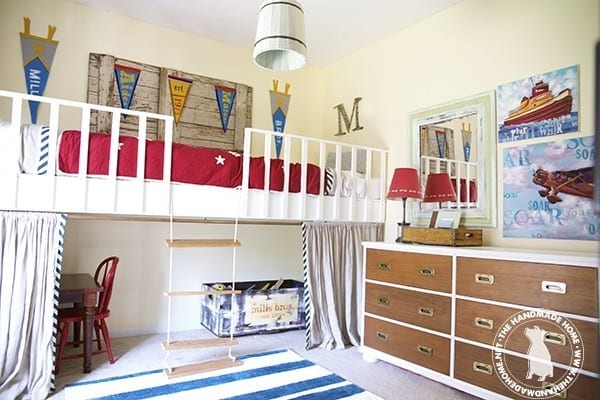
It kind of feels like a celebration in their room.
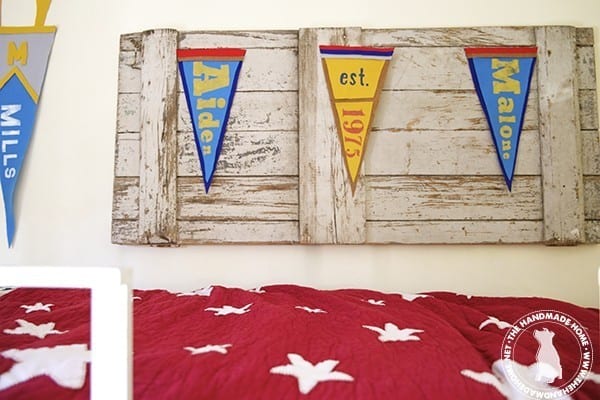
Just a little color and character for easy art on those walls!
The end look is up to you, and the possibilities are kind of endless!
Let us know if you have any questions. Or if you try it… we’d love to see!
Have an inspired day!


Very cute, and simple. That’s a win-win in my book!
Now this is fun! Thanks for sharing…pinning!
I really do love this idea. I think I’ll be making some this weekend for all my kids. Thanks for sharing! And I love that room!
Adorable!
A project like this will be perfect for my boys. Thank you for this awesome idea! 🙂