
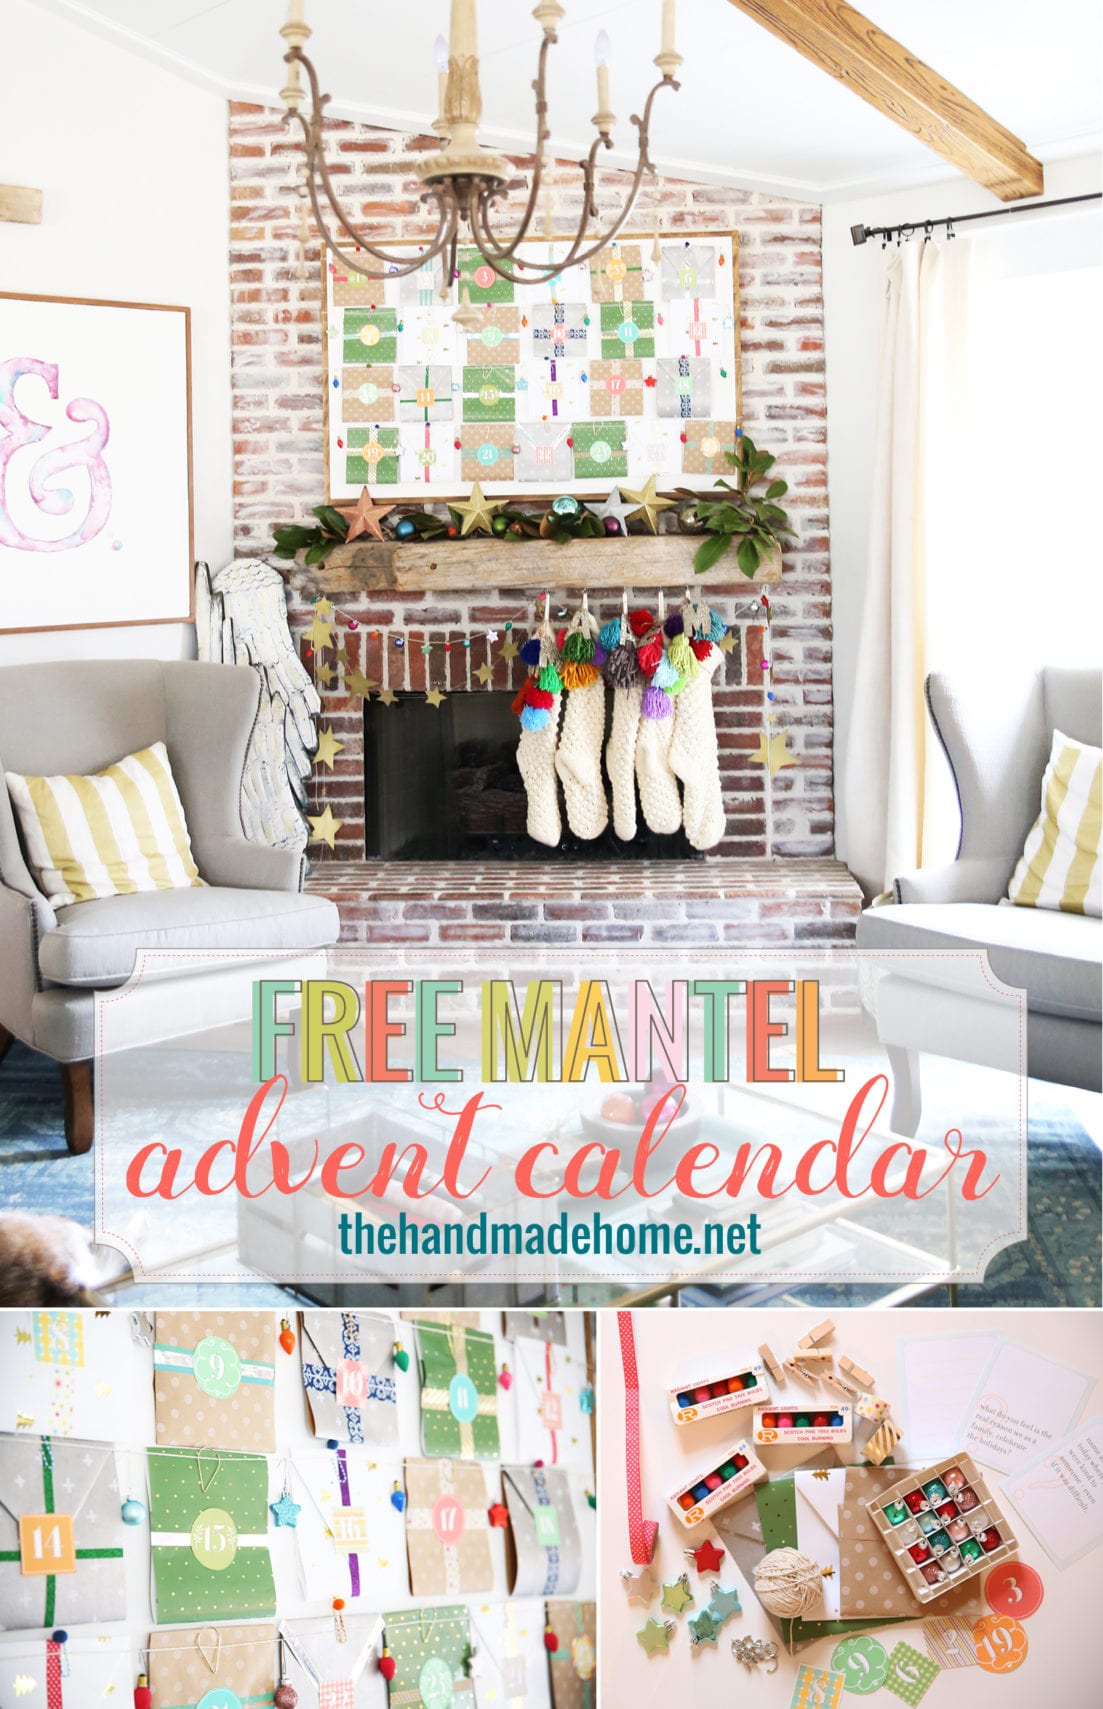
mantel advent – mystery box creative challenge
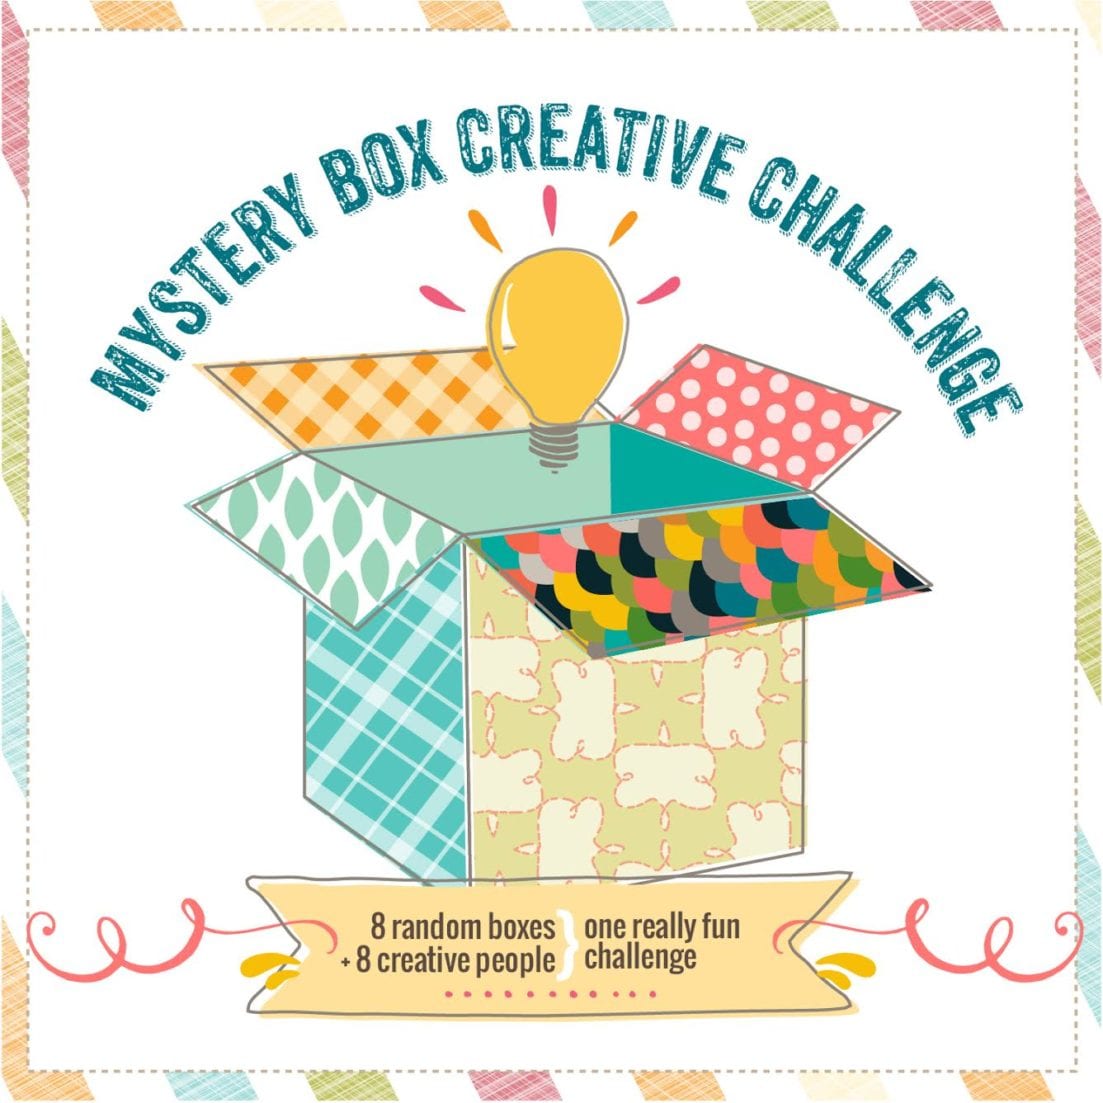
Hey guys! We’re so excited to be here today with our second official mystery box creative challenge!
If you’re headed over from My Sweet Savannah, welcome! We are so glad you’re here!
What on earth is the Mystery Box Creative Challenge, you may ask?
One person sends a box to the next person on the list. The box is a random assortment of something different every time. This round’s guidelines? It’s anything from our homes that we aren’t using. We then create something from the items in the box, for the “theme” at hand. For our second round, we thought we’d try mantels! So while you’re at it, be sure to check out the other fabulous sites’ posts as well – here’s a list of the fab sites participating: {in the order in which boxes were sent a-la round robin style}
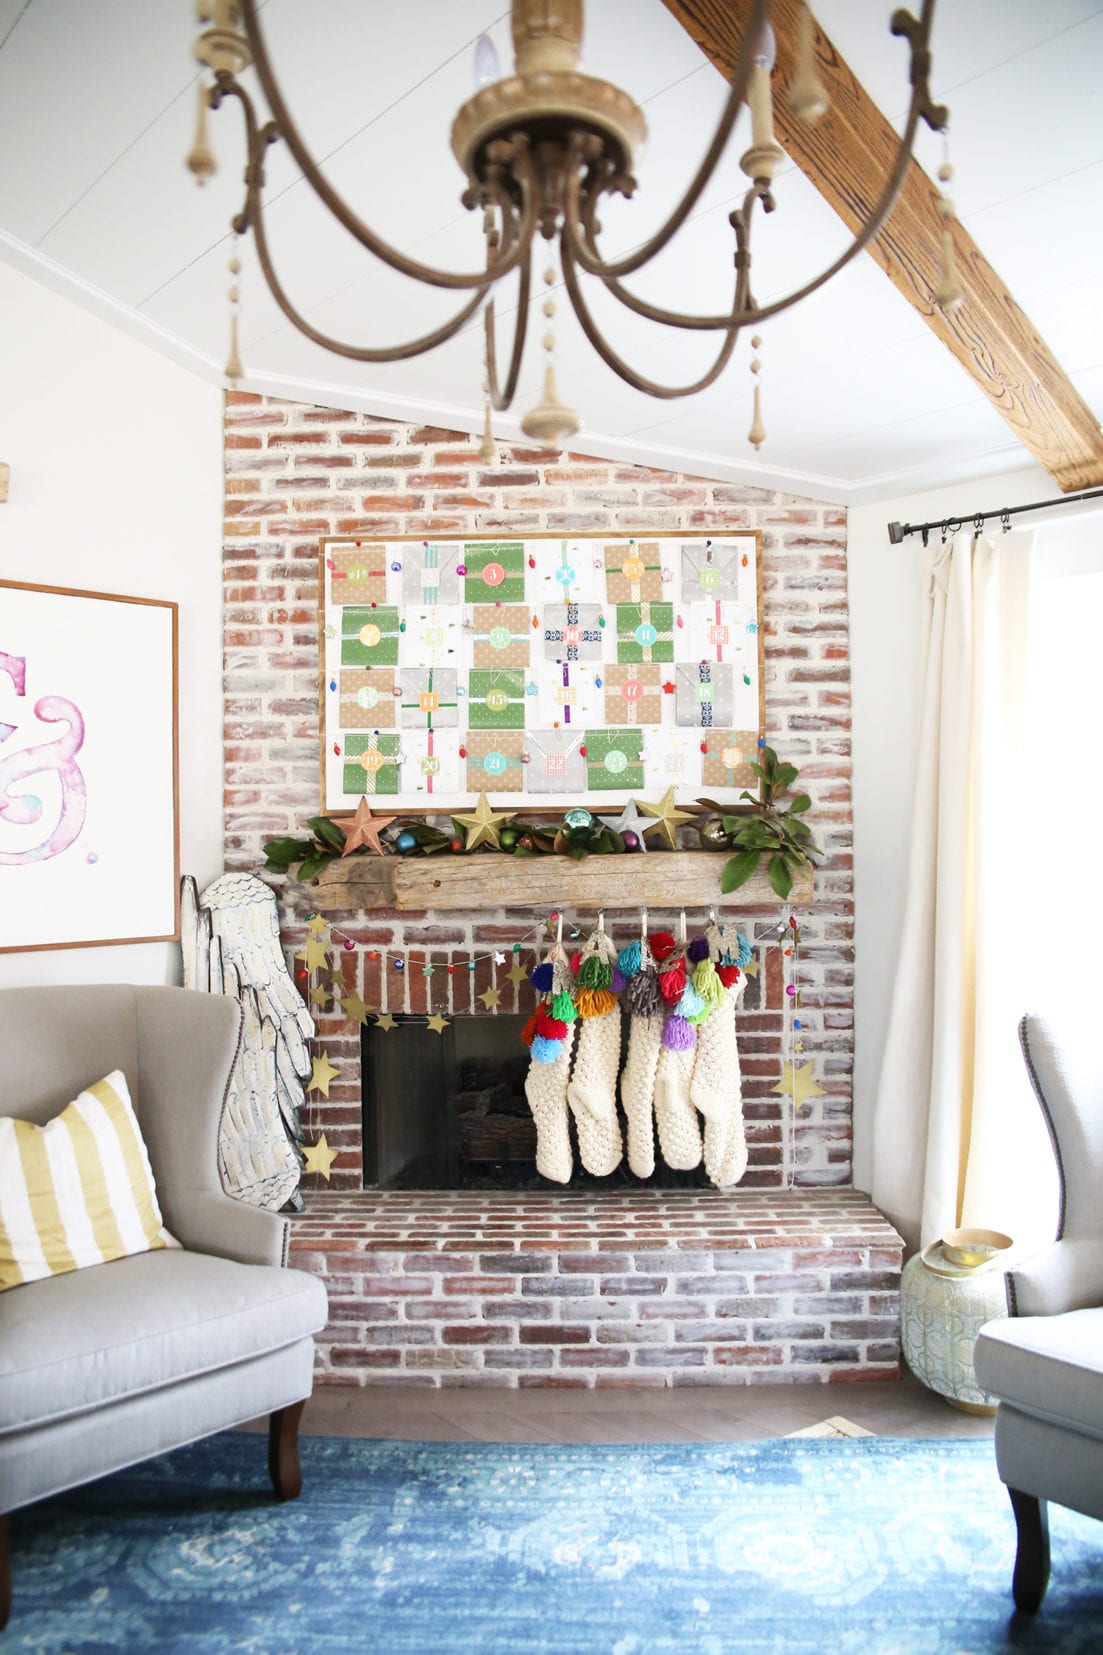

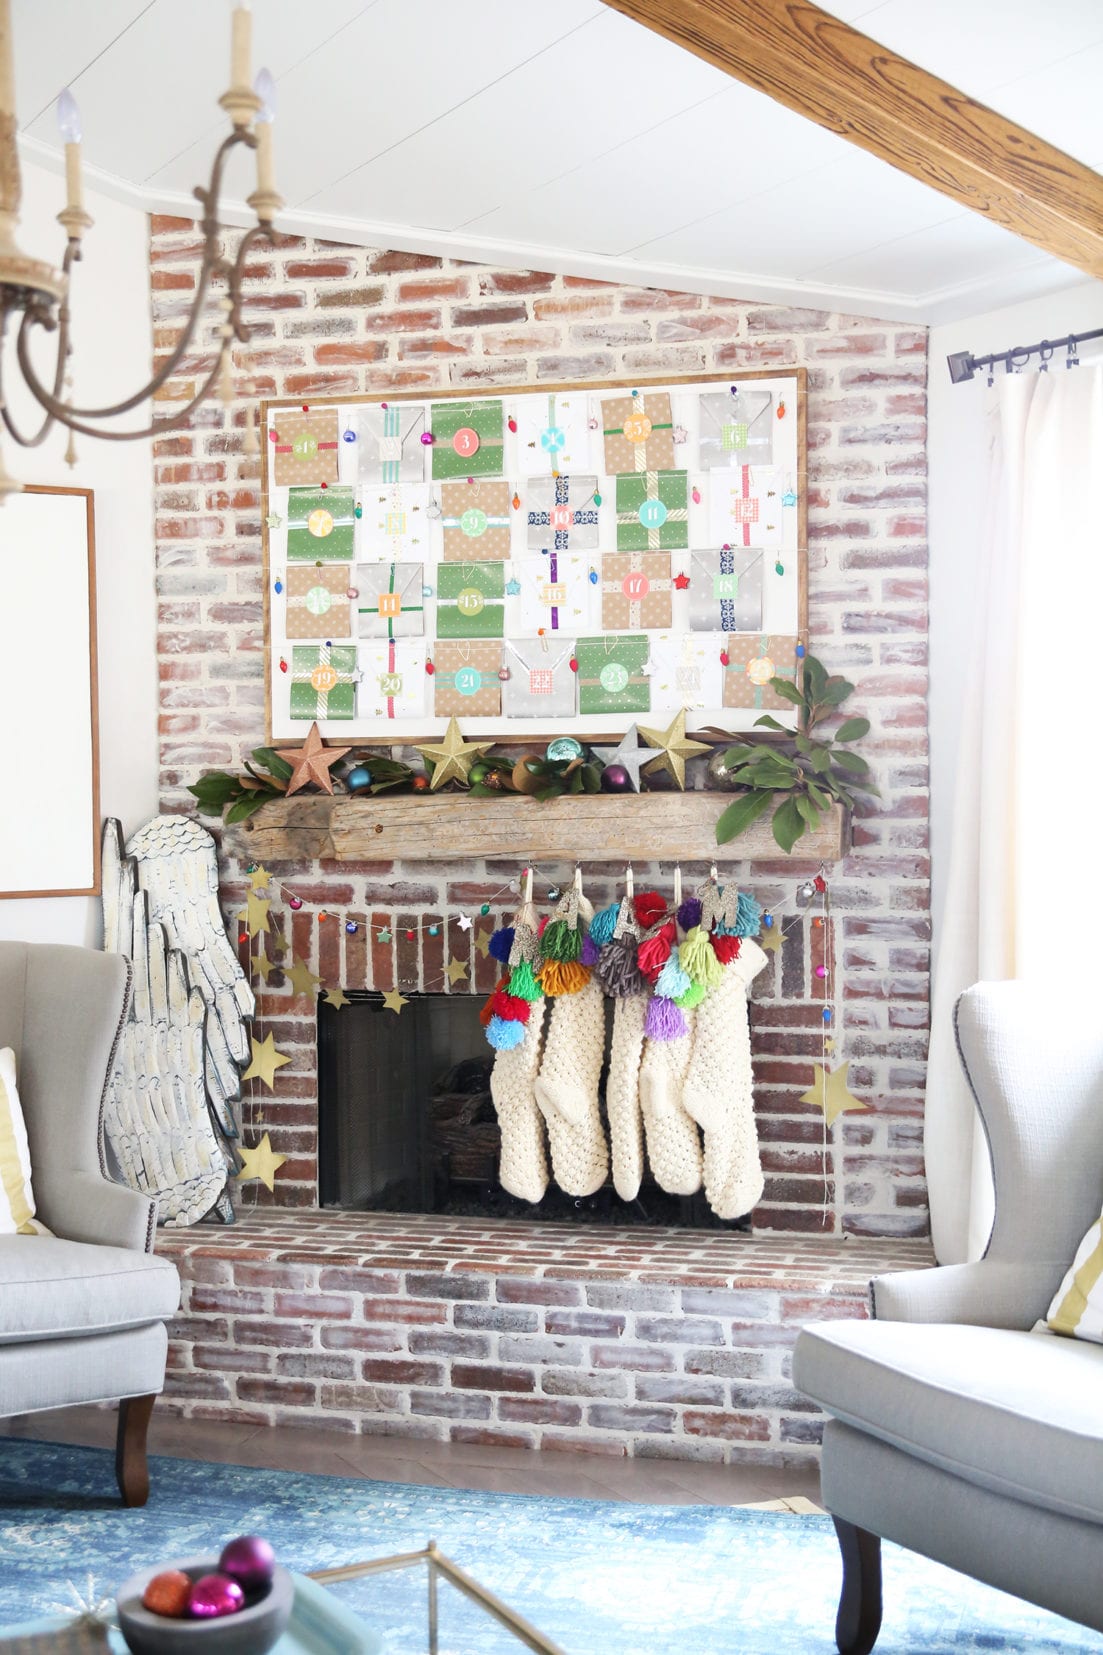
– this is a plain jane canvas I had on hand, that I plan to use again for a painting. In the meantime, it made the perfect backdrop, and we framed it out. However, you can easily place this on your wall, a bulletin board, or even a fridge with magnets. Just know this is what we chose to use, and it made simple mantel art.
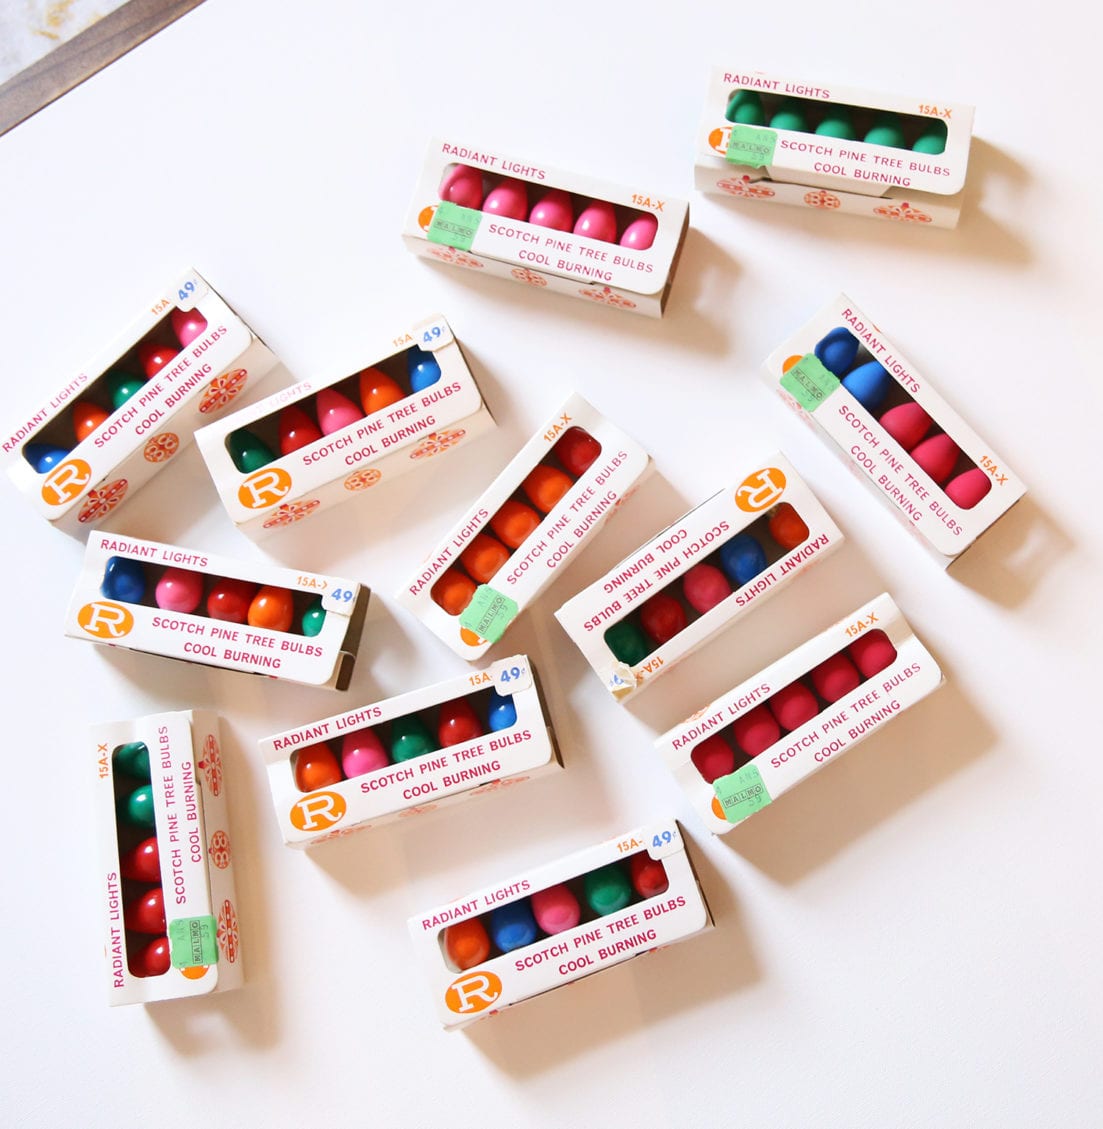
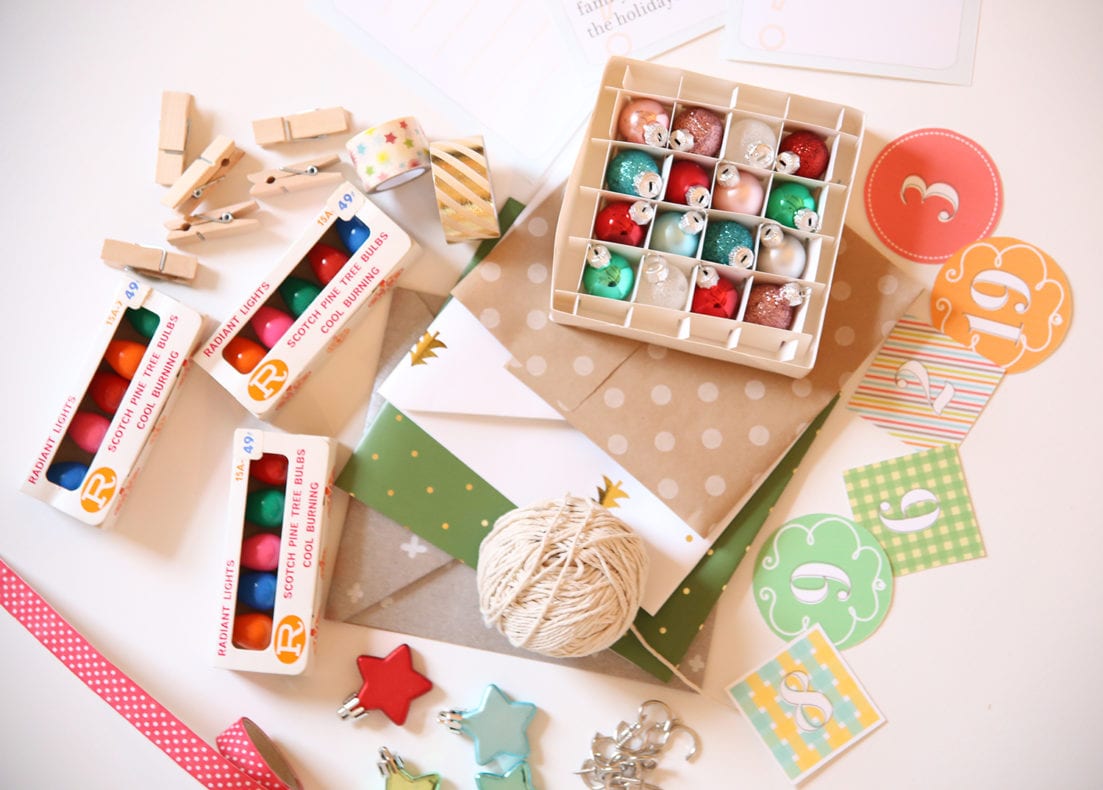
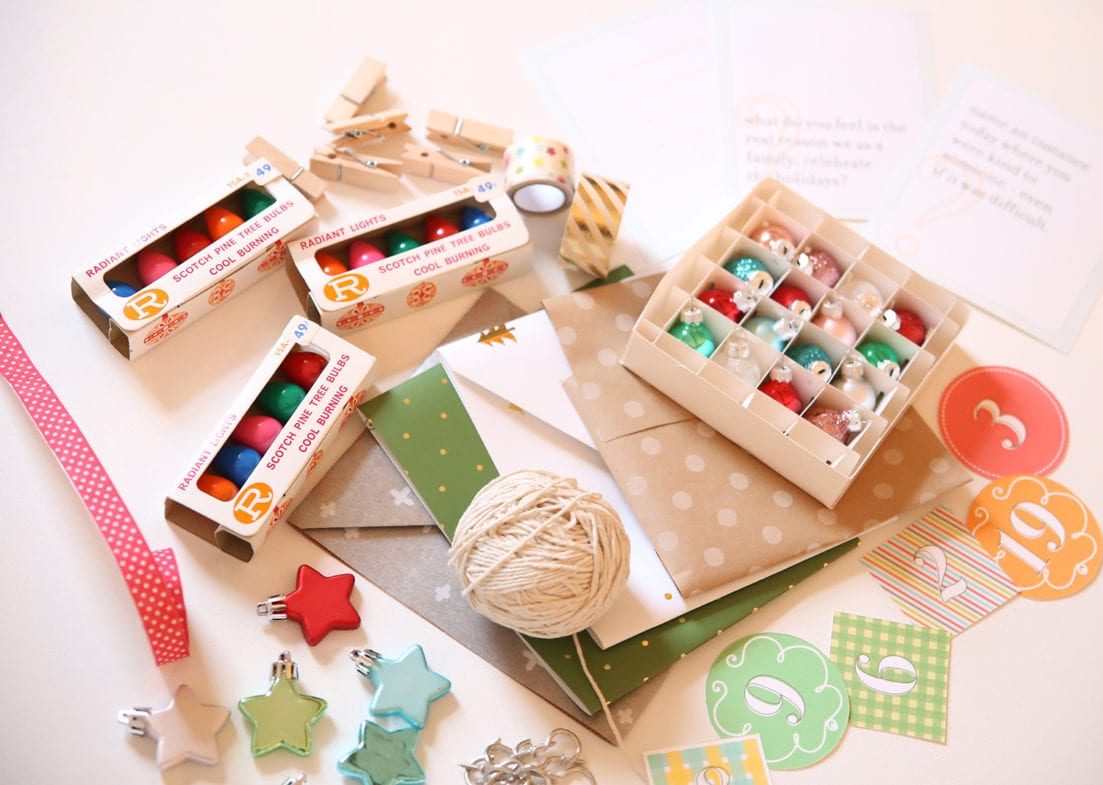
• small round {and star} ornaments + vintage lights
• paper clips or clothes pins
• wrapping paper {we used four kinds from Target}
• washi tape in various patterns
• ruler + X-Acto knife
• free printables
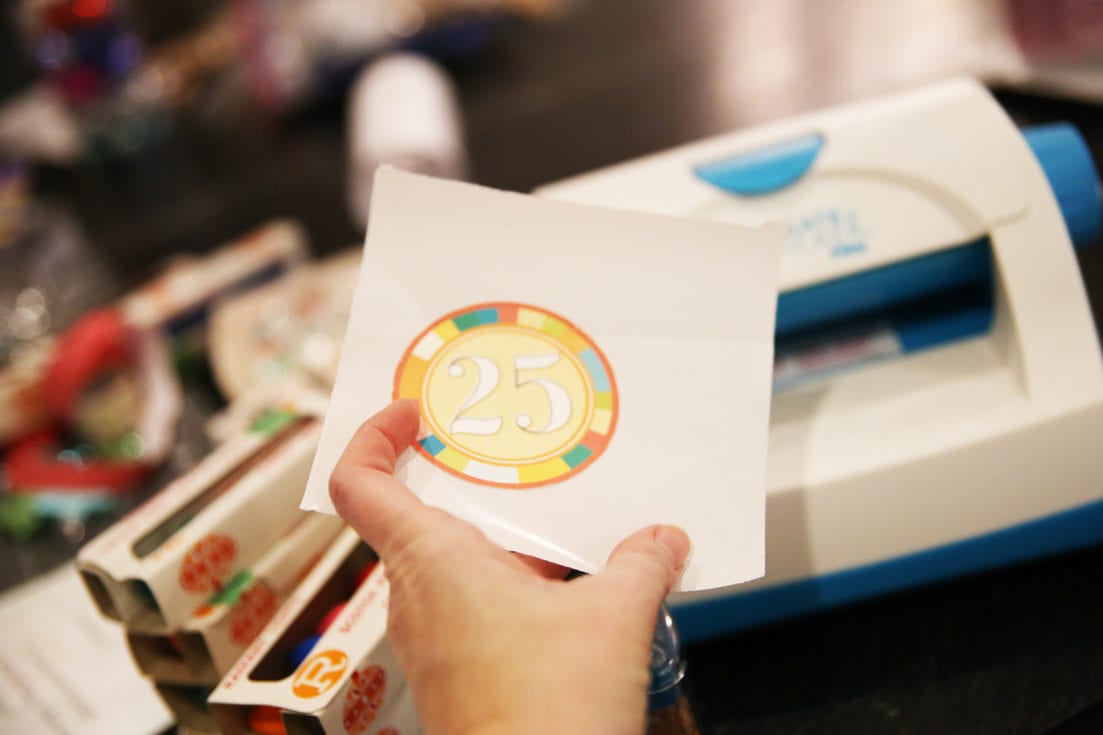
– get your numbers here {numbers 1 / numbers 2/ numbers 3}
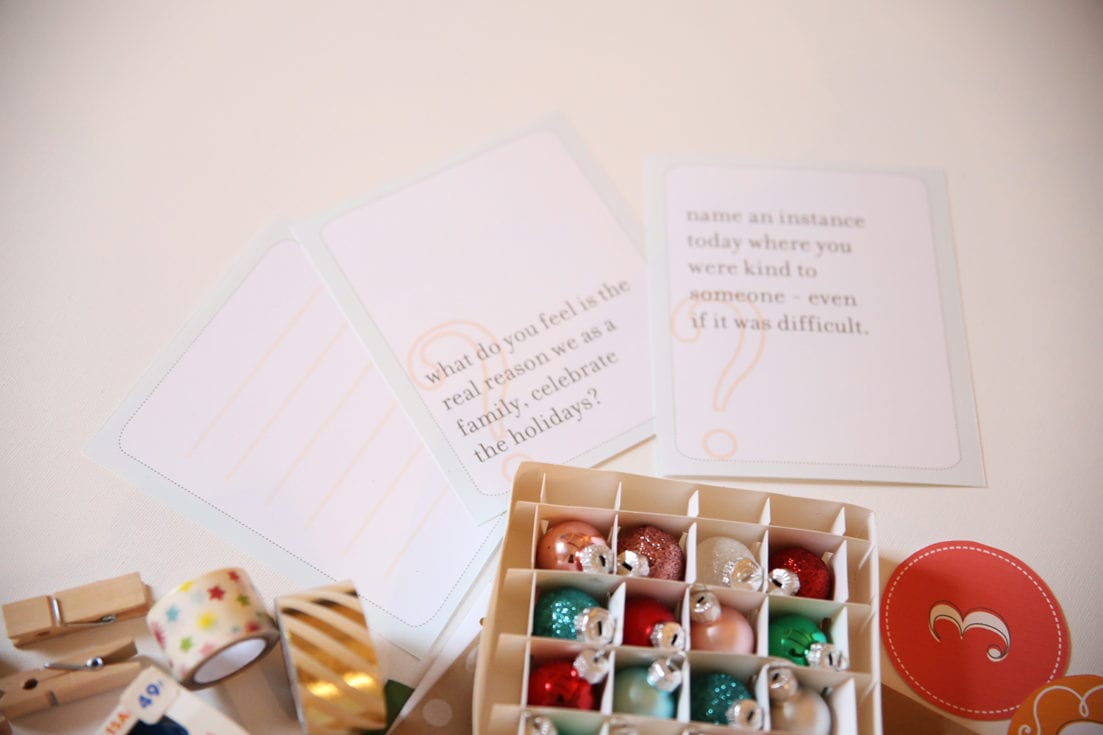
– get your convo starters here {blank cards / cards 14 / cards 13 / cards 12 / cards 11 / cards 10 / cards 9 / cards 8 / cards 7 / cards 6 / cards 5 / cards 4 / cards 3 / cards 2}
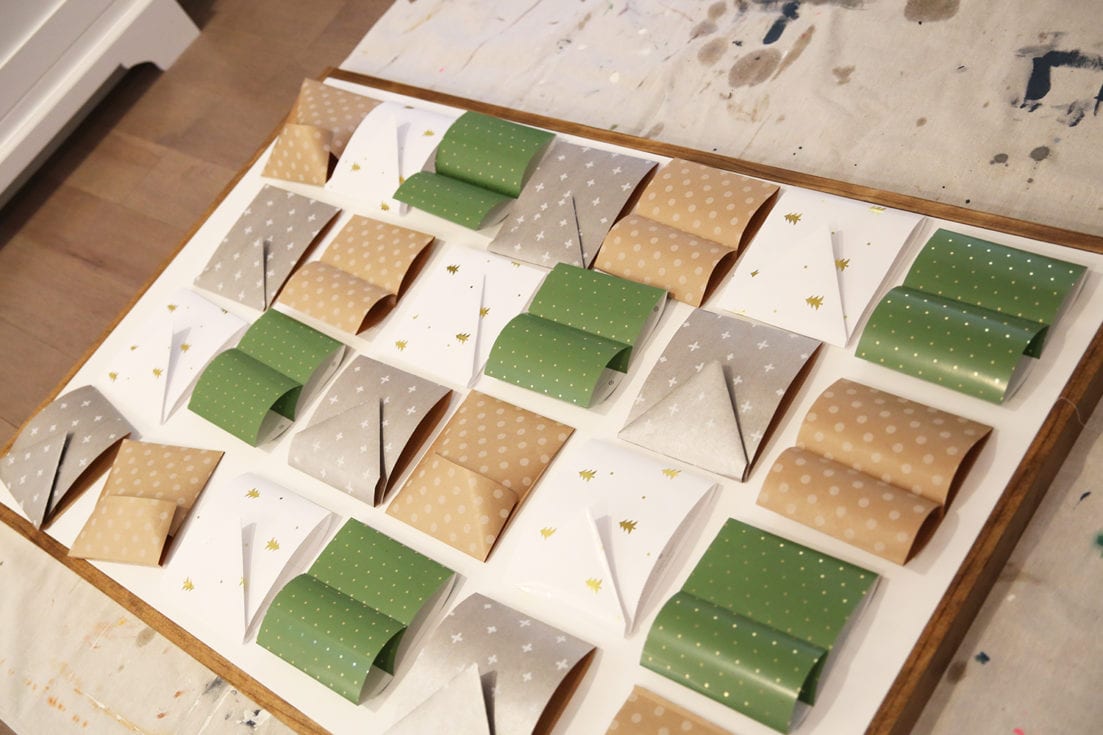
So when my canvas was ready, I decided on four types of wrapping paper, and laid them all out. My printables are basically 5.5 inches squared, so it made sense to do roughly 6 inch squares down in rows. It helped to plan them out ahead of time to know how they would sit. These will all be different, depending on your “backdrop” size.
I simply made my first template, and then cut strips of wrapping paper, to make sure they were all the same size.
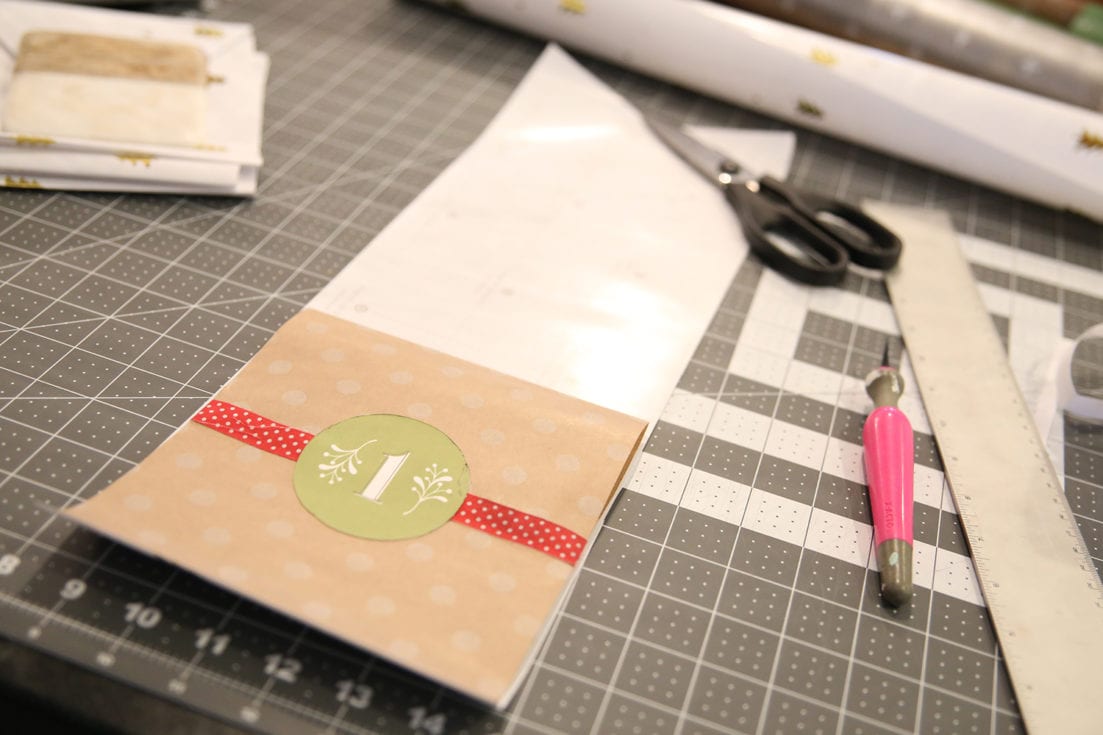
Each one was folded differently, though I kept the folds consistent with each color as I went.
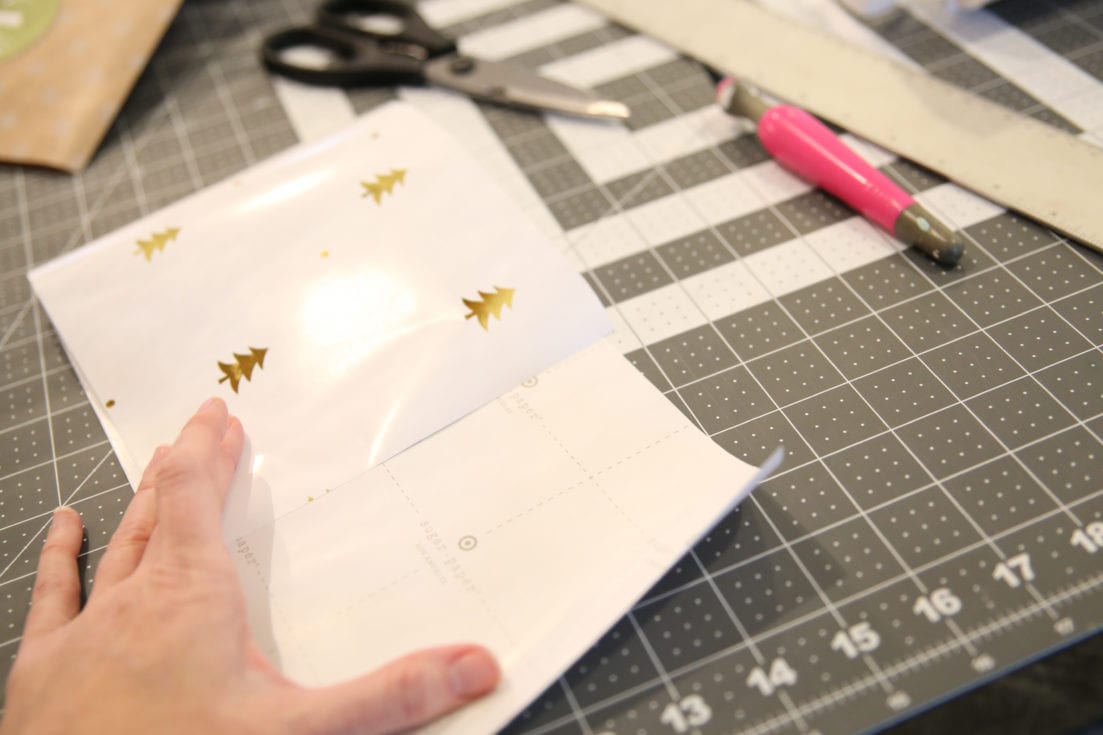
So we basically folded each strip into little presents, so that they sat neatly all the way across.
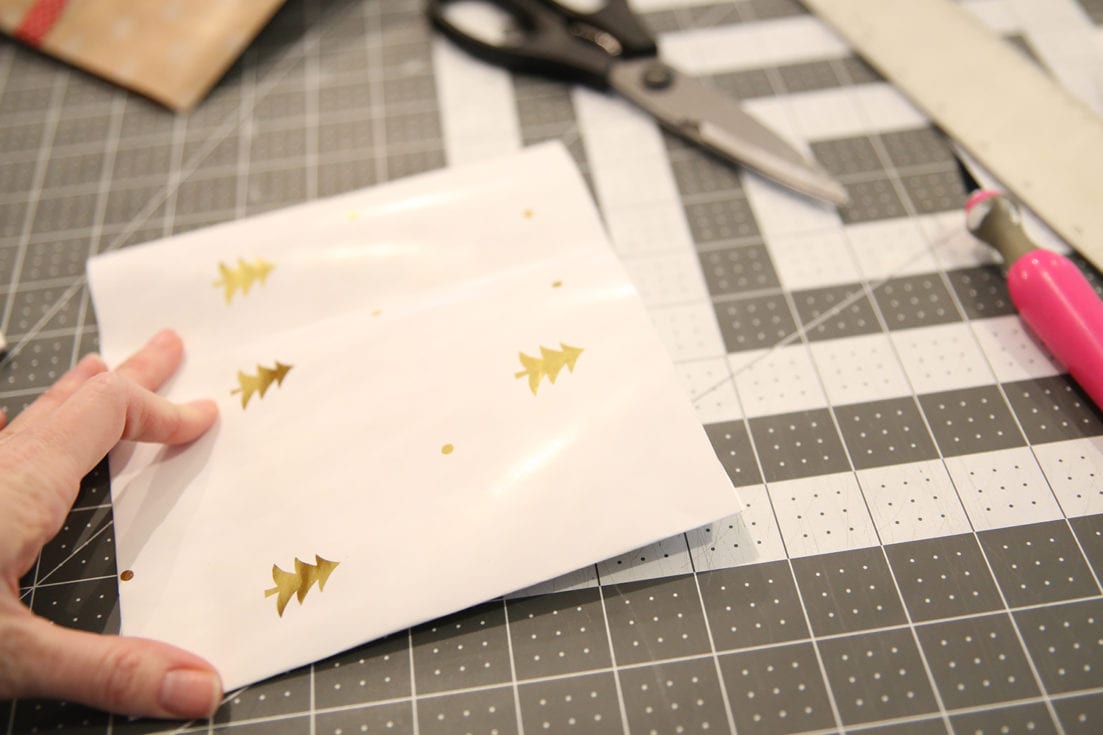
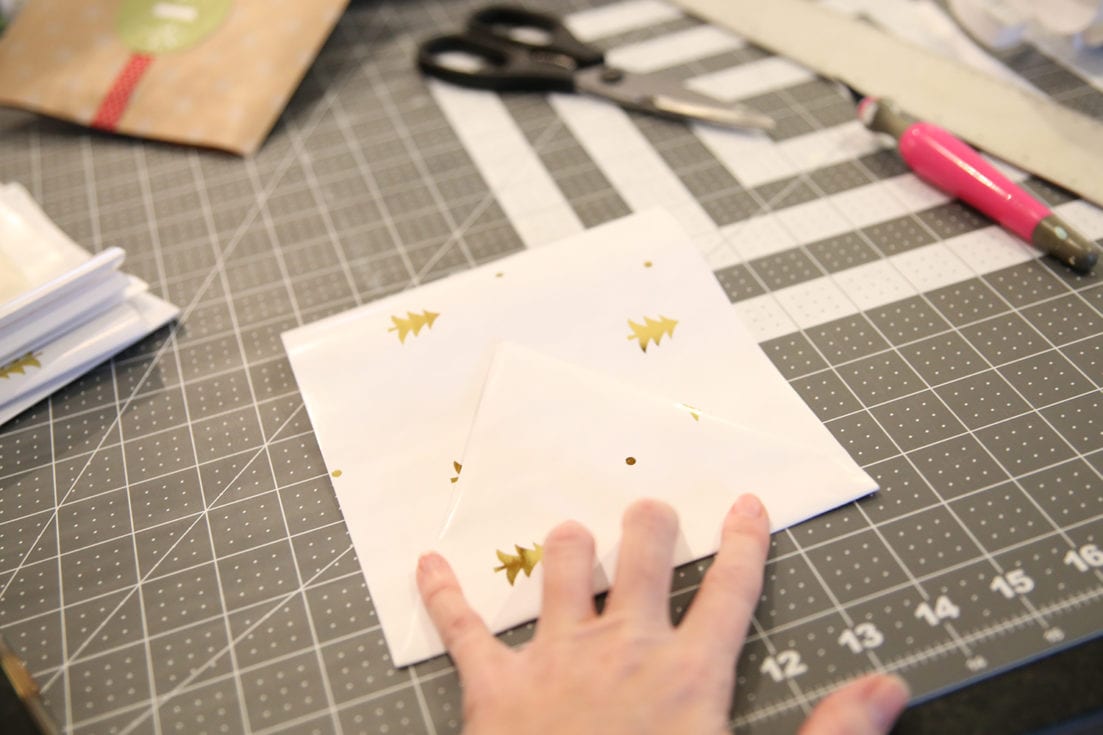
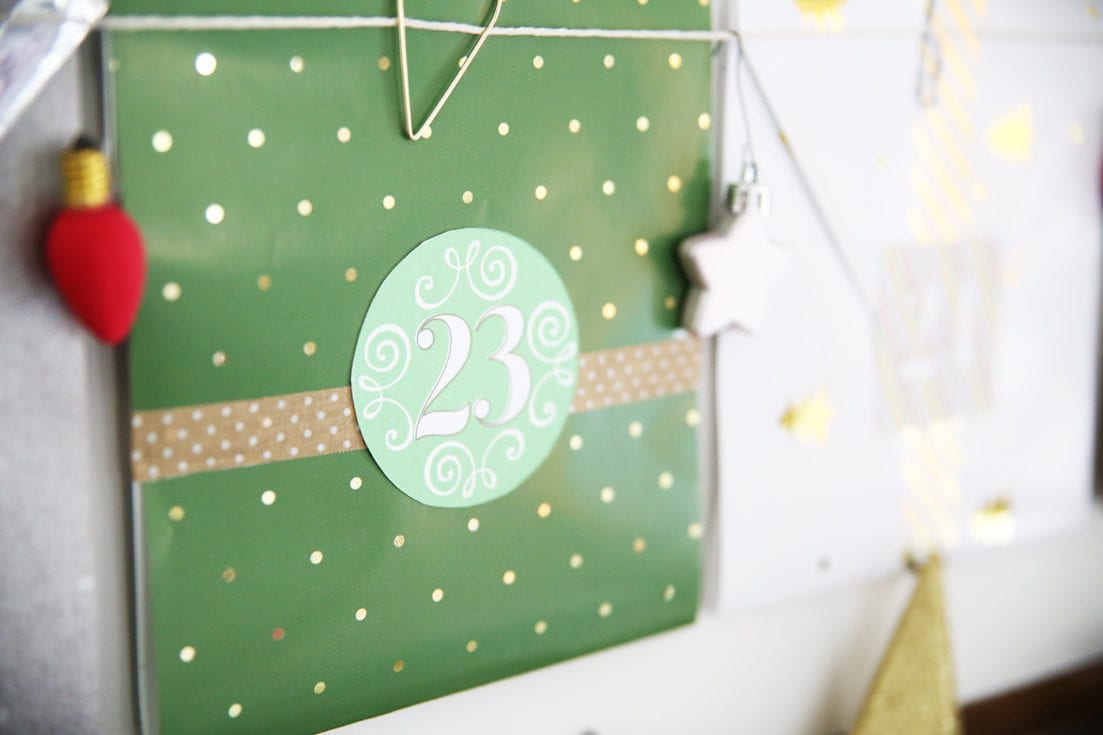
These little “envelopes” had the printables placed inside, refolded, and taped shut.
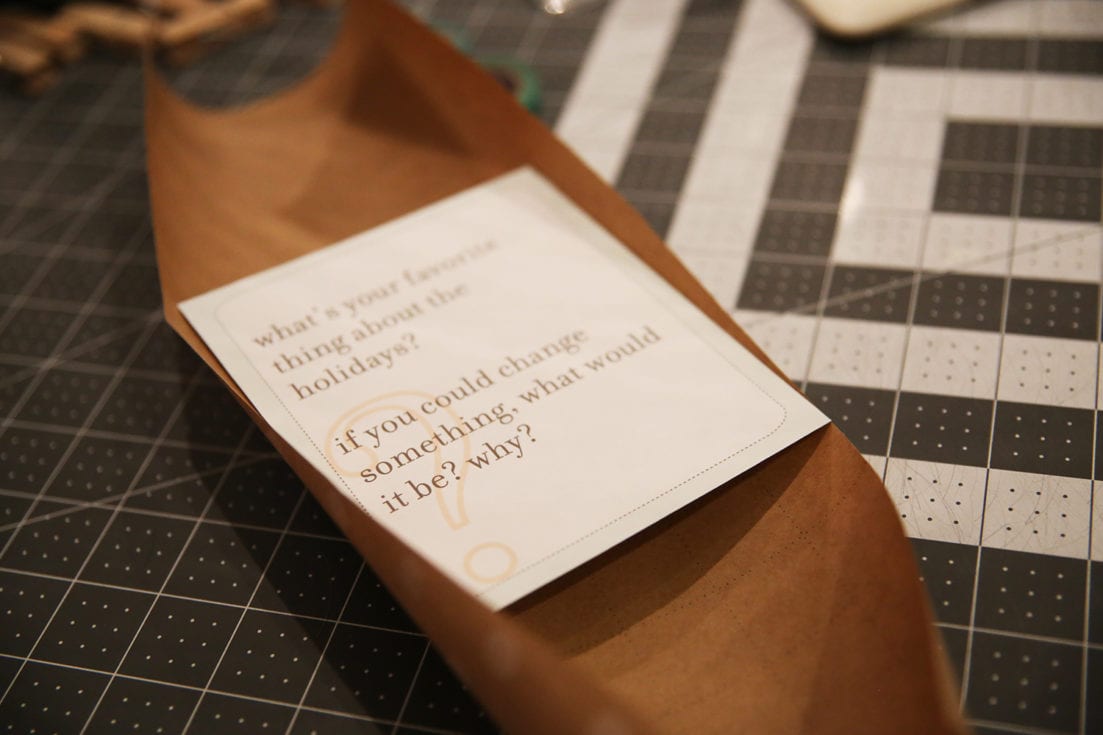
Then we added washi tape and our number printables, to the front.
Hint: we love our Create a Sticker Machine, and this helped turn them into full-on labels.
Then they were ready to go!

To add them to our canvas, here’s what we did:
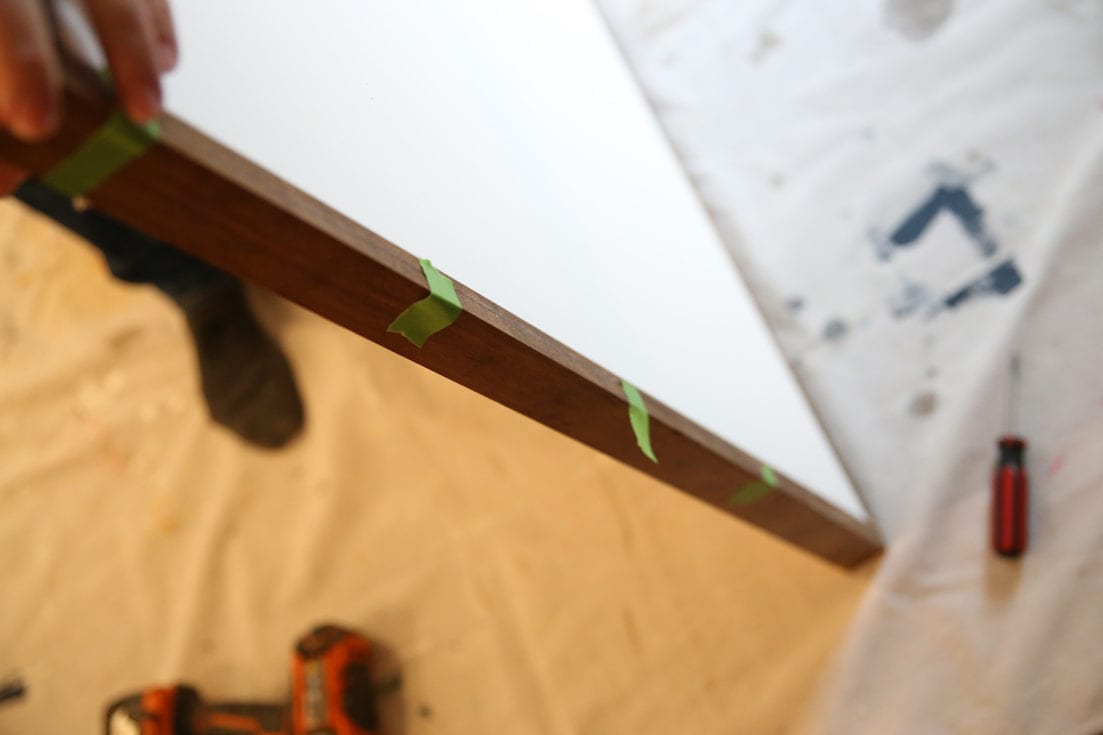
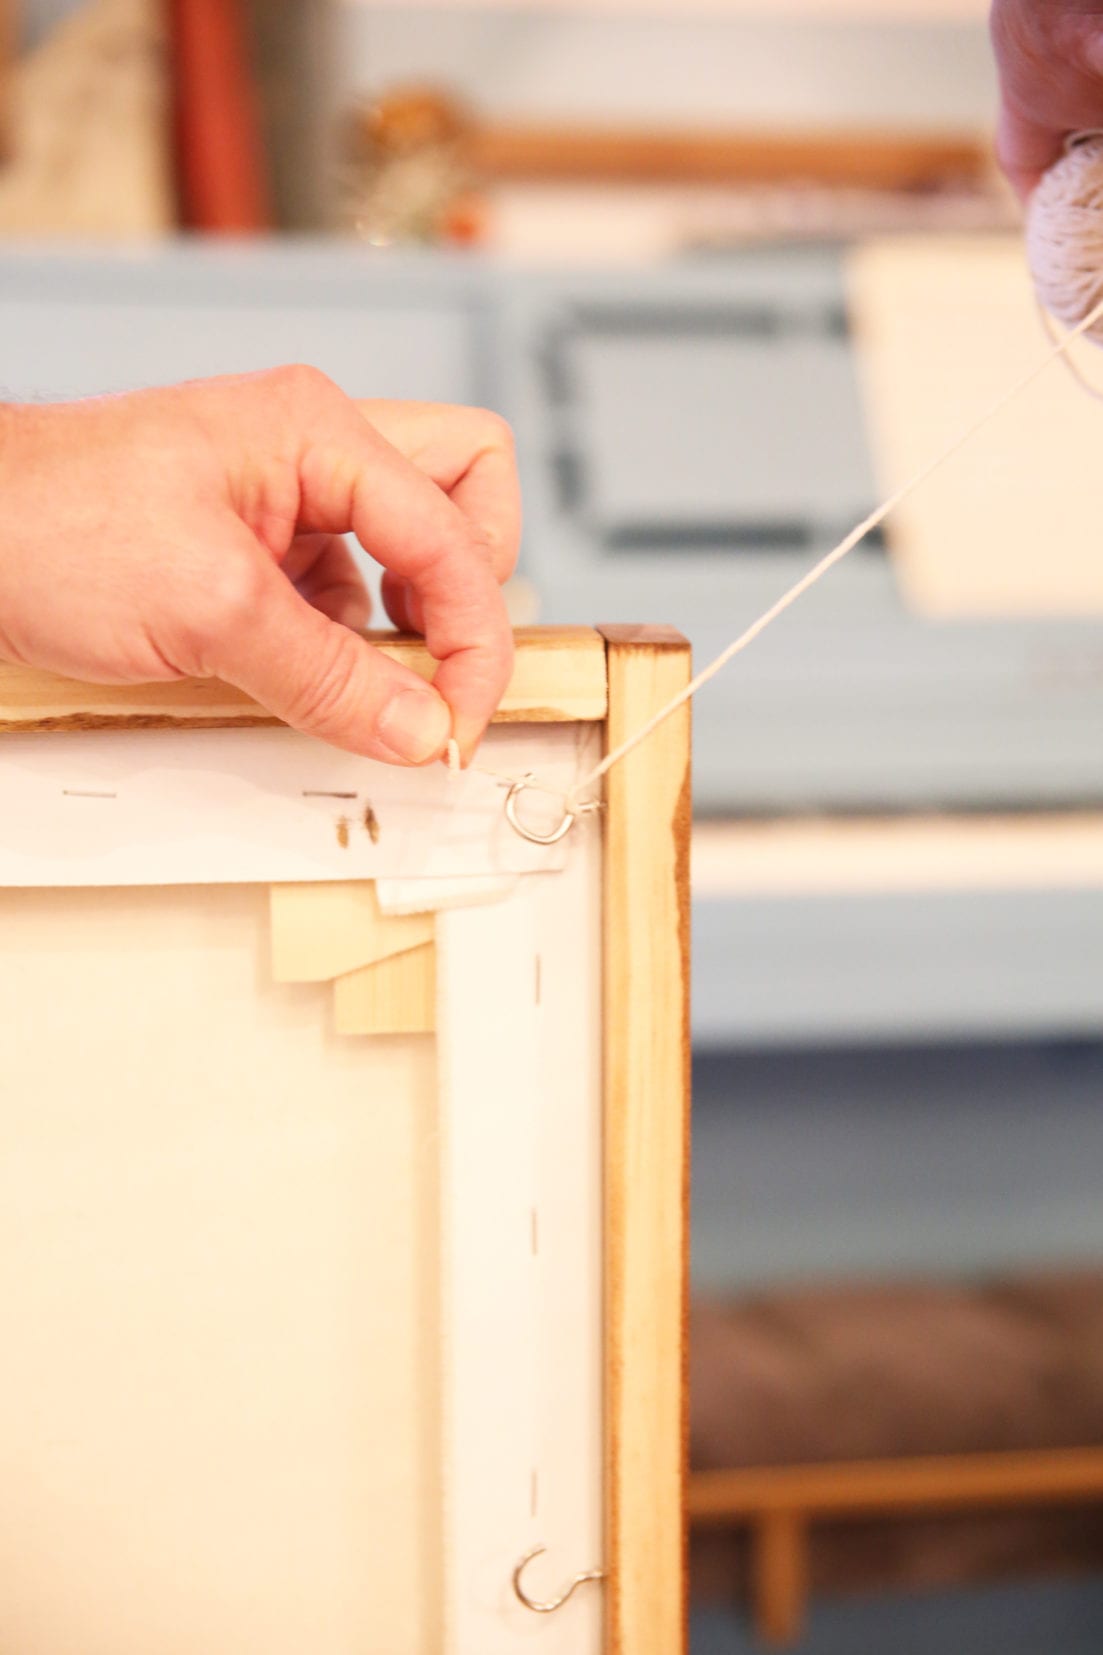
Depending on the size of your canvas or backdrop, map out the rows by measuring them out. We then marked each row with tape, and added hooks to the back of the frame. {See below.}
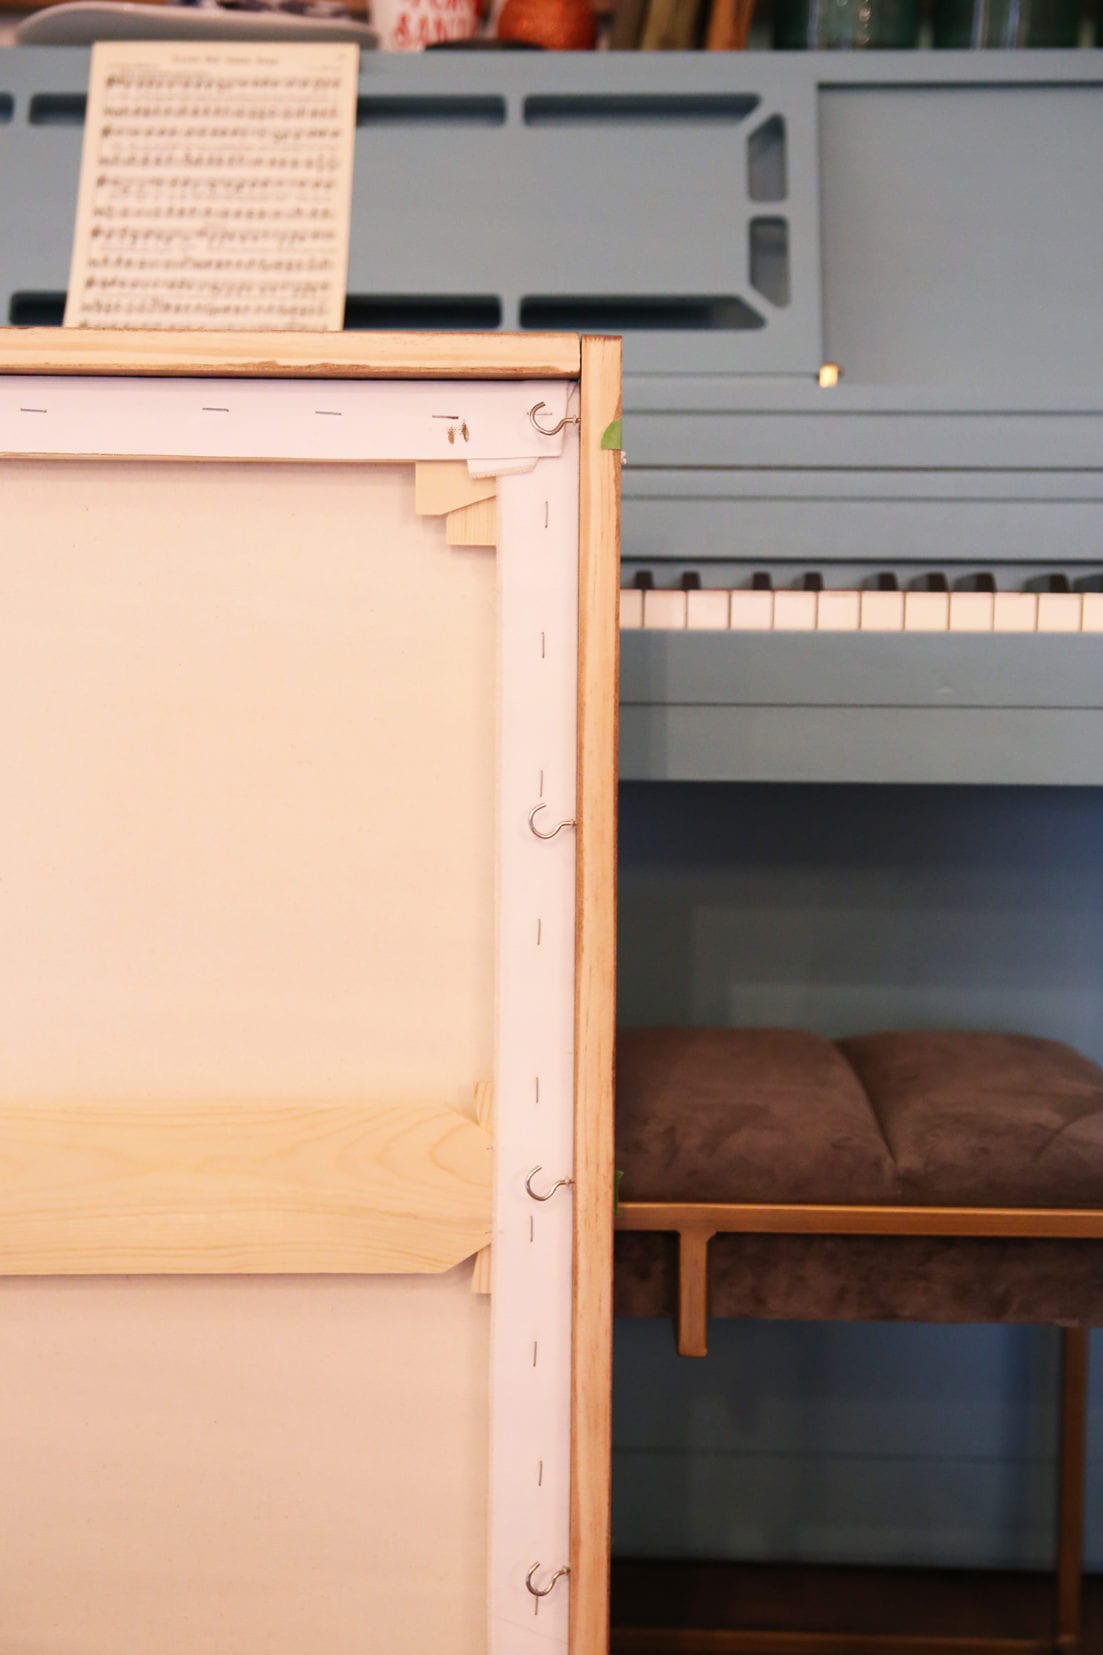
With each hook, we then added string, and strung them across in a row, on the front.
Then they were ready to hang!
Hint: depending on the twine you use, the strings may droop a little under the weight of all the envelopes or “gifts”. This is why we opted for paper clips.
You can also discreetly reinforce your envelope by using FrogTape® on the backs.
They work like a charm!
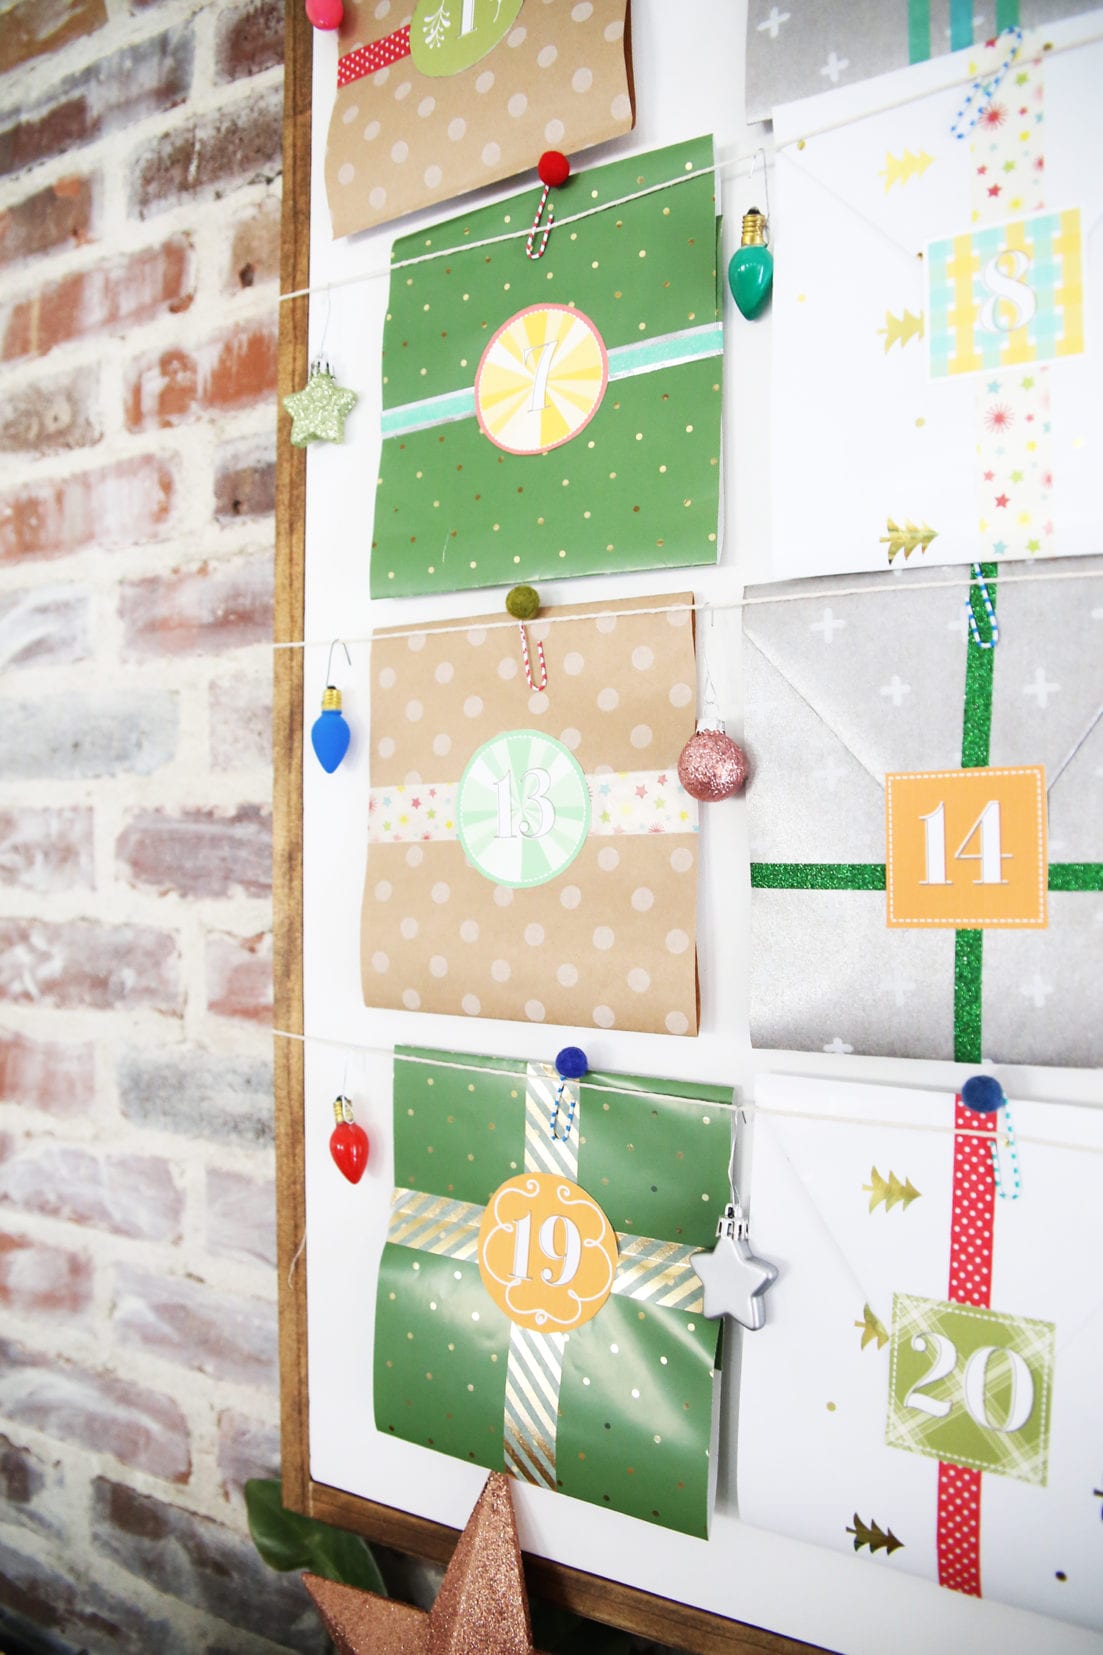
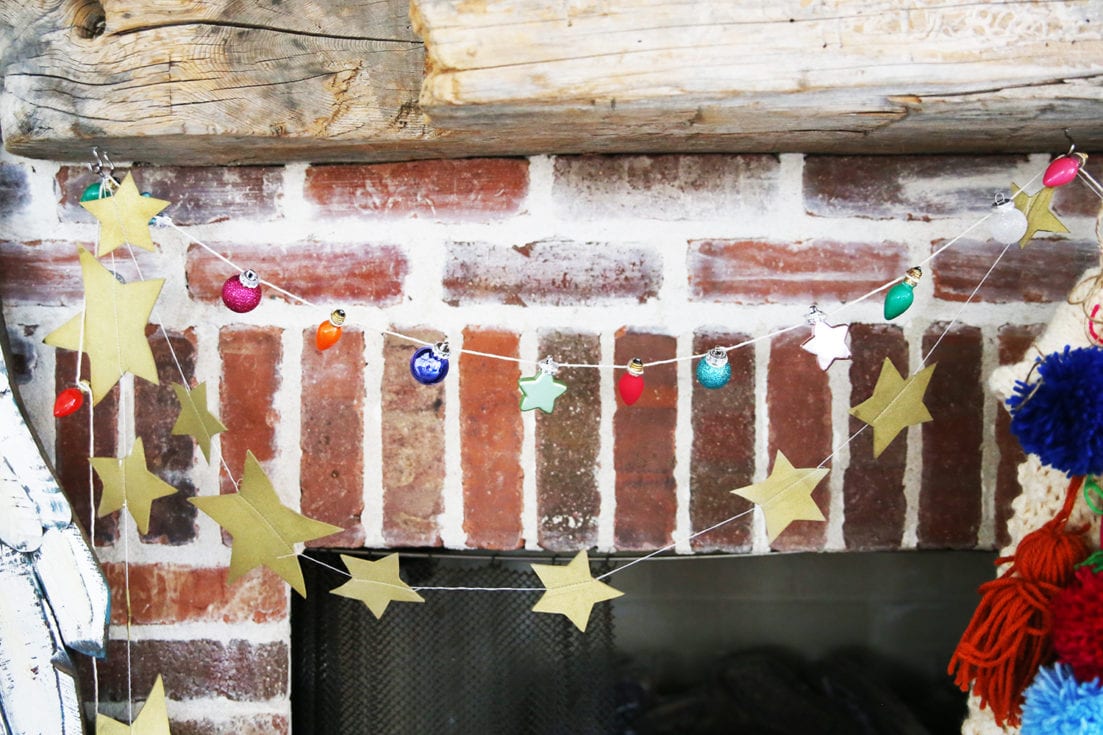
For embellishments, we added the ornaments and vintage lights, by adding hooks with hot glue.
They went seamlessly with the entire look.
We also made a small garland and mixed it up, by adding ornaments and lights, wrapped with twine to string on the mantel. We simply glued them on with hot glue. Easy peasy, and the cutest little elements to add so much personality!
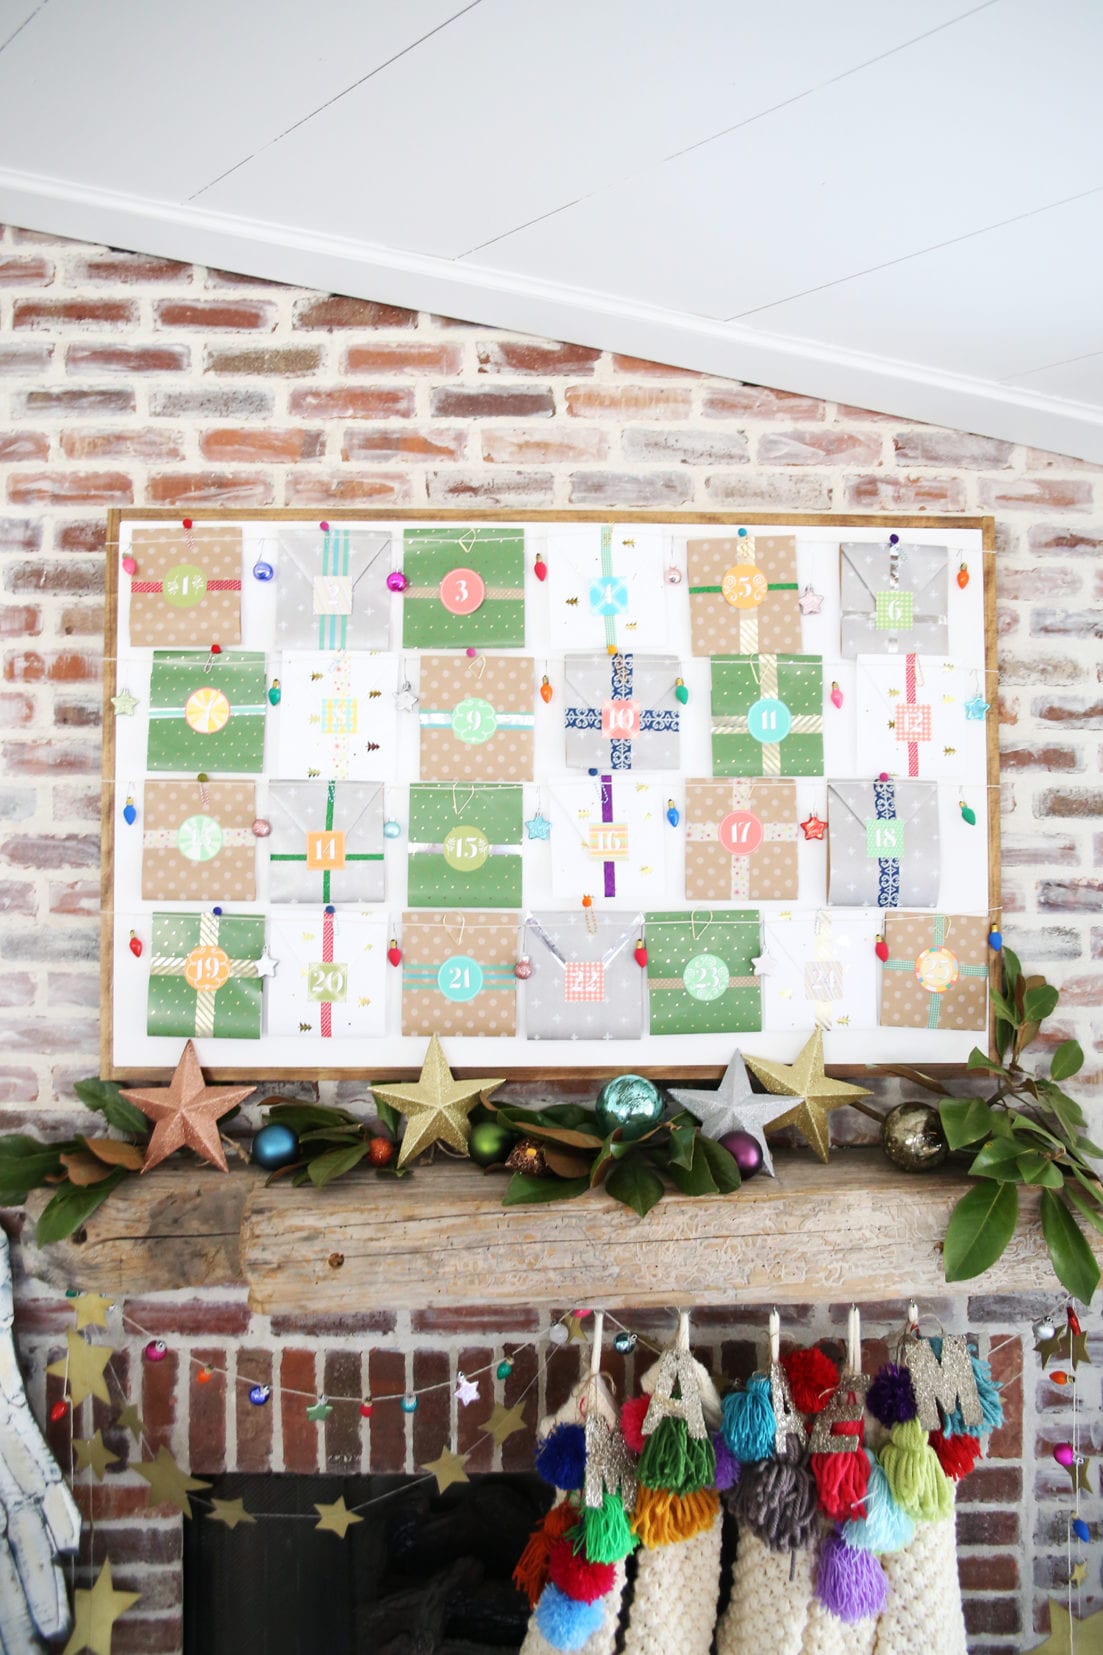
We love Christmas decor with meaning, and especially this advent calendar to count down the days with purpose in our family.
The kids love the conversations we’ve had so far, and we can’t wait to keep introducing new topics.
As always, let us know if you try it.
We’d love to hear!
Be sure to check out what Nesting with Grace did with the box we sent her!
Thanks so much for tuning in. Be sure to check out the other fab sites participating in this challenge… and see what we all sent each other! We plan to host more of these in the future, with versatile combos and themes and items sent, so be sure to stay tuned for more Mystery Box Creative Challenges coming your way!
We can’t wait to see what they came up with! Be sure to check them out.
Have an inspired day!

Ummm.
I’m speechless.
Truly.
I think I’m declaring you the winner. Hands down. You are amazing my friend!
Merry Christmas!
karianne
BAHA you’re too funny. Thank you for participating, Karianne! Your door is gorgeous.
So creative! LOVE the advent and alllll the fun colors!! THANKS for coming up with such a fun idea!
XO
Thank YOU for playing along with our crazy ideas! ;}
You are seriously amazing! I love the advent calendar!!! And all the color is just so beautiful… I am having so much fun doing this with you all and hope you have a wonderful Merry Christmas! xo!
Your advent calendar is GENIUS! and so YOU! I love all of those colorful vintage lights!
Great job, friend!
xoxo