
how to stretch your own canvas
Hello lovelies! We’re inching ever-so-closer to the grand finale with La-Z-Boy and the Ronald McDonald House in Nashville! In case you’re just now hearing about it, you can totally catch up. And we think you’re going to want to because we can’t wait to share the reveal soon. We introduced the idea behind the project…

And then shared more about it here with a few sneak peeks, and we’re honored to be participating in such a wonderful cause.
Installation began last week with a new look for the mantel. See the finished space with details + before and afters, here!
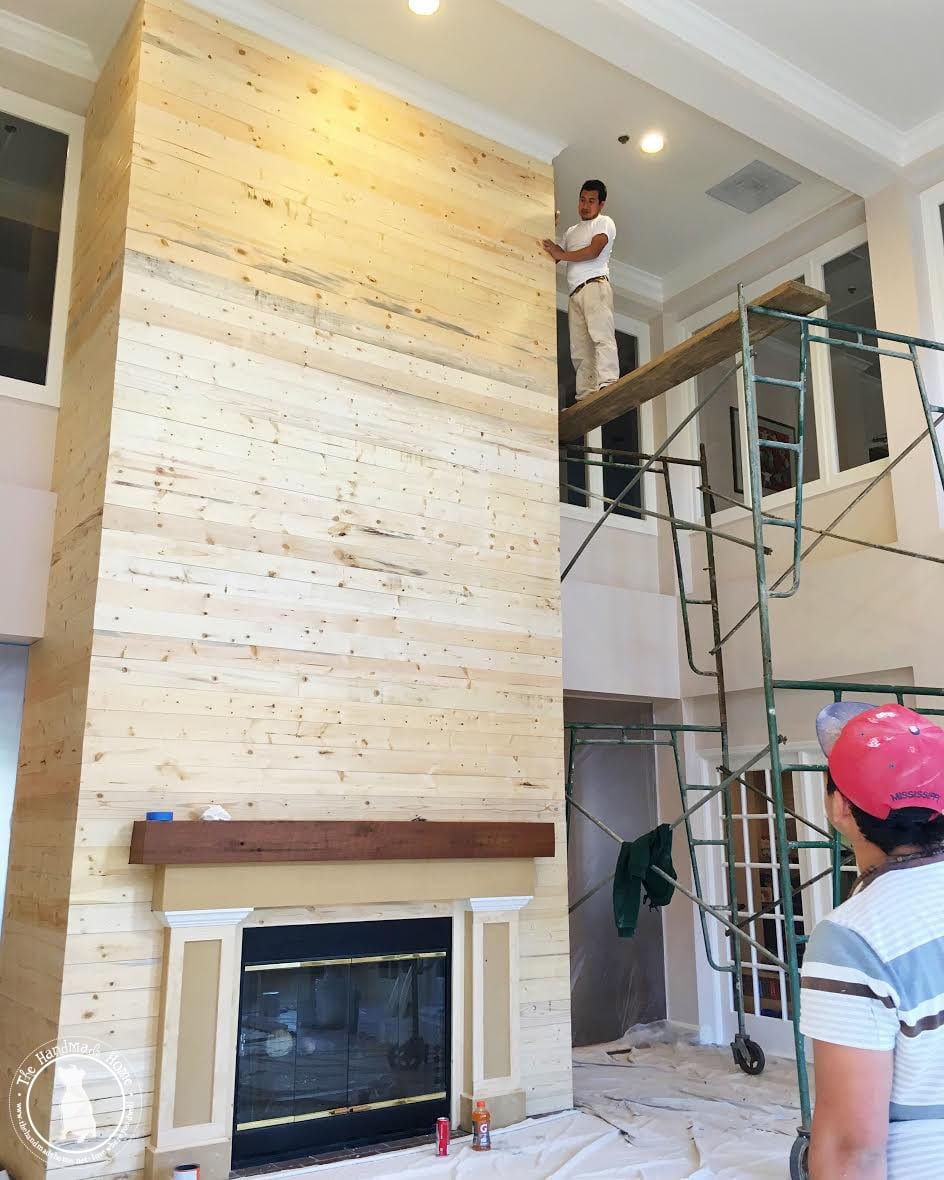
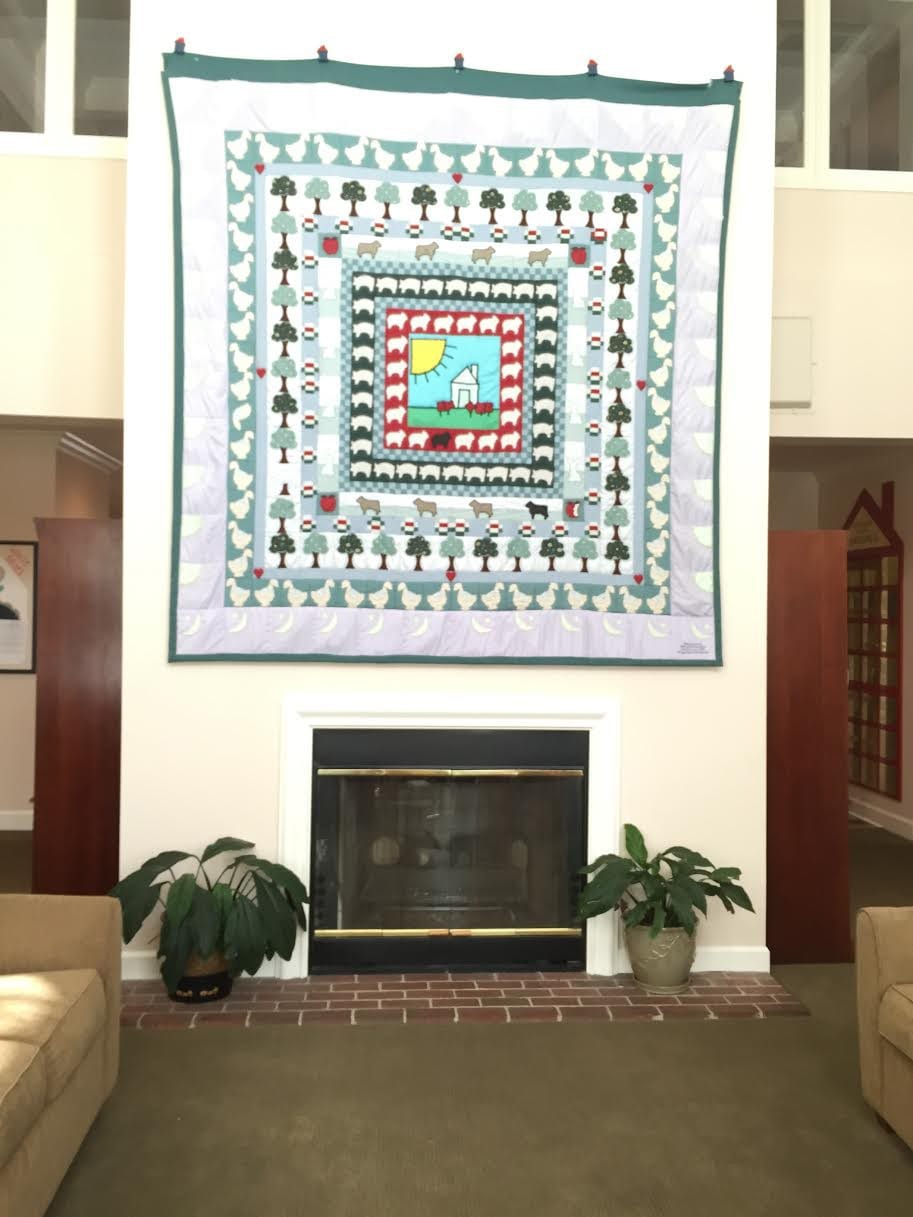
This family room was just dying for an actual solid mantel, and while that beautiful quilt is going to another great location in the house, we were glad to bring in something colorful and fun to the center of the room for a bit of that Handmade Home touch. And it needed something big. Like, at least six feet tall, big.
Problem alert: Where on earth where we going to find {an affordable} a six foot tall canvas?

The trend of painting on various surfaces is great, and totally useful. But there’s something beautiful and timeless about a hand-stretched canvas in the home. And this space called for that.
Today, we wanted to share a little bit of the lost art of canvas stretching. It’s actually quite a common practice amongst the artist crowd, but we thought it would be useful to talk about why it can be beneficial in your own creations for your home. It’s a little snippet to keep in your back pocket if you ever feel like tackling such a task.
We use this process with most of our own oil paintings and art within the studio.

This is something one of my favorite professors taught us in grad school. One of those valuable snippets I’ve taken with me and practiced over the years.

I hadn’t stretched one recently, and I was pleased to find that it’s just like riding a bike. We needed a tall piece for this space, and we needed to keep it affordable. Stretching your own canvas is a great little skill to know, and there’s a learning curve to it all. You can save big if you plan on creating more than one especially with larger pieces, with a one of a kind look.

So here’s what you’ll need:
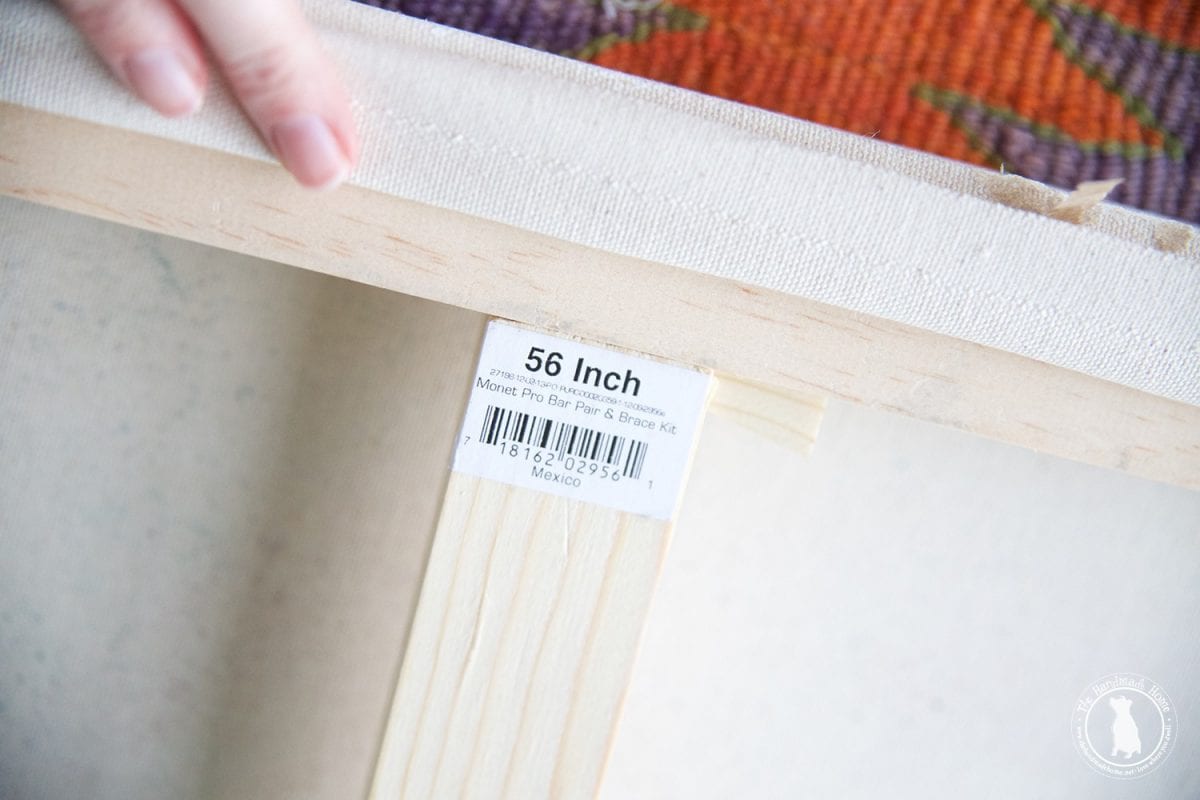
• A stretcher kit – Technically, you can build your own, but unless you’re quite the skilled craftsman, these particular ones come with a curved front, that help eliminate lines from your painting. They make for fairly easy assembly. You just need two parts {two lengths per selected part, which make the entire rectangle or square}. The key is to keep your stretched canvas from warping, so it’s usually best to go with kits so that the only issue from there is assembly. We ordered the Monet brand bars and were very pleased with the quality, variety and timely delivery.
• Mallet + carpenter’s square for getting your corners just right.
• A roll of un-primed Canvas – As we said, you’ll pay a little more upfront for the roll. But we can also think of quite a few projects we could try out with a roll of unprimed canvas, and it’s still cheaper than most fully assembled in much smaller sizes. It’s great to have on hand if you feel like creating more than one piece for your home. Canvas rolls come in different widths, so the wider, the better if you create larger sizes. We recommend you have enough give once the final measurement is in place, to wrap it around to the back. {see more on this in the photos below} Be sure to consider this when purchasing your canvas.
• Primer {double check to make sure it’s for the medium you plan to use} + large brushes {A better grade, standard paint brush will actually do just as well} + a large cup of water
• Staple gun – the old fashioned, hand held should work just fine.
• Some people recommend canvas pliers – but we had two sets of hands and didn’t use them. I’ve stretched many a canvas in my day and have never used them once. You may also want to use a level to make sure it’s as precise as you can get.
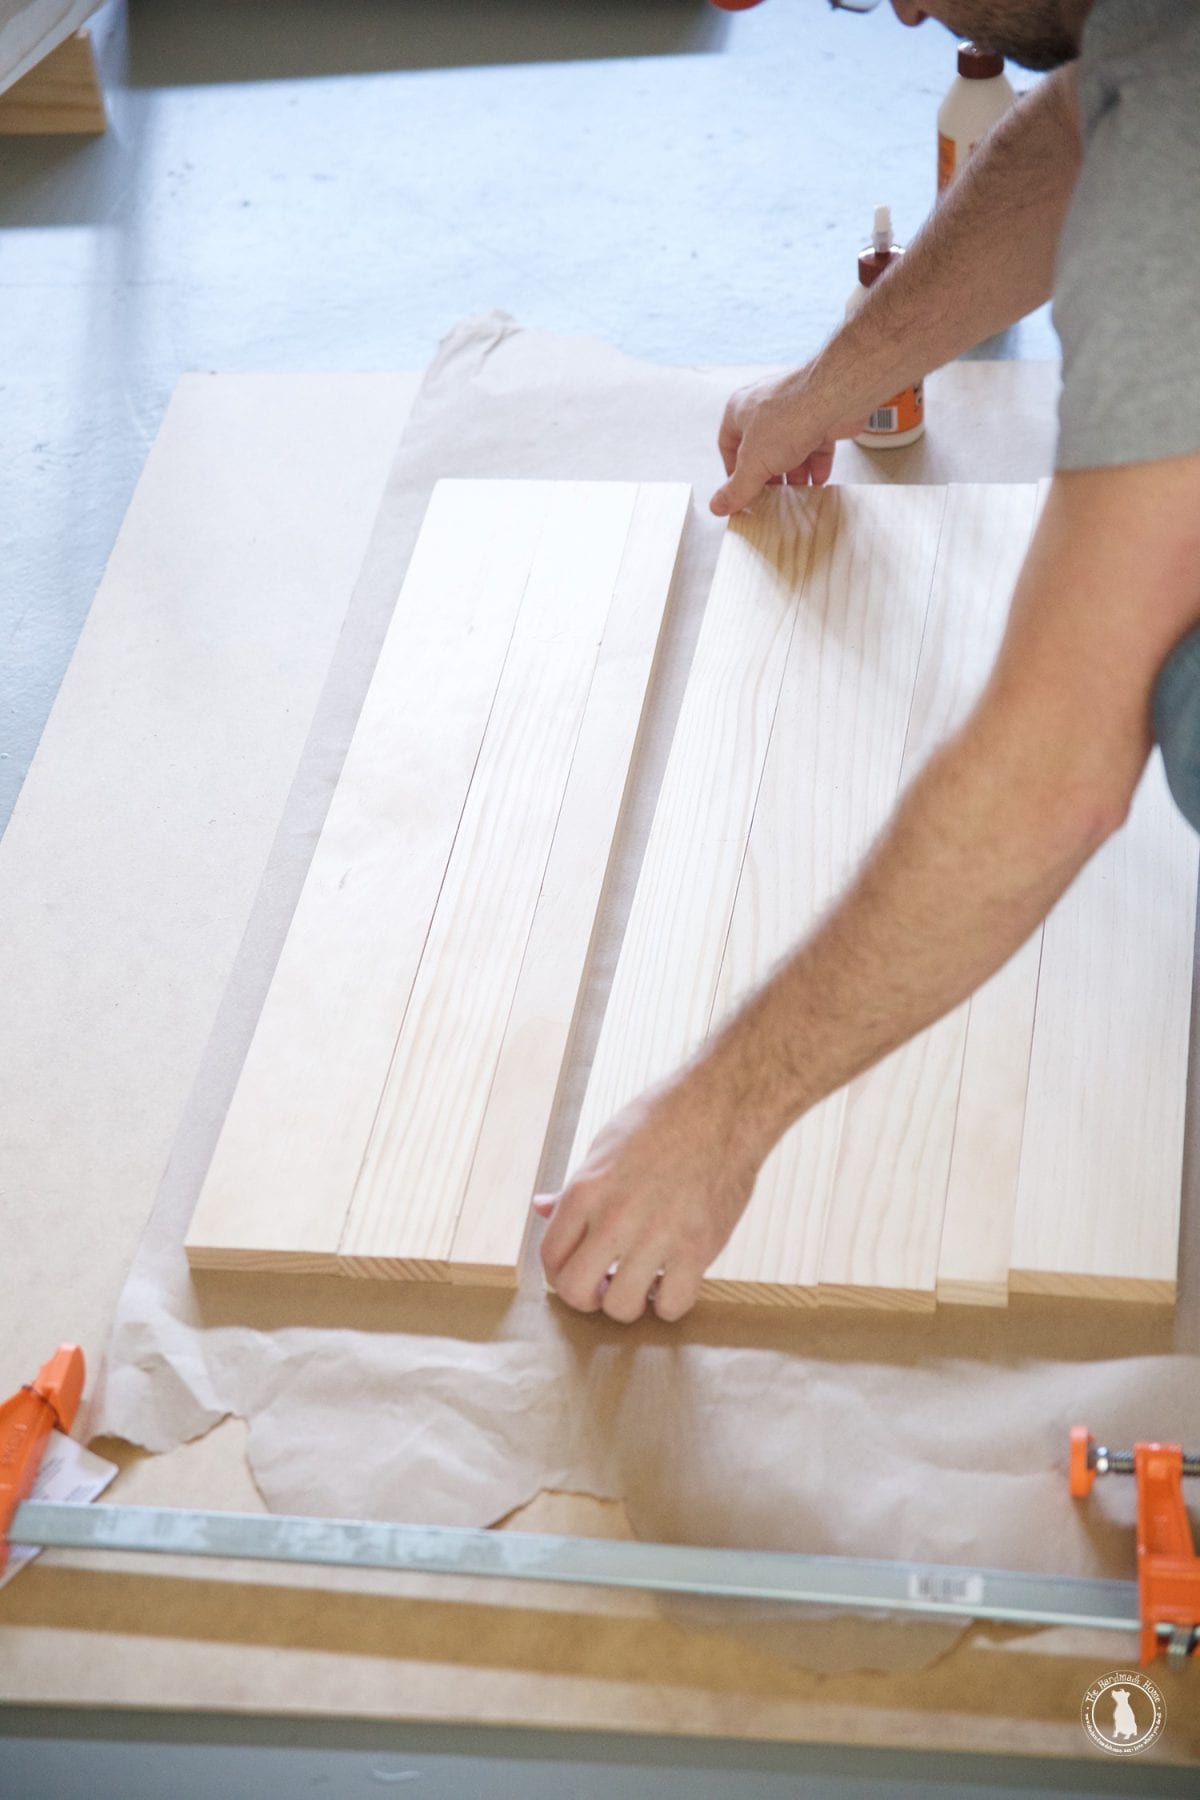
First things first: When you’re ready, set your bars out on a clean, large surface. We used the garage because we’re fancy like that.
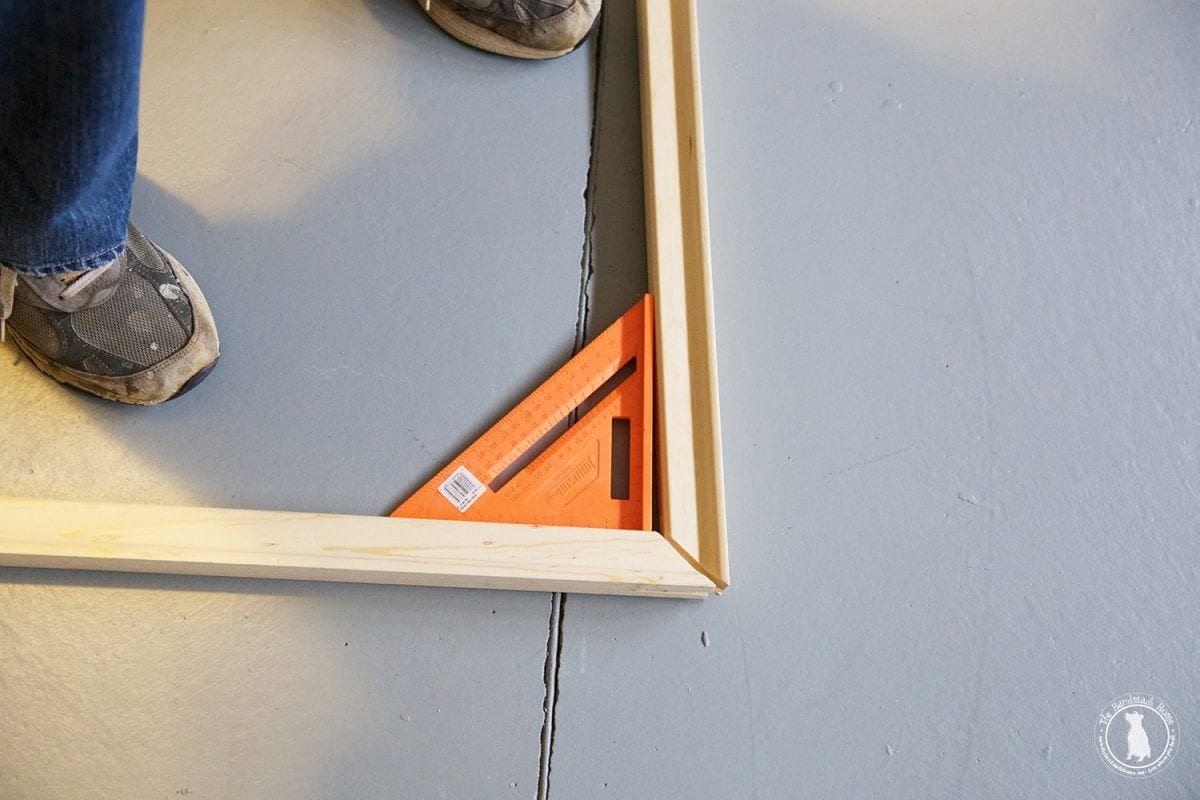
Most kits come with instructions, so be sure to check those out, accordingly. But they’re a little vague and only pertain to the bars, so that’s where our tutorial comes in. Line up each piece, sliding them into the little angled slots. It will probably take a while to get them precisely square, and this is the hardest part. Two people for this job definitely helps speed up the process.
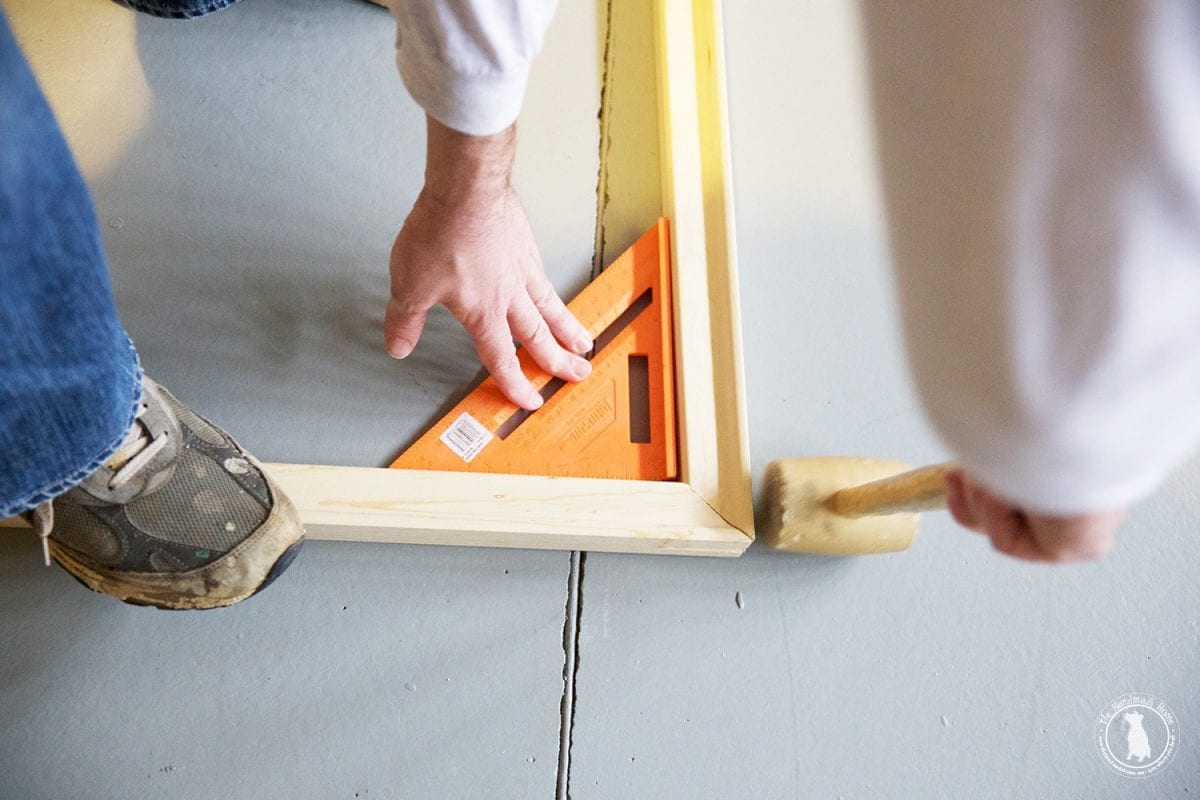
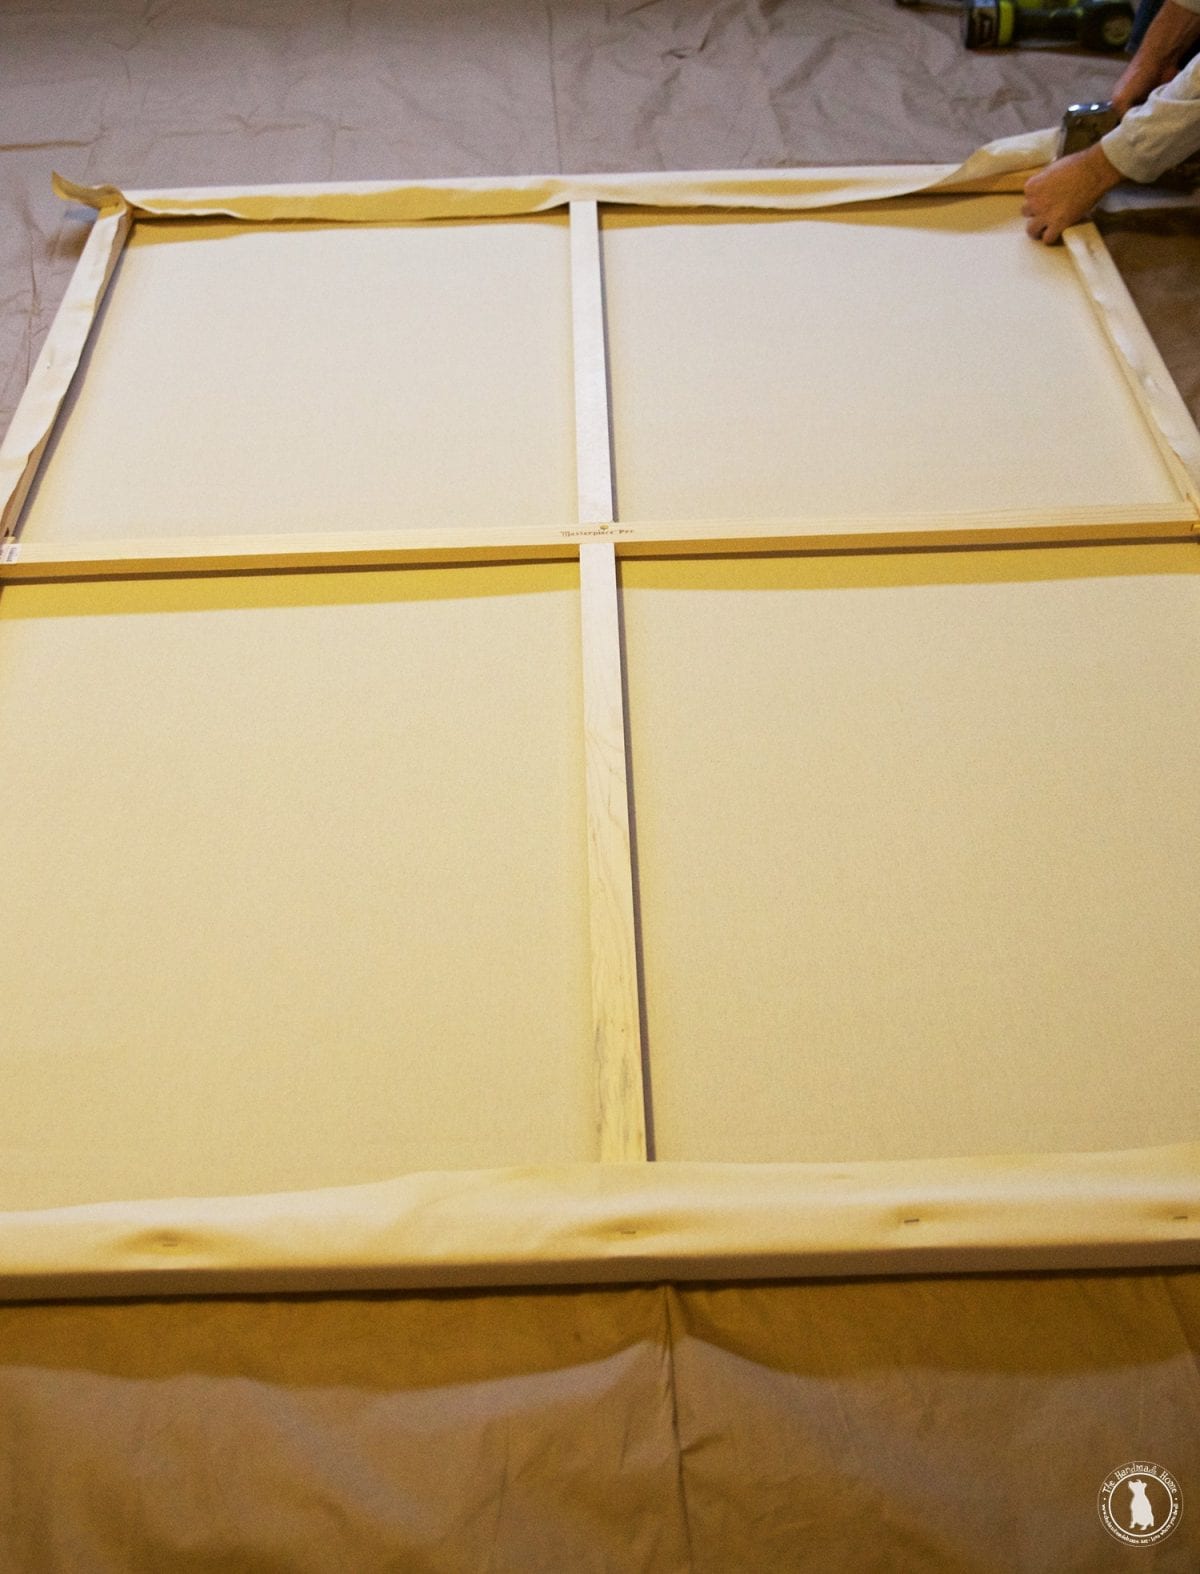
Use your mallet, and right angle ruler to help getting it just right, and when it’s just the way you want it, add your cross bars.
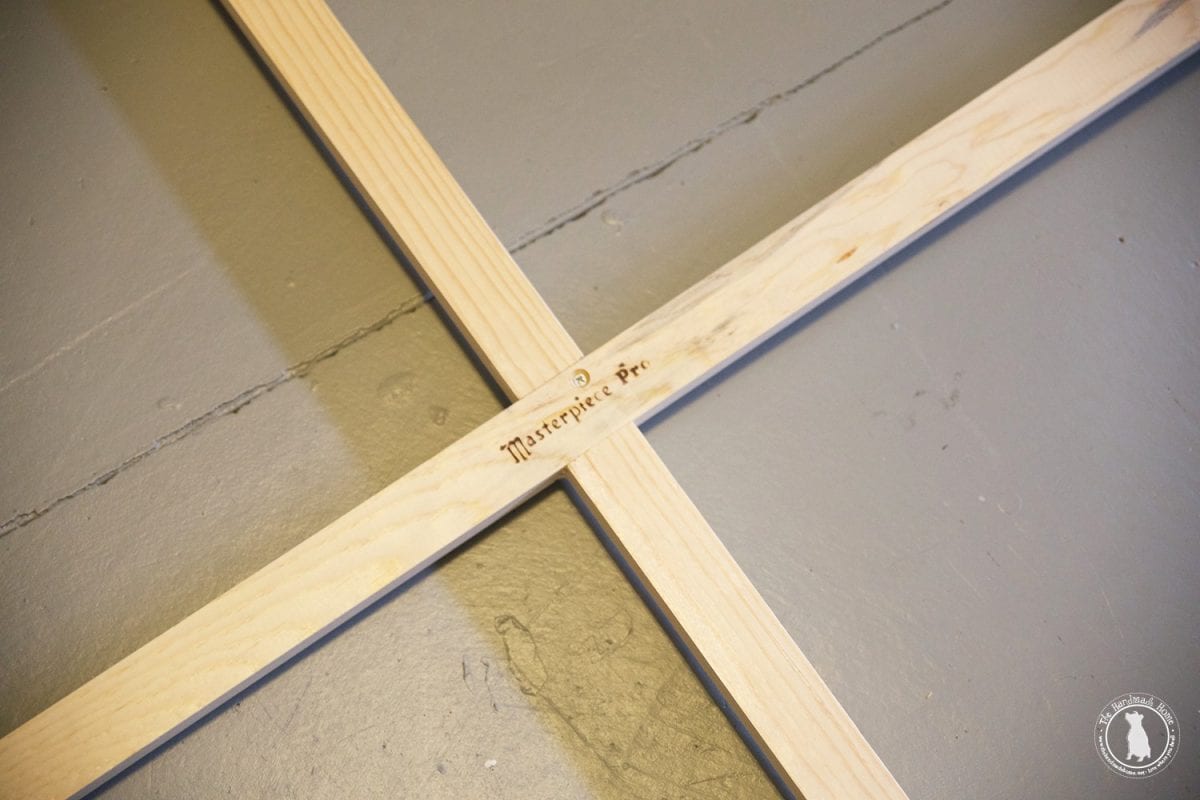
For this particular set, {these images below of the wedges and cross bars are out of order, so just pretend like the canvas is not in place yet – our hands were busy at the time} the cross bars go in the center, and then they literally wedge in the recesses of the bars, securing the crossbars in place. This helps keep your canvas from warping.
Hint: one final step we suggest not pictured here, is to measure from one corner to its diagonal corner and then the same on the opposite side. If your piece is squared, then the measurements should be the exact same. It helps with this process!

This adds support to really large canvases, and helps keep them from warping, later.
Once your crossbars are in place, and the final piece has been secured in the corners with your mallet, and you’re happy with the stability of your fame… it’s time for the fun part!
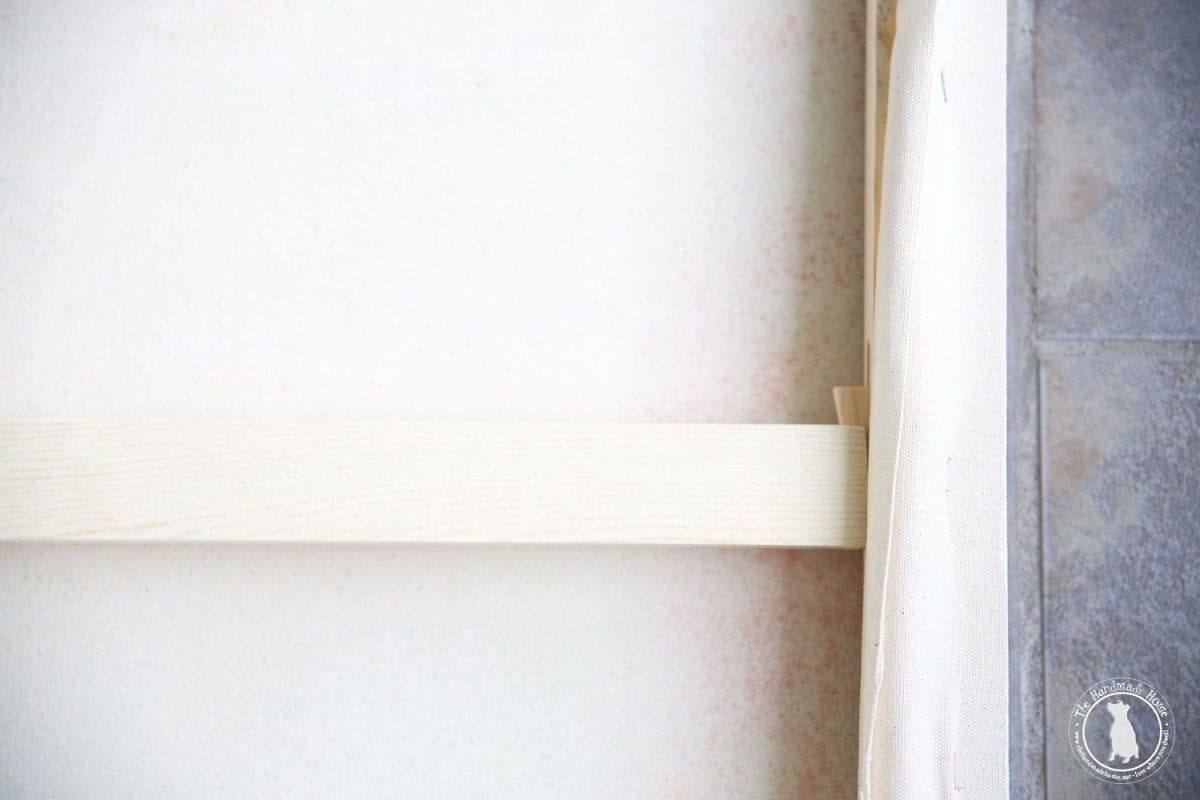
Once upon a time, this part scared me. If you’re trying this for the first time, we definitely recommend starting with a smaller piece because it’s easier to control and gain confidence. If you have a larger piece like ours, be sure to have two pairs of hands and an extra set of eyes. Lay your canvas down on the correct side {Double check if your bars have a curved edge to help with the final product and make sure said curved edge is facing down} on top of the rolled-out canvas.
Double-check again to ensure the frame is still square now that you’ve moved it to roll out the canvas.
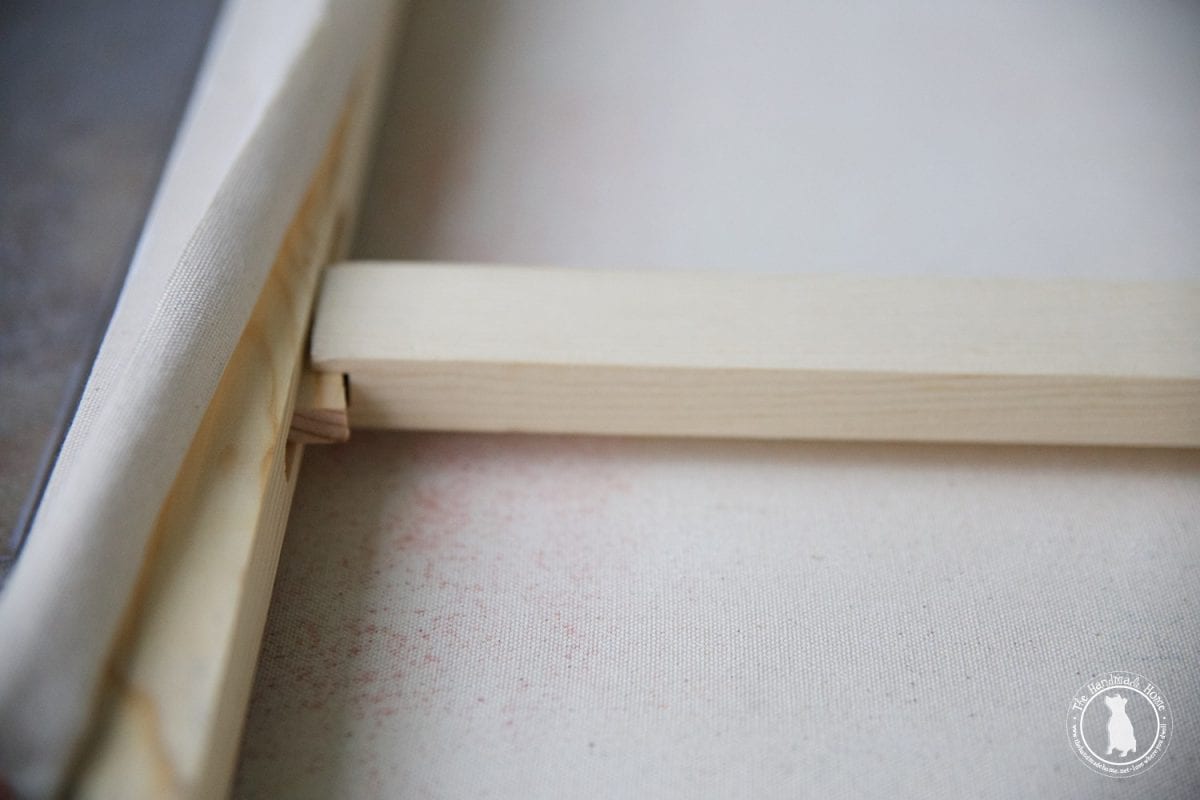
With the canvas, you should have a little give on each side. Enough to wrap each edge around to the back to secure it there. We made a little diagram below to illustrate it, but selecting a starting point, lightly pull around each side, pulling the canvas around to the edge of the wood. Secure it with your staple gun.
Two things are important here, and this is where another set of hands comes in handy for those larger pieces: There should be no puckering as you do this, so only pull lightly. And each time you pull, repeat that pull on the opposite side. Almost like a mirror reflection. So, if you’re looking for a starting point, begin at the number one and staple. Then, find the one on the other side of the diagram, and stretch and secure that side next. Then the two, and two. The three and three. Gradually work your way all the way around {you’ll have a lot more staples than just ten, but you can basically fill in the gaps after the initial sides are pulled as you go. Just keep repeating the mirrored pattern you’re using}.

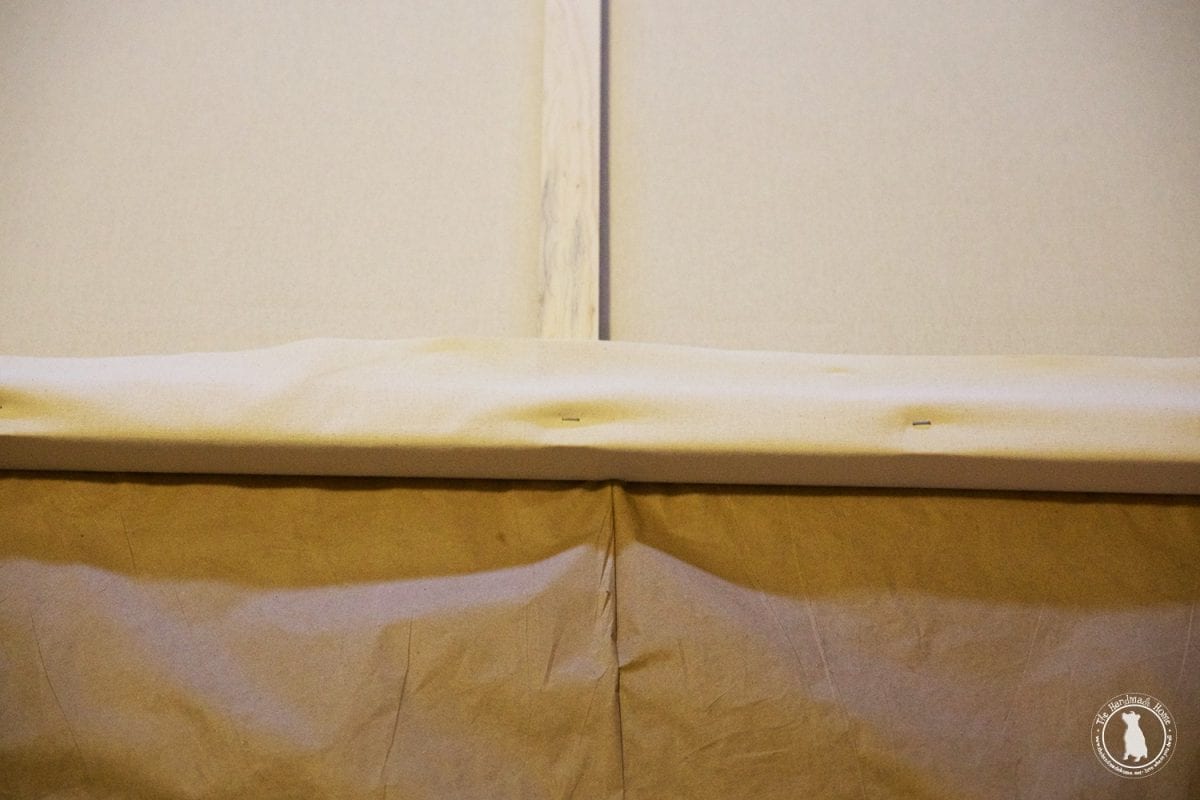
Keep working until you get to the corners, working from each side, and gently fold them under. Smooth with your hand as you go to avoid pulling too tight, or puckering the fabric. Remember to pull just tight enough to get the fabric over and have a little resistance, but not too much. The key is to work all the way around without too much pull on each side, but an even, distributed amount. This will keep your canvas steady and help it keep from warping.
Your corners can look a little like this – clearly, they don’t have to be perfect.

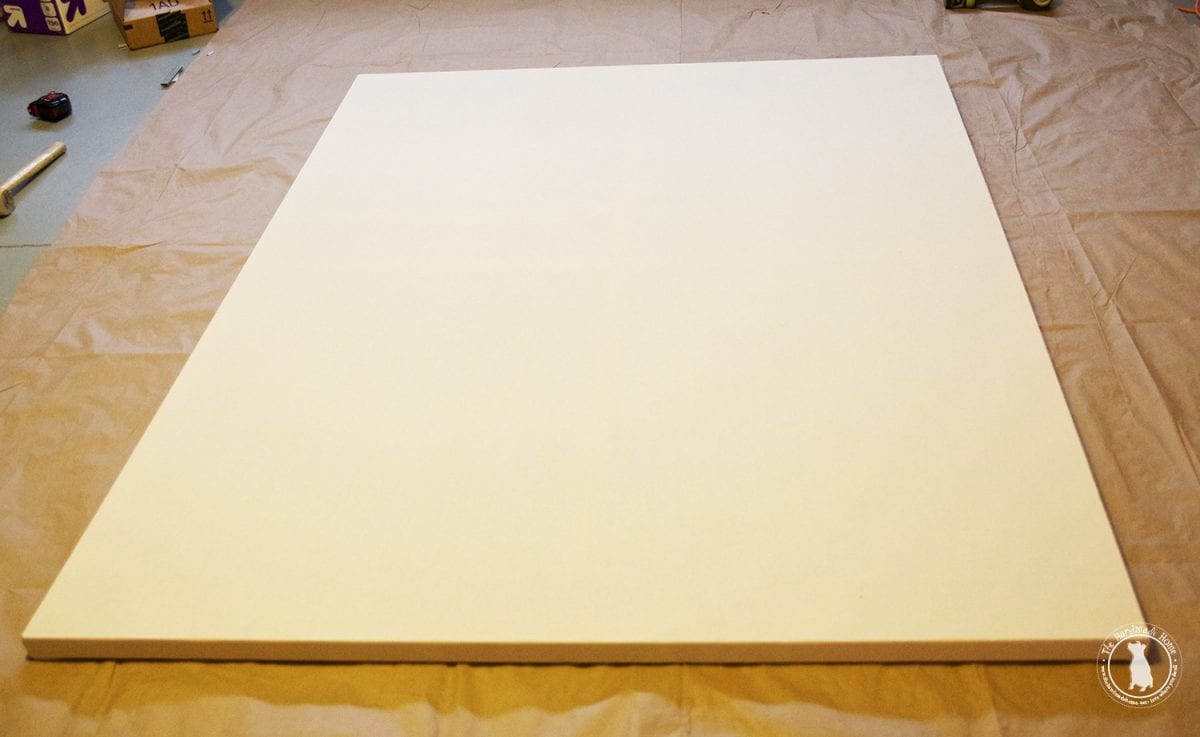
When you have enough staples in {they range from 1 – 2 inches apart but you should have plenty to stabilize your piece}, carefully flip your canvas back over. It should be pulled like a drum across the top, but it won’t feel as tight as one if you went with a really large size. Just right enough without too much give in between. Applying the gesso will finally tighten it all up all the way, and prep it for paint.
From here, break out your gesso, {primer} and brush.
Depending on your gesso, it will be super thick, and you may want to work a little water into the mixture to stir before you begin. We started out with working a little water in, and then dipping our brush in water as I went to help thin it out. We always say it’s better to have three thin coats than one to two thick ones. Depending on the weather, you’ll want plenty of drying time in between, so we let ours rest overnight in between each one.
Once it’s dry, you can even use fine-grit sandpaper to sand out any major lumps in between, so it’s not the end of the world if you miss something on a piece so big. In retrospect, we probably should have had four coats. Just remember there’s always a benefit to one more coat, as long as it’s a smooth finish to paint on. This helps preserve the canvas over time.
This process feels a bit laborious, but we promise you’re almost done, and patience pays.
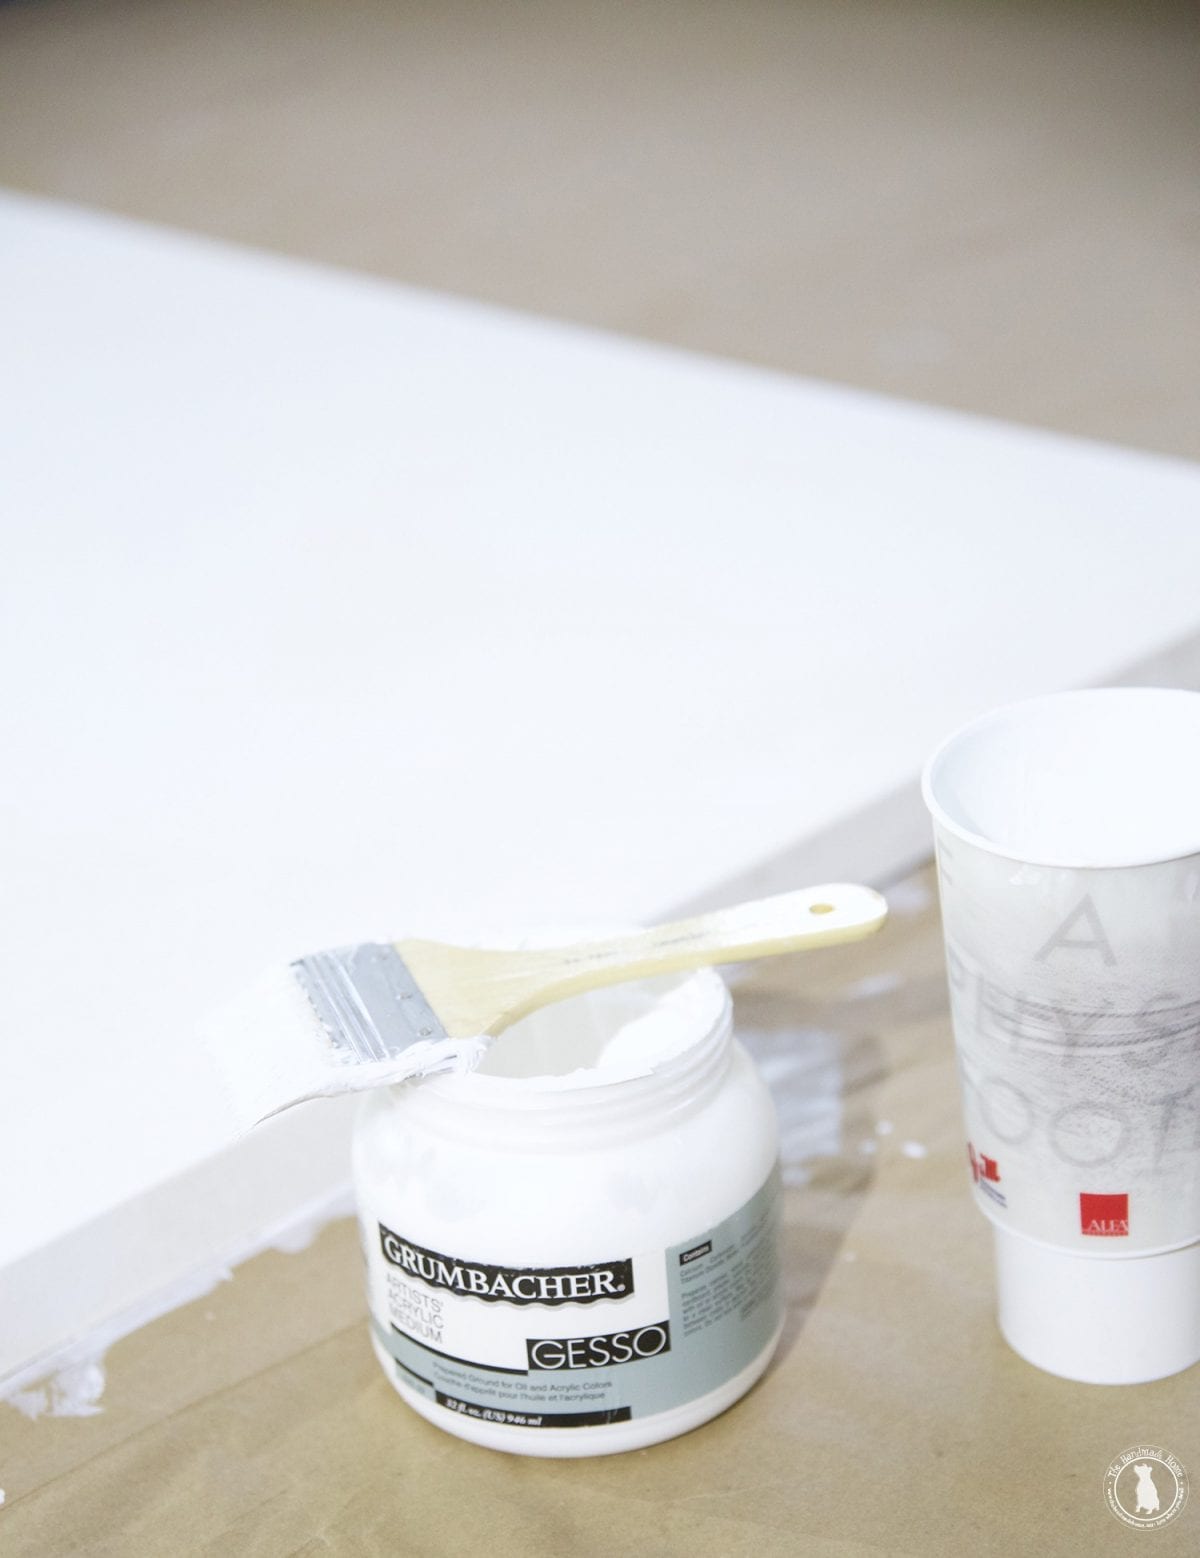
We used this gesso – It’s acrylic but is also safe for oils, which is what I used for the final painting. I linked the oil one above because it was a better value.
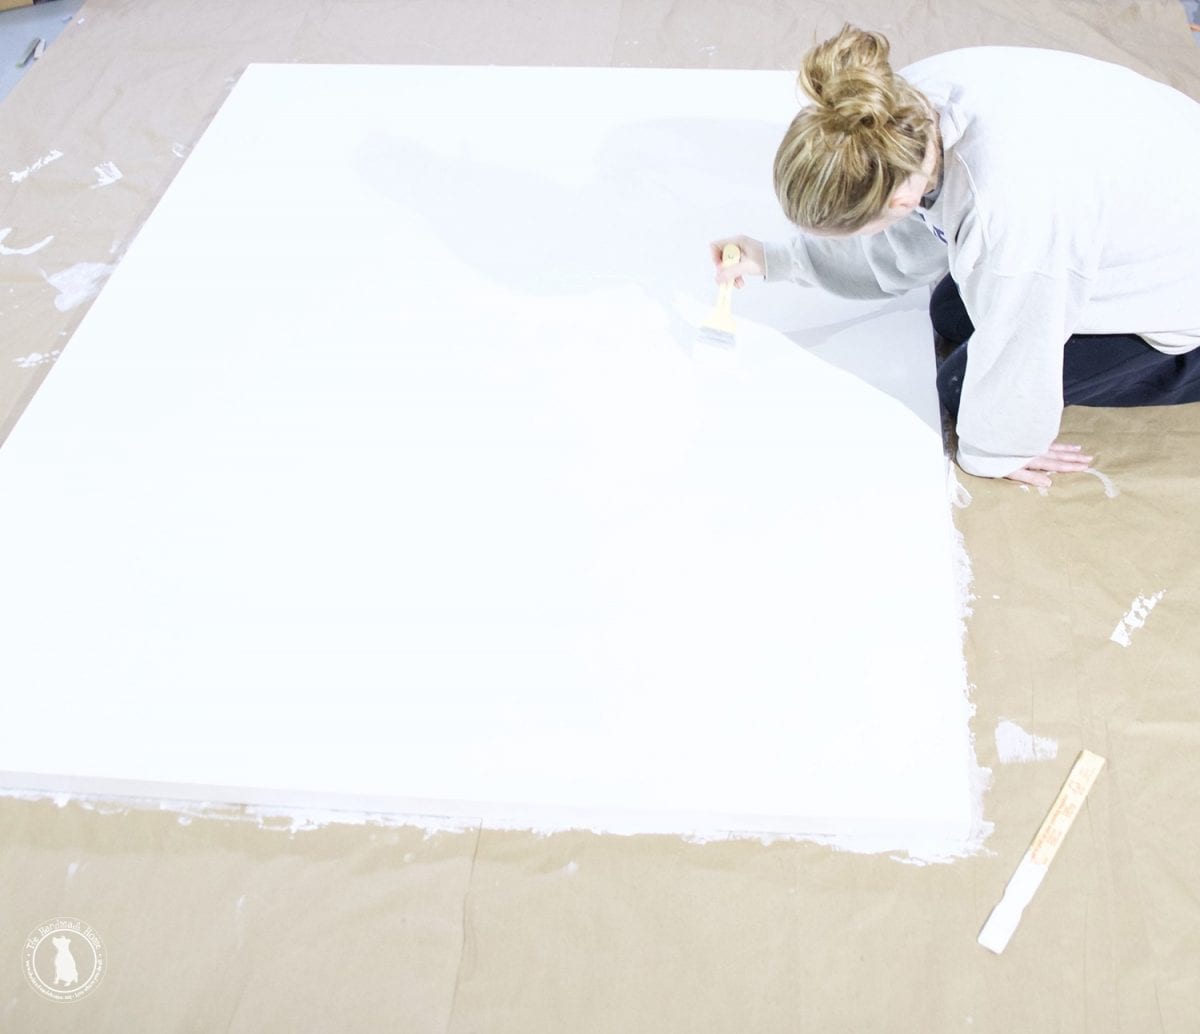
From the center of the canvas, slowly work your way out in each direction. Again, this evenly distributes the gesso, because once wet, your canvas will tighten. This ensures that it will tighten evenly and avoid warping as you work. Use a little water as you go, to help thin out the gesso and give it an even coat.
Also, you’ll totally want a drop cloth, some old clothes, some outrageous hair, and probably some coffee.
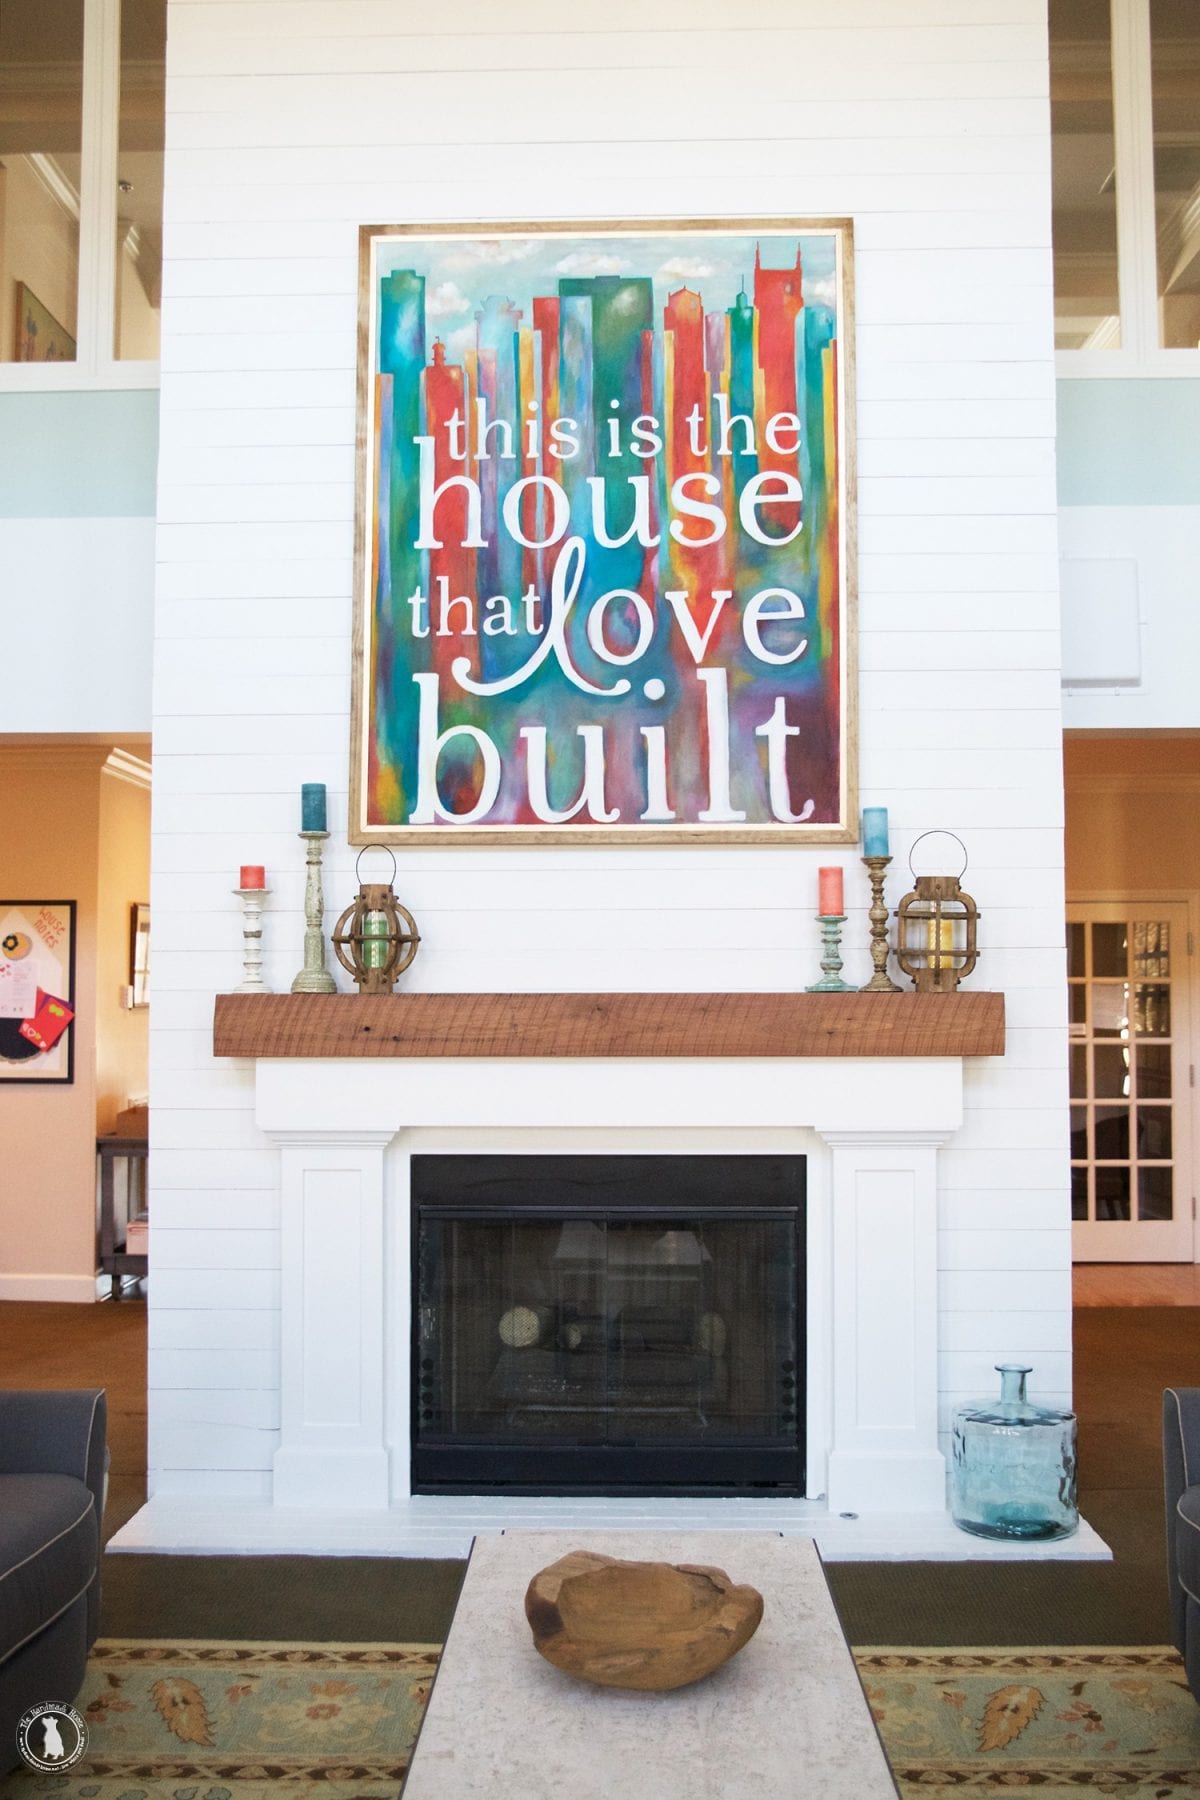
Tada! Once that third coat was finito and dry, we were able to hang it on the wall, and begin. This may seem like a lot of work, but it’s a great way to get more unique bang for your buck along with those large and in charge sizes in the world of art for your home.
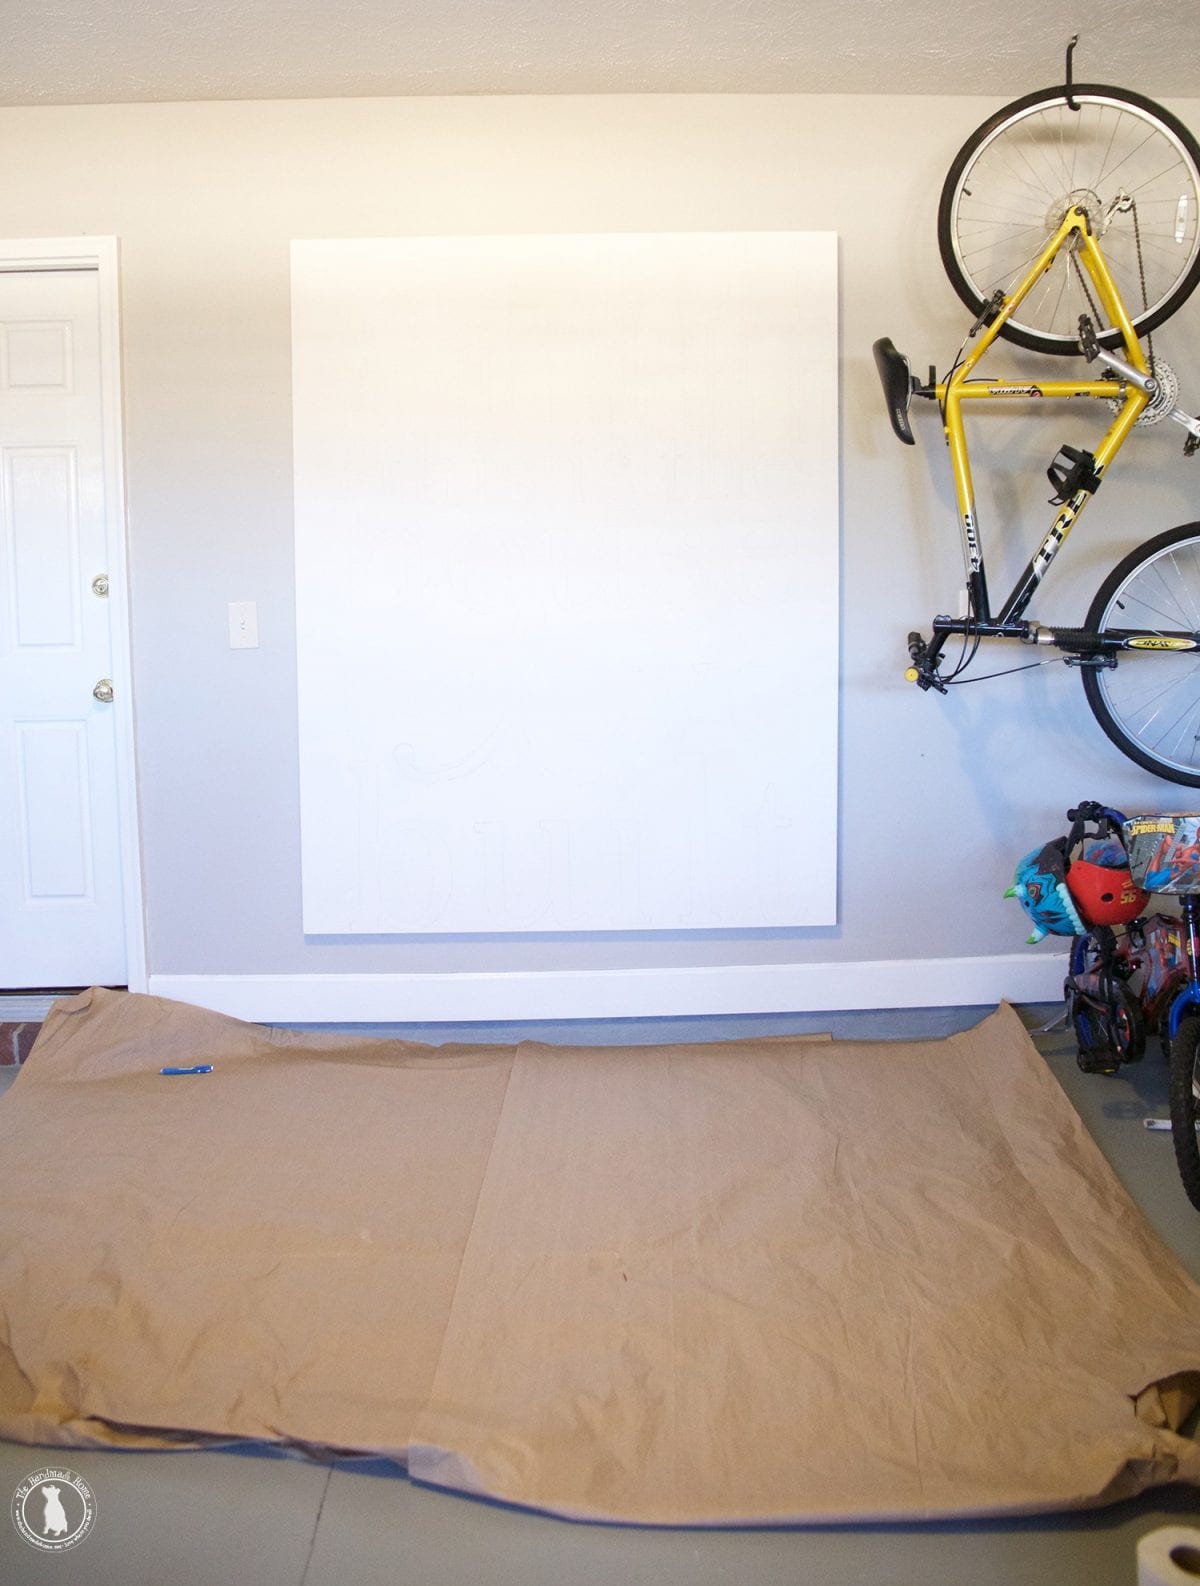
Isn’t our studio oh so fancy? It was even more fun explaining to the people who came to see our house during showings what we were working on.
Here’s a little sneak peek of the finished project. Since it was so large and in charge, we went with a fun, colorful mix between impressionist and abstract for the space. We can’t wait to add it in the room and hope it will brighten the day of all those sweet little patients.

We’re sending them our good vibes for quick healing, and we’re honored to be a part of this space with the wonderful La-Z-Boy for such a great cause. It’s our greatest hope that this space helps families feel nothing but welcome and comfy.
Stay tuned for the big reveal after our install next week, and more fun projects that are coming with it!
We hope you can use this little how-to. As always, let us know if you do! We’d love to see.

Have an inspired day!


As I was reading through your post it brought back so many memories ( not about the pooping birds because I’m kinda guilty of the feeding the birds thing) but about selling our townhouse, I just wish I could’ve given you a big hug! The showings are the worse especially with kids and and a pet. What we finally realized, was, after two price increases at our new development, that we were better off lowering the price equal to a few months mortgage because one way or another we were going to be out that money. I also started leaving nice refreshments-store bought, during showings with a note for them to enjoy and take their time thinking about living there. It sold within two weeks. I wish you nothing but the best and a speedy sale! PS I’m glad you and your children finally got to enjoy the birds?
Hi Ashley,
Great post! Although I don’t paint much anymore, I’ve always wanted to stretch my own canvasses and can certainly see trying it now that I’ve read your post. I do use Gesso though on my handmade paper mache bowls and thought I’d share a homemade recipe for the stuff. I go through buckets of it and store bought can be expensive in shipping costs. The stuff is heavy!
Homemade Gesso: 1 part white glue – 2-3 parts water – 6 parts baby powder and a bit of white acrylic paint to make it brilliant white. Store it in a big jar and be sure to mix it up before use. It’s easily painted on and sanded. For me it saves big $$$$$!
Goodness- thanks so much for that recipe! Fantastic!