
how to build pantry shelves
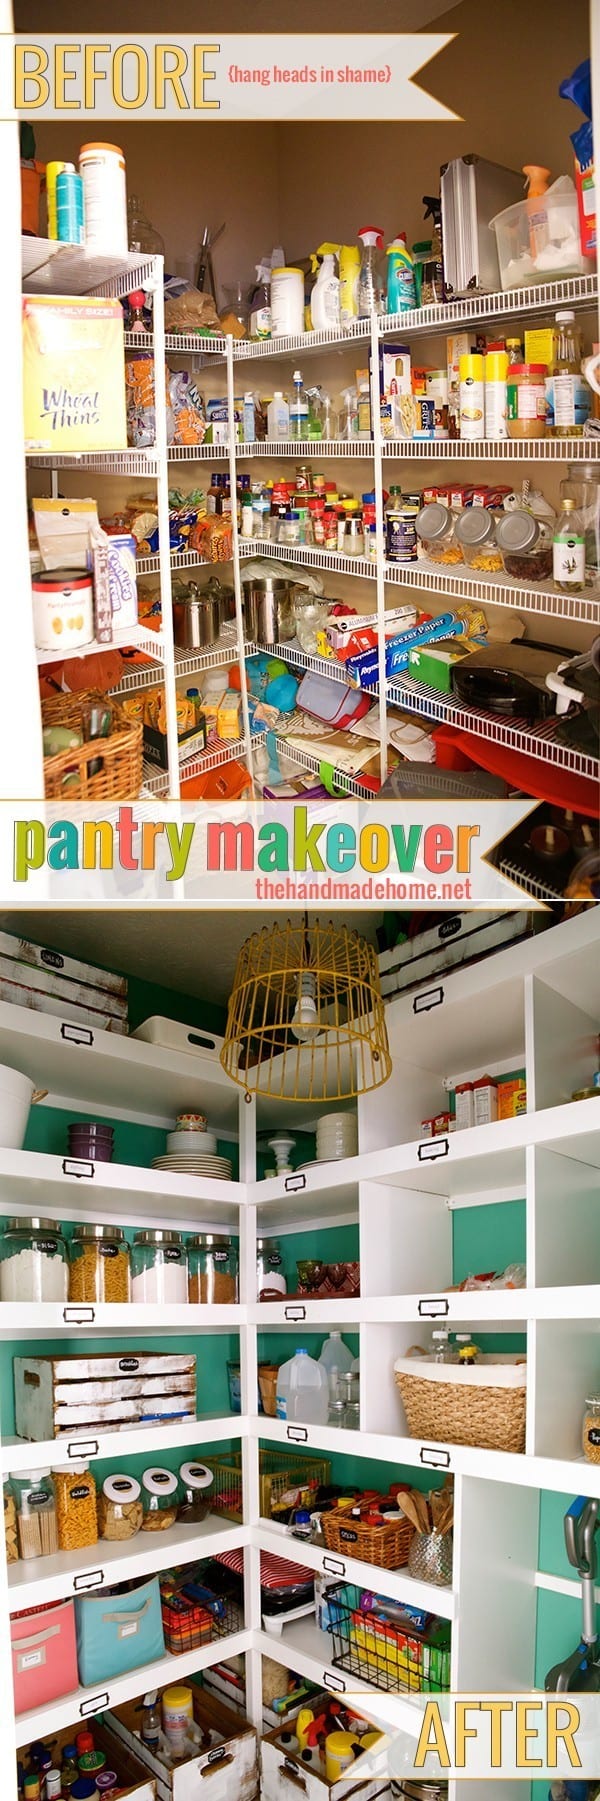
We all have our own dirty little secrets in our home… the ones just hidden out of sight. From the crazy closet to the horrible garage, we wince a little every time that door opens. Ours was the pantry. Our literal skeleton in the closet, and we pretty much had everything in the pantry… minus the skeletons. Which is what drove us to this post on how to build pantry shelves.
Sometimes we keep those sore spots because let’s be honest: They’re working for us right now and we don’t have time to change them.
There’s no shame in that, right?
Okay, maybe we did let it get a little out of hand. Such is life.
A needed makeover
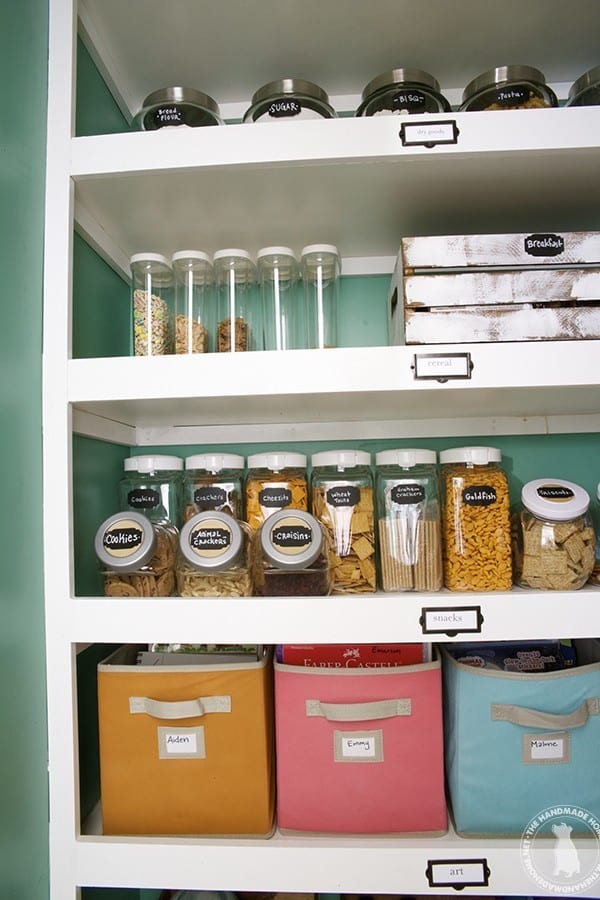
Our pantry makeover was our desperate attempt to change something. Our nonexistent system had gotten out of control, and we were ready for something simplified and different.
In retrospect, who knew the new system we have going would make grocery shopping so much easier?
Like a breath of fresh air in the menu planning department, we’re even amazed by how much smoother our meal prep rituals for the family can run.
 Not too long ago with the previous albatross of a pantry, we’d just guess at what to buy, because figuring out what we did and didn’t have with the old system was like searching for that lego piece your 5 year old had sucked up in the vacuum cleaner.
Ain’t nobody got time for that.
And most of the time we pretend we didn’t see that obscure piece that was sucked up into said vacuum cleaner. It’s one less casualty to the foot at night.
gutting and getting started
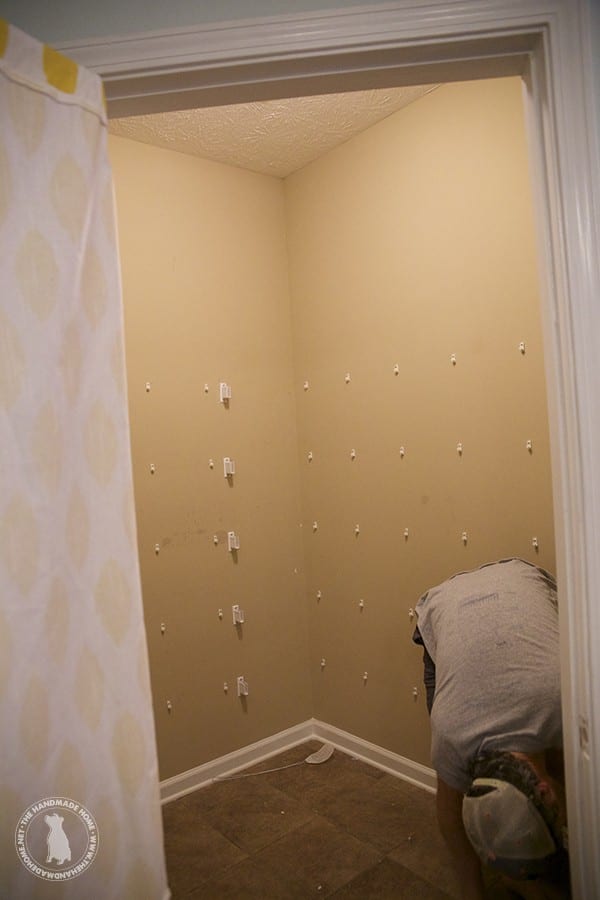
So we gutted it…….
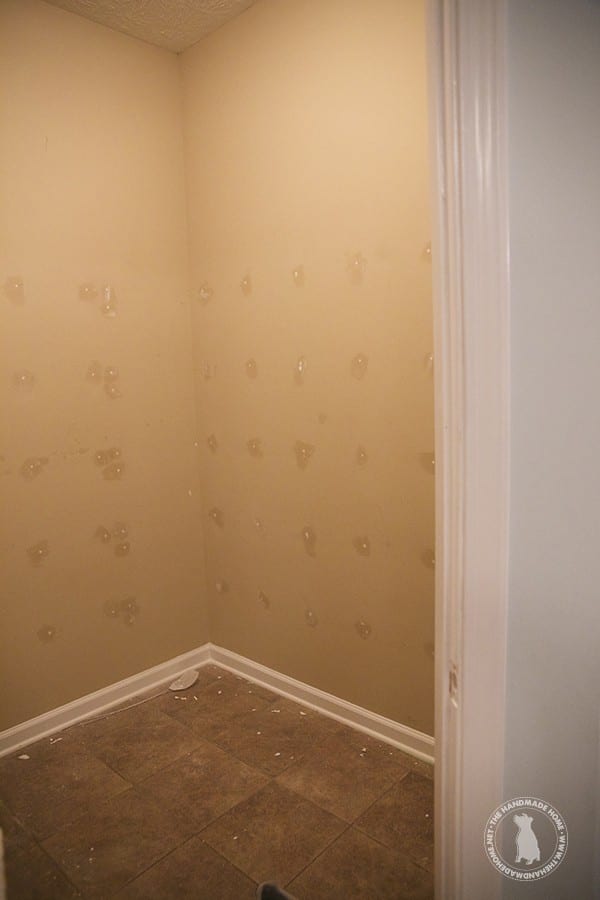
And spackled it……
And began building it back, new.
It may seem like a complicated build on the surface, but it’s easier than one might think. Today, we’re breaking it down in our how to build pantry shelves tutorial.
That, and there’s always the added benefit of demo day- making up for years of suppressed resentment over wire shelves, lost items, and that fabulous grease magnet known as matte builder’s beige.
Tearing things apart is kind of fun.
The supplies
• 3/4 inch thick melamine board • 2 x 2 x 8 pine boards • 1 x 3 x 8 pine boards (primed) • 1 x 2 x 8 pine boards (primed) • wood glue • #6 2 1/2 inch wood screws • finish nails • L brackets • caulk • quart of paint to match melamine board
helpful hint: how much of each of these supplies will depend on the size of your pantry or shelving space.
What we used:
• (10) 3/4(thick) x 15 3/4(w) x 96 inch (l) melamine board • (3) 2 x2 x 8 pine boards •(10) 1 x 3 x 6 pine boards (primed) •(14) 1 x 2 x 8 pine boards (primed) • box of 100 count #6 2 1/2 inch wood screws • large bottle of wood glue • RYOBI 16 gauge nailer • RYOBI drill • RYOBI impact driver • scroll saw • L brackets • caulk • quart of paint to match melamine board – minimal painting!
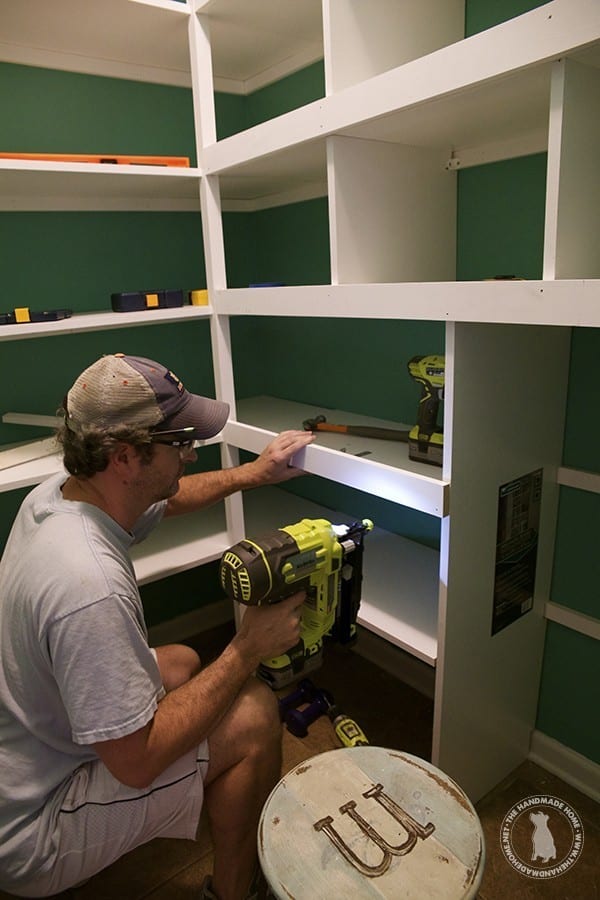
how to build pantry shelves – getting started
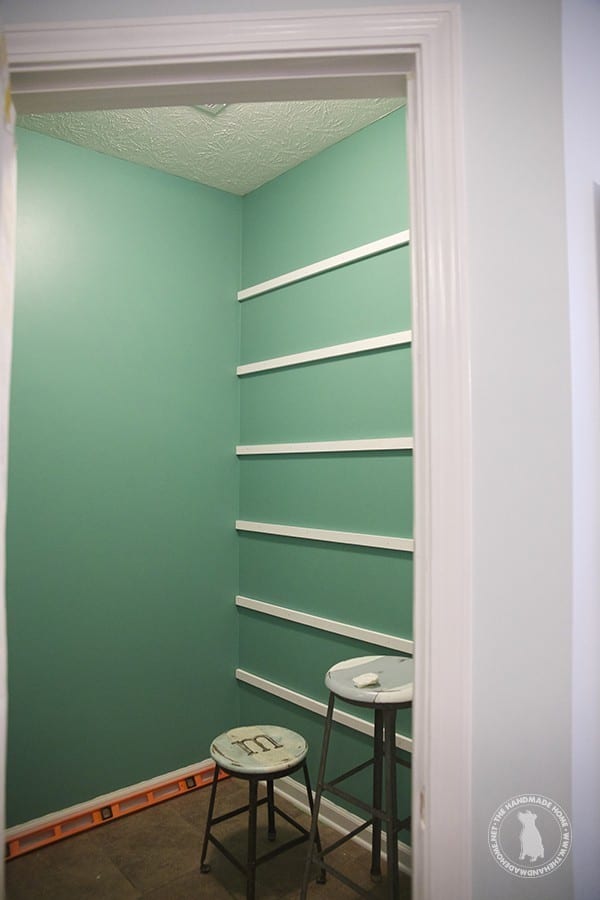
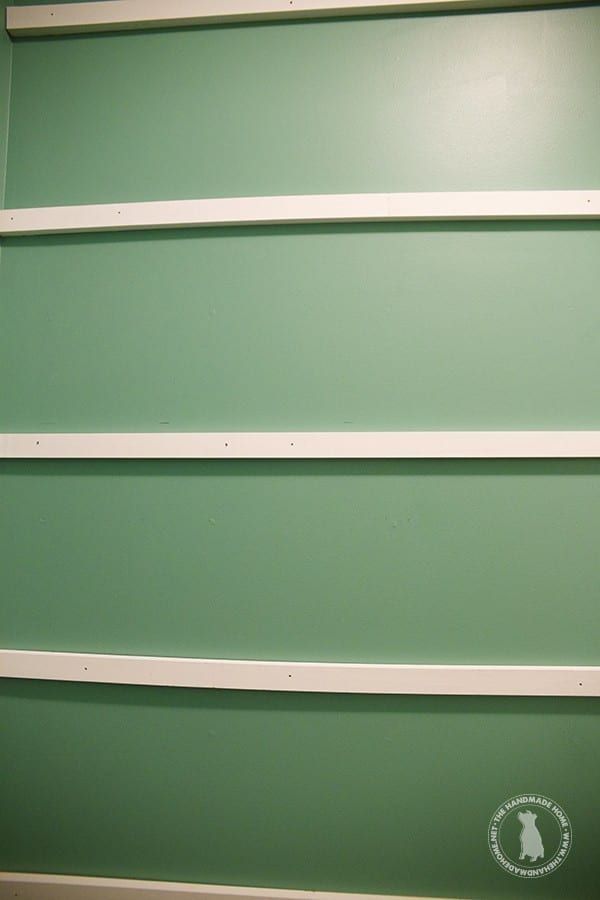
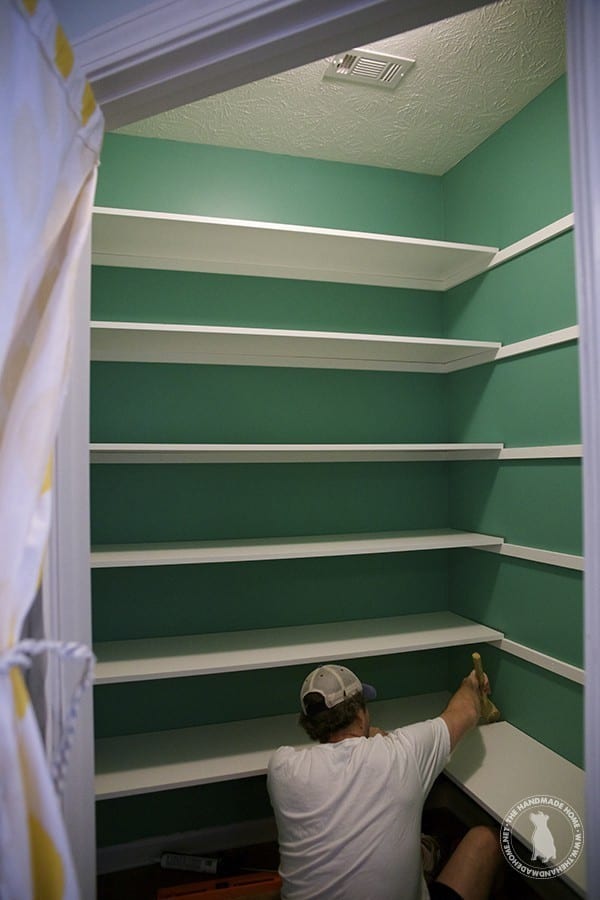
First things first: We patched the holes and painted the the pantry, then began installing our wall braces. To install the wall braces, you’ll need to find the studs in your wall(s) and mark their location. Then decide on the height and number of shelves you will use and mark their placements on your wall(s). I suggest marking where you want the bottom of the shelf to hit.
Next, measure the length of your wall(s) and cut your 1 x 2’s to that length. If you are installing on two walls that will meet, remember that you will need to compensate for the width of the 1 x 2 butting up against the other 1 x 2 from the second wall.
You’ll want a brace on any wall that touches the shelf.
Once you have your measurements, cut the braces to the correct length. Then spread some wood glue on the side touching the wall, and line up the top edge with the markings you made earlier. Level the brace and shoot or hammer a couple of nails into it to hold it in place.
Next, pre-drill two holes into the brace where the studs are, and screw in your 2 1/2 inch screws. (Repeat this for all your braces.)
how to add shelves in your pantry
Once your braces are up, measure and cut your melamine board to size. We ran one shelf the length of the shorter wall, and then butted the longer wall’s shelf board to it.
You can brace the front side of the shelf in several ways. We used a combination of a center support between the two shelves, and then on the long wall, a dividing shelf.
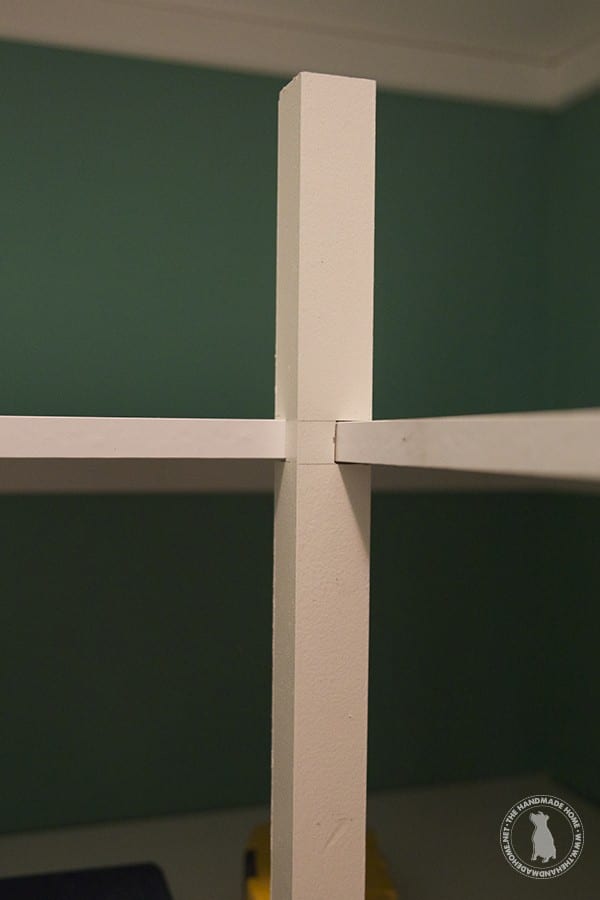
Center support
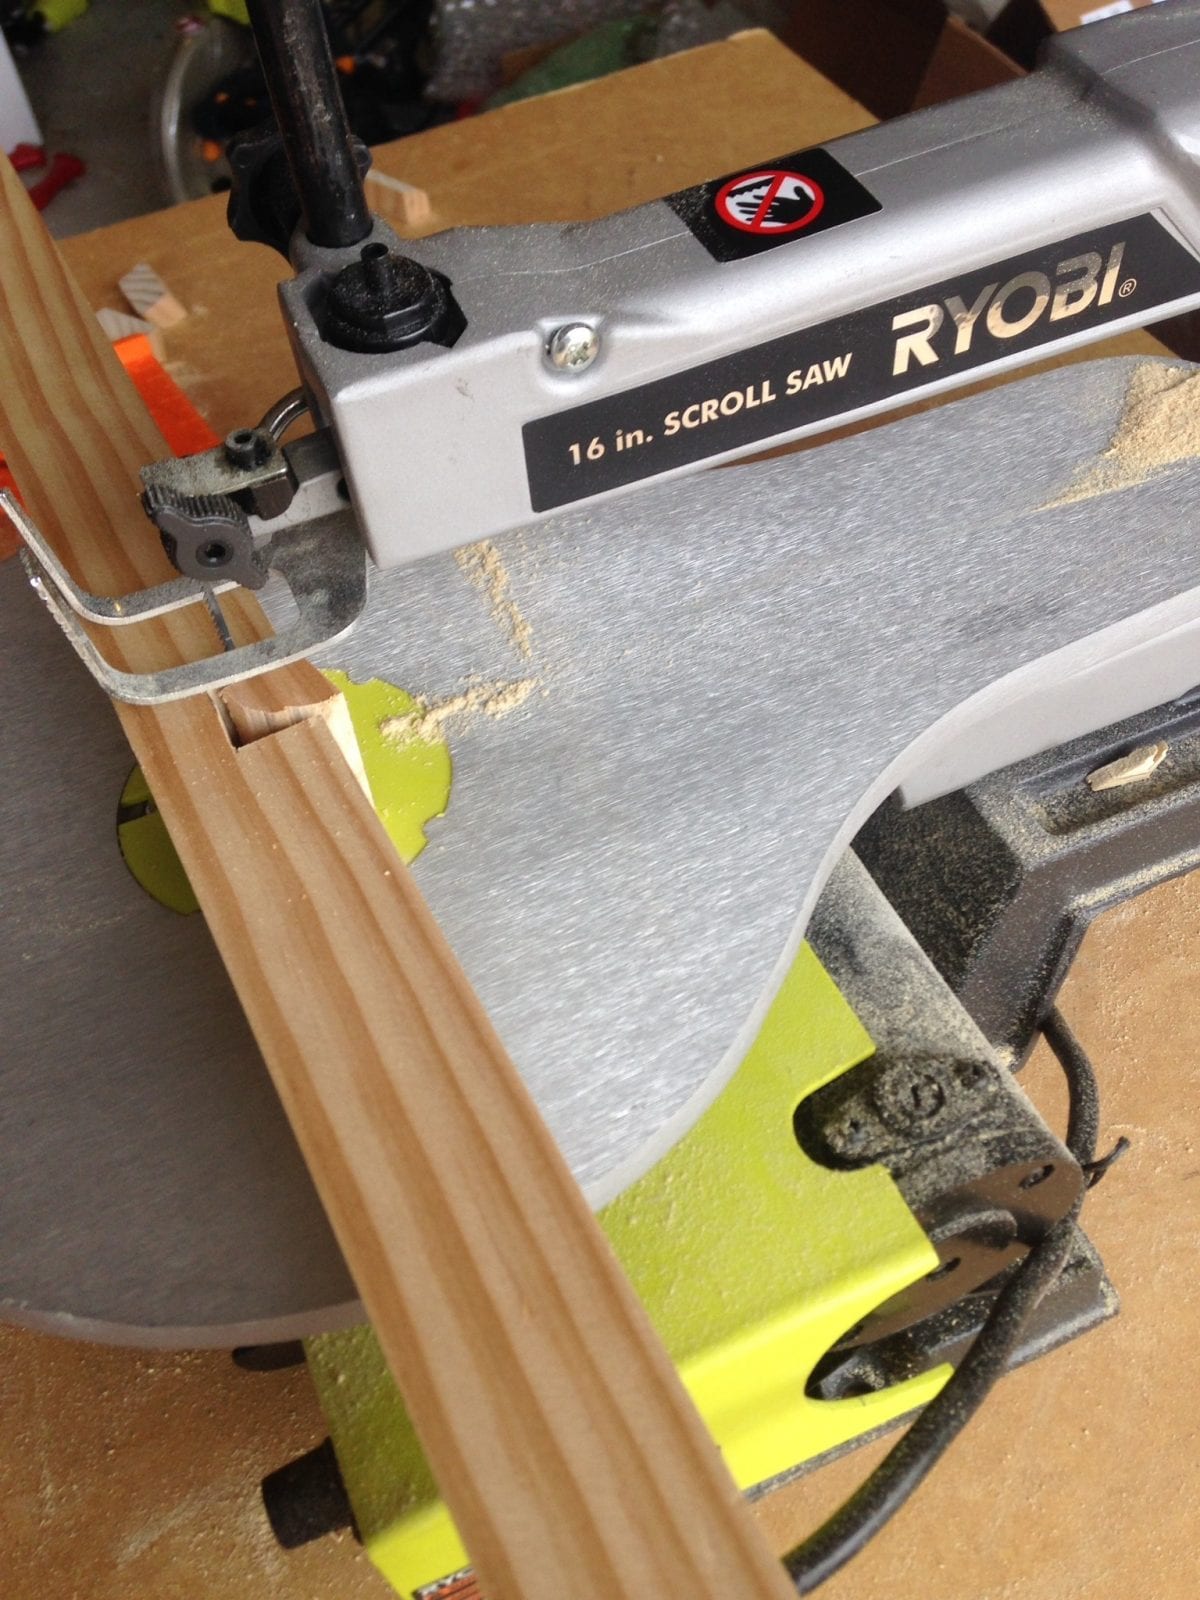
To make a center support between the two shelves, notch out a 2 x 2 x 8 so that each shelf will rest on the notch. We notched it so that 3/4 of it’s thickness was uncut because we planned to finish off the shelves with a 1 x 3 on the front. This would give us the finished look we were after.
We took a melamine board, and laid it on each brace. We held the 2 x 2 up to it, made everything level, and marked where we needed to notch.
Using a scroll saw, we notched out a place for each shelf to rest. (You’ll need to notch out two sides.) We also cut our 2 x 2 to 3 1/2 inches above the bottom of the last notch, so that when we ran our 1 x 3 it would be flush.
We painted the 2 x 2, and when it was dry we ran a bead of glue on the top of the wall braces, and placed all the melamine boards in place.
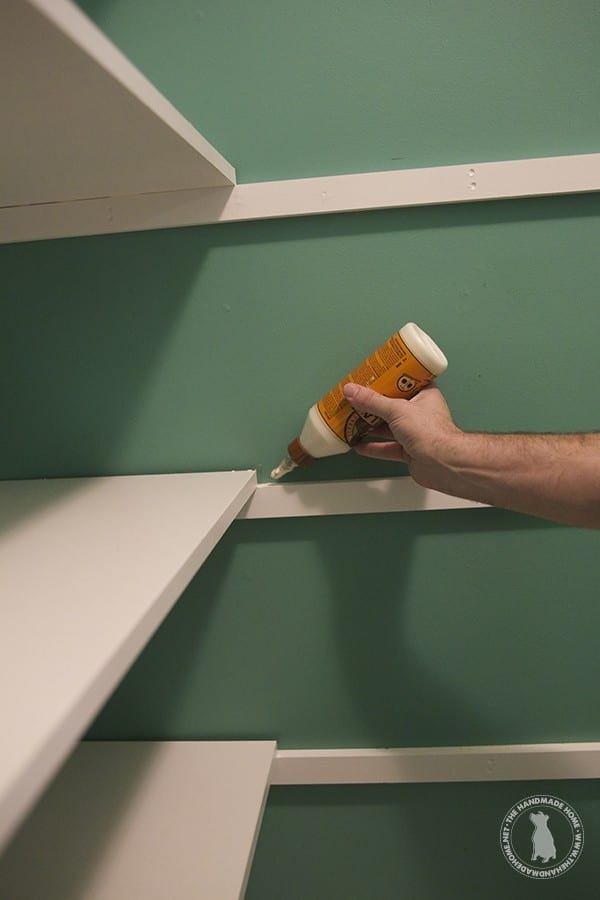
Helpful Hint: We found a mallet helpful for hammering some of the shelves in.
Then we put some glue on the notches, and slid the 2 x 2 into place.
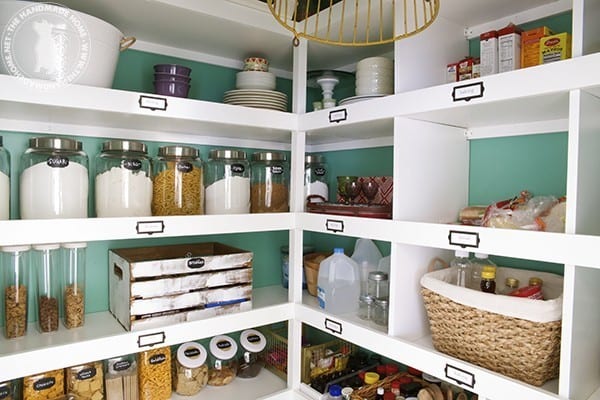
adding the cubbies
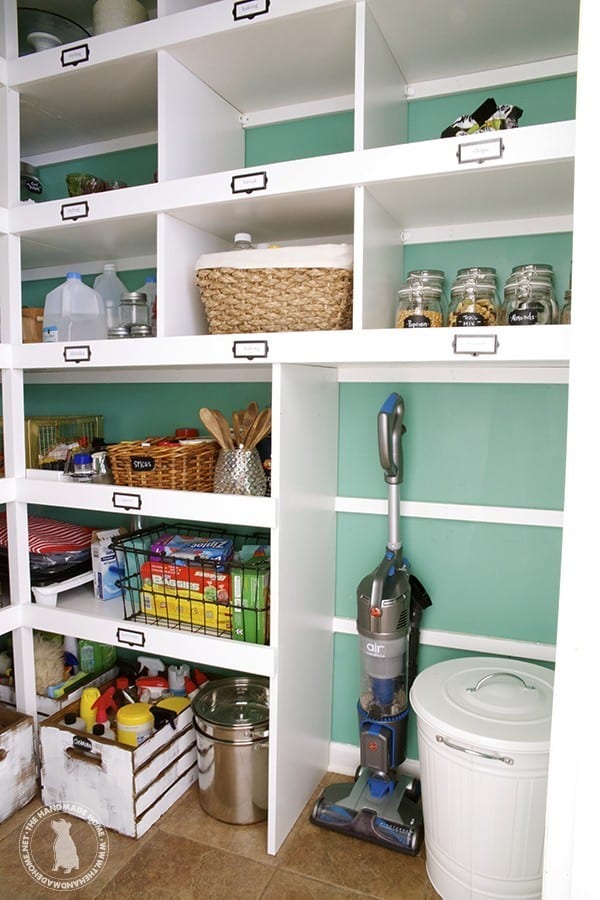
Once it’s dry, you can begin adding cubbies and a half wall. We added a half wall to provide a great place to store our trash can and vacuum. It also added a little extra support to that side.
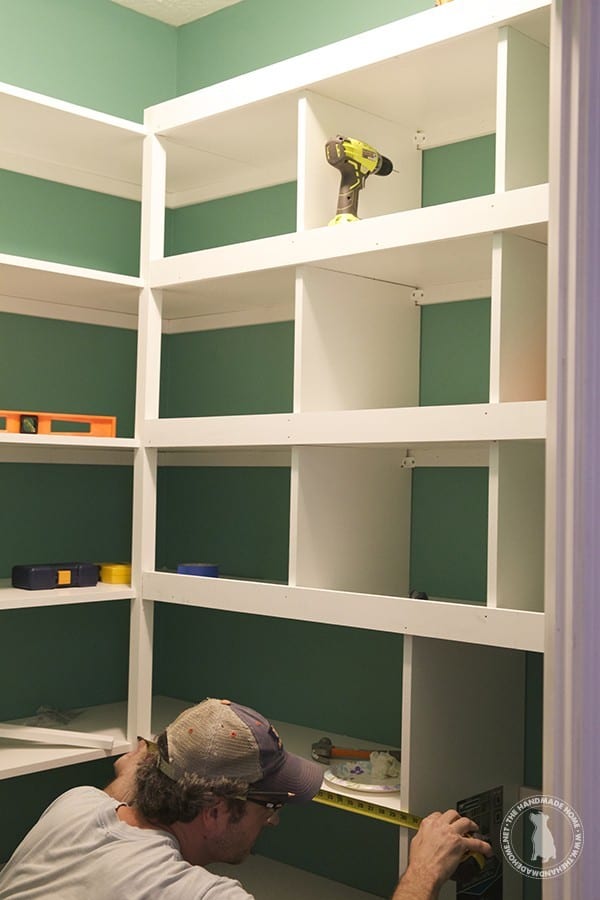
cutting the melamine
When cutting your melamine board for the cubbie dividers, remember to notch out the back top where it will hit the support. Then simply attach it with some plastic “L” brackets you can buy in the same area as the melamine board. (If your cut is precise, you can get away with hot gluing them in place and then caulking it.)
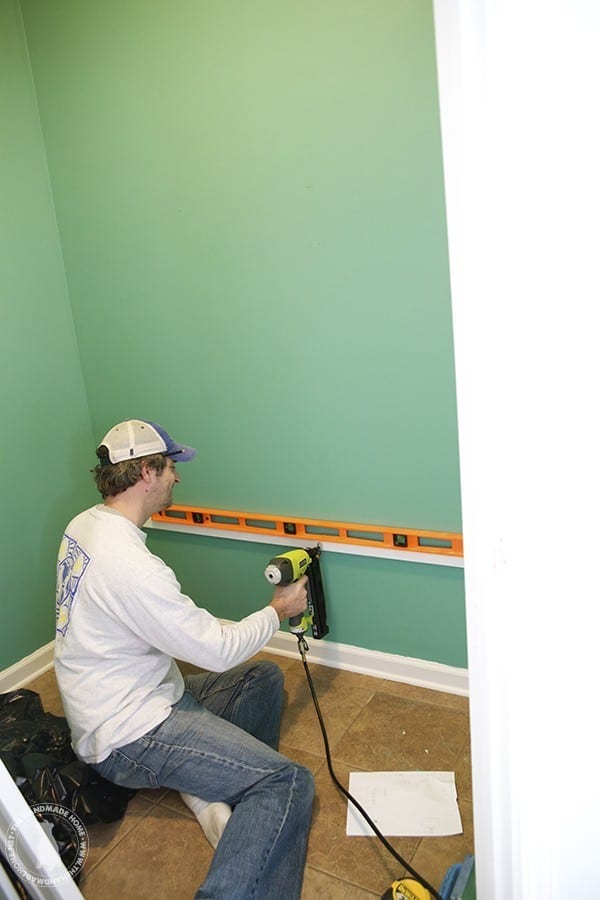
how to build pantry shelves – trim
We really loved the whole “vintage cubbie” look, and the polished finish the front ledge gave our pantry, so we decided to add this final step. You’ll want to measure a the 1 x 3 to finish off the front. Cut it to size, then glue and nail it.
We finished off the edges close to the walls with some primed pine 1 x 2’s cut to size, and simply glued and nailed them into place.
finishing touches in building pantry shelves
Finally, caulk all the holes and edges or any gaps. Paint the caulk as well as any exposed edges to match the melamine board.
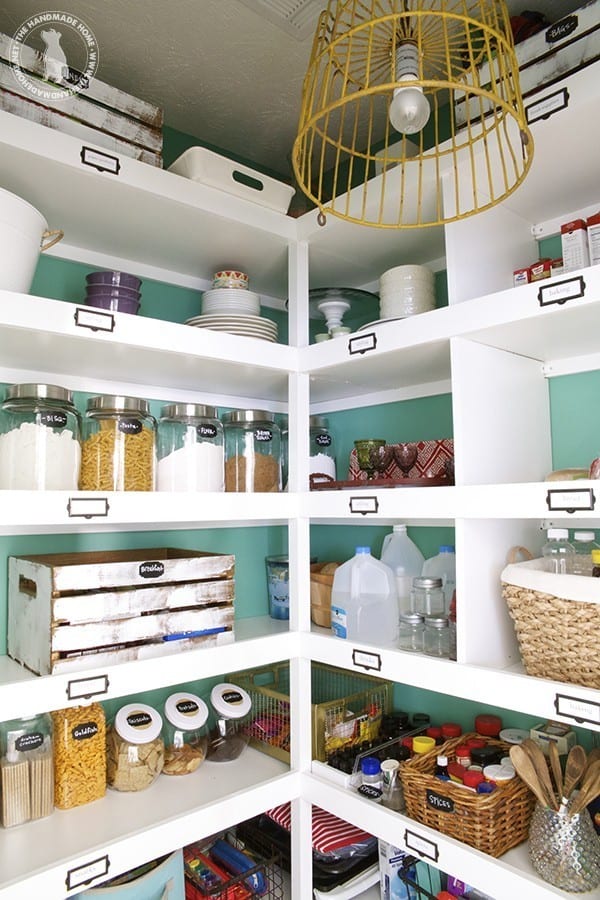
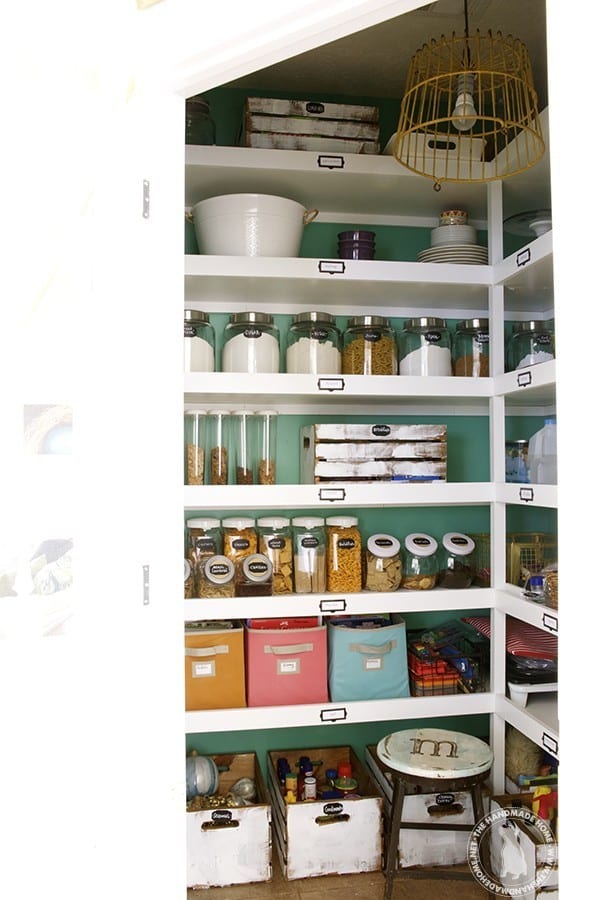
Pat yourself on the back, because you are now the proud owner of a new pantry!
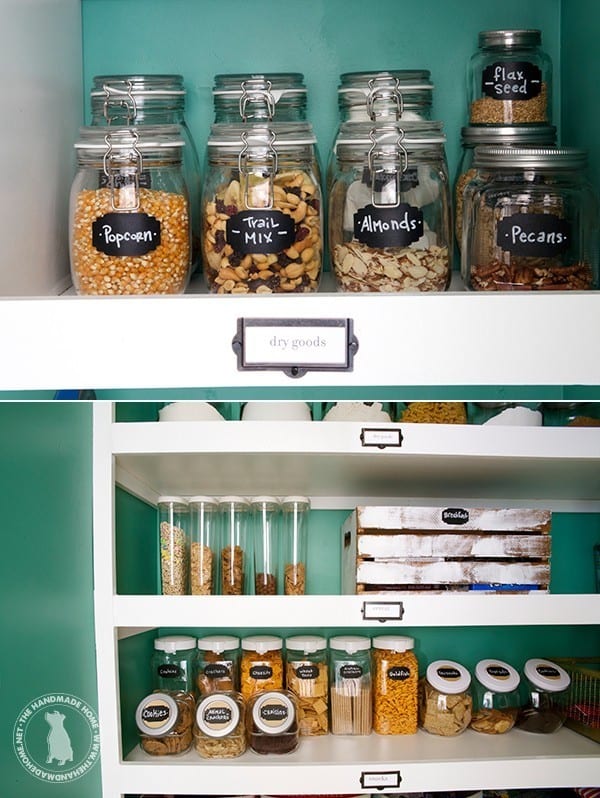
You can read all about our sources here, but we polished off the front with these simple labels from DLawless
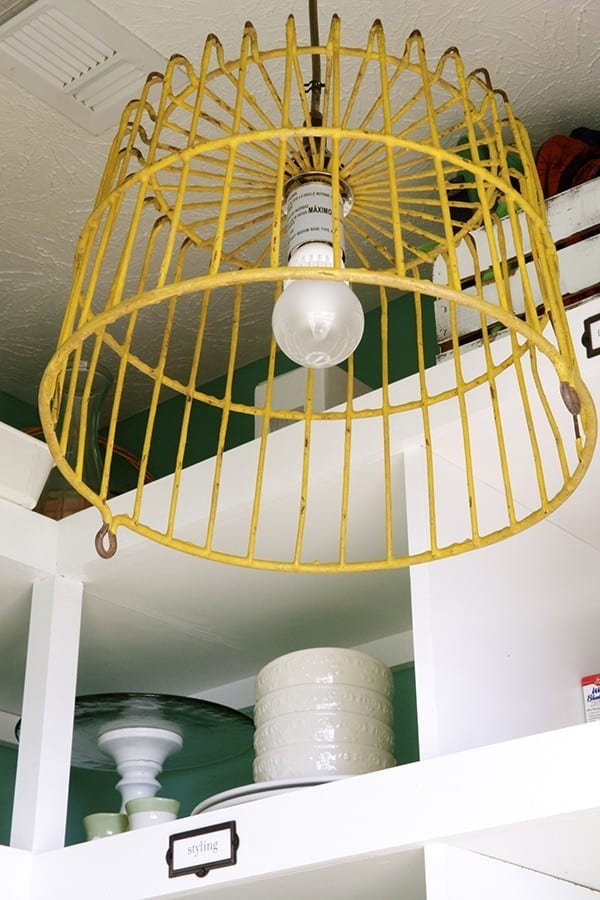
And crowned it off with this fun flee market find…
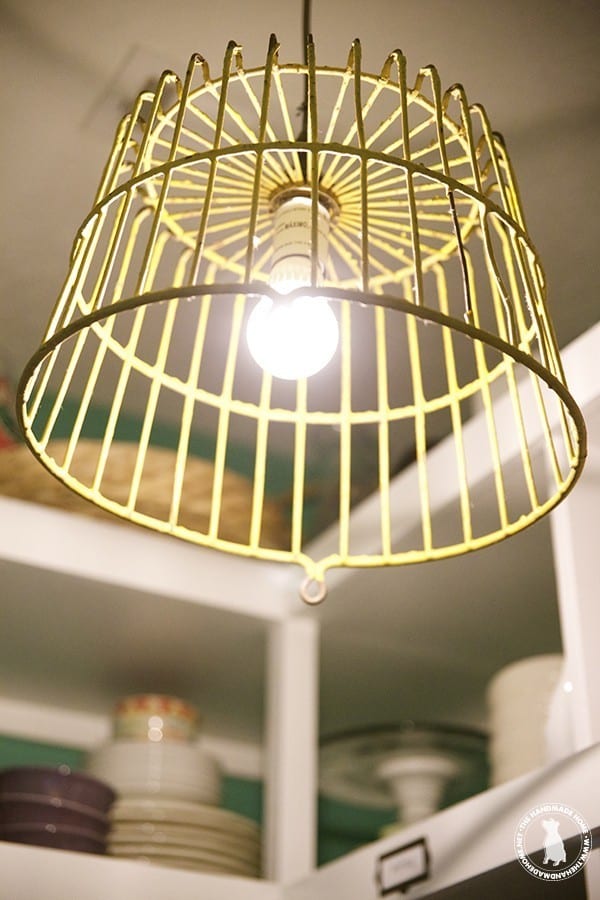
It’s kind of amazing what it did for us to pull down that ‘boob light’ {as we so affectionately refer to them}.
We are loving the new feel and functionality of the space, and as always we’d love to see if you try it! Let us know if you have any questions. It’s amazing what a little elbow grease can do for the functionality {and sanity} in your home.
Have an inspired day! And for some more DIY Kitchen ideas from around the web check out this post.


Love your make-over! That’s a great wall color. I envy you even having a pantry. I use my inoperable dishwasher to store food items and ignore all the onion skins and what-not that always fall to the bottom. LOL
Can you share the wall color? It is breathtaking.
Maureen
Hey! Thanks so much! All of our sources for this particular project can be found here. https://www.thehandmadehome.net/kitchen-sources/
I love the way you break down things- not overly detailed but just enough so it all makes sense. As always- great style! 😀
WOW!! Its perfect and I don’t blame you if you just hang out in your pantry for awhile!! Great job!
It’s amazing how much a little organization can make things so much easier and fun! I’ll bet you look forward to going in that pantry every day now.
That’s pretty awesome! Such an amazing transformation! Great job!
Jamin –
Hey! Do you make housecalls?
‘Cuz I have several projects that are on my list.
Seriously: beautiful job on the pantry shelves. : )
–Michael
Could you break down how you organized your pantry? I’m always interested in how people organize their spaces 🙂
WOW! What an inspirational post!
Y’all have truly accomplished a transformation of note with this pantry revamp!
It’s functional, bright, happy, very useful for maintaining one’s sanity when searching for a key recipe ingredient, and best of all; you have provided an excellent tutorial with clear instructions and photos that will make it a breeze to follow! Thank you!!
I love the color, shelf design, labels, flea market light and the Cree bulb, did I miss anything??? Oh yes, your great choice of storage containers…… This project has truly inspired me to make some changes in my much smaller pantry space and opened my mind to new possibilities! Thank you so much!!!
Hello! I know it’s been a few years… I am wondering if you know the size of the pantry without anything in it? Mine is 4×4 and im thinking yours is quite a bit bigger. I really want to build these shelves and I’m trying to decide if mine is big enough Thank you so much!!
Hey, Sorry we don’t know the exact measurements, of it as we don’t live anymore. 4 x 4 is still a nice size pantry.
Used your post to show my husband how we could do our own pantry easily ourselves-and we did!!! Thanks for sharing your work for others to learn from. Would love to share our pictures, just let me know how 🙂
Good for you guys! So exciting! Would love to see them! Feel free to tag us on insta or send them via email? Ashley {at} the handmade home. net
Great work… possible to give the pantry dimensions…
Hey, I am sorry we do not own this home anymore and don’t remember the dimensions of it. I might guess 42″ x 60″ but have no idea.
I showed my husband this post and we will be getting started on ours in October!
Awesome! So excited for you!
Love your pantry! I am starting ours but I have a question. The front piece you added to the shelves did you line that up with the top of the shelf or the bottom or did you split the difference? I can’t tell by your pictures.
Hey, I would line it up with the bottom of the shelf so that the bottom of the trim is flush with the bottom of the shelf.
How much higher does it extend above the shelf level approximately?
I love this pantry. The dividers you put between each items placed on the shelves are genius. This will so work for my household. It would make it a little harder for my husband and son to just throw things anywhere in the pantry. Our pantry is small and was created underneath our stairs. I got to figure out how to Utilize every inch of the space there. I love these styles of shelving. I just found your site. Will be joining. Thanks for sharing!