
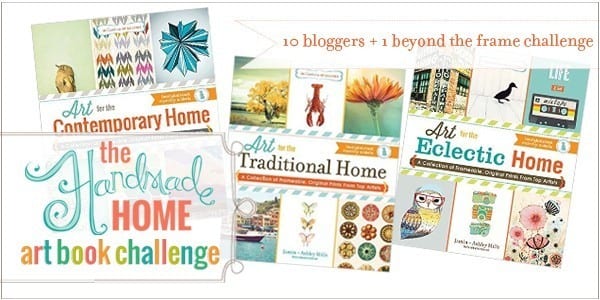
the art book challenge {diy map}
Hey guys! We’re super excited about this little series today, and if you’re headed over from Thistlewood Farms, welcome!
We’re so glad to have you. If you’re new here, you may not know about our little Handmade Home Book Series: Handmade Walls, paired with three other art series books for the home, featuring both amazing up and coming and established artists with their beautiful work. Every time we open these books, we’re just wowed by all their talent!
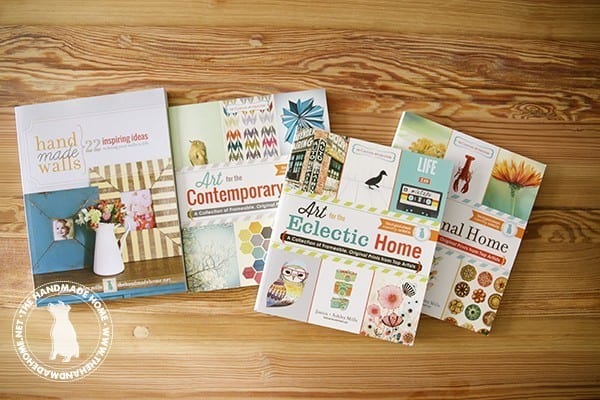
Since the season of giving is upon us, and to highlight what great potential they hold as gifts, we decided we would do something fun with our art books. So we sent these out to some of our friends, and threw down the creative gauntlet, if you will. We were all, “Let’s play a game.”
Woah. Refrain from swatting at your screen. Because it wasn’t a scary little man on a bicycle, kinda game. A fun game.
The challenge: Create something with these books. The only requirement? Do anything, anything but placing them in a plain old frame. It’s a beyond-the-frame, out-of-the-box challenge, if you will.
Of course, we had to make something too…
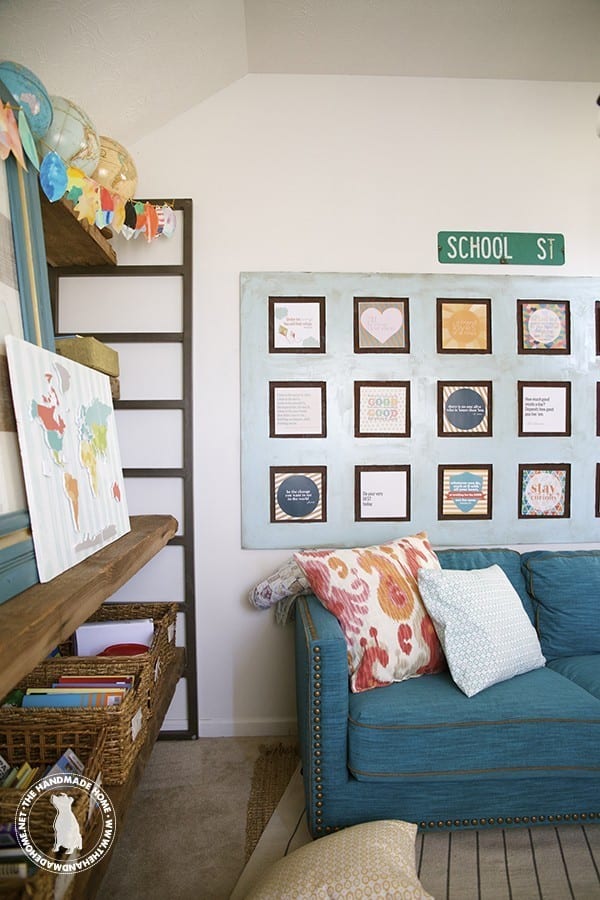
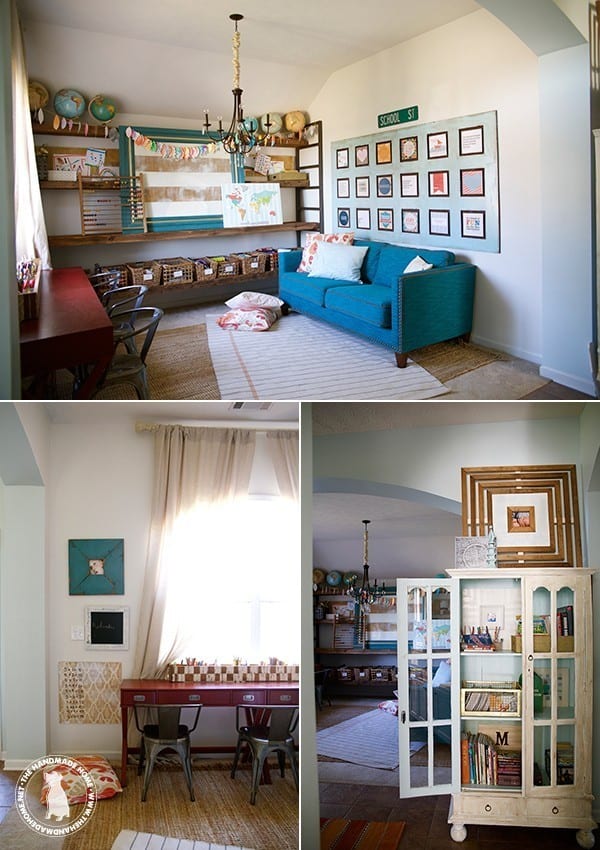
This past year, we started the {very unexpected} journey of homeschooling with our family. We totally ditched the classic dining space (that we never used) and turned it into a classroom. I wanted to create something for their space that would be useful, interactive, and educational all while doubling as great art for their walls.
We’ve already used the art prints in some great places, and will continue to use them, displayed in frames and showcased around our home. But this idea was a little different than the typical framed approach… and it included some of our own prints, as well. Since they are prints of the original works, it’s like inception for artists. Art within the art, in an abstract presentation… we’re reeling it in with the movie references now.
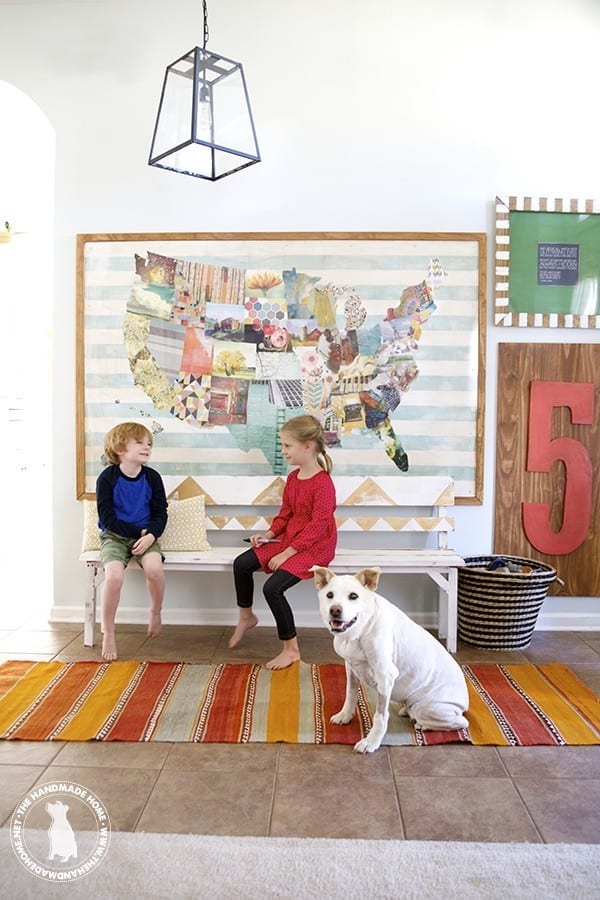
It was actually pretty basic once we figured out how we were going to do it. So we decided to place something in our entryway {which is right beside this school room} to extend it a little, and make that area functional, too.
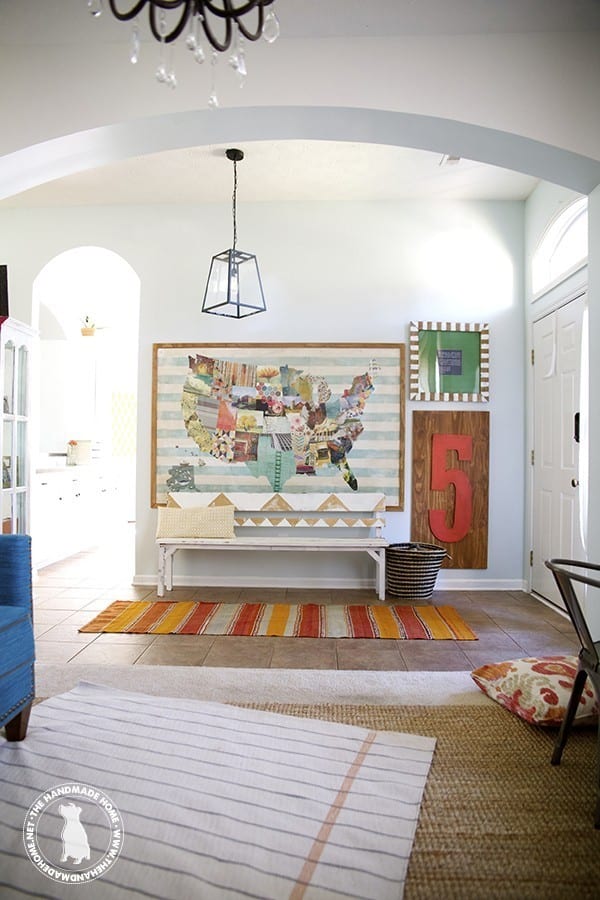
Here’s what we came up with… {cue the drum roll}. With just a few steps, we created this:
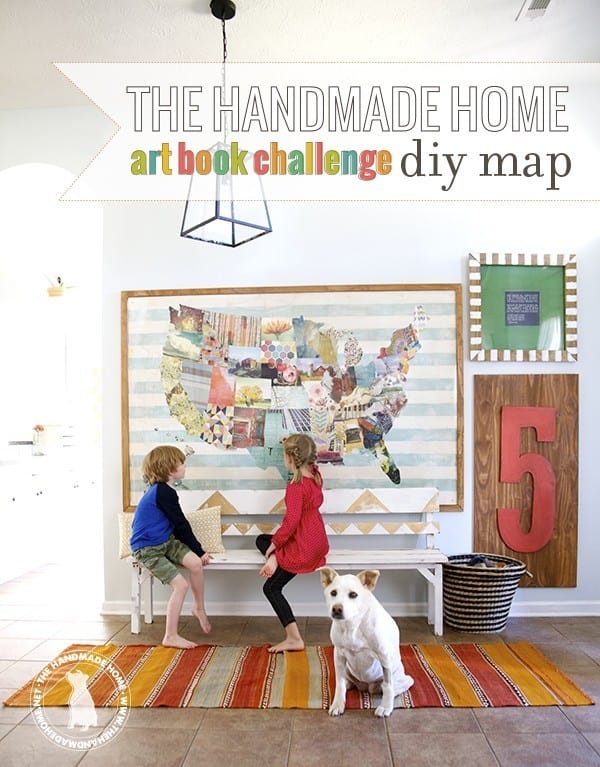
It’s a big map of the ‘ole US of A. And the best part?
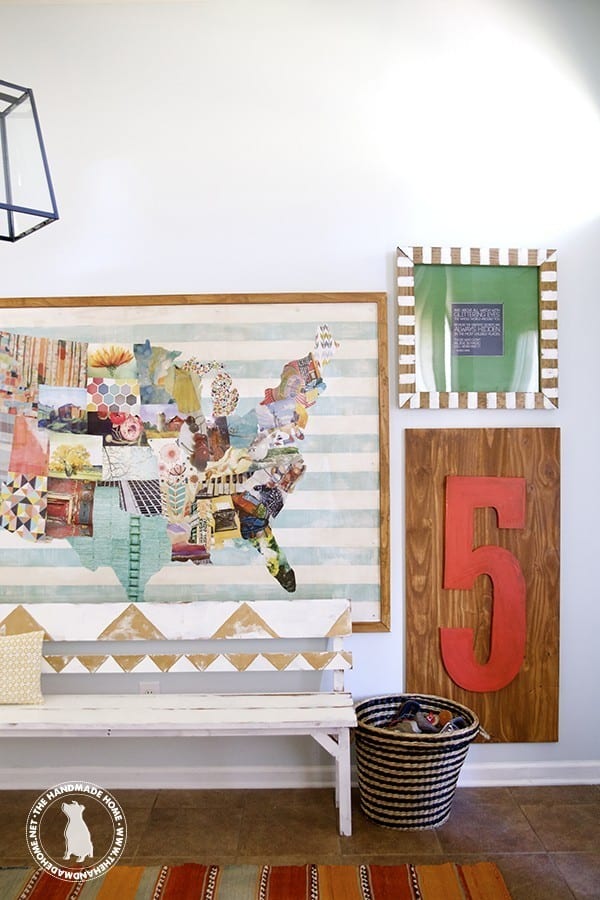
It’s a teaching tool, that you can write on.
It may be our favorite thing ever.
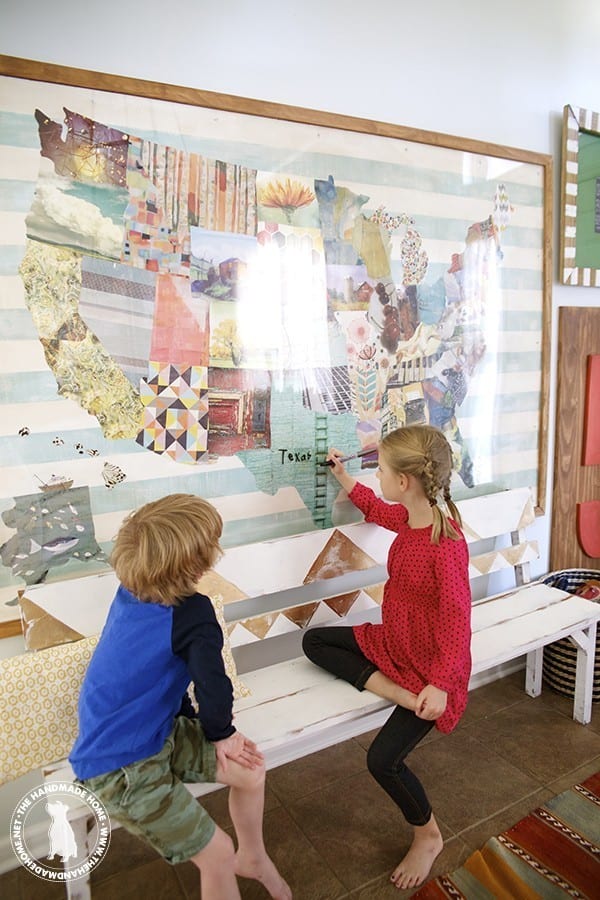
We went large and in charge for a fun school room impact. If you wanted to try this, we’ve broken it down step by step. The beauty of it is, you could adjust for the size, medium, and subject matter… the possibilities are endless!
It’s a big hit with the kids.
It looks complicated, but we broke the project up into afternoon snippets, and in no time we had our own large and in charge collage map.
Here’s how we did it:
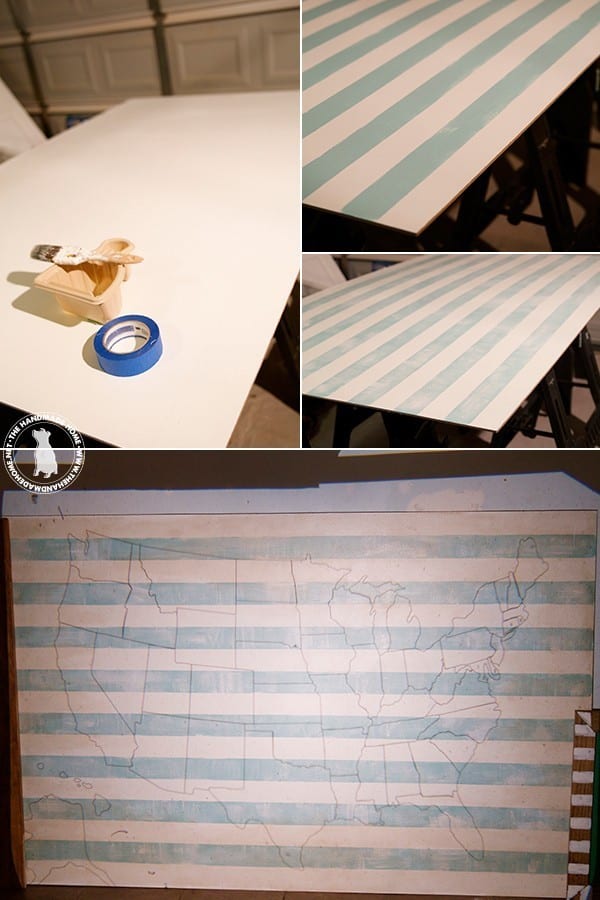
We used our RYOBI skill saw, measuring tape and a chalk line to cut a full size board down to size – {the size was large and in charge: 75 x 48} from our local lumber shop {a great cheap alternative than your regular stores, especially for larger pieces} If you don’t have the tools to cut it yourself, they’ll be glad to cut it for you.
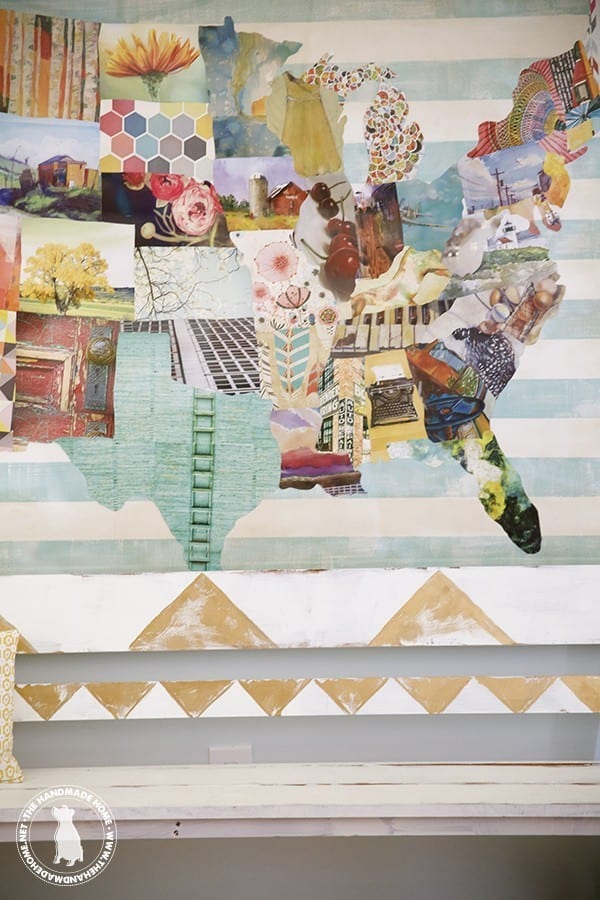
We gave it a great base coat in a pretty white, and when that was dry, taped off some stripes, in an aqua {leftovers from old projects we had lying around} When the paint was dry, I went back and did some dry brushing over the blue stripes to blend, and give it more subtle character.
When the entire surface was finished drying, we used a tea stain technique {that’s a fancy way of saying a wipe on, wipe off via paper towels and some stain until you accomplish the look you want} to age it around the edges. {Helpful hint: If you try the tea stain technique, you’ll have better results with a semi gloss or glossy paint finish – it gives you more control.}
When it was all dry, we put up a projector using this map {from our puzzle project} in black and white as a guide. {Get the PDF here} and when we positioned it to the size we wanted, and traced it on top of the stripes.
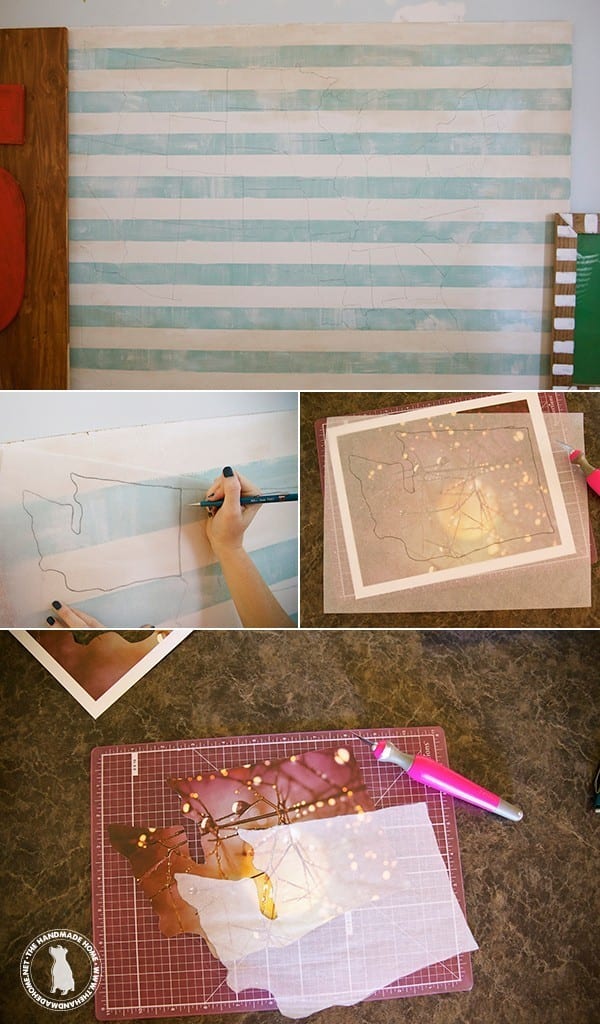
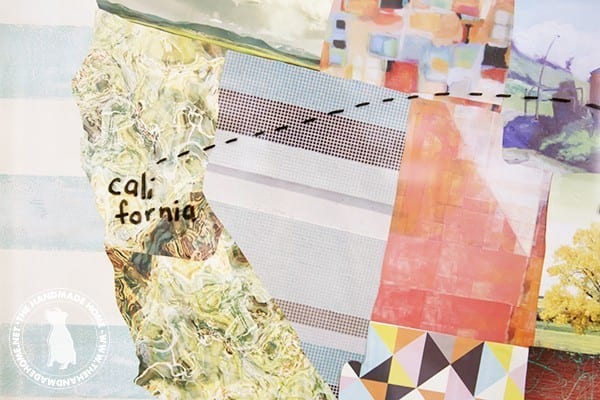
In retrospect, (top photo) I totally left off part of Michigan at first. {JK, Michigan. Promise we love you. If you miss something, just realign your map and retrace the missing area.}
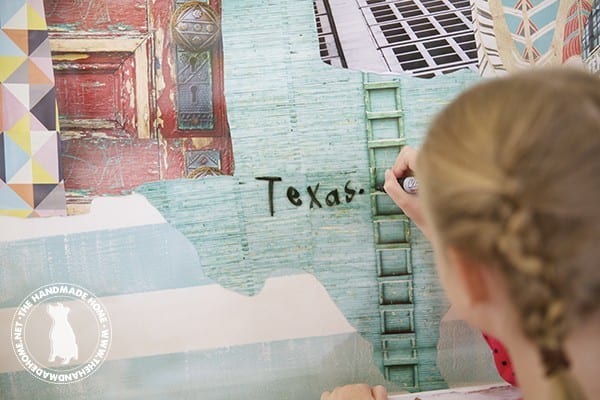
Next, take a sheet of tracing paper + trace it right off your big drawn map. When you’re finished, move your tracing paper, and place it over your art. There were a few states that were too large {Hello, Texas} so I combined images as I went.
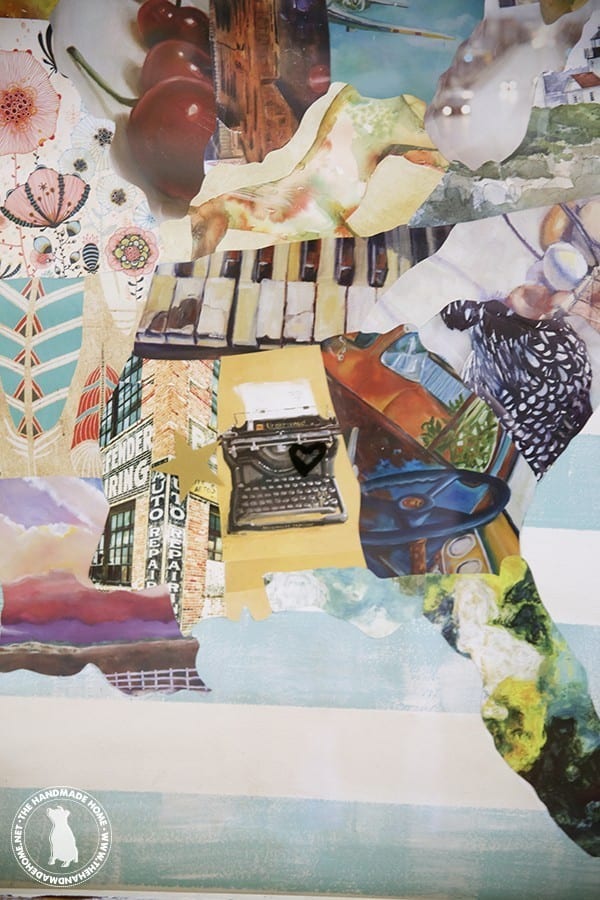
Using painters tape, tape down your art of choice {we tried to stick with things that personally reminded us of the state, just for fun} to a self-healing cutting mat, and then the tracing paper right on top. Tape it as well. This allows you to rotate the images as you cut, without losing your place. Using an X-Acto blade, cut your art. {You can always use scissors, but this method is more precise, and honestly easier. Just watch those fingers!}

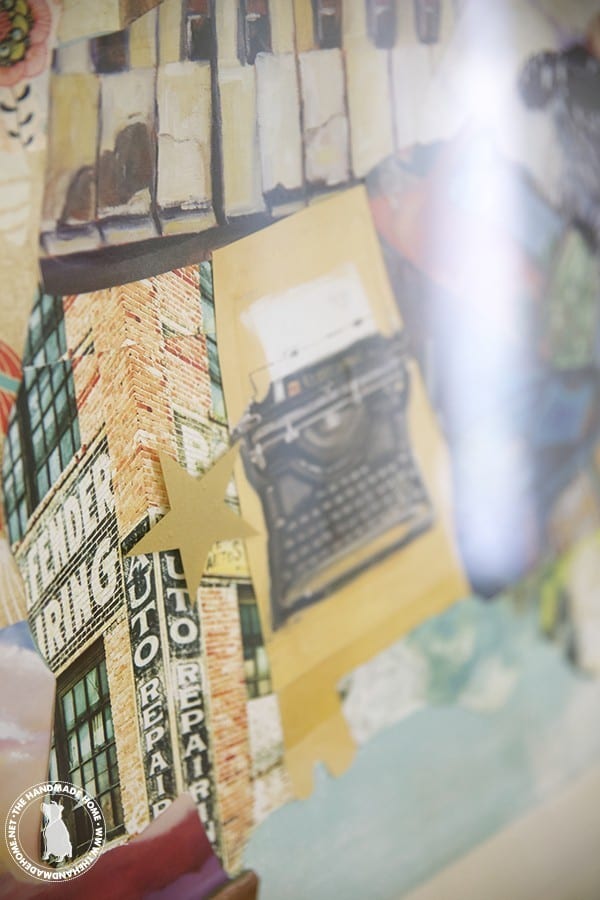
Using good old fashioned Elmer’s craft glue, I used a few subtle spots, and returned the state to it’s rightful place on the MDF board.
When you’re ready for the next state, repeat. In the end, you can go back and erase any lines, because it won’t be perfect… and tracing as you go lets you compensate for any imperfections with cutting as well. Obviously our map isn’t perfection, but it’s a great learning tool for the kids!
Simply fill it in as you go, and before you know it, you’re done.
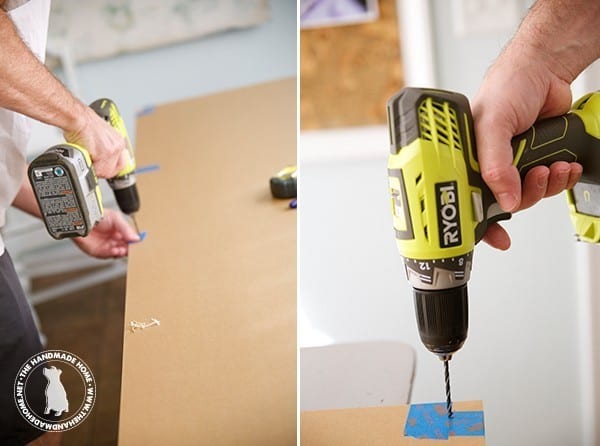
For the final part, we had a large piece of plexiglass cut at the local glass store, and laid it face down {paper still on} on top. We taped the sides together so it wouldn’t slide, and drilled holes at each foot measurement.
We then separated the two pieces, and placed just the MDF on the wall to decide on placement. We marked the holes with a pencil once we were sure it was level, and placed some holes and wall anchors in the wall. We then removed the paper covering the plexiglass, held it up, and added the screws. This will definitely take some patience, and more than one person to make sure it’s level/hold it steady.
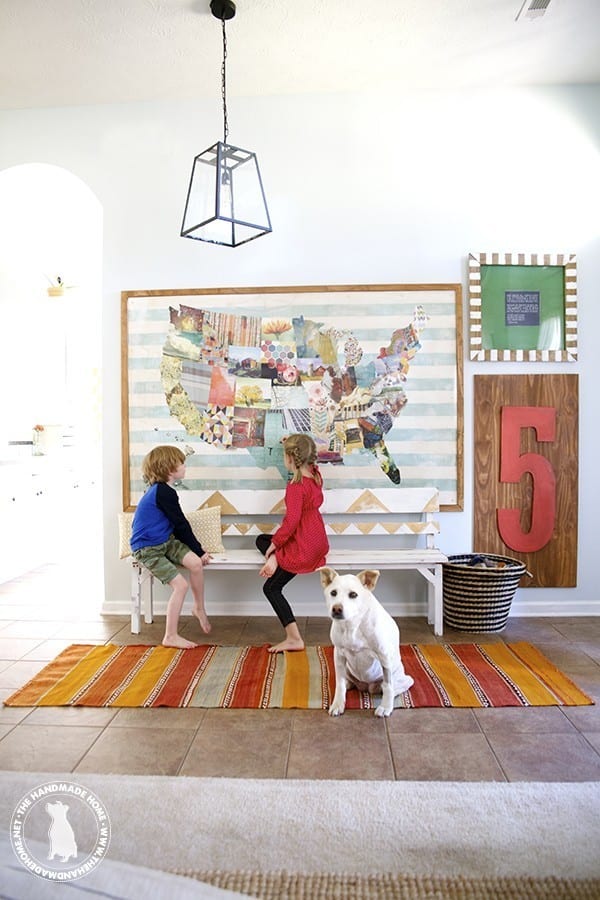
We added a simple frame cut at 45 degree angles (you can use a miter saw or miter box for this) with some stained 1 x 2’s for a modern/industrial look {covered the visible screws with a little paint} and we were finito!
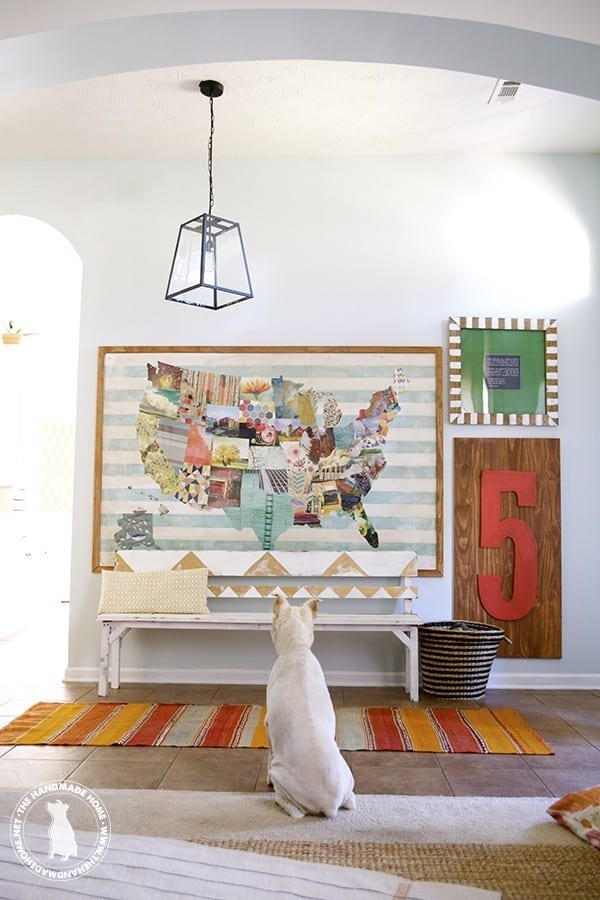
And I think Chloe was confused. Or maybe she was just taking it all in.
Bless it.
 We even purchased some star decals from here so that we could mark the places we’ve visited, as a bit of an ongoing activity with the kiddos to keep up with our travels.
Sweet home, Alabama.
{Total side note: build this bench with these instructions.}
It’s a great teaching tool for history, geography and more!
Let us know if you have any questions… and as always, let us know if you try it – we’d love to see! Want to see what fun the 9 other bloggers procured?
Be sure to stop by The Hunted Interior for the next stop! You’re going. To. LOVE. It.
Oh, and we’re giving away three of our art books to one lucky duck winner. Just follow the rafflecopter below. Thanks for stopping by. Have an inspired day!
Ummm….seriously.
Hello.
Can the map come and live in Kentucky. 🙂
Happy day friend.
karianne
PS Praying for you today.
It may not be thinking outside of the box at the current moment, but I’d put some of these beauties in my three large window panes that hang from out 11ft ceilings by wire. It would add beautiful instant artwork to our in living room. Thanks for offering these terrific books!
Adding to my Christmas list, these are great gifts but I’m putting on my own wish list!
I would really like to frame some of these.
I love *everything* about this project!! Amazing! 🙂
Love this so stinkin’ much!!! Great job guys and thanks so much for including me!
Seriously LOVE this map!! In fact, I love everything you guys do! I’ve been reading your blog for a while, but don’t think I’ve ever commented. But this map brought a question to my mind. I just wonder how you guys always find a place for big projects like these? I also like to create artwork and frames for my walls, but if I made a huge piece like this, I would have to completely rearrange my whole house to find a place for it! Or at the very least, I’d have to take down a bunch of other wall décor that I still like in order to make room. Are you just always rotating art around and putting away pieces? Or do you just have a ton of wall space, so there’s always room for more art??? Again, LOVE this piece- I may try to recreate it in my son’s room- he has a boring looking map hanging- maybe we can jazz it up!
Hey Corey! Great question! I feel your pain. We don’t have a lot of wall space in our home because it’s pretty open. So, I do rotate our pieces out a lot. There’s a reason our garage is so cluttered at the moment and it’s next on my purge list ;} I hold on to the art though, because it’s worth it to have some to choose from and switch out for fun looks. We also may not be living here forever so I hate to get rid of our handmade stuff. Obviously, I’m kind of an extremist ;} But For this one, we’ve always had this annoying light switch that was smack dab in the center of the wall. I was never able to do a big fun piece there, like I’ve always wanted. So we finally caved and had an electrician come out and move the switch- but short story long, we are always moving things around like crazy people, and making crazy decisions to do so- wall art is our very favorite thing!
Thanks so much for your reply, Ashley! Okay, good, it sounds like I’m not the only crazy person who stockpiles old pieces for our someday future house (the house that of course has tons more wallspace)! Again, love your blog and your great ideas! 🙂
I would create some fun gallery walls around my house.
Beautiful project!!!!! I love the idea of a map like yours! I must find a projector! I have a gallery wall in my house and I’d love put them in there somewhere. Perhaps, borrowing from your idea, I could do silhouettes with the art. So many options! Thank you for the giveaway! God Bless!
are you even serious right now? Like honestly my jaw is wide open……… DYING! You knocked it out of the park!!!!!!!!!
I would frame these bad boys for my own home and for gifts. xo
I would use as a big scale art piece
Love these books! I am putting them on my wishlist this year. I need to mix up some of the art on our walls and bring in some more colors. Love the map, BTW.
You totally missed part of the Eastern Shore. Where is the Virginia tail on Delmarva lol? Its ok we still love you guys anyway. This is such a cool idea!
I absolutely love the map! I think I would just frame the pictures if I won them.
I LOVE the map! I’m already thinking of where I can use a smaller version. Thx!
Love it!!! And thanks for making Nebraska adorable! 😉 Though Texas totally caught my eye. Love love love!!!
This is SO cool!!! wow! I’m very impressed lol
I’d LOVE to win the books..I’d make some cool art like you did(only I am a bit challenged in that area ha) & maybe gift 1 of the books:)
Thank you for the chance to win!
Joey J.
**Oops, I meant to say I’d probably frame some of the images..and maybe do something with modpodge/decoupage project lol
Love the map!
This is fabulous!
I originally saw the clubhouse post from your website on Pinterest, but I just recently found this website. I. cannot. stop. looking. around! EVERYTHING is beautiful here! Can I please have you redo my home? 🙂
I would definitely frame them, but I’d use them other ways as well after seeing these challenge results! 🙂
I think the map idea is fantastic – I may try that! Or a house shaped collage!
Collages! It has been years since I sat down and collaged but I absolutely love the creative outlet it provides and the resulting art is always fun and fresh!
I love your map idea! I would love to add more maps to my décor. would also love to win these books. thanks!
I entered (of course!) every possible way, but I also just received a long-awaited payment this morning – so this is a good reminder to start my collection of your books. Just in case I don’t win… I’ll be picking up your Eclectic book as soon as I hit “post”. I’m really looking forward to displaying them in different rooms – especially now that I have regular guests. (They’ll get to have fresh art every day they’re here!)
I love the map of america!!! You do such amazing things.
With the holidays coming up, for gifts!
What a fun idea! Such a great way to add color and interest to a wall. Your daughter looks so big in those photos. I say that every time I see a photo of my six-year-old twin girls. They can slow the growing down just a bit now. ; )
LOVE the map!!!
LOVE the map!!! I’ve got so many ideas….beautiful art!
We are planning a 8 to 12 week trip to visit the Wild West and West Coast. As we plan for the sites we would like to visit we are locating them on a map and determining how long it will take to get there. This will be a great help as the kids learn their state names and locations as well as where we will be traveling.
I am in LOVE with this book series! What a seriously fantastic idea! Your map is amazing – y’all are just so stinkin’ clever & talented! I have bare walls everywhere that would look fabulous dressed in these art pieces. Thanks so much for the giveaway!
I would love to have these books! With three kids ages 4 and under and a budget it would be so great (easy and affordable) to switch things up every now and then! And by the way, I enjoy your blog daily. I so appreciate your faith, humor, and the inspiration it gives me.
I am always looking for art to put up on my walls and to use in scrapbooking/crafts.
My first thought is to collaborate with my artistic girls. At 9 yo and 10 yo, they are great, outside-the-box, artistic thinkers!
Tina
Lovely and inspiring project!
OMG I MUST HAVE THESE! If I don’t win I know what’s going on my christmas list!! 🙂
I love the idea of having these books to pick and choose art from my own home. Such a great idea and very thrifty for what you are getting. I plan to order.
I would use them in my guest room! I want these books bad!
Would certainly frame some prints!
Brilliant! Pinning this for my upcoming playroom revamp!
AWESOME idea! I LOVE the use of beautiful art in the school room! Thanks for sharing!
Why do my eyes always POP OUT OF MY HEAD when I visit? Seriously. THE CUTEST. Thanks for having me be a part of your challenge :-).
I would totally use them for inspiration and motivation (and since they’re well bound, I may set a child on them from time to time at the dinner table.)
I need a gallery wall in my new house!
I spied a whale print on the Nester’s challenge post that I’ve been wanting to purchase anyway, so I’m pretty sure I need to win this!
I’m so excited at the prospect of winning your books. This would be an awesome way to begin the holiday season! Thank you!!!
This idea is amazing! I love it and would totally want to try it! I would also maybe use the pages as the backgrounds for calligraphy quotes!
This is beautiful! My homeschool room does not look this awesome but I love it. Perhaps this map is just what it needs….
Oh, I love that map! And would LOVE those books as a pre-Christmas present!!;) ~Kim
i would so love to make a map for my two youngins. i would also just hang your art throughout our home. you have such great taste.
What a great giveaway! There so many ways you could use them!
This is so cool! And HUGE! Love it!
I adore it! Its so beautiful, colorful, creative, interactive, just plain fantastic! I have a few different art projects I’d utilize them on- and might possibly copy your design. I’m kind of a handmade home junkie. Please keep up the great work. Love it all.
Love this idea! Perfect for our new playroom!
Love these books.
I got nervous when you said you’d left off part of Michigan! I’ll bet it was the best part of the mitten state!
Thanks for the chance for a giveaway.
I love this idea! Oh how I would love to create something amazing with these.
Just found your site. Love your map!
These books have been on my wish list for too long. 🙂 They look beautiful.
Amazeballs you two. I bow down.
Thanks for asking me to participate! xo
WOW! I love what you did and I would totally copy that idea if I didn’t already have many maps floating around my house already. You are getting my wheels turning over other large art pieces I could do where I could assemble smaller parts to make a whole. Hmm . . .
Love this project! Can’t wait to make one with my girls. Thank you.
What a fun project! It looks like it took a while, but you got a great product out of it. I’m looking forward to the other stops.
Don’t know how I would use them YET…but, I’m sure I would be able to come up with something.
Just found your blog- hopping over from Nester! Will be following. So nice to meet you!
Oh PS- I would use them on my freshly pained walls! Yes painted today-yippee in the hall going up the stairs to the kids area! SOOO perfect. And PS have my sights on making a state map with them of MA, cape cod & islands!
This is my favorite project yet!! Bravo!!!
This is INCREDIBLE!!! I can’t get over it! So beautiful. 🙂
Love the map! It must have taken a long time to make it!
Aaaaaaaaah! I love love love this…I adore all things maps/globes/geography. Totally need to make this!!
I would have to do tjis and make it center piece in a room! different map though
I have been wanting these books for a long time! I’d love to try some of the projects I’ve seen this past week with the art!
I love these types of books, and after oohing and aching, I’d try to tackle a few projects!
Putting this on my “make it” list right now!
Just discovered your site, and I’m SO EXCITED! There is hope for my empty, empty apartment walls!
Love this map, love your blog and would love to win your books. I am going to make a map like this. Thank you for the step by step tutorial.
Love this. These books are such a good idea.
What a cool idea for the books!
Oh, I’d love to enter,but I seem to be having a problem with the rafflecopter. It says “aw shucks, we didn’t get your entry. Please try again.” On all my entries.
Karen U
Yay!! Thankyou so much for the opportunity!!! My first win ever. I cannot wait to get craty with them. I have sent my information via email. Thank you.
Wow! I love this map. Everything you do is amazing but that little dog of yours is so cute and acts right on cue. So sweet!
Awe thanks, Mary Beth!