
build a screen door – for your pantry
Remember when I talked about building a screen door? We finisssshhhed….and we are super excited to share a full tutorial with you on how to build a screen door for your pantry.

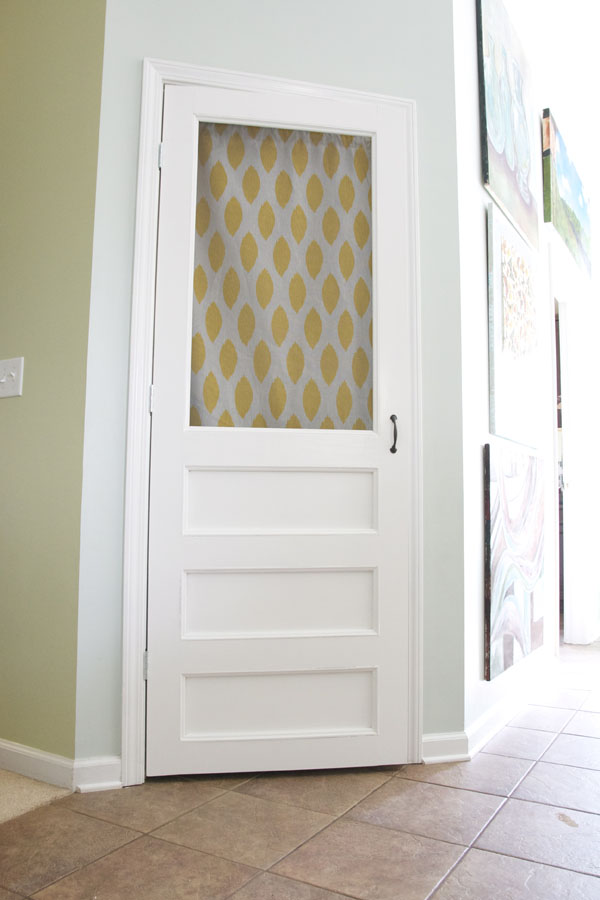
Build a screen door – for your pantry
And I couldn’t love it more.

It fits perfectly in our home and removes that old ugle builders great door and it was so simple which to build a screen door – for your pantry
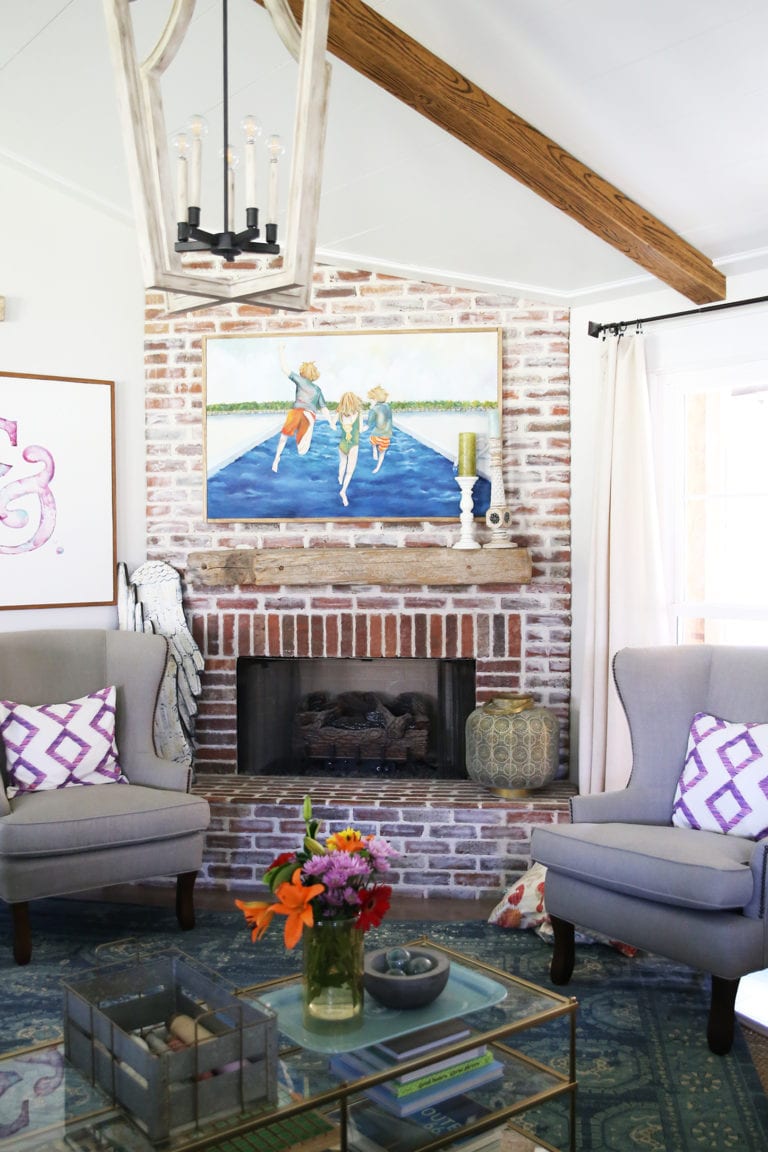
It really brings some major character to an otherwise overlooked space in a once cookie cutter house.

We wanted to purchase one, but didn’t really see anything that fit our style. Or the weird sizing of this pantry door. We also didn’t want to pay 200 dollars for one. So, we decided to build a screen door for our pantry. It couldn’t be that hard, right?
Build a screen door – getting started
Wanna know how we did it? It was actually pretty easy once we got the measurements down.
Our original plans were for an entire screen. And then reality hit, and we realized that with three children five and under…we were doomed in the destruction department. So we decided to give it a little character at the bottom.
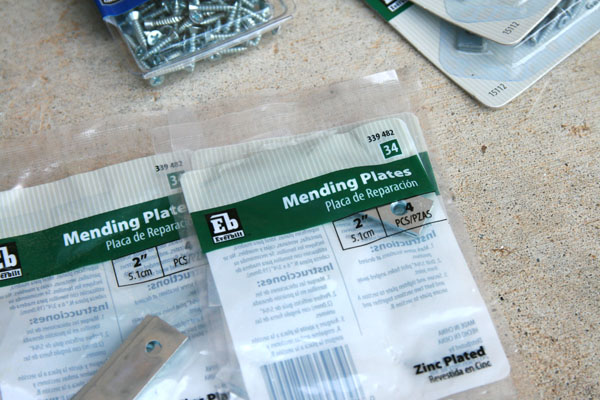
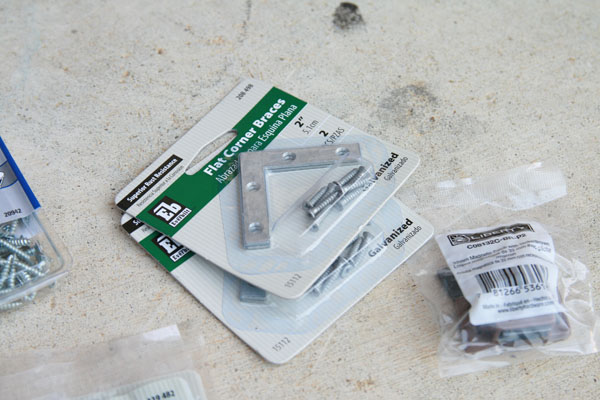
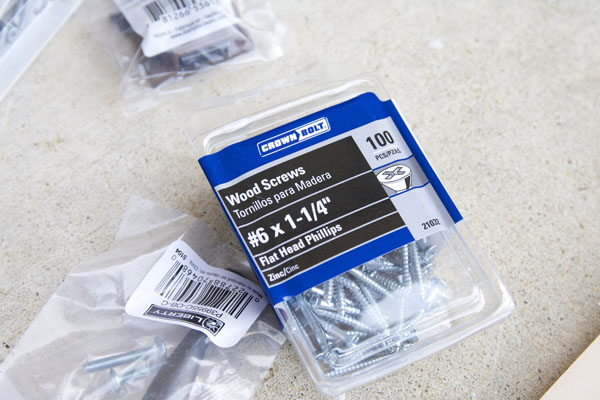
supplies
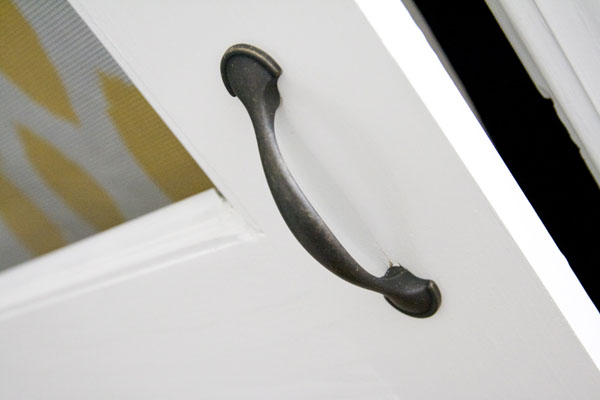
First, we grabbed up 4 boards (1 x 4’s.) And an MDF sheet, (at .25 thickness) cut to 3 @ 9 x 24. We also got some mending plates, flat corner braces, and wood screws. Add in some smaller hinges, trim of your choice, a pull…and you’re ready to go.

building
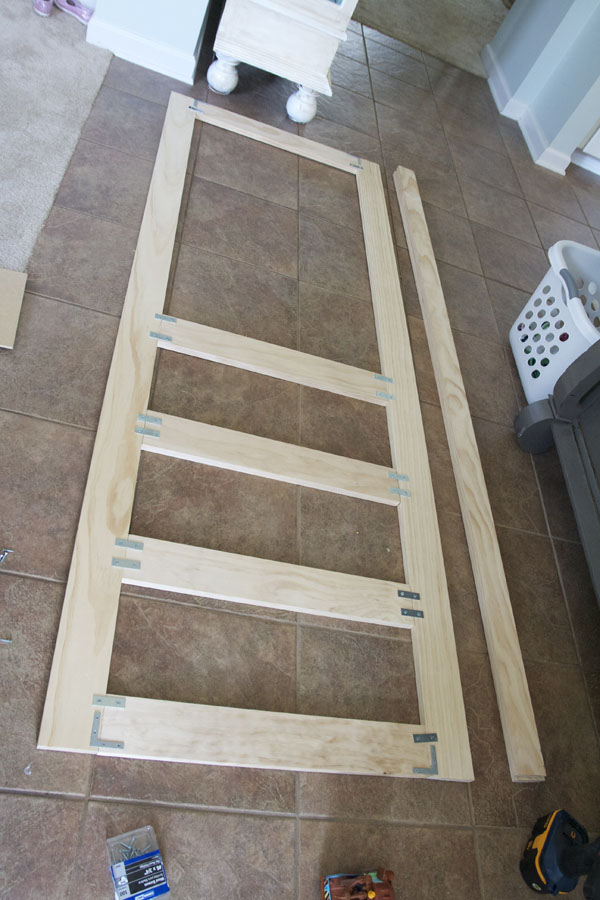
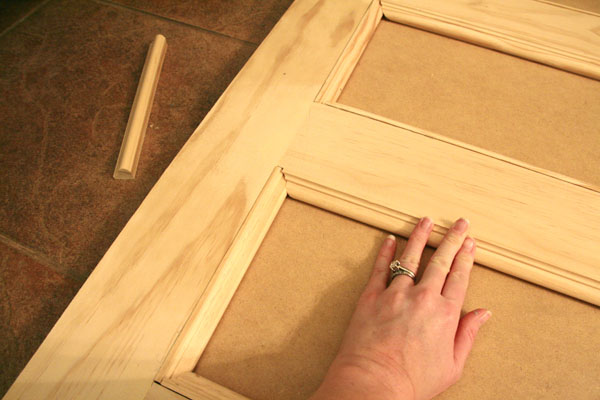
I’ll try not to get all technical with the measurements, because all of that depends on the width of your own door. We may or may not have had this put together, when we realized we did it too wide, and had to start over. MEH. We’ve never built a door before so ya live, ya learn. This is the bare bones of your structure, laid facedown. See how we used the brackets and braces to join them together?
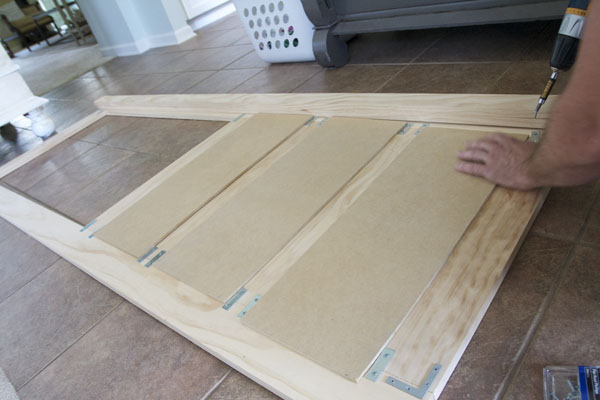
We then joined the MDF to the spaces with screws.
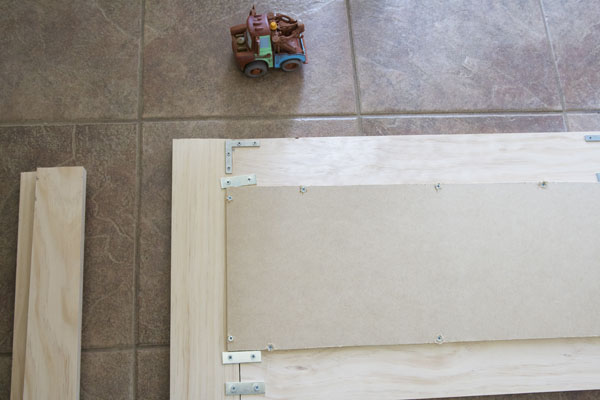
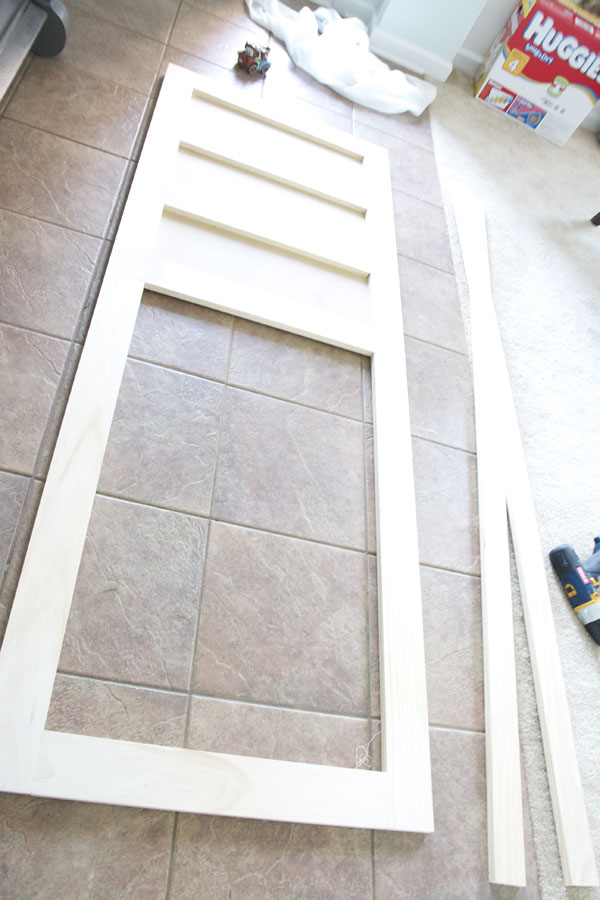
flipped back over, the door looked like this. {Apparently Huggies boxes and Toy Mater Cars are essential to your door construction.}
trim
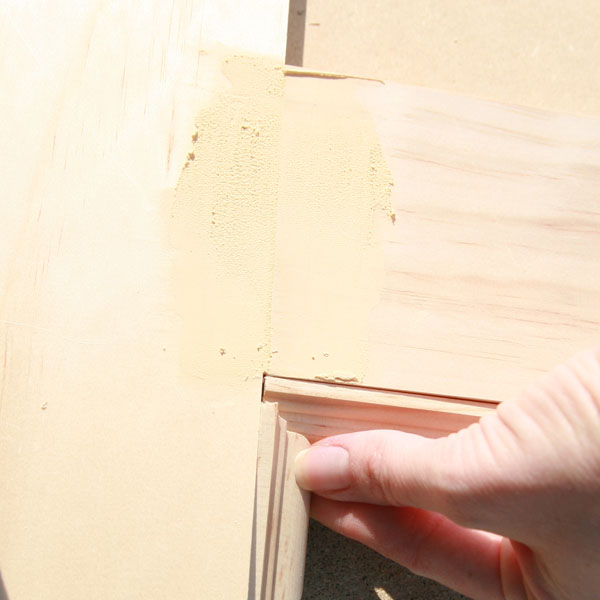
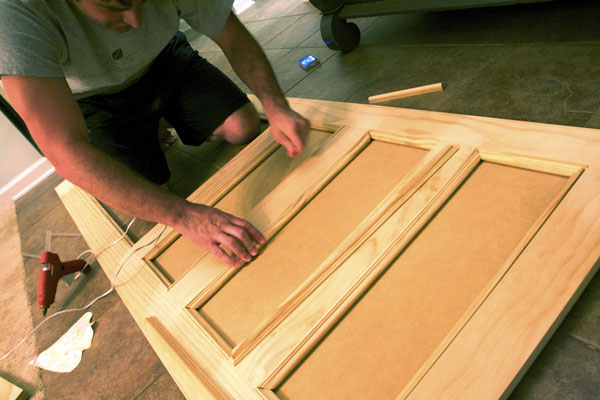
We used wood filler to fill in the gaps between the boards, (once it was dry, we sanded) and then cut the trim to fit. Here’s a little tid bit of cheat: we only cut the side pieces at an angle. We didn’t cut the top and bottom trim at an angle. Then we put all of the pieces of trim, cut to fit, in the insides of the door, and it all fit together quite seamlessly, especially once painted.
what did we adhere it with?
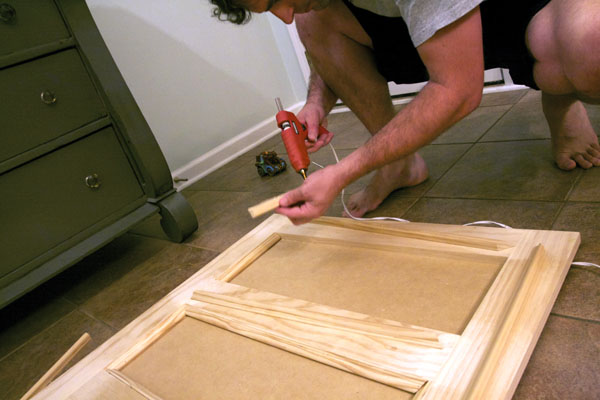
our handy dandy old trusty: the hot glue gun, of course.
I’m not sure why my hand looks like an alien appendage in this pic, but we’ll just go with it. A little wood filler in some of the corners to smooth it out, and some paint…
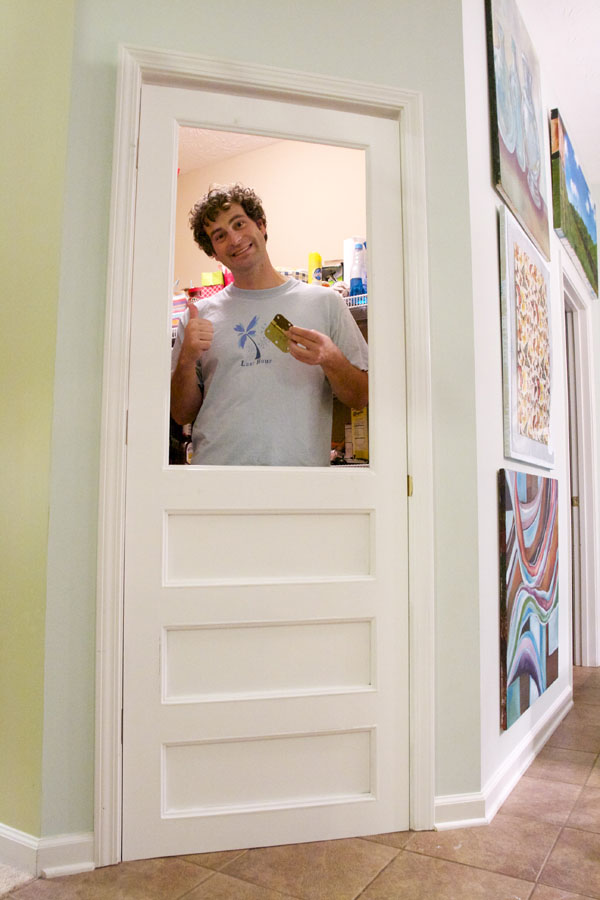
And we had a great little door. We propped it up to see how it was going to fit in the space. Just pretend like you don’t see the junk behind Jamin. It’s life. {one day soon, we shall gut out the existing pantry, paint it a pretty blue, put in nice white wooden shelving, and organize the mess out of it, and it will stay that way for ten seconds. HURRAY!} If Jamin doesn’t break up with me first. 😉
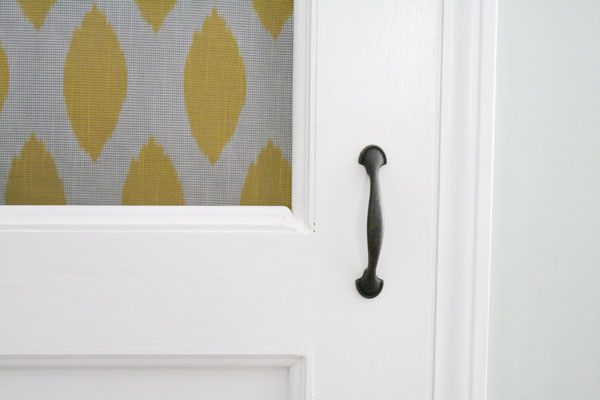
adding the screen, curtain, and hardware
Next, it was time for the screen.
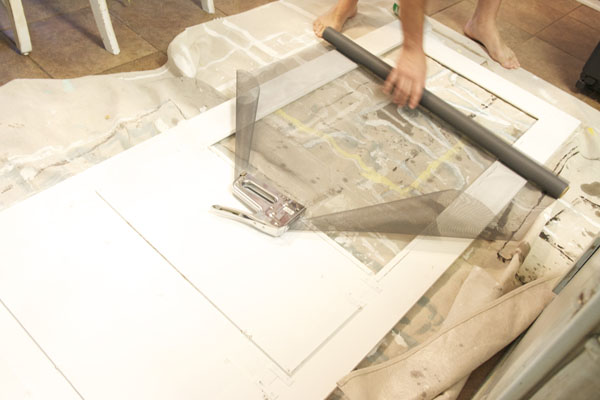
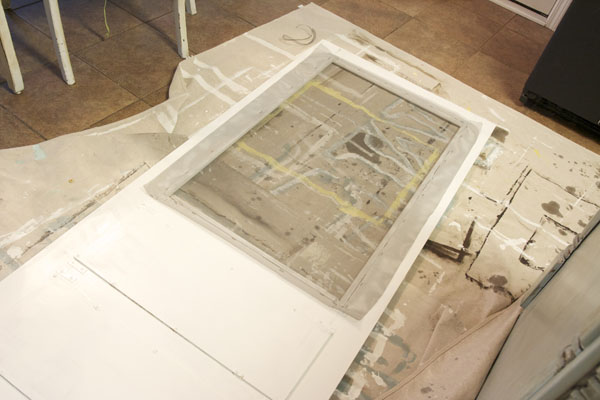
We rolled it out, trimmed it, and used a staple gun to secure it. Now, you may notice that our door is a little rough on the back. If you wanted to make the back of yours pretty, you would simply repeat the first few steps, and join them to the back of your door, complete with more trim if you like. We don’t care that much, for now, and it’s just a pantry door, so the rougher look on the back is fine with us.

Door closer
We will also be installing one of these, later this week. There wasn’t time to get to it just yet, but I’m super excited about it closing on its own…we have a new rule in our house that our three munchkins are NOT allowed in the pantry to climb on the shelves and fish our their third helping of fruit snacks on their own. Because that’s what they do, and it drives us bonkers. This closing behind us on its own will help with our new house rule. That, and I LOVE the sound a screen door makes.
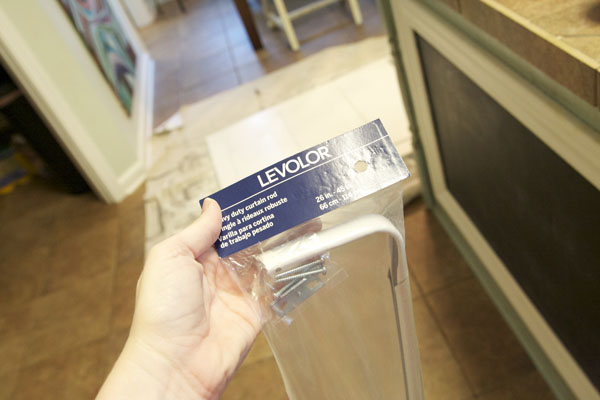
we used this to hang the curtain…
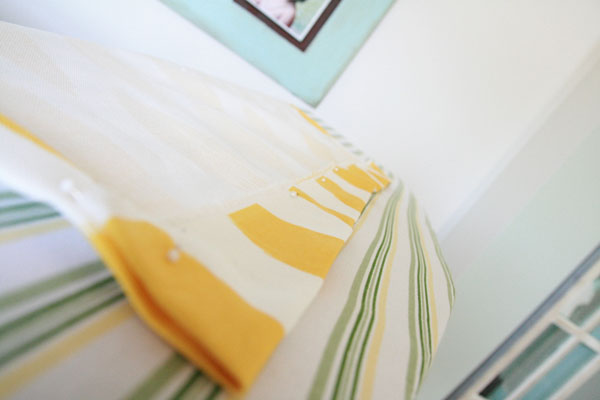
And with a small pocket rod I made at the top, hung it backwards on the rod so that the front would face the outside. We also added the small iron pull, and after actually hanging the door, {which was kind of a feat in itself…}
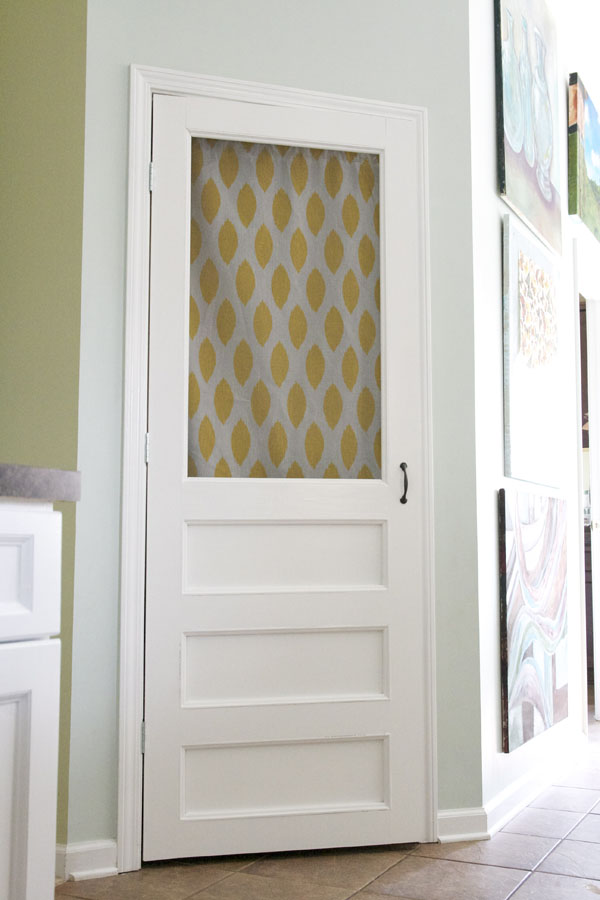
TADA!
Totally worth it to make and design my own, to get what we wanted…with a major price difference of about 130 smacks from purchasing one. And there you have it. One of my favorite things about our new kitchen. Which you can see here.
Let us know if you have any questions about how to build a screen door in the comments below.
Oh my lands you have no idea how much I adore this! Totally totally love. Such a genius you are. I have wanted a front screen door for so long but the ones at the stores have the screens and the bottom. Like you with little ones they punch the screen out! So totally saving this in my idea file! Thanks again.
BRILLZ. No. Seriously. BRILLZ.
Oh my, LOVE this idea! I'll have to see if I can get my husband on-board 😀
I LOVE this Ashley! Maybe I can get my hubby on board to make me one too. 🙂
Gorgeous!! What a great idea!
So amazing! You are one talented and lucky lady!
That is sooo stinkin' cute! I have always wanted a pantry screen door! 🙂
LOVE this to pieces! And I love the little peeks of white cabinetry I keep spying… I am dying over here for the full kitchen reveal! I know it's gonna be so beautiful! With all of the white and yellow you are incorporating… the word "happy" keeps coming to mind- which is a great way to feel about such an important room in your home!
You know I love it….just keep me away from it. I might accidentally break it…or hit my head on it…or eat it. 'Cause, clearly, I'm not afraid to eat everything in your house. (SO bummed I forgot that Subway sandwich!)
😀
Lay
It looks fabulous!
It looks amazing!
Ashley! It's amazing!!!!!!! You inspire me! 🙂 xoxo
I love, love, love this!! I recently gutted, painted, and stenciled my (much smaller) pantry. Just waiting on the hubby to install my shelves. I searched for a screen door but couldn't find one small enough- 24". I told my husband I thought he could probably make one, he's pretty handy. Now he has no excuses. I have photographic evidence it can be done.
Did I mention I love this? Cause I do! Thanks so much : )
i covet your door and want one in my house. thanks for the great tutorial and inspiration! enjoy!
i'm sharing your amazing door with my fans because it's just way too amazing not to!
http://www.facebook.com/barnowlprimitives
xo ~ kristi
I LOVE this! It looks awesome! I'd love for you to link it up at Sundae Scoop.
Wow, what team work!!! It looks wonderful 🙂 Great job, y'all!
WOWWY!!!!!!!!!!! This is totally the coolest thing ever!!!!! You guys rock my socks!
I love the curtain! What's the fabric? I've been looking for something similar in blue….thanks!
I love how fresh and clean the door looks!! Great job on the fabric selection too!! 🙂
Wow! That was quite a project. Well done!
WOW love love it! Amazing job 🙂
I would have been impressed if you found and installed a cute door. But you guys MADE one? Crazy! (In a good way of course.)
So impressive and it looks just perfect in that spot.
Now, how do I get one of those at my house????
I adore this. Can you send your hubs over to help me? I need to find a handy helper to do some of this stuff. Just love your door and the ikat to boot.
Wow!! Love your ingenuity! Great job!
~jaime
This is great and will help a lot. We have been talking about adding a screen door. Thanks for sharing!
What a clever idea! I love the fabric!! What a great way to spice up a boring door! And WOW on building the door yourselves! It looks great!
This is SO wonderful! I totally agree that door nowadays are totally lacking in character! And I LOVE this! Coincidentally I was just talking to my husband about making some screen door like this to cover some storage shelves! So thanks for the tutorial it is perfect timing!
I would really love to have you come do a guest post about this project on my blog Remodelaholic if you are interested please let me know and I will send you the details!
Thanks!
Cassity
What fabric did you use? I’ve seen it several times before and love it. Who is it by?
hey! so sorry. thought I’d included it. guess that was my kitchen post! 😉 http://www.fabric.com/ProductDetail.aspx?ProductID=2f3b0f73-8a2a-4c27-bcb8-2ab68d1b3706
Great idea. Adds a ton of character. Love it.
What a pretty door, you’ve done a great job building it too – thanks for your tutorial. I’ve got this linked to my doors post too today, well done!
Absolutely, love it. Perfect tutorial…
I just pinned you here…
http://pinterest.com/sdavis245/woodworking-and-moulding/
I know it’s been a while since you’ve done this, but I just found it, and I am in LOVE with the idea. But what I’d love to know is how you chiseled out for the door hinges to sit in the side of the door instead of on top of it? Did you use a router? Because I recently tried with a chisel, and yeah, not pretty… I just didn’t see the step in the tutorial.
We didn’t chisel….we used small hinges, since our door was light. The frame had already been chiseled and provided enough room to hind the small hinges. That is the quick easy way to do it, but there are all kinds of tutorials out there about chiseling a door out. And yes a router is the easiest way.
What did you use for the trim pieces? Thank you!
Jamin is so talented and you are lucky to have someone that loves projects as much as you do. You two make a great team… It’s beautiful and it lets the air circulate in your pantry…. I would love to have this same thing on my pantry door… I have a good size pantry… I’m lucky in that… Thanks for sharing this with us…
Love this! Thanks for sharing 🙂
Oh my…. I can’t believe you made this door from scratch! I am seriously impressed!!
Looks terrific… 🙂
hugs xx
Crystelle
Crystelle Boutique
Awesome job building this screen door! Great pics an instructions! Thanks, I will be building one like it.
Thanks Suzanne! Hope you enjoy! ;}
Looks Great! What size is it?
I LOVE YOUR BEAUTIFUL DOOR!! You GUYS DID A WONDERFUL JOB. IM THINKING ABOUT BUILDING ME ONE TO MY CRAFT ROOM NOW… Love it!!!!
Awesome! Just love it! Thank you for sharing. Love that not only does it look great, but you did it in a way that real people can relate to. Looks pro on front who cares on back! ( which the to me, the back looks just fine too! ) Job well done!
How did you cover up the hardware on the back?
LOVE LOVE LOVE IT !!!
THIS IS TUTORIAL EXACTLY WHAT I HAVE BEEN SEARCHING FOR!!!
I’m not sure how many years ago you wrote this article but I just found it on June 24, 2020. I have spent a lot of days researching different DIY screen door tutorials on Pinterest, but All the ones I read said to join the wood pieces by using a biscuit joiner. I don’t have one & I don’t really want one either. That would increase the cost of the door dramatically. Besides I have no extra space to store another tool that I probably will never use again.
While reading your article, I immediately noticed your photos of the flat brackets that you used to join the wood pieces! I wasn’t even done reading everything when knew this was the exact tutorial I have been looking for! Easy & inexpensive! I pinned it & emailed myself a copy right then. Then I went back and read the rest.
An extra bonus for me was your note about straight cut & angle cuts on the trim Now I only have 2 angled to cut (to screw up instead of 4, lol)y That was very clever & I will be doing that too! very
I am have been planning to make 2 different screen doors: one in each of my 2 bedrooms. Each one will be a closet door. My bedroom closet entrance is only 24″w x 8 0″ tall & the other bedroom closet entrance is slightly more martow, at 22″ w x 80″ tall. So buying 2 differeby odd sized door has been impossible.
I already have enough extra fabric that matches my bed quilt & window curtains, so your screen door window will match perfectly!
Thank you so much for writing & sharing your tutorial with everyone! I know it sounds silly & unrealistic, but I feel like it was written just for me!
I am forever grateful and I sincerely appreciate your time & effort!
I CAN HARDLY WAIT TO GET STARTED !!!
YAY! This comment makes us so happy. Your project sounds awesome. So excited for you + so glad it helped!