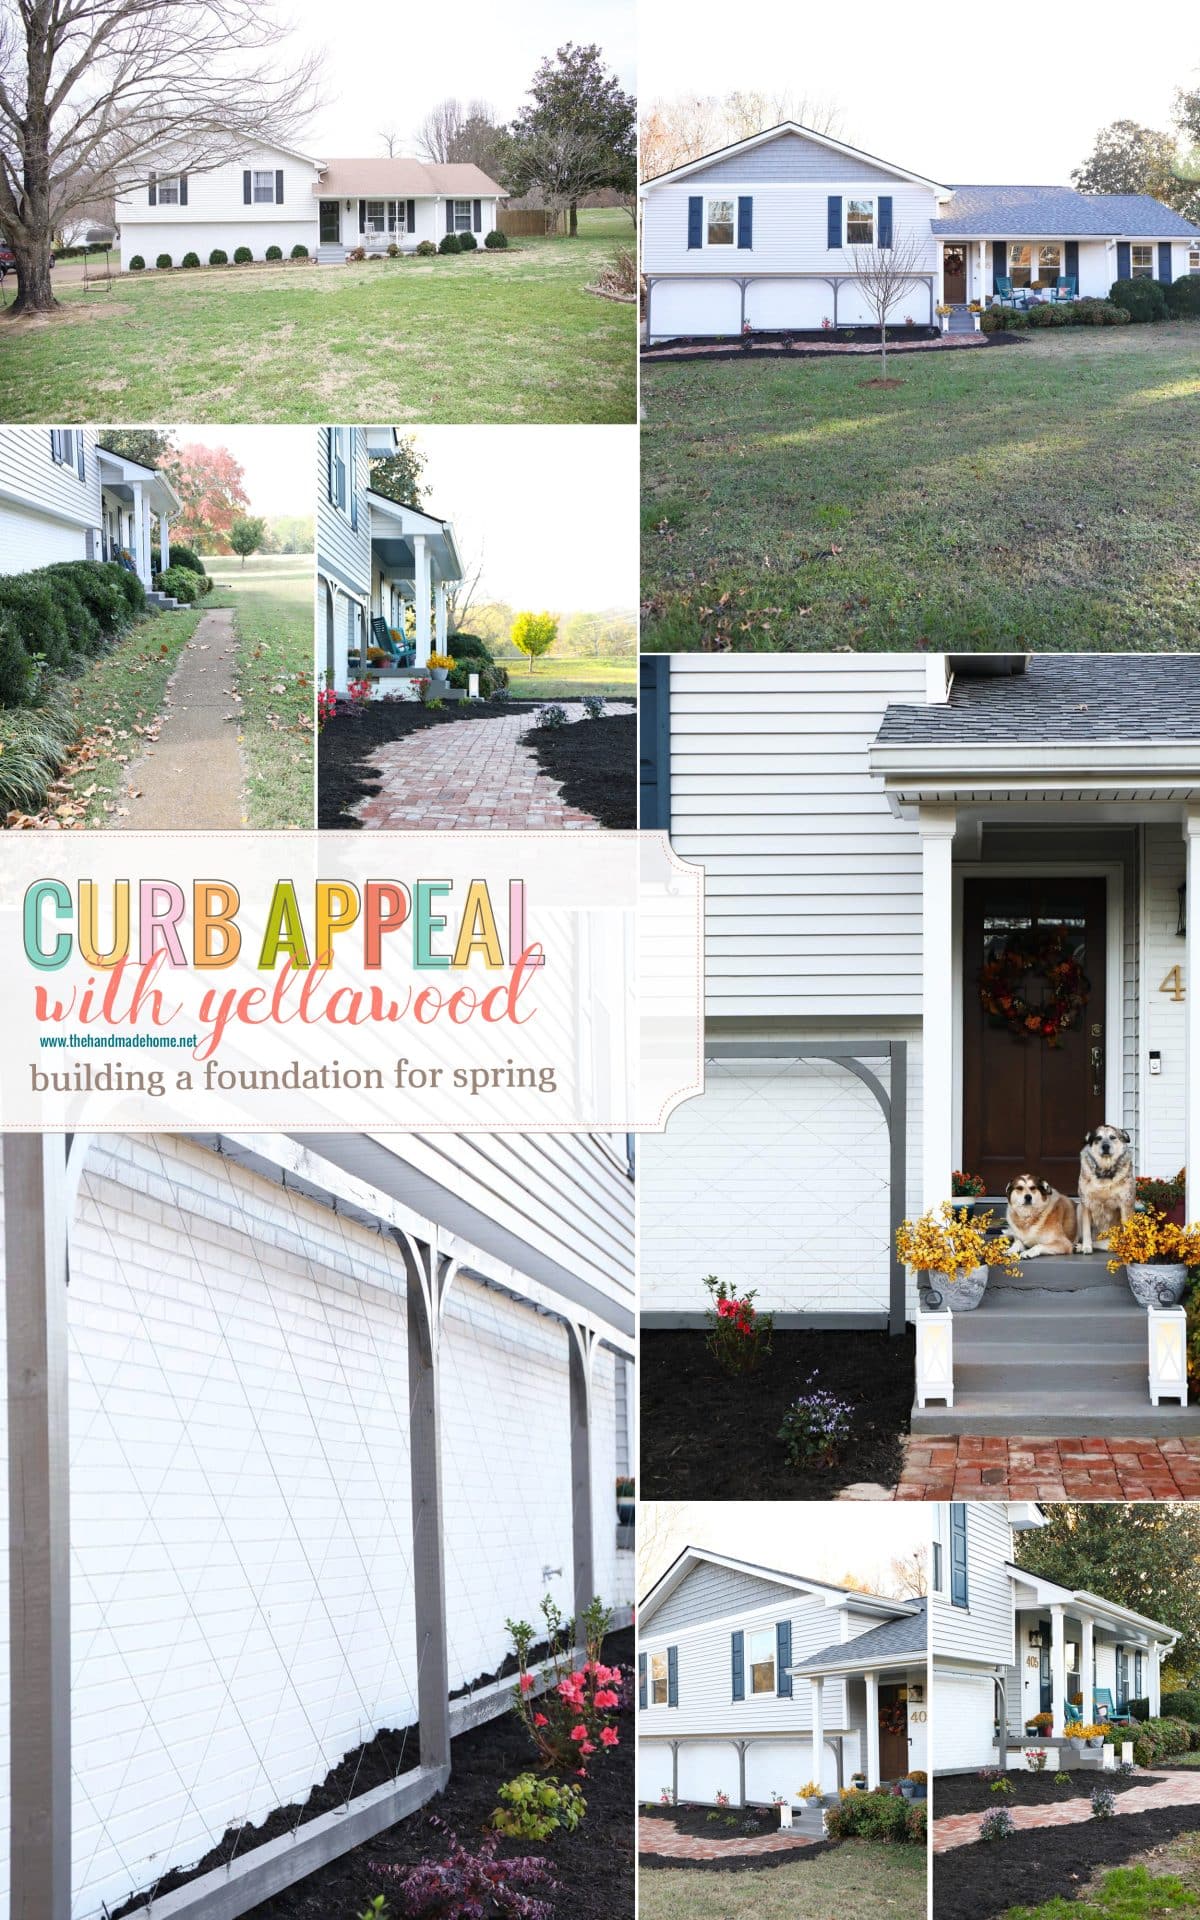
curb appeal with yellawood
Remember the post we shared a few weeks ago about our front yard landscaping inspiration? Once upon a time, our yard had a mullet. Business in the front… party in the back. We’re thrilled to share our front yard makeover: Curb appeal with YellaWood®!
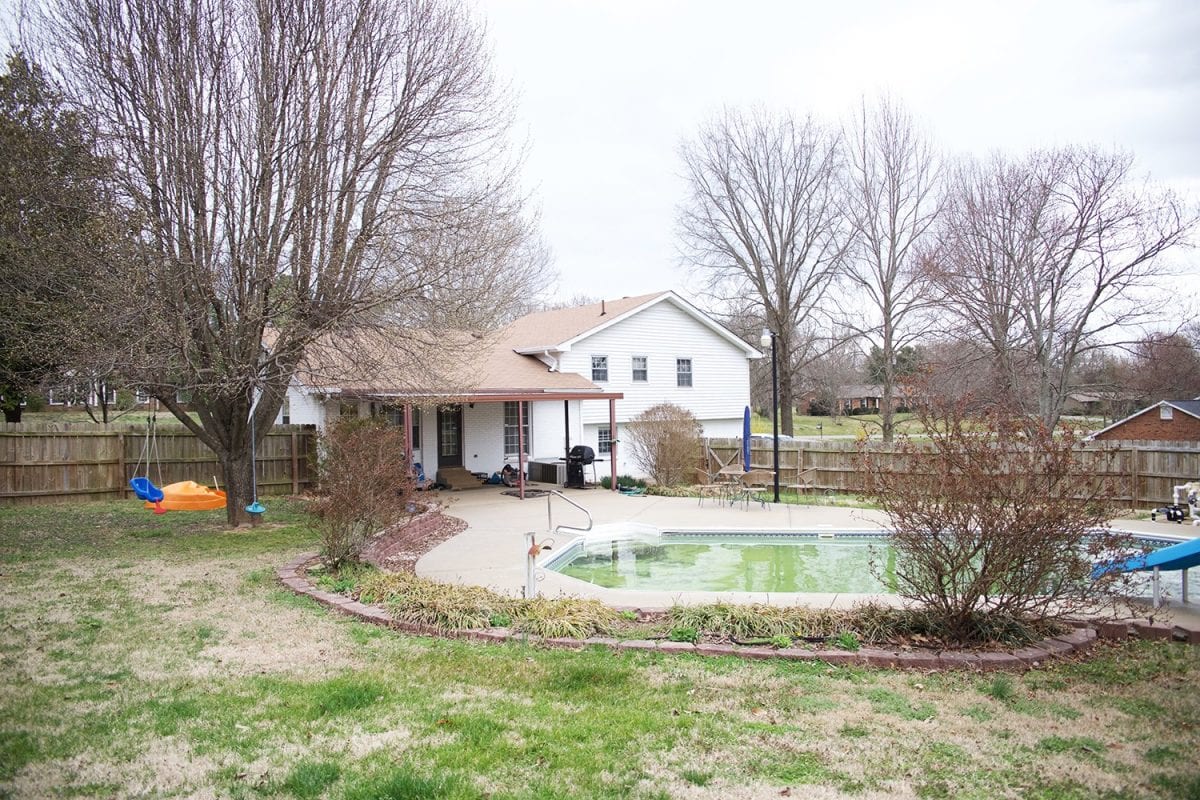
A quick little history: Our yard sat for years, while we worked away on the inside in phases. It’s been a total gut out with the main level + upstairs, outside makeover, an added basement from a garage, pool room addition, back yard cabana, then finally the primary suite which includes our bedroom + bathroom, butler’s pantry + laundry room. {Still in the works with those finishing touches.} Then this summer, we moved back out {I know. Hold me.} while we took care of a water damage issue {bad faucet} to have all of our floors redone. {It had a happy ending and we’ve recovered… More on that later, too, but all those crazy adventures can be found here.}
Then we moved back in, to dive into this project, and one more coming up in the next few weeks… All in between our day jobs, of course.
That summary was a lot. This 1976 fixer upper house has been quite the journey for us. Blood. Sweat. Happy tears. But we’re thrilled to share the first part of our plans for curb appeal today, with our trellis reveal + new walkway. Now is the time to prep those yards for spring!
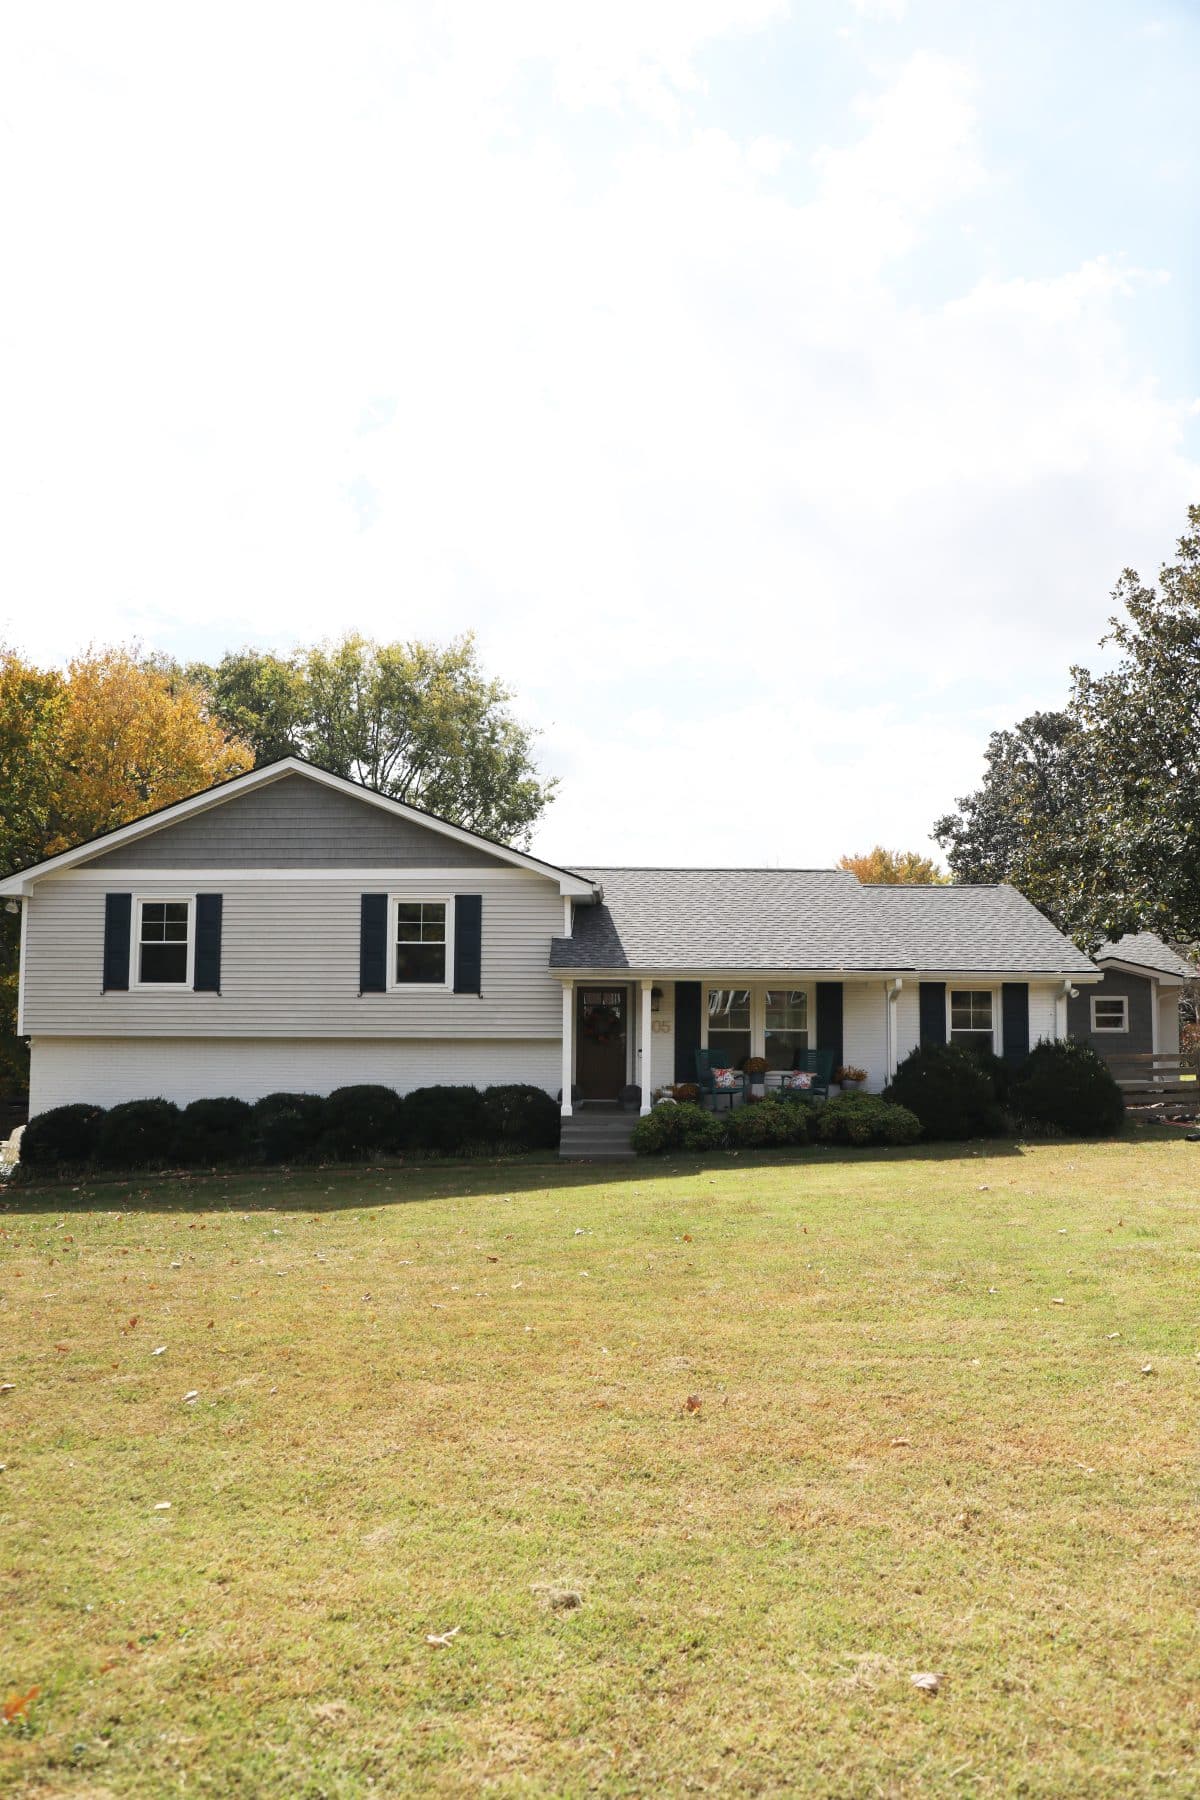
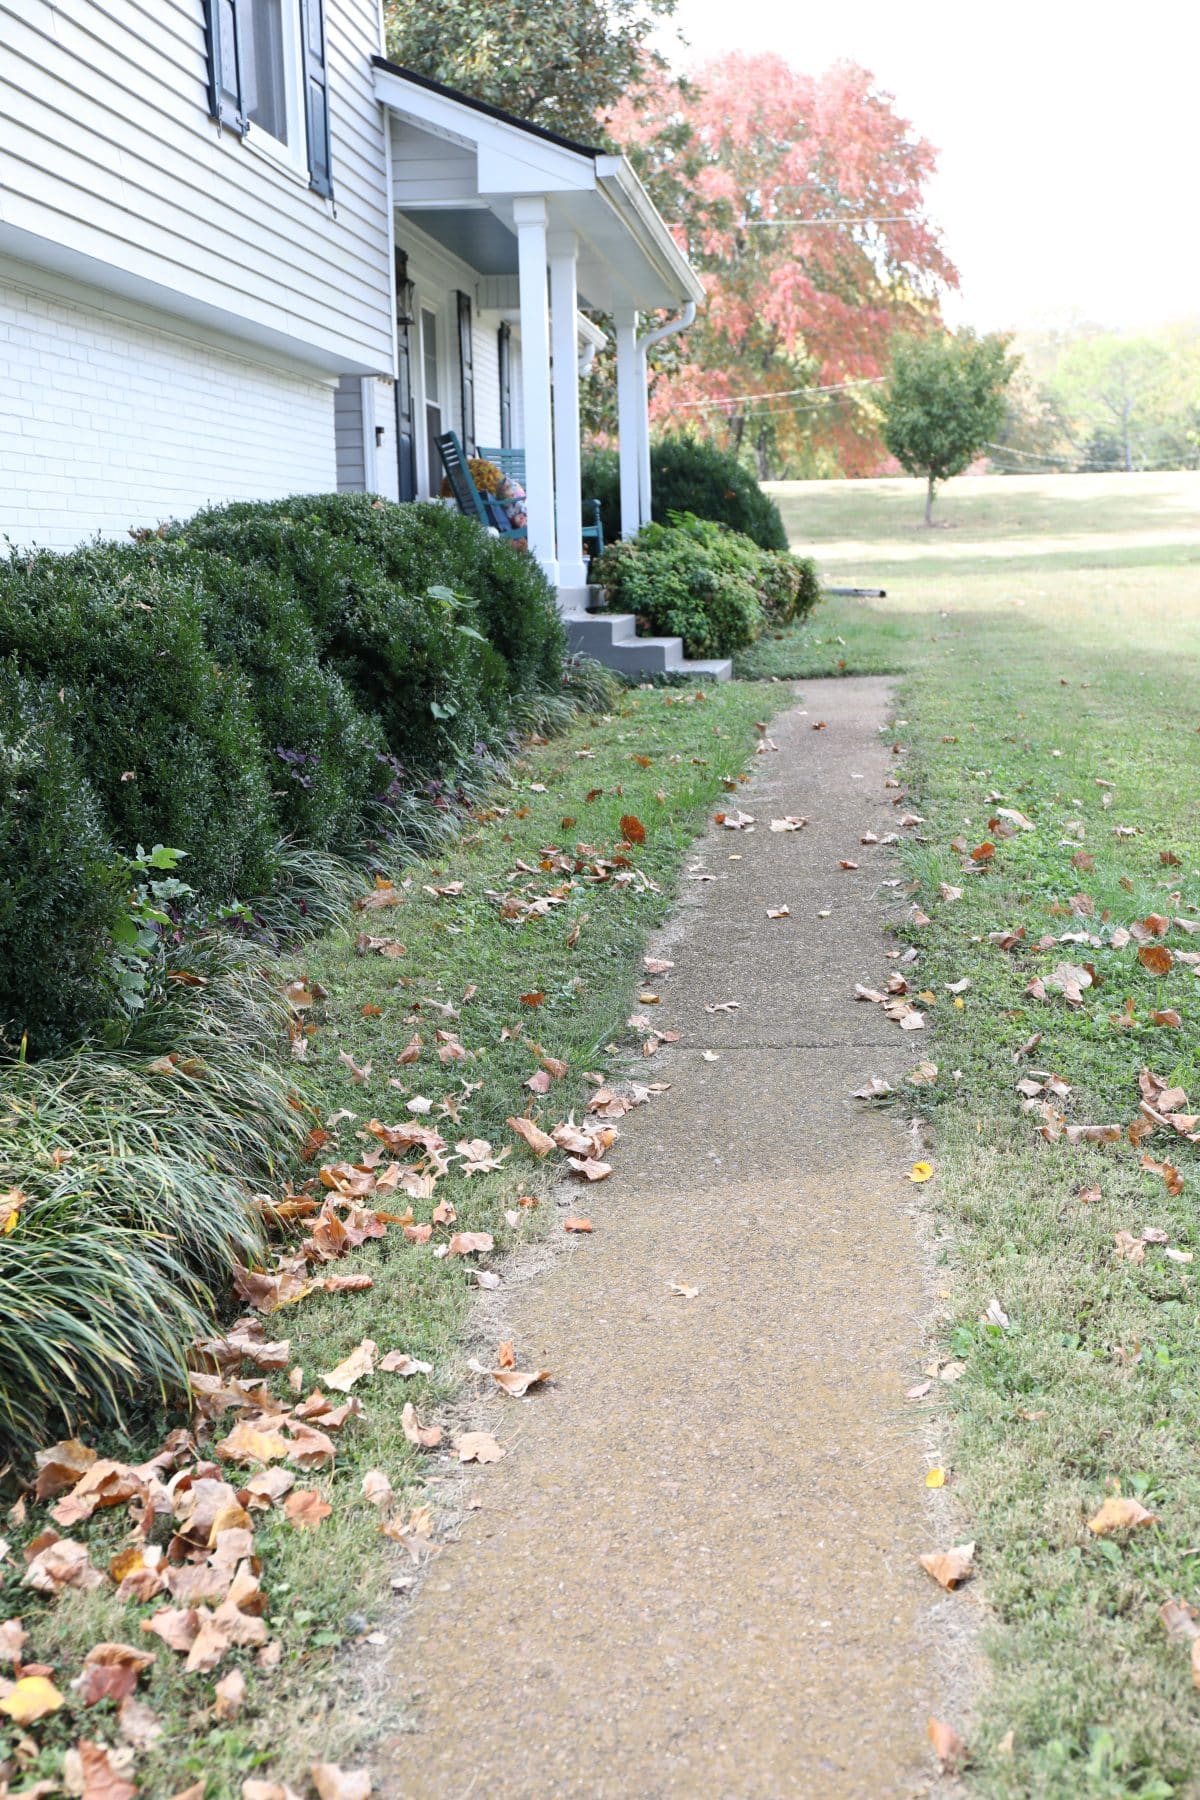
Here’s where we started:

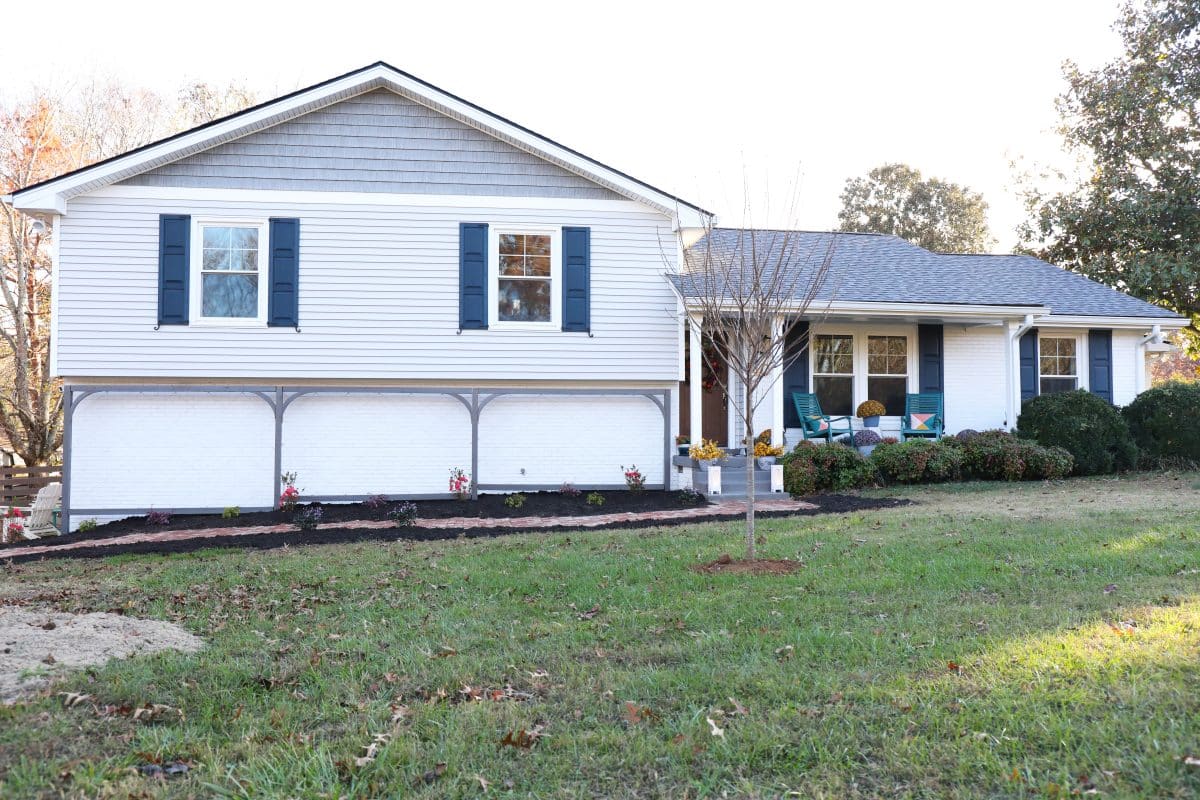
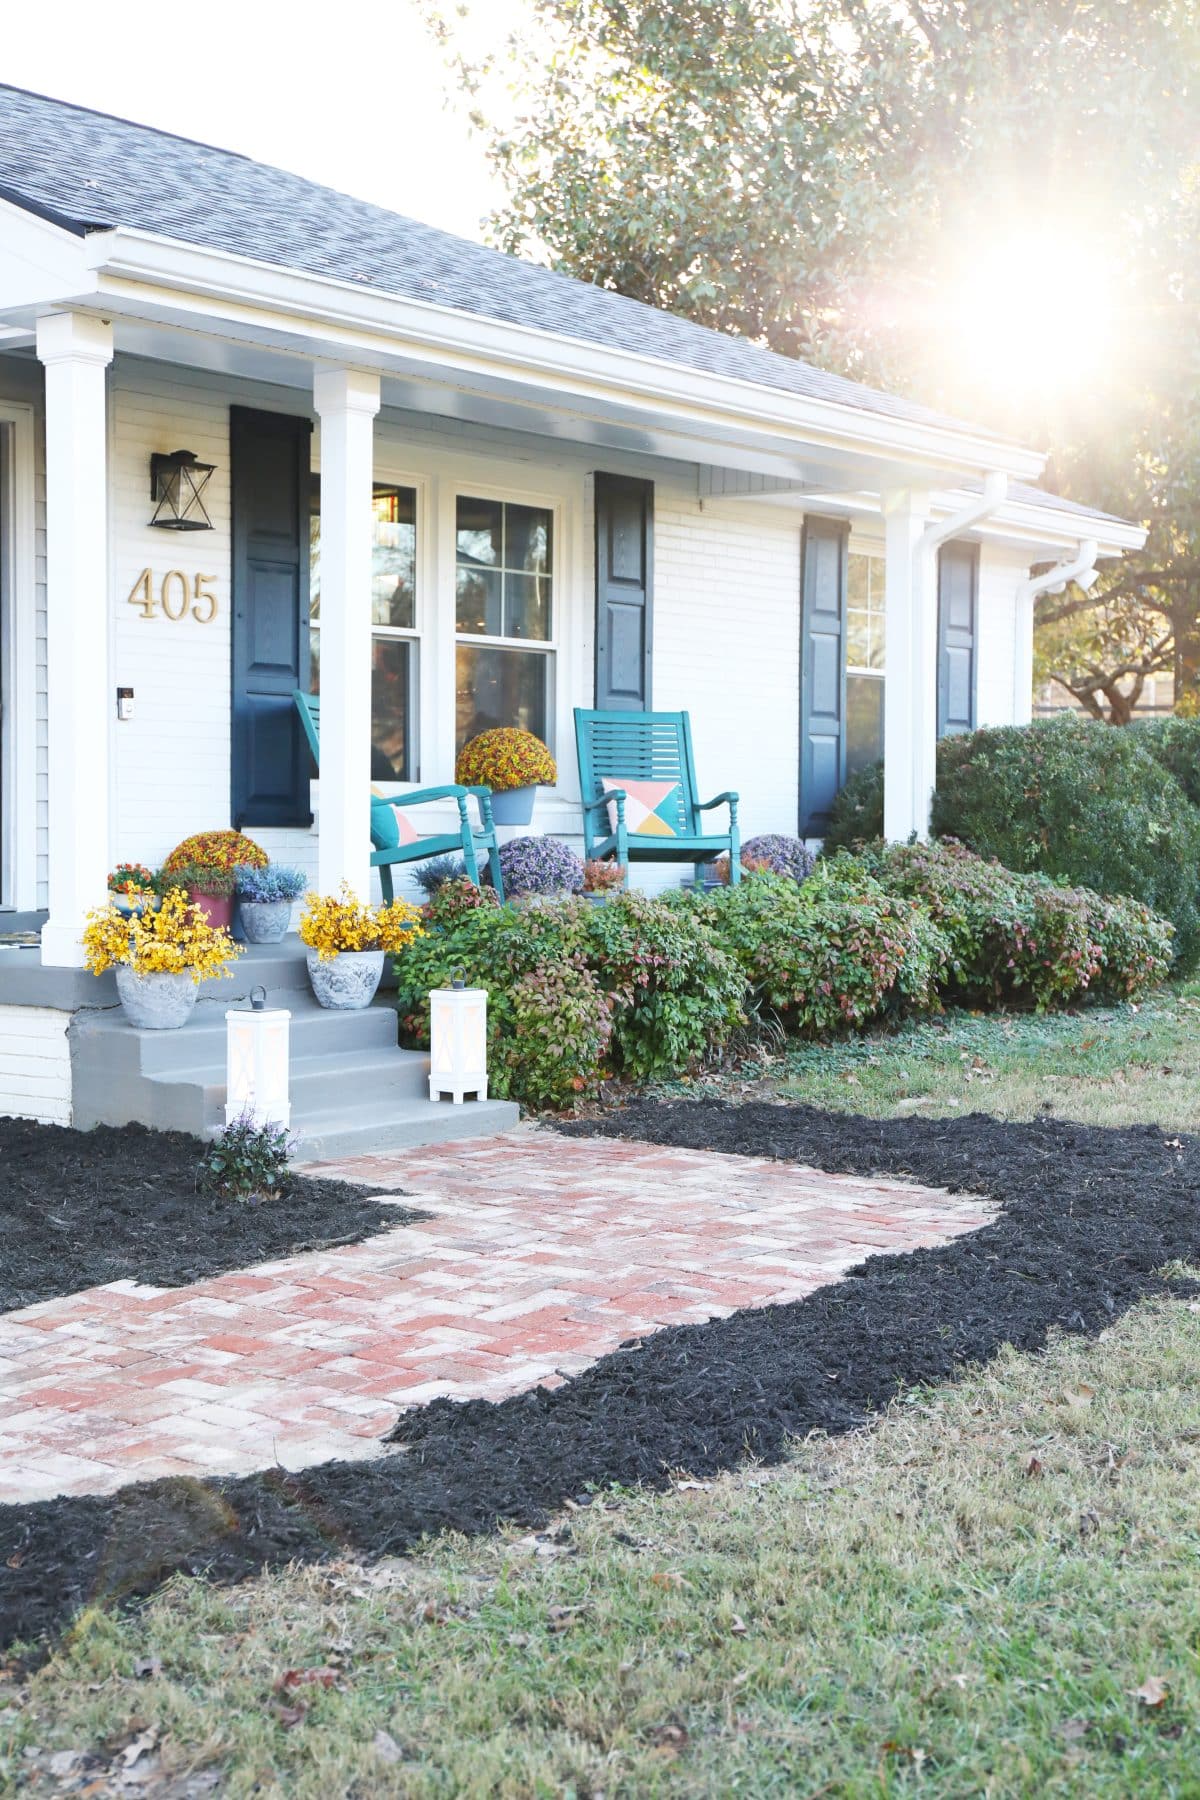
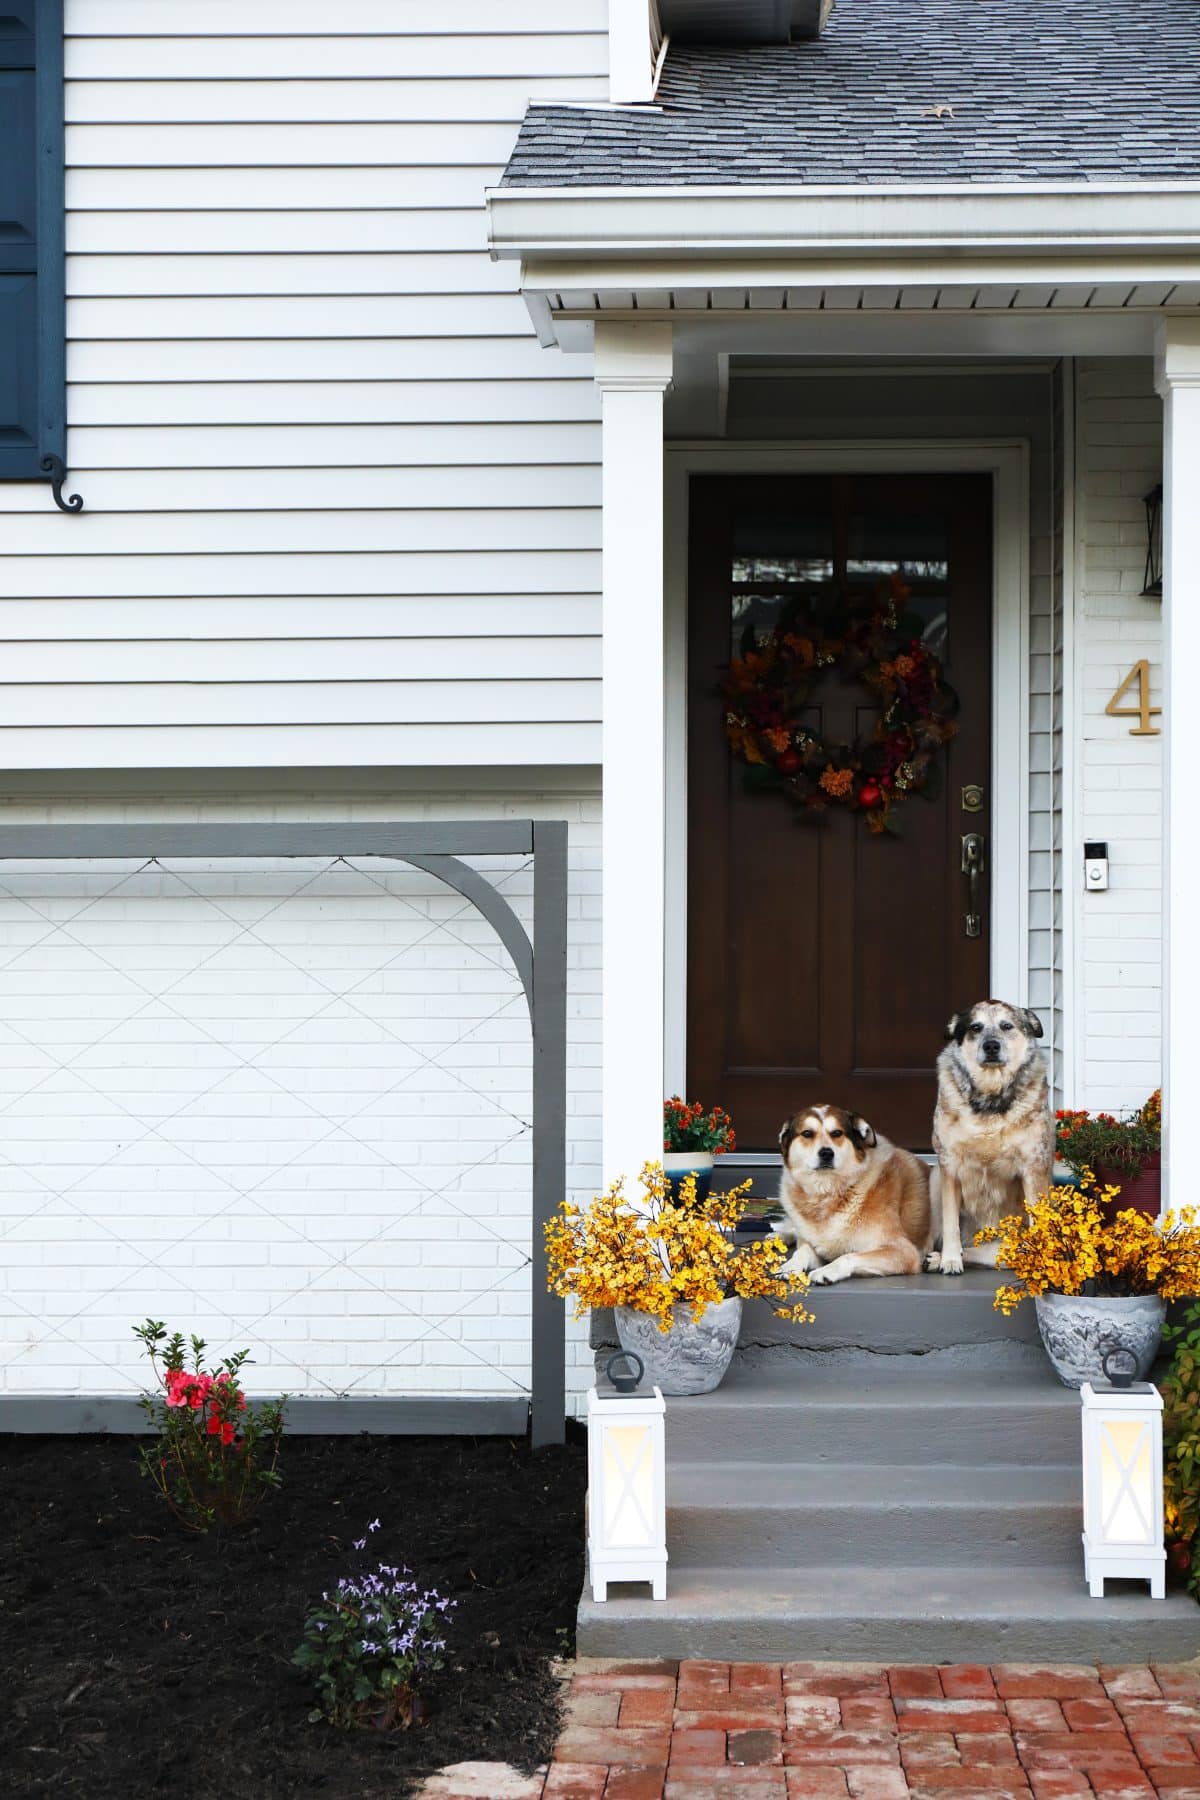
And here we are now!

Our main goal for the front yard was to bring in some major character, and curb appeal in phase 1. It was definitely time.

Our phase 1 plans are a two part system.
A. Architecturally:
Split level homes are a little tricky, so we wanted to soften it up a little with some great curb appeal and a master plan. As a split level, it honestly has some harsh angles which are both charming, and a little annoying. They don’t allow for much wiggle room, but they also have that fun vintage feel. We just didn’t want it to feel too dated because there’s a fine line. The key has been in a little personality, in making this house our home.
Enter YellaWood® our go-to and trusted lumber brand that has been a part of everything we have built outdoors. We chose it again to truly help protect against rot, termites, and any fungus that might try to grow.
We decided to go ahead and implement a few big things so that in the spring, we can dive back into our long term plan of what I like to call an “English Garden” approach. {More on that below.} If you remember from our initial {dramatic to make a point} sketch up, this is the direction we’re headed.
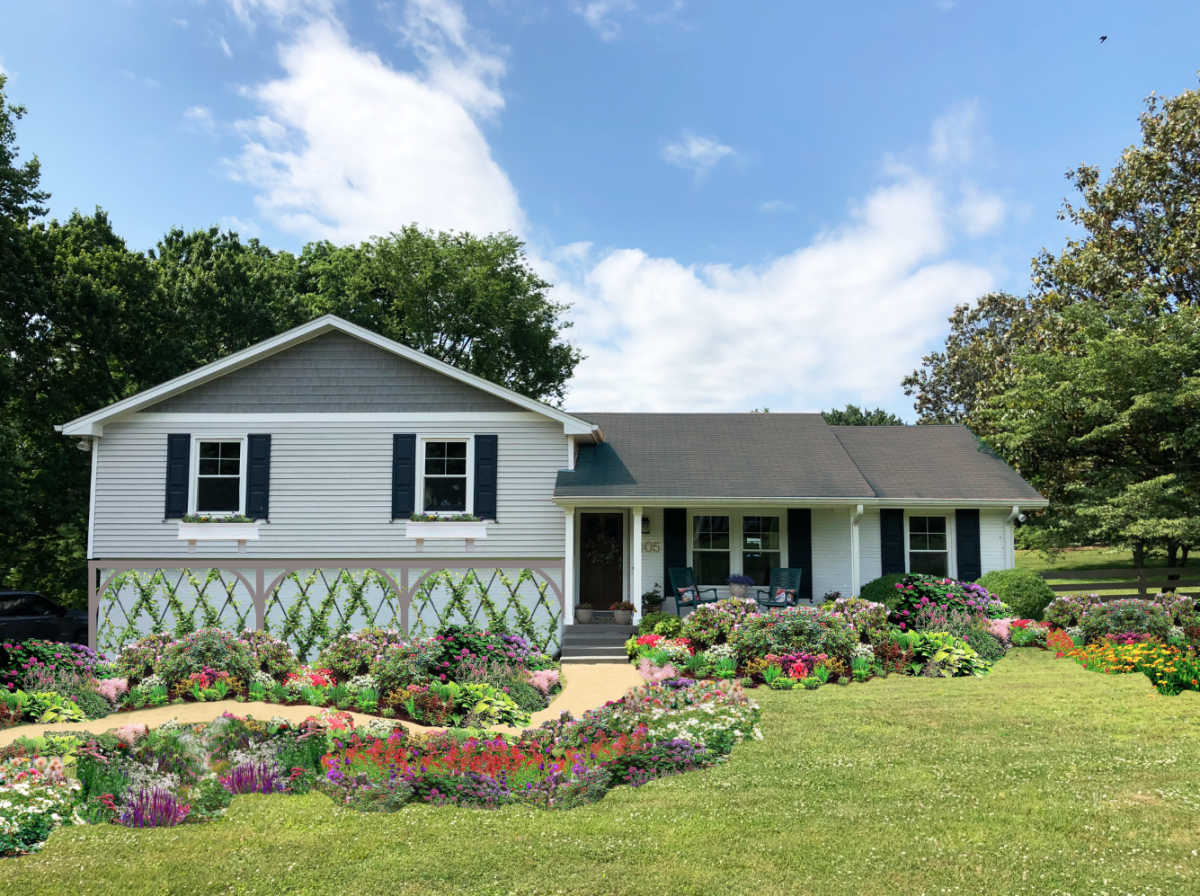
Not a bad start!
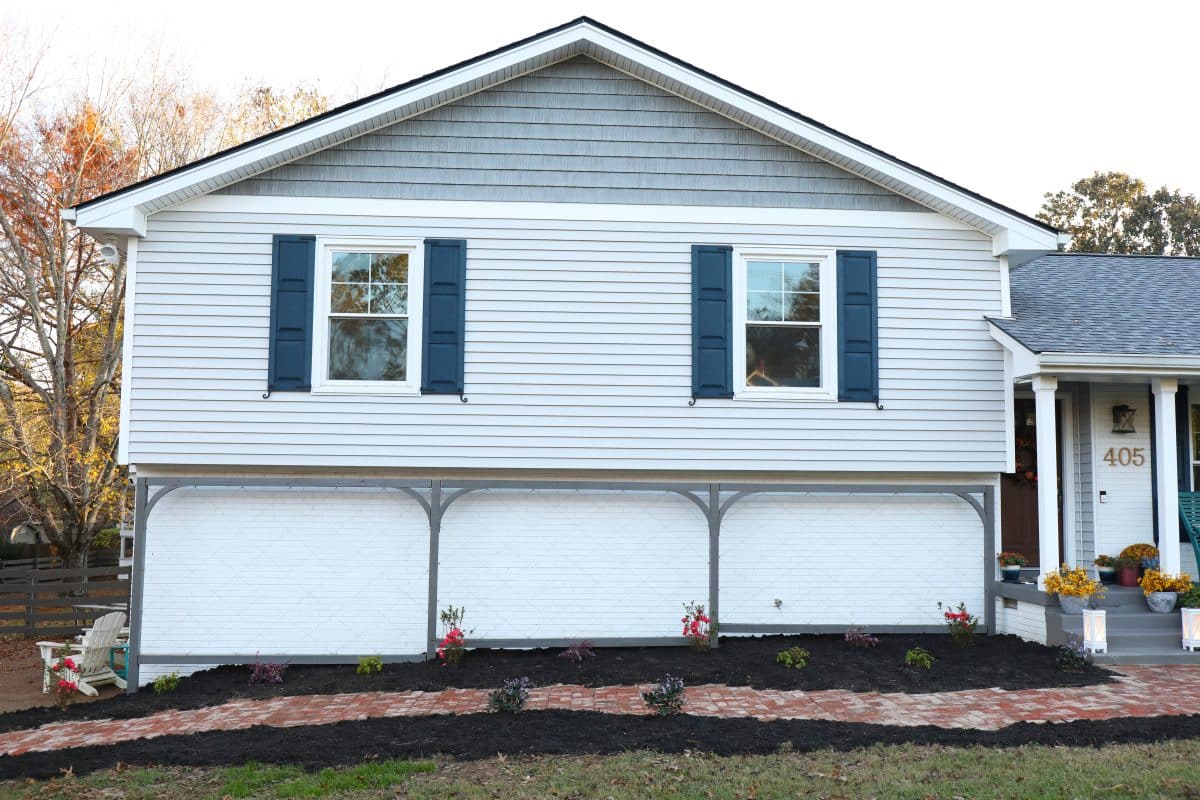
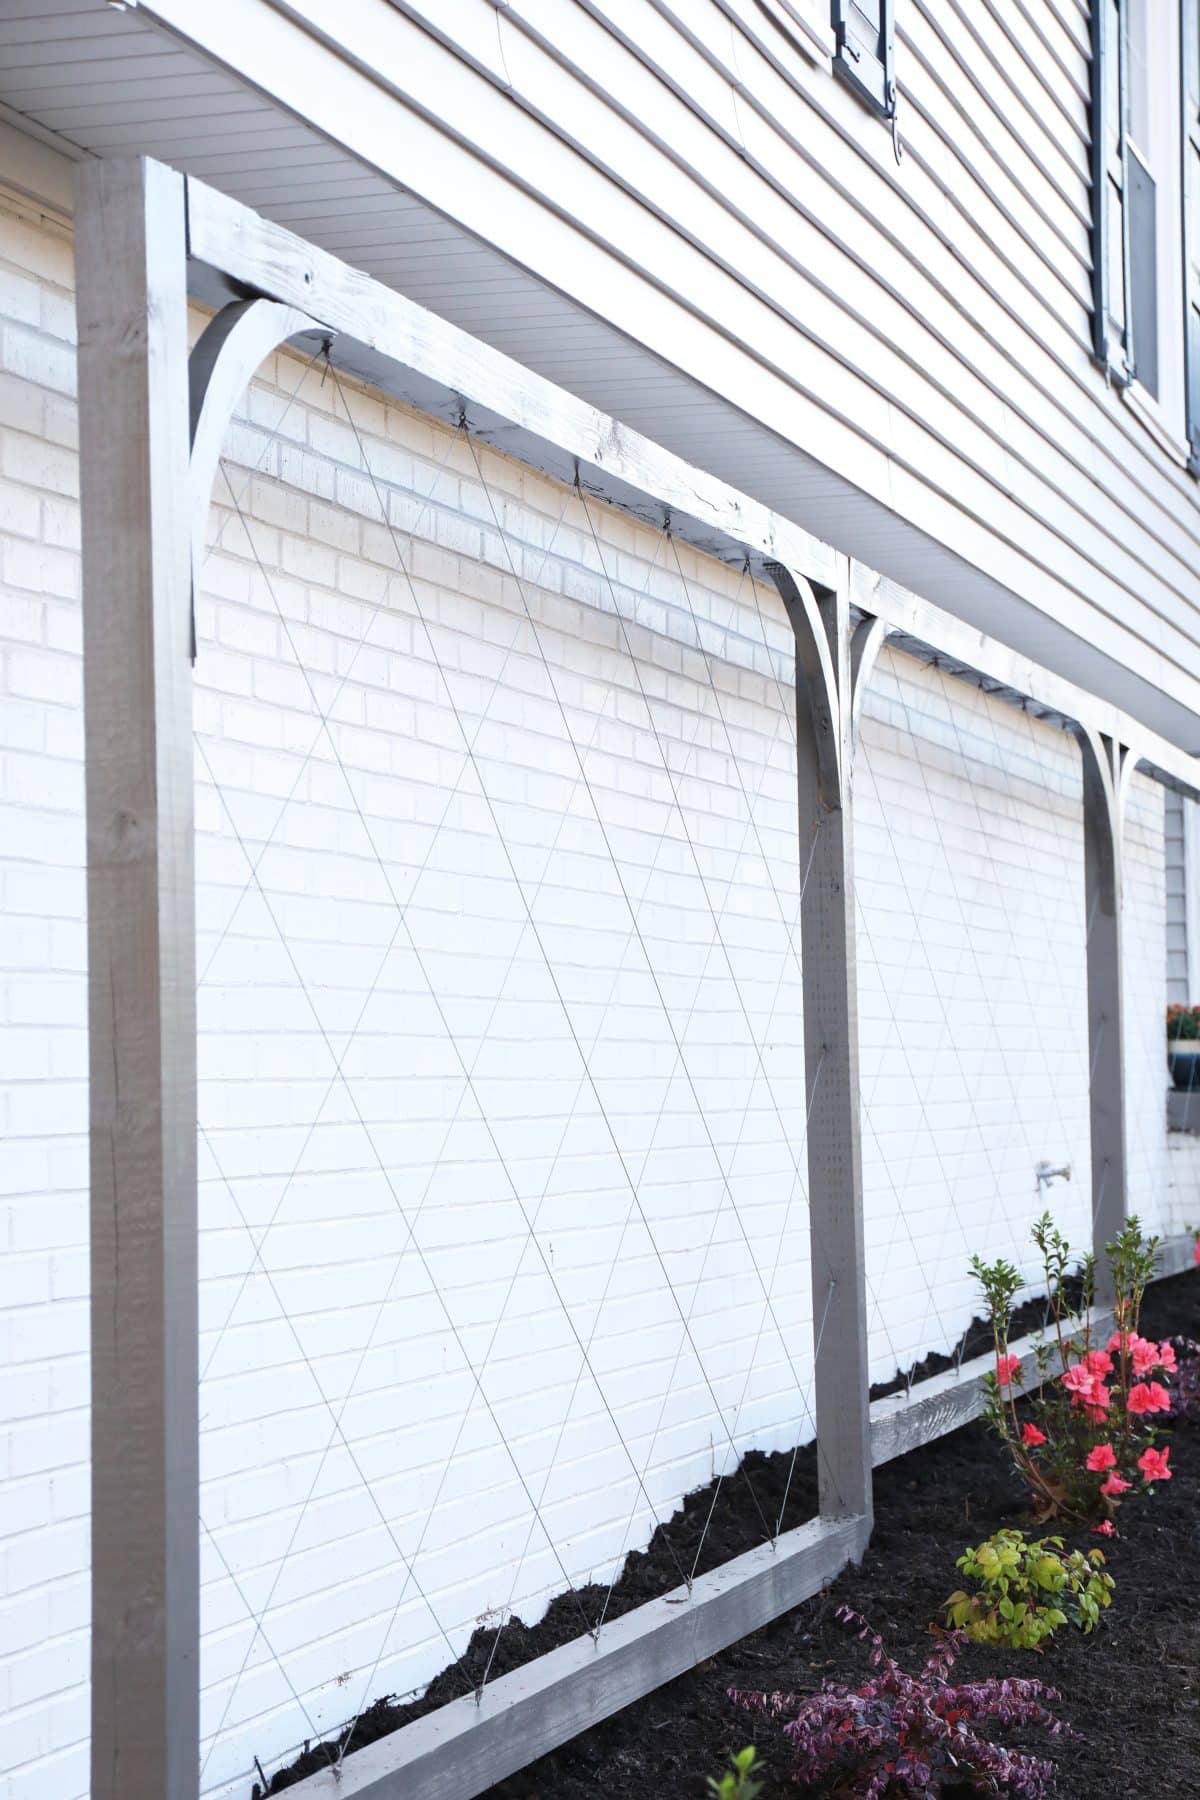
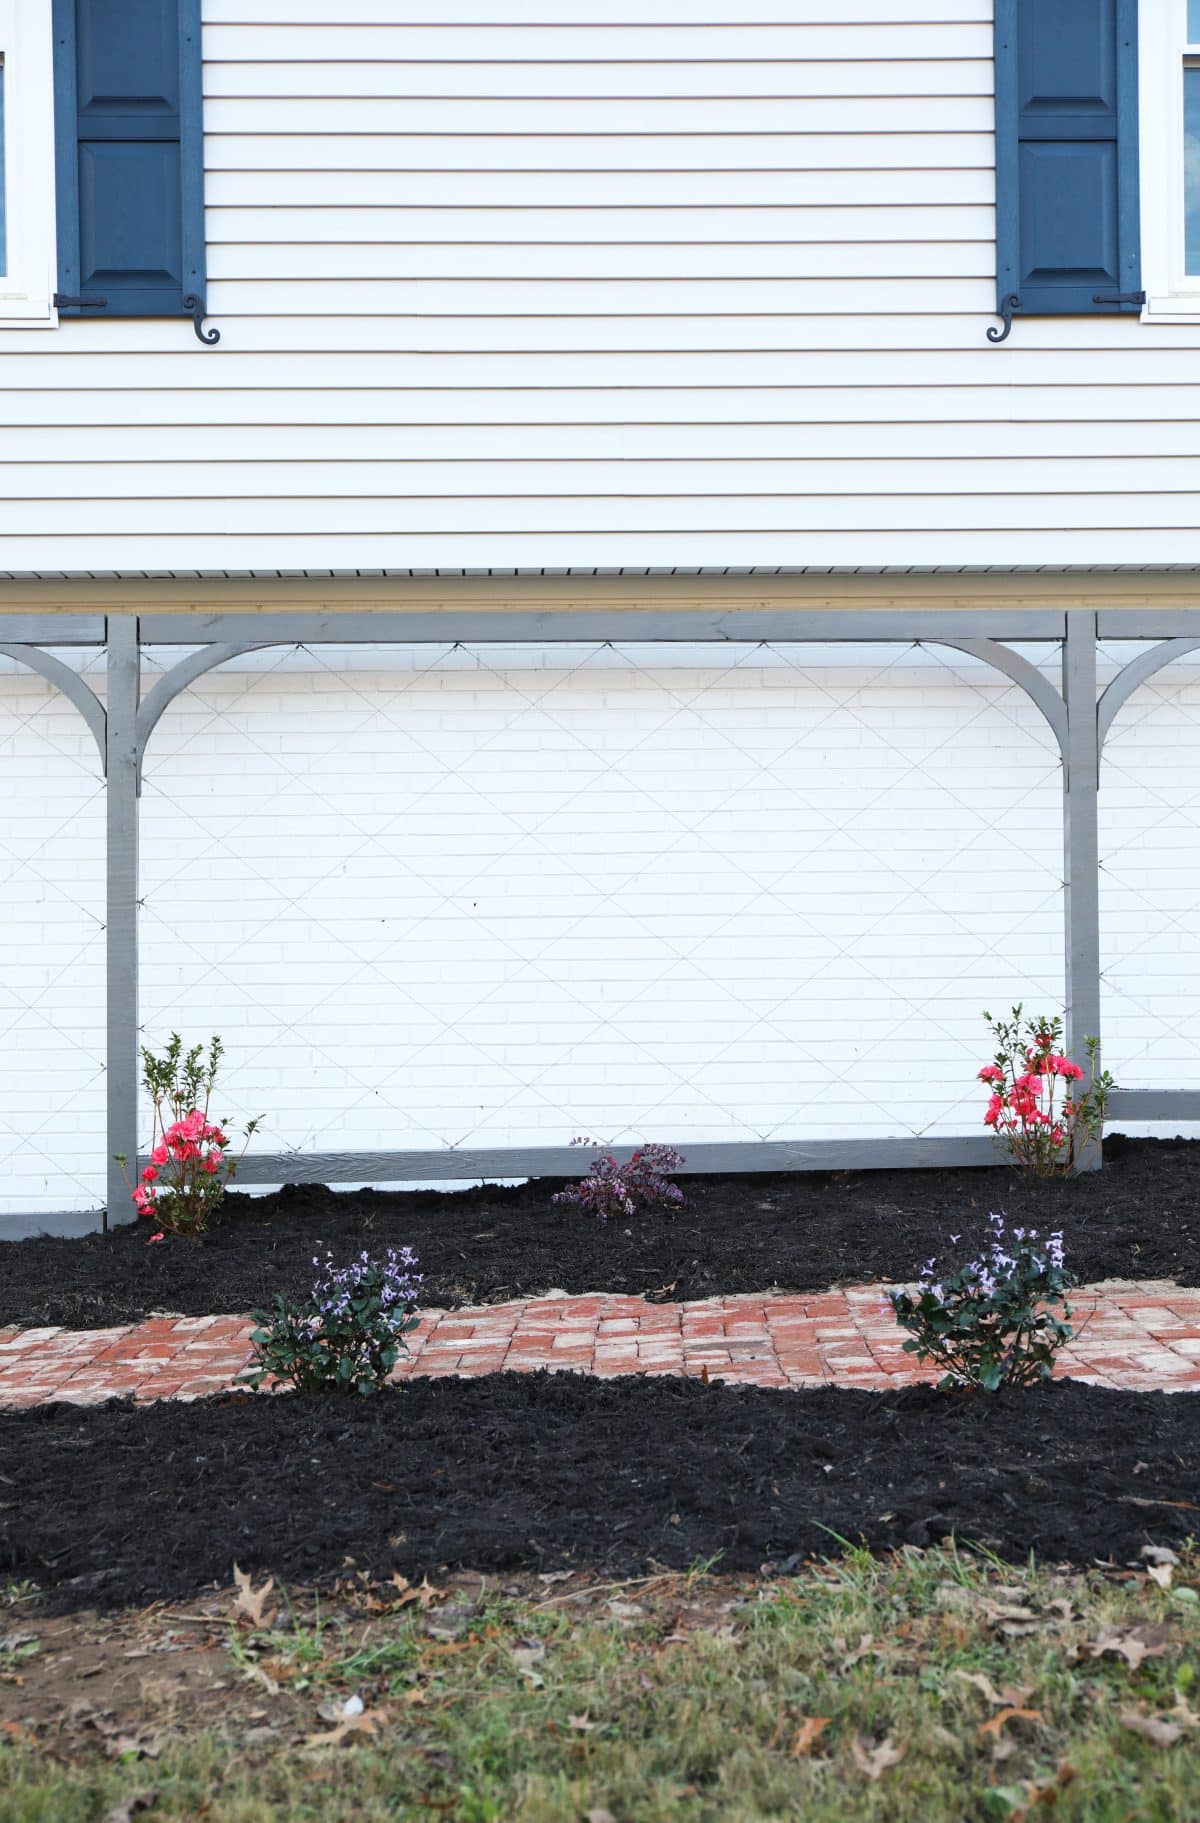
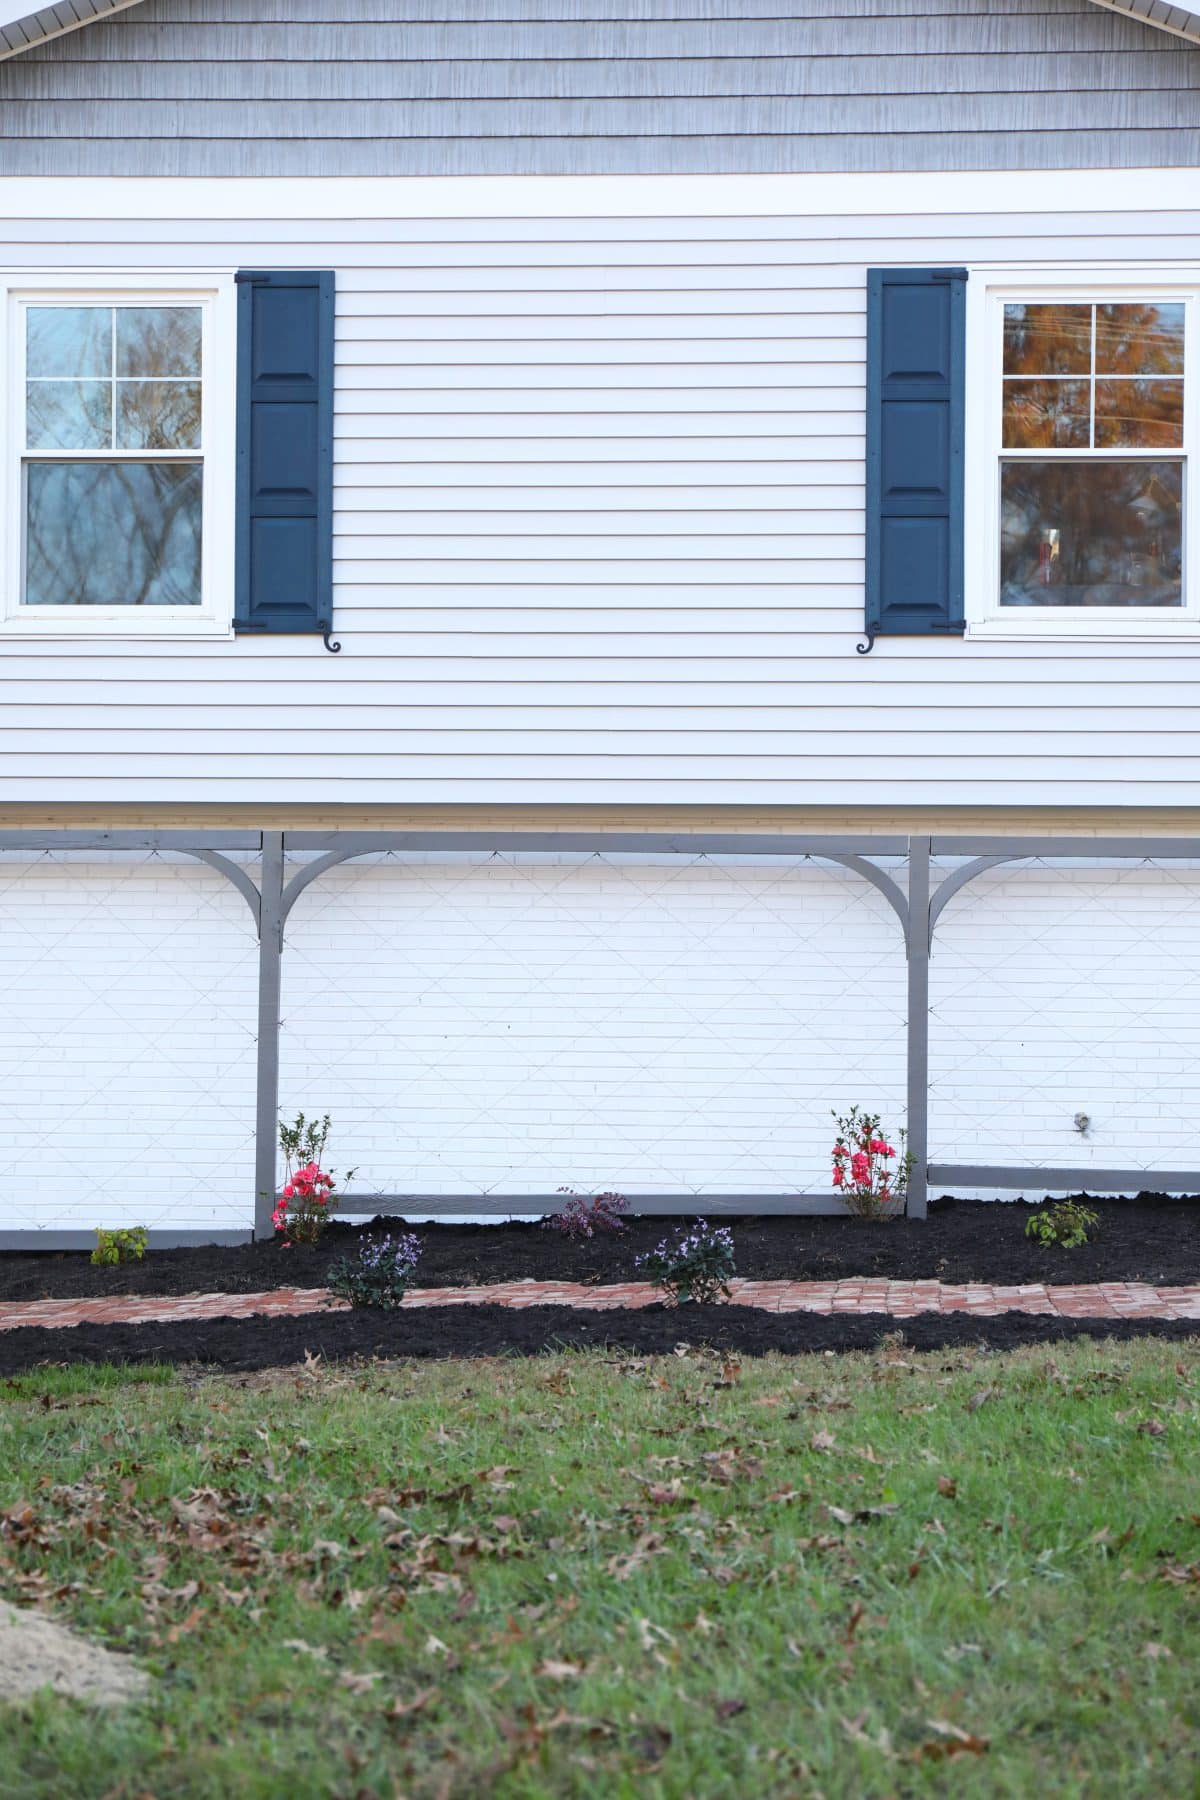
This is not our ‘big reveal’, since good things come to those who wait {and nurture} in the world of landscaping so we’ll be circling back around in the spring. But little things are already making a big difference. We were thrilled to build this trellis with YellaWood®!

You know you’ve done a good job with the yard when your youngest, stepping off the bus from school in the afternoon, says that the bus driver told him, “The yard is looking good!”. Mission accomplished.
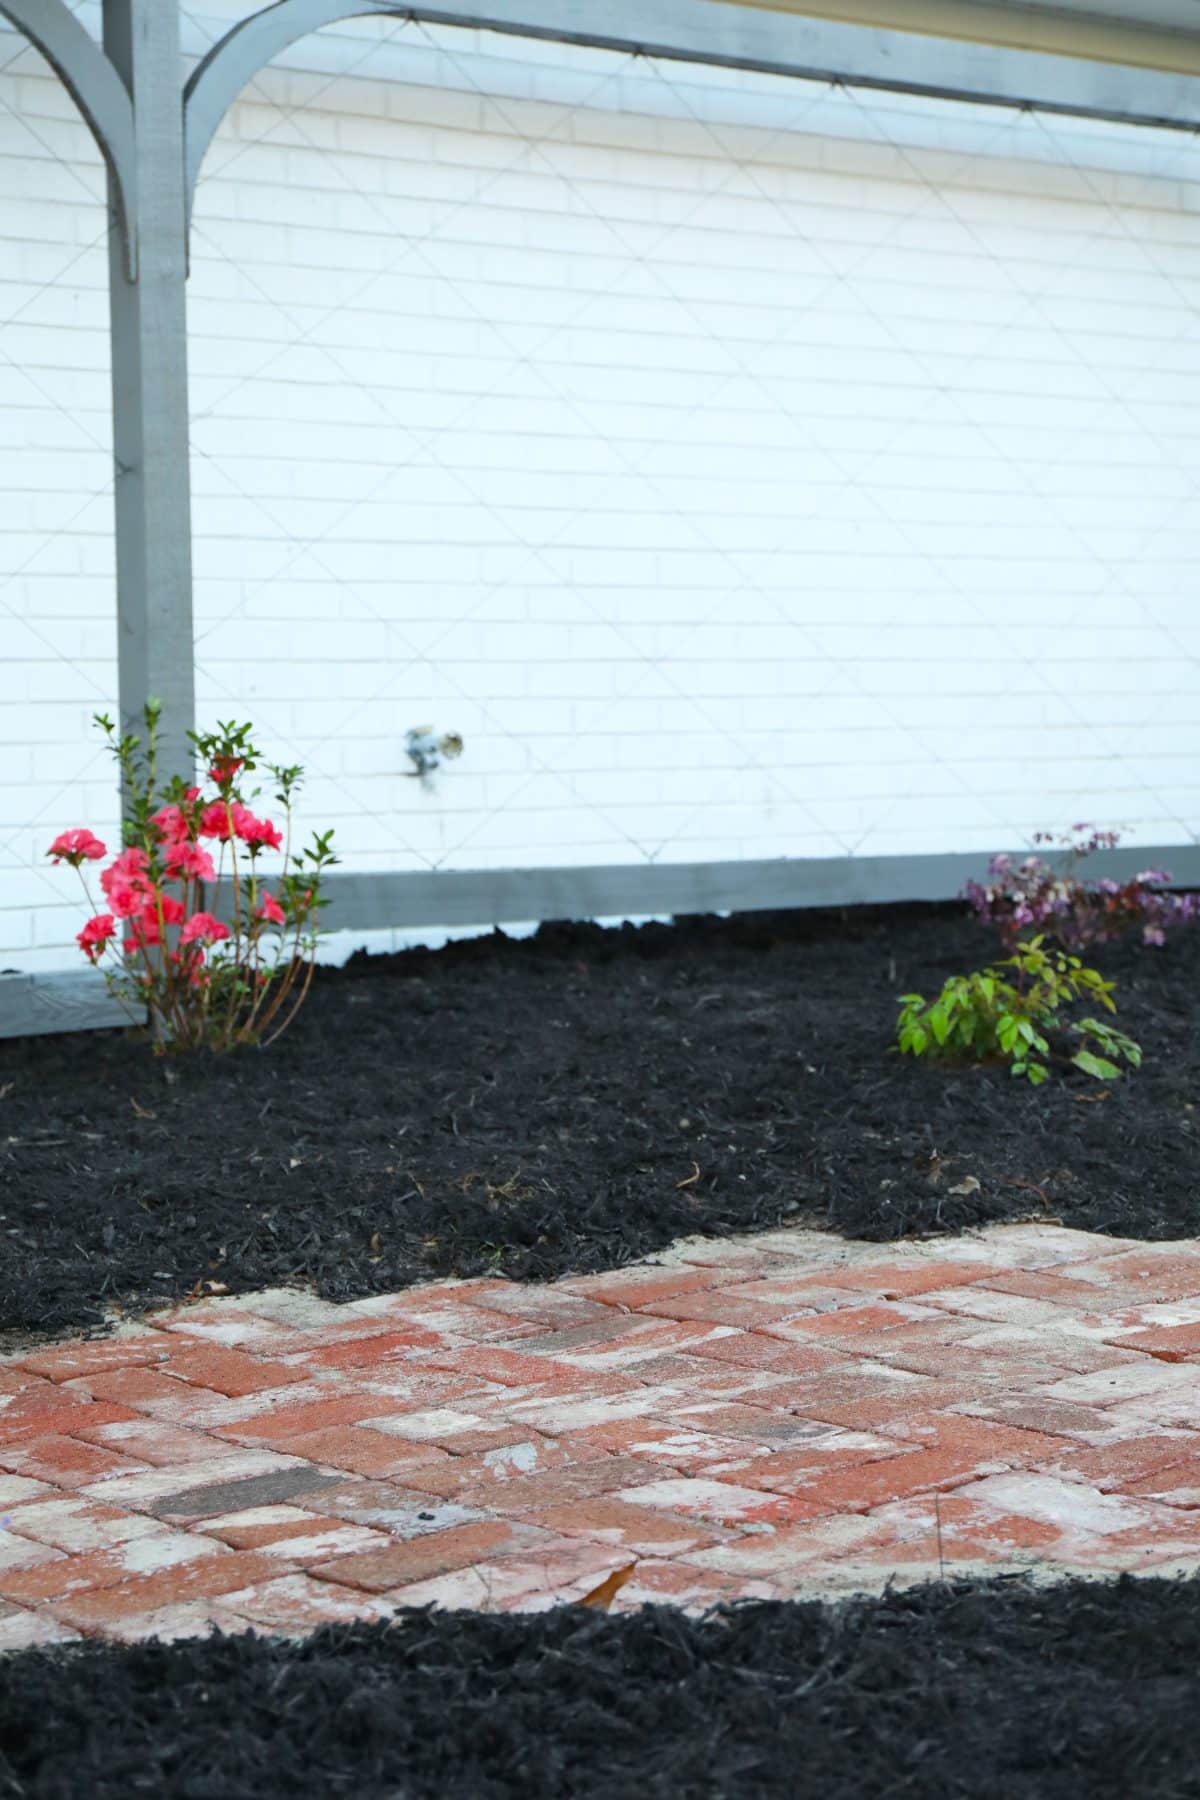
We love the way that we were able to bring in some contrast to the bottom level since the original walkway and boxwoods just weren’t doing much for the house. More like a neckbeard to go with that mullet. So while we love boxwoods, we said goodbye and moved on to better things. We adore the way YellaWood® added so much to this area!
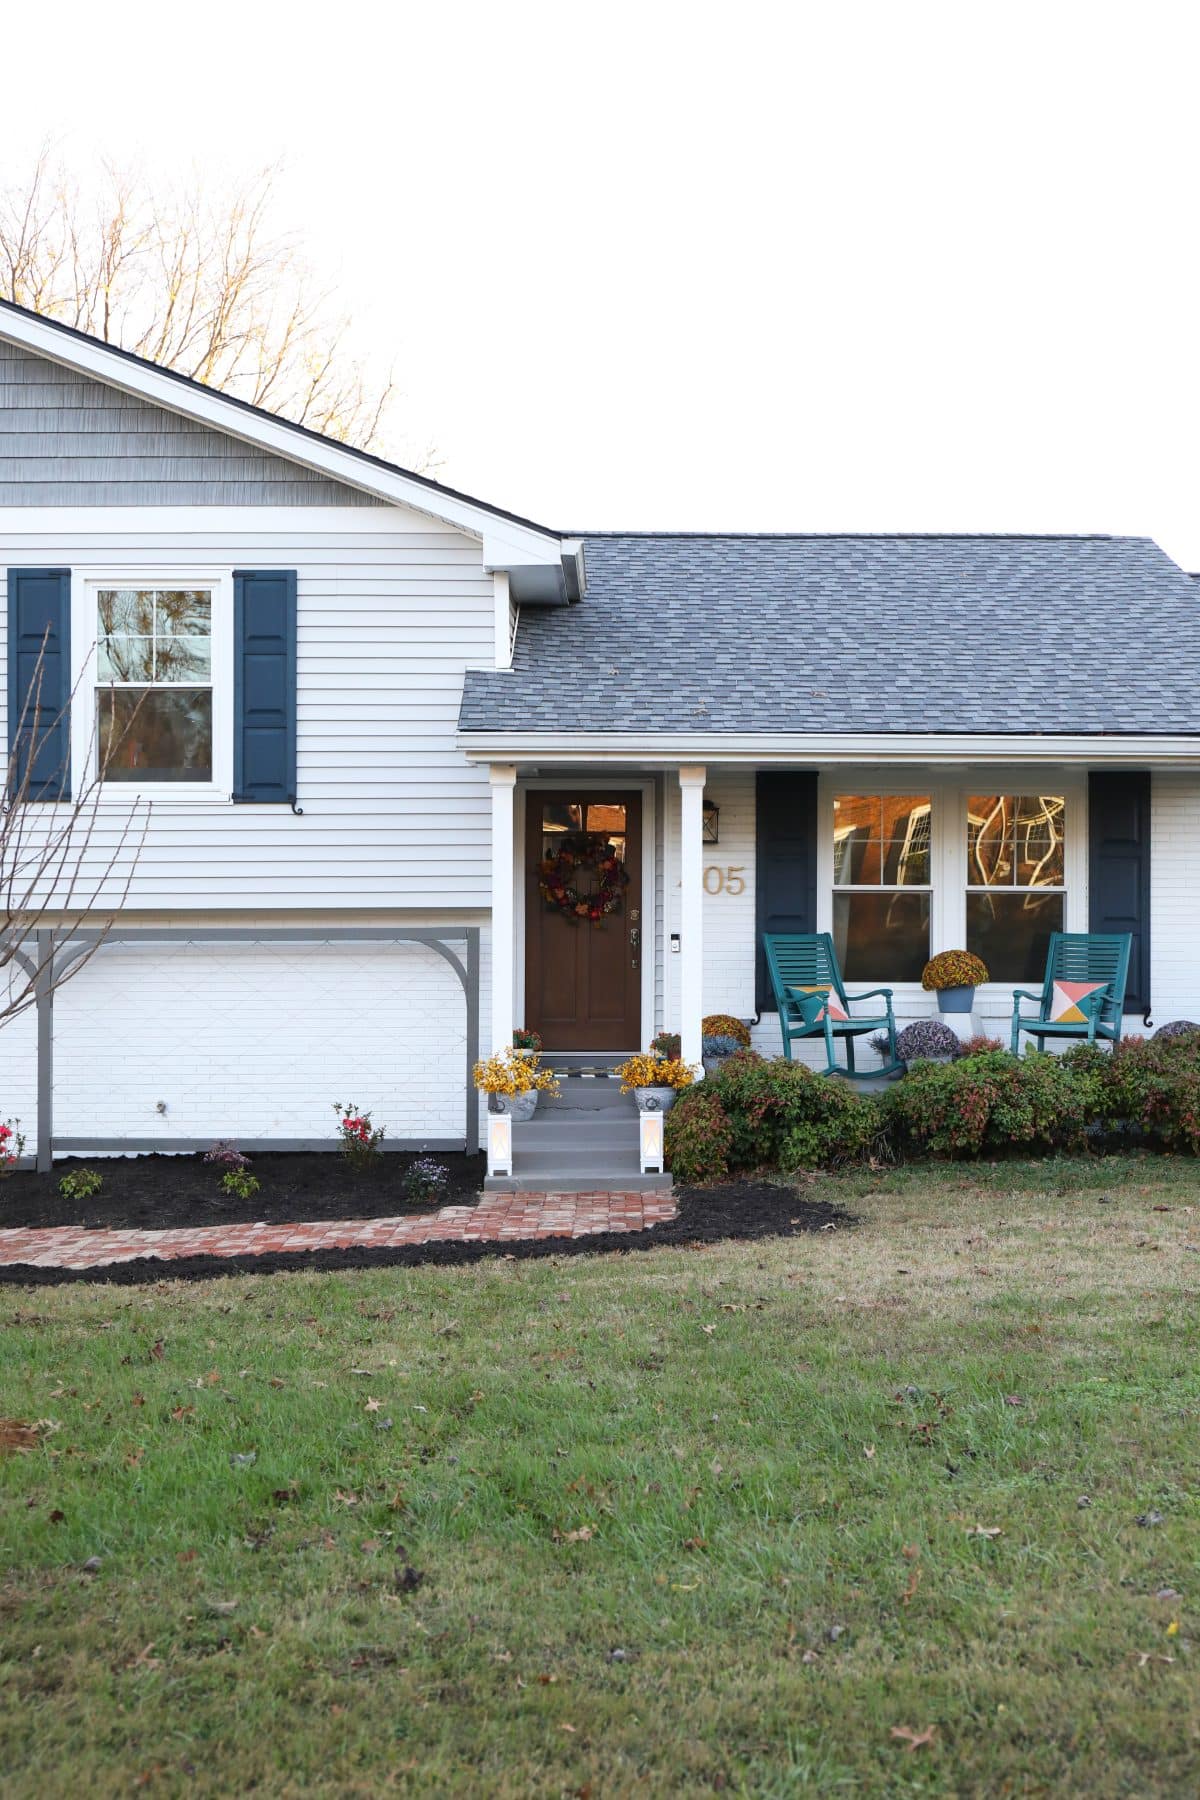
The key to us, was that it would look good for that in-the-meantime, until-something-can-grow-there, phase. It adds so much to the front.
One of my favorite elements of this trellis is all in the pretty little curves we added to give an arched feel to the over all look. It helps to soften those multiple angles, and adds so much character. We have more on how to build this {with a template for these corbels to save big on your builds} coming up!
Their quality wood is just so easy to work with. It’s sturdy and holds up for years to come. It really finished off the entire look.
From their site, since they say it best:
2. Landscaping:
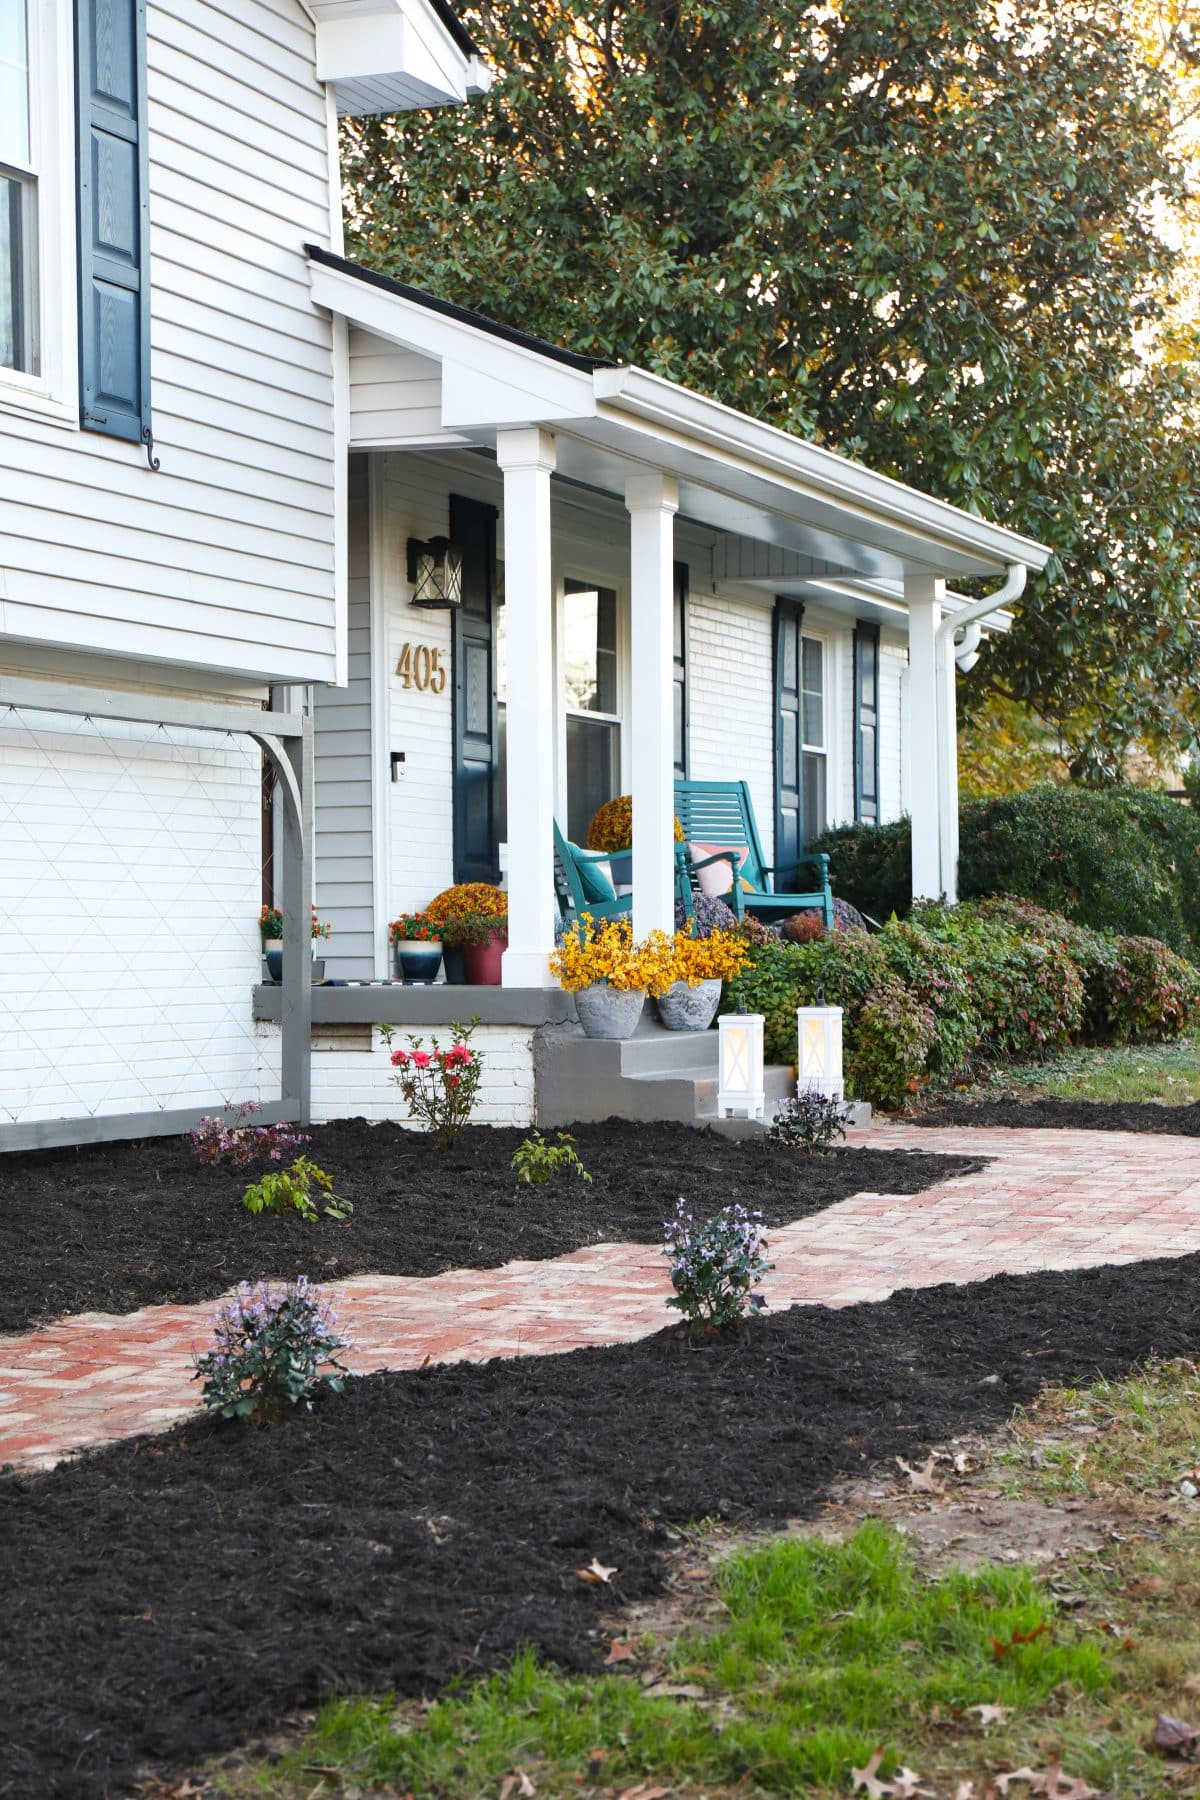
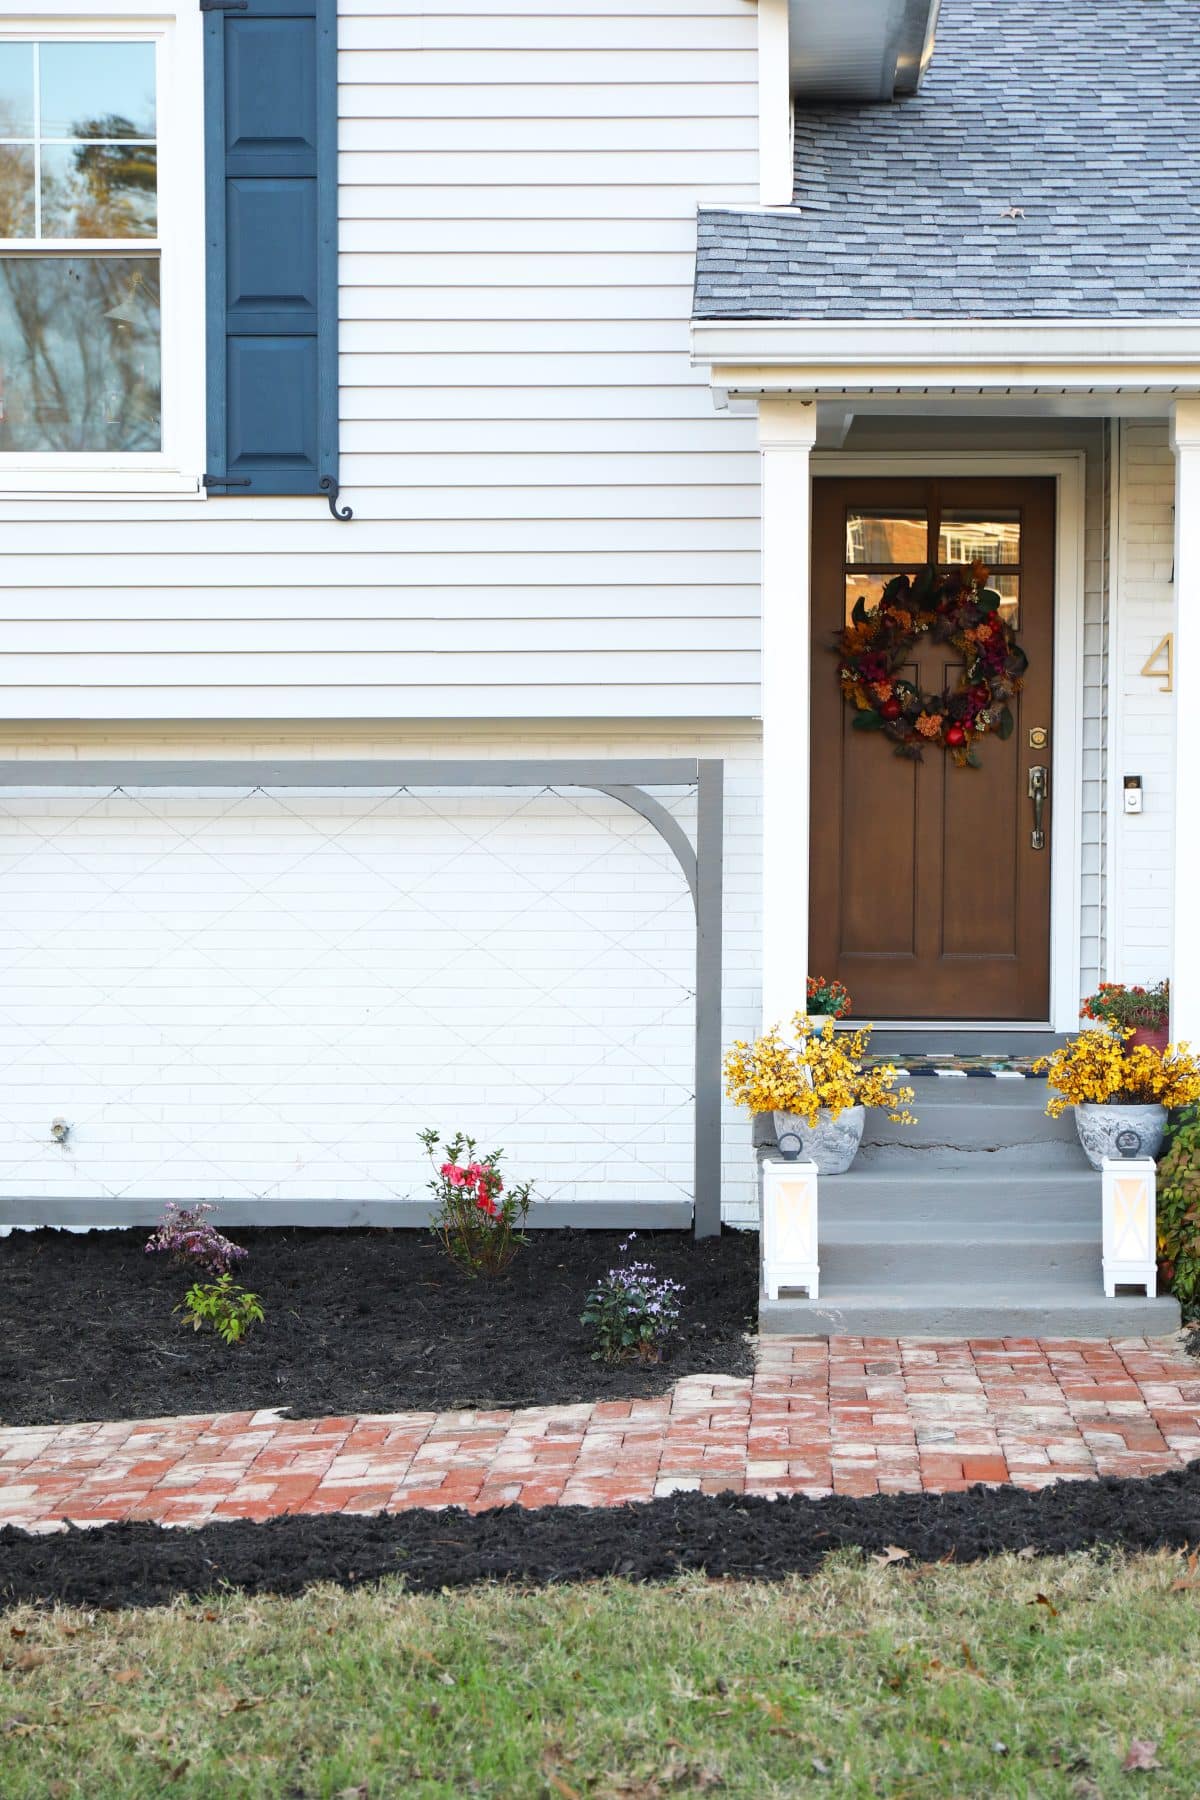
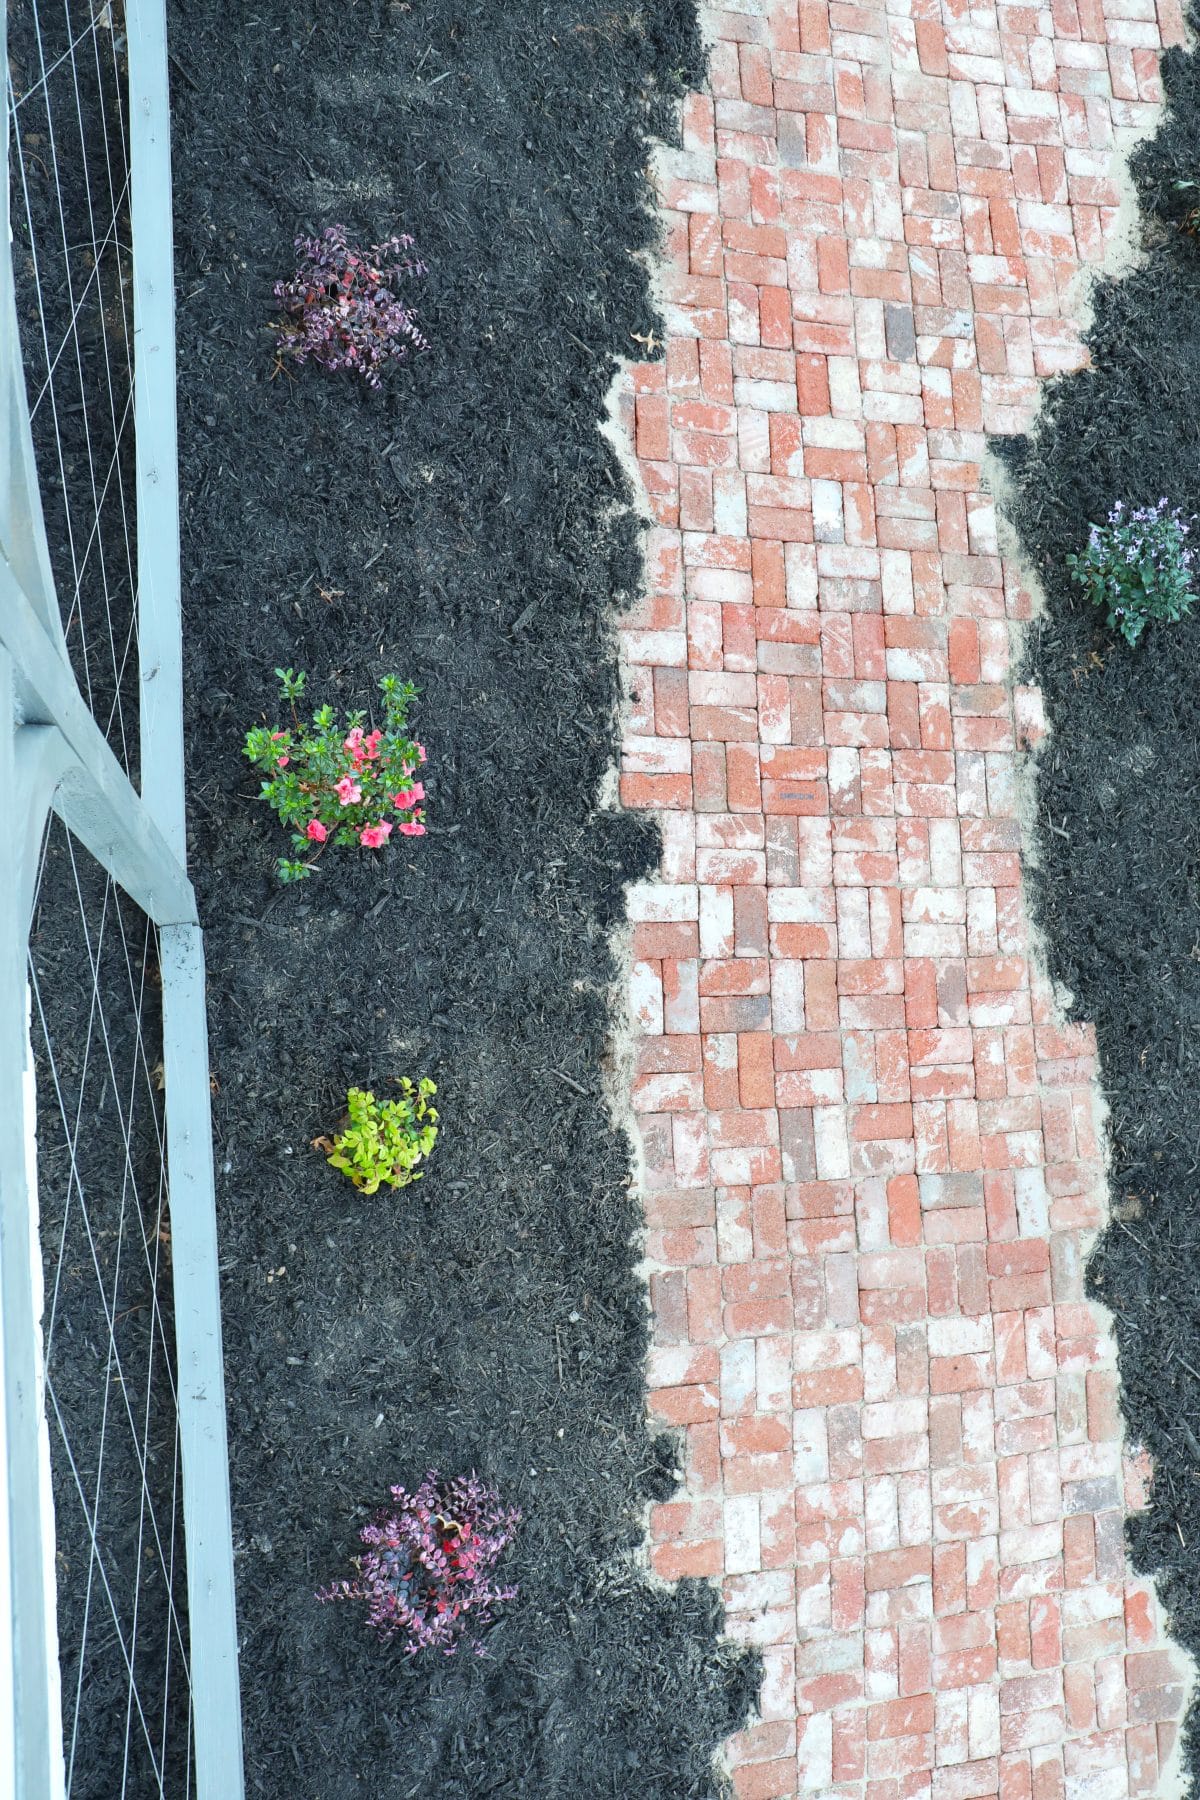
The second part of phase one is all in the landscaping. We broke up the old walkway, and added these beautiful pavers from Glengery Bricks, to serve as an anchor for what is to come on all things yard and ground. It also got rid of that harsh angle with the old pathway, {Byyeee aggregate} and loved doing a basketweave pattern to add a little more curve.
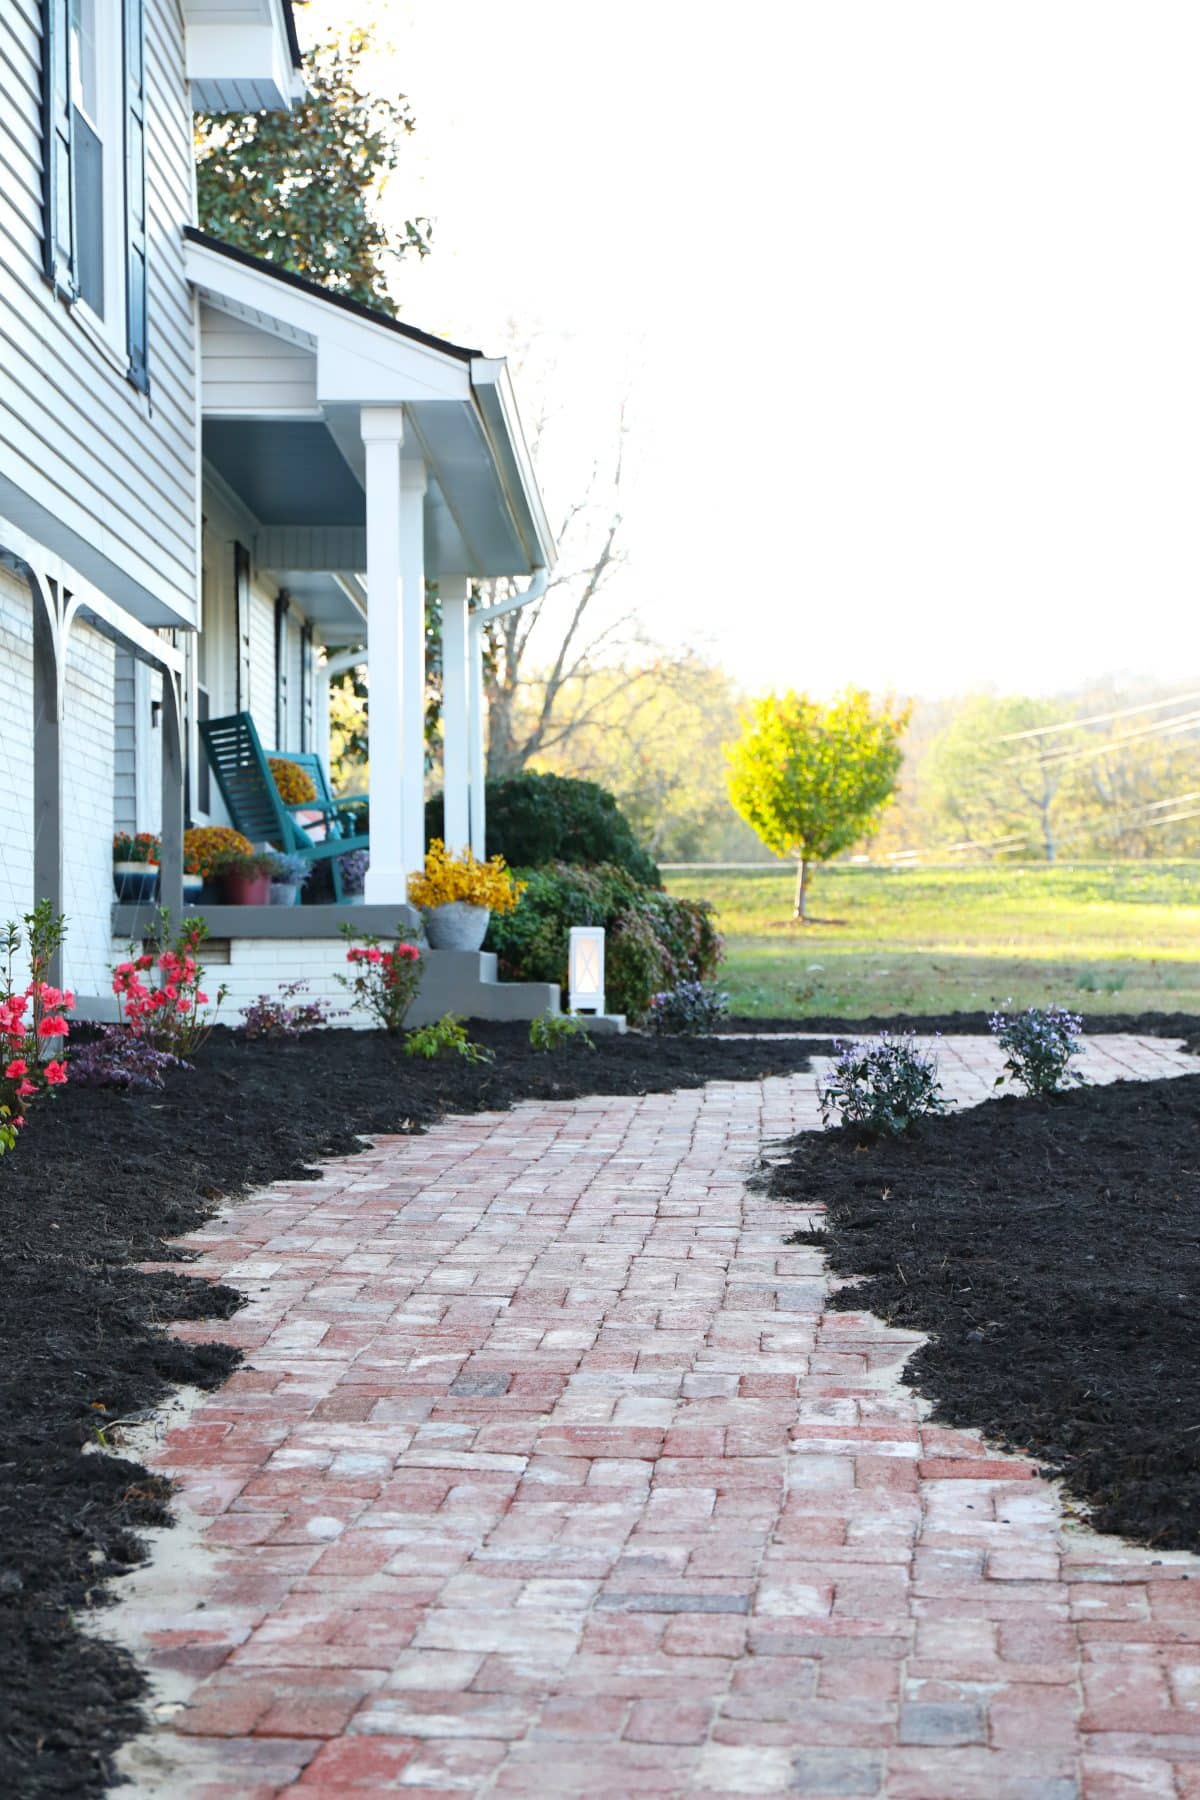
The pavers {Market Street Pavers} are a part of a two part system with the trellis, to break up that rigid feel and give it a softer view. At first, we thought we would cut the bricks into a defined path, but we didn’t like the rigid look when we tried to trim it down, since this is what we were moving away from. We wanted this pathway to feel like it’s as old as the home itself, and with their unique character it wasn’t hard.
We’re still adding sand over time to help stabilize the pavers – so you’ll see it in most of the cracks. {More on that coming up in our tutorial for a pathway.}
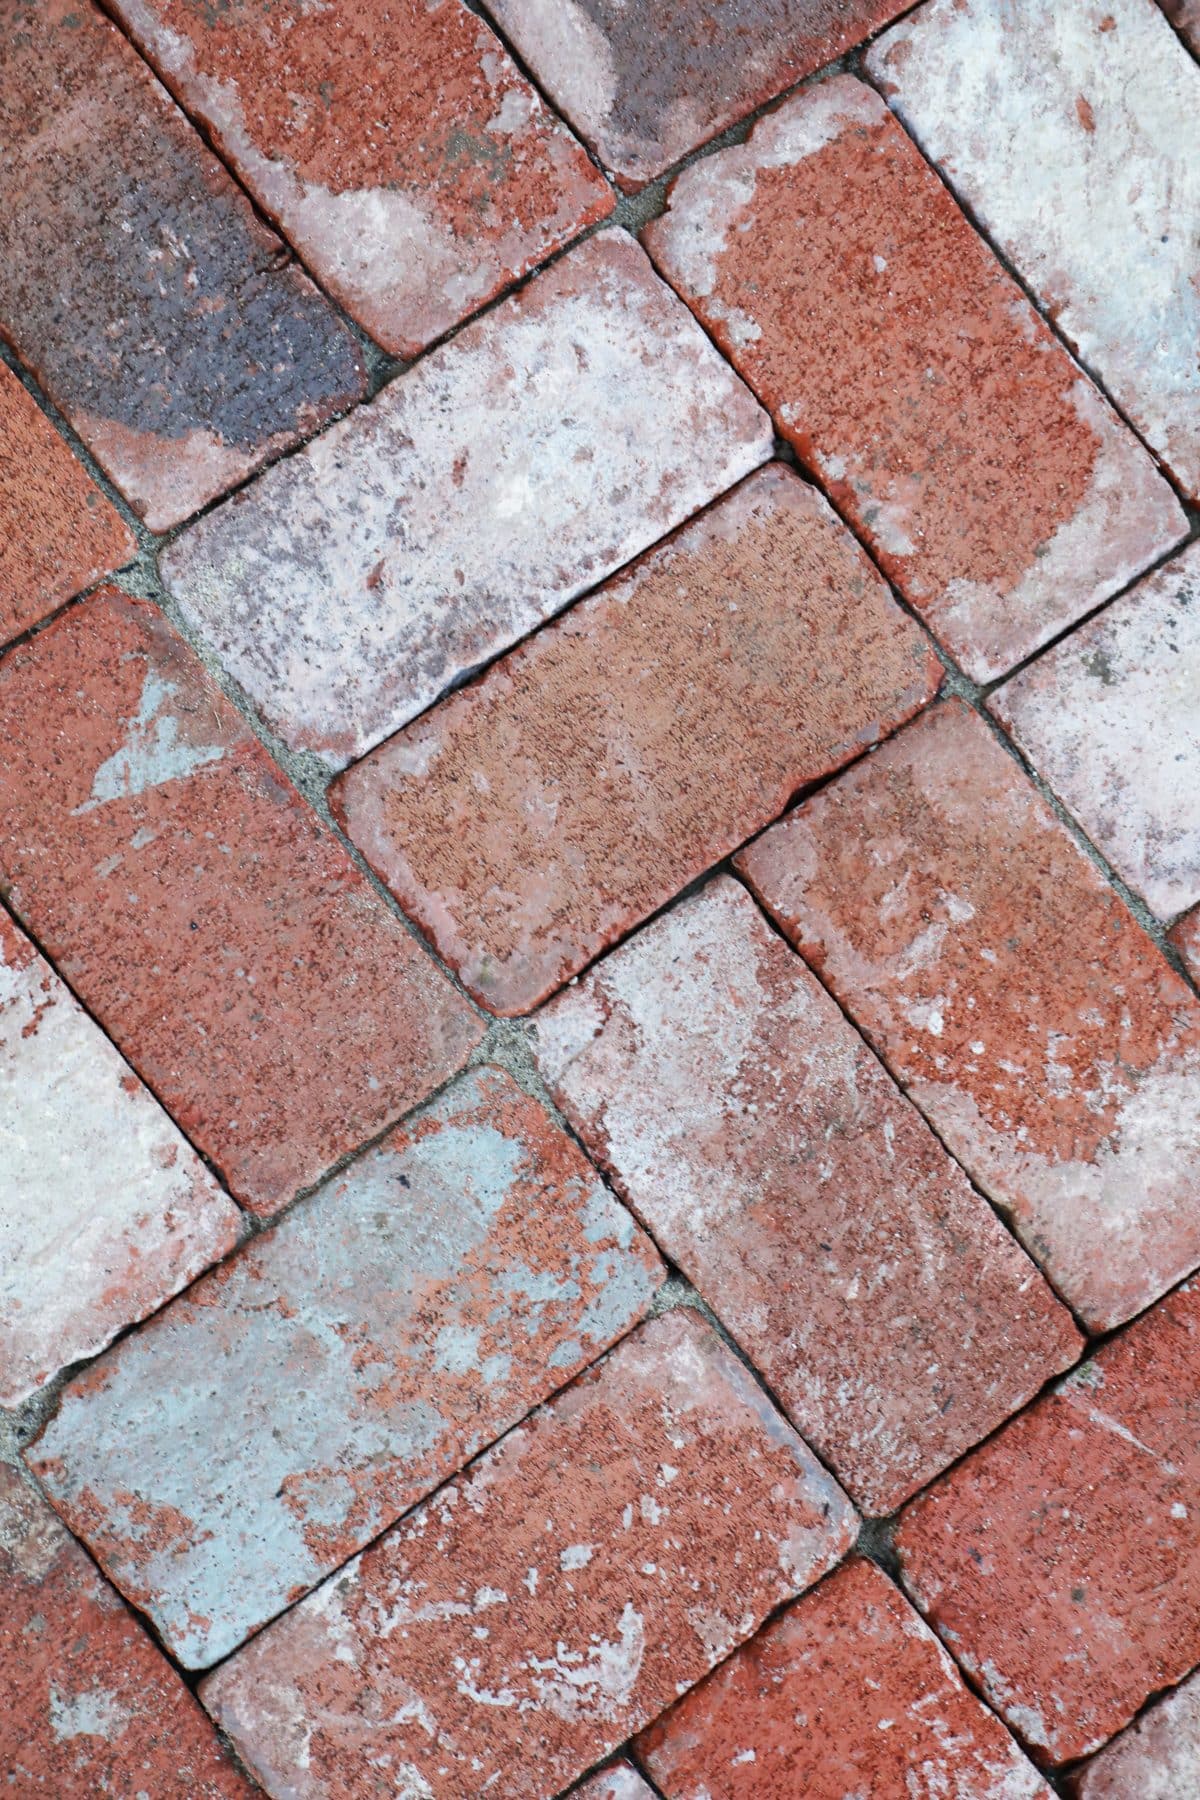
But aren’t they glorious?
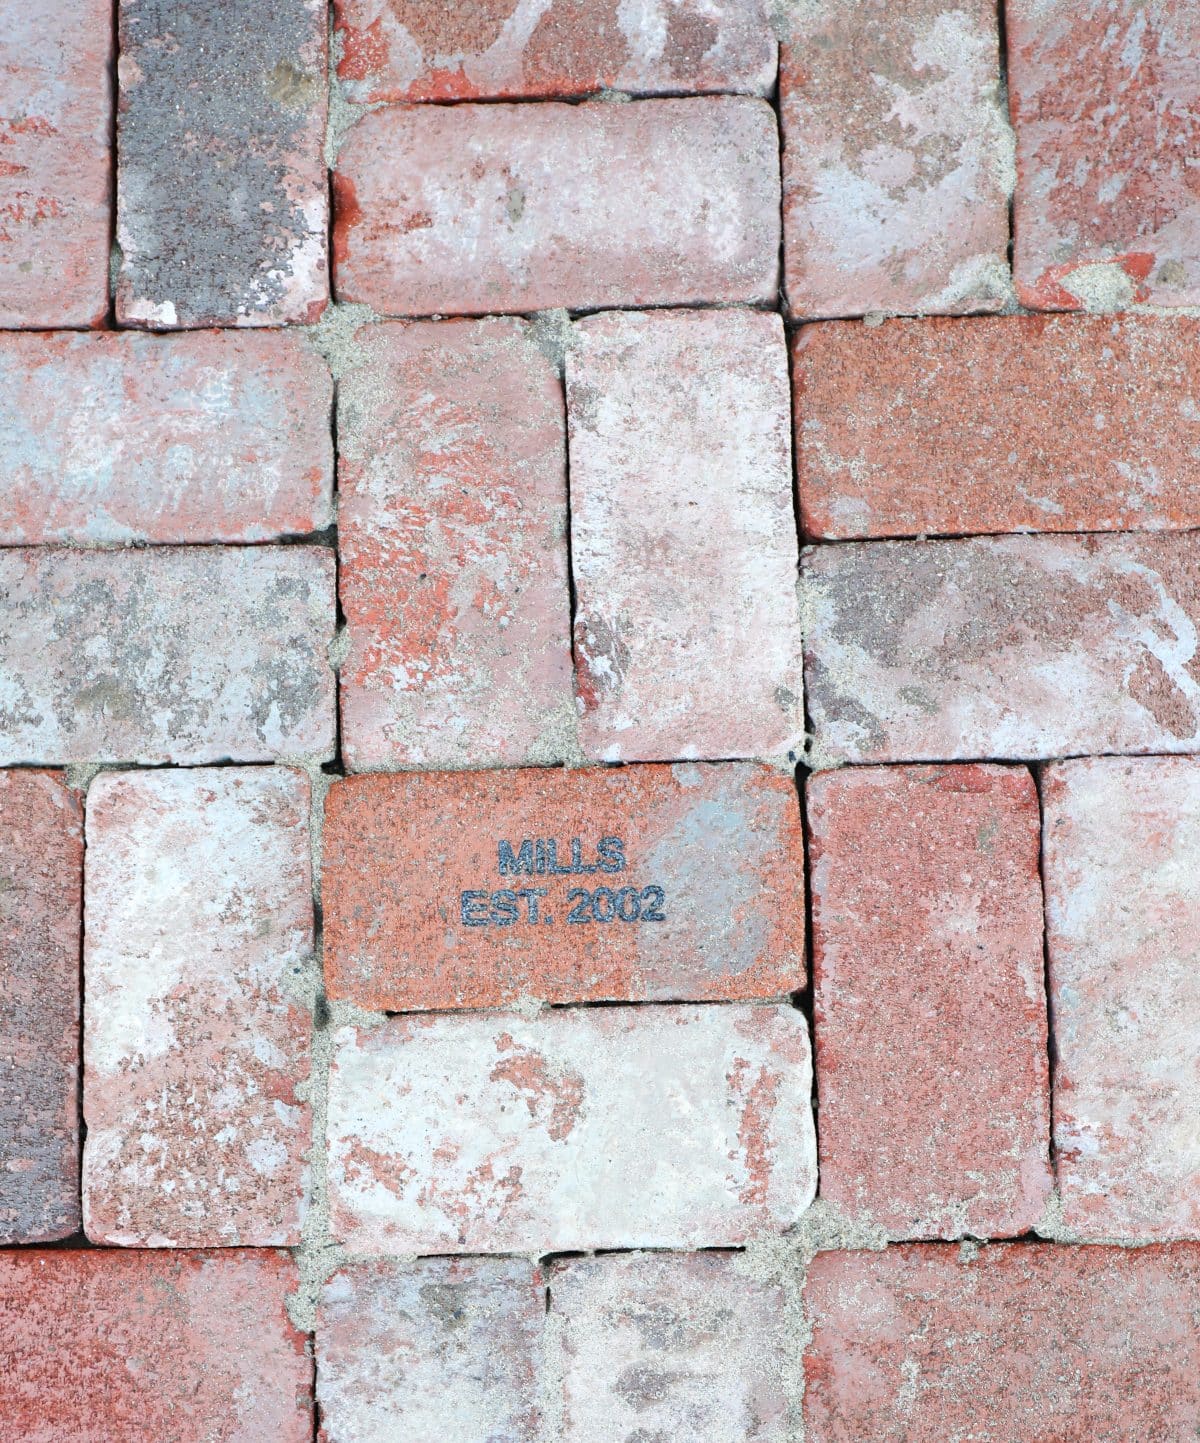
One of our favorite elements is that we have personalized pavers, hidden long the pathway for any eagle-eyed observers who happen to stop by. We love that there is one for each kiddo since this is definitely our forever home.
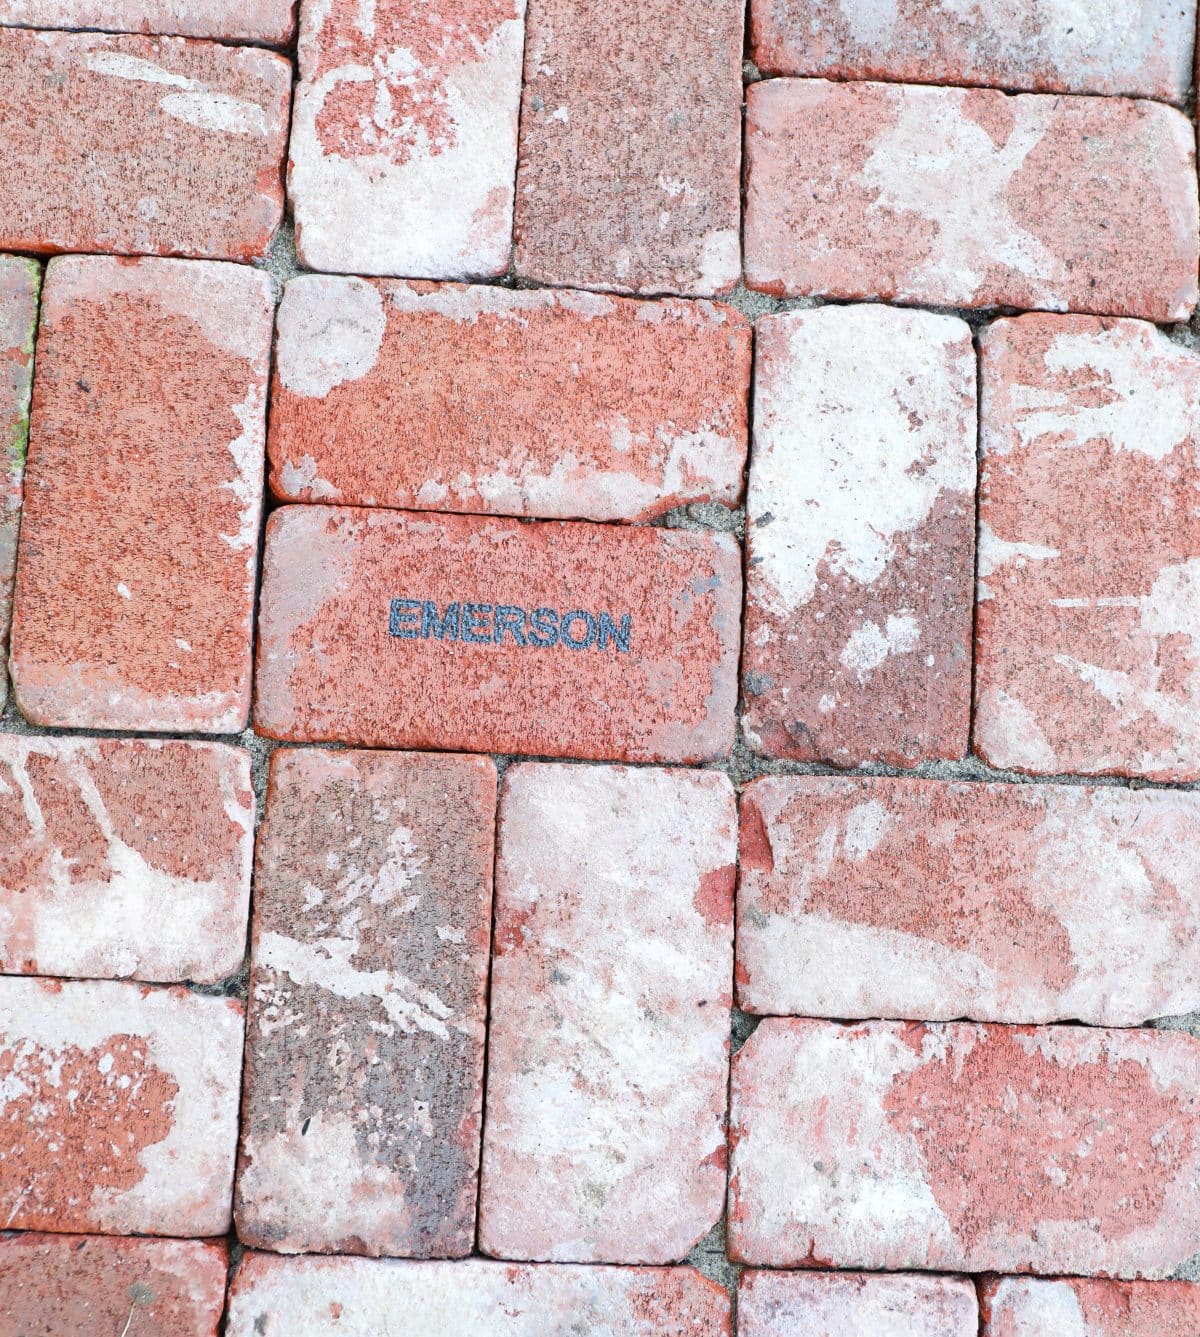
Walking up the path, you see one for each child, finally landing on our family name at the steps. Glengery added that as a sweet option and we couldn’t be more pleased with the outcome. Our youngest loved finding his name. The oldest… I’m sure it will grow on him. #teenagers – it’s definitely a sweet, sentimental addition.
We plan to add ground covering in the spring {phase 2 below} to add more of that timeless feel along the edges. Here’s a quick view from the upstairs window. We love the way it all pairs so well together. There is more to this project than meets the eye, for sure.
In turn, this establishes our new garden area, on which we only plan to continue to build, in the spring. We’ll also be expanding that plan into the right side of the yard in front of the rest of the house. We’re leaving the existing plants there as a nice base. Our goal is to add color and character in all seasons with sustainable options that work well in a north facing yard. For someone who hasn’t been big into all things plants before, this was a little bit of a challenge to research and plan.
{Side note, but we also gave the house a much-needed pressure wash, which is just the most satisfying thing in the history of ever. It gave our home an entirely new lease on life. Such a little thing with big impact after so many big projects.}
All things green: Our goal with the over all look, is all things color.
What we did in addition to the new build projects {Landscaping Phase 1}:
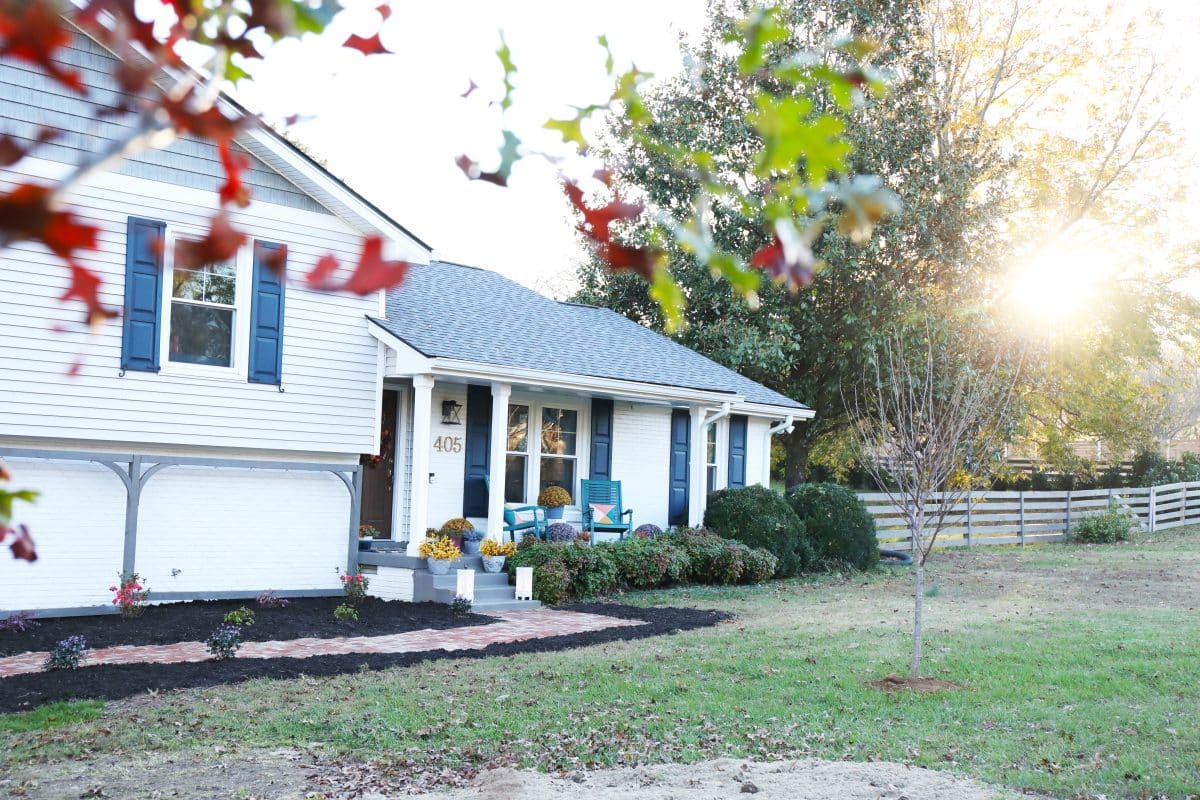
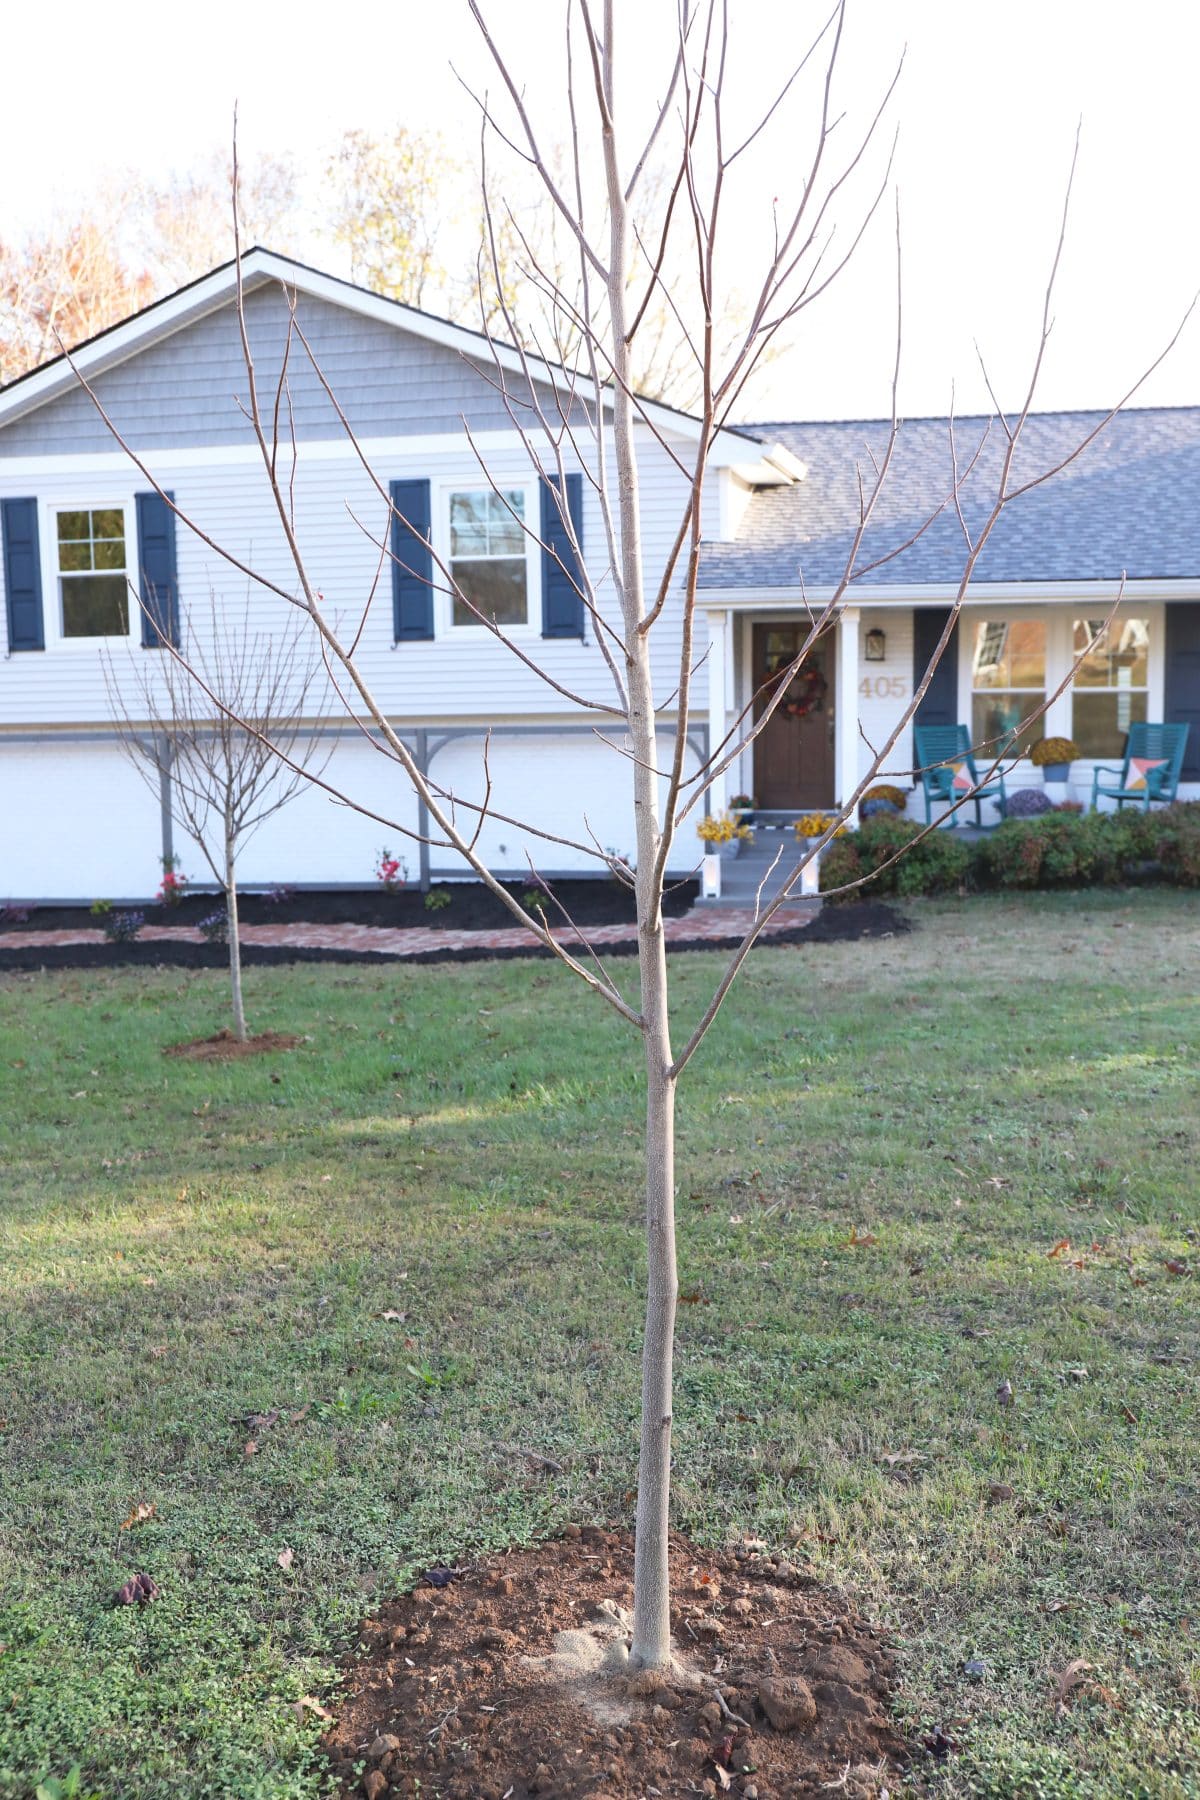
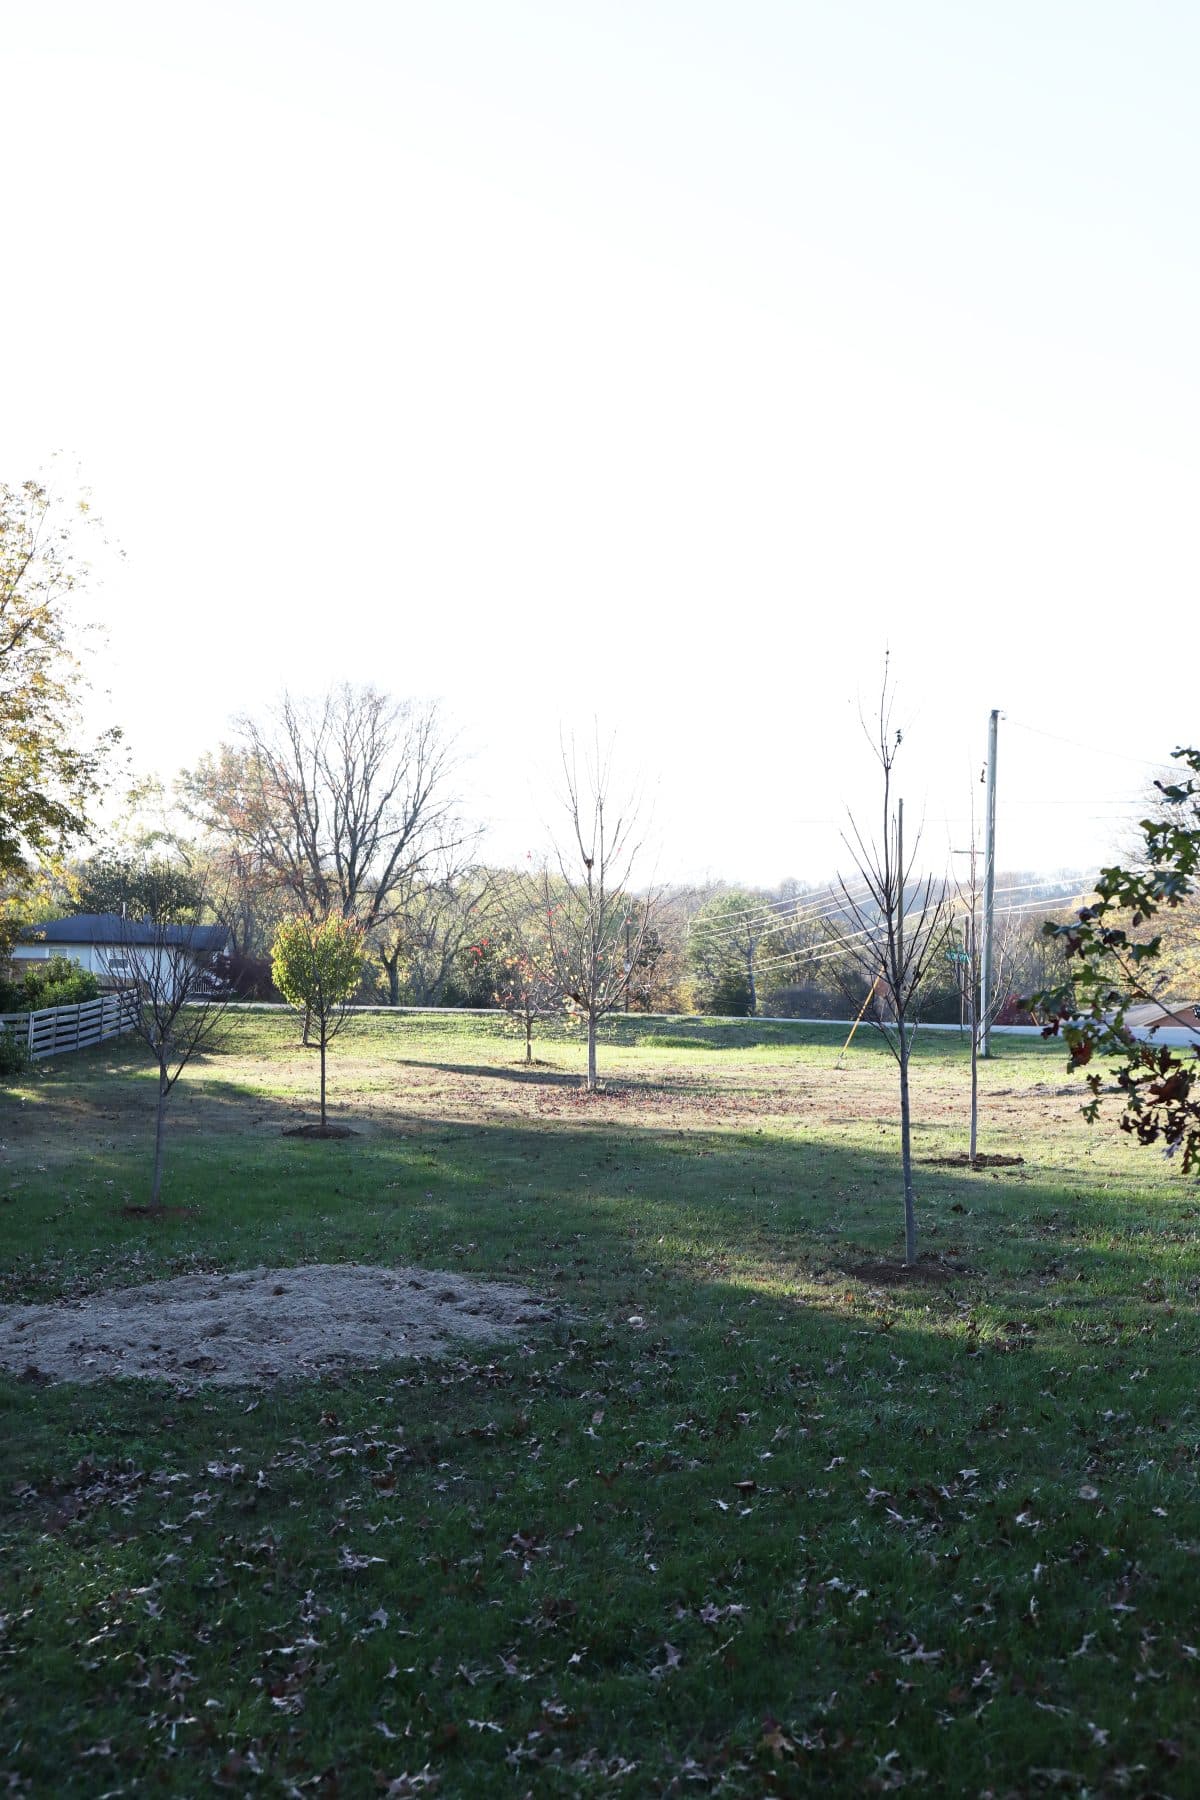
Trees: It’s tree planting season! As you may know, it broke our hearts when we lost our huge maple in the front yard. So we planted four trees for now, and will add two more in the spring.
• Kwanzan Cherry {spring color}
• Yoshino Cherry {spring color}
• Tulip tree {we have a giant one in our side yard that turns bright yellow in the fall + love it}
• Red Maple {fall color}
All. The. Colors.
Here’s a view from the side with our smaller trees we’ve already planted, added to the other trees. Our front yard was lacking. We’re filling in some much needed construction ruts with sand for now, to re-grow the grass, too. We weren’t kidding when we said our yard needed a lot of work. It looks a little sad now but we know it will have big results later!
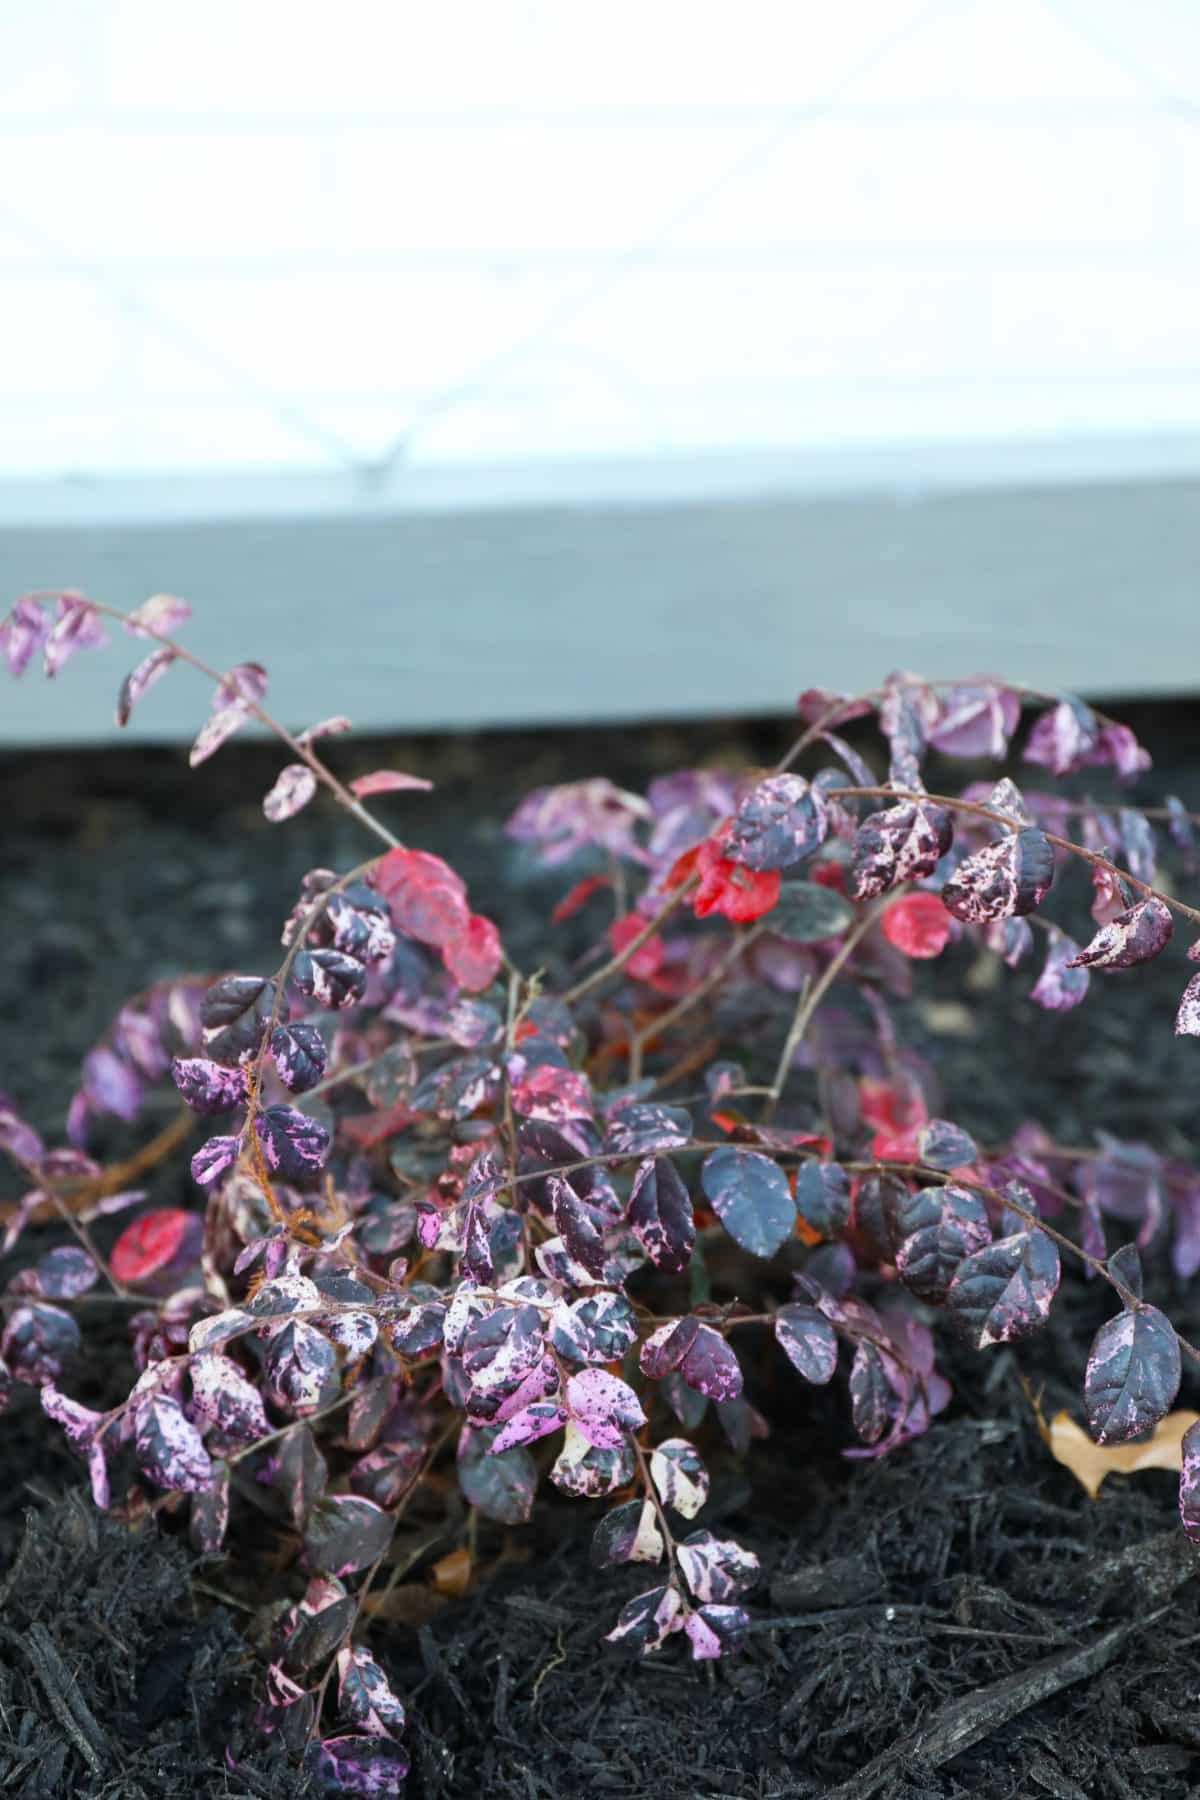
What we added in the garden bed as base plants to build on: {The blooms arrive in spring + fall}
• Jazz Hands Variegated – I fell in love with their purple leaves + their blooms are something to behold
• Peachy Keen Azalea – it’s just so happy to be here with it’s beautiful peach blossoms
• Plectranthus – I love the small purple blossoms
• Nandina – for a little green – no blooms
• Mulch – to cover all the mud which will be pulled back in the spring to allow for new growth.
What we will add in the Spring {Landscaping phase 2}:
• On the trellis, we plan to add Clematis in the spring. We know they have big blooms, and are fast climbers with bold color. We planned for that with our diamond placement. This was a little tricky going up a steady incline in the front, but we love the way it all positioned together. That end result is going to be amazing, and we can’t wait to share.

• Window boxes under both of those top level windows, to add more character.
• Ground covering around the brick pathway to block the grass – we’re currently considering moss or thyme.
• More flowering shrubs of various kinds around the other side of the yard + in the main garden bed with more of a defined bed.

So here we are, with that not-so-small project of adding a whole lot of curb appeal to the front! It was much needed, and I have to say this was more in depth than we initially thought, but we’re already SO glad it’s finished so we can add to it in the spring, at planting time!
Now is the time to prep those yards for next year. Rigby and Fitz definitely approve.
We plan to share so much more in the coming weeks from how to build a trellis with easy instructions {and a template!} to how to add a brick pathway + easy instructions there, too. Then we’ll be sharing more on this ongoing project, so stay tuned! Thank you so much for stopping by today to see our big little changes! What are some of your surefire plants for a north facing yard? We would love your input here, since we’re still adding!
Have an inspired day!
{We partnered with and are sponsored by our good friends at YellaWood® for this post. For more info on our branded content please visit our disclosure page.}