
pom pom wreath an easy diy
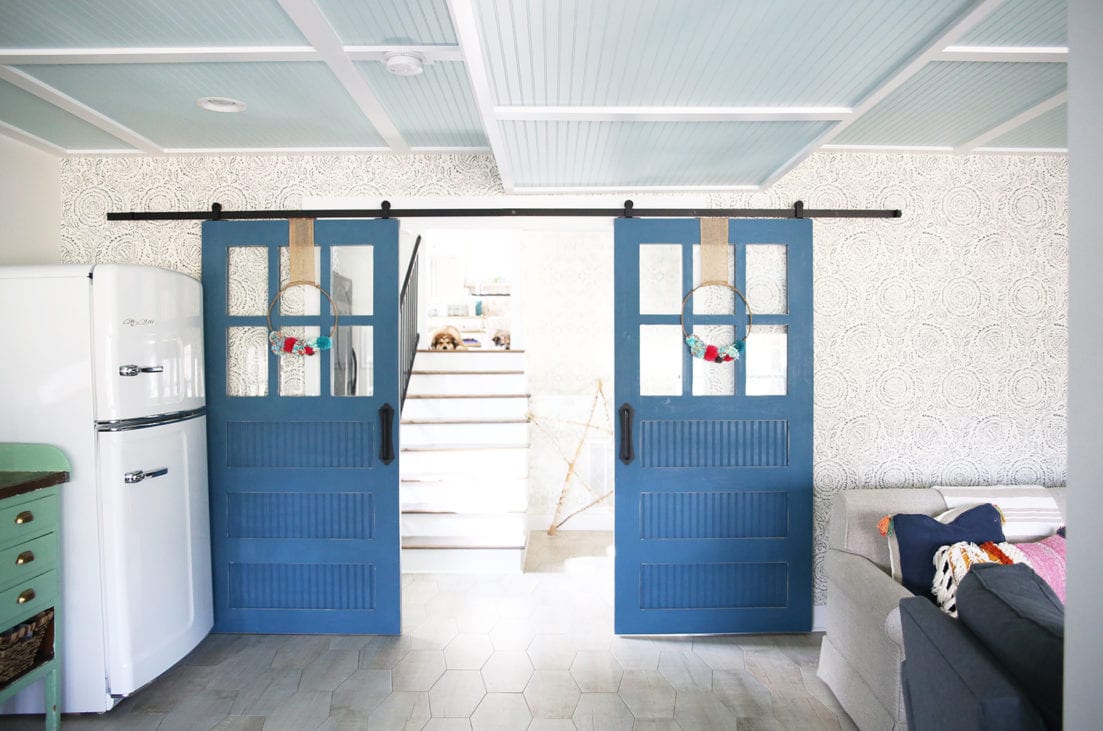
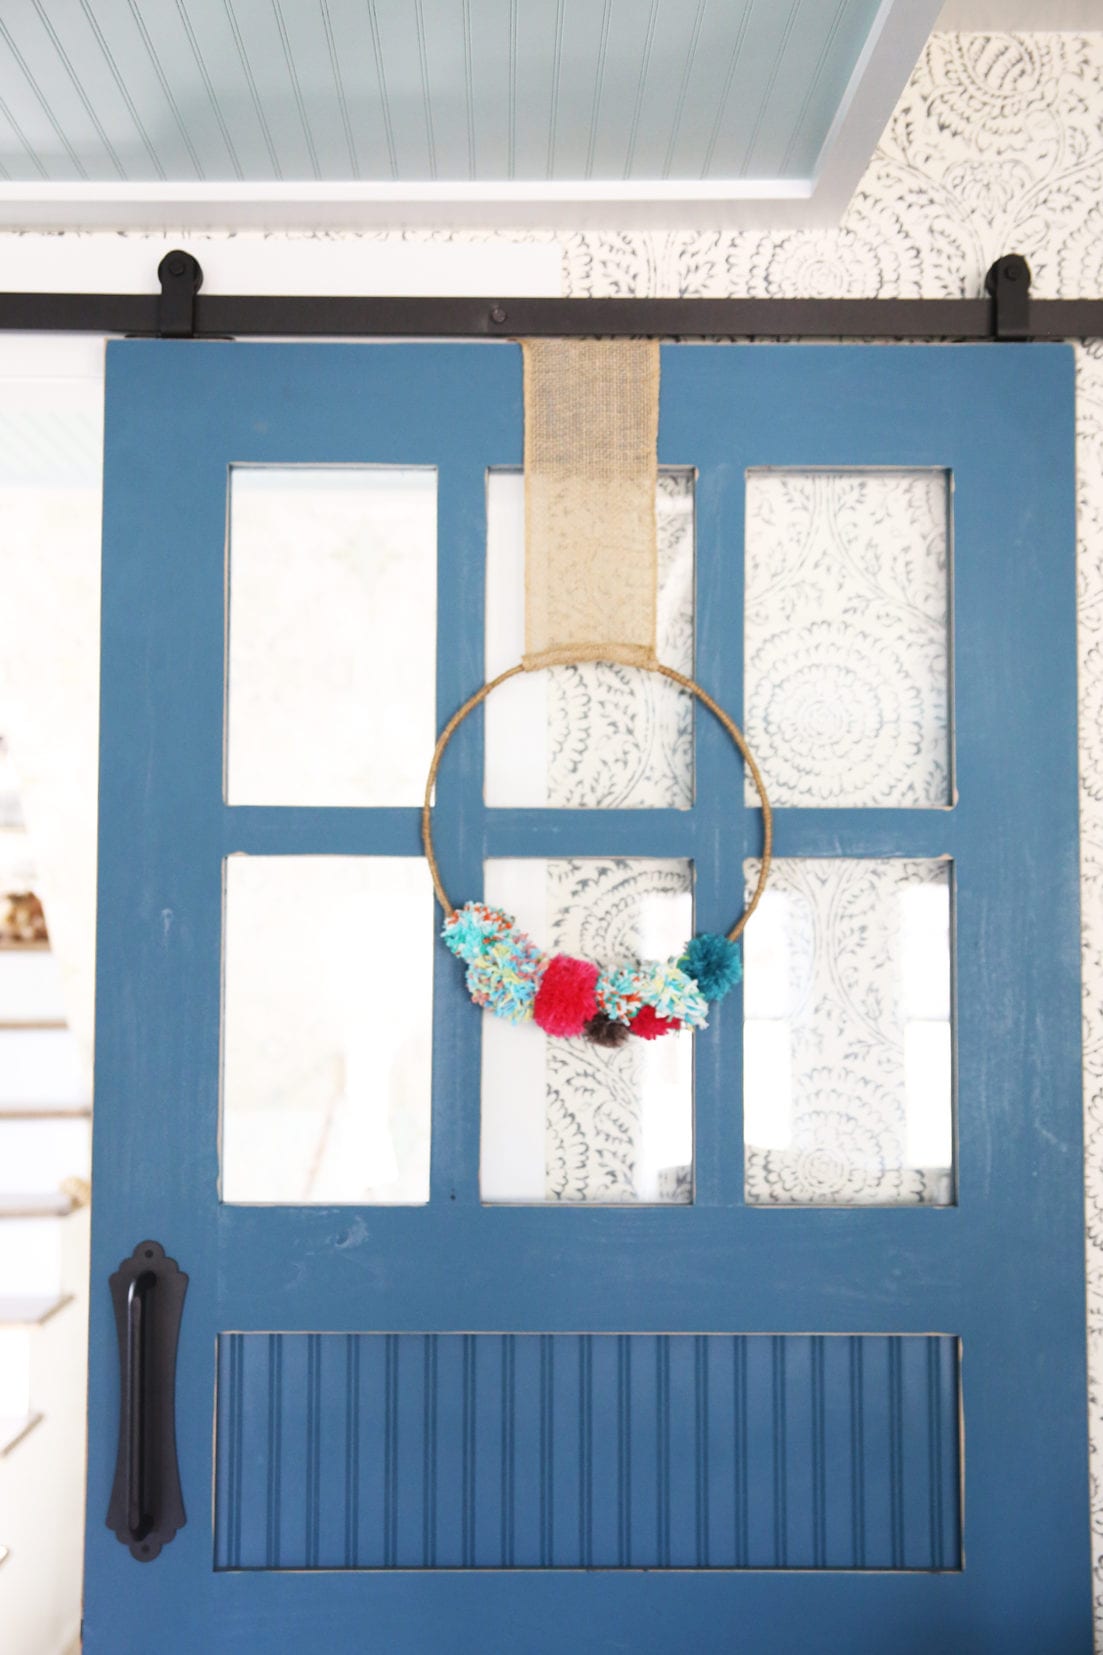
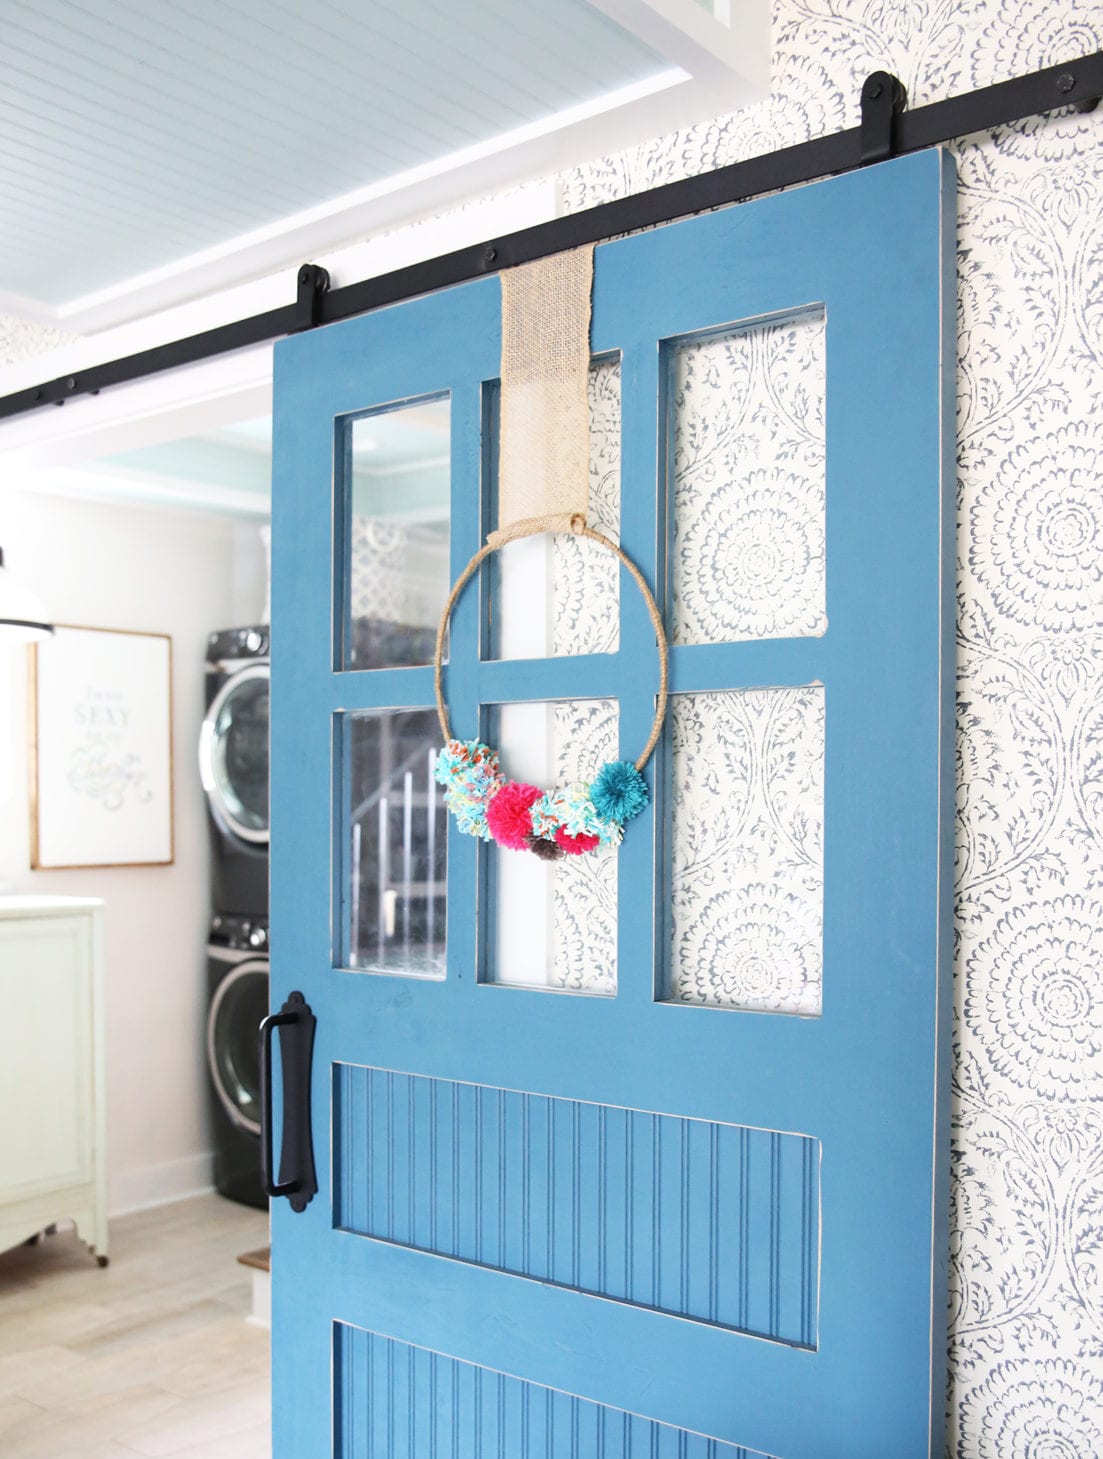
So we decided that our basement’s fabulous barn doors {via the amazing artisan hardware} could use a little Christmas cheer in the form of a pom pom wreath our very own Christmas wreath.
It’s with a subtle revelry here and there in the form of color and pom pom wreaths!
These pom pom wreaths are super easy to make… almost shamefully easy.
And today we thought it would be fun to share a little how to on this years Christmas wreath.
This is the perfect project if you’re in the mood to keep those hands busy while watching Christmas movies, and they’re something that can honestly stay up through the winter months for a little ongoing cheer, with all their fun color. You children cab even make this pom pom wreath.
There’s no reason to take them down right away. So since we’re a little slower to get our decor up and going this year, that makes this a win!
Round up your supplies, and you’re ready to begin!
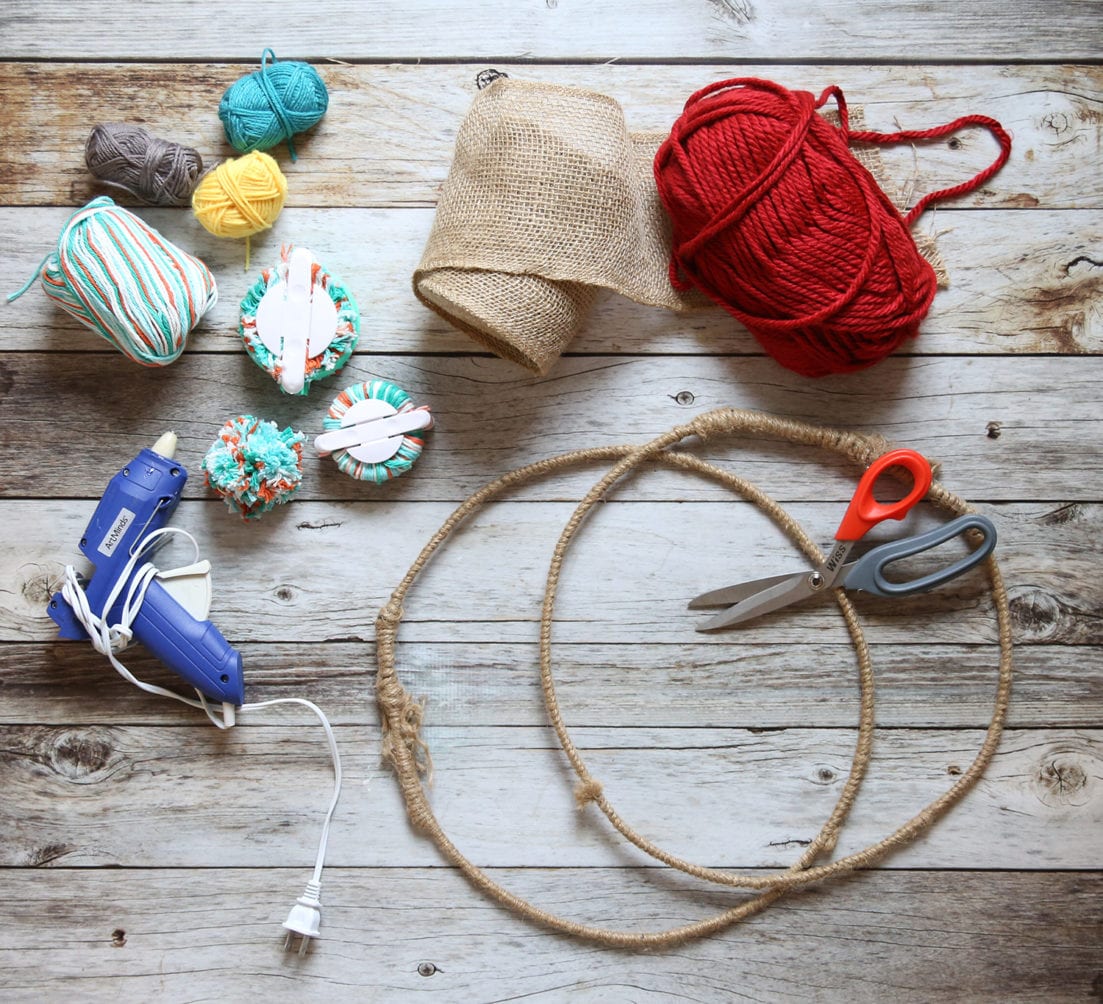
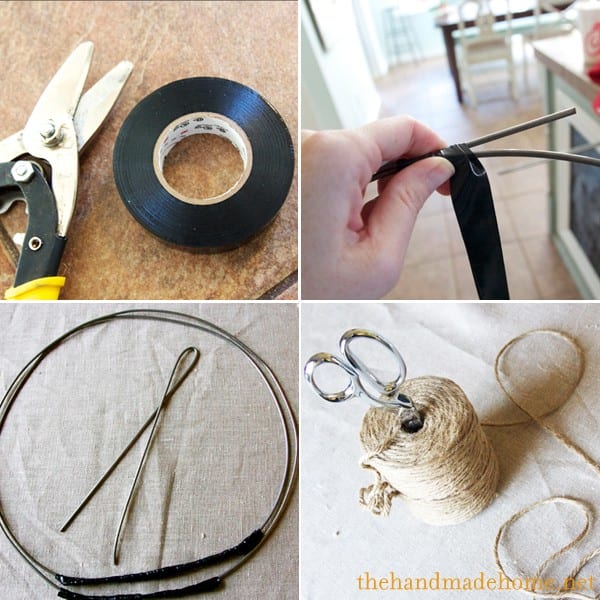
Here’s what you’ll need:
• Yarn – in bulk here and special colors here
• scissors
• pom pom makers
• Glue gun
• twine + burlap ribbon for hanging
• wreath form
– note: we used a thick gage wire and formed it into a circle, secured with electrical tape and wrapped with twine, but any wreath form will do – this was left over from an old project
Getting started with your pom pom wreath
Follow the steps above, or simply purchase a wreath form that you can wrap in twine. This will be your simple base.
To make your pom poms: Take your pom pom maker {they come in four different sizes, so you can mix and match as you go} and open it up. There are two sides that hinge, making 4 c-shaped sides, total.
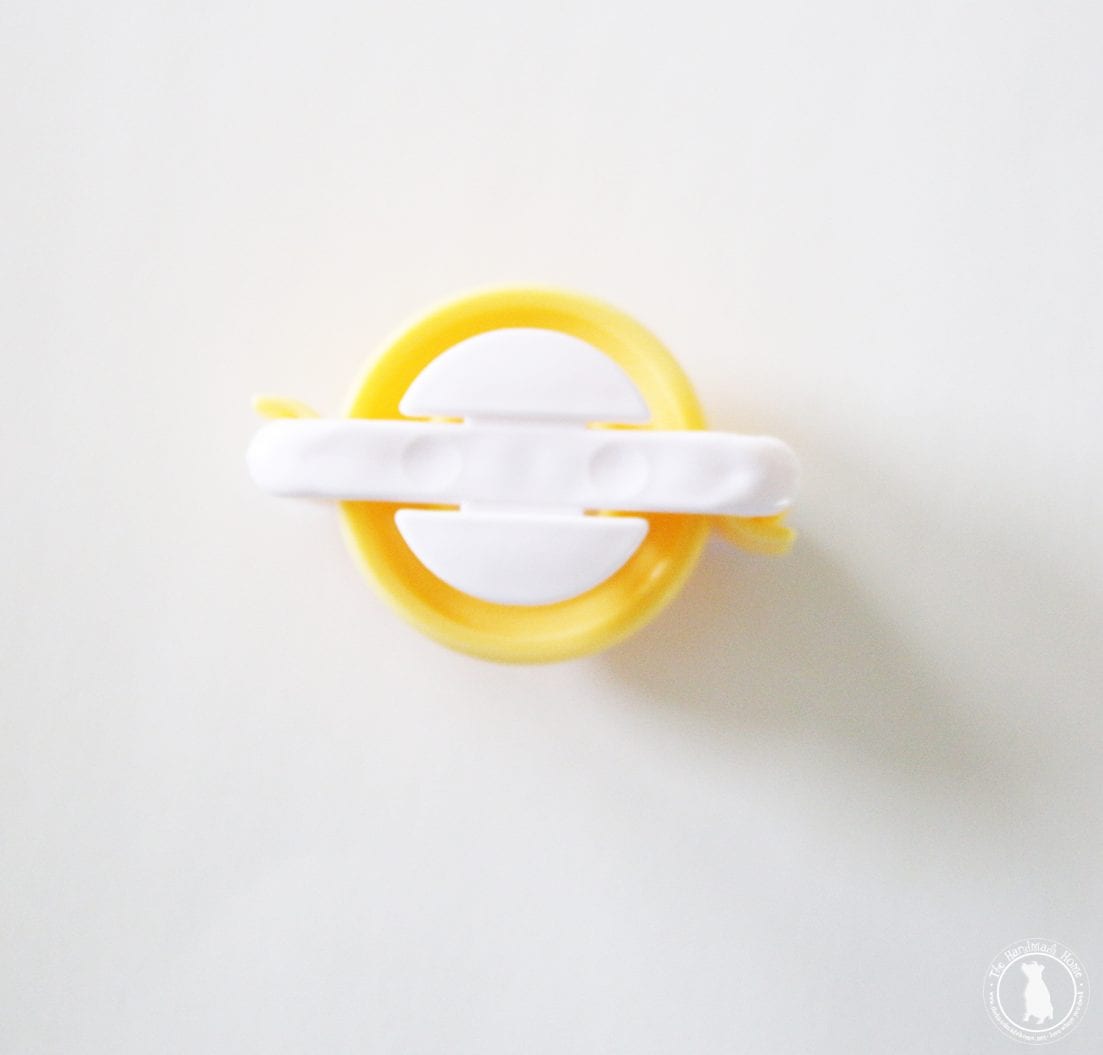
It also snaps together in the center, so you’ll have it snapped together, with the sides opened as shown below.
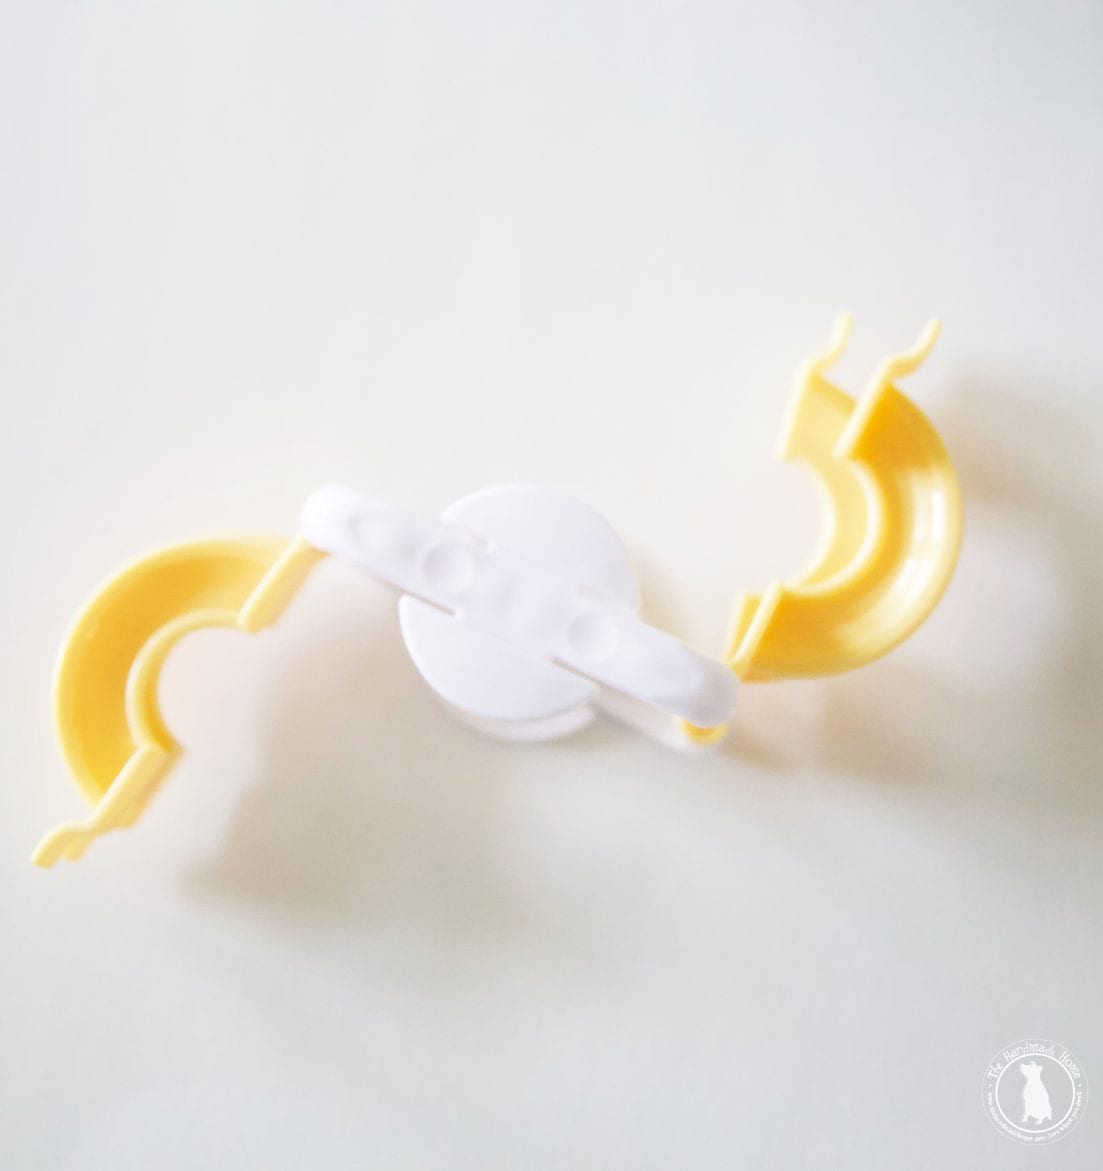
Taking the yarn of your choice, wrap it on the first part of you “c” that the pom pom maker makes when it’s open. {That will be two sides}.
When that’s complete, turn the pom pom maker around, and keep going on the opposite side.
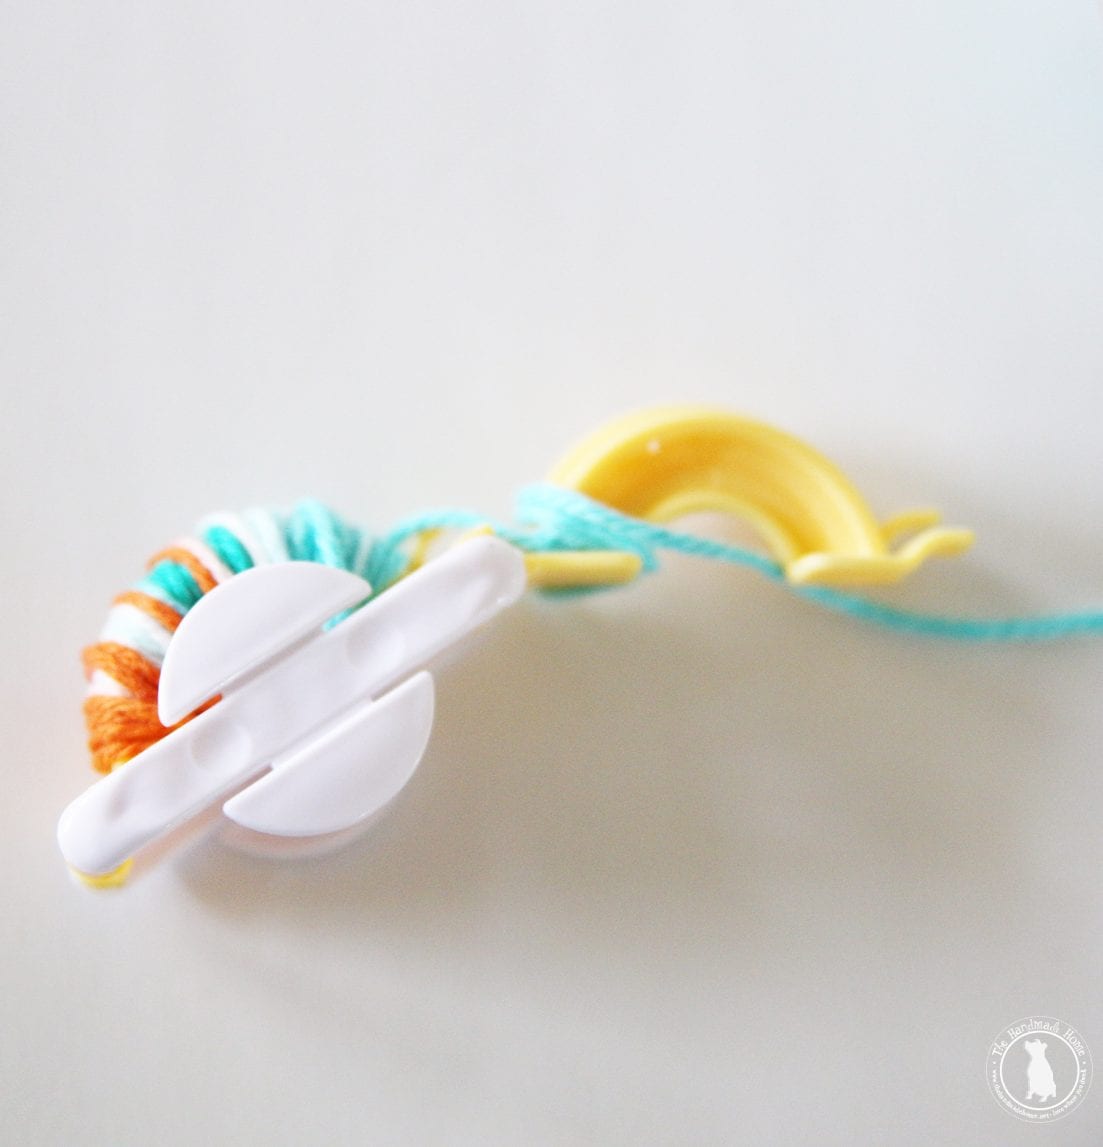
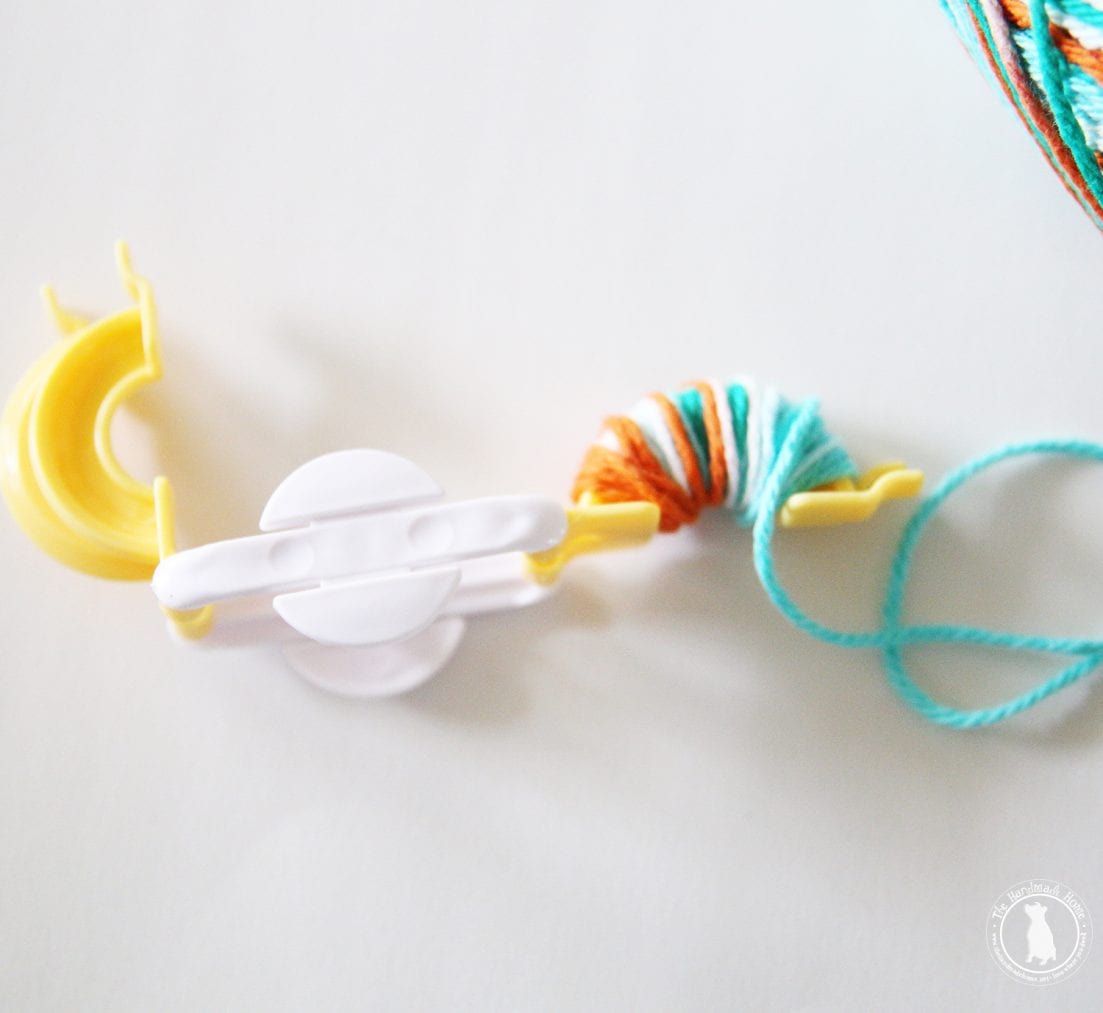
When it’s wrapped on both sides, close the C-shape back up on both sides, and make sure it’s secure.
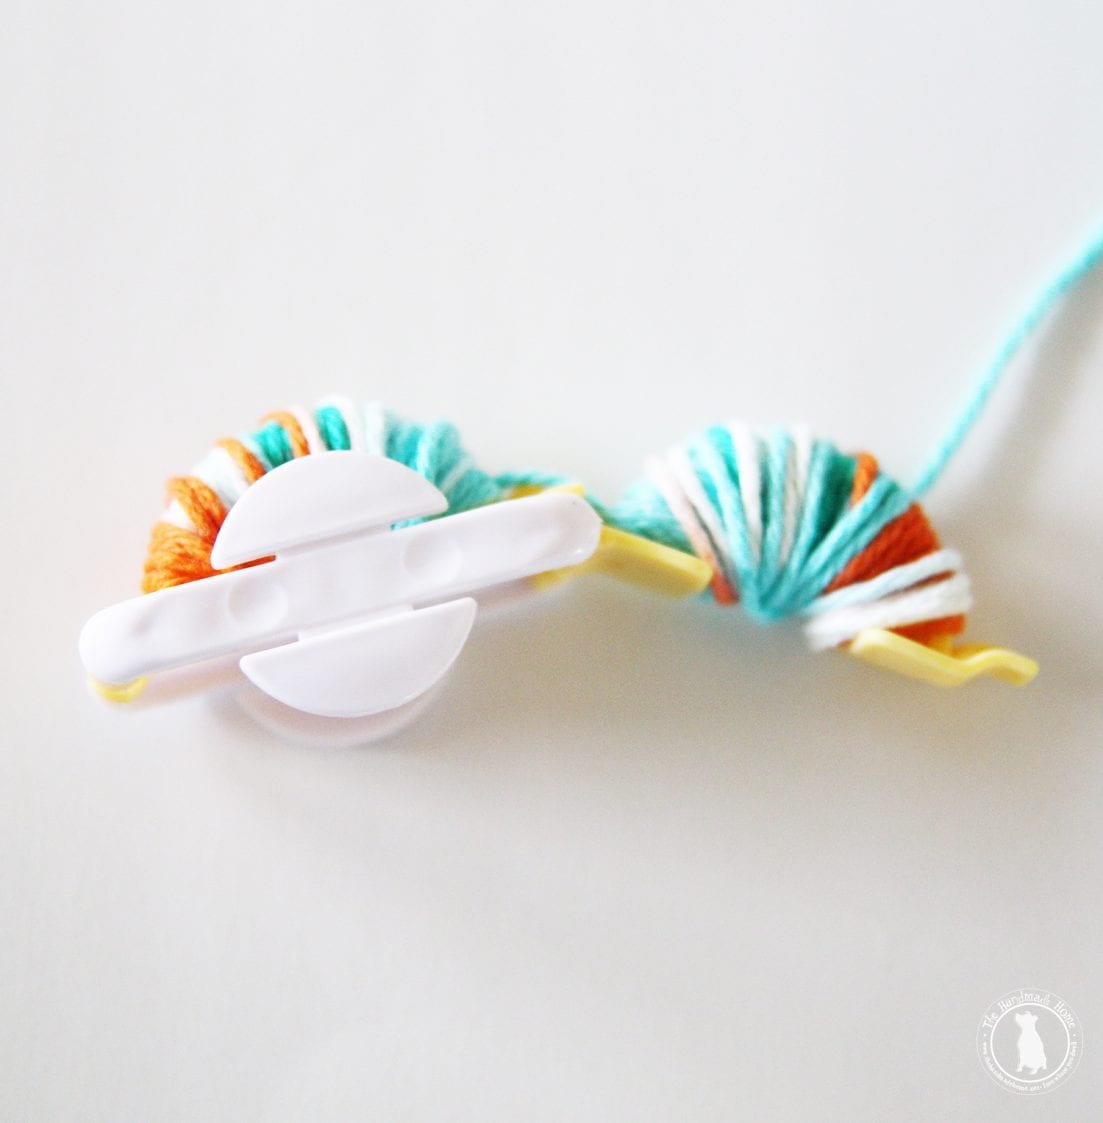
Following the C-shape on the circle, gently cut the yarn loose, so that it looks like below.
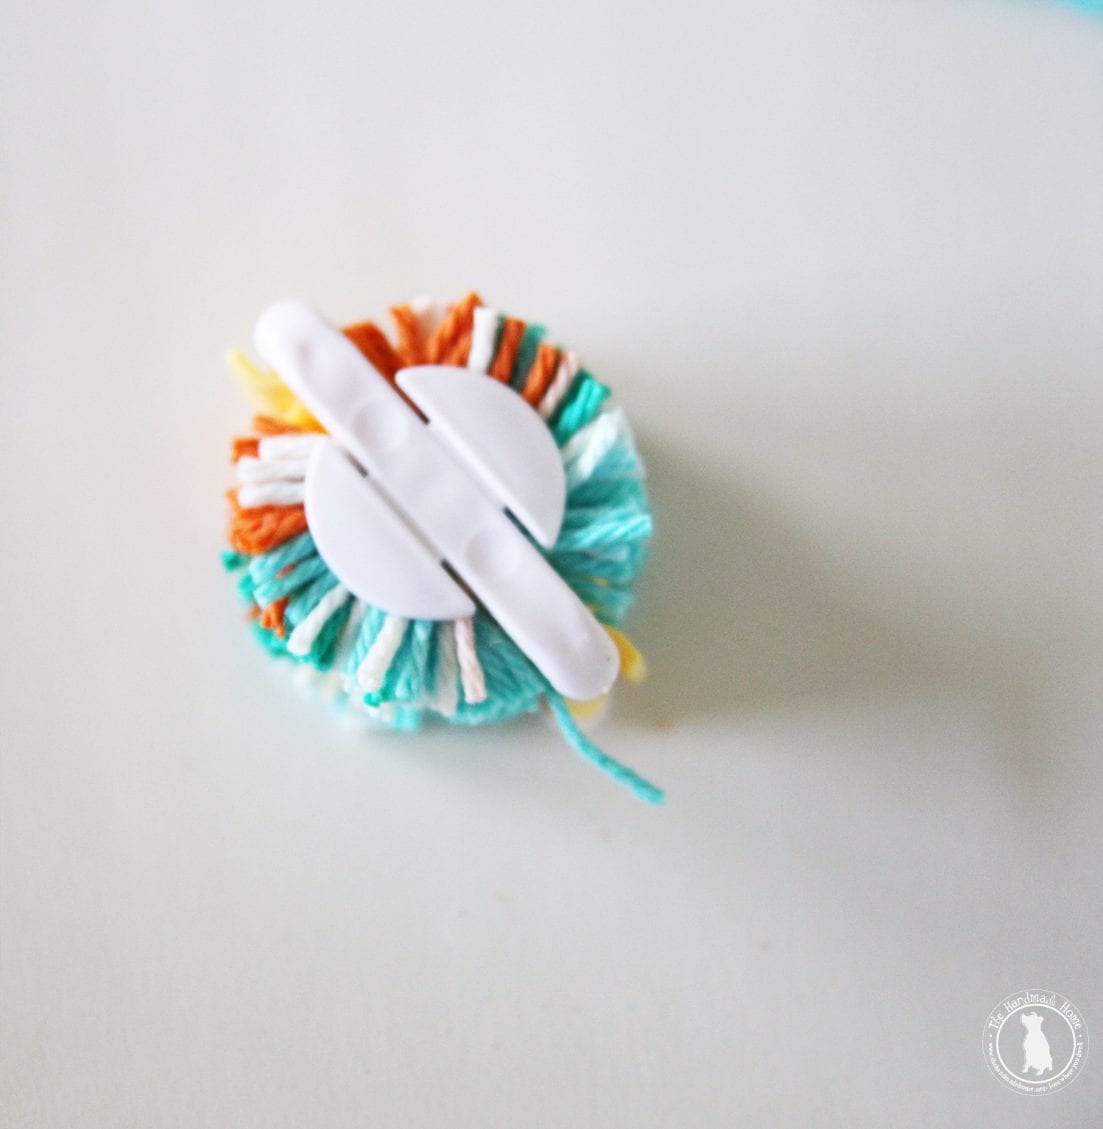
While it’s still together, take an extra piece of yarn, and tie it. This will be what secures your pom pom. (Are you having fun making your pom pom wreath yet.)
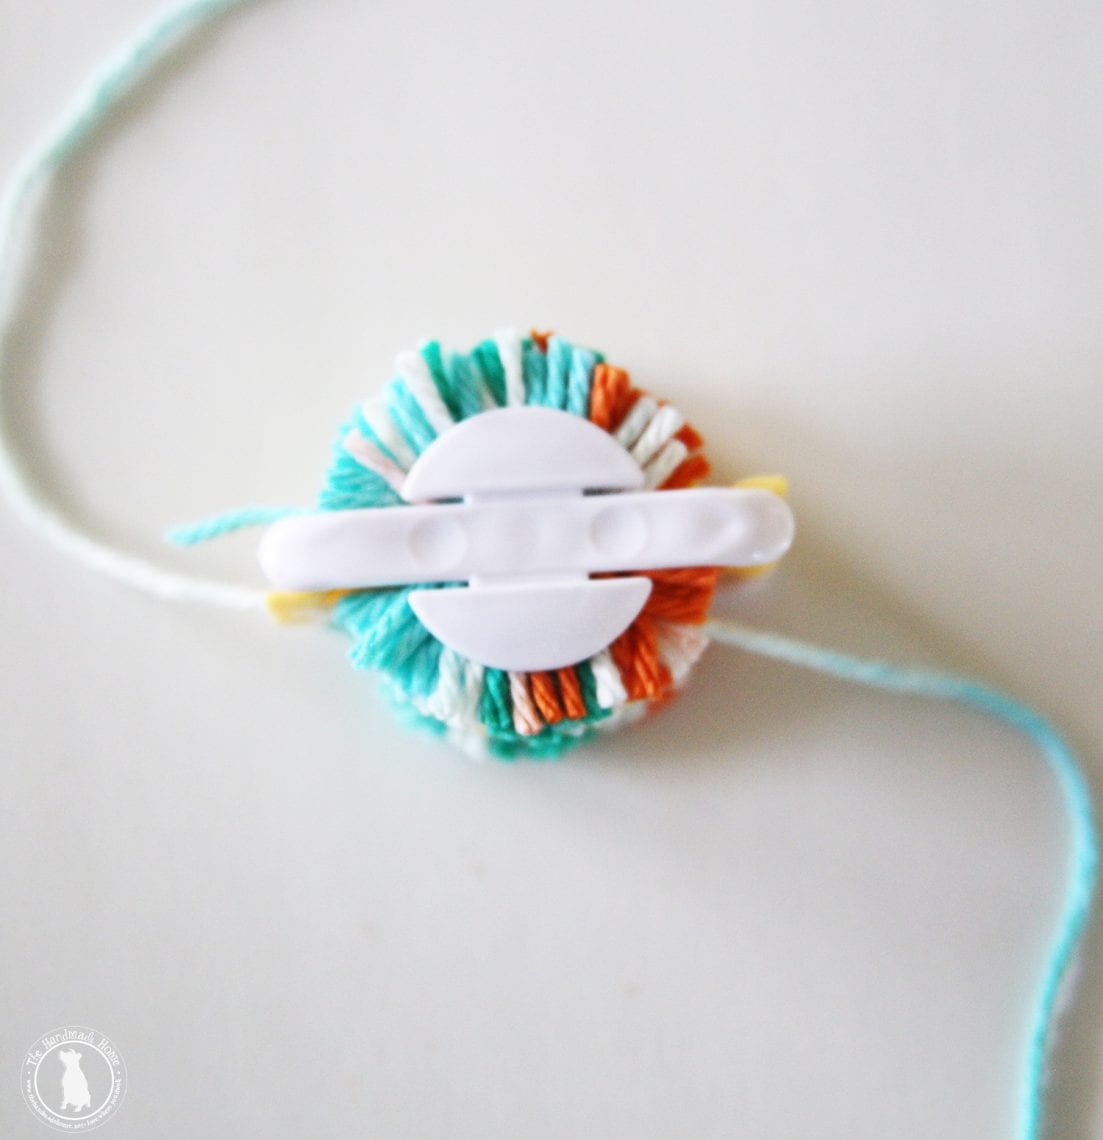
Then, pull it apart from the center part of the pom pom maker, and you’ll have your pom pom! One step closer to your pom pom wreath, yay!
If you purchase the set, it comes with instructions on the back. I just thought it would be easier to show them in photography here, too, since that can sometimes be a little confusing.
pom pom wreath – Note:
You can also make poms without the pom pom maker. I’ve done it both ways, and like this one better since it’s easier to maneuver. Check out our other instructions here.
Tada! You have your pom poms and you’re ready to go.
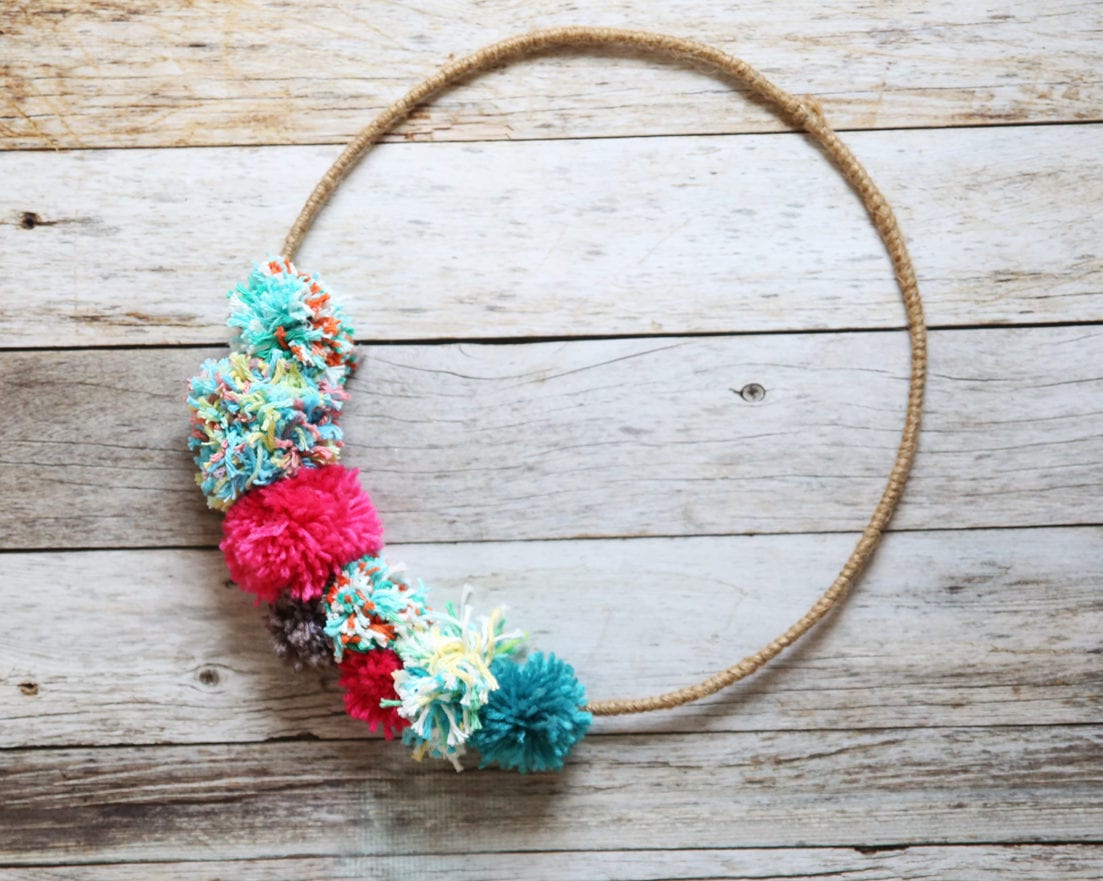
Heating up your glue gun, carefully glue it to the wreath form, and you’re almost there.
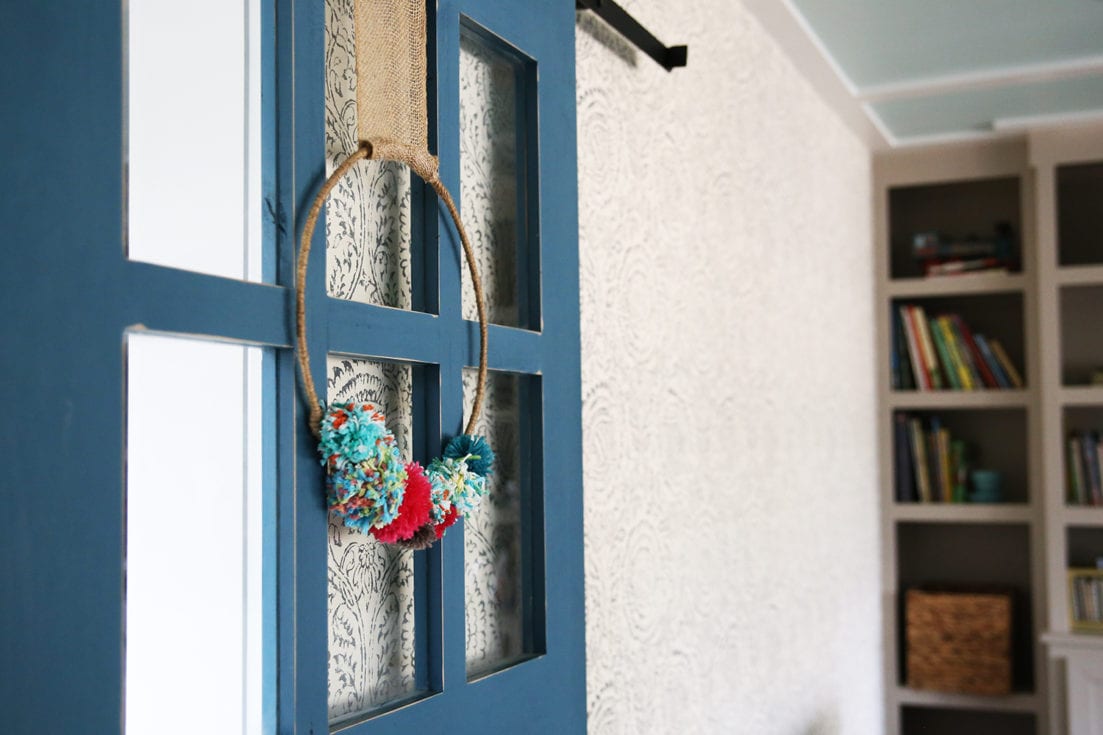
Hanging it
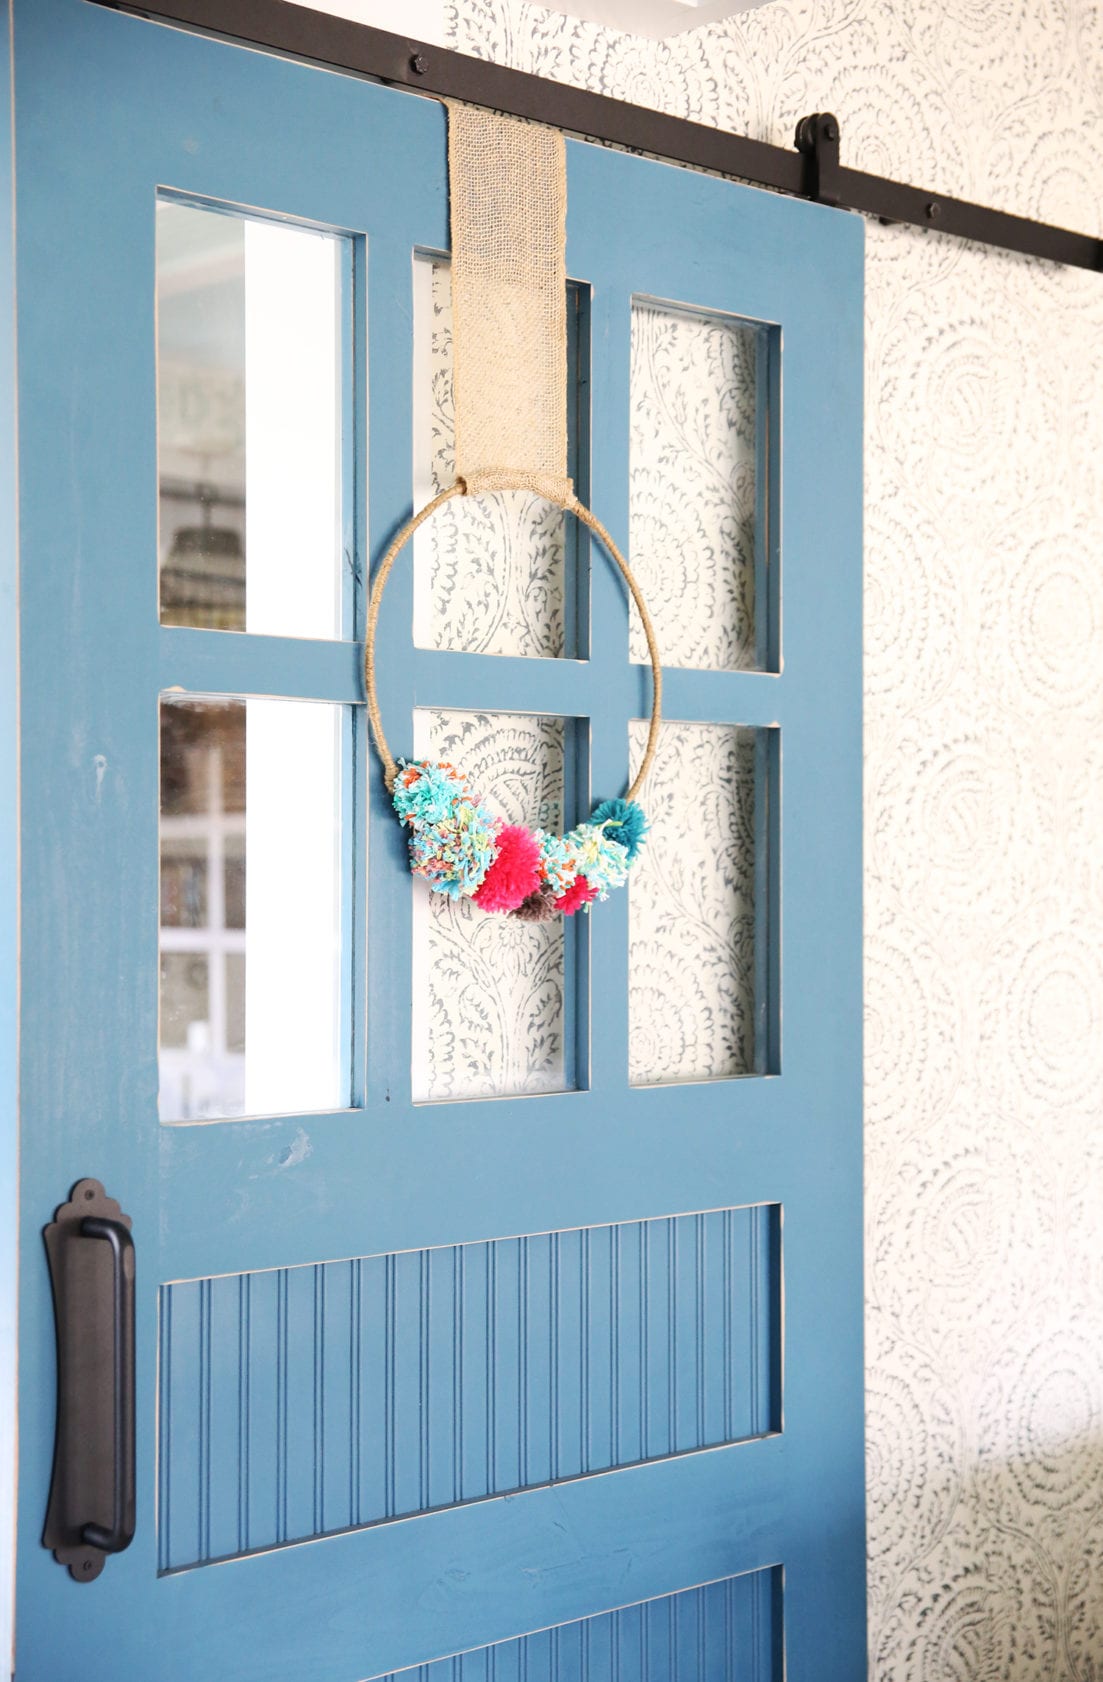
Cheater’s tip to hang your wreath: simply attach it using any type or ribbon or burlap to the very top, with a dab of hot glue. It’s easily removed and no one will ever know the difference. I’ve been doing this for years, but believe I borrowed it from The Nester years ago!
Tada!
A little something festive with a touch of fun colors.
To see the rest of our basement before and afters, be sure to check them out here: the main area + entry, studio, and laundry.

Rigby + Fitz totally approve of our new pom pom wreath.
They really are my holidaisical spirit animals. ;}
Have an inspired day!


OK! You talked me into it! I’ve gotta make one! Putting the necessary parts on my shopping list now.
Hope y’all have a great Christmas!