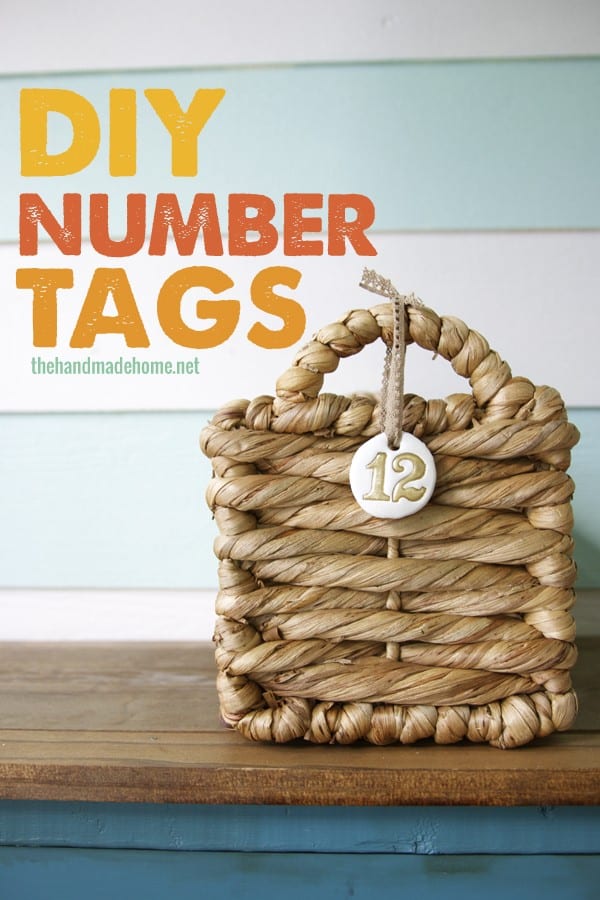
Hello lovelies! We’re back with a quick little project we worked up this week in the process of working on Emerson’s new room. For me, it’s all in the little things, and this was such a fun, sweet project. I’m already dreaming up more ways to work this into our home!
I’ve been itching to make some clay tags for some of the baskets that will be in her room, and decided earlier this week to (literally) cook some up.
 The uses for these are kind of endless…
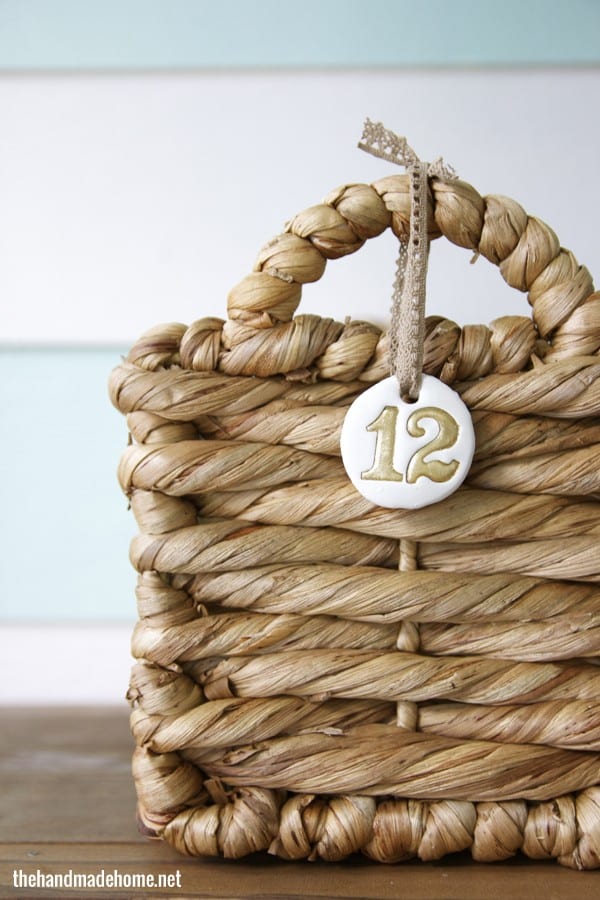
And my very favorite part is the super fun golden finish they have to them, perfect for her space. The kids are already asking to make their own version of something with this addictive, bake-able project.
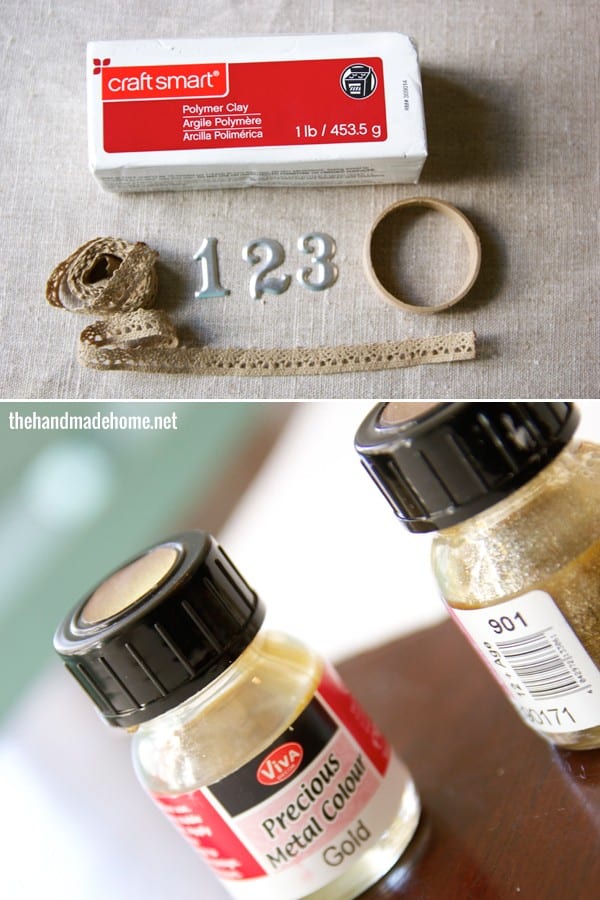
Here’s what you’ll need:
You can definitely make these with a salt dough recipe, but we had this clay left over from an animal project Aiden finished this year, and I wanted a smoother look. (It was only the most amazing model great white you’ve ever laid your eyes on… if we do say so ourselves.) But this clay is one of those supplies you can always have on hand with its endless uses.
Here’s what I used: Polymer Clay, Paint of your choice {I used this awesome metallic kind} + a super fine tipped (#1) brush, a sturdy straw, Xacto knife, spatula, cutting board (or good work surface) rolling pin, and these metal numbers by Tim Holtz. {Note: You can find numbers like these in the scrapbooking section of any local craft store}
Pulling off small parts of clay and working them into a ball {the clay needs time to warm to your hand} I patted the ball down. From there, I rolled it out into a flat surface with my rolling pin, and used my cardboard-circle-turned-cutter {This particular circle came from the inside roll of floral tape I had lying around the house. Decide what you want to use and you’ll be surprised at all the potential cookie cutter shapes you have around your home.}
I pressed down to cut out the circle. From there I trimmed off the excess with my Xacto, and lightly stamped each circle with the metal number of choice.
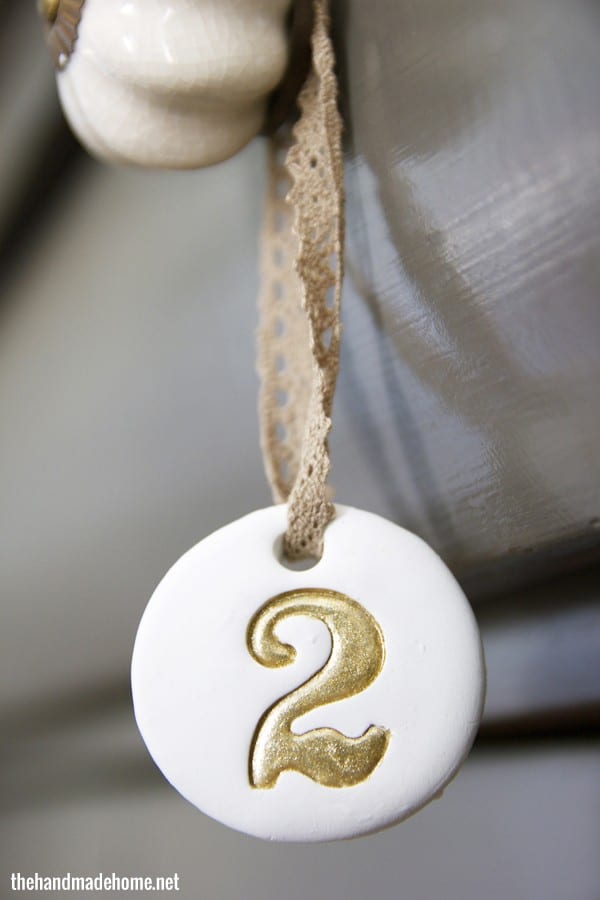
I loved that the shape underneath each one left room for an imprint beneath. This also helped in trapping the gold paint for a neat outline. When I pushed it down, I then removed the metal number with the end of my blade, and punched out a hole at the top of each tag with a sturdy straw.
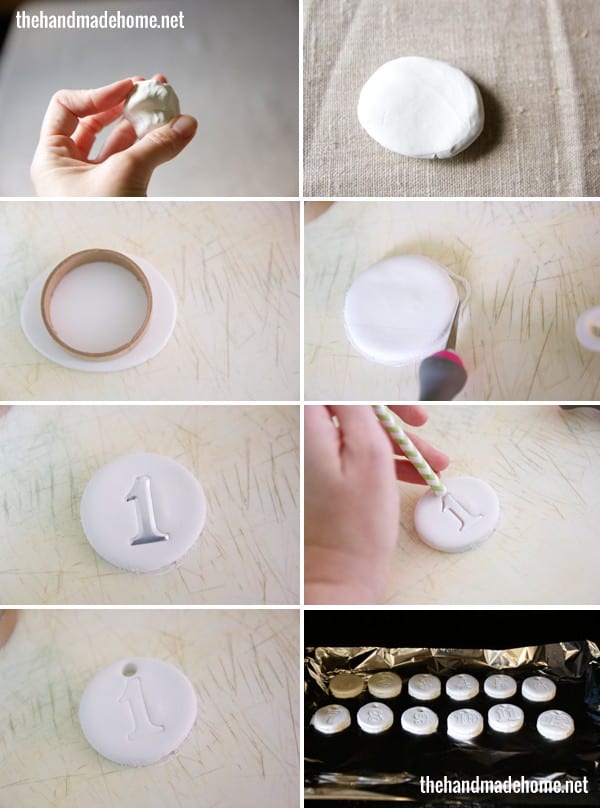
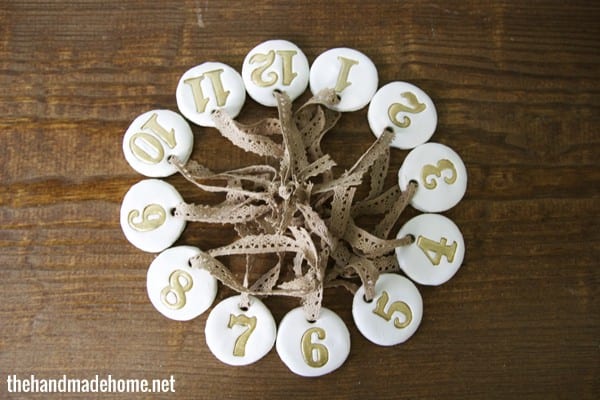
Following the directions on the package {I left mine in the oven for about 20 minutes} I pulled them out, and…
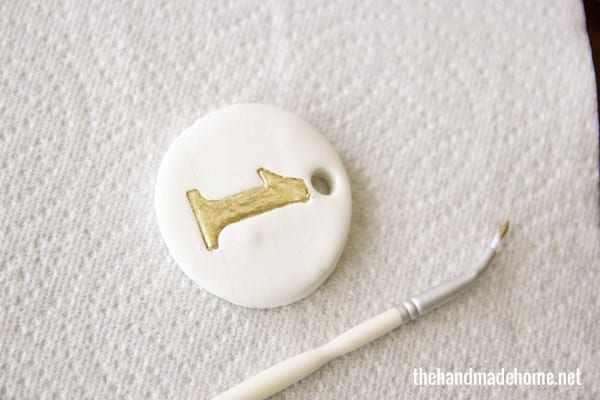
Tada! Now for the fun part. I carefully painted each number with my fun gold paint, going back over it in some places for a second coat and strong metallic finish. I was finito. Just mind the edges!
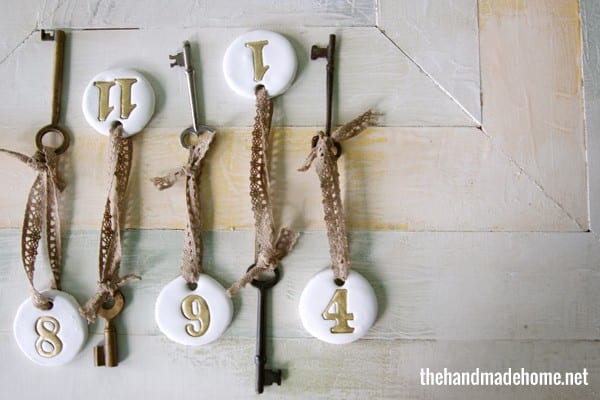
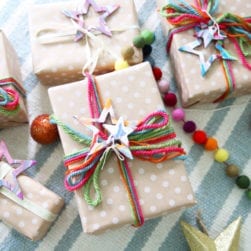
I grabbed some ribbon from our local craft store (also in the scrapbooking section) and I love the burlap/lacy-look that it has for that perfect frilly touch. A fun, simple way to organize her new closet…
I can’t wait to show you guys!

 Have an inspired day, y’all. And as always, let us know if you try it!


Love these! How adorable. I wonder how hard it would be to make tiny little bowls for storing jewelry! I bet it would be a similar process…
P.s. still hoping to hear back about my failed ebook download! Would love to get started on some handmade walls!
Hey Gretchen,
Tony our friend who oversees all of that (and I think Jamin, too) have tried contacting you. Can you check the email address that you purchased it under, and your spam as well? I want to make sure it’s going through. Thanks so much! ;}
Pretty pretty!! I love this little project. I’m sure Emerson’s loving them too!
you could also do this with letters – a cute way to personalize gifts. the possibilities are endless! thanks for sharing this!
Cute cute cute! a little sparkle makes everything bettah.
have a great weekend!
These are totally adorable!! Pinning:-)
These are so cute! They would be perfect for using in our playroom. I am definitely going to make them.
Such a nice idea! I’ll try it for sure! 🙂
That is really very cute & chic. I will absolutely be doing I this project for something! You did a wonderful job!
Thank you, Wendy! ;}
I like the idea of using clay instead of salt dough. I once heard to never use perishables in crafting but salt dough is popular and making the Pinterest rounds these days. Thanks for sharing!