easy diy earrings
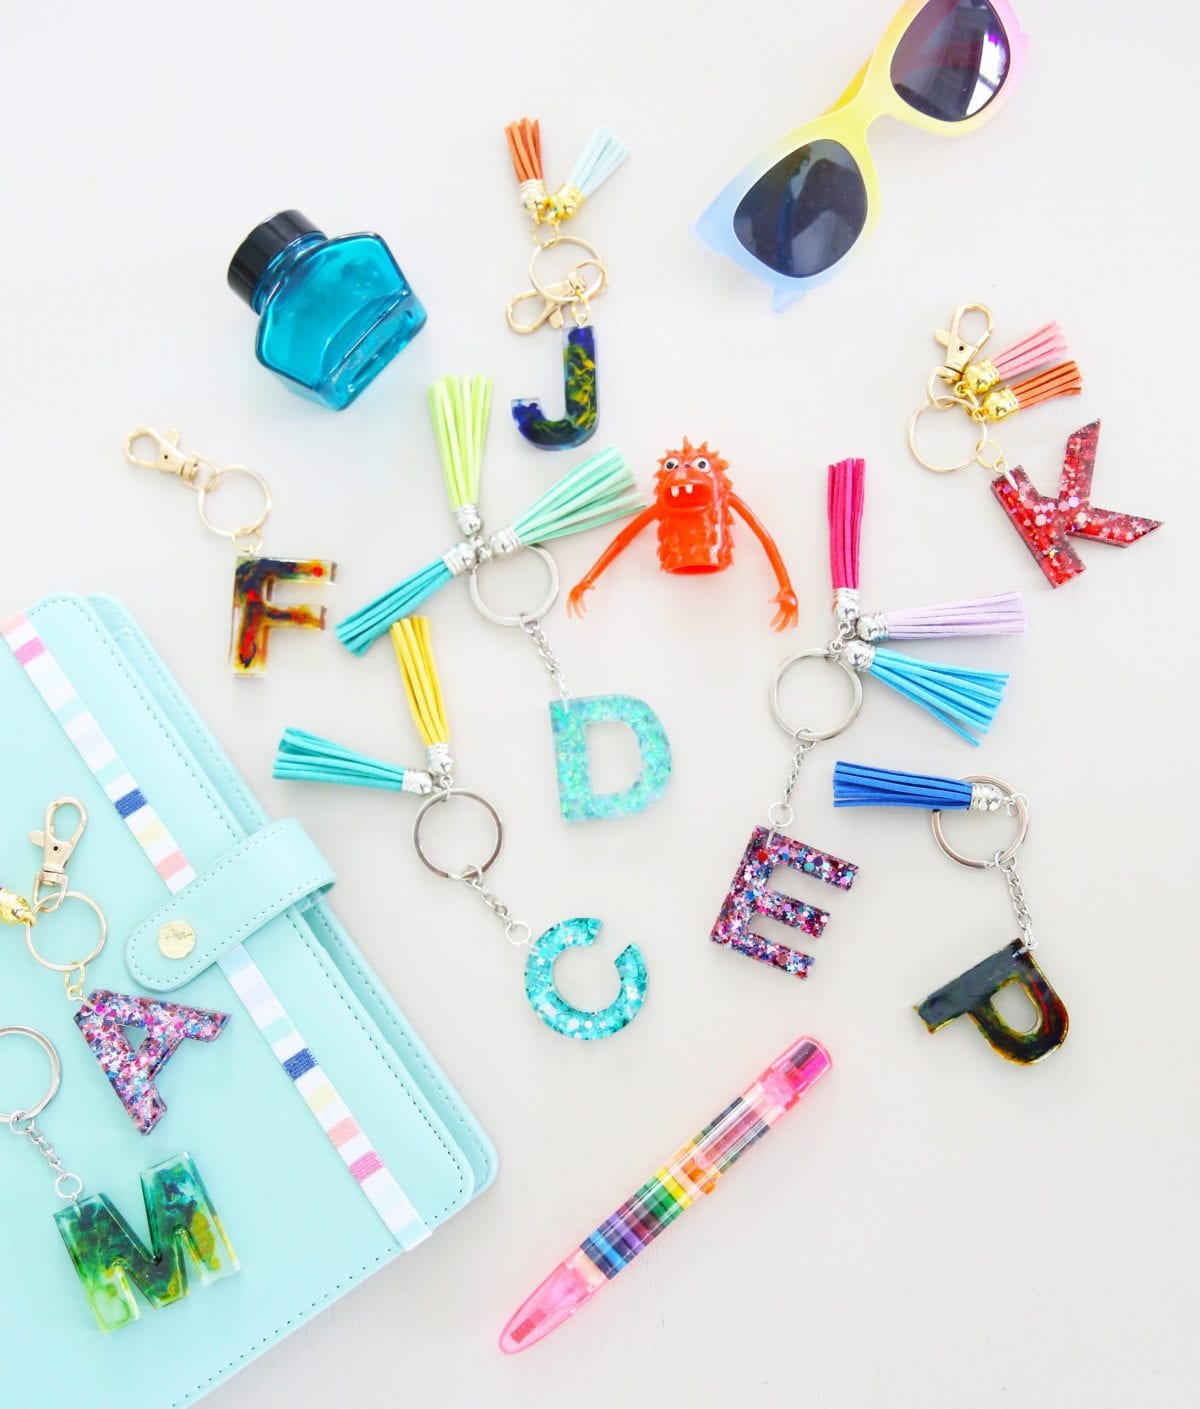
We love that this quarantine time has given us more opportunity to dive into the projects we usually don’t have/make time for. The other afternoon, we decided to try our hand at resin earrings. We’ve been in resin-dork heaven recently, between these fun necklaces and our personal faves, the awesome little keychains. So we thought we’d share this how to for some easy diy earrings!
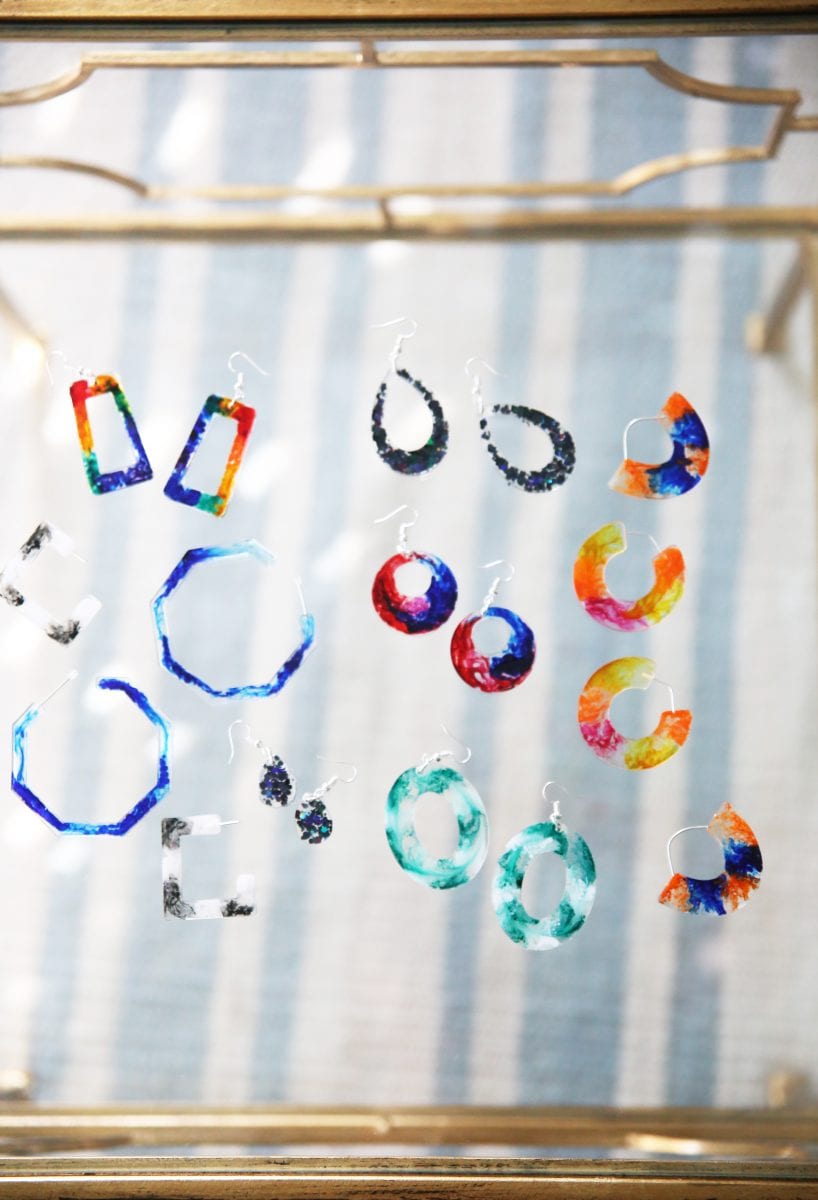
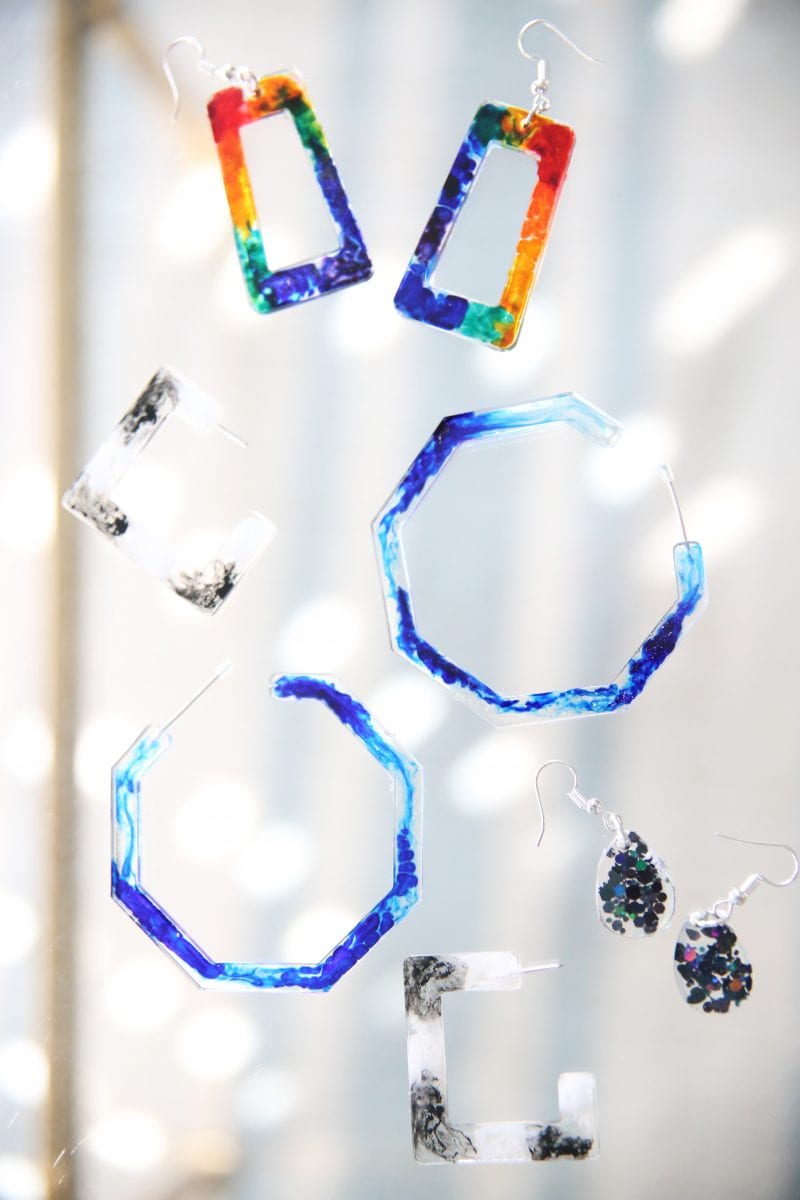
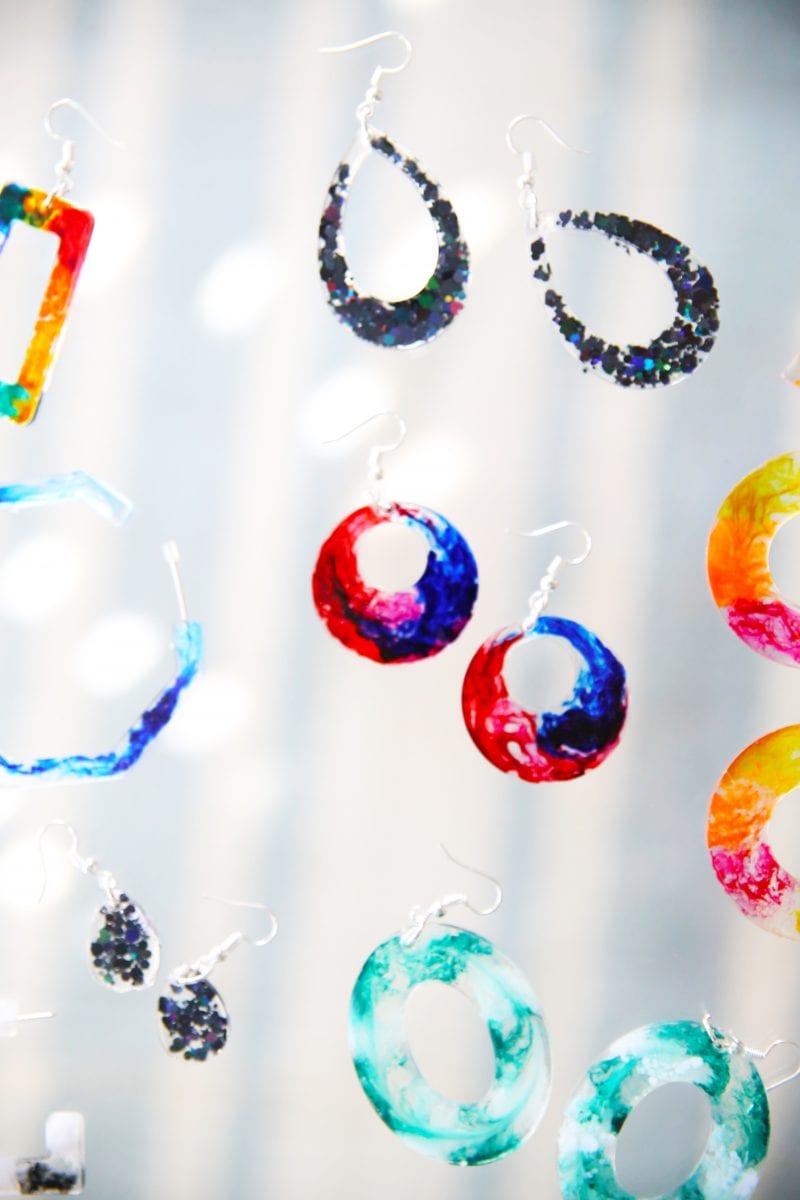
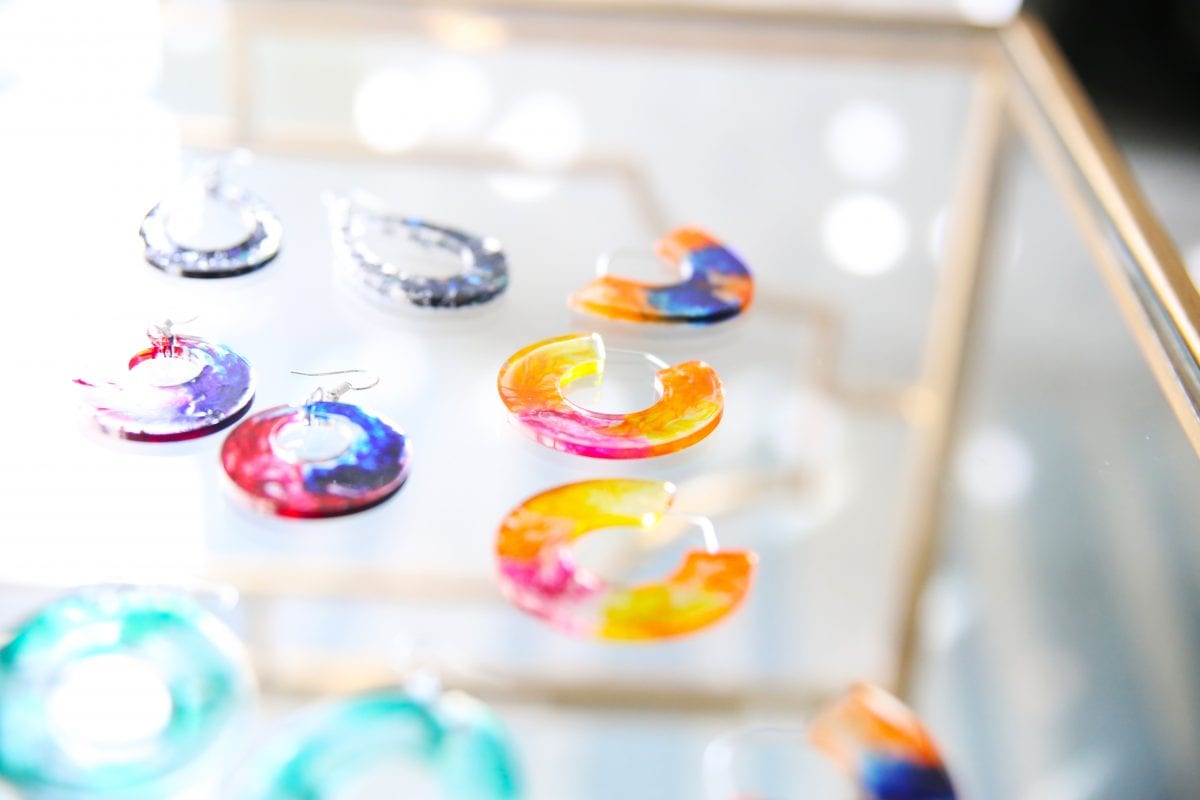
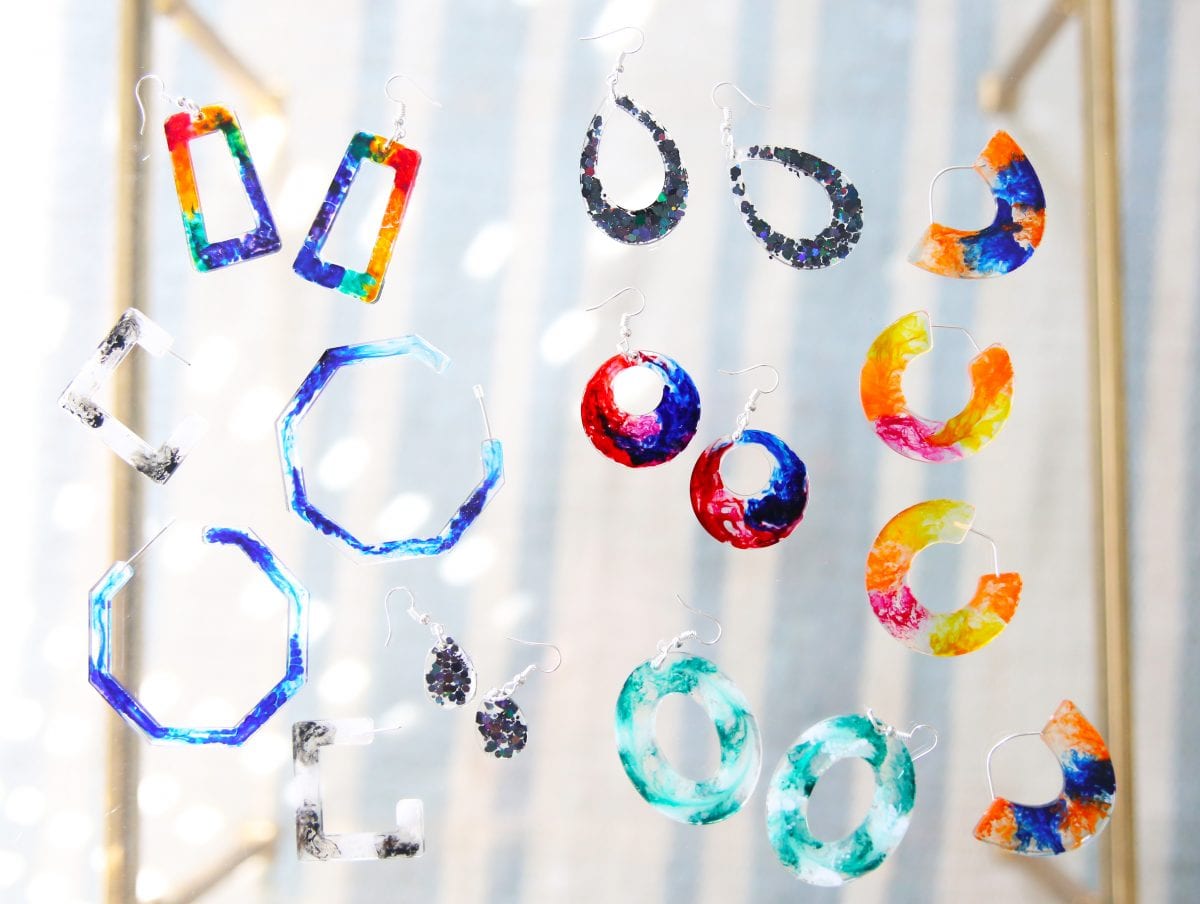
We love all the fun easy color and endless combinations you can make!
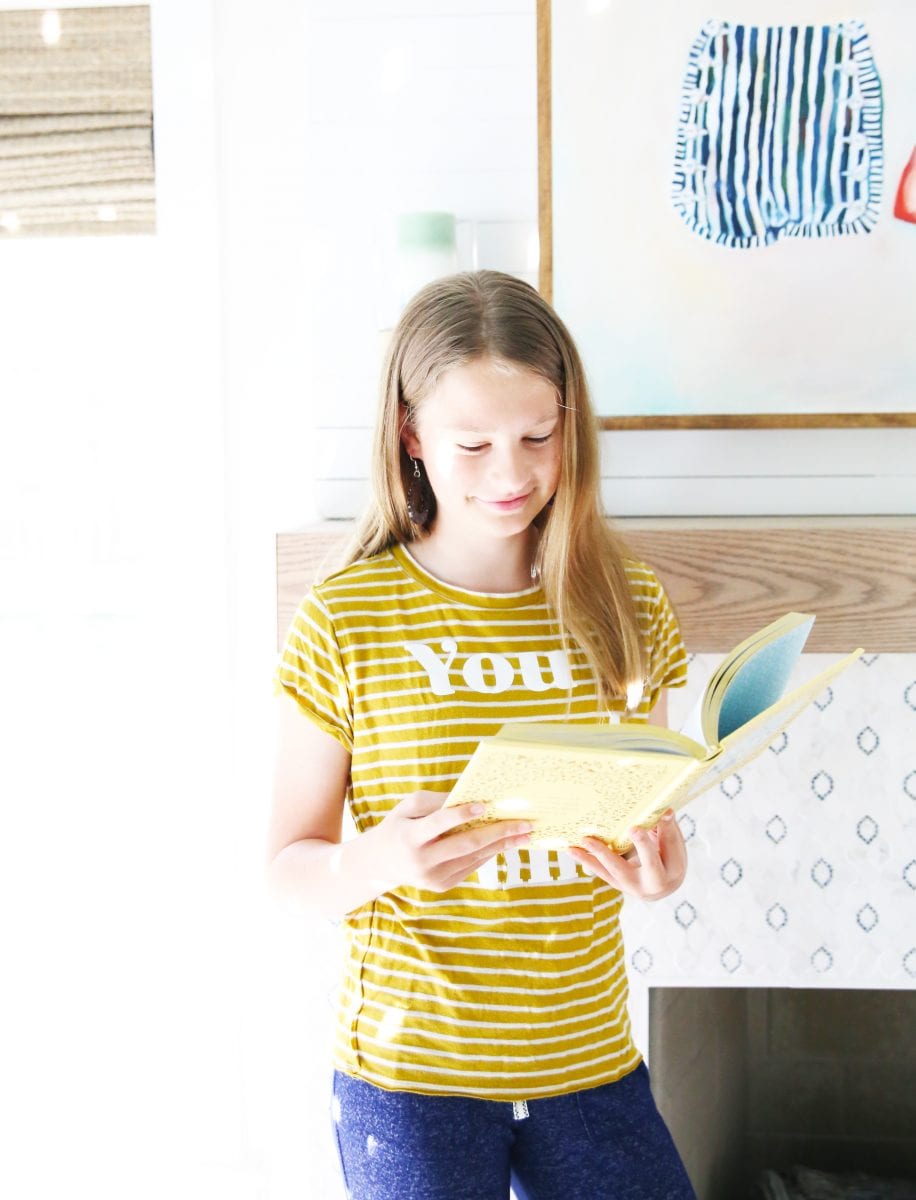
Emerson loved the idea so much, she can’t stop modeling them for me.
They have so much fun personality, the options really are endless.

I think she really got into her role.

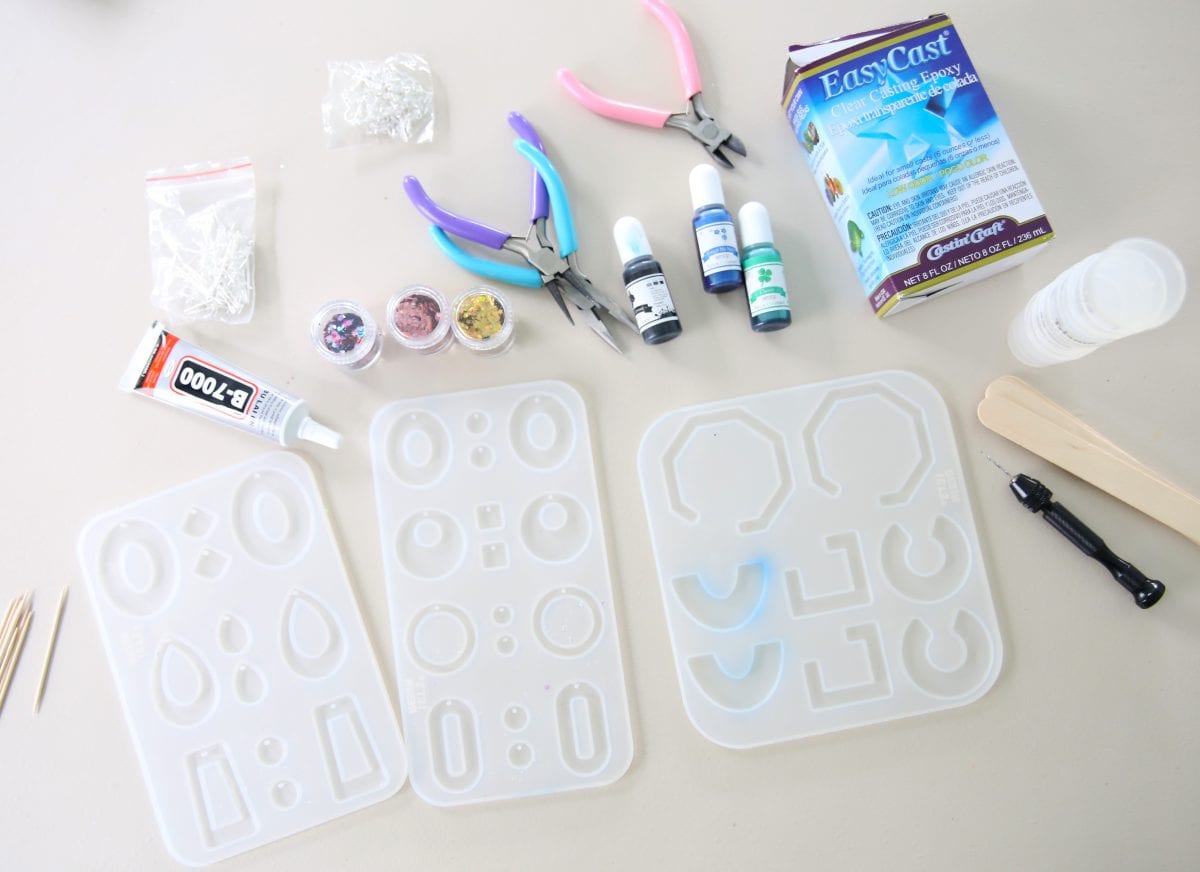
Here’s what you’ll need:
• resin kit – I like the easy cast because it comes with thorough instructions. Read them all, but I’ll cover more of that below.
• measuring cups {the kind you give your kids medicine with} – A good place to start will be two smaller ones and then one larger one for each pour.
– make sure they are marked for measuring.
• toothpicks or popsicle sticks {aka that pink thing above that came with another kit
• this mold
• glitter or other fillers – it’s fun to get creative with this one
• other earring accessories – the mold above comes with some great jump links and hooks – I recommend using these first before deciding on more.
• these little tools are helpful if you plan on making more
• tiny screw driver
• wax paper or another way to work on a protective surface – resin doesn’t come out, so make sure you’re covered
• gloves – this stuff gets sticky.
Note: Work off a protective surface, and in an area that is well-ventilated. Also work on an area that can be left that way to give the resin plenty of time to cure. This takes about 24 hours, give or take, so be flexible with wait time and the area being able to be left alone. {AKA the family dinner table is probably not a good option}
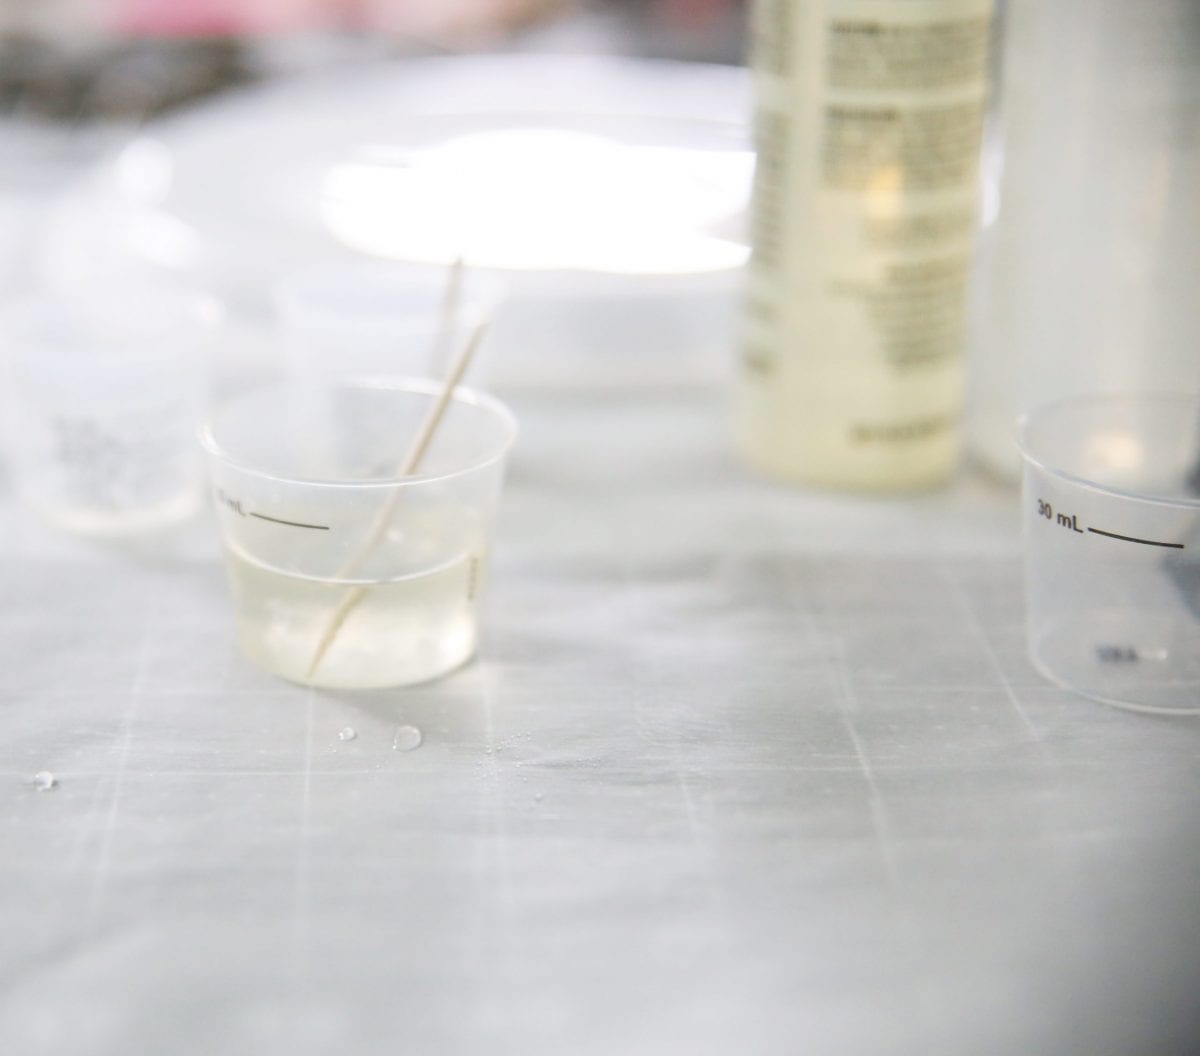
Measure out your resin according to the instructions.
Before I began, I read the directions about three times over, because it’s a very temperamental substance.
What I learned:
• Work in small amounts. This keeps it easier to deal with- It can get away from you quickly, so this is important.
• Use two different medicine cups to measure out your resin + hardener precisely. It’s a 1:1 ratio so make sure you have it right.
• If you don’t get the measurements right, you can have cloudy, sticky mixtures that never dry. So pay attention.
• Pour one into the other after you’ve measured, and stir in a figure 8 motion, with a toothpick. Work the sides, too.
• The instructions will be more precise, but stir for 2 minutes.
• Do not remove your toothpick, when stirring. This reduces air bubbles.
• After two minutes, pour it into another measuring cup, with a fresh stick.
Stir for 1 minute.
Your resin will go from liquid to soft gel in about 15 minutes. Now you can add filler, or whatever else you wanted to add to your resin.
You have that period of time to work with it. Stir again and you’re ready to pour.
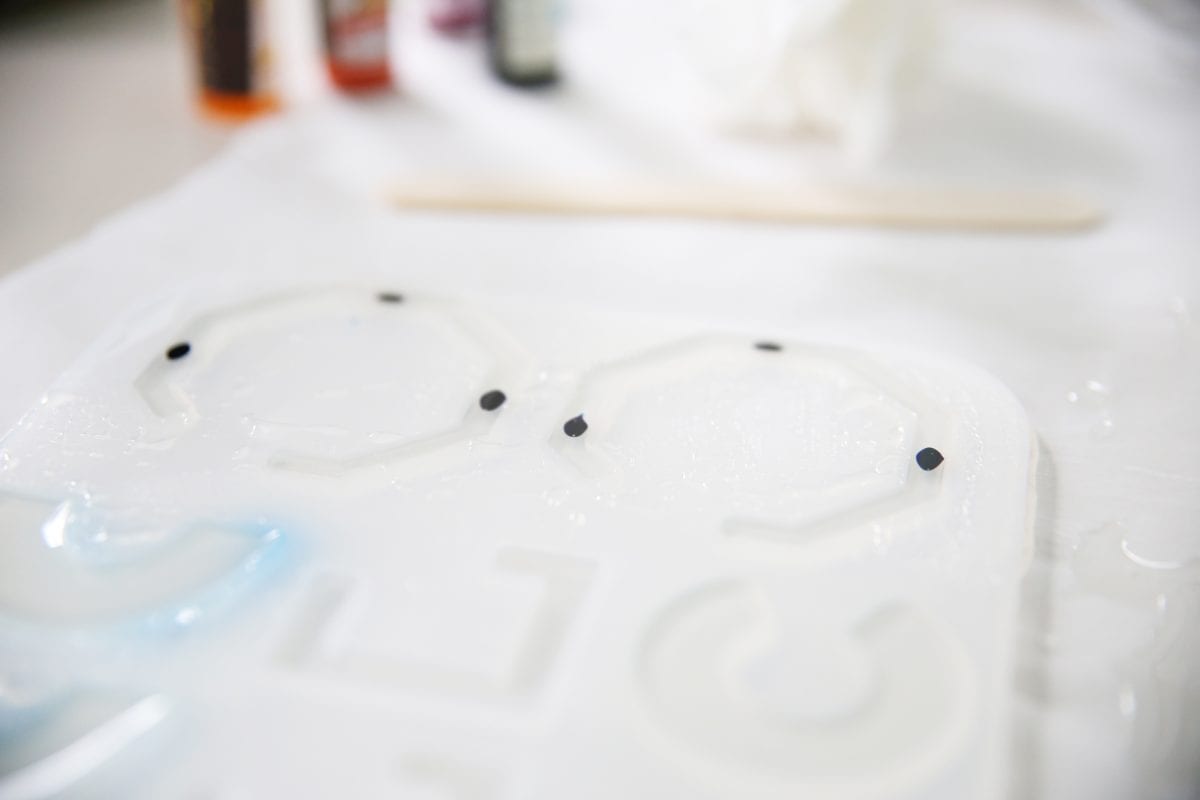
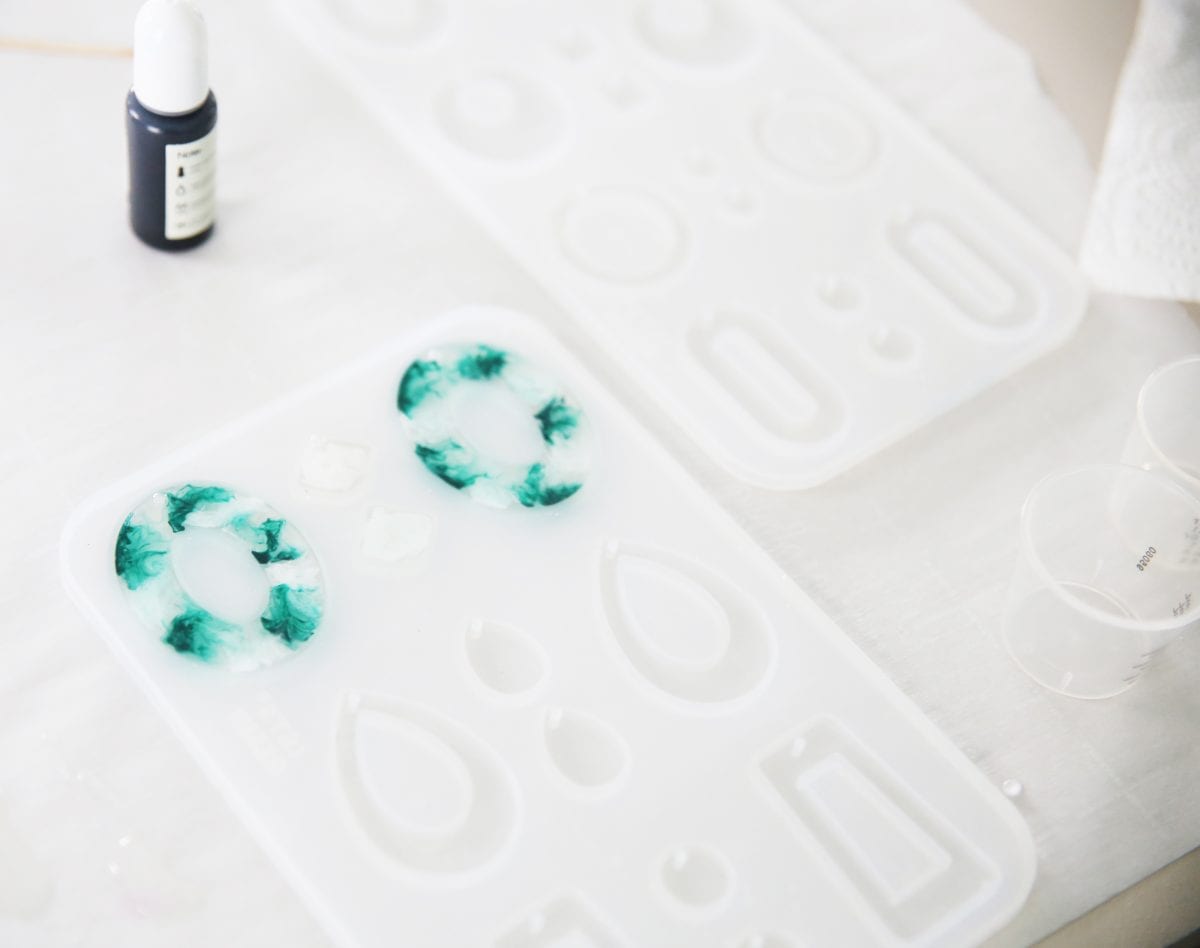
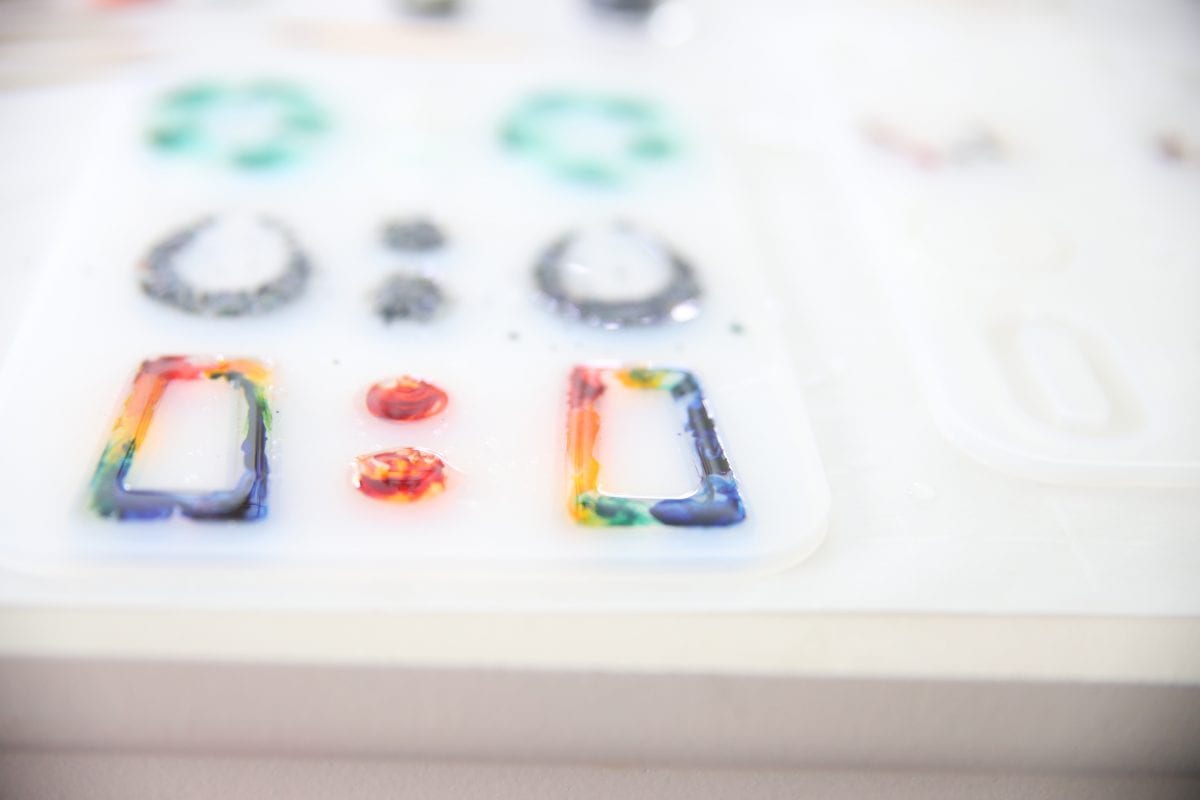
Once you’ve poured into your selected molds, you can use dye to make this fun look. We only did a few droplets and then spread it around with our toothpicks.
The key is to not do too much dye, or the resin will have trouble drying. A little bit goes a long way.
We also added glitter to a pair of earrings, but did that by adding it into the mixture before we even poured it in.
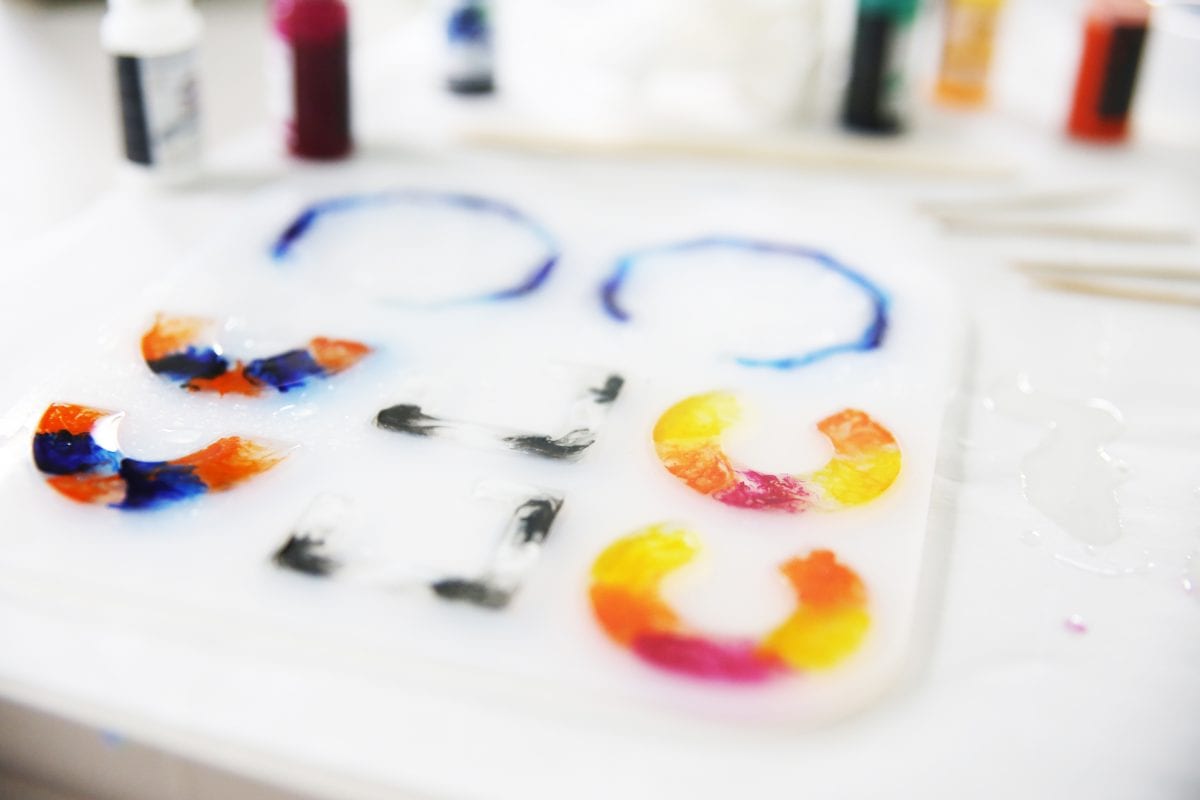
We loved this look as well and just experimented with different combinations as we went.
When the earrings were dried, we popped them out of the mold and it was time to turn them into earrings.
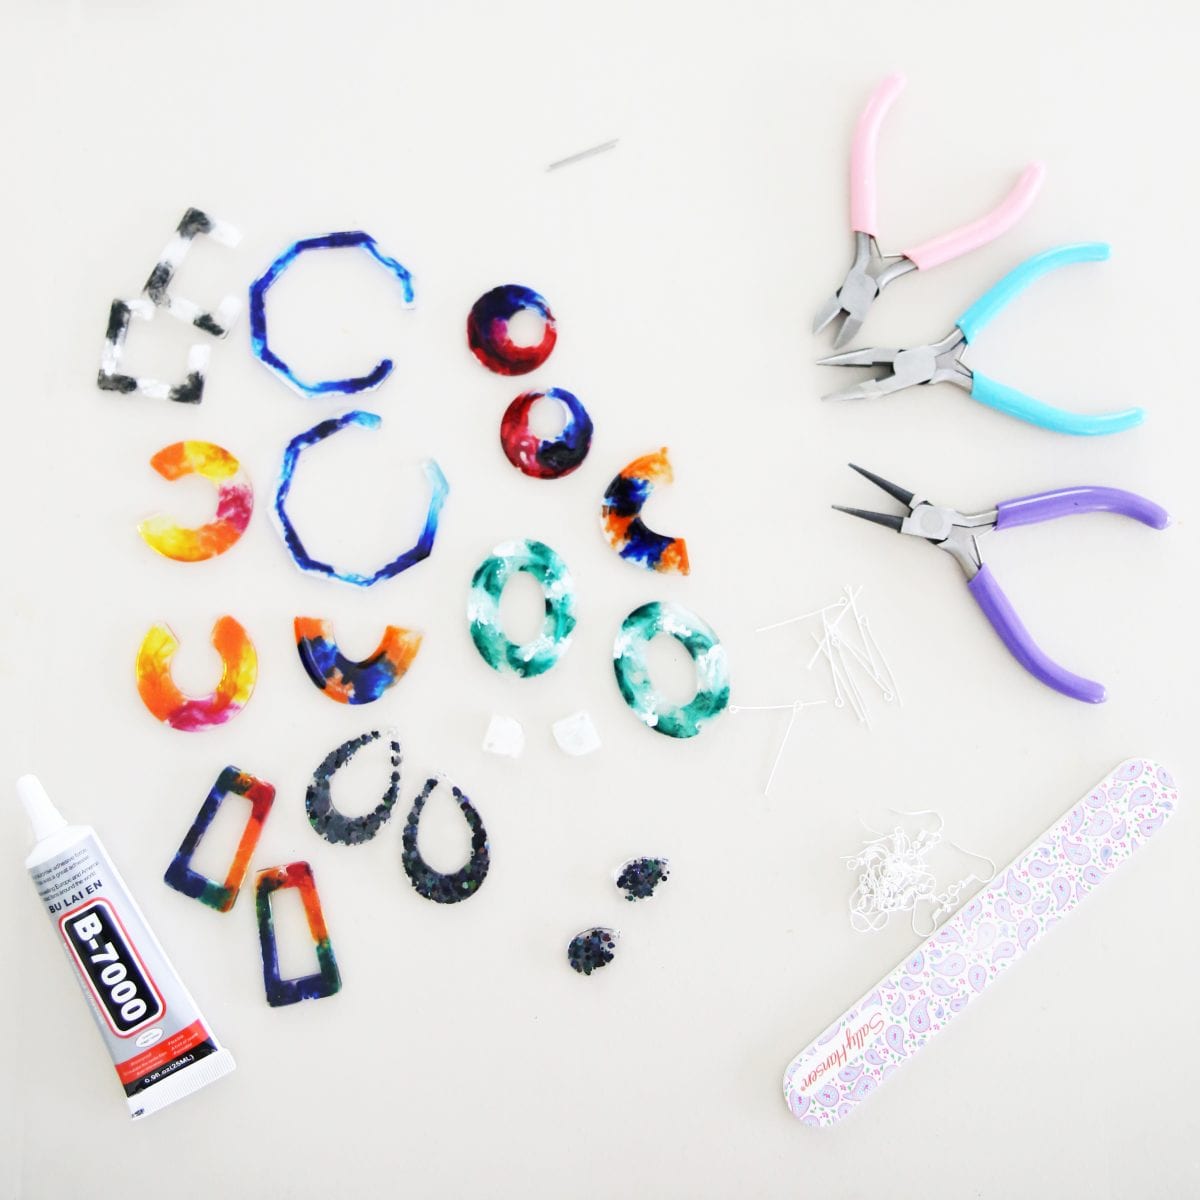
Some were easy to convert, with simple jump hoop and hook combos.
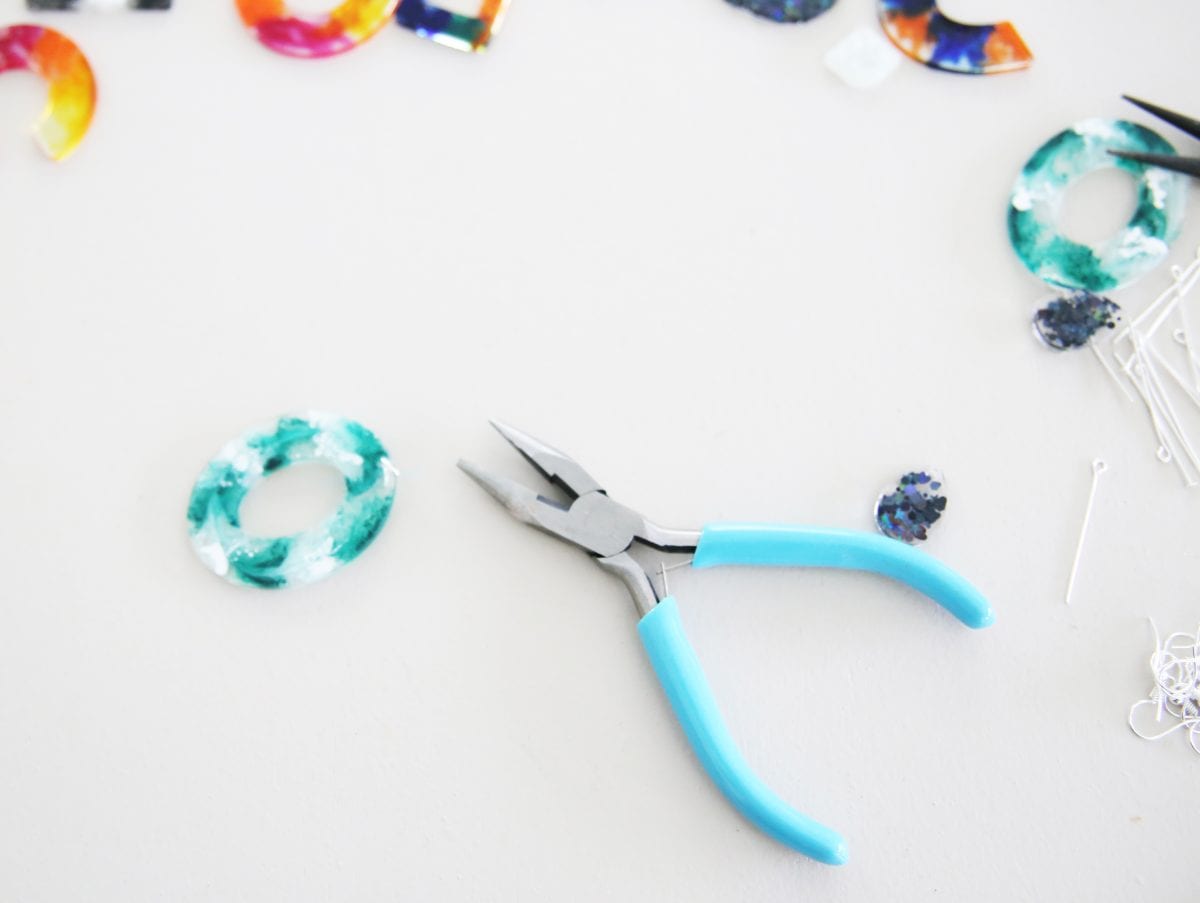
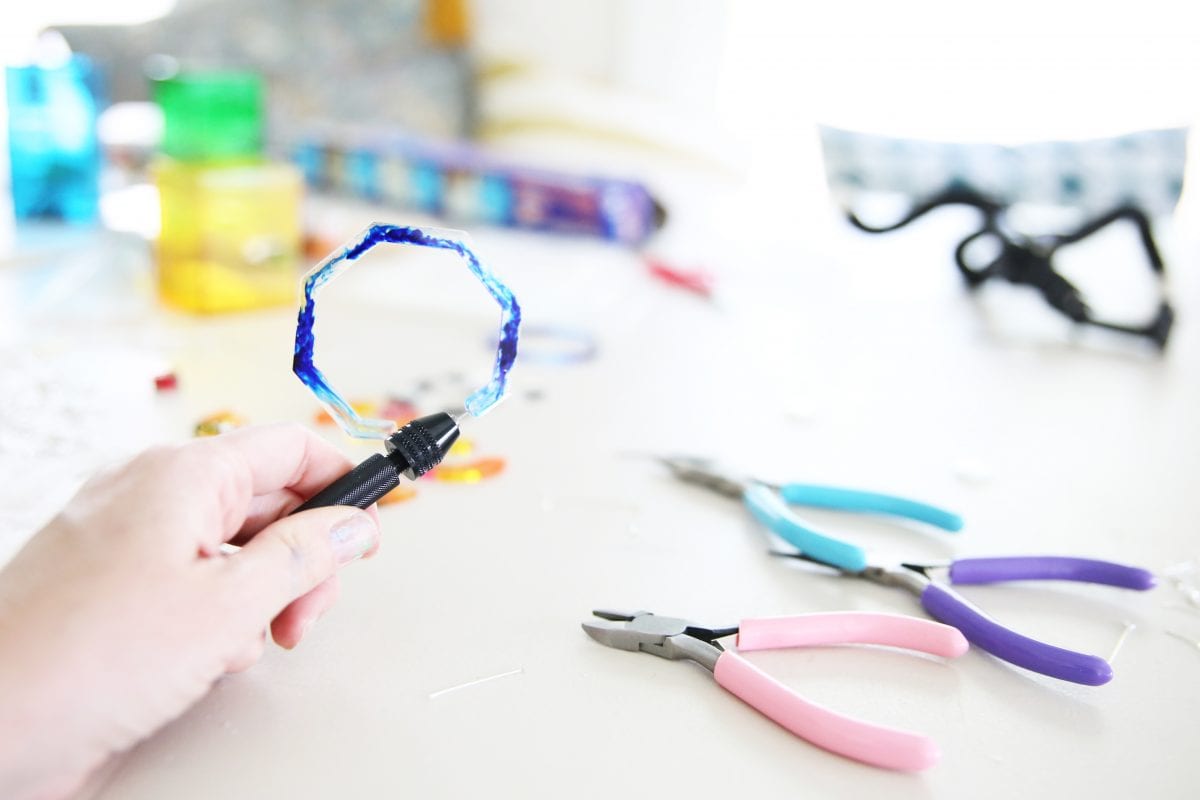
Other shapes needed a small amount of drilling so that we could add little pieces of wire.
We simply selected a drill piece that was the same width of the earring metal, and drilled it in. We then secured it with glue, and trimmed. After a little drying time, they were good to go.
Tada! The possibilities with this one are kind of endless.
We had so much fun with all these fun little creations!
On another note, this is what I’m now contending with in all my shoots.
At least he makes me laugh. All three of them do.

As always let us know if you try it or have any questions.
We’d love to hear.

Have an inspired day!

Want more resin fun?
Check out how to make resin jewelry here
and these really fun monogram keychains!