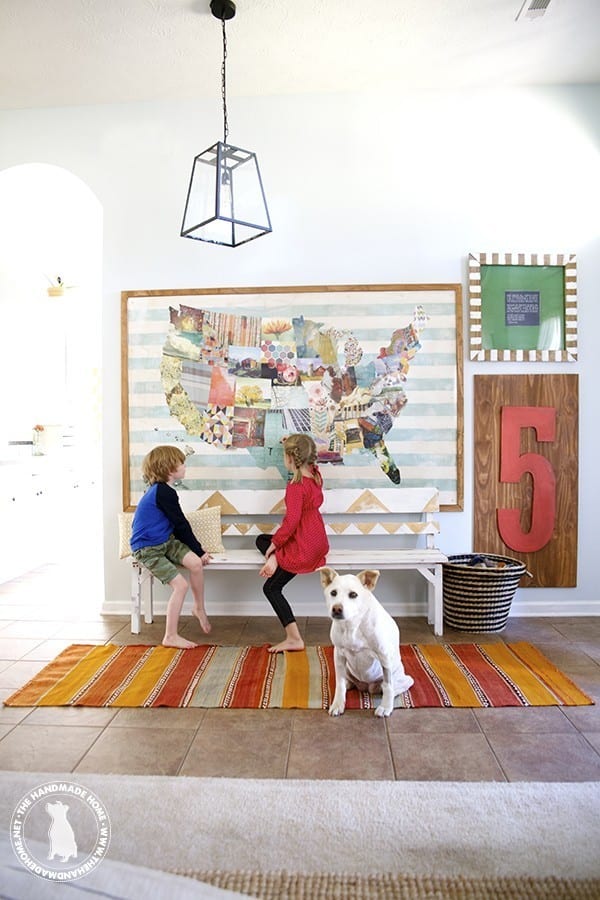
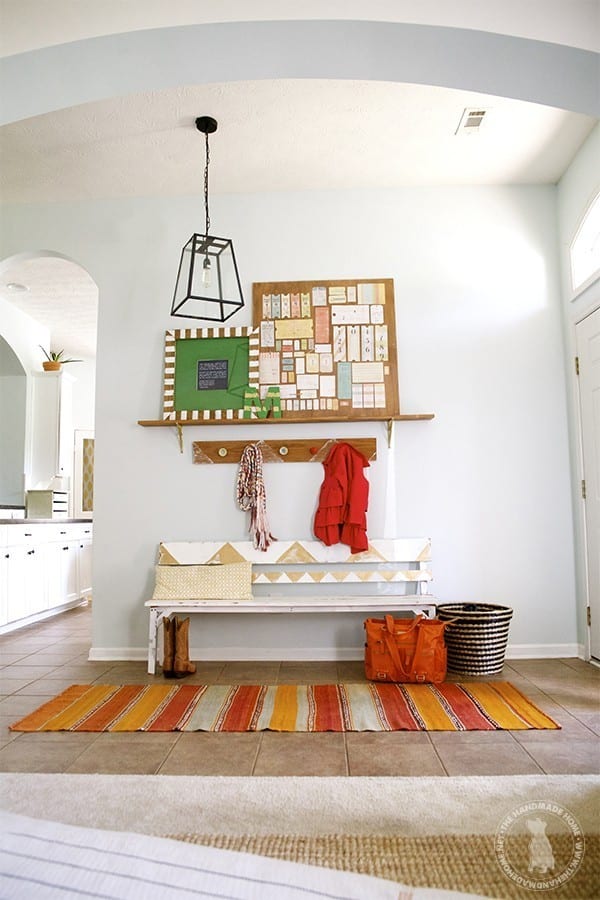
A sweet gal Jamie wrote in recently and asked: I loved your recent new map addition to your entryway/homeschool space. It might be one of my favorite projects ever. But I actually had a question about your old entryway hooks. Where did you get it, and if you made it, can you share any tips? Thanks so much!
We’ve actually had quite a few questions about this in the past, so we thought today was as good as any to share a few tips on this super easy project for even the beginning DIYer!
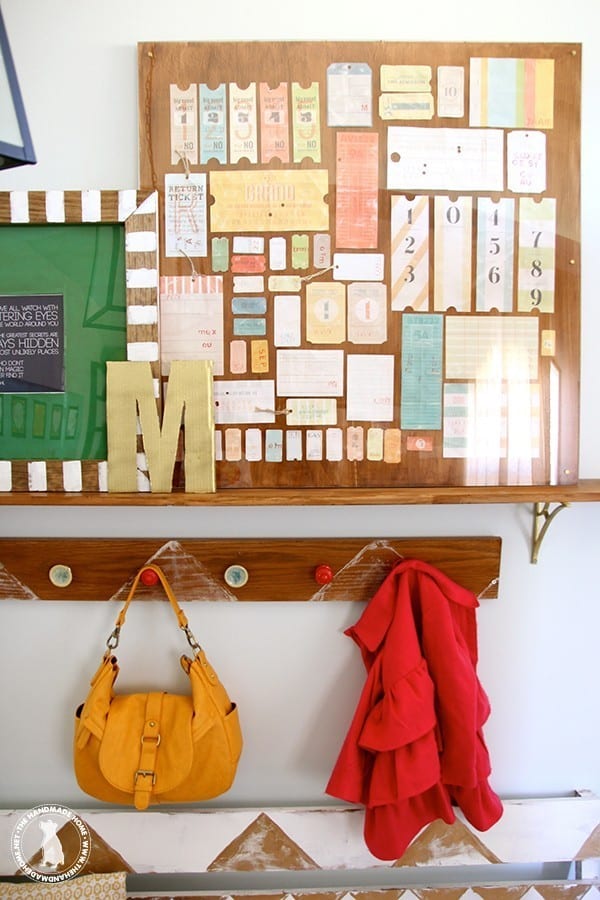
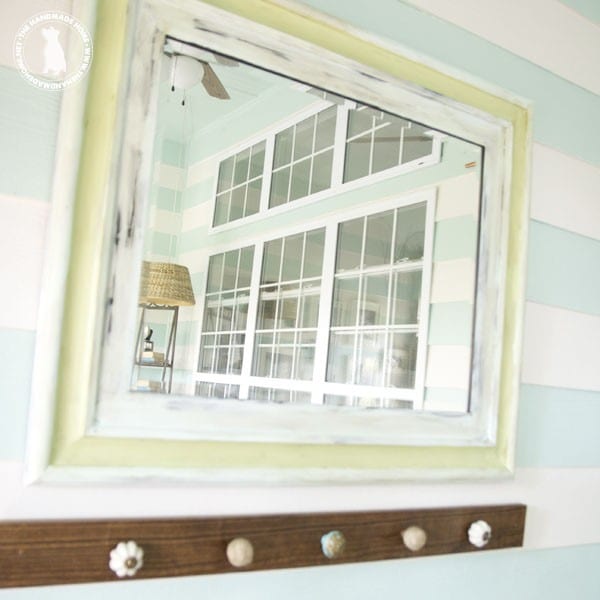
 One of our very favorite pieces in our home is oh so easy, and so super versatile that we’ve made different versions over the years. {We’re still looking for a new place for this one since we did pull it down, we love it so much. I don’t know how I’d survive in our home without a drop zone for all. of. the. things.} If you have some sort of system in your home that functions well, then you know how important it is!
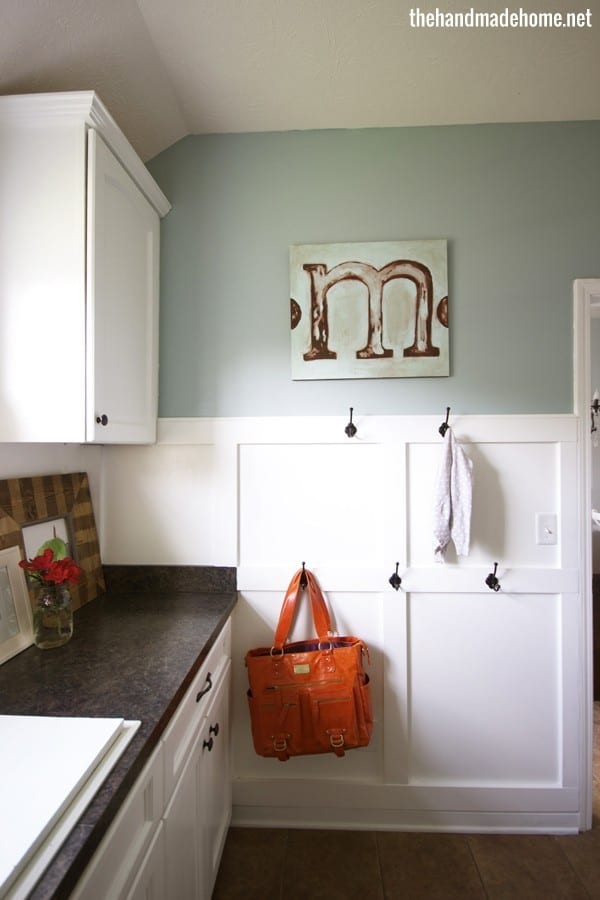
They can serve as an entryway hanging rack when closets are sparse and space is essential…
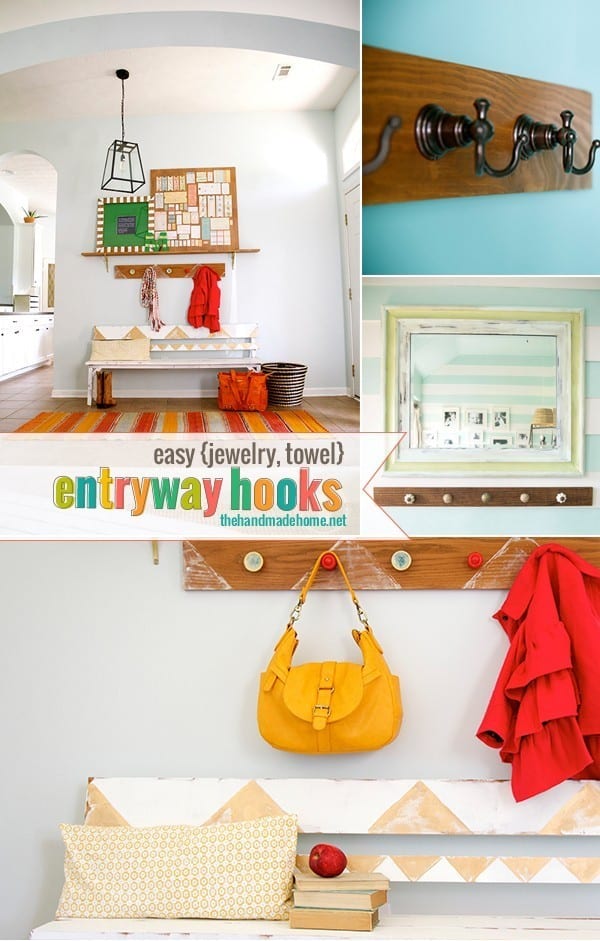
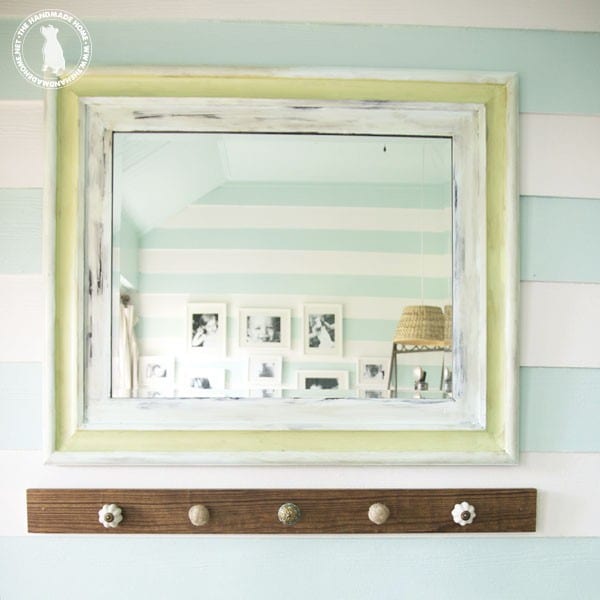
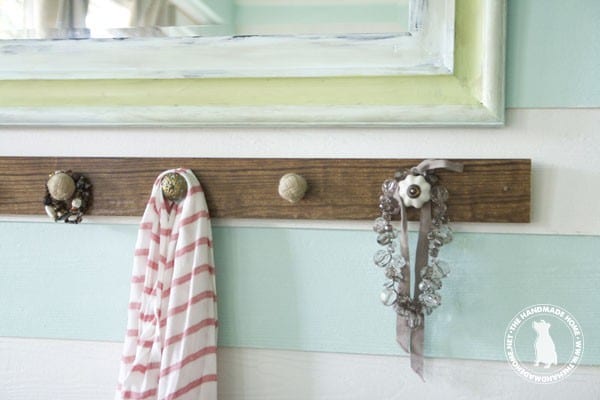
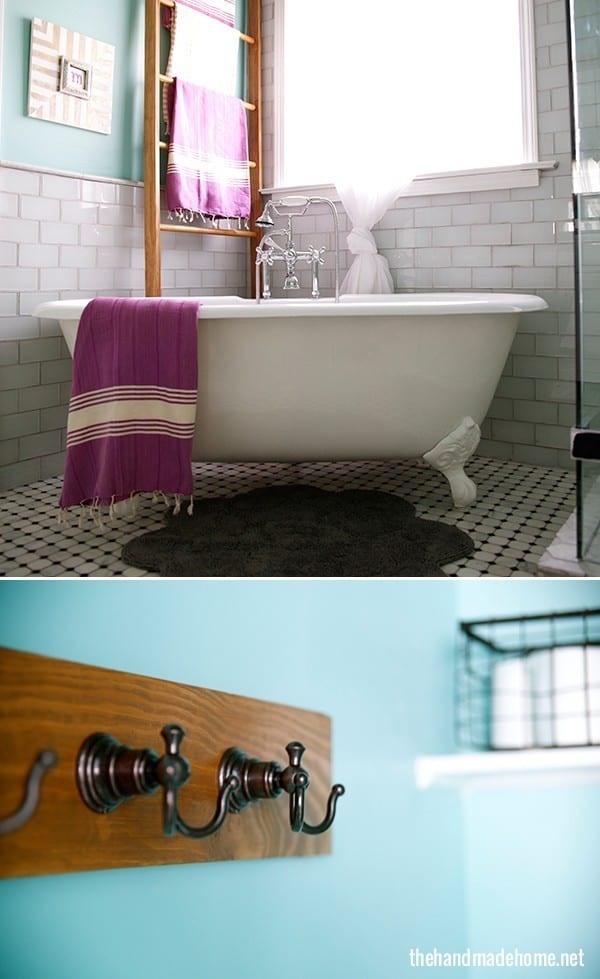
Prepped to handle heavy towel duty: they can be switched up easily to be a towel rack with the right addition of super fun hooks {just like we used in our bathroom redo}
Or clever, stylish storage for jewelry, scarves, belts, and just about anything else you can throw at it.
They also make a great, unexpected gift for the holidays. It’s a project that is super easy for the first time DIYer to make with just a few supplies, and basic steps.
It’s one of the things we love about this project, that it can be accomplished with only a drill, drill bits and a tape measure. Of course you will need • A piece of wood of your choice • fun hardware {or hooks if you need some heavy duty hanging} and some type of laser, chalk line or a good old fashioned straight edge.
Decide on the size of the wood needed for your project. You can simply ask the guys at Home Depot to cut it to length for you – they’re happy to oblige.
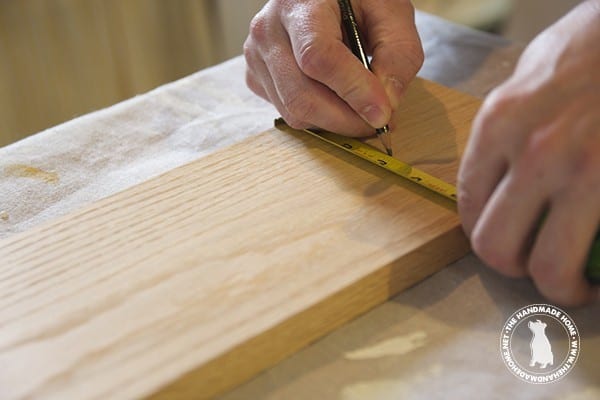
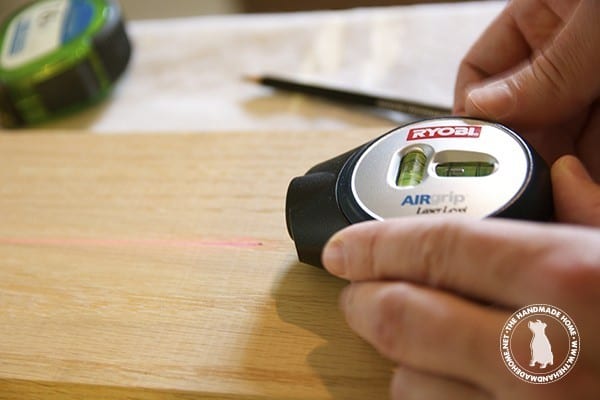
Once home with your wood and after you’ve decided how many hooks you want, you’ll need to measure out where to drill your holes. {Cue the laser or straight edge, they’ll come in handy- We used a laser.}
We found the center of our wood on both ends, marked it, and ran our laser through them. Then we simply laid a tape measure out on the wood and found the appropriate spacing, marking where the holes would go. (FYI: If you will have 5 hooks, you will need to divide the wood into 6 parts for it to be evenly spaced. If 3 hooks, then divided into 4 equal spaces. It will always be 1 more than the number of hooks/hardware to account for the edge spaces.)
Once you’ve marked out your spaces, find a drill bit that is the same size as the post from your hook that you will insert into it and drill the appropriate number of holes. You can even wiggle the drill around a little bit in a circular motion to loosen the hole a tad bit more.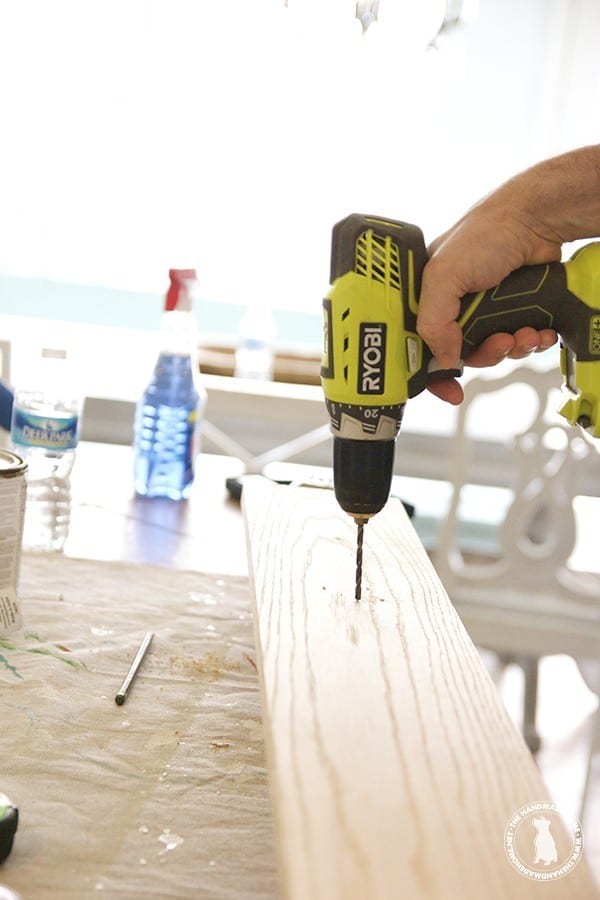 After the holes are made, you’ll insert the hardware to make sure they fit. Depending on how your choices are made, you can address the back in several different ways:
• Use a drill bit larger than your nut and drill in to the wood just enough to recess the nut. Then use a RYOBI job plus to trim off the excess post.
• If you don’t have a job plus and are cool with fixing a few extra holes if you ever move the piece, simply drill a few more holes in your wall to allow for the post to slide into. {mark where the holes will go by placing a little toothpaste on the ends of the post and pushing it against the wall where it will be hung.} Then simply drill into the wall on the marks.
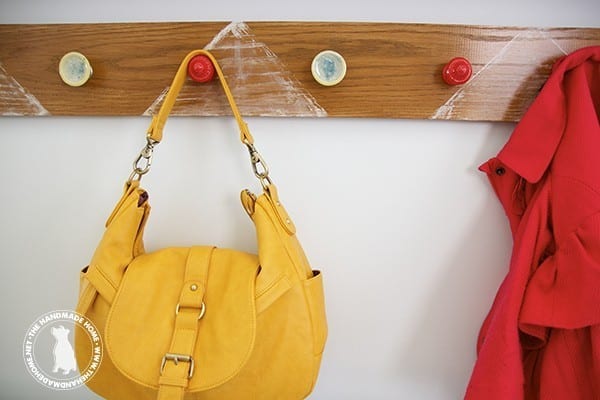 Remove the hardware, and finish it off with your own stain, paint, or personal look.
With the variety of stencils, paint, hardware and designs… the possibilities are endless- and the available real estate it provides… priceless!

Once you are done with the painting/staining, insert the post back into the holes and secure them either with their nuts, or you can even glue them into place if the bolts aren’t long enough to reach through.
If you’re using them with something lightweight, you can always hang it with a pair of hooks or picture hanging kits. For heavy duty pieces, drill it directly into the wall.
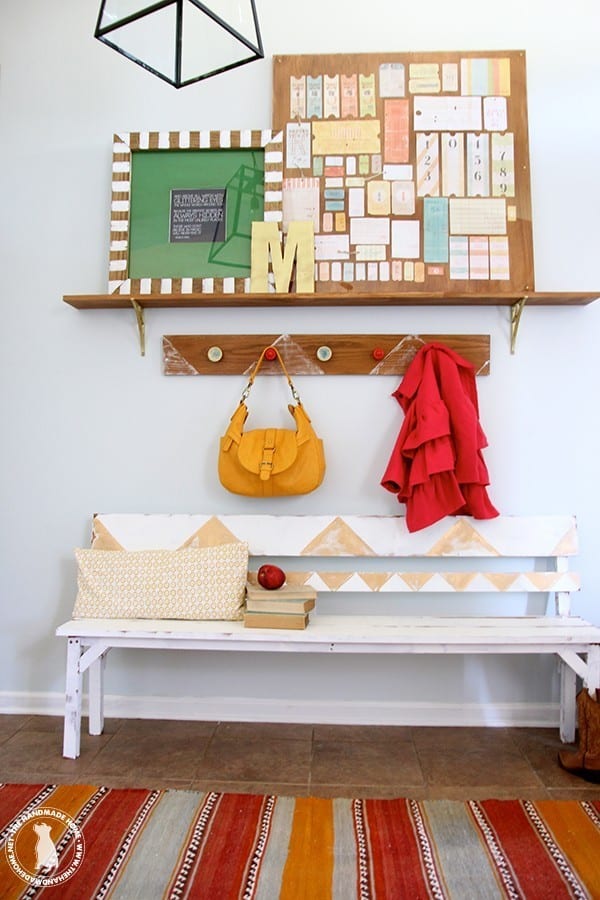
Tada! A sweet project that makes a one of a kind, addition to your home or even a great gift for the holidays and Jamie, we hope this helped. (pssst you can check out the bench project here.)
Speaking of holidays, our good friends at RYOBI tools are aiming to inspire the DIYer in all of us this holiday season. We are partnering with them and several of our other friends to kick off a fun DIY-a-thon.
So here is what is happening; on Dec. 1st RYOBI nation will be hosting a DIY share-a-thon. (We will share the link when it is live.) Partnering with RYOBI we are helping build a community of DIYers celebrating the holiday season and will be giving away some great RYOBI tools as well. To enter simply create your own DIY holiday project or even a great DIY gift and be ready to submit it when the contest kicks off.
If you need a little more inspiration you can see a few of the other projects we’ve created with RYOBI here or check out what some of our friends have been doing here.
We can’t wait to see what Holiday projects you create and gift this season.


My hubby remodels kitchens and baths so he brings home all kinds of knobs and hooks…so much fun. He recently attached a bunch of them on a 2×4 and we hung it outside the door into the garage. We keep our onions, potatoes, garlic and apples hanging out there ….great cool storage and easily accessible!!:)
I LOVE this, Dolores! Such a clever idea! ;}
I love this idea- it would make such a great piece for jewelry & a great gift!
You somehow manage to stay stylish and organized, and make it look beautiful. Love the different wall hooks, and your entry is sooo pretty!
xoxo
I love these ideas and will try my hand at some in my new home.
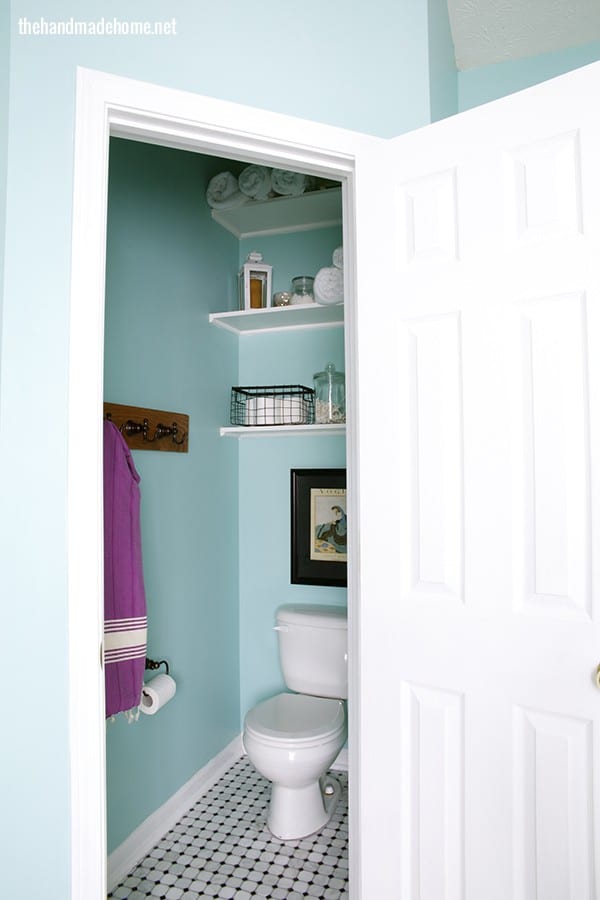
you never cease to amaze me with all your creativity and goodness. also gimme that bathroom.