
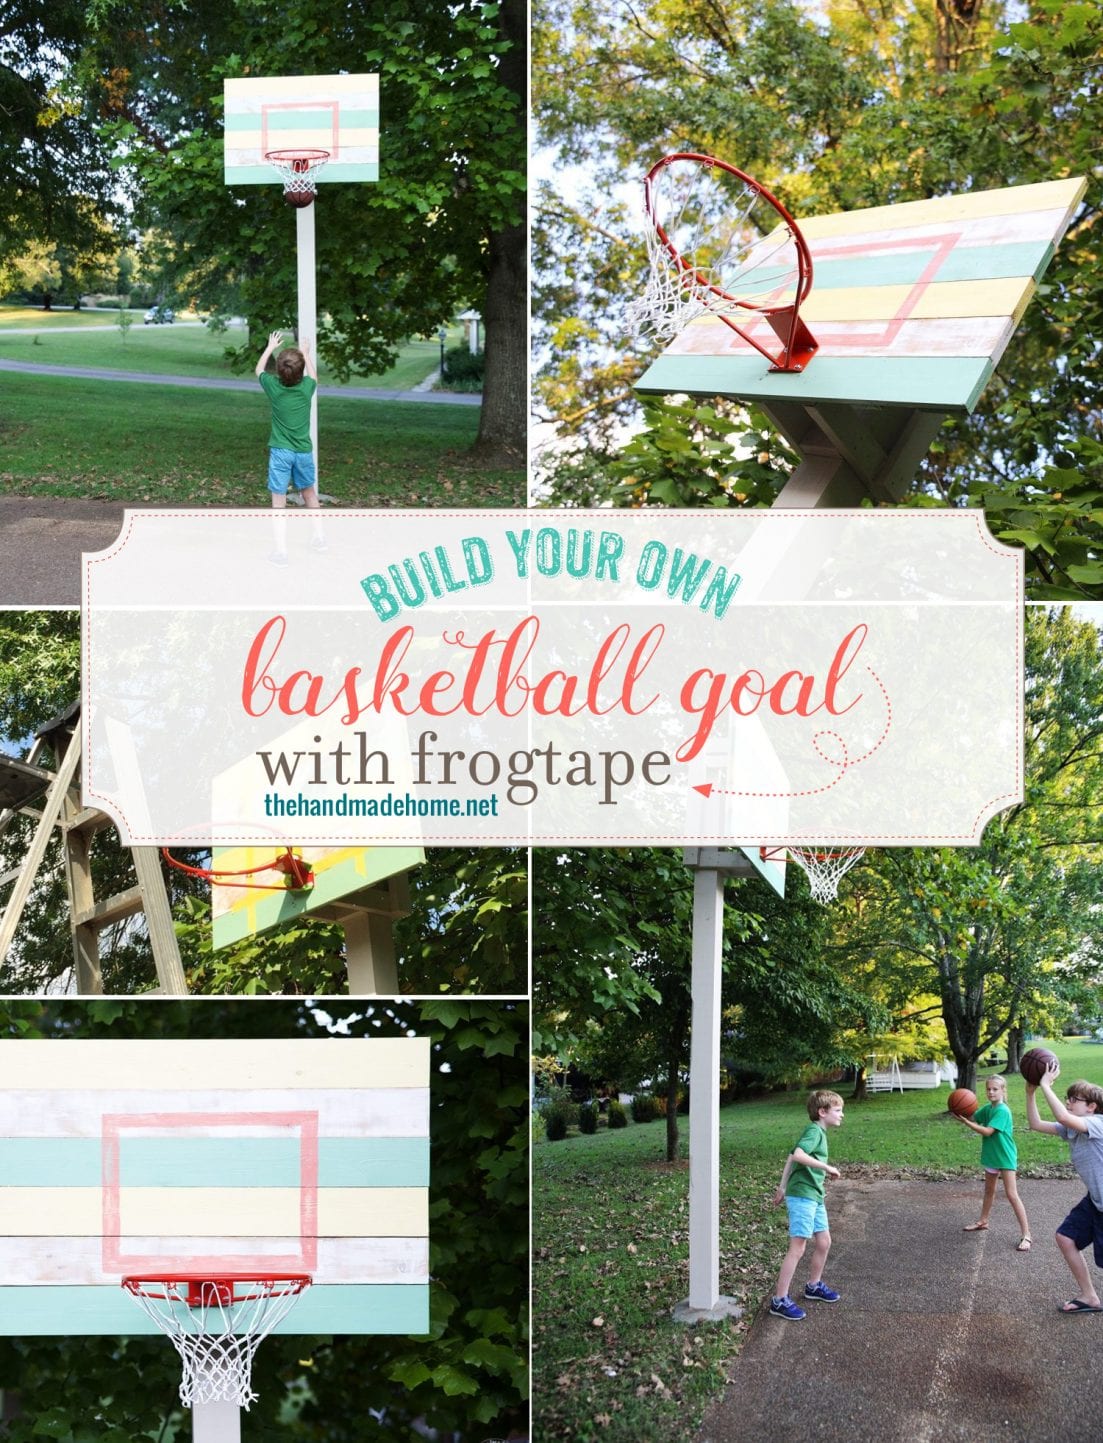
how to build a basketball goal – handmade and beautiful
We’ve lived in our house for a while now {we’re coming up on our one year anniversary this Fall!} and while the outside makeover is underway, we wanted to add something else that’s a little fun for the kids. They all love a good game of horse, so a basketball goal seemed like a good addition, but we wanted something more than the plastic one’s you buy at the big box store. Something cool and vintage and unique. So today we thought we’d share how to build a basketball goal.
See what we did there with the color coordination and all things Handmade Hideaway?
I mean, we couldn’t help but point it out.
We might have rotted-out posts on the front porch of our house, and the pizza guy can’t tell that anyone lives here, but we can’t tell you how many compliments we’ve already received from our sweet neighbors on the basketball goal {and hideaway}!
Priorites, y’all. Priorities.
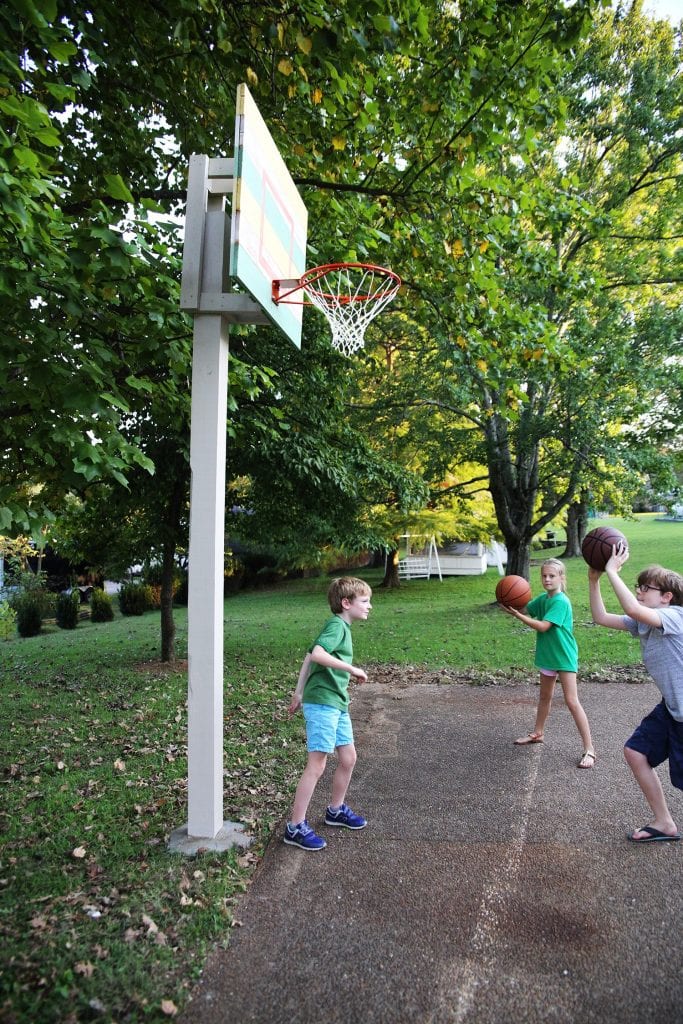
The kids adore it, and between the hideaway, pool, and this… they should never come back inside. EVER. They live outdoors now.
Seriously though, with the dumpster finally out of the way and the rest of our renovation underway, it feels kind of nice to start to feel normal again. A real home where kids can play outside and dribble a basketball in the driveway… it’s the little things that are pretty great.
If you’d like to try a hand at your own, it’s a pretty simple build!
How to build a basketball goal – a video tutorial
Here’s a little video we made for some of the steps, the written instructions are below so you can follow along.
How to build a basketball goal – the tools
• Post hole digger
• drill
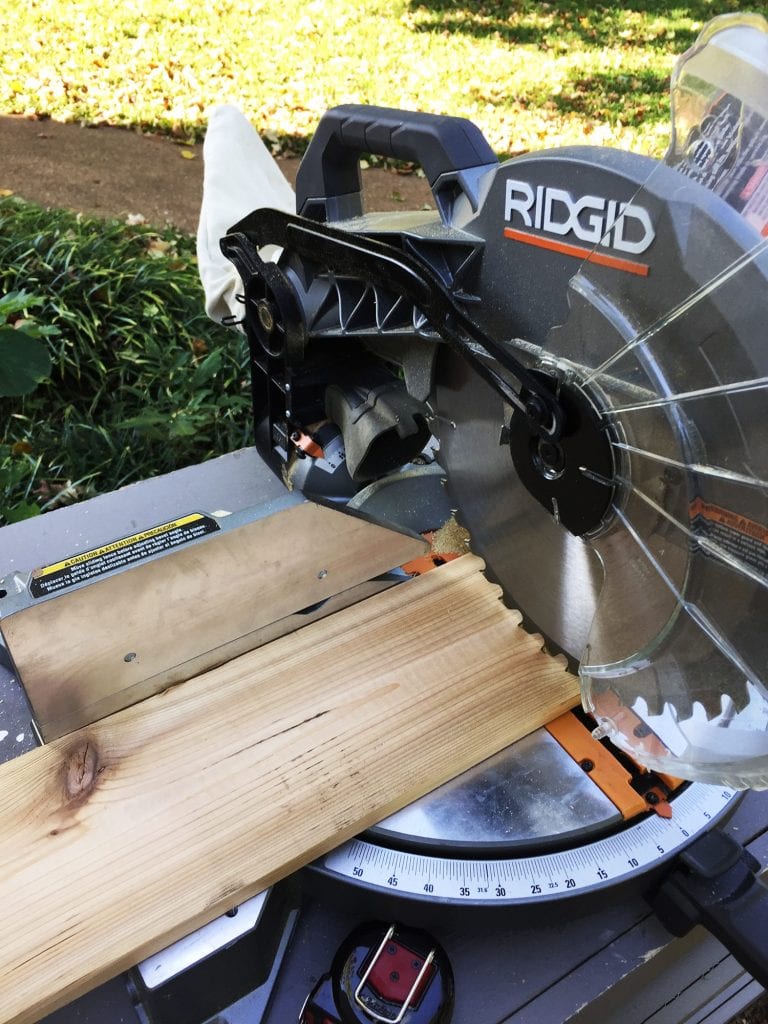
• miter saw
• wrench set
How to build a basketball goal – the supplies
• 6 x 6 x 14
• (2) 1 x 6 x 12 cedar boards
• (2) 1 x 4 x 8 cedar boards
• (4) 2 x 4 x 8 pressure treated pine
• (2) 8-inch lag bolts with nut and washer
• one small box of 3 1/2 inch deck screws
• one small box of 1 1/4 inch deck screws
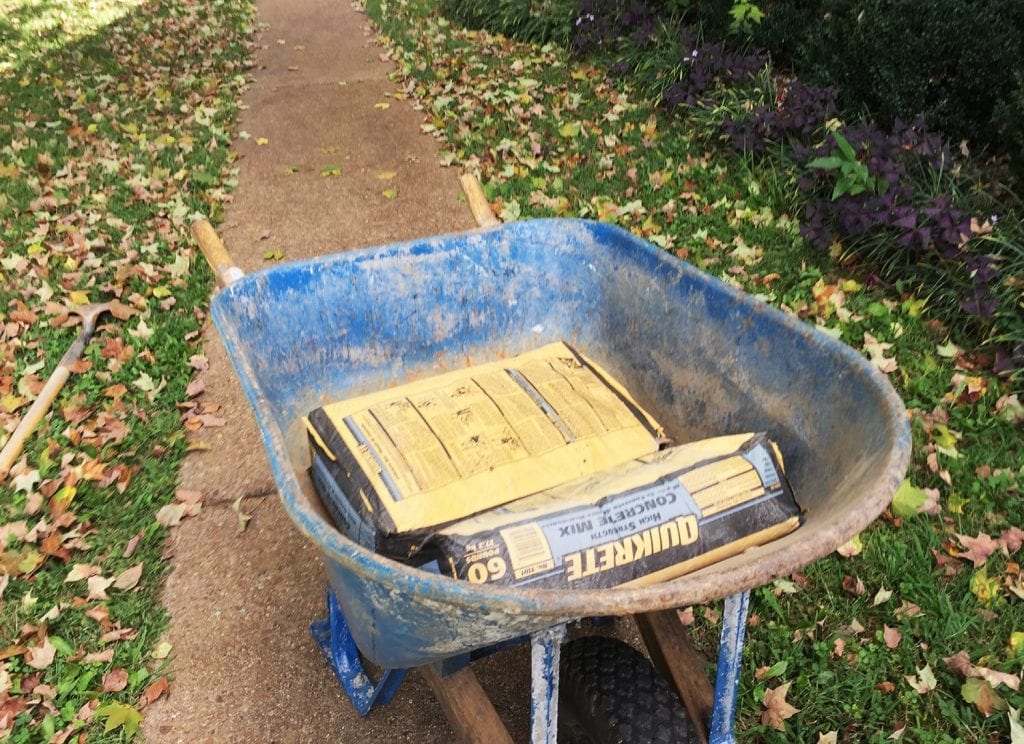
• (2) bags of 60 pound concrete
• (2) large metal mending plates
How to build a basketball goal – the base
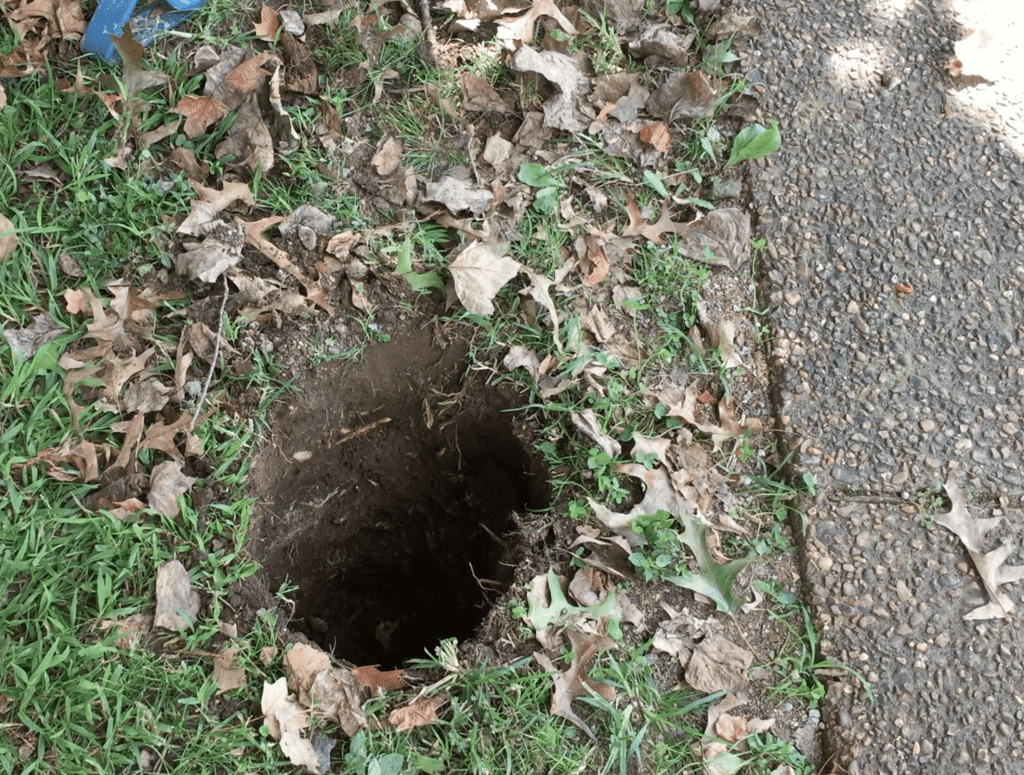
First, measure out where you want the basketball goal to be located. Next, dig a hole for the 6 x 6 post.
We’d suggest digging it 12 inches wide, and 2 feet deep.
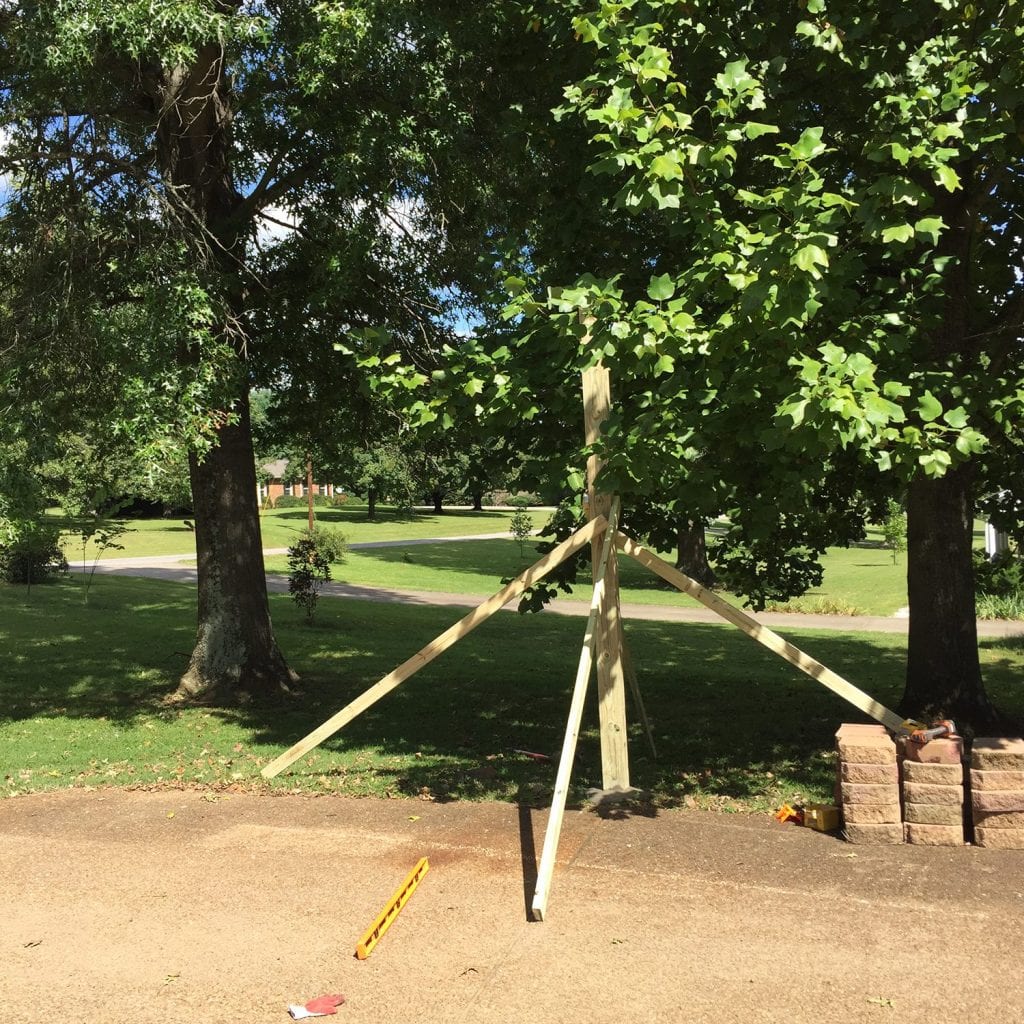
Once the hole is dug, place the 6 x 6 in it and brace it with your (4) 2 x 4’s and a few screws.
Mix the concrete and pour it in the hole around the post.
Then, make sure to level the post again.
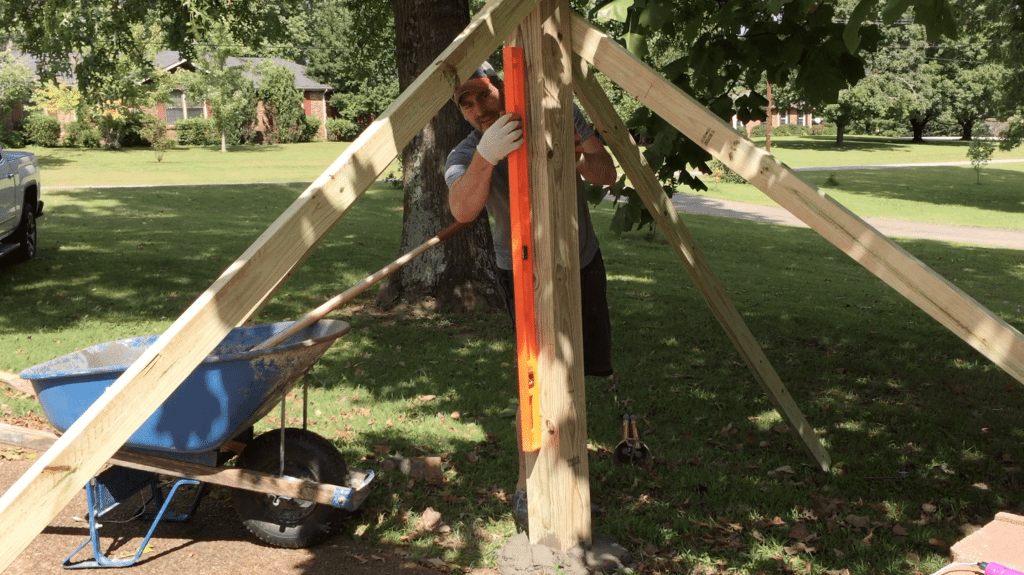
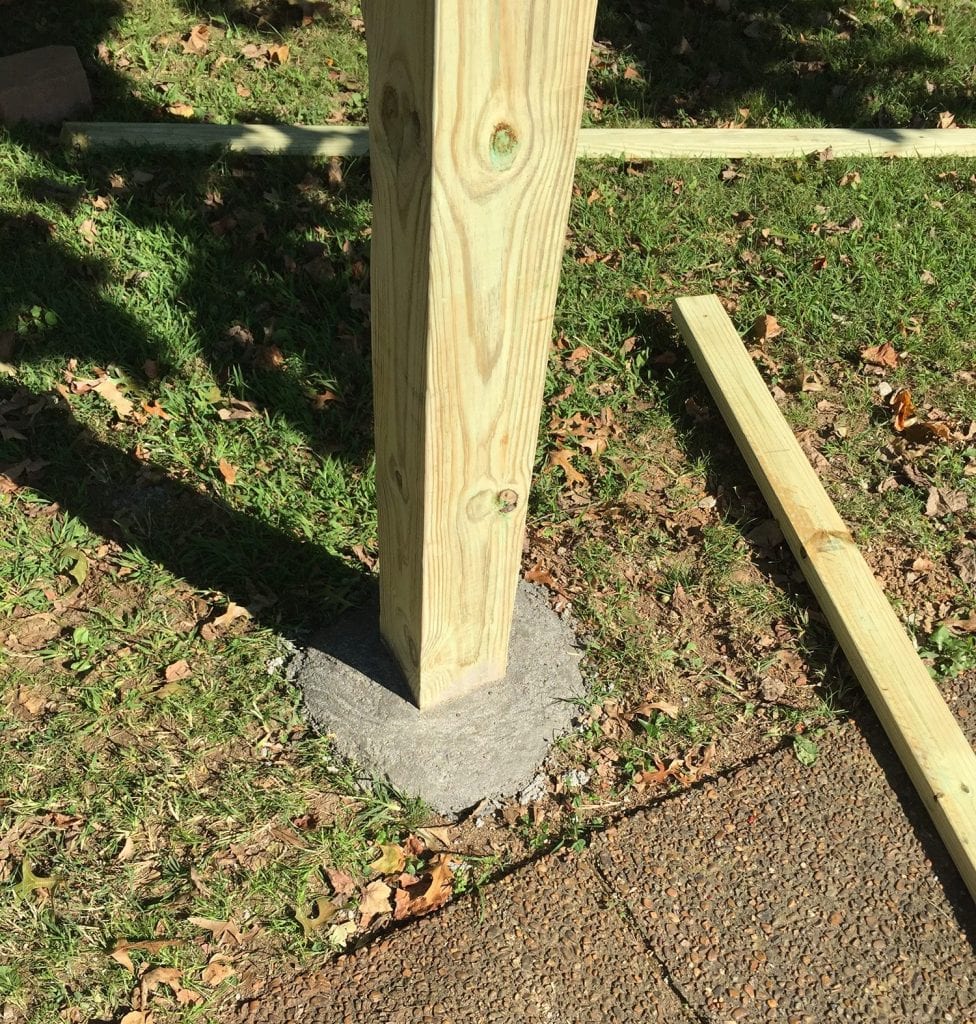
Let the concrete sit for 24 hours and then remove the 2 x 4 support post.
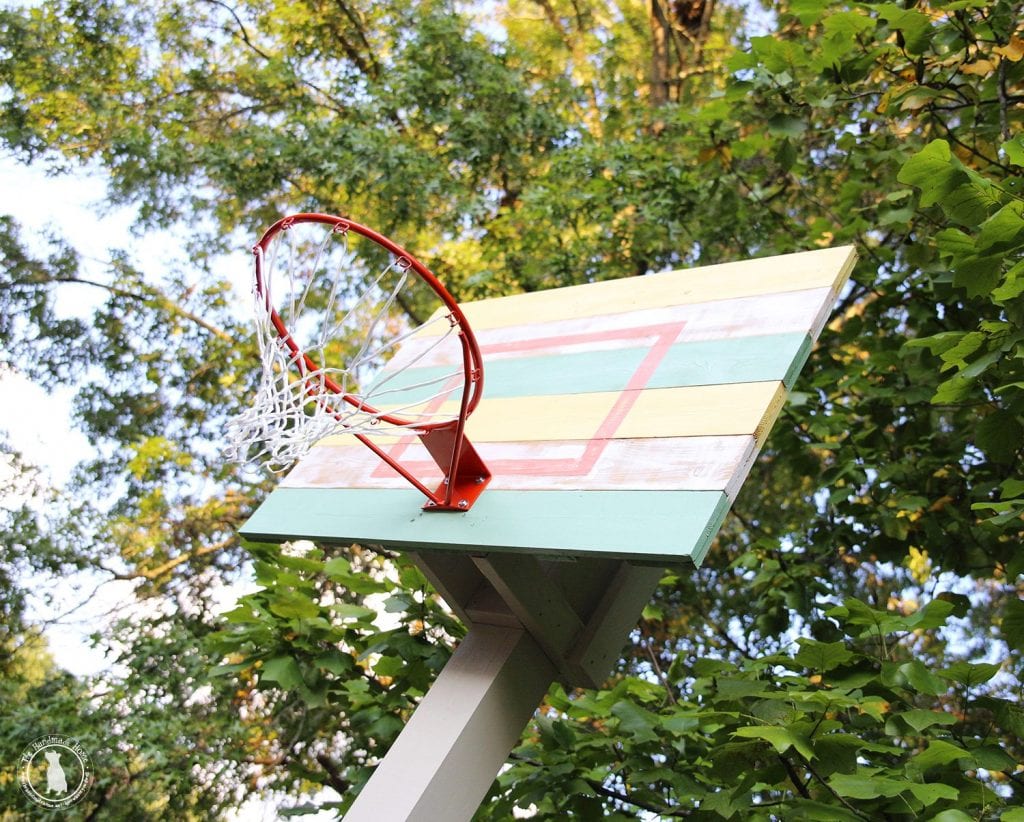
How to build a basketball goal – building the backboard
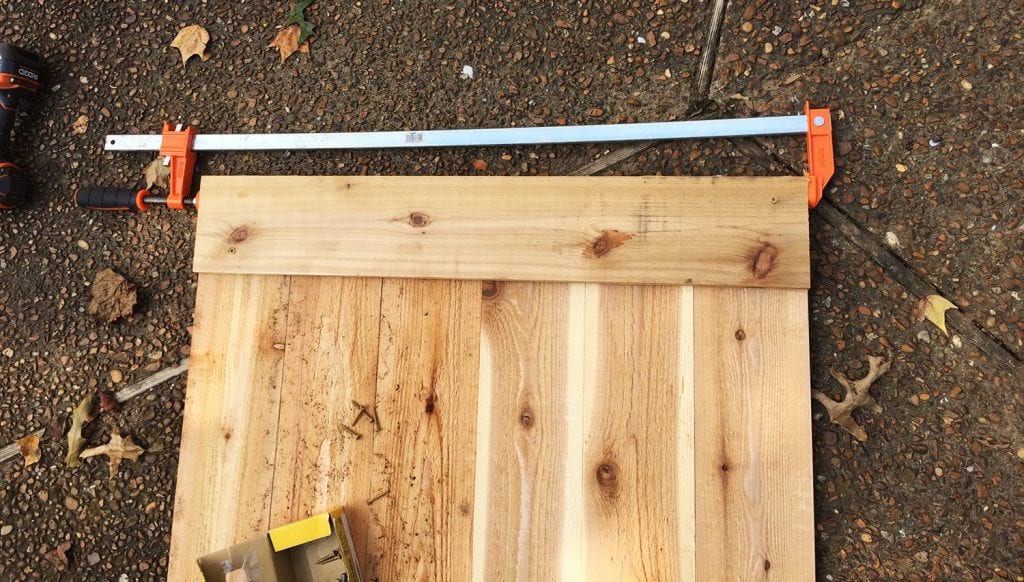
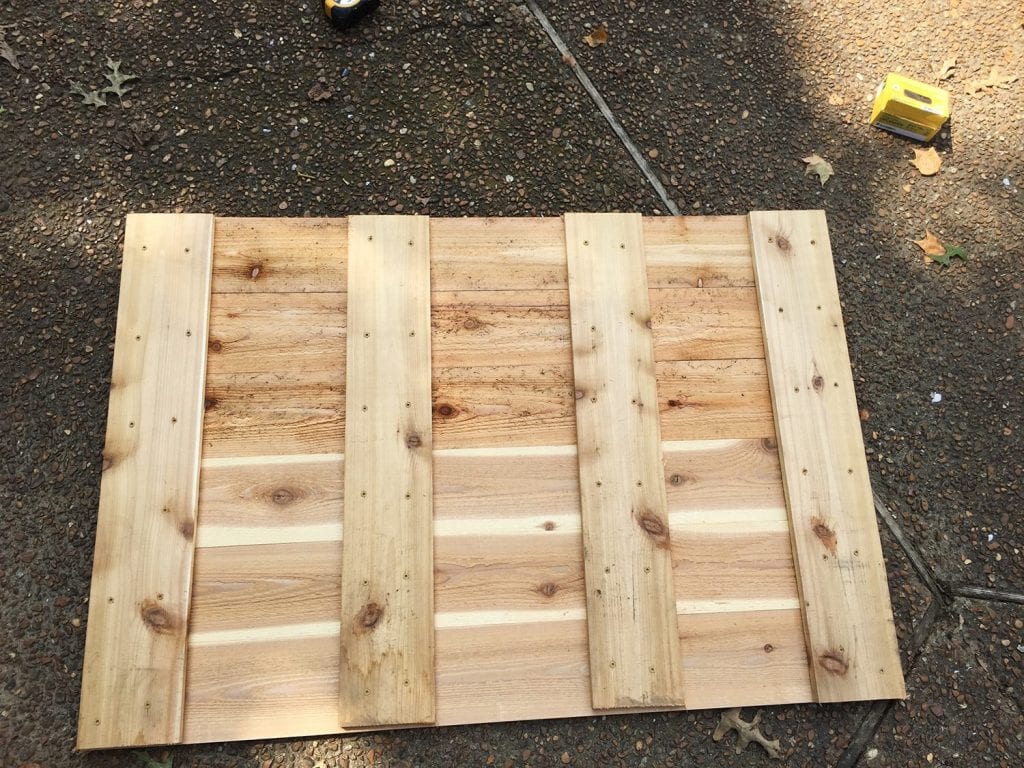
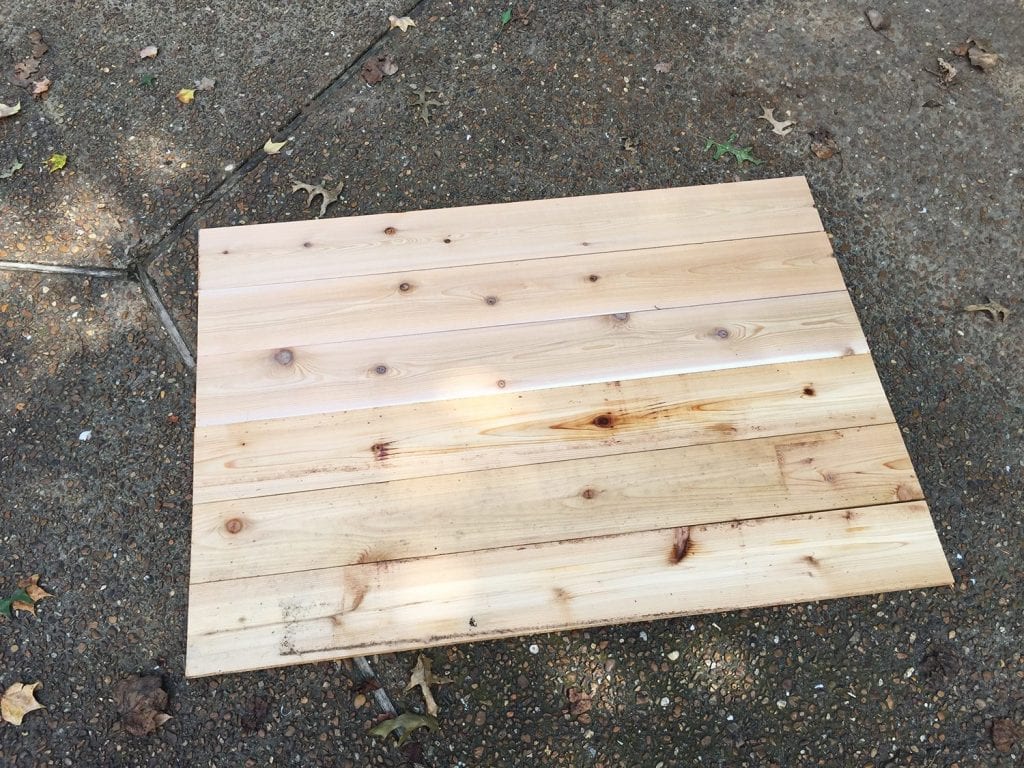
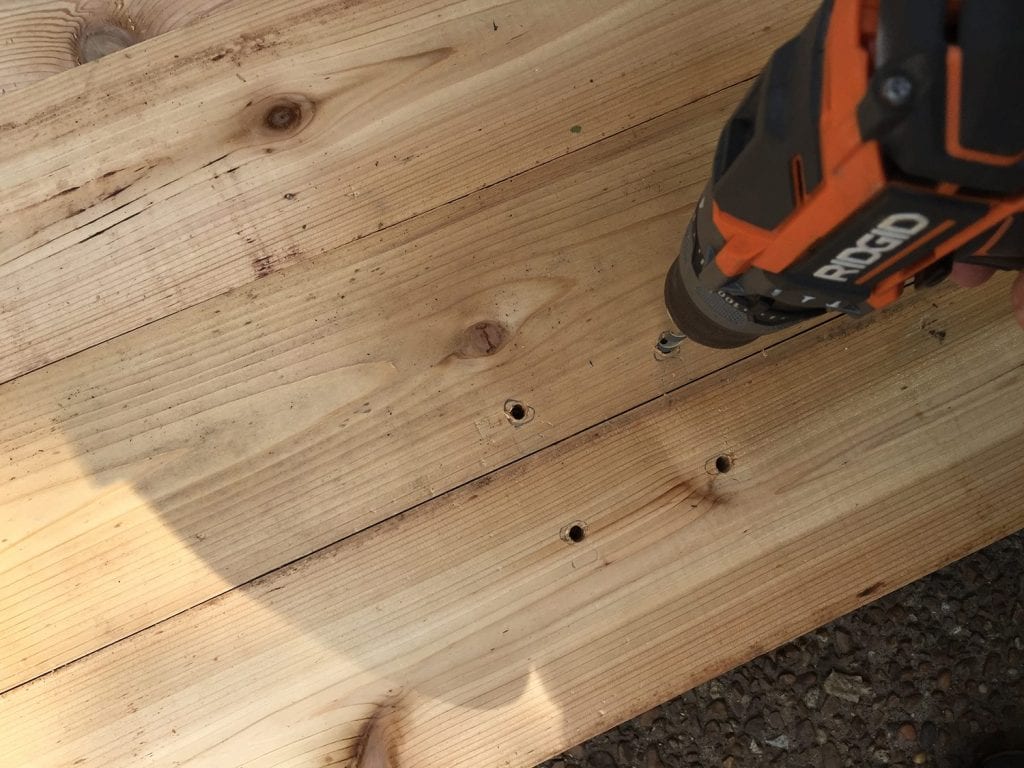
You’ll need to cut your 1 x 6 cedar boards down into (6) 4-foot sections, and cut your 1 x 4 cedar boards down to (4) 32-inch sections.
Use a clamp to tighten your boards, then screw them together using your 1 x 4’s as the brace, and 1 1/4 inch deck screws as the fasteners.
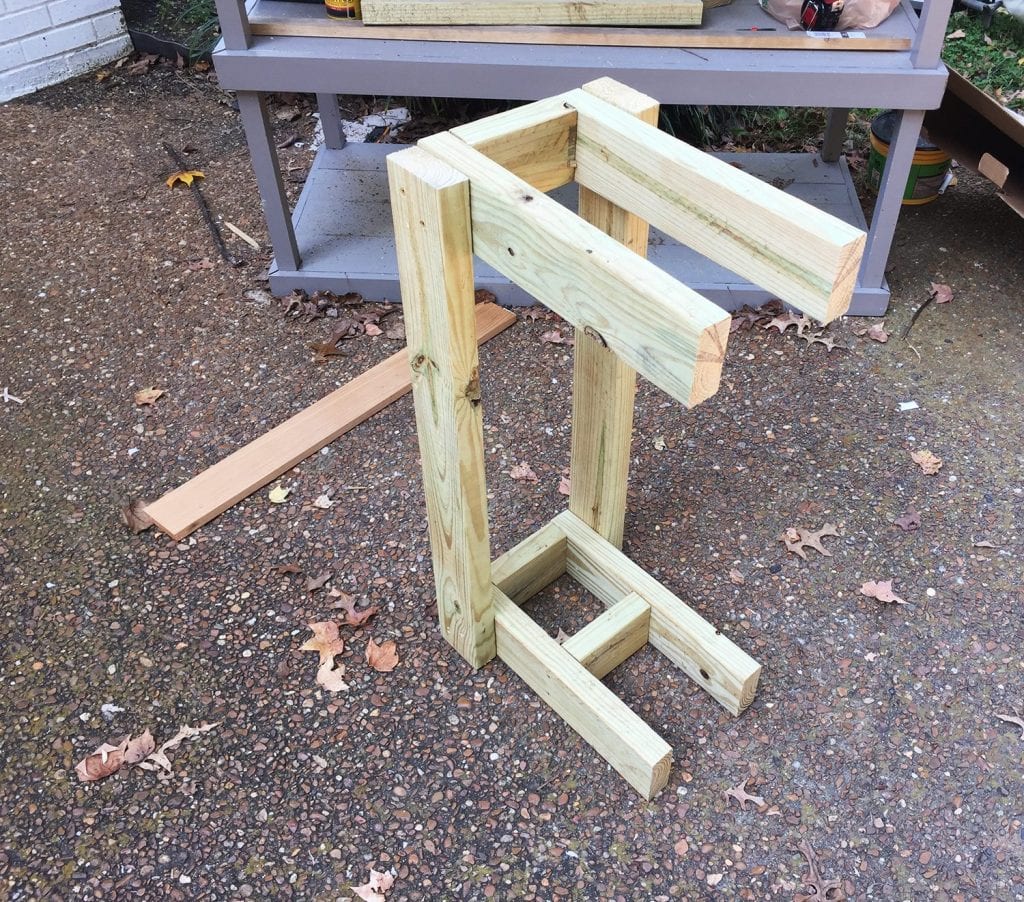
How to build a basketball goal – building the backboard support
Now you’ll need to build the goal support. You’ll use the 2 x 4’s that were also used as the braces for your post.
Cut the following pieces:
• (4) 6-inch pieces – used for the front and back cross braces
• (4) 12-inch pieces – used for the two side brace on the top and bottom. This piece will attach to the backboard as well.
• (2) 30-inch pieces – used to join the two boxes on the side.
• (1) 23-inch piece – use on the back side of the support to prevent the goal from leaning forward.
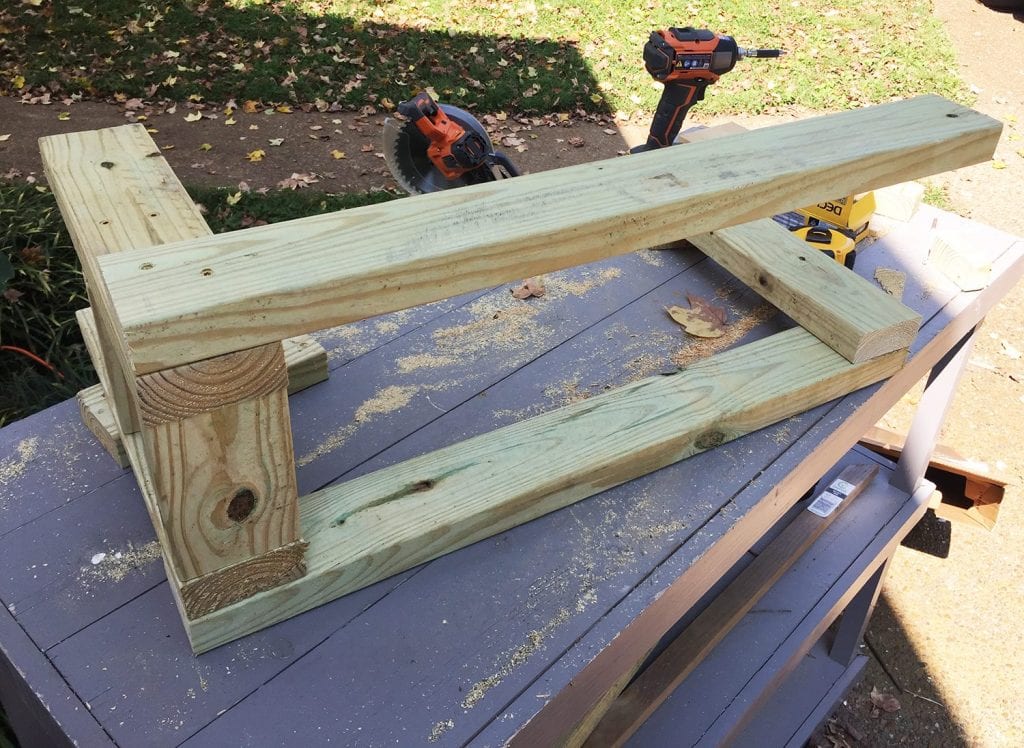
Use your 3 1/2 inch screws to build the support as pictured below. This photo is also before the final front brace is added to the top.
The back support piece is best to add once the entire goal is up. We attached it with two metal mending plates.
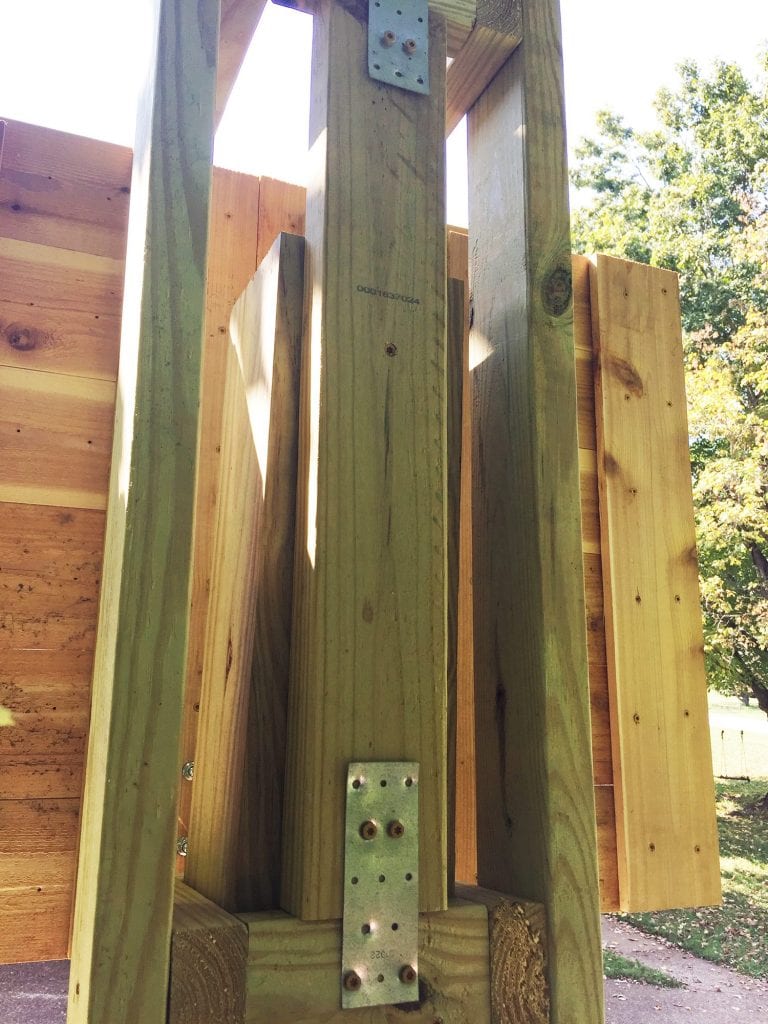
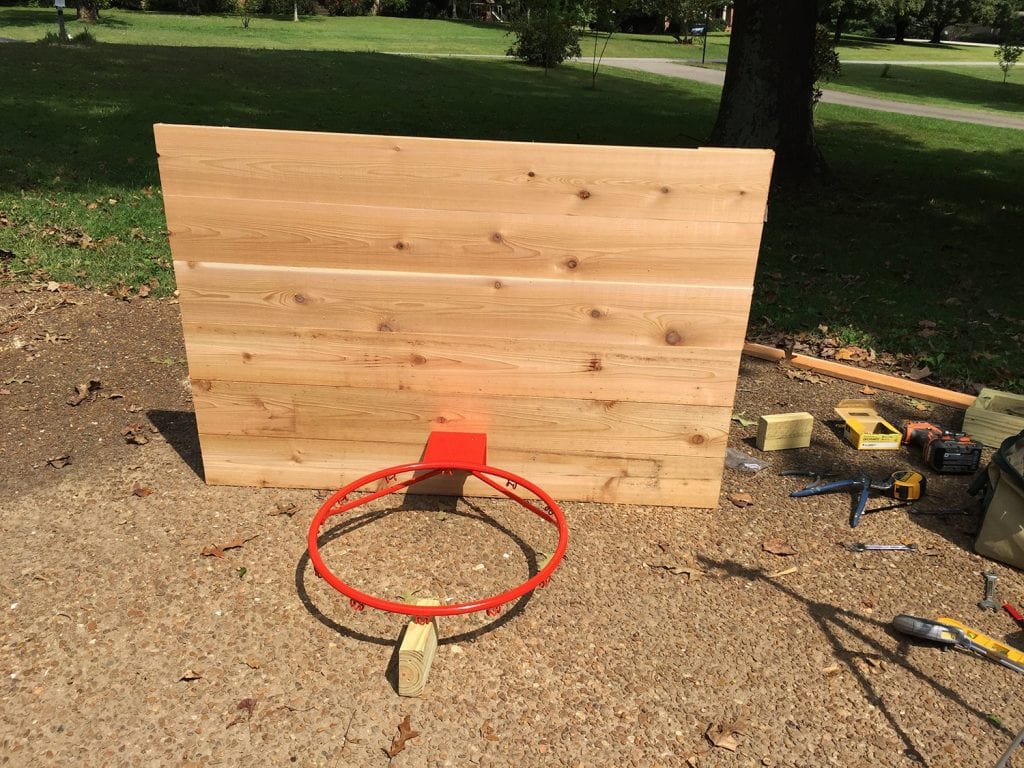
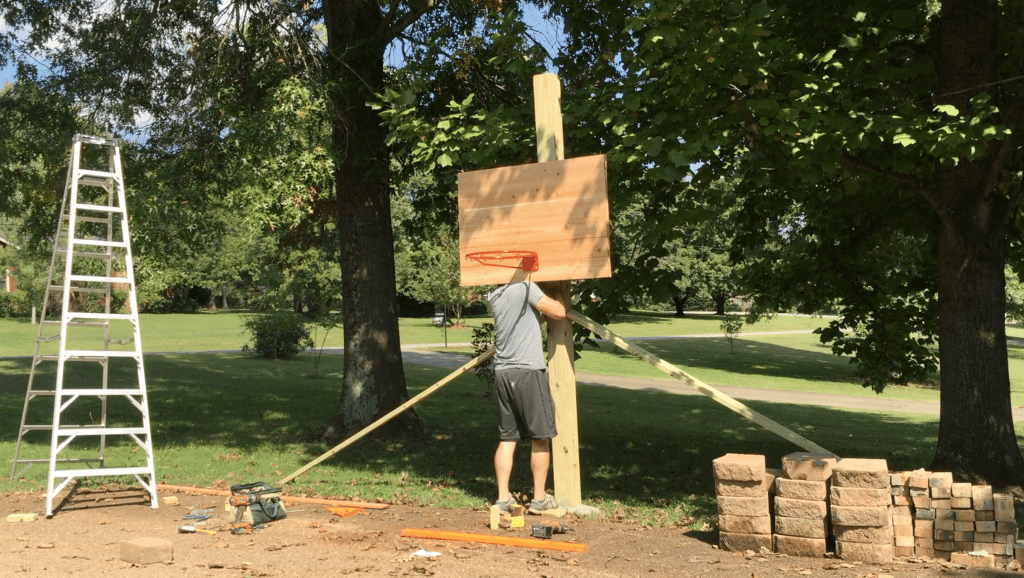
Before we attached the back board to the suports, we attached the goal.
You’ll want to center it on the back borad near the bottom. We choose to split the two bottom boards.
Because Ashley was not around and I’m incredibly impatient, I used some 2 x 4’s to help me raise the goal. I simply lifted it and braced it with the 2 x 4’s and moved it up the post. Once I had it up I simply screwed the brace into the post.
If you want the option to raise and lower the goal, then you’ll want to use the lag bolts for this. Simply drill holes through the post at the appropriate levels and use the holes and the lag bolts to raise and lower the goal.
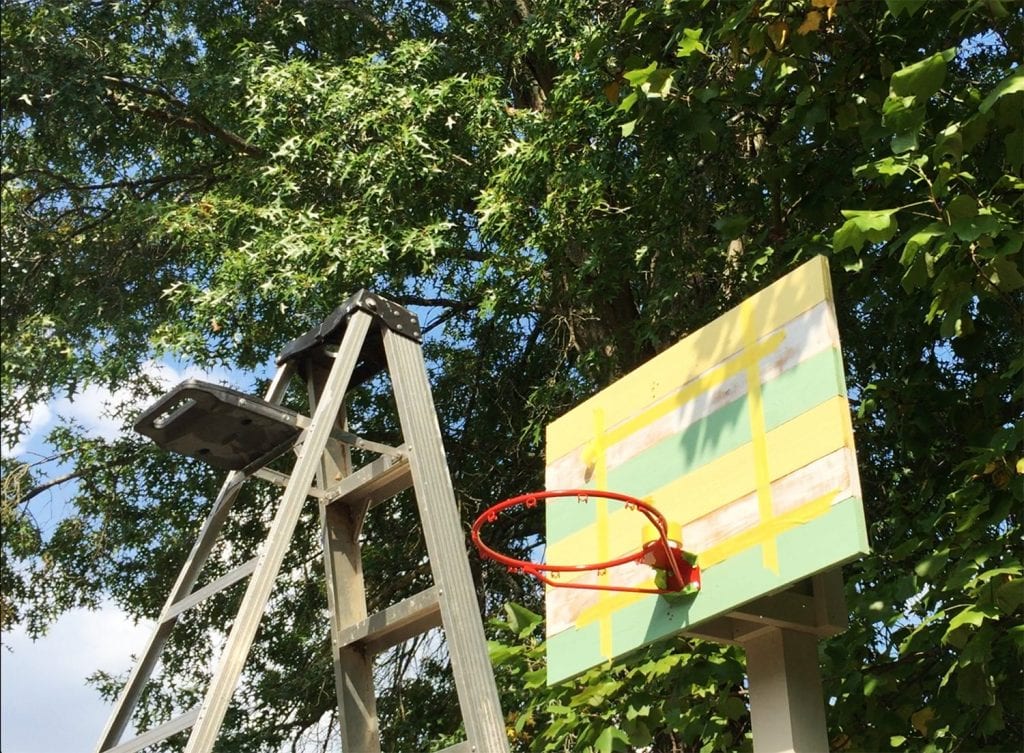
How to build a basketball goal – painting
Before we began painting, we broke out the Frog Tape to protect the goal from the paint.
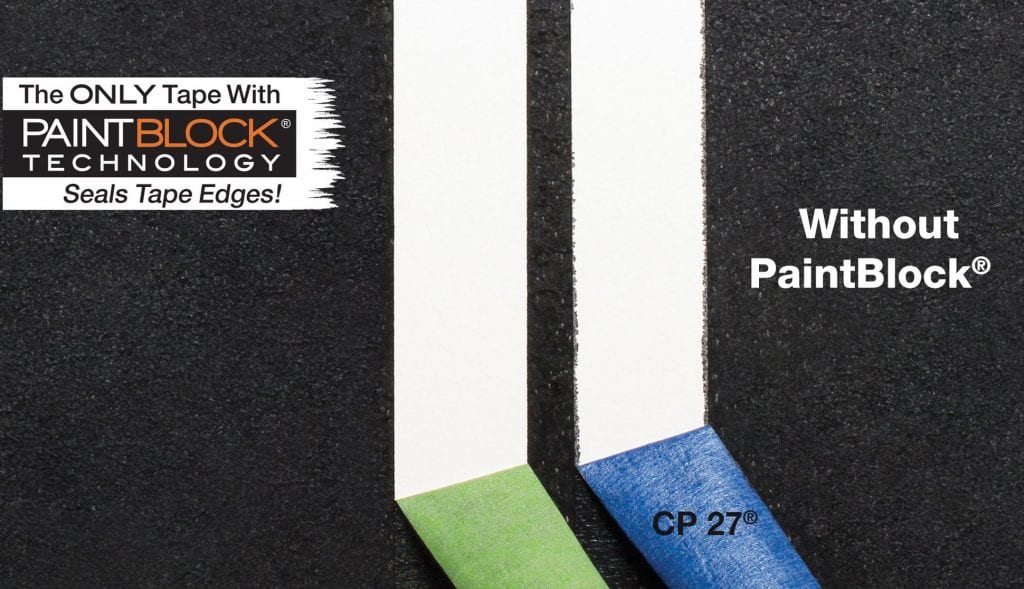
Trust us on this… you don’t want to be scraping paint while standing on a ladder because you used the wrong tape for this, or decided to freehand it. The paint lock technology on the green tape is far superior to the other brands. {We learned that lesson the hard way on some art, switched tape brands, and haven’t looked back.}
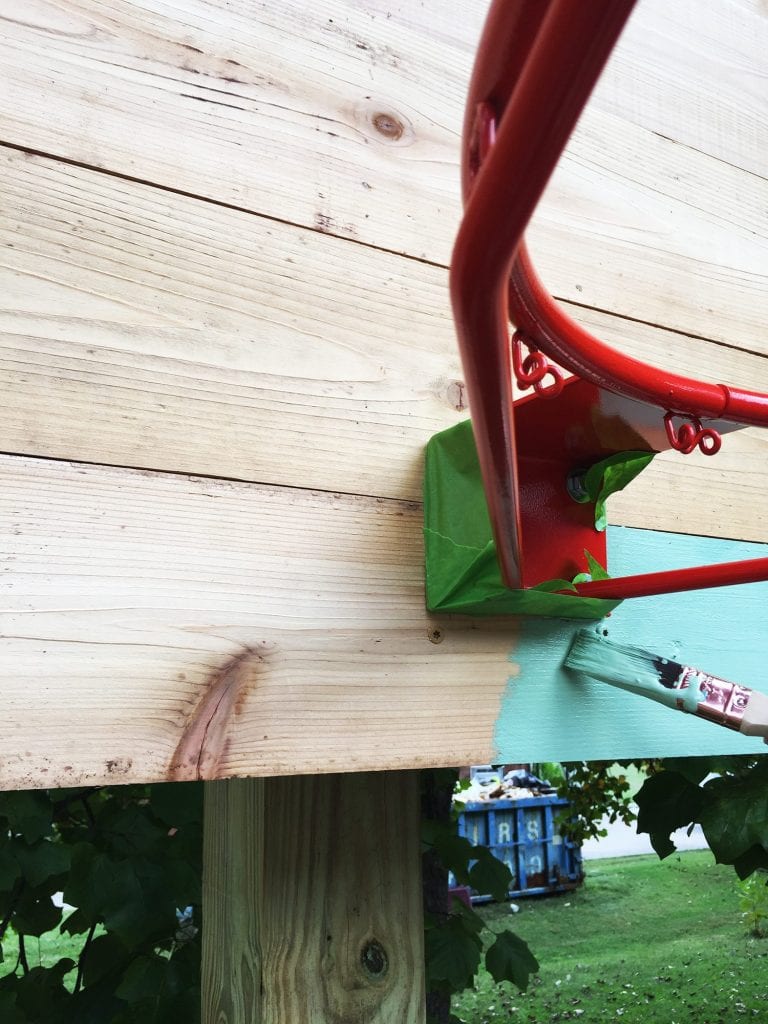
We also used the Frog tape to assist on some of those crisp lines we needed.
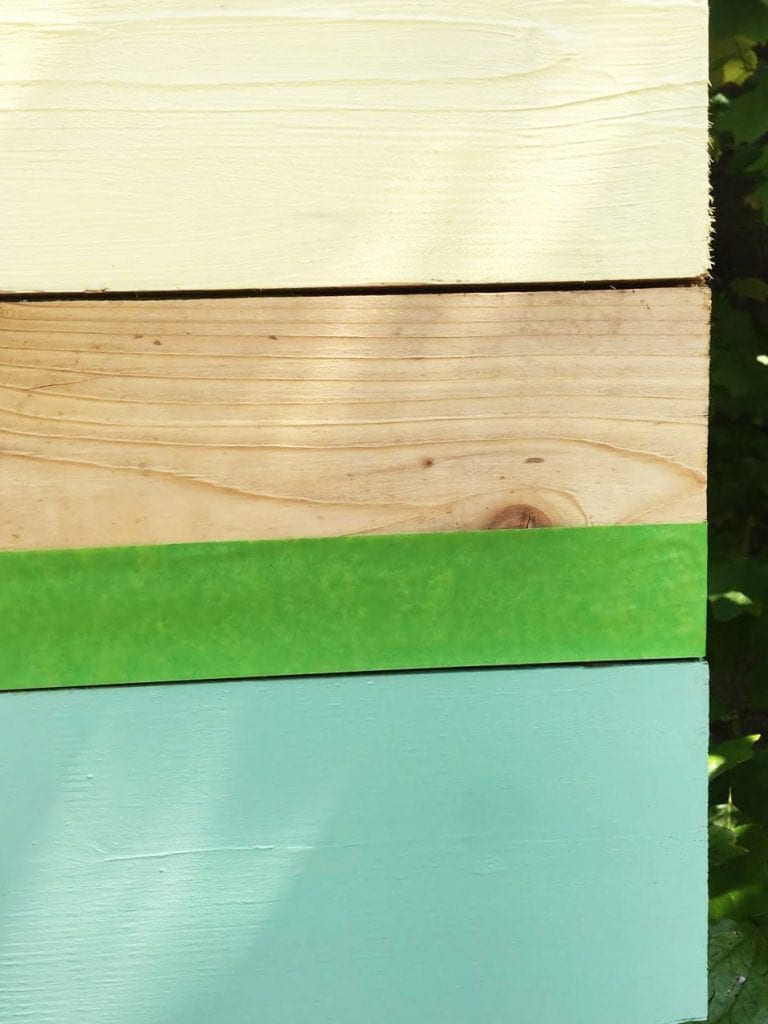
It was hard to show this while standing on a ladder. It turns out, taking photos while 10 feet up and trying to pull tape isn’t easy, and turns out blurry. So we decided to steal one of the pictures from their website. {We’ll try to show you a video when we paint the basement.}
Once the backboard is painted, you’ll need to paint the “box” on as well. We choose to use the Yellow Frog tape for this as it’s built to be used on freshly painted surfaces.
Your box should measure 24 inches wide x 18 inches tall. That’s from outside edge to outside edge. We used a level to get our lines straight. Then we taped off the area we wanted to paint. Next, we did rows of tape above and below the original tape. We removed the original tape and painted between the two remaining rows of tape.
The kids absolutely love it. We love that it can grow with them, because the height is adjustable.
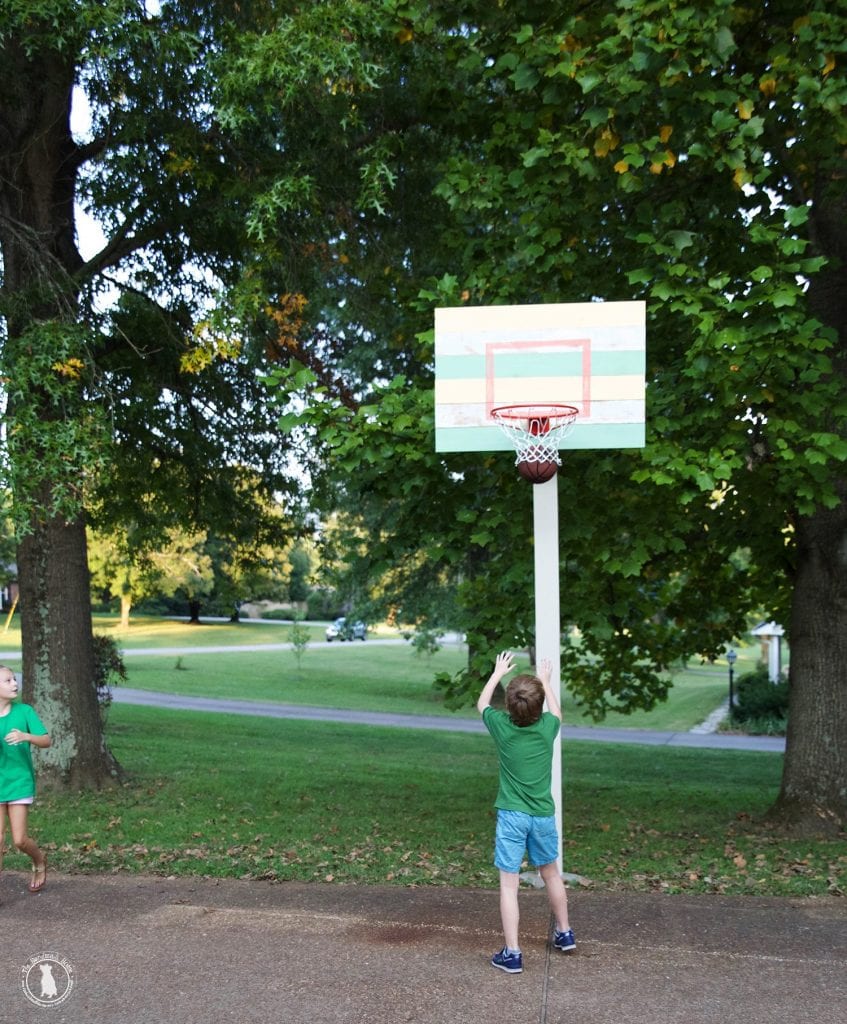
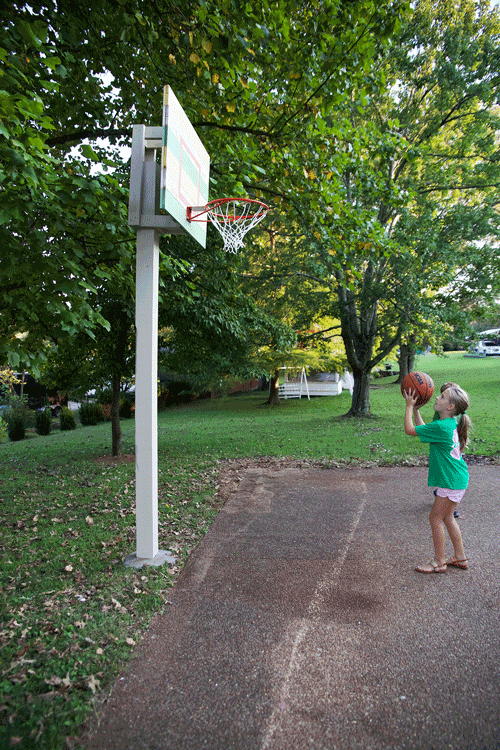
We see lots family rounds of PIG and HORSE in our future!
As always, let us know if you try it! We’d love to see!
Have an inspired day!
{We partnered with the with our good friends at Frog Tape to build this project. For more on our partnerships please visit here.)

This wood designing basketball court is looking awesome. I know we need a professional worker who knows how to operate these tools. Thanks for sharing this here.
what is the space of the small blocks in between the 12inch 2×4
Hey Michael. We used a 6 x 6 which really measures at 5 1/2 inches, so we left the space at roughly 5 3/4 inches. This made it tight enough, yet left enough space so that there wasn’t t0o much friction when raising it.
what would you say the total cost was to build this?
Hey,
I don’t remember an exact amount off the top of my head, but I’d say we spent under $75. The rim was the most expensive part of the project.
Greetings from southern Norway. Superb instructions and design – thanks very much for taking the time to share!! You’ve made a pappa and his 4 boys in southern Norway very happy. This will be our summer family project 🙂
thanks so much for the sweet comment – it makes our work so worth it! so glad you can use it.;} Happy building and stay well
I know it’s been a while since your video was posted but hopefully I can get an answer on this.
We buried the 6×6 post about 2 1/2 feet deep and cemented it. The kids would like to have the backboard extend out about 3 feet from the post with a larger (60 inch by 42 inch) backboard os 3/4 inch plywood. Do you know if the weight of the backboard system would cause the post to lean or fall over time?
I would think over time unless you braced the backside with steel, yes it would begin to sag. Wood is malleable under the right conditions and I think that weight and the elements would be the right conditions. I’d pick up some steel and brace the backside of it.
Great tutorial! Going to use this week, but dude, how did you pick up that 6×6? No, seriously what’s the technique for getting that thing in the upright in the ground? Can two people do it?
Haha, It was dragged to the hole and then lifted from the opposite end to let it slide in place.
👍💪
I hope you answer because this is an old post, but could we use a 4x4x14 instead of a 6x6x14? Lumber is crazy expensive right now and a 6x6x14 is going for $80-$100! Yikes! 4x4x14 is half that cost.
Hey, “you could” but you would be giving up some stability and the goal would more likely bounce or waver under pressure from the use of the ball against the backboard. I don’t think it is a deal-breaker, but you just need to be aware of the downside.
Could you share the brand and color names of the paints used on the backboard?
Thank you,
Lisa
They are all in our Handmade Hideaway series which is linked at the top of the post.
Nice work! I’m currently working on my hoop as well. I was wondering if you could post a pic of how you mounted the wood brace to the back of your backboard? I don’t see any pics on that specifically. Mine is a little bigger I think…I used reclaimed pallet boards and made it 54”x36” weighing in at 64 lbs with the hoop. Ha. However, I’m still not sure on how I’m going to mount it. Thanks for the advice!
Hey, I’m not sure if we have any pictures, did you check out the video? We simply screwed it in though.
Hello,
Absolutely love this. I’m in the progress of building mine now! Just wondering how secure the whole thing was when up. Did it wobble much when hitting the backboard?
Also, how high was the rim from the ground?
Thanks!
Jacob!
Hey, It is very secure and it only wobbles when I dunk on it, haha. In all seriousness it has the same give as a traditional goal.
Hey guys, Love from India!
I am currently working on building the same at my backyard(ps- on my own:)). Can I just attach the backboard with the 6×6×14 post without making a support for it. Is it going to increase the wobble or it will be just fine?
Looking forward for a reply.
Thanks
Hey,
I have not tested it that way so I am simply speaking hypothetically here, but I would think it would be fine. Yes, there would be an increase in wobble, but I am not sure it would be a huge deal and you could block out the sides of the 6 x 6 with some more 2×4’s or 2×6’s to add width to that part as well as stability. I hope that helps, best of luck building!