
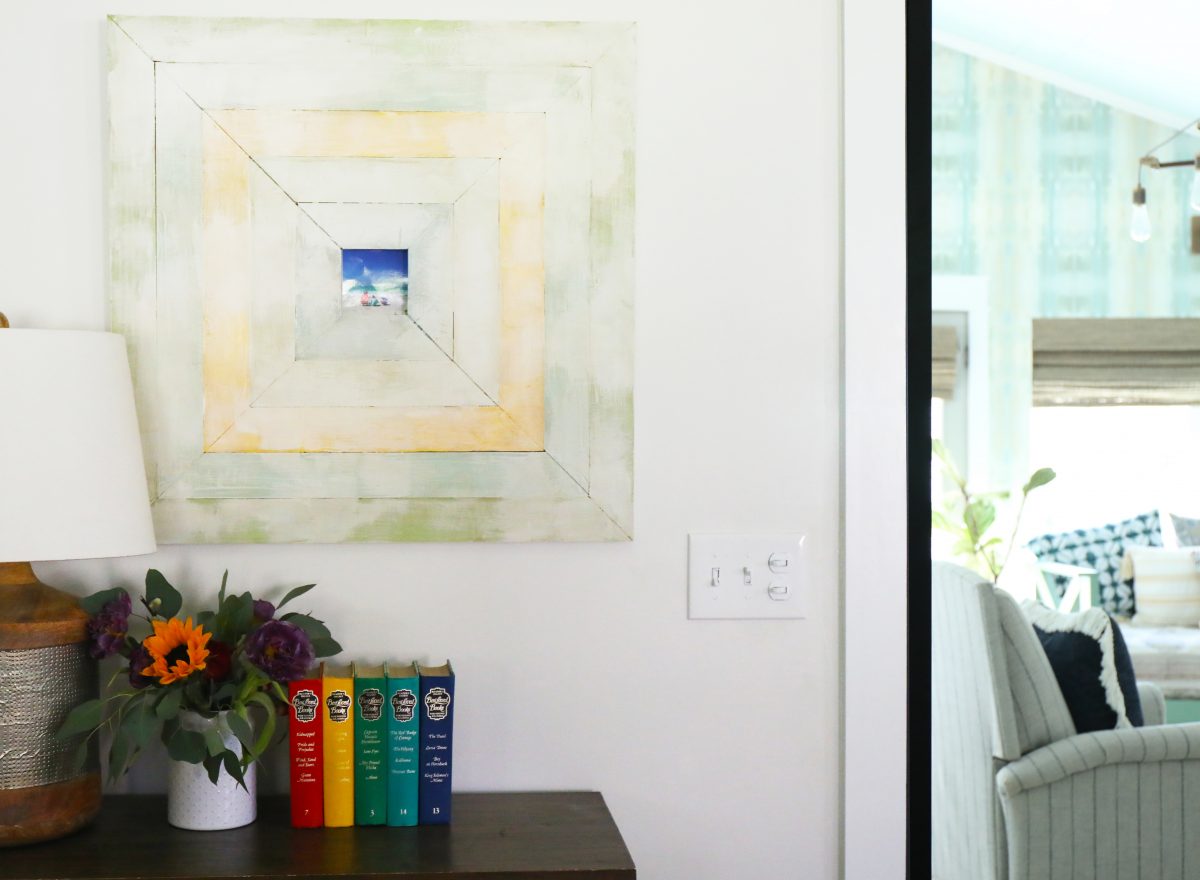
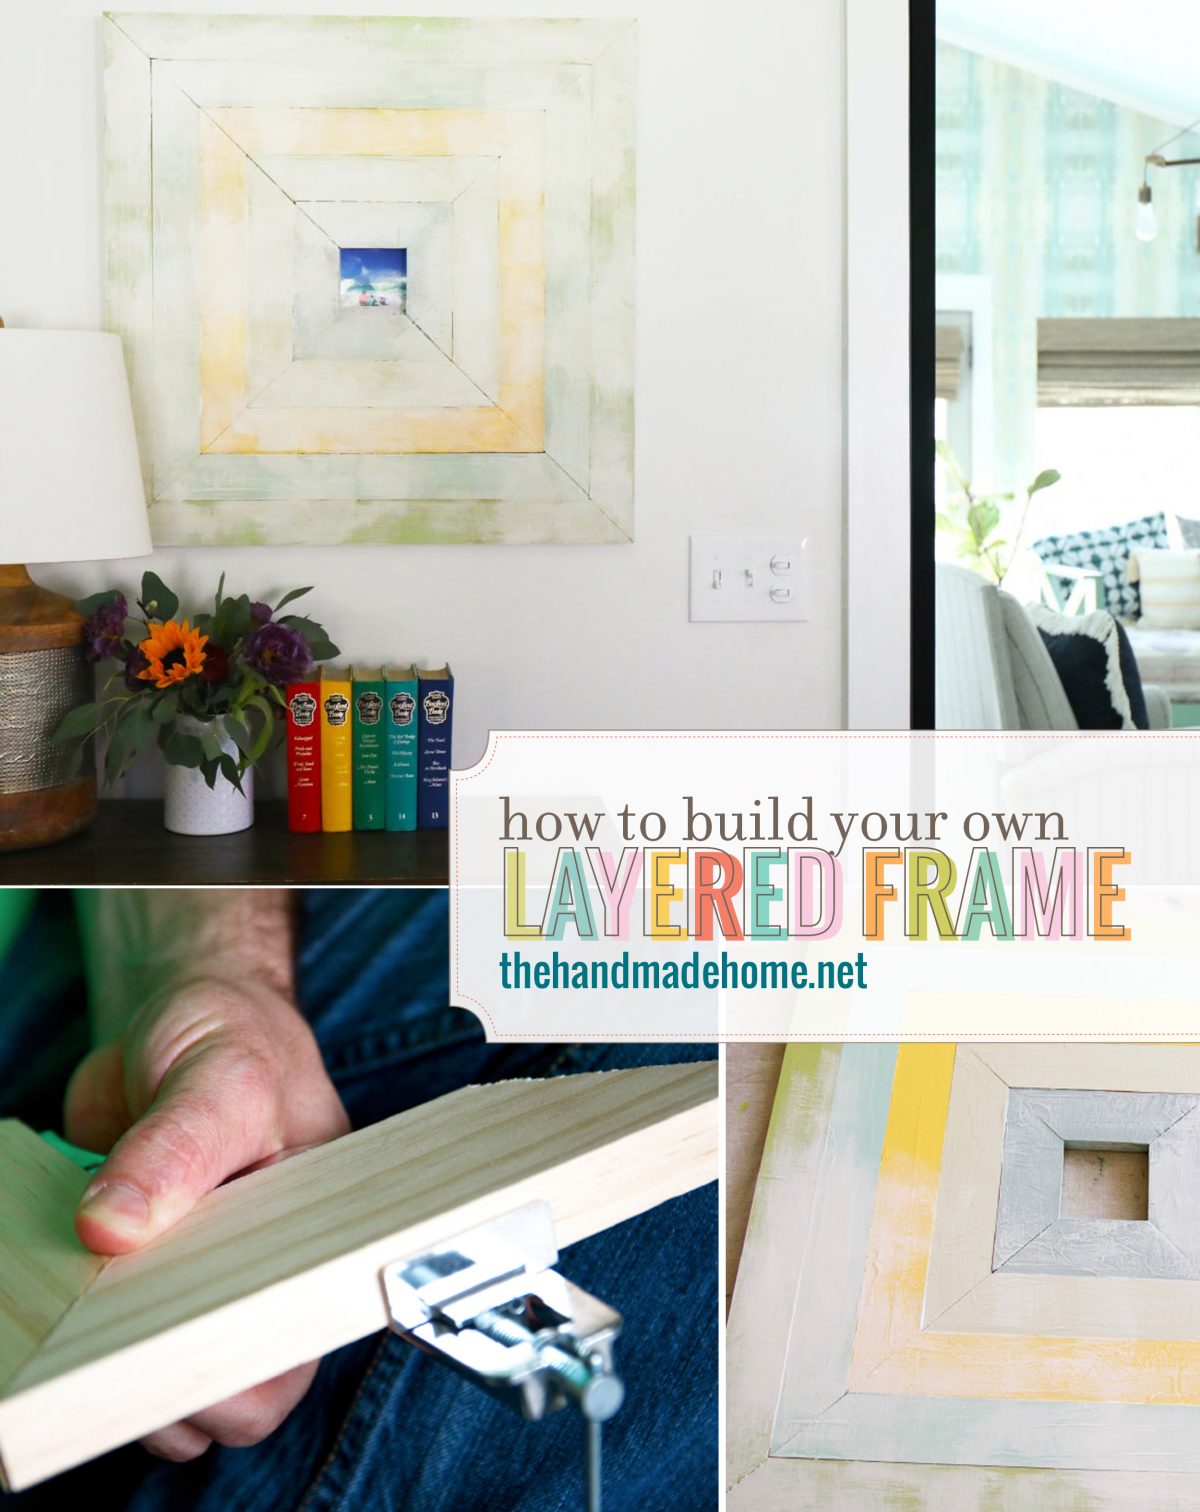
how to build a layered frame
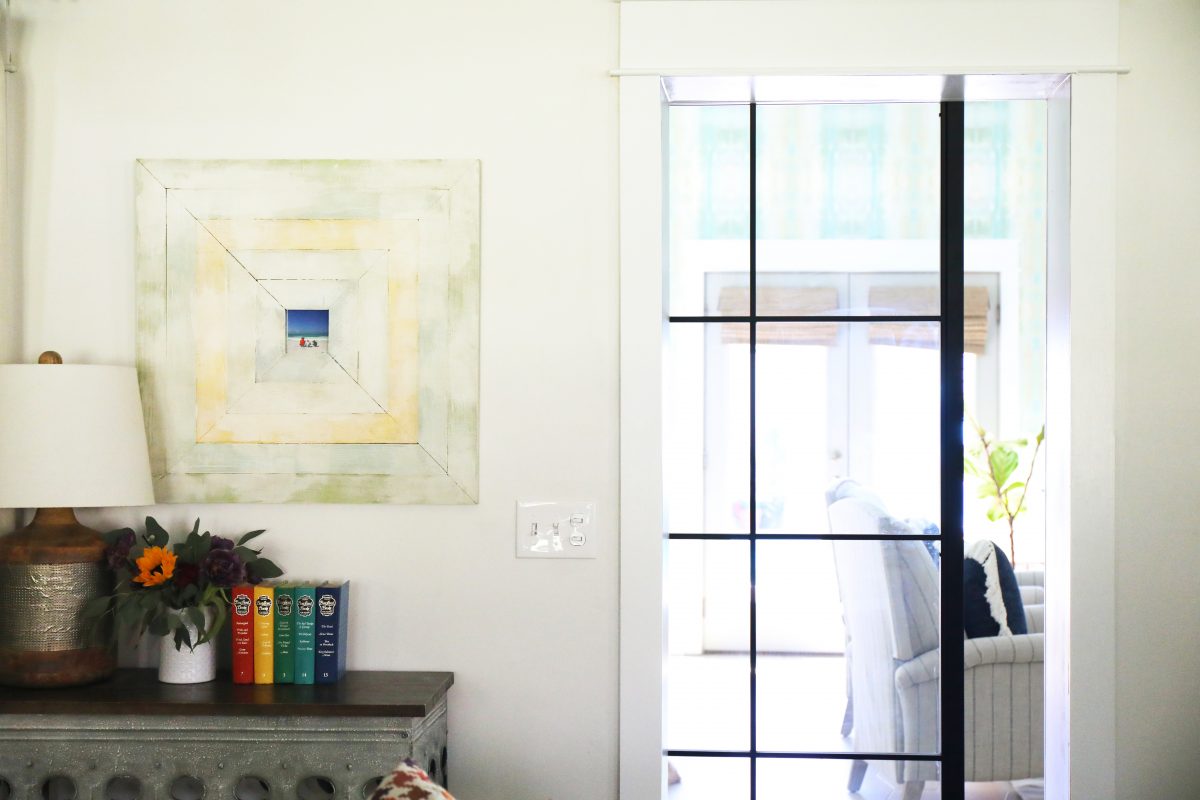
It’s been a while since we’ve shared a frame tutorial with you guys. Fun fact: did you know that creating frames is how we started out working together? This one is one of my all time faves, and still hangs in our home today. It’s an oldie but goodie, and we love the fun colors it brings into the space!
We thought it would be fun to share this simple frame here today!
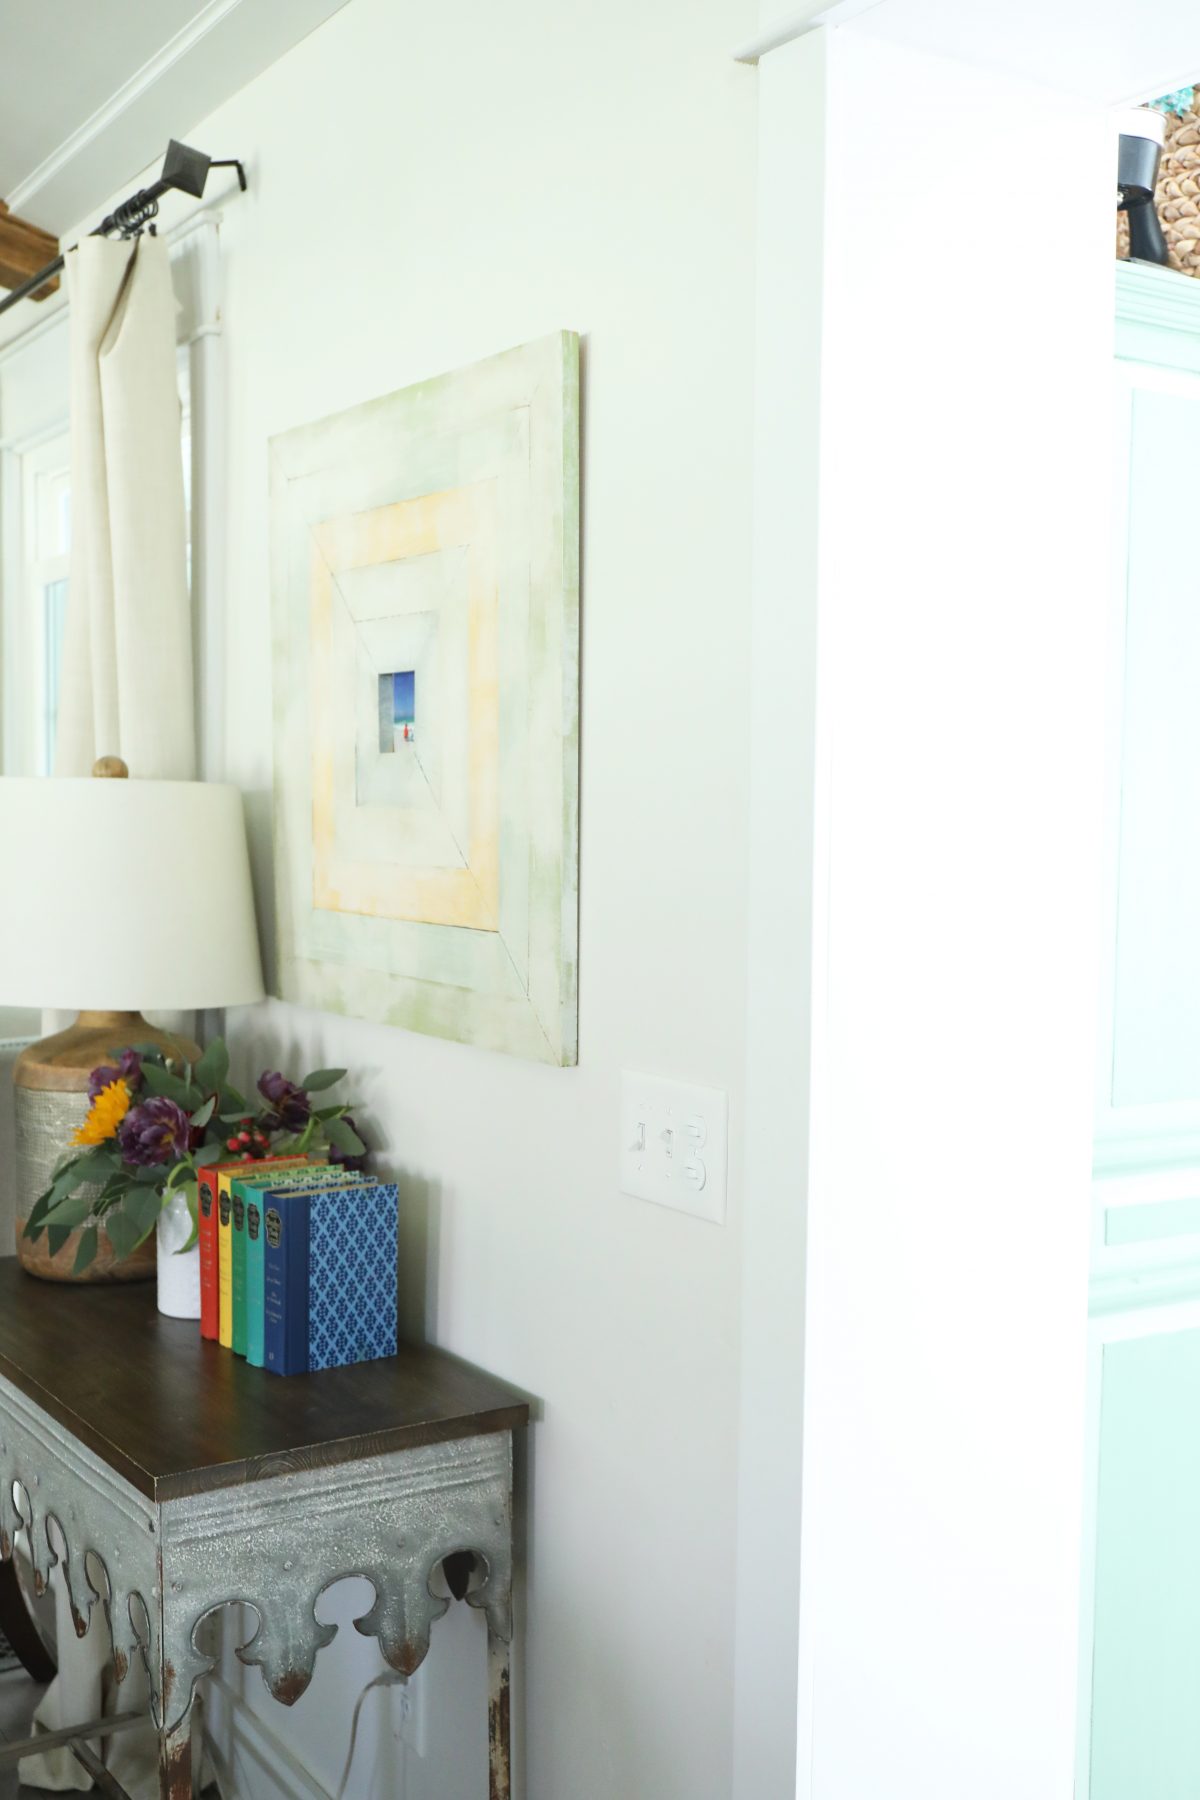
The size can be altered to accommodate any design. A larger display area for your photo and thicker planks open up a variety of options. This frame can make a beautiful composition on any wall!
Want to make one? Here’s what you’ll need:
• 1 x 3 x 8 Wood (4)
• Corner Vise/Clamps
• Corner Brackets (20)
• Wood Glue + Hot Glue
• Miter Box + Hand Saw (Or Miter Saw)
• Sand Paper
• Painting Materials of Your Choice
• Carpenter Square
• Butcher Paper or Felt (Optional-for backing)
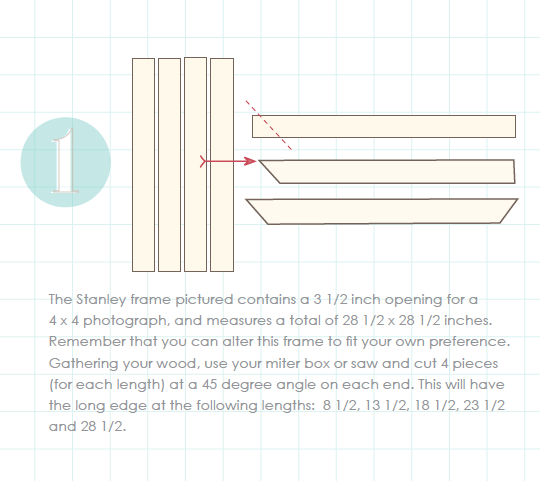
The Stanley frame pictured contains a 3 1/2 inch opening for a 4 x 4 photograph, and measures a total of 28 1/2 x 28 1/2 inches.
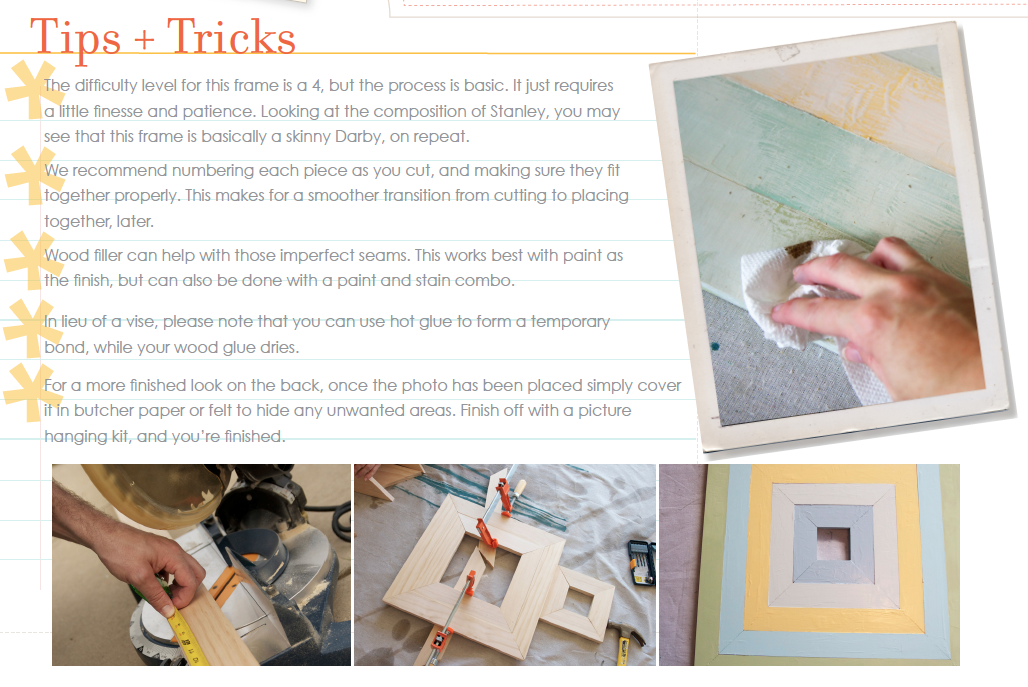
Remember that you can alter this frame to fit your own preference. Gathering your wood, use your miter box or saw and cut 4 pieces (for each length) at a 45 degree angle on each end. This will have the long edge at the following lengths: 8 1/2, 13 1/2, 18 1/2, 23 1/2, and 28 1/2.
Measure twice, cut once. This frame is the same step, repeated multiple times to create this layered frame. It’s not a difficult frame to make, but requires a little diligence and patience.
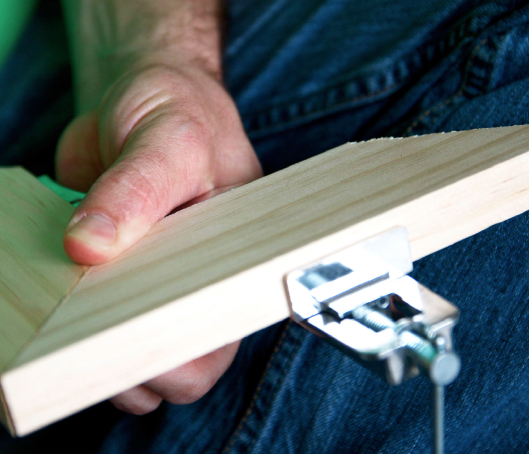
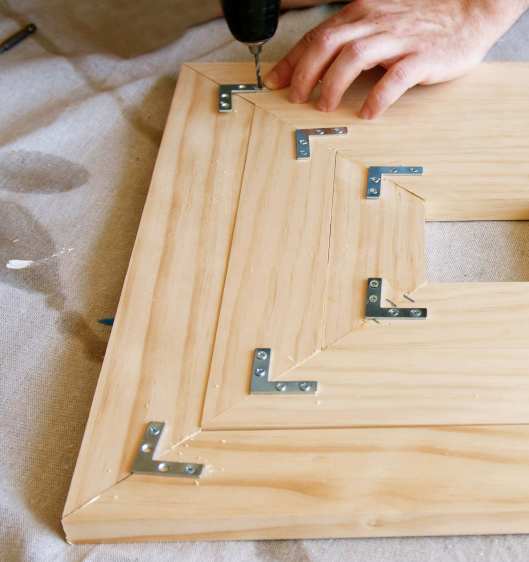
When building this frame, you can use either corner brackets, or a vise. If you decide to use the corner brackets, an extra pair of hands keeps those pieces at a correct angle when assembling. With corner brackets in place, simply mark them. Then drill your holes separately before screwing in the screws.
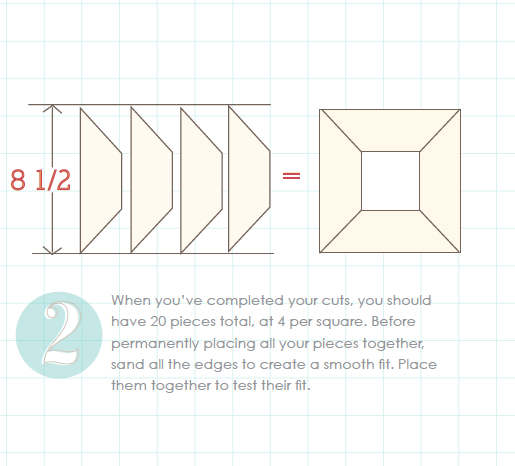
When you’ve completed your cuts, you should have 20 pieces total, at 4 per square.
Before permanently placing all your pieces together, sand all the edges to create a smooth fit. Place them together to test their fit.
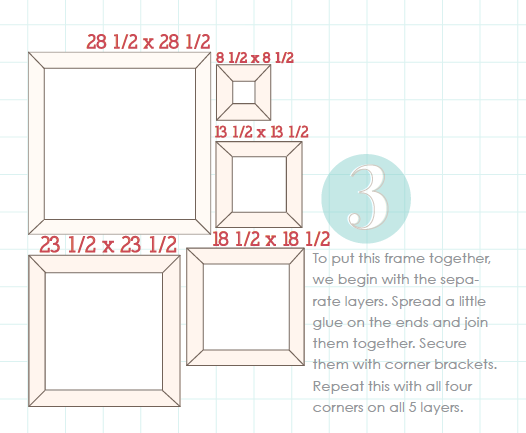
To put this frame together, we begin with the separate layers.
Spread a little glue on the ends and join them together. Secure them with corner brackets. Repeat this with all four corners on all 5 layers.
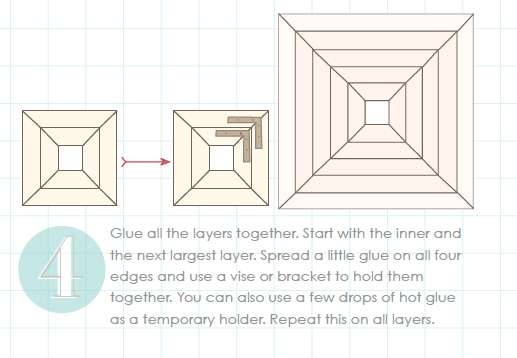
Glue all the layers together. Start with the inner and the next largest layer.
Spread a little glue on all four edges and use a vise or bracket to hold them together. You can also use a few drops of hot glue as a temporary holder.
Repeat this on all layers.
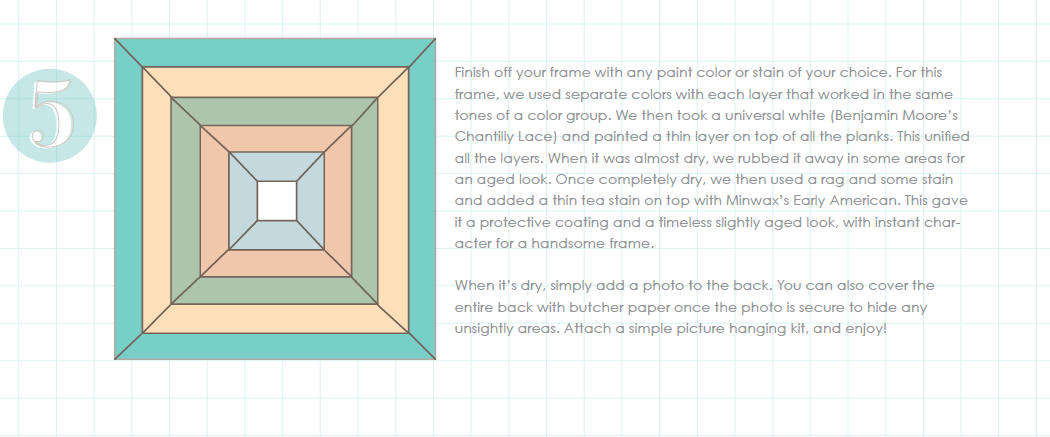
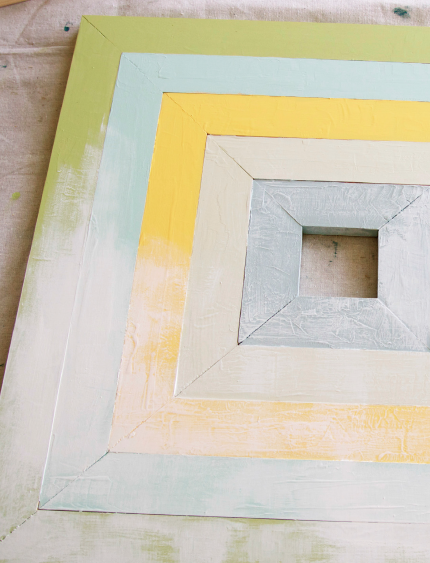
Finish off your frame with any paint color or stain of your choice. For this frame, we used separate colors with each layer that worked in the same tones of a color group.
We then took a universal white (Benjamin Moore’s Chantilly Lace) and painted a thin layer on top of all the planks. This unified all the layers. When it was almost dry, we rubbed it away in some areas for an aged look.
Once completely dry, we then used a rag and some stain and added a thin ‘tea stain’ on top with Minwax’s Early American. This gave it a protective coating and a timeless slightly aged look, with instant character for a handsome frame.
When it’s dry, simply add a photo to the back. You can also cover the entire back with butcher paper once the photo is secure to hide any unsightly areas. Attach a simple picture hanging kit, and enjoy!
As always, let us know if you make one. We’d love to hear!
Have an inspired day!

One Comment