
how to build a simple window box
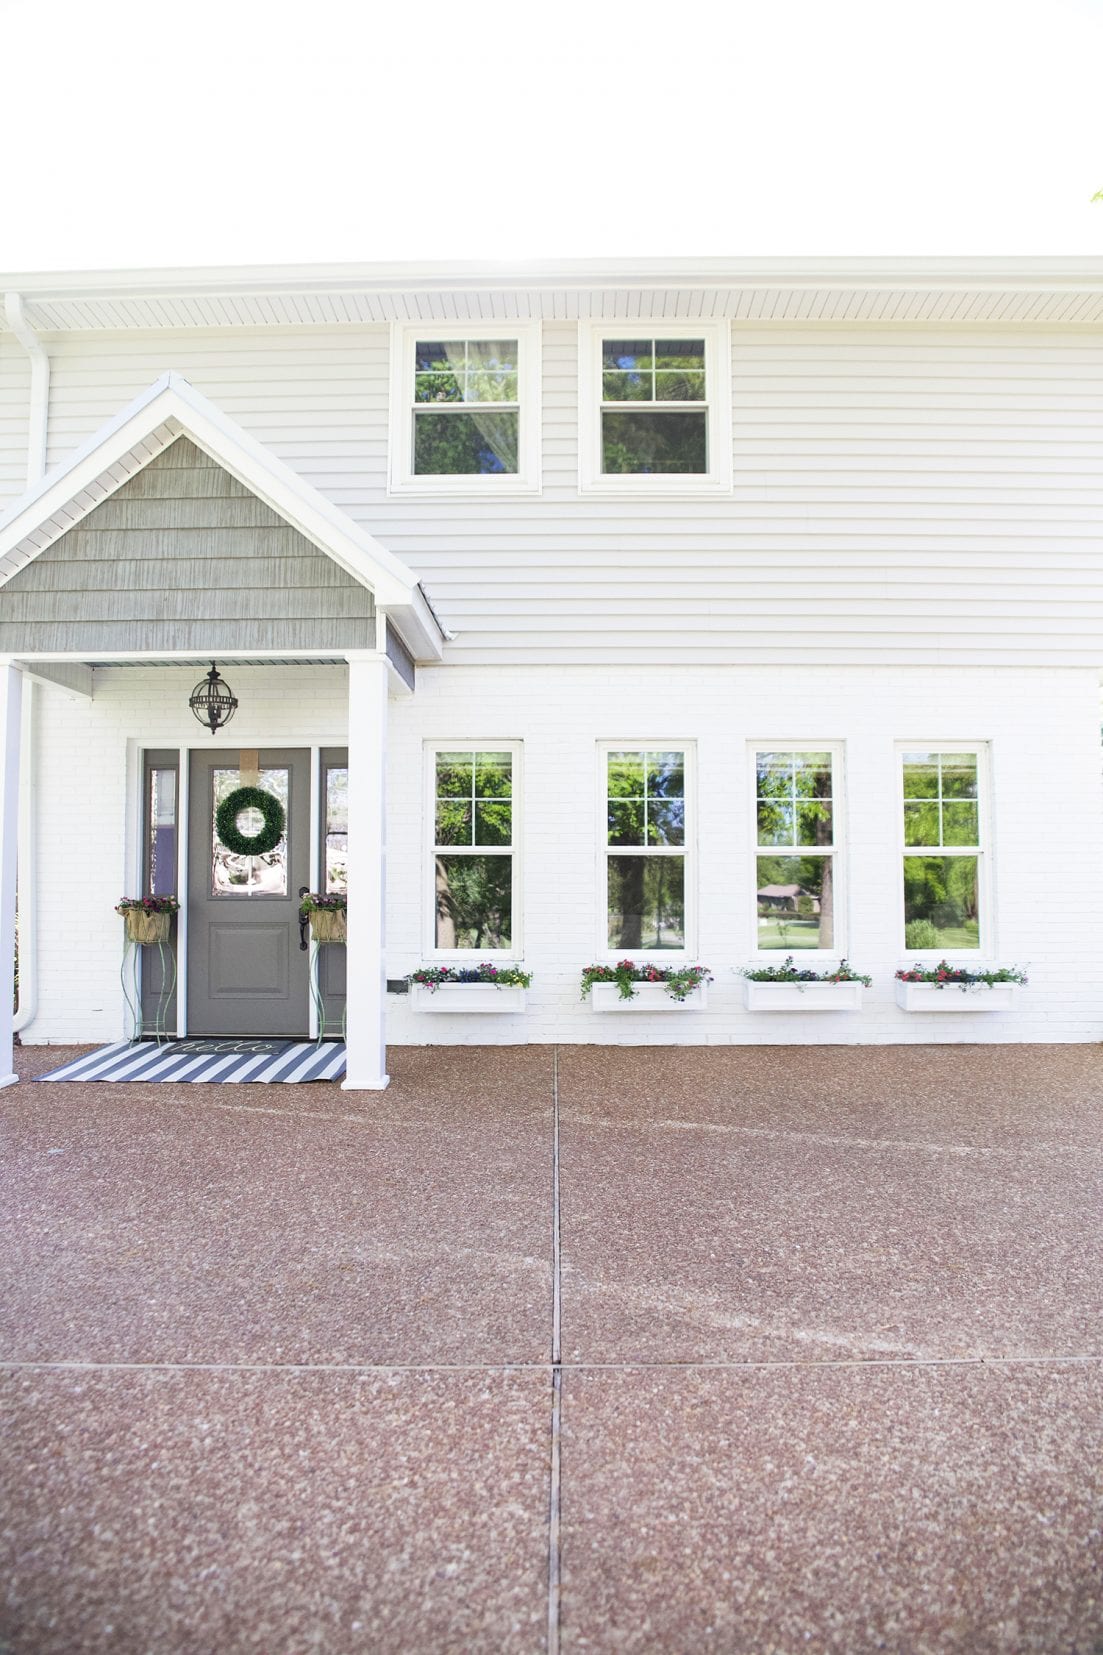
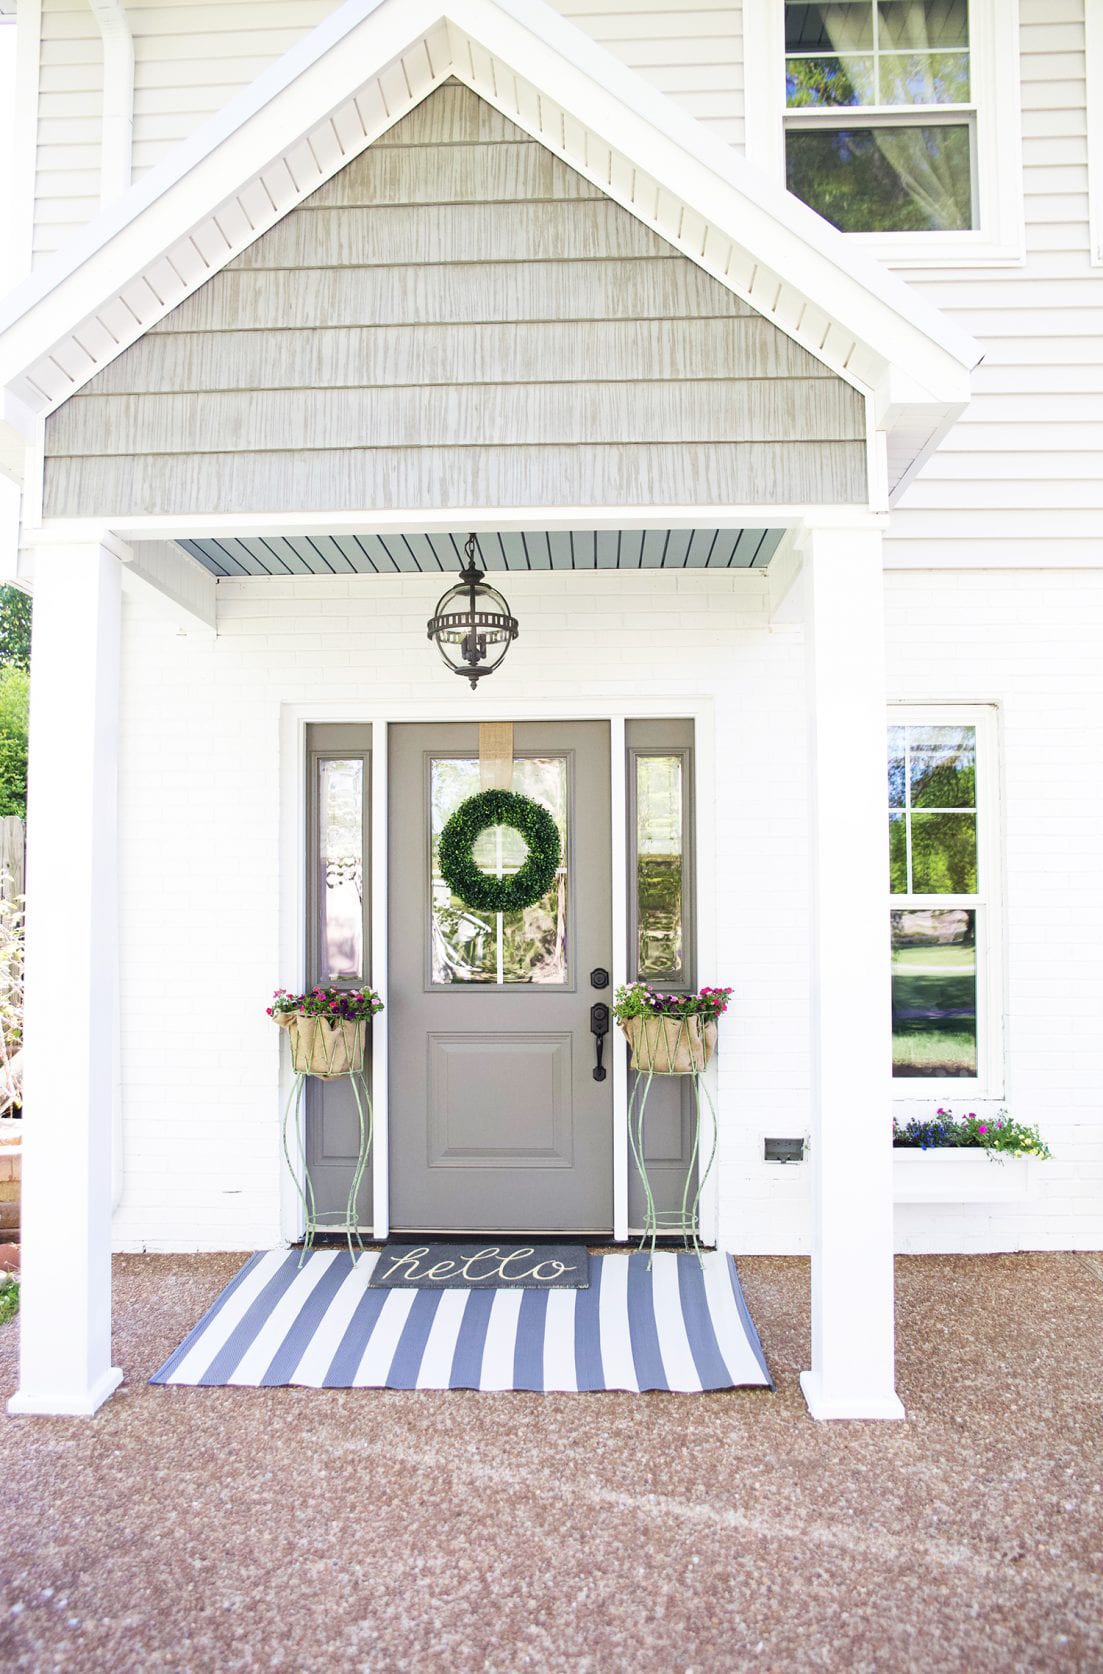
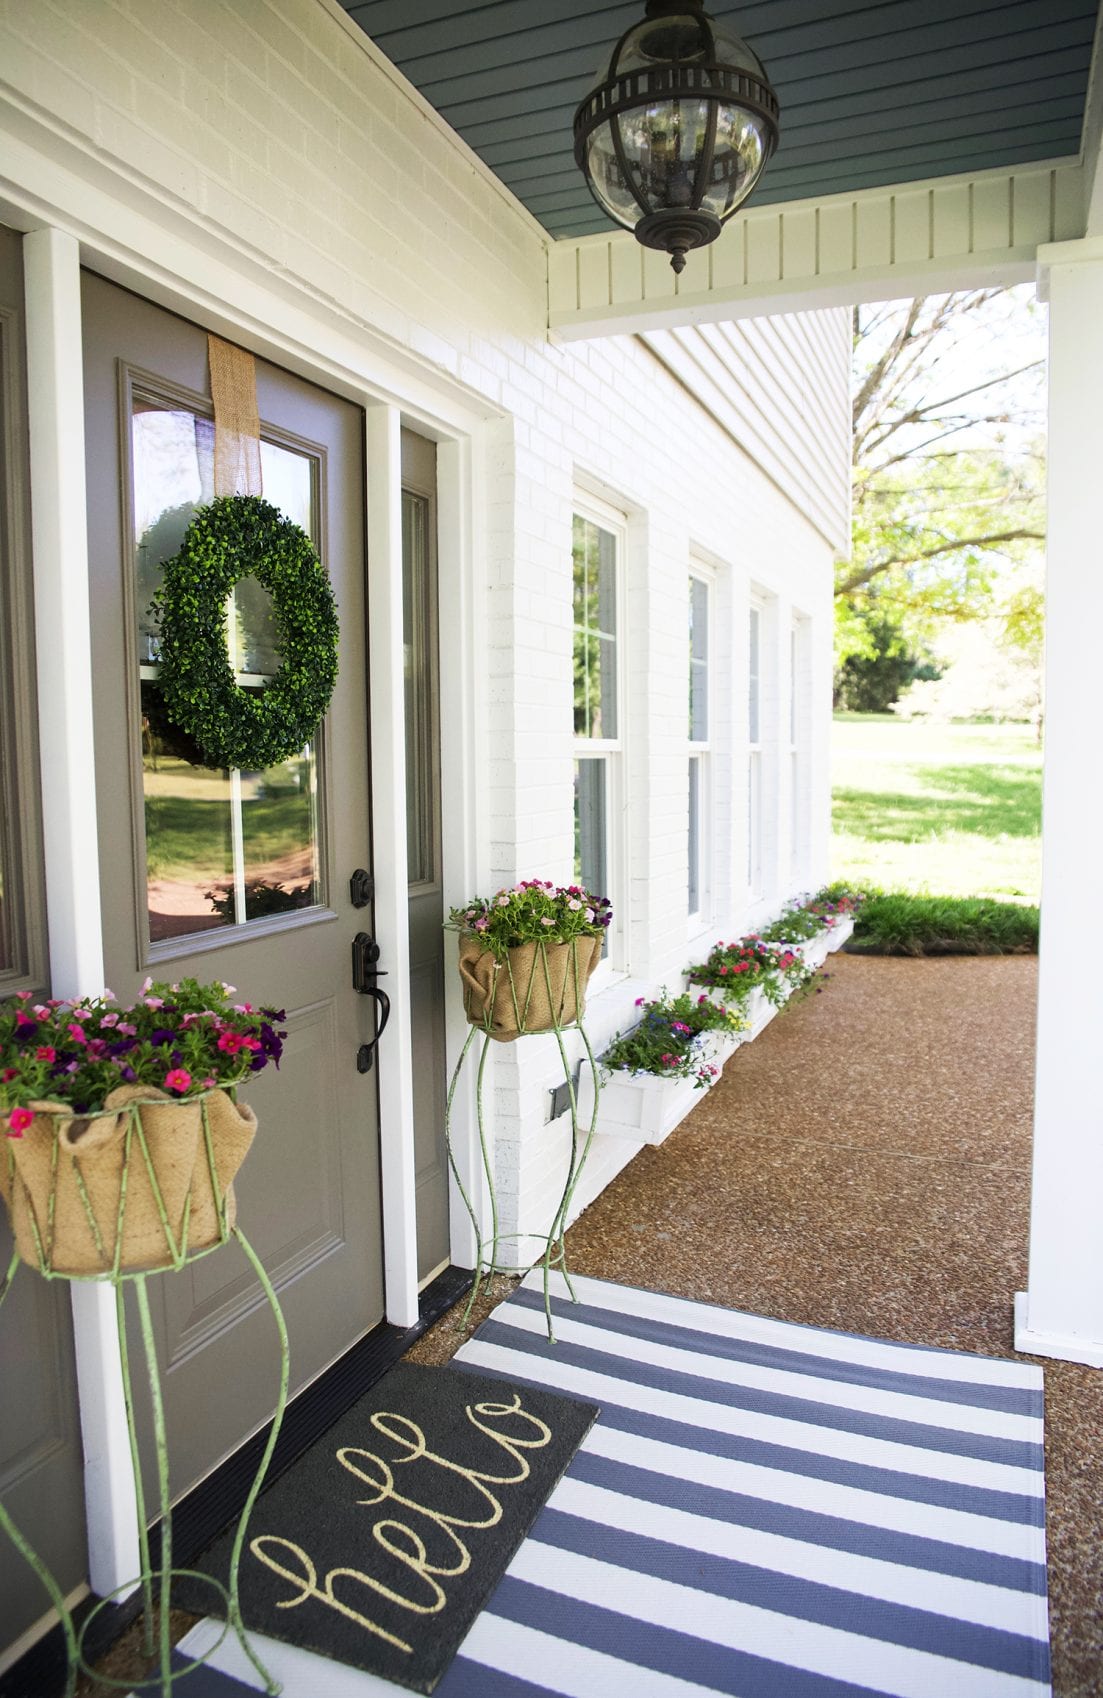
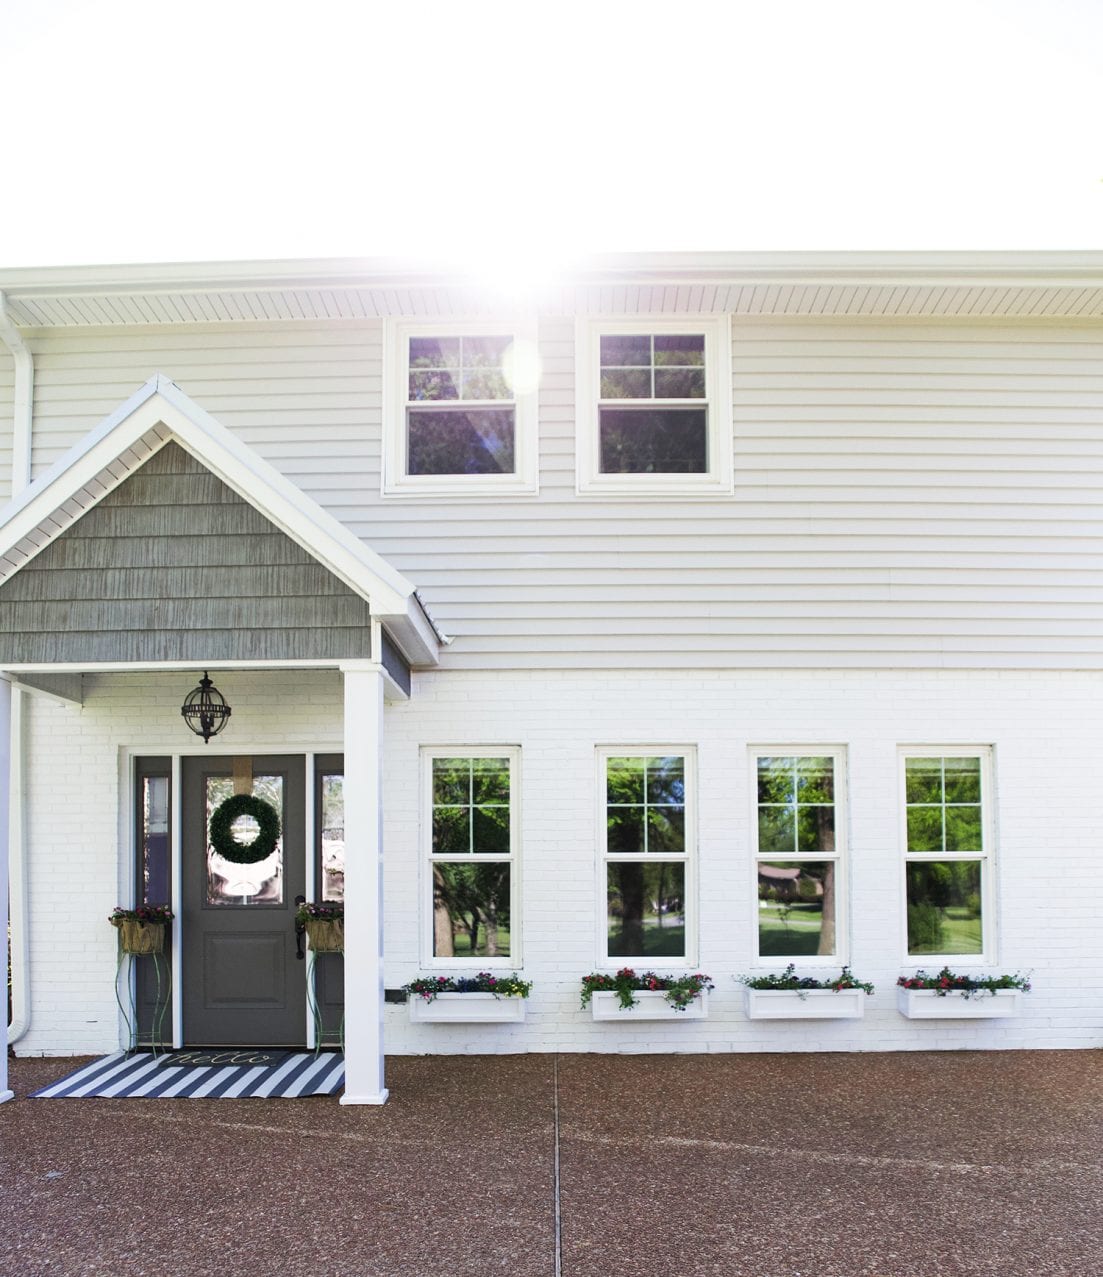
It was so much fun to share all our before and afters of our side entrance in the money pit last week – and we love the details – what, how, and why we chose what we did for some major curb appeal. All of these changes came together to make a huge impact! The best part? Aside from the eye candy, is not getting soaked in the rain every time we leave the car to enter our house. Once the windows, shakes and portico and all the pretty things {a-la Window World} were added, we knew we wanted to add some spring touches to warm up the side a bit. And we adore the way our window boxes turned out. So today, we wanted to share how to build a simple window box.

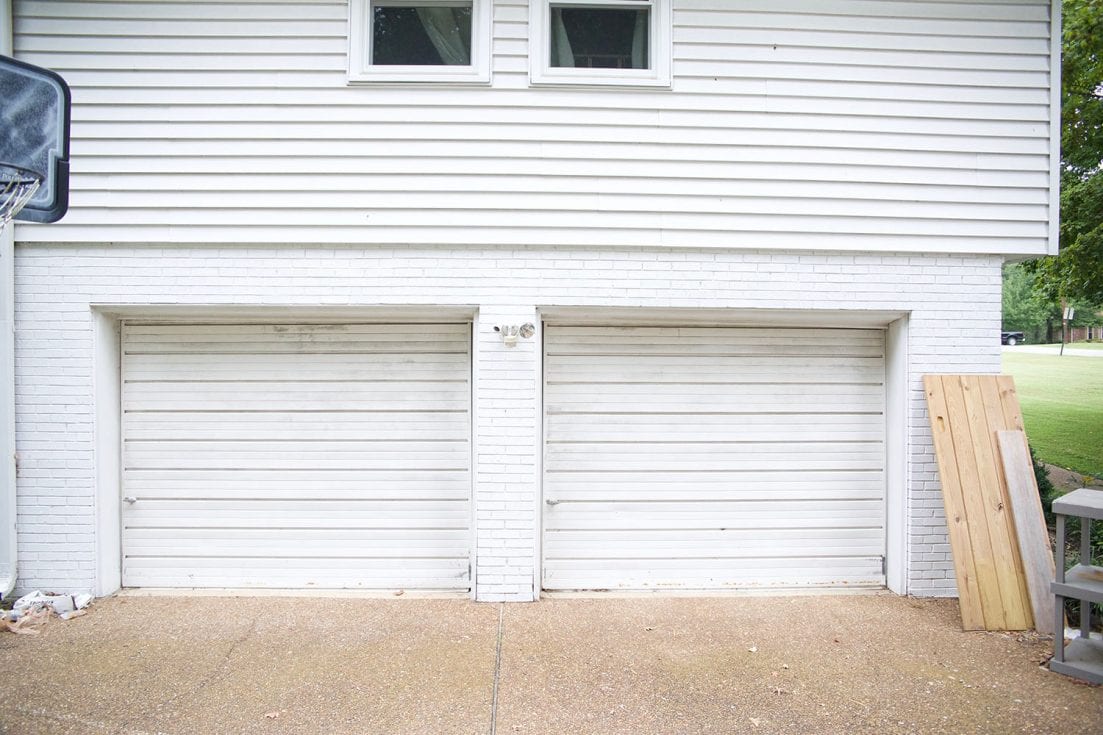
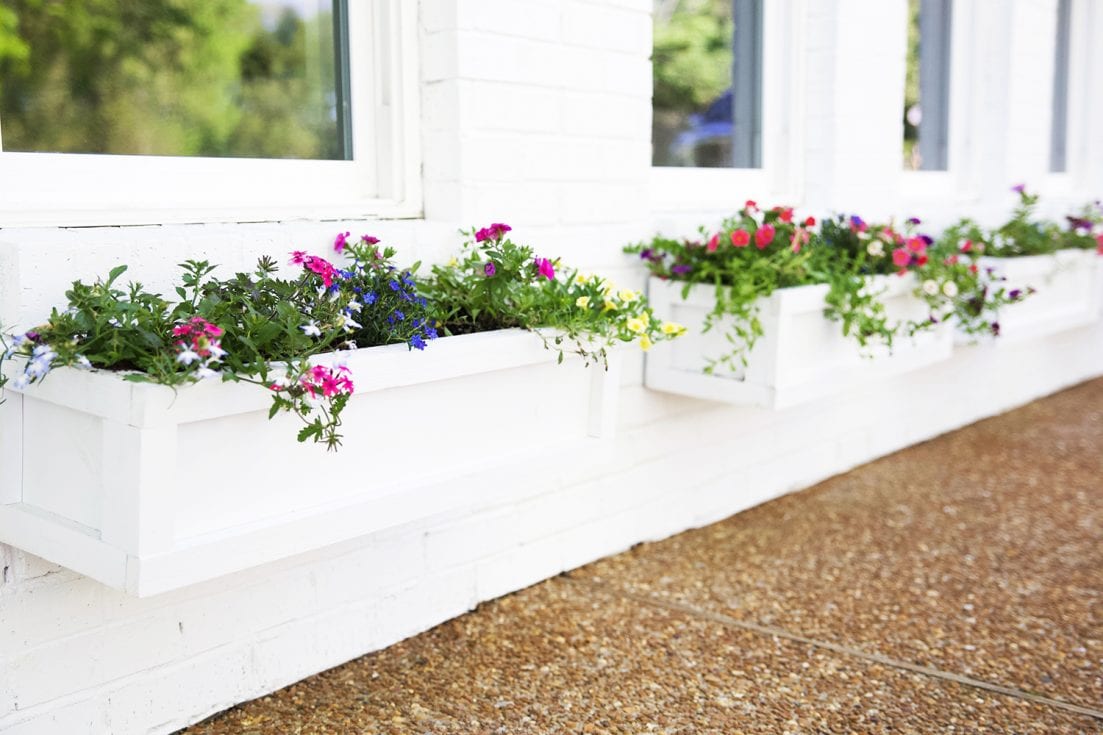
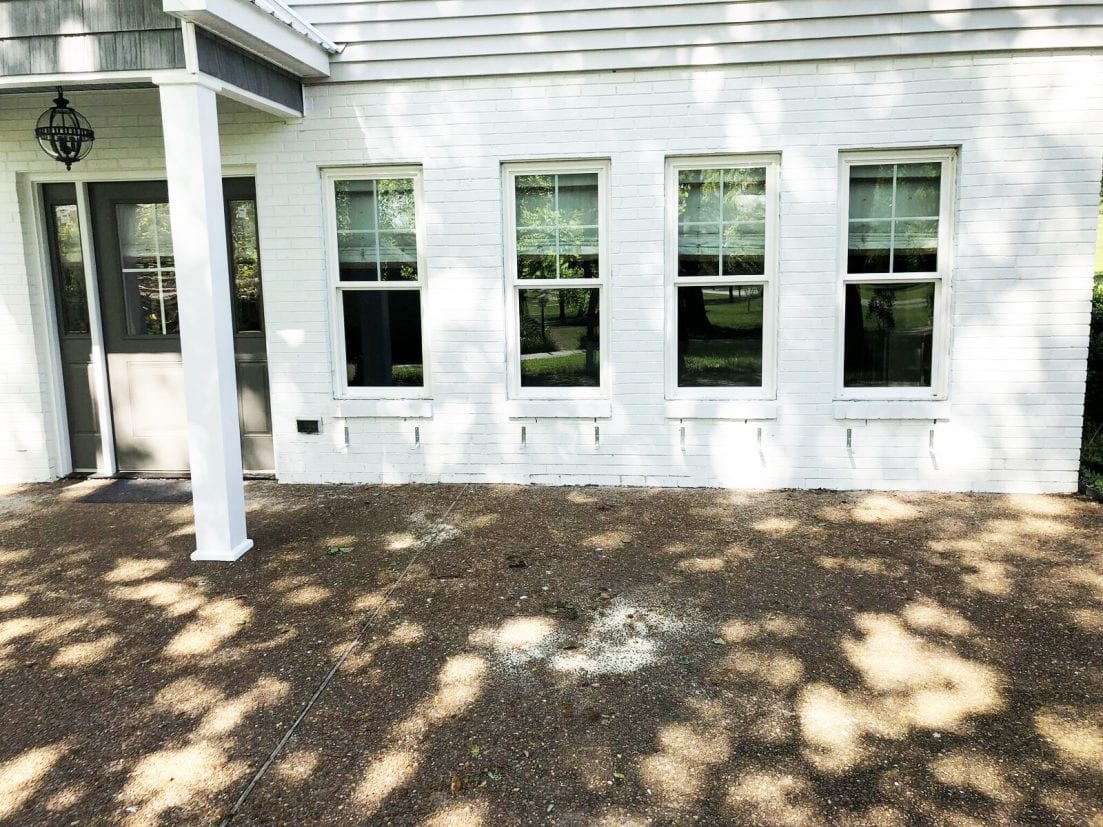
Below is the before we renovated the house and finished it off with some beautiful window boxes.
How To Build A Simple Window Box
Ahhh! ::cue heavenly lights and angel music::
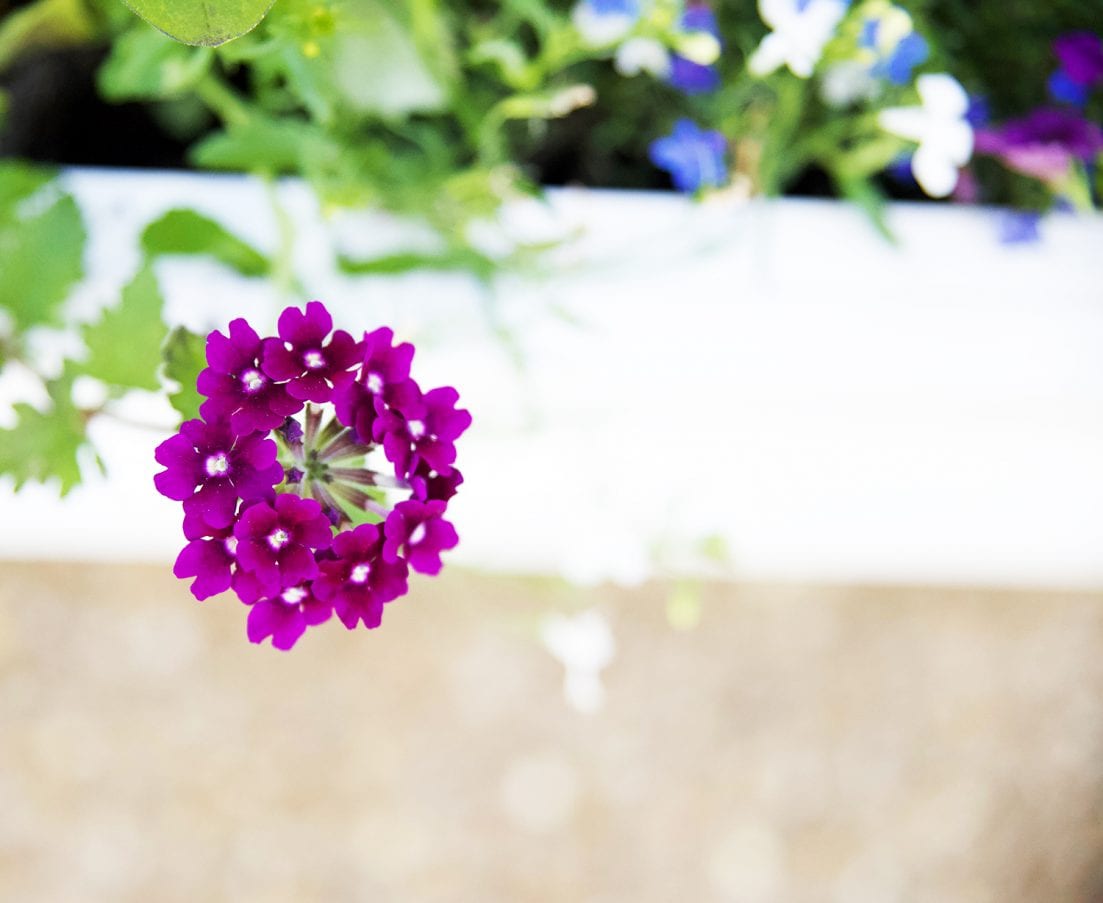
We just love all these pretty touches of colorful spring around us. Did you know we only have a 6 more days of school, and that’s it? We couldn’t be more ready. Last year at this time, we were just hoping to begin on our garage area soon, and refinish it into our basement. And we were slowly whittling away at the second hideaway. This year, it’s fun to step back and see this pretty gem from the street, and know that all the blood, sweat and tears were totally worth it.
So without further ado, how we built these easy peasy window boxes!
How To Build A Simple Window Box – An Easy Affordable Project
Building window boxes is an easy, affordable project anyone can do to dress up their curb appeal.
This project, building 4, only took an afternoon, for instant upgrades in the looks department.
So let’s dive into a few supplies and tools you’ll need!
How To Build A Simple Window Box – The Supplies
• wood: duh! Whatever lumber you use, the process is the same. Pick the wood you think will best suit your needs.
Cedar has a natural resistance to rot. A common board is cheaper and sometimes easier to get your hands on. We used a common board because we knew we would paint them and I think you’d be surprised at how long it takes wood to really rot. Conservative estimates put it at a decade+. So we decided to spend less money and bank on the fact we will do something different in 1o years.
We also used 1 x 8’s to build the main box and 1 x 2’s for the trim.
• wood glue
• 2 1/2 and 1 1/4 18ga nails and of course a nail gun (you can also sub in screws here)
• A saw any saw will do really, but a miter is probably the easiest.
• 5 inch “L” brackets {2 per box}
• concrete screws and a hammer drill.
•sandpaper
• caulk
• 4-foot level
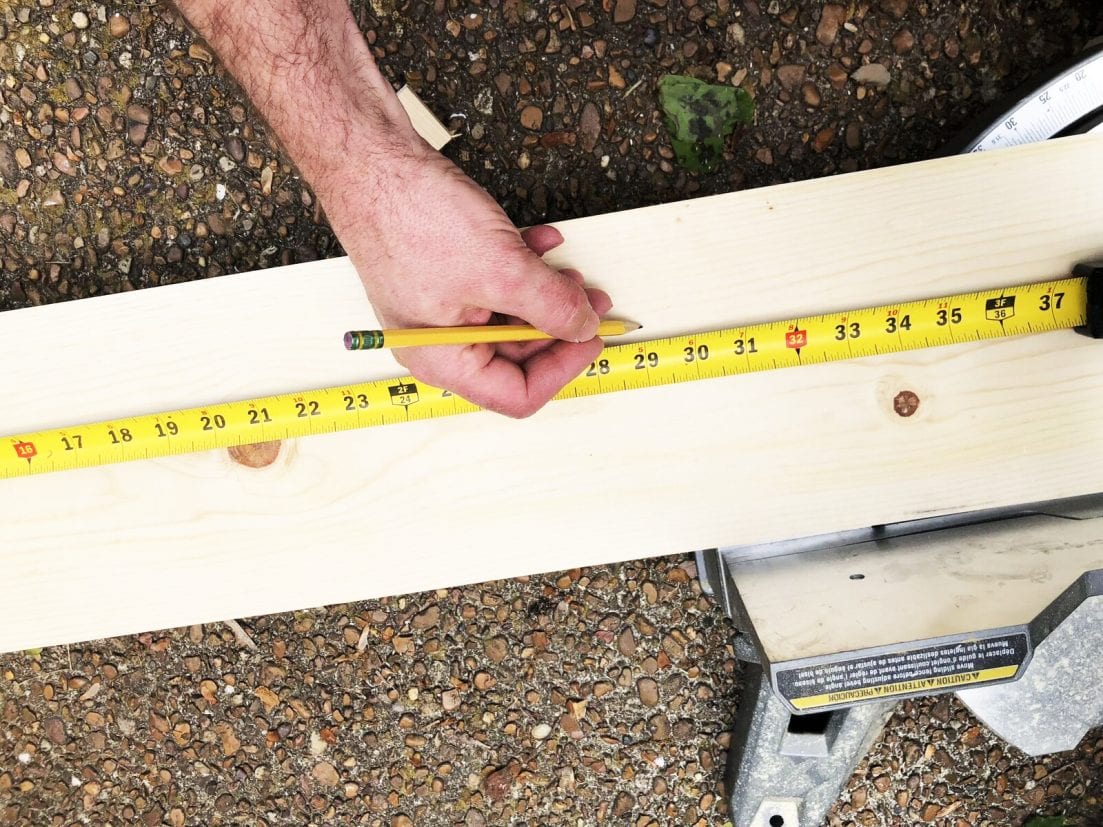
Once you’ve decided on the wood, you’ll begin by measuring your window size.
This will let you know the length of the window box you’ll be making. Ours was 29 inches. so we cut (3) boards to this length (Our front, back, and bottom boards). Then we cut (2) boards to 7 inches, these would be our end pieces.
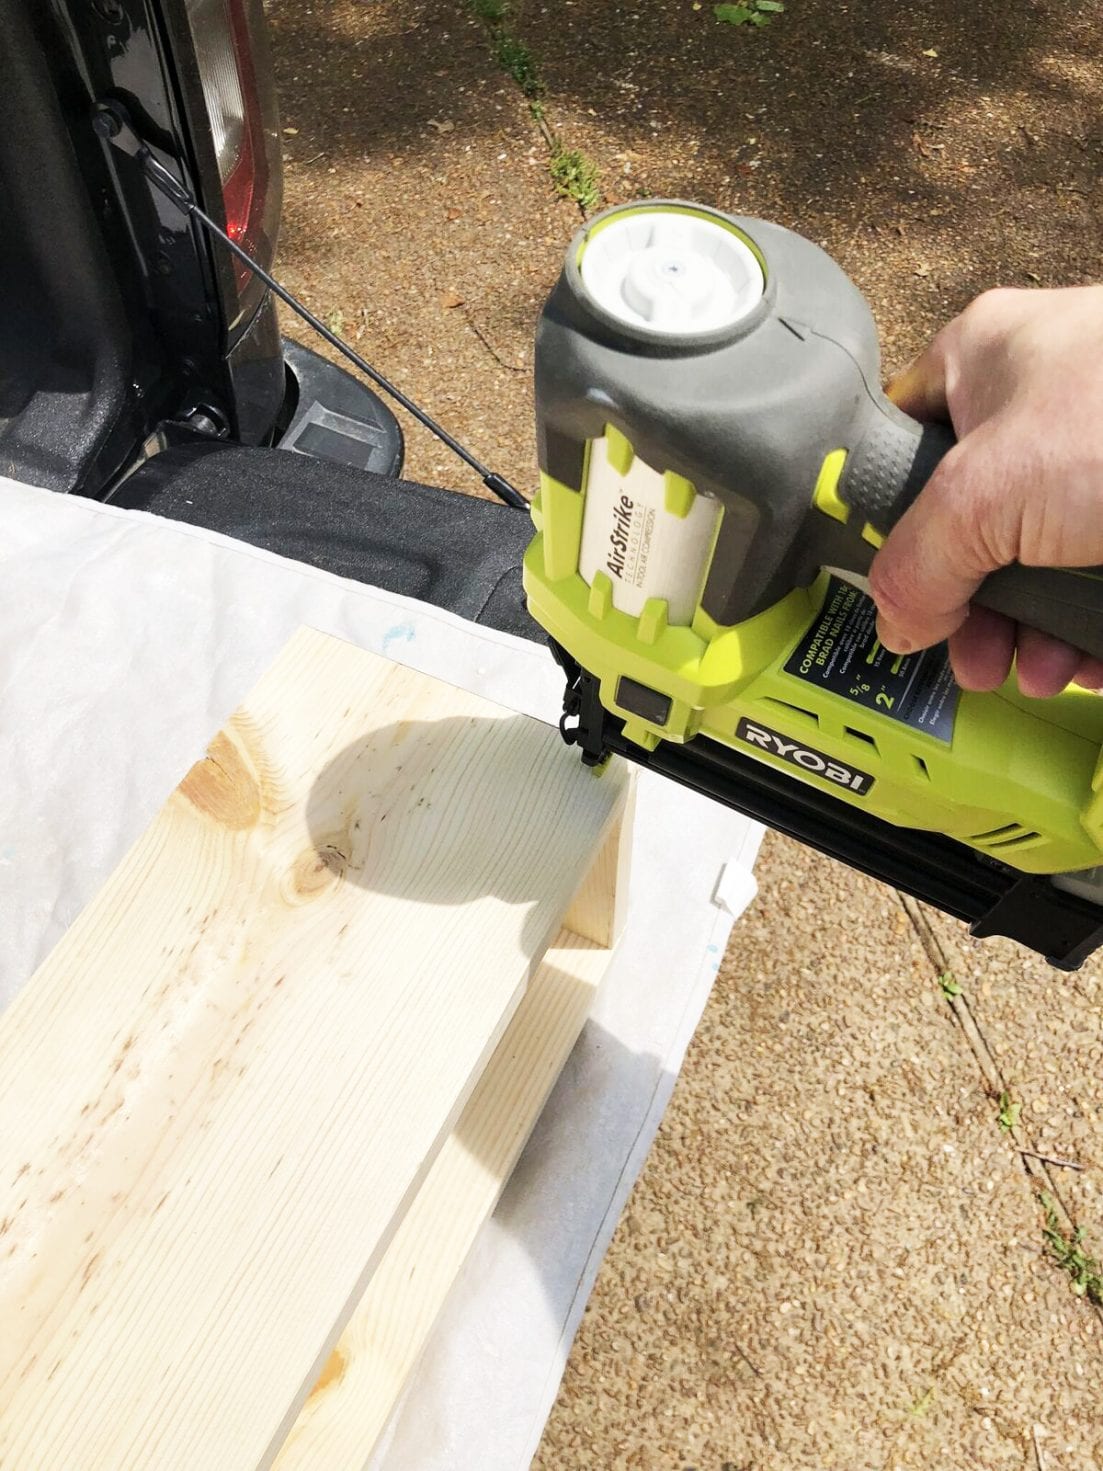
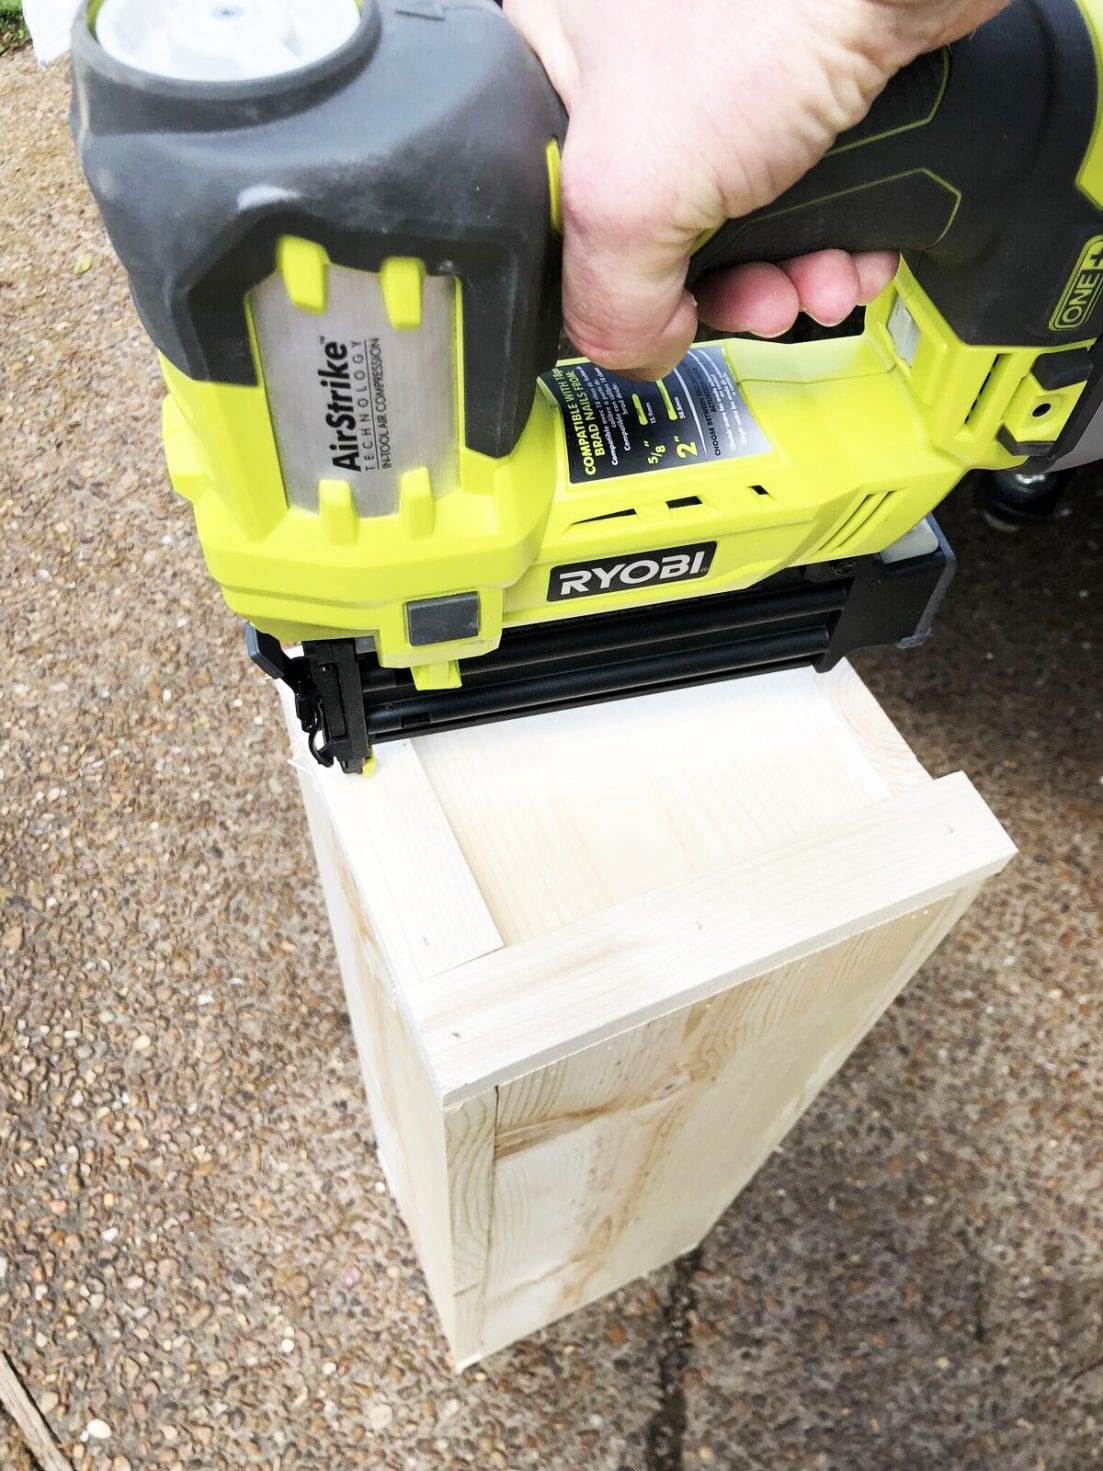
From here, we glued and nailed (1) 29-inch piece to both end pieces.
The end pieces are butted into the 29″ piece. Use the 2 1/2 inch nails for this.
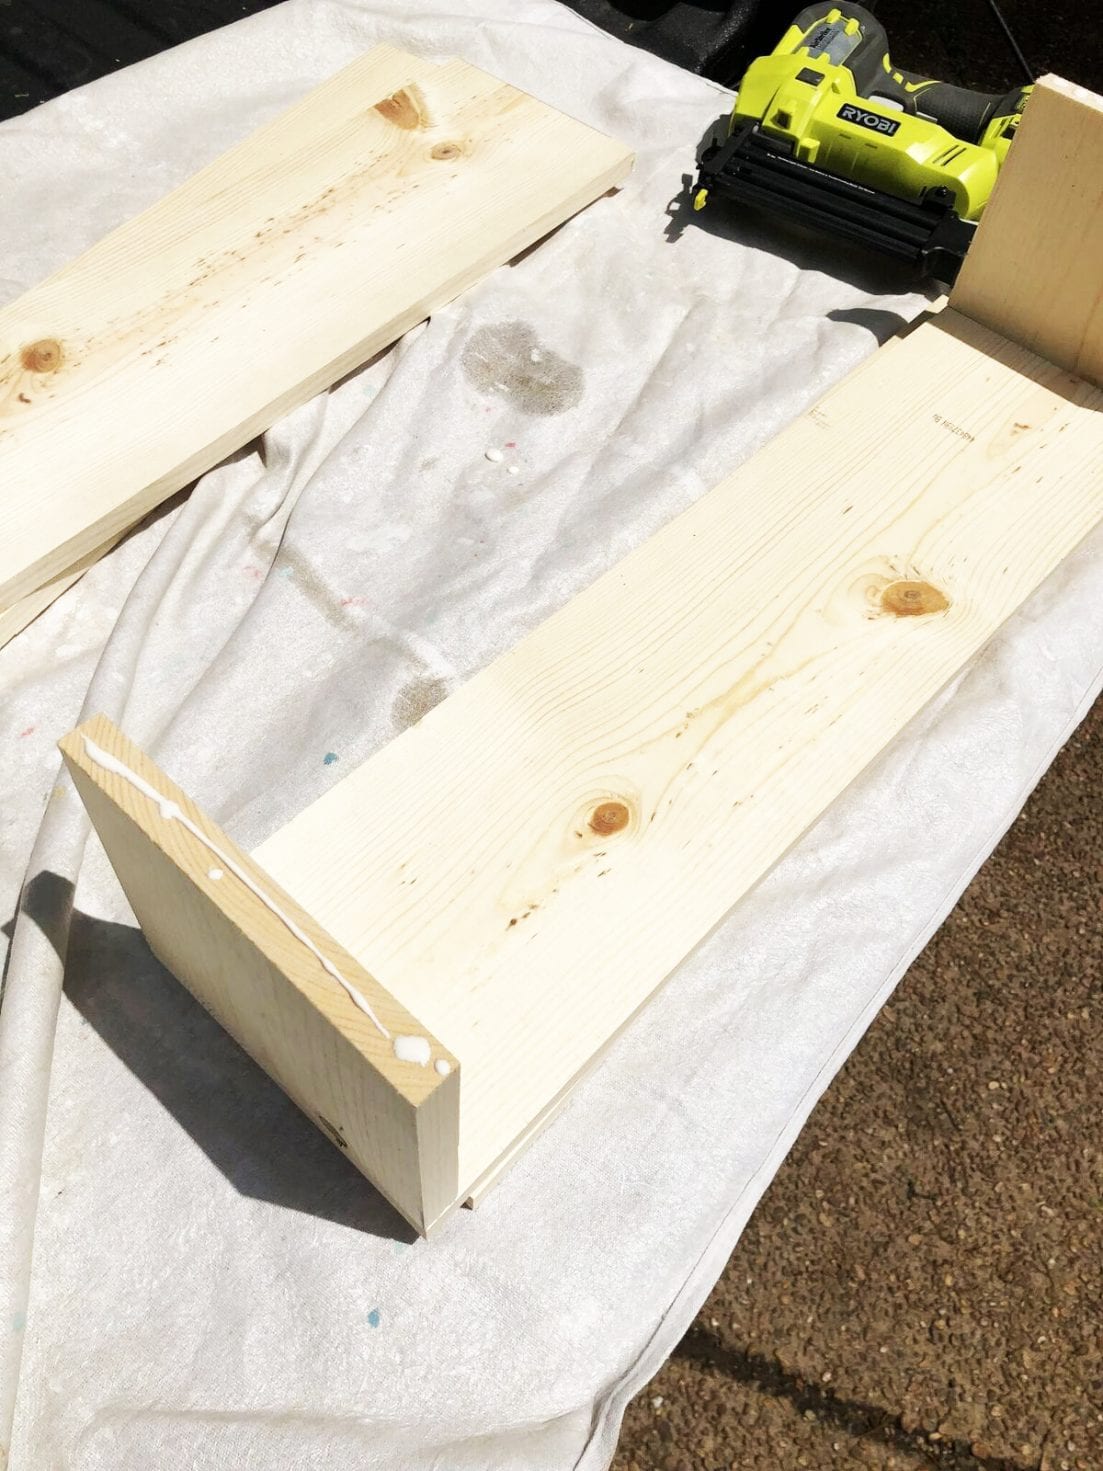
Next, you’ll glue and nail another 29-inch piece on the opposite side as well as the side that will be the bottom of the window box.
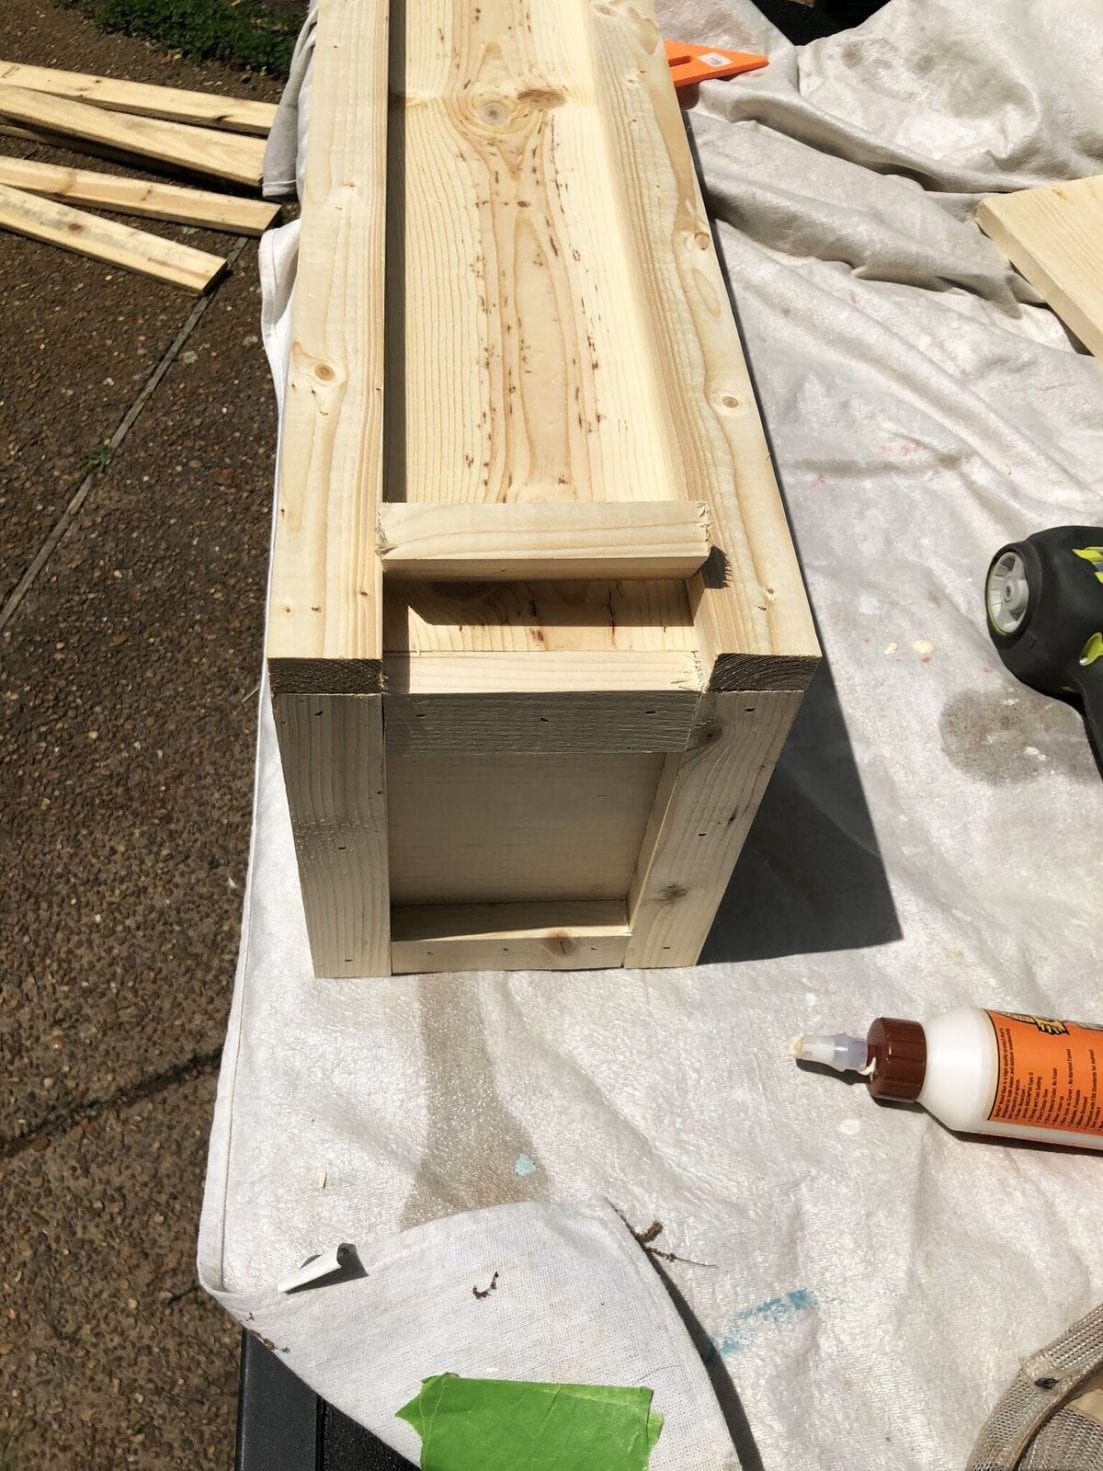
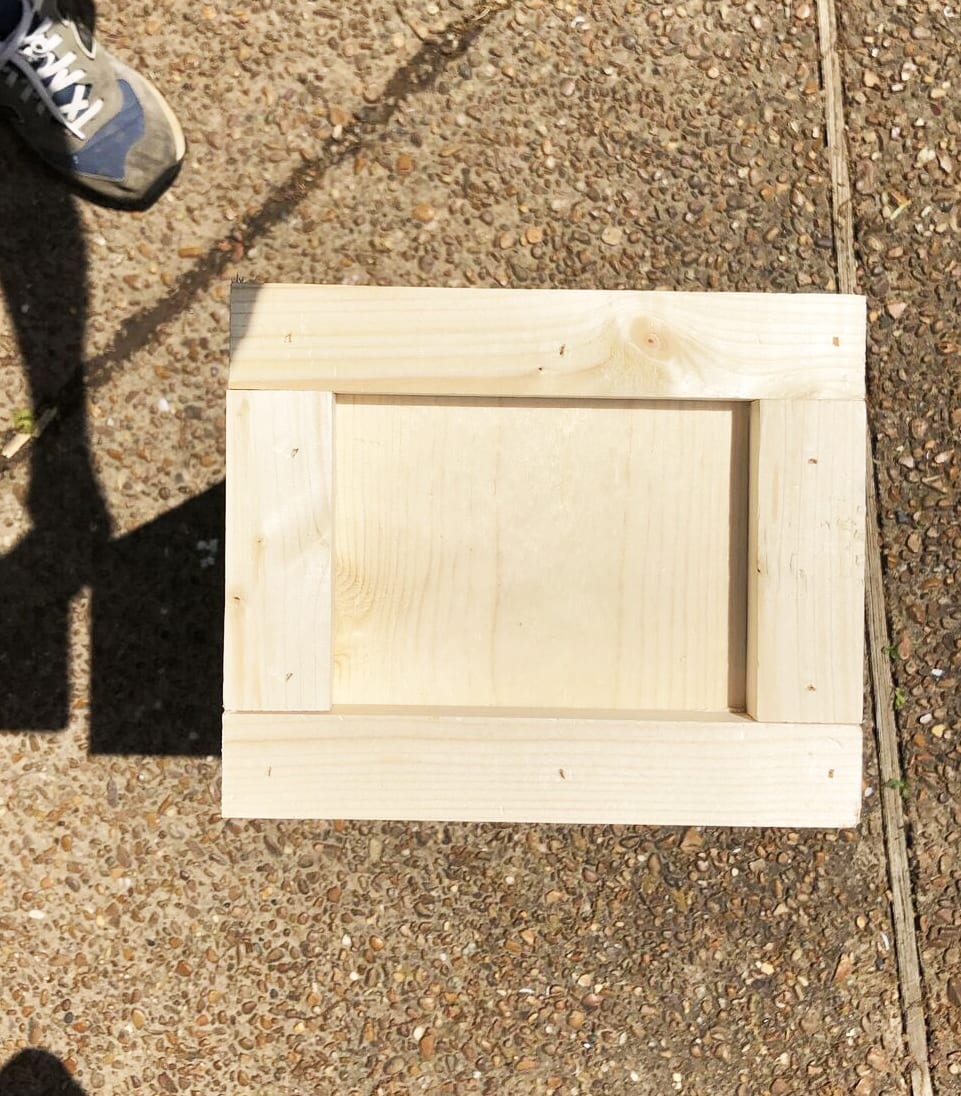
For the next step on how to build a simple window box, cut the trim pieces to size. {(2) 29″ pieces (4) 7 1/4″ pieces (4) 7 3/4″ pieces}.
Basically measure the edges of your box and trim it with the 1 x 2’s.
Attach it with glue and 1 1/4 inch nails.
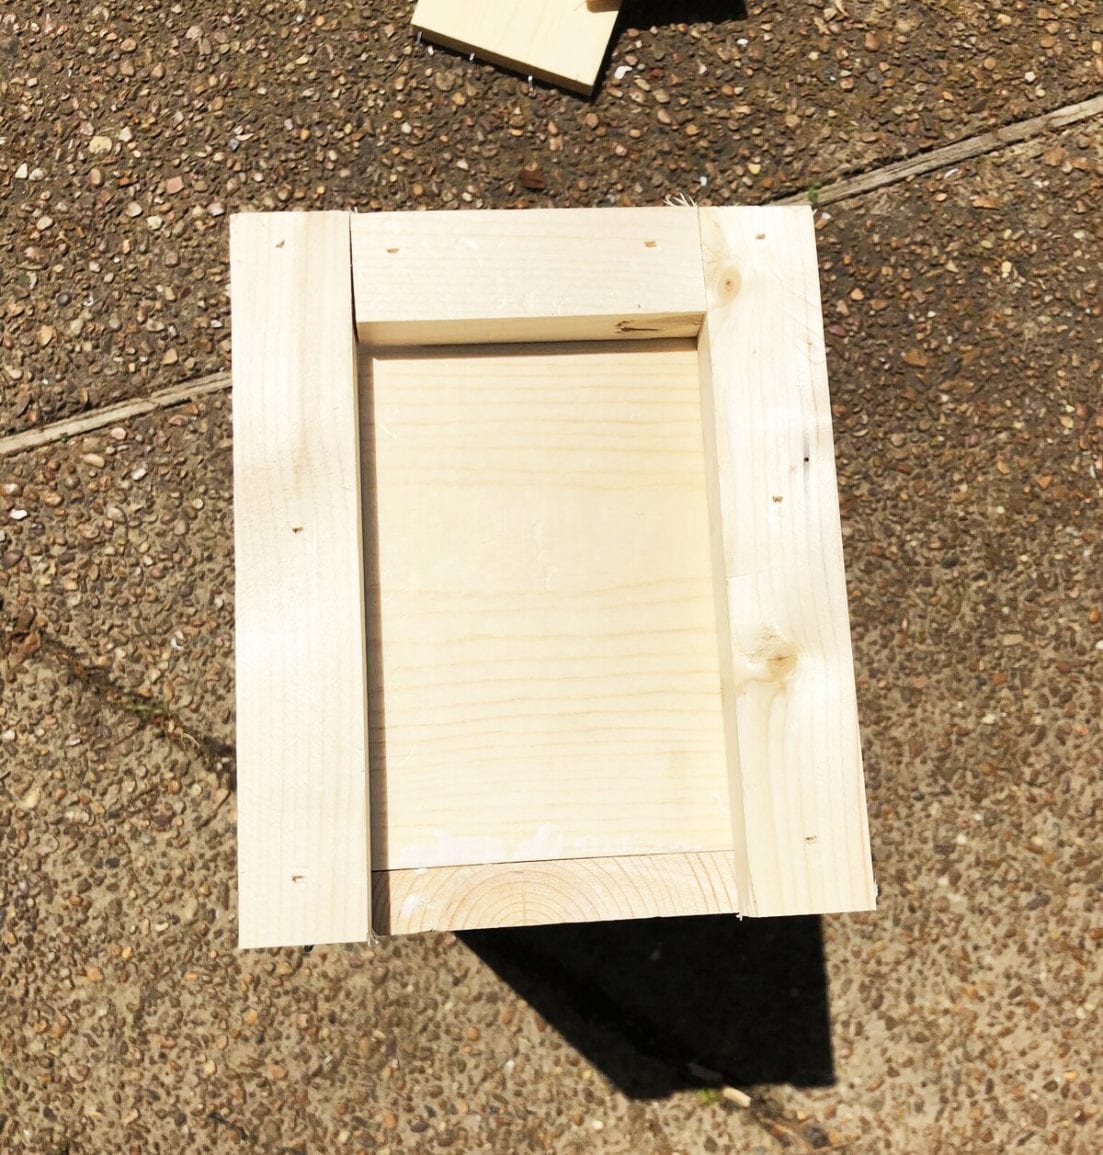
How To Build A Simple Window Box – Time for sanding
Once you have the trim on, take a piece of sandpaper and simply freshen up the edges with a little light sanding
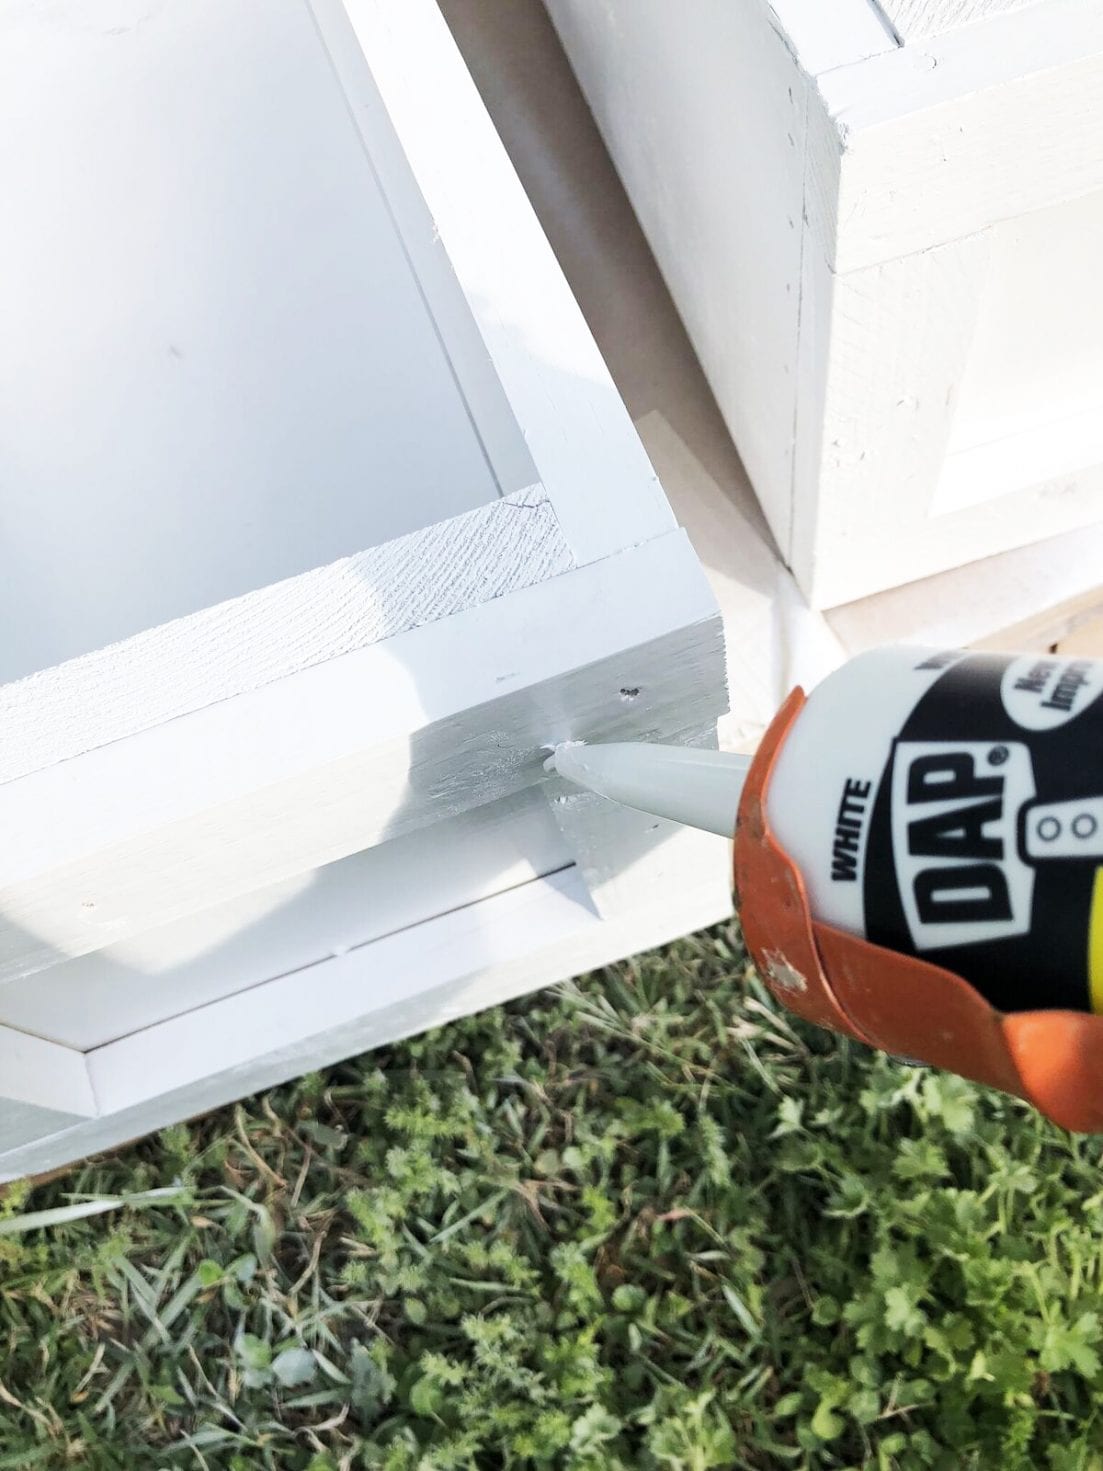
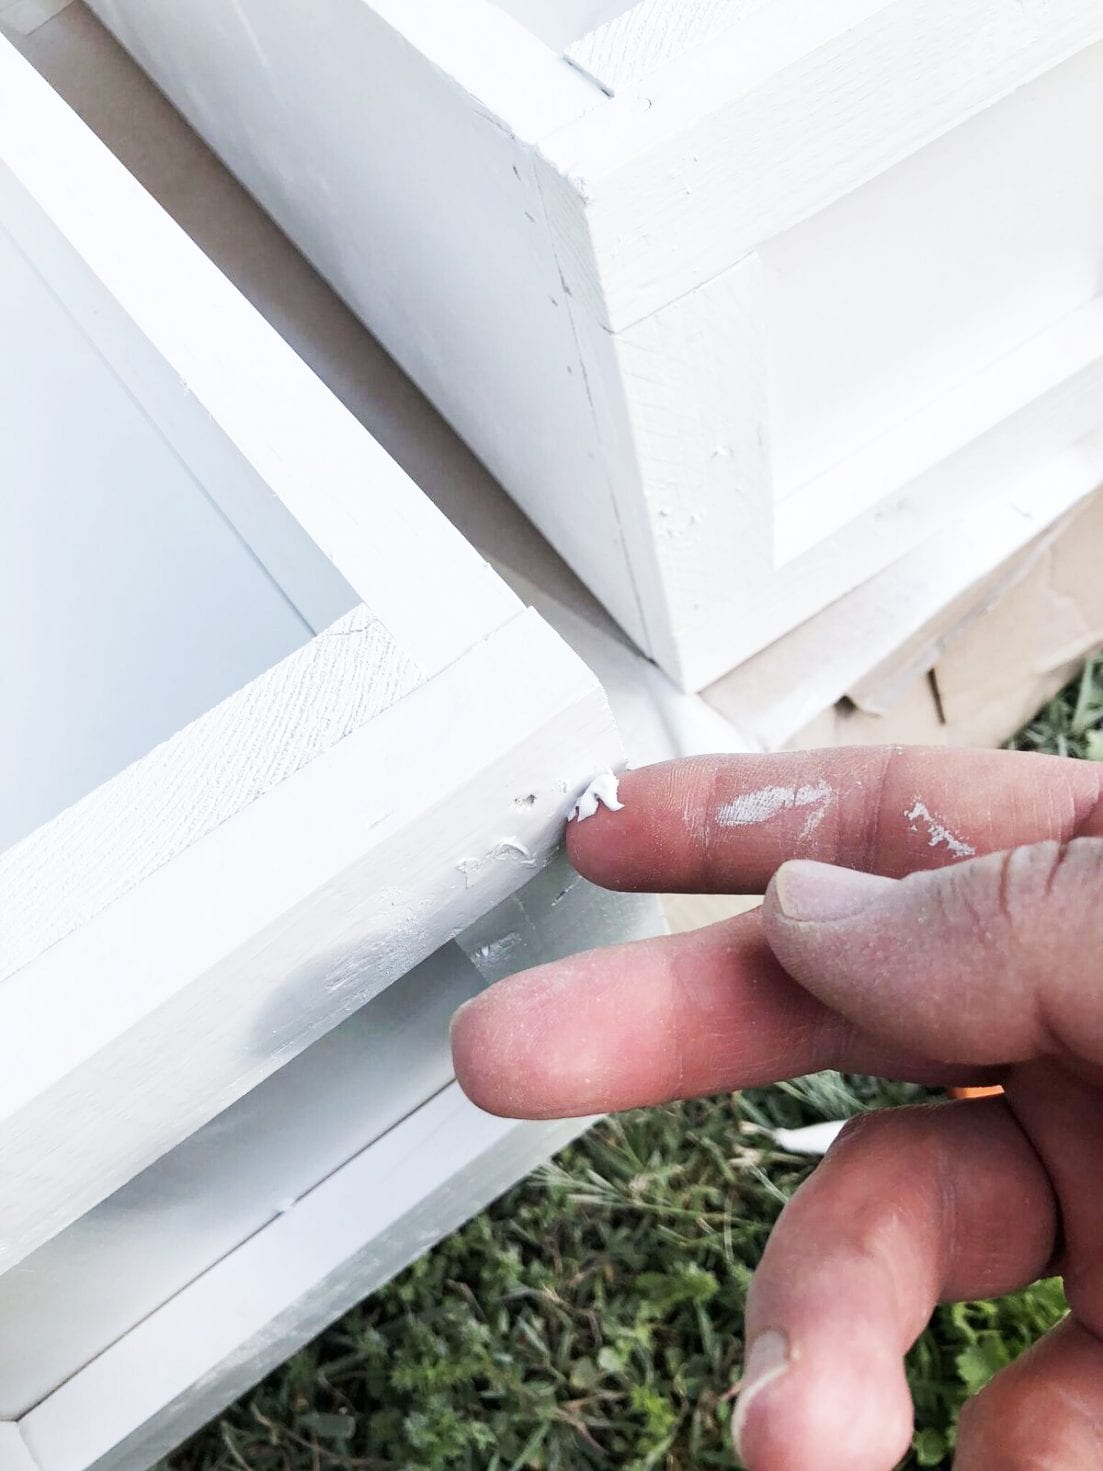
Finally, we painted, caulked and painted again… and they were ready to hang!
How To Build A Simple Window Box – Ready To Hang
To hang them, you’ll simply want to measure the appropriate distance down from your window.
You’ll do this by measuring the height of the box and then making sure the top of your “L” bracket, where the box will rest, is at this height.
Now mark the holes with a pencil. Use the hammer drill to bore a hole and place the anchor in the hole, and screw the bracket in. {Note we suggest starting with a center window and working your way out. This helps keep everything level.}
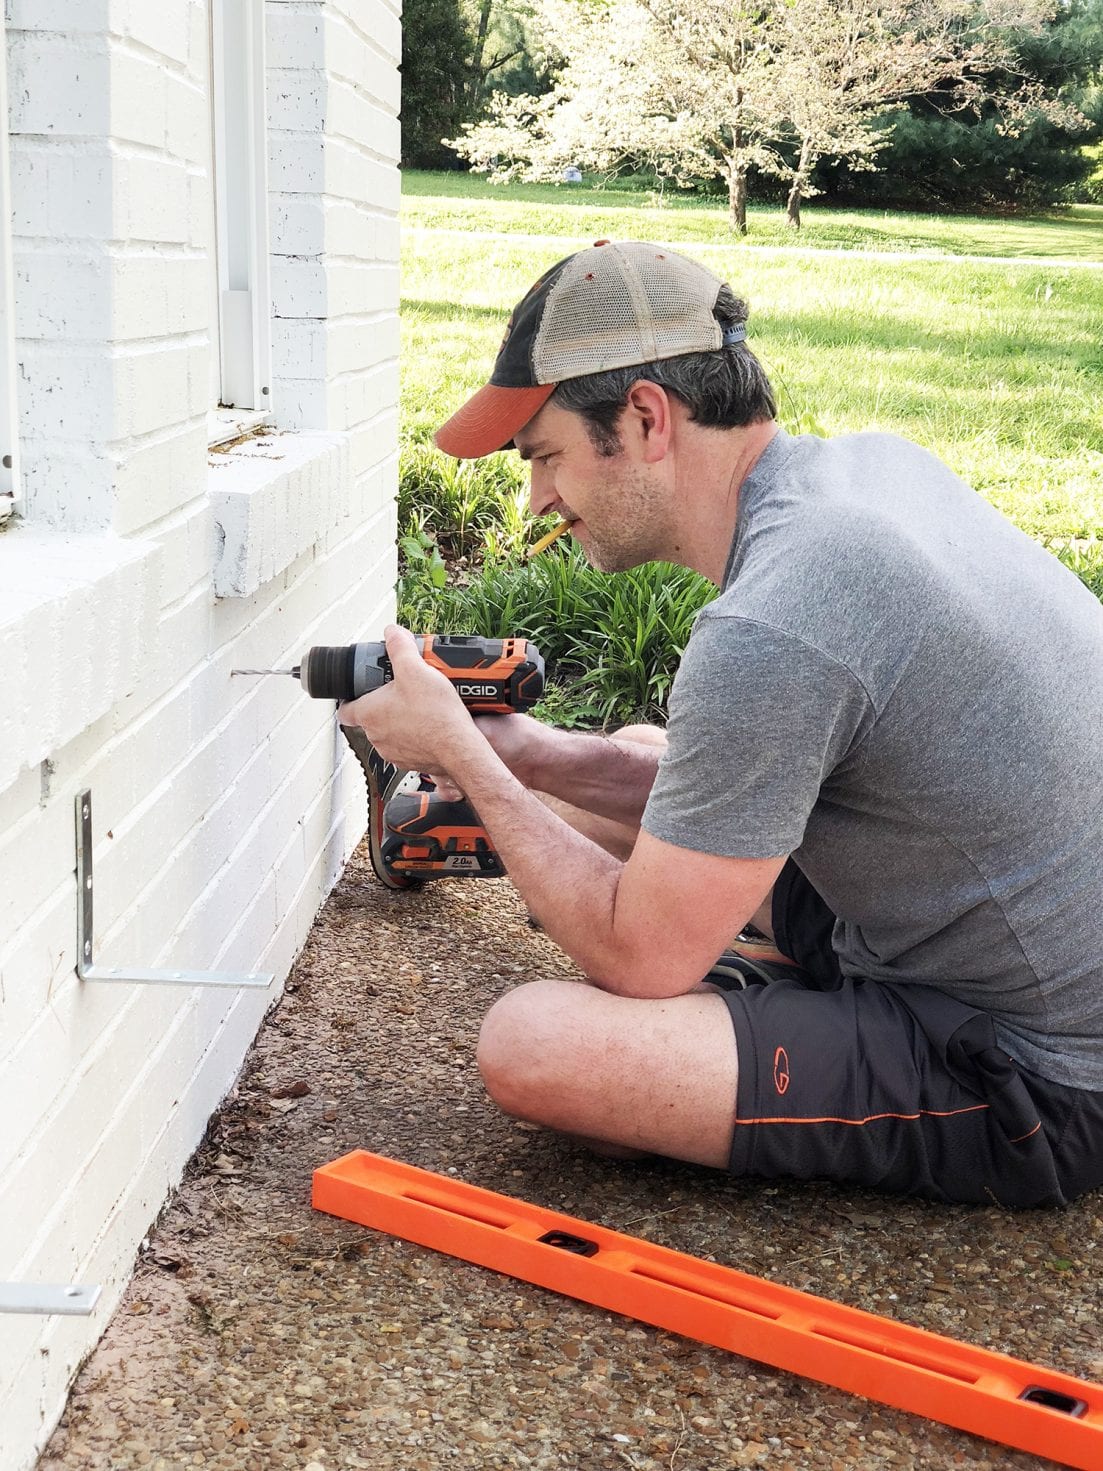
At this point, use a 4-foot level to make sure the window boxes are level across the house.
It is more important that the boxes be level, than be the same distance from the windows. The flowers will grow and cover and gap at the top.
In other words, you really can’t tell.
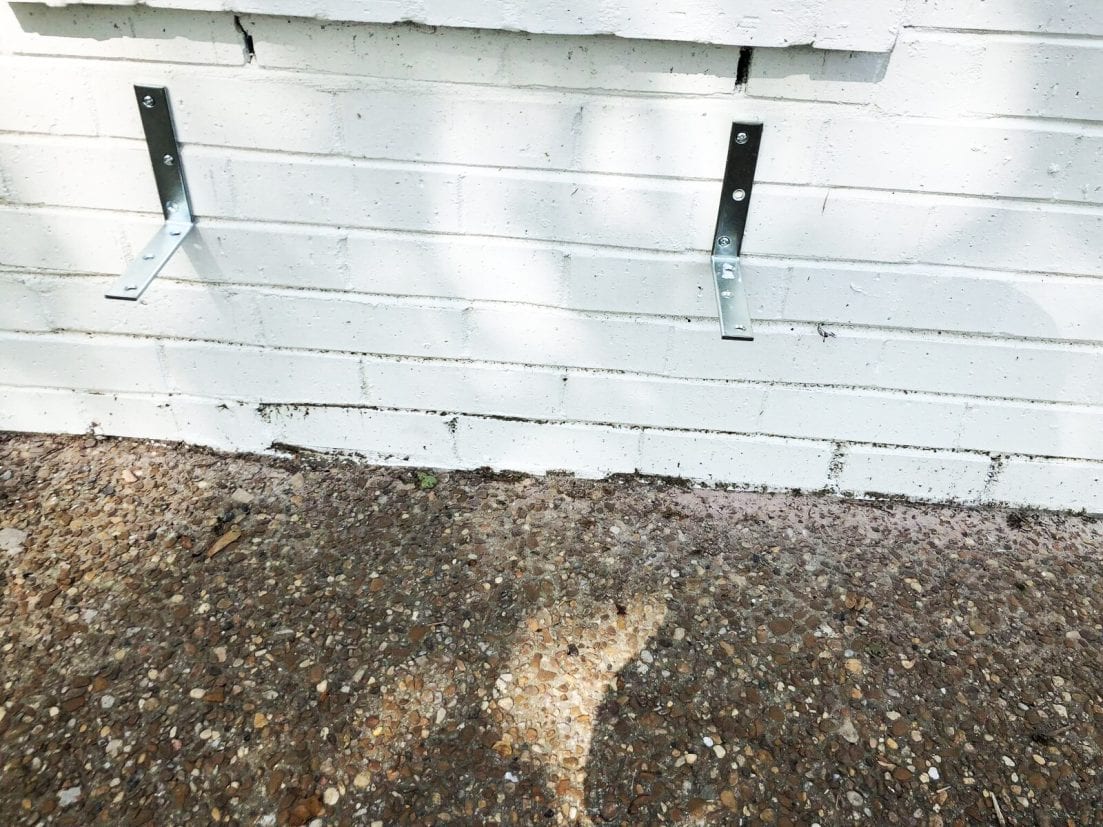
Once all the brackets are hung, you can place the window boxes. And if you want a little extra security, you can screw them in from the bottom.
We plan to rotate our flowers throughout the rest of spring and summer because of differences in the amount of light received, in the shade vs. the sun at different times of the day. So we chose not to anchor ours like that.
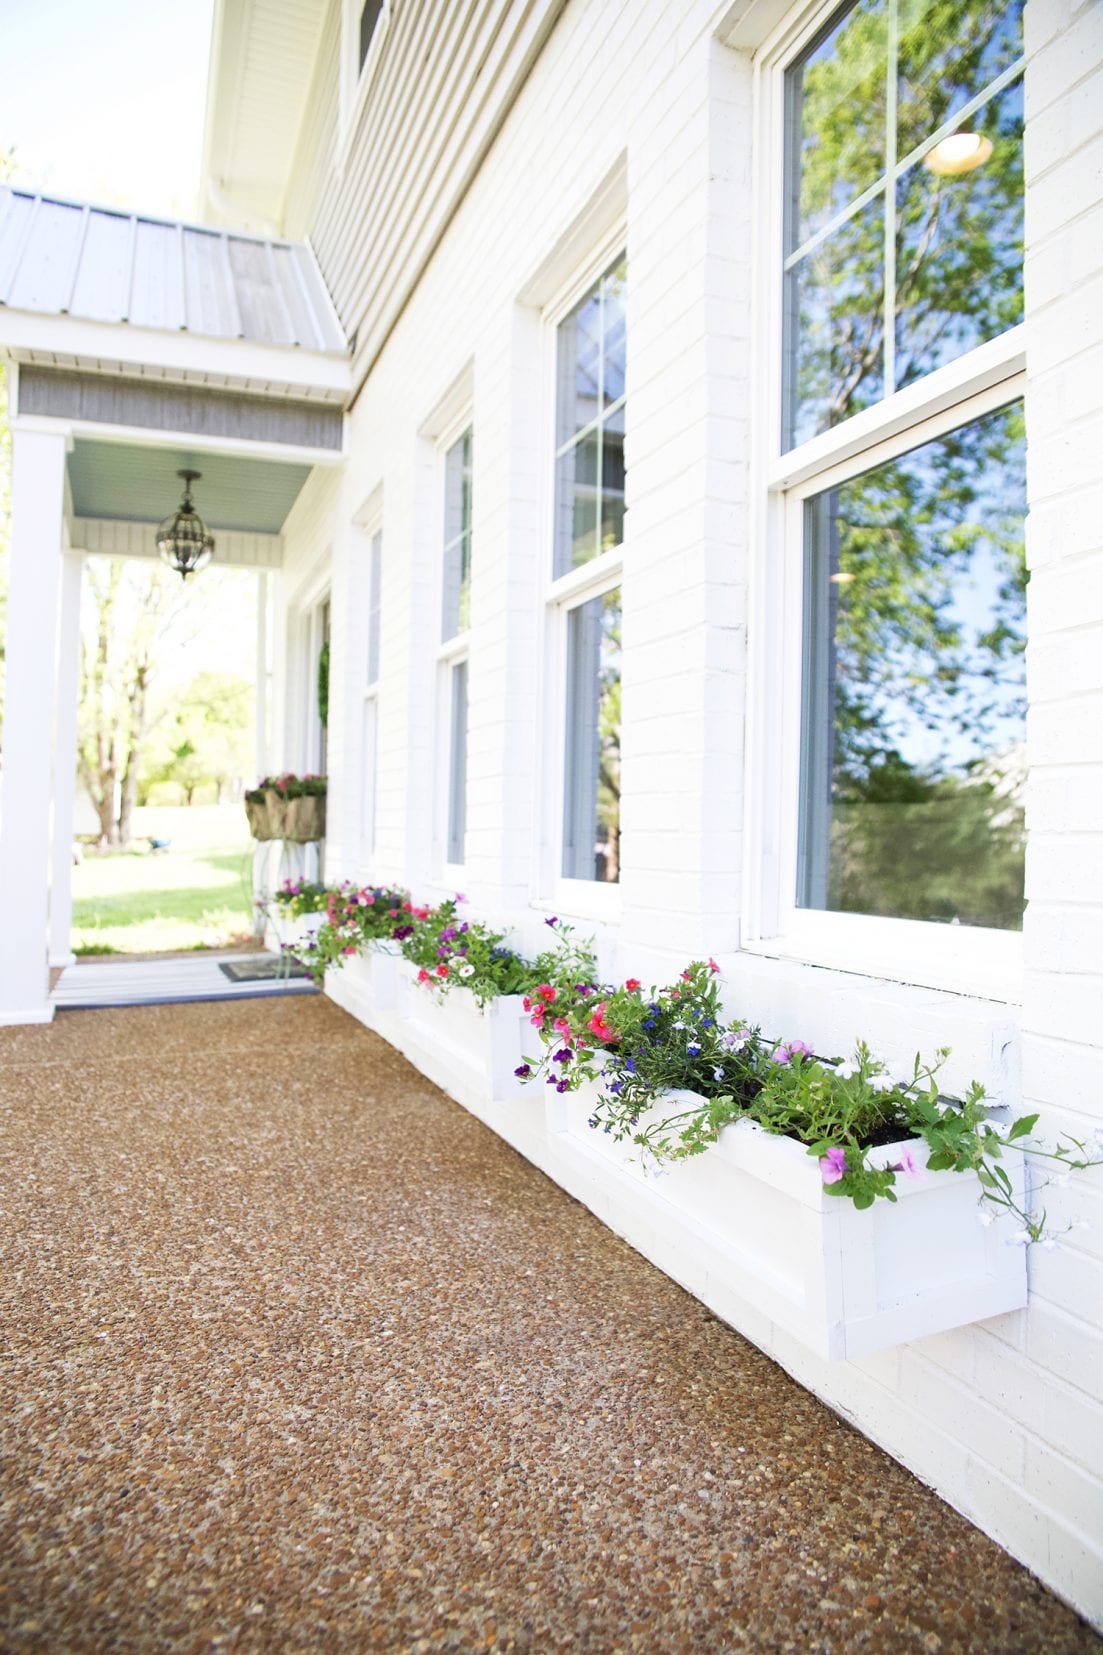
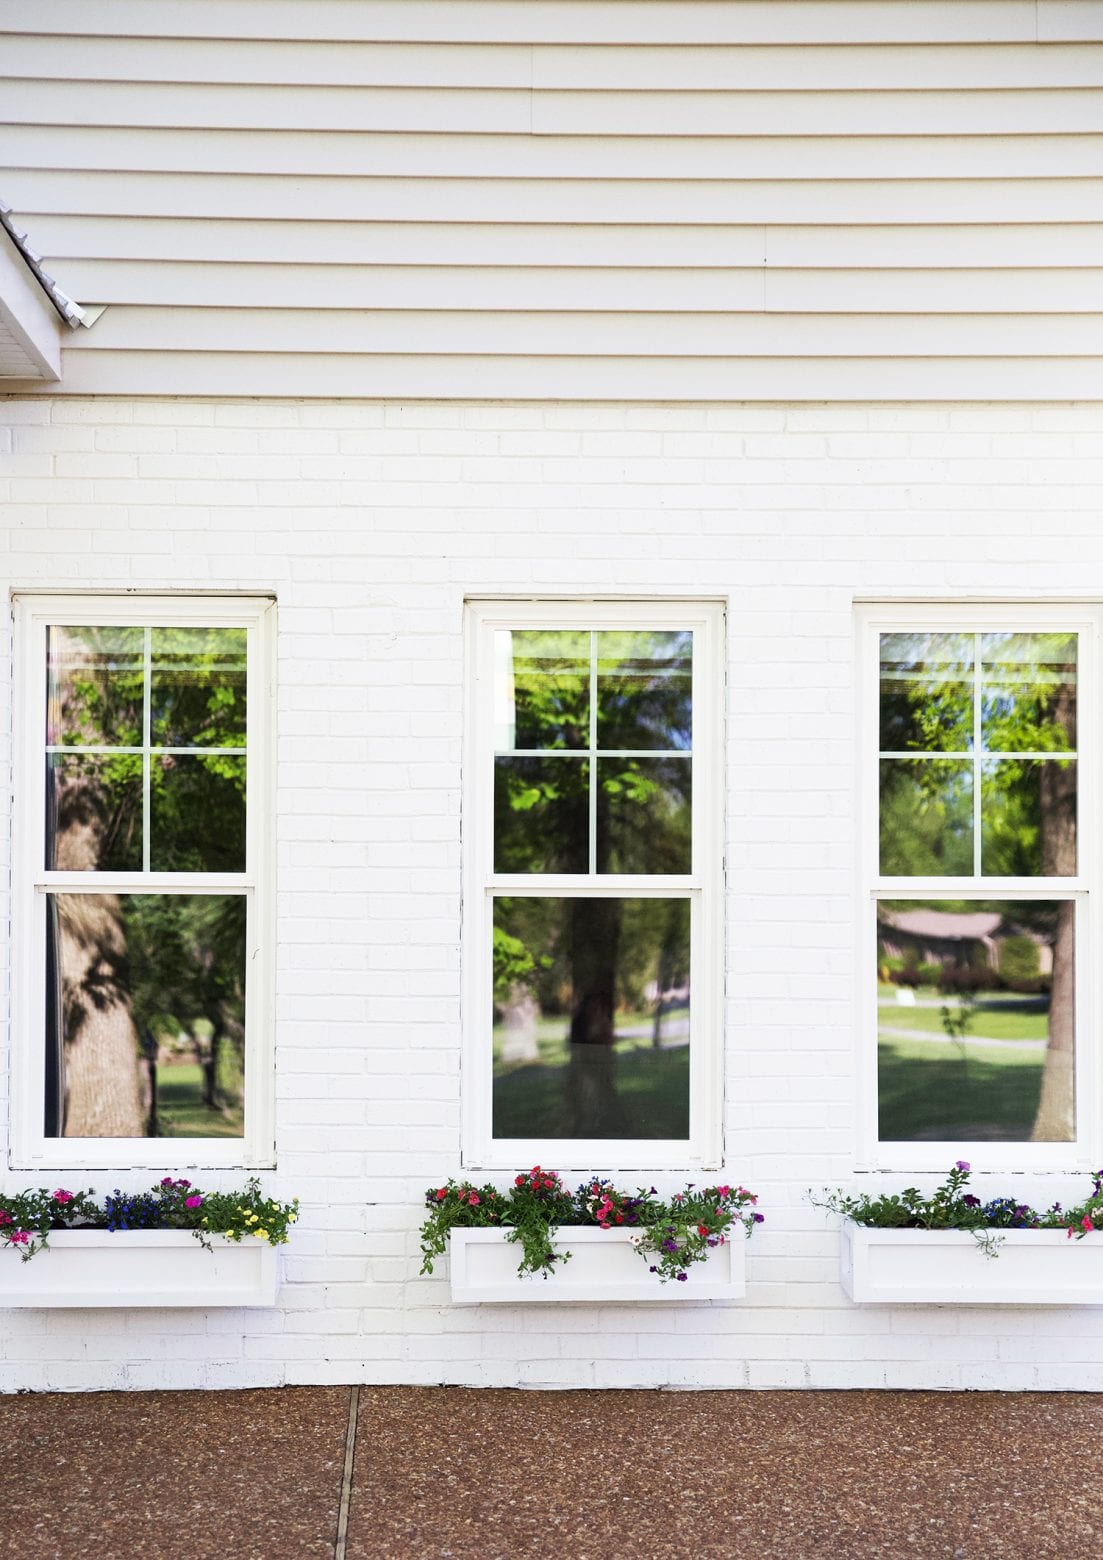
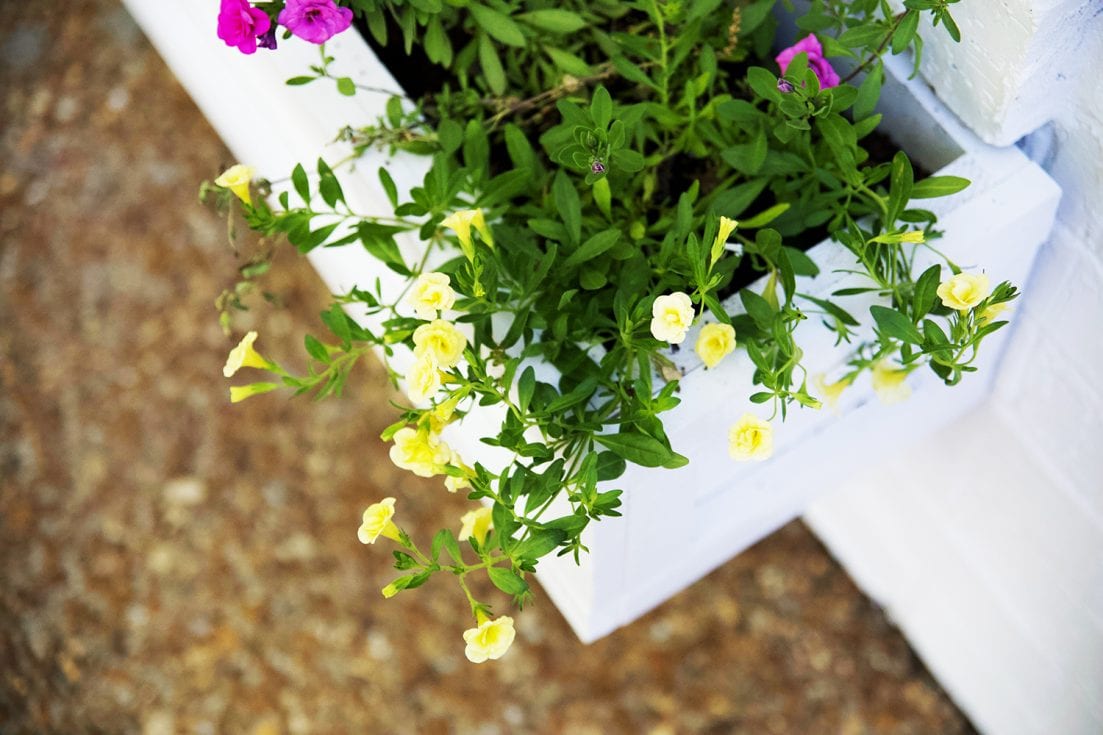
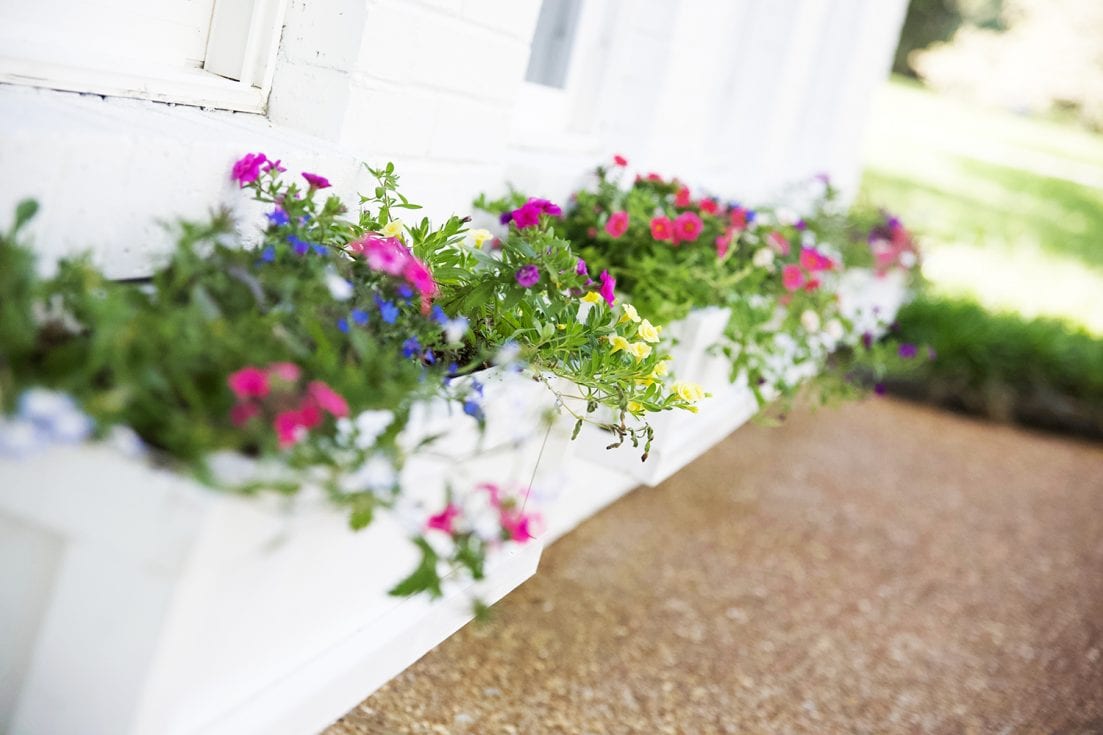
We planted our flowers, placed them under the windows, and we were finished!
A great afternoon project with lots of curb appeal!
As always, let us know if you make them. We’d love to hear.
And let us know if you have any questions!
Have an inspired day!

I didn’t see any reference to drilling drainage holes. Drainage is essential for plant health and extends longevity of the wood.
Yes! Drill those holes!
Love this! These added so much character and beauty to the side of your house. I really can’t believe how far you guys have come. I read a lot of blogs but you are by far the most talented.
Agreed. And those windows though!
I saw Jamin putting those together the other day. I had no idea what he was doing, but then saw the finished hanging and thought THAT’S what he was doing!! Haha! SO nice! Super cute! And a very great little touch to the already beautiful home!!
HAHA! SO funny. They’re up! ;} Now if only I can remember to water them like, all the time 😀 The Tennessee summer heat is HERE!
Hi! I know this post is from many moons ago, but I was wondering what part you use the caulk on – all of the seams and it looks like maybe where the nails/screws are? Thanks!
Hey! Yes. Wherever you feel like it’s needed will make them last longer. Hope that helps!
just finished mine and they looked great.
These are beautifully done – thank you so very much for sharing, Jose! Way to go!