
make your own hexagon magnets
I don’t know what it is about the weather and all things a little beyond the norm for a daily forecast… but when it rains, it makes our kids carazy. Like, clawing the walls, jumping across the sofas to avoid hot lava, wrestle on the ground, stick them in a box with a sign that says ‘free children to a good home’ and leave them in front of Walmart, wild.
There has to be some scientific discovery out there that states that the low pressure system meeting with a high one has an influence on their hippocampus. Update: I had to google hippocampus because I am not a neurosurgeon. I also know nothing about pressure systems other than it gives me bad hair, and I learned more in homeschool this year than they did. It just sounded important and that’s how I roll.
So I decided that since we want to keep said children and not hand them out illegally like rabid puppies -I mean, they’re kind of cute, and the older ones are getting to that point where they help me dust and put up the laundry, so duh, free slave labor- I came up with a fun little project we could tackle this weekend.
Make your own hexagon magnets!
I know. I’m so random. Kids… you’re totes outtacontrols. Time to make some hexagon magnets!
Everyone needs some hexagon magnets.
Stay with me.
Here’s what you’ll need:
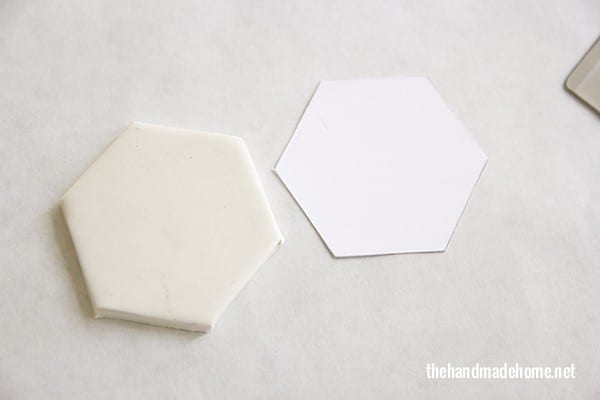
Sculpey Clay, This little hexagon template {I have large + small – these I made with the small} A jar {or other surface for rolling it out} A spatula or dull knife {for cutting}.
After cutting out your hexagon shape, simply soften some of the Sculpey in your hands and roll it out like this.
Then cut around the shape. I was careful to lift each one off of some wax paper and onto a baking sheet covered in foil. Tada! Hexagon central, baby.
I simply followed the directions on the back of the Sculpey box.

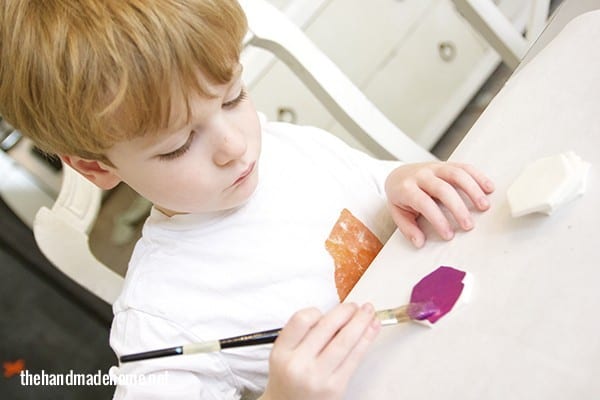
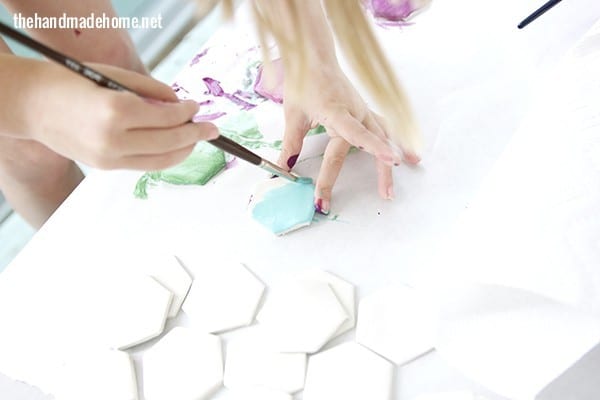
And then it was time for the fun part.

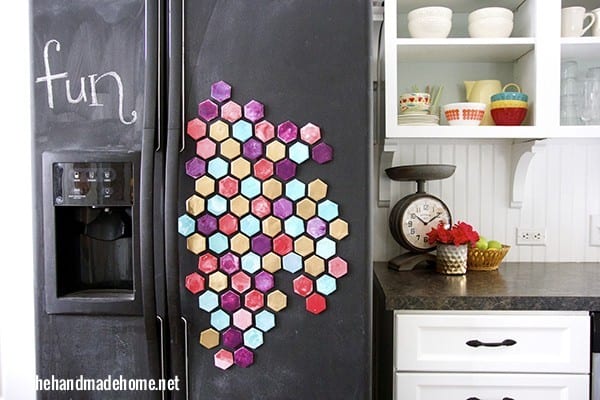
We used four main colors for a fun little color scheme, but the possibilities are endless.
When we were finito, I simply stuck some of these on the back {super small magnets – I have to admit I had no idea they would be so tiny because I don’t read descriptions and this was my punishment but they worked fine …I would recommend larger especially if you have younger children- these make me nervous with really small children} With this glue. {Let dry for a little over an hour}
This may seem like the siliest thing ever, but they had so much fun making little images with these things.
I kind of want to add more shapes.

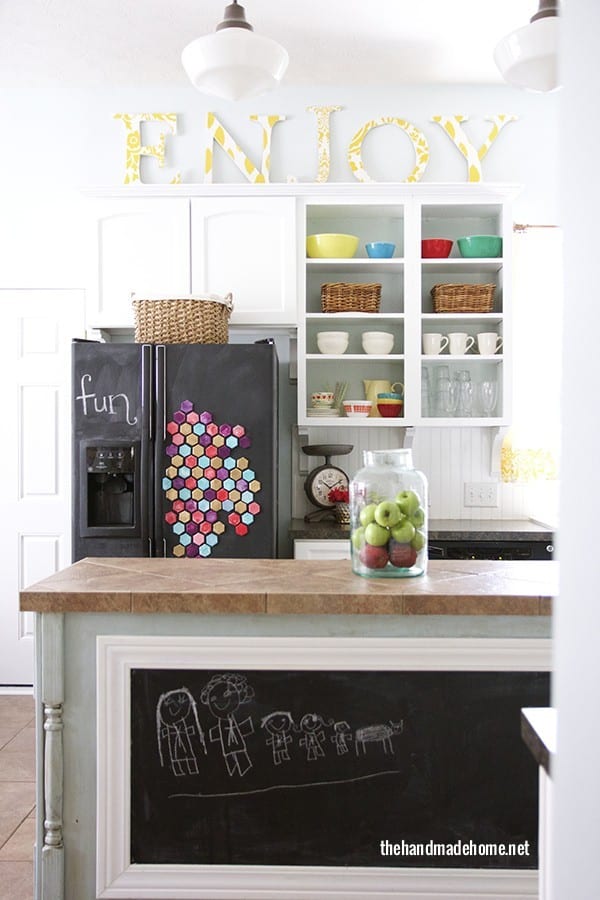
And when they’re not in use, they make a really cool little decor for the fridge. ;}
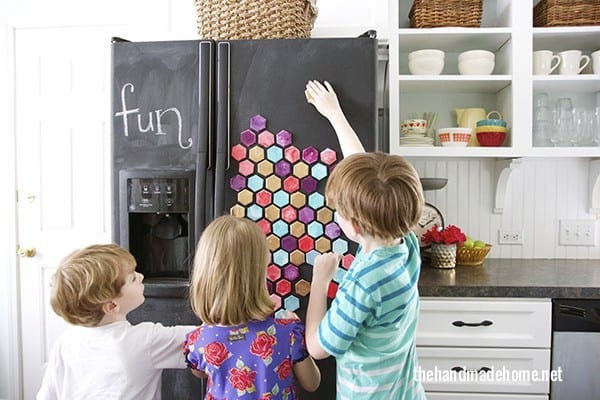
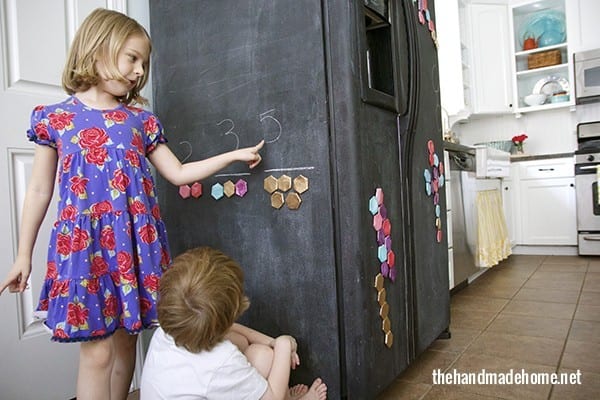
Emerson and Malone are even using them for math problems.
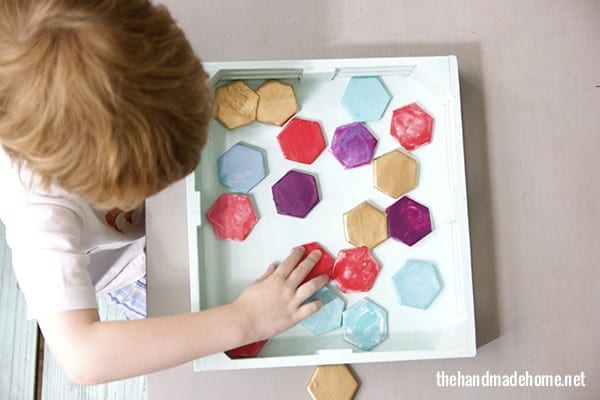
And I painted an old Melissa and Dug puzzle holder, so when they’re not in use on the fridge, little hands can use them at the table. Great for counting exercises!
And that, ladies and gents, is how we kept the kids from tearing our house down this weekend.
For five minutes, anyway.
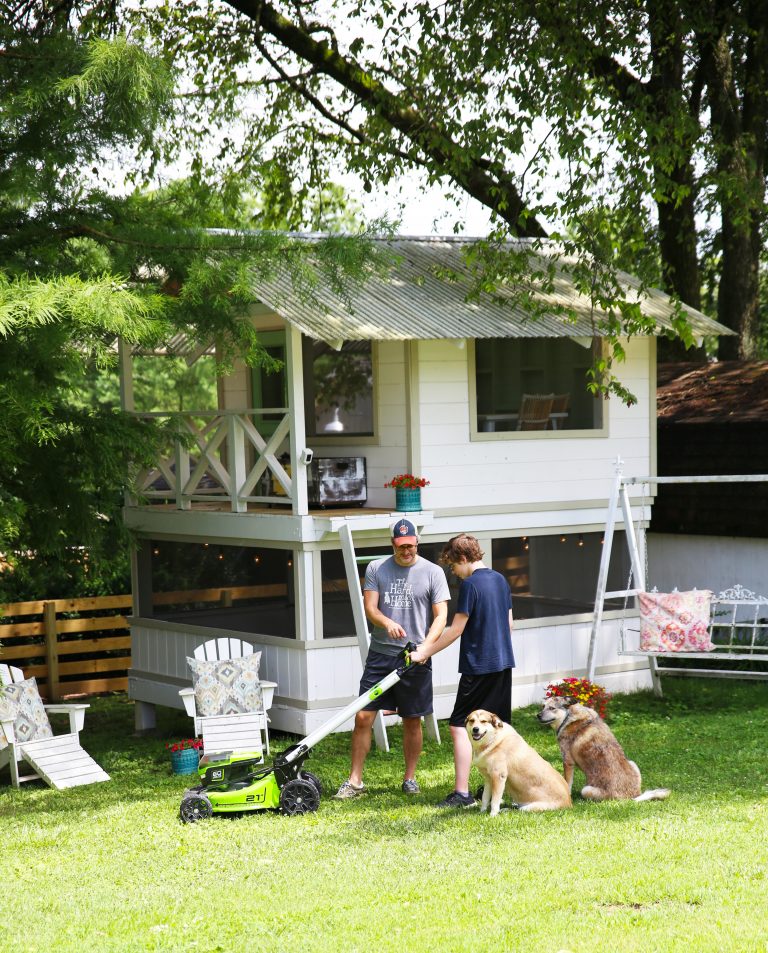
{Our fridge is painted in chalkboard paint… if you’re new to these here parts. It has held up great, It is really not messy, and the kids love it. See the how to, here!}
As always, let us know if you try it!
Have an inspired day!


these turned out really cute. great kids project.
Thanks, Erin! ;}
These are lovely! I love crafting projects that you can do with kiddos but also use as decor. Also, Miss Emerson’s dress and hairstyle are delightful 🙂
Haha Thank you, Kyla. She BEGGED to cut her hair for months. Daddy wasn’t thrilled and then he saw how cute it is. ;} Now she wants to pierce her ears and he just may die. ;}
Ask any teacher and they will confirm (scientific or not) that low pressure systems AND wind totally affect kids’ behavior!!!!
Very fun! I love them!
Big fun for little kids 🙂 This profect turned out great!
I love this fun idea! My daughter and I made mosaic tiles out of sculpey clay years ago. I am sure I still have lots in my stash 🙂
Definitely pinning this for the next rainy day!
What a great, simple project. The color scheme makes such an impact; I love when kids things can look so “designer-ly.” And, your black chalkboard-painted fridge gives me hope for my black fridge 🙂
What kind of paint did you use?
Hey! Just a standard acrylic paint from the craft store ;}
So did you paint before you baked the clay? Or after?
Hey Erica! After they were baked. ;}
Saw you on Nate Berkus this morning absolutely love love your home!
I am a new fan so excited about seeing all your ideas!
Thanks so much, Linda! So fun that they’re still running that show!