
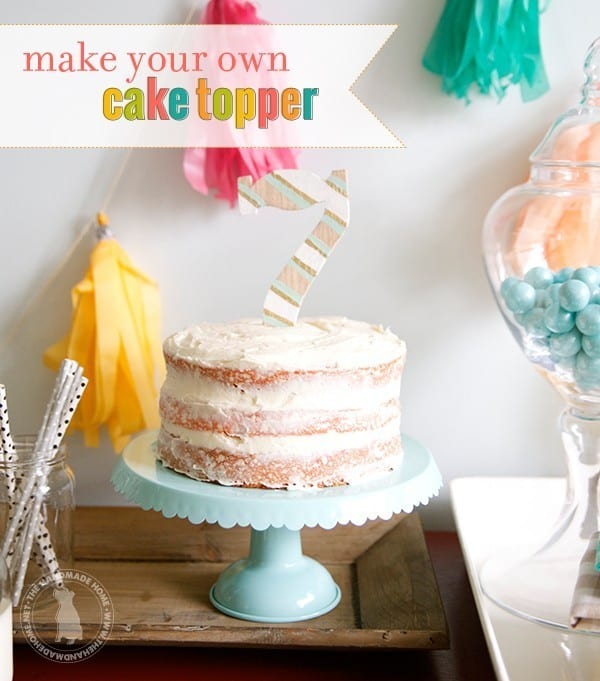
make your own cake topper
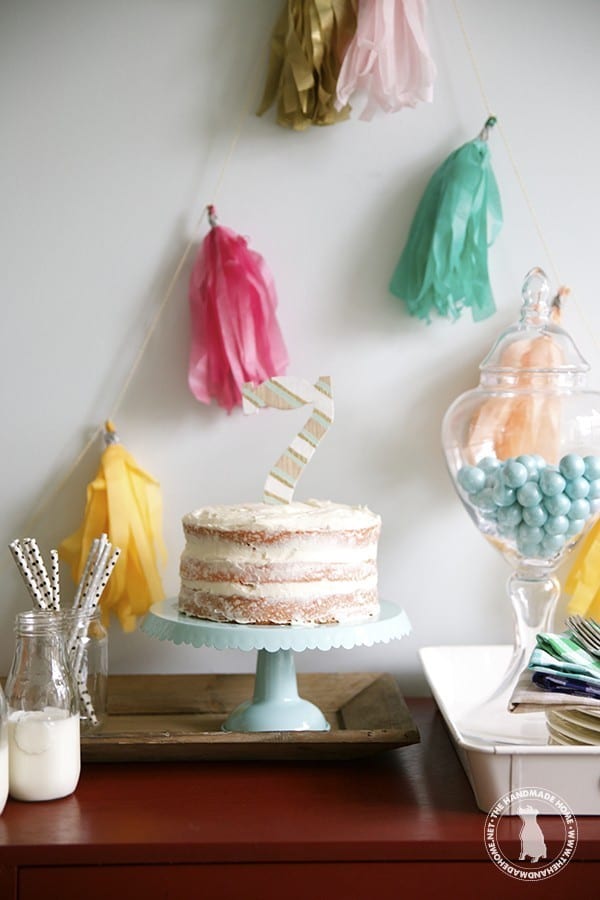
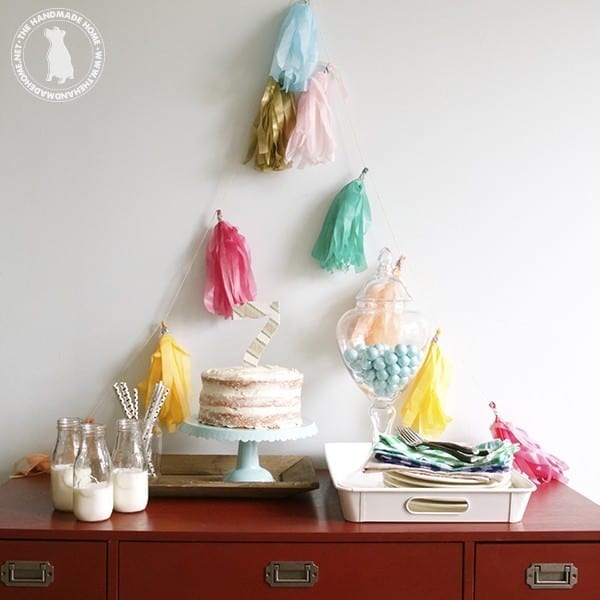
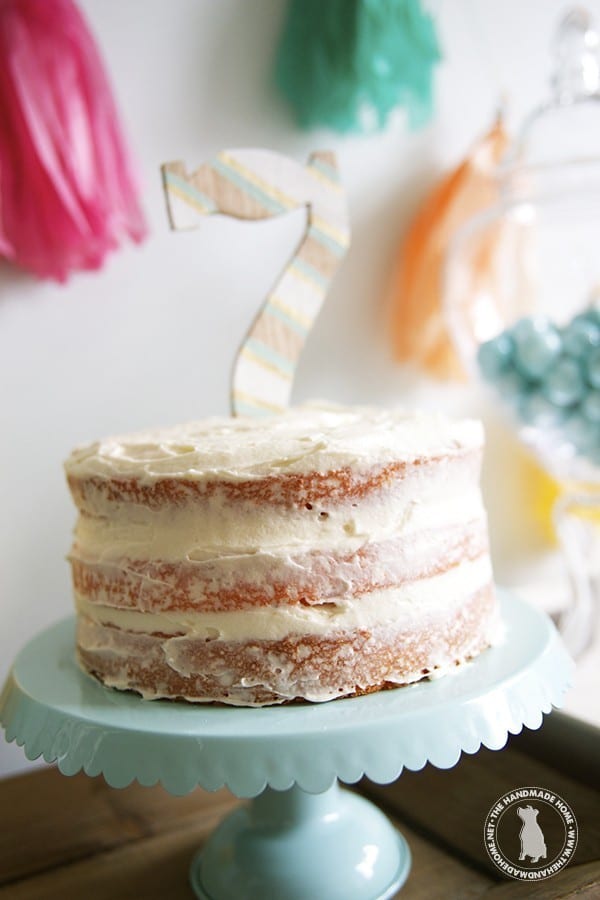
Today we wanted to share an easy project for a holiday/birthday/anything idea you may have coming up. A few of you guys wrote in and asked where we found our cake topper on our nearly naked strawberry cake recipe from last week.
We knew we wanted something cute and simple and affordable for the top of little gal’s birthday cake, but couldn’t find what we were looking for. So, of course, we decided to be nerds and make one.
So without further ado, here’s how we did it: make your own cake topper!
It’s basically a smaller version of this project that we shared forever ago for making your own letters, but even if you don’t own a saw or you’re not feeling up to attempting to cut your own, we’re sharing an alternative today on how to make your own!
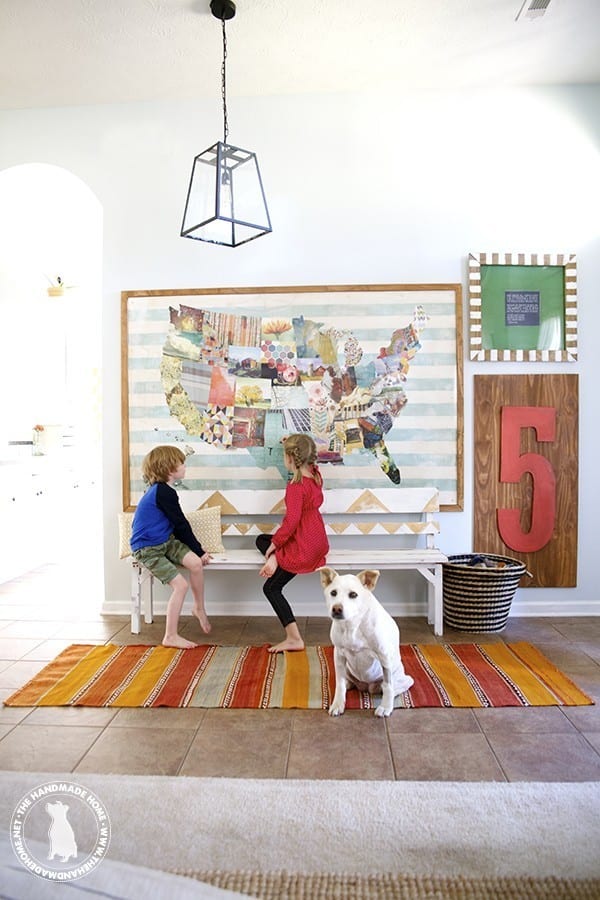
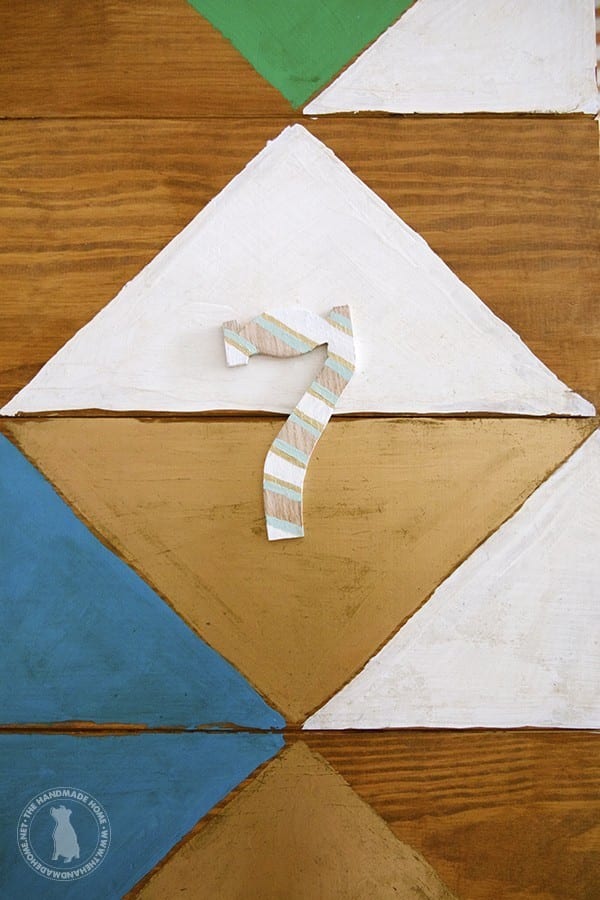
This five {below} is another version of the same thing, mounted on a board-we’ve loved these little custom art pieces used in different ways around the home. From gifts, to cabinet toppers to art for your home, the possibilities are kind of endless.
So print a number {or letter or shape} of your choice on printer paper to the desired size. Cut the shape out of the paper, and lay it down so you can trace around the edges. You can even freehand it, as I did here. I made this part of the 7 a little longer, so it had plenty of length to be anchored in the cake without toppling over. You may want to allow a little for sitting in the cake, or an additional piece below it that will be hidden for it to sit on as a part of the piece. For instance, we would add a little straight piece below an 8, so that the 8 could be seen clearly.
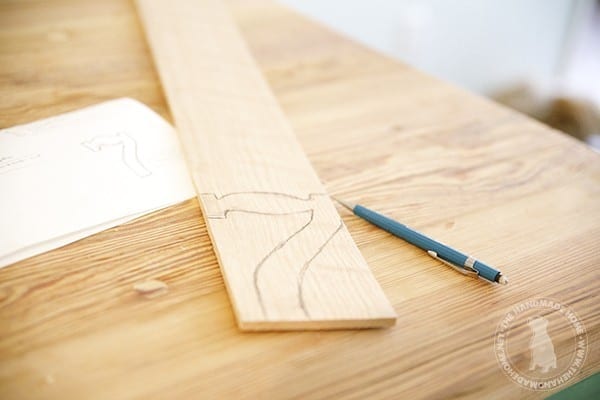
This is an oak board {left over from our coasters project} at our local home improvement store for a whopping 4.50. It’s dimensions are .25″(thicknesss) x 3.5″(w) x 36″(l) We loved the idea of natural wood combined with paint for the finished look, and it was already sitting in our garage.
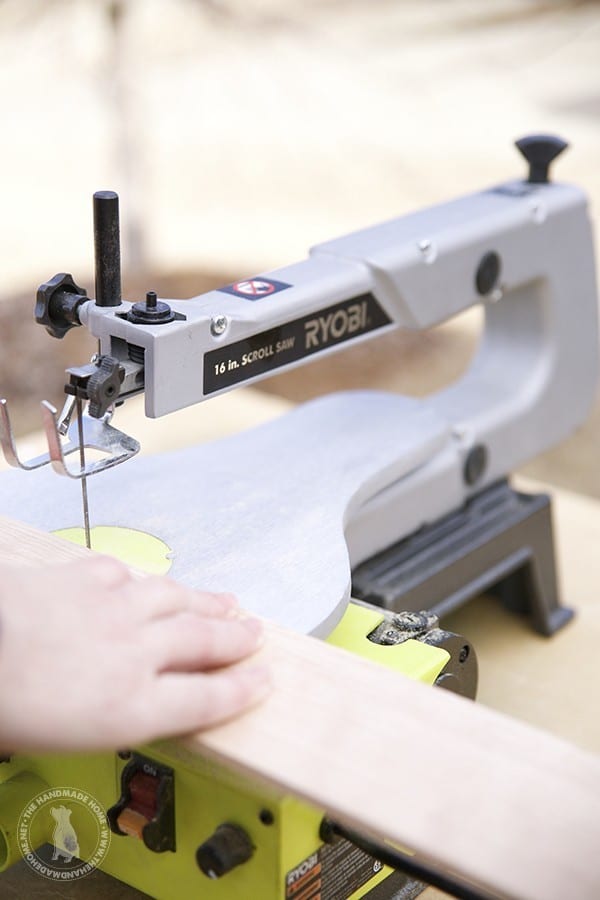
When we were happy with the shape, we took to it with a scroll saw, and followed the lines to make our cake topper. We sanded down the edges a little, and tada! We had our number, ready to go.
If you’re not comfortable with wood and saws and all those shenanigans, you could do this with some foam core, and an X-Acto for the same effect. And if you keep your eyes peeled at your local craft store, sometimes you can luck out and find these little pieces in the wood section. Just a little thinking outside of the saw box for anyone who is a little hesitant to use one.
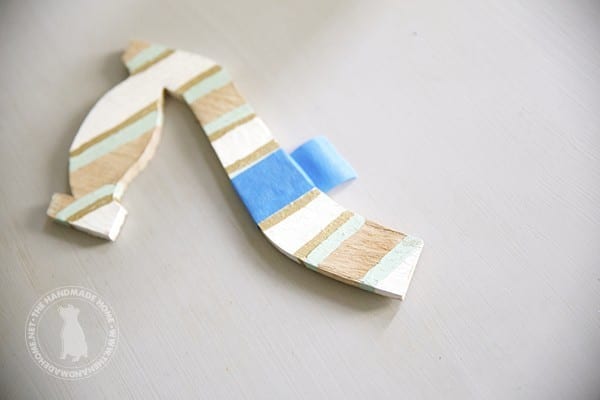
When our seven was ready to be painted, we added layers of paint by taping it off with painters tape at a diagonal angle, and adding stripes all the way down.
I would recommend finding a non-toxic paint if you plan to gift these, or stop painting at the base so you don’t die. But since I’m lazy, reckless, and aint nobody got time for that, I just painted it in whatever, forgot to stop painting at the base, and wrapped the base in saran wrap for the time it was in the cake.
You totally get to learn from our mistakes.
And no one died.
So there you have it! An easy way to make your own little topper – imagine the possibilities of these, and the keepsakes they are for years to come! The boys are already asking for their own.
As always, let us know if you try it… or if you have any questions. Have an inspired day!

Yay! to not dying! That always makes a party awesome! That, and a super cute cake topper of coarse. Loved it!
Yay! to not dying! Nothing ruins a good party like death. LOL Super cute cake topper!
HA! Thanks Pam! YES. I would like to not poison people when they come to my house to eat cake. ;}
Love it!
It’s amazing how everything in your home coordinates all the way to the cake topper! It’s beautiful and you can always tell what comes from The Handmade Home.
Awe thank you Juliana! 🙂