
how to mortar rub brick {on a fireplace}
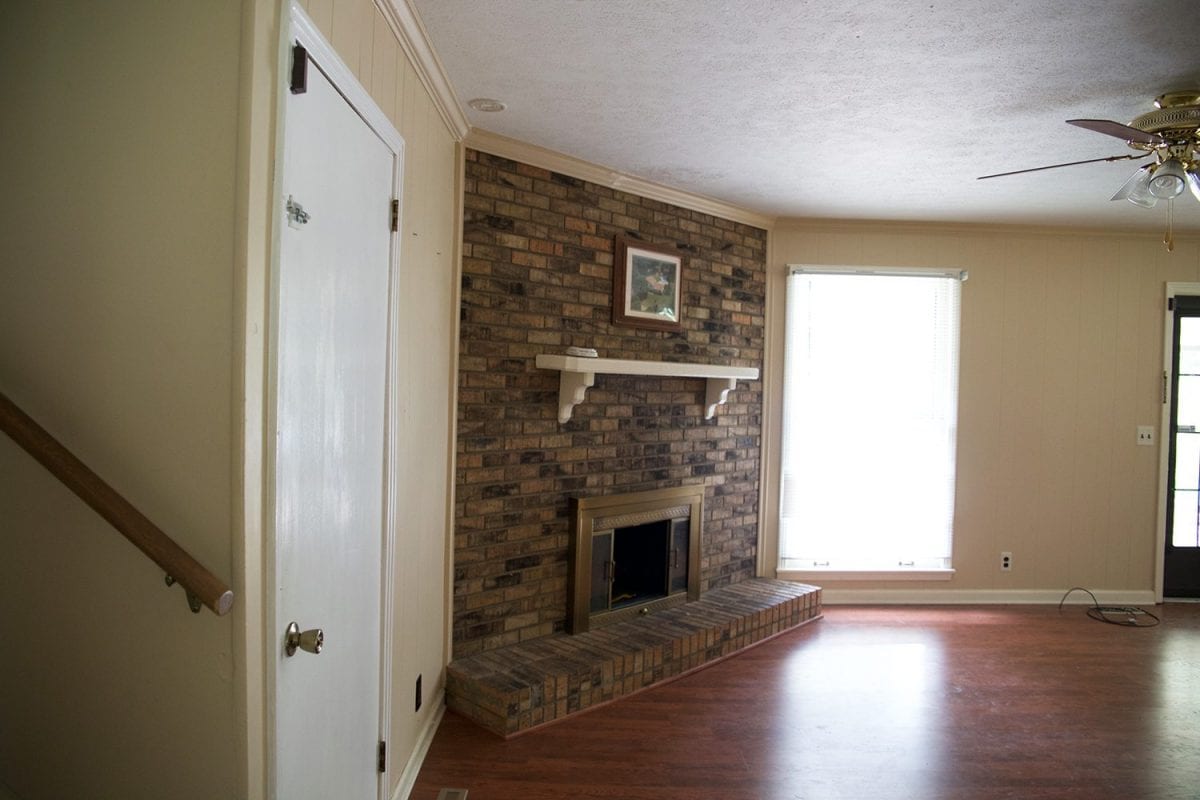
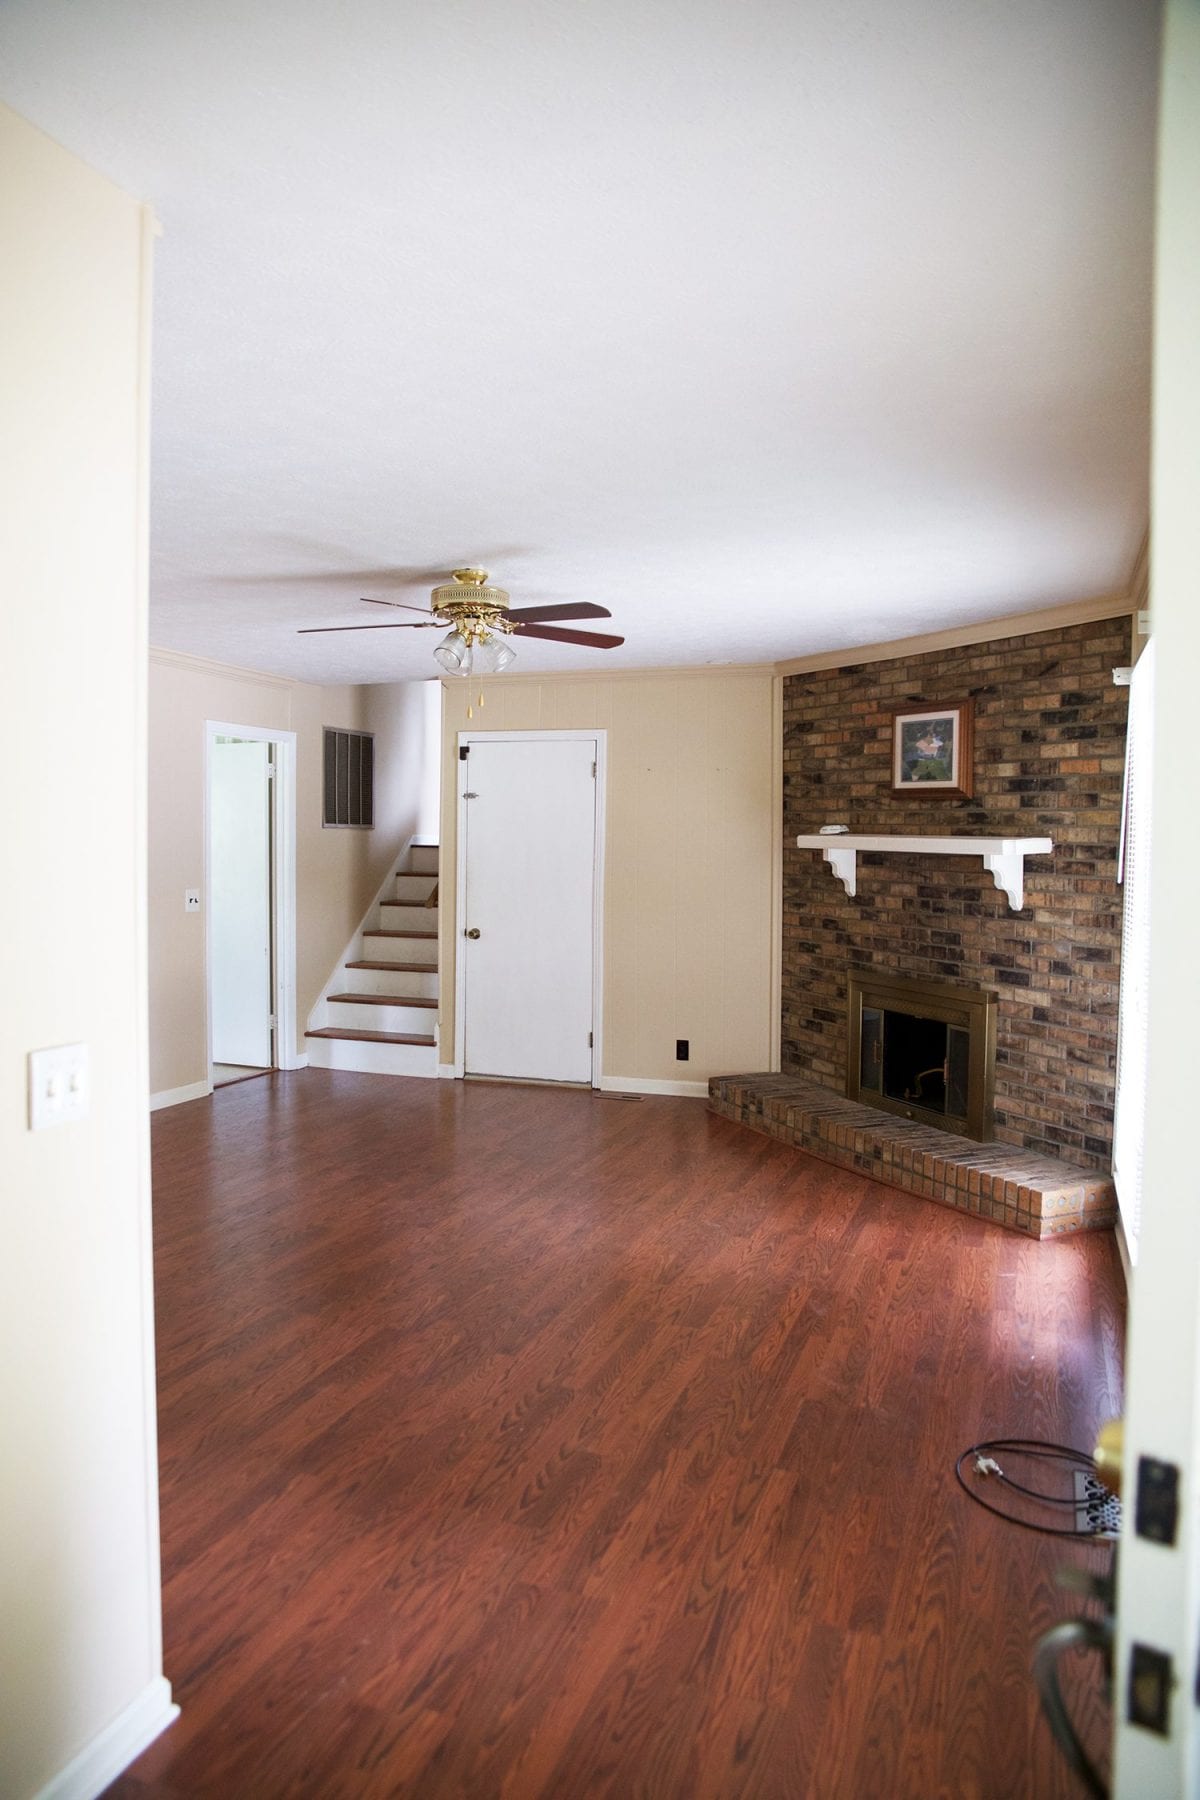
If you remember from our post on fireplace plans, when we first started, the mantel looked a bit like this. Today we want to show you how to mortar rub brick on a fireplace and how it turned out.
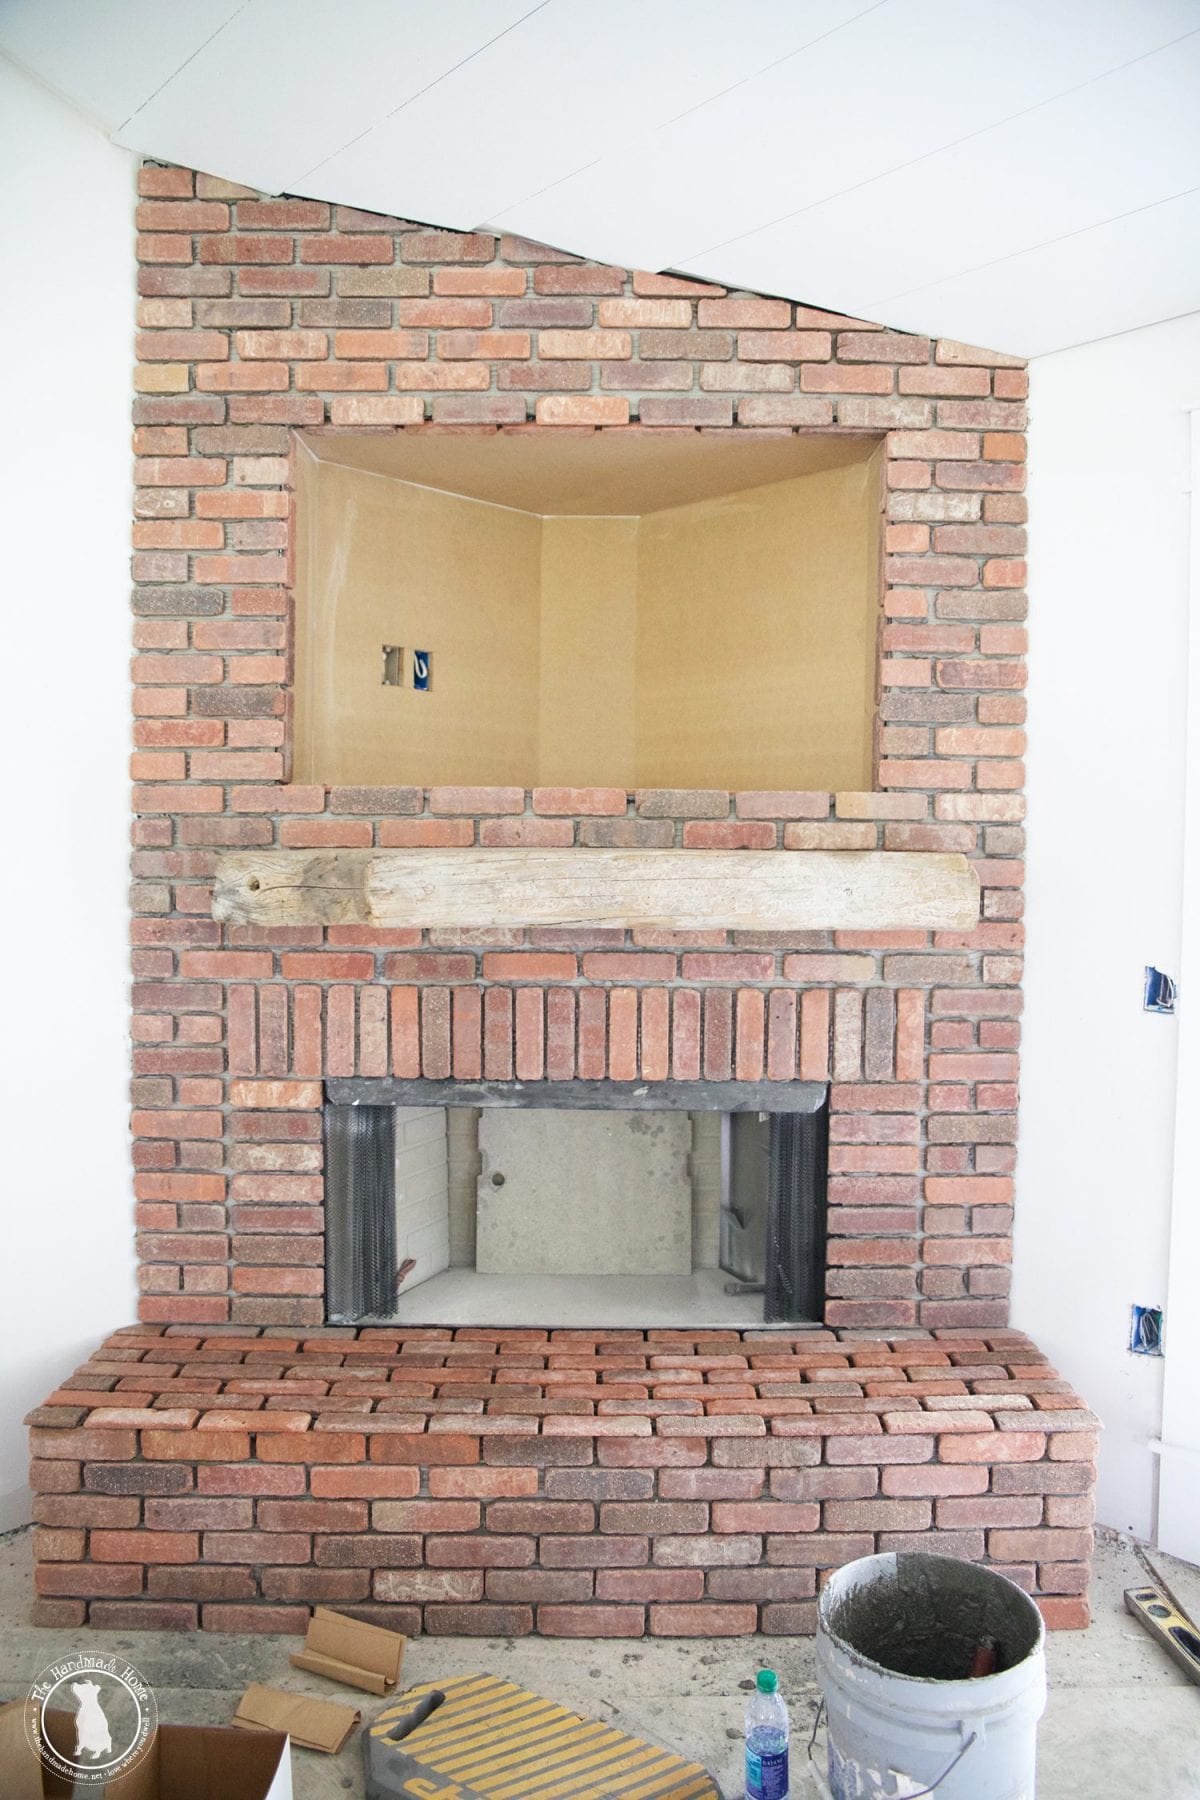
And right now, it looks like this.
We originally had plans to salvage the old fireplace, and treat it with a mortar rub on our own. I’d researched it and everything, ready to take it on. But when the drywall came down, the old fireplace had a few plans of its own…
It was basically ready to topple. And when it did, we were fine with that because we found an old leak with some rotted boards behind it that needed to be replaced. And we got a fresh chance at a new look. The proportions weren’t really working all that fabulously for us before, anyway.
At least, that’s what I told our budget. My sad little injured, kicked-while-it’s-down abandoned puppy of a budget. Before it started reeling from possible septic issues. {We’re literally sweating bullets over here, waiting to hear back.} I’m nursing it back to life in the corner.
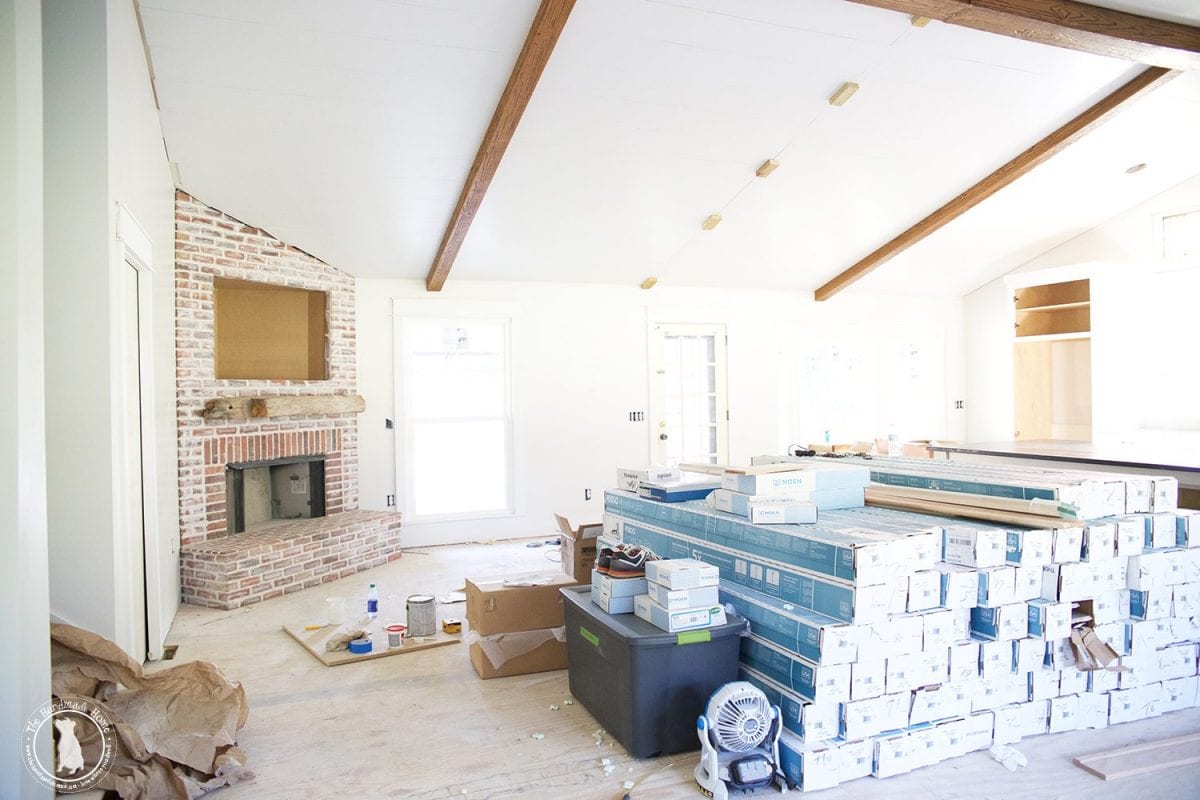
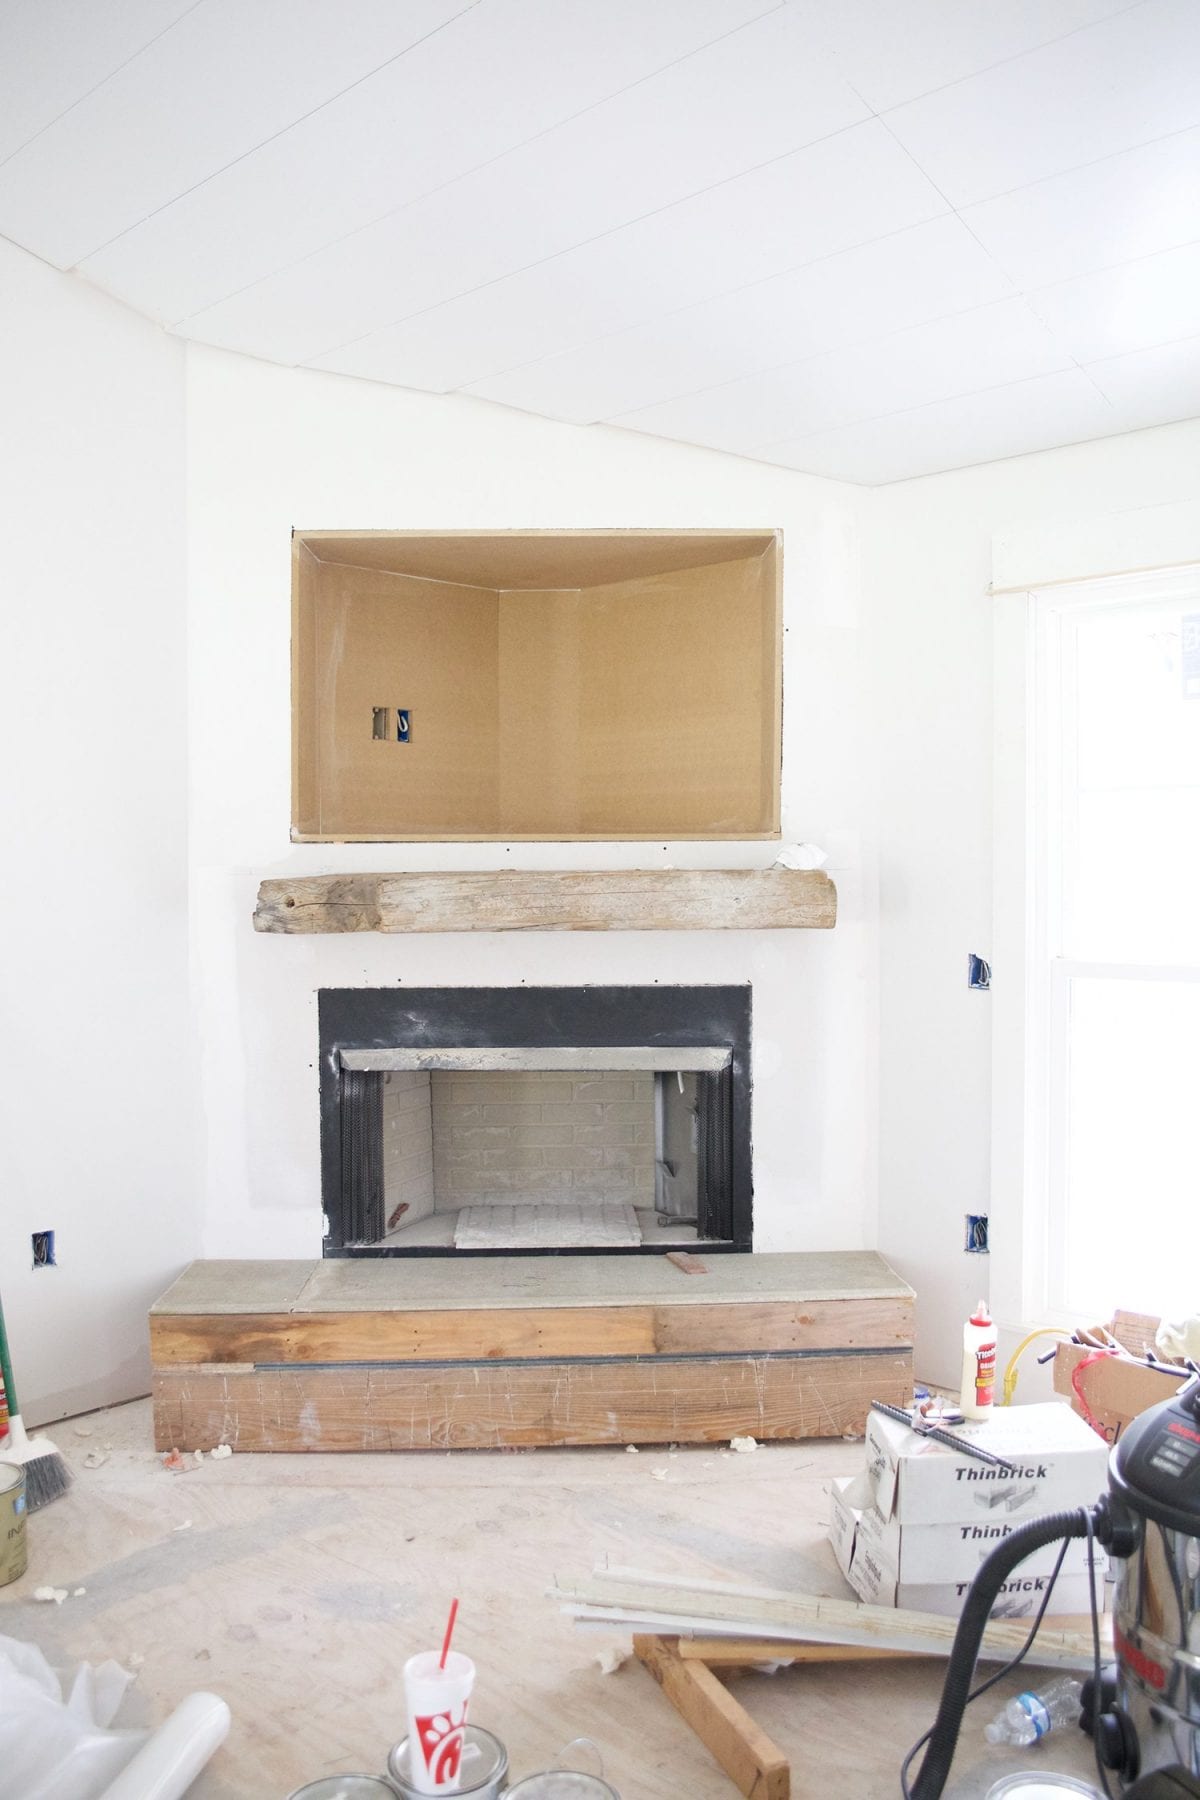
And so we placed the firebox, had a little drywall, and built up the hearth underneath.
When they came to do the windows, we got our {new favorite} brick guy to take on the fireplace for us, as well. It wasn’t too much of a difference in labor cost since he was over here anyway working on the outside, and since we’ve decided to take on the ceilings, walls and floors {and now most of the basement when we’re allowed to move forward} ourselves, we could use a little help. But there’s a reason we don’t DIY everything. I mean, let the pros do their thing. I wasn’t about to lay my own brick. I’m sure I could figure it out… I’m just over it.
We have been educated this round.
how to mortar rub brick on the fireplace – first things first, the brick
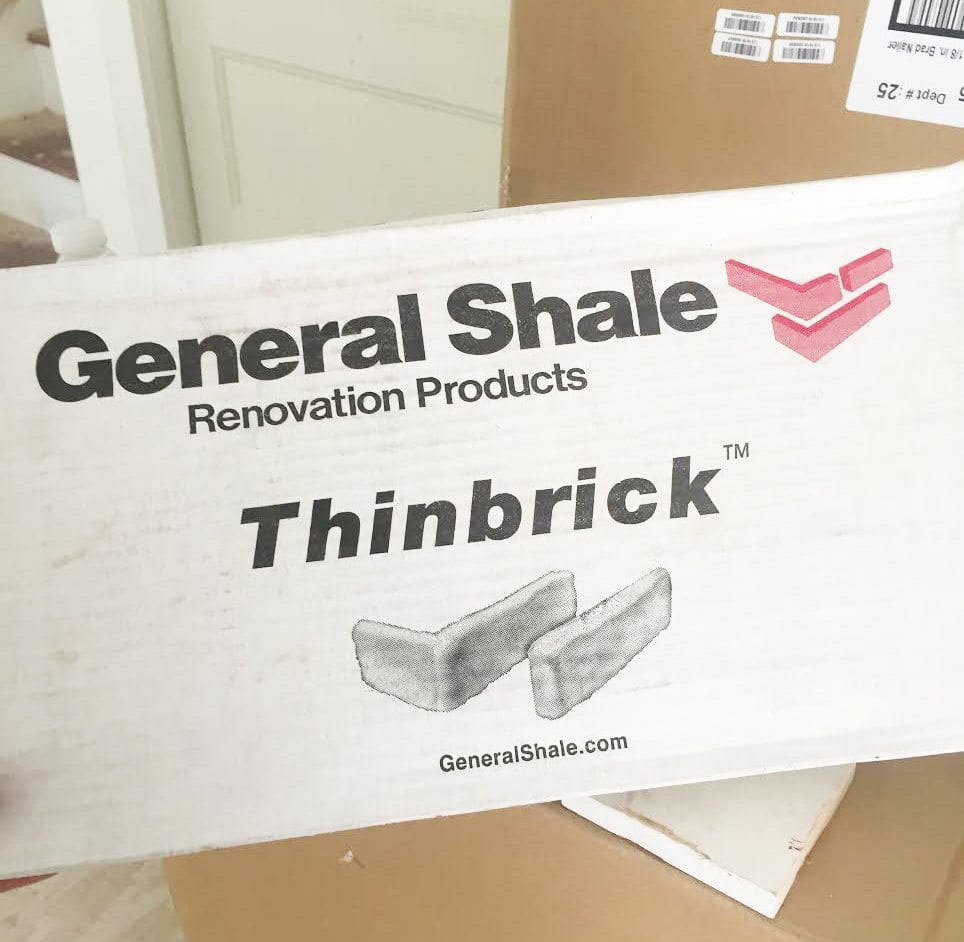
We decided to go with this fabulous thin brick, for those of you who were asking. Which is perfect for all things fireplaces and walls. It also took a little weight off these floors.
So when the bricks were laid, we were ready to begin. I shadowed our brick guy who is kind of an expert… I mean, he just knocked out Carrie Underwood’s house so that basically makes us fireplace twins. Something tells me I’m the much less attractive and much smaller and cheaper fireplace twin, but fireplace twins all he same. You’re beautiful in my eyes, fireplace. {I explained to our fabulous brick guy what we do and asked if he’d let me stand creepily over his shoulder.} It’s funny to ask the subs who’s homes they’ve done… I guess it’s pretty common here in Nashville. Our tile guy just knocked out Al Gore’s bathroom, so maybe we’ll get some good traffic to our little corner of the internet since he invented it and stuff.
Celebrities… they’re just like us!
Okay. I’ll stop now.
how to mortar rub brick on the fireplace – lets make it look old now
Let’s just take a moment and admire how glorious the brick is on it’s own. But we wanted a bit of that old world style, to blend in oh so prettily with the rest of our room. So when it was ready to begin, we started. Here’s what you’ll need:

- White Masonry Cement – of course it comes in lots of colors. We just wanted it white {shocker} so it mixed well with our other colors. Little fact: white is pricier.
- Joint Compound – these are your two main ingredients.
- A grout bag – this will help you squeeze it out. I said it looked like something a baker would use.
- Brick laying trowel – this will help with mixing and scooping/etc.
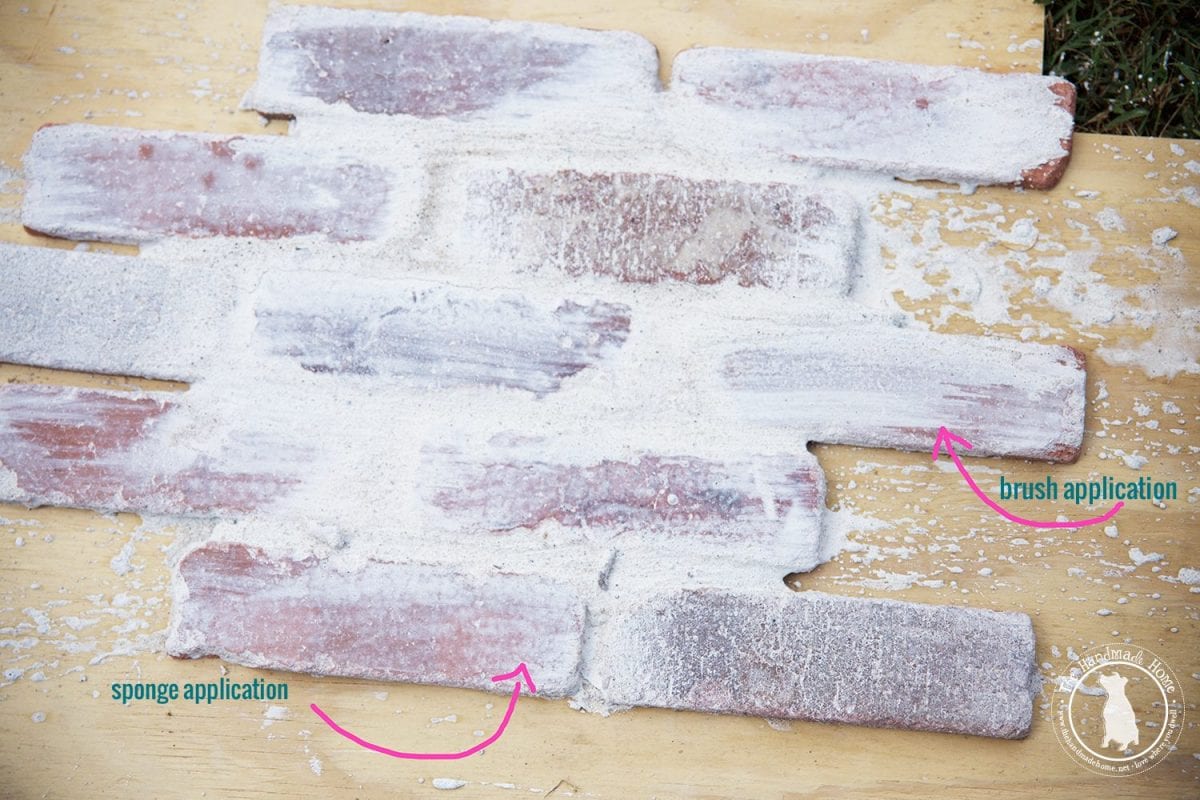
- Bricklayers brush – this helps you spread the mortar. If you want a thicker application, a sponge works, too.
You’ll also need: A bucket for mixing and water. You can also get really professional and get a mortar mixer if you want to impress your friends or go crazy in the kitchen. If you have a large job, I recommend one of these…
Something to protect your existing mantel/hearth/floors where you won’t want mortar.
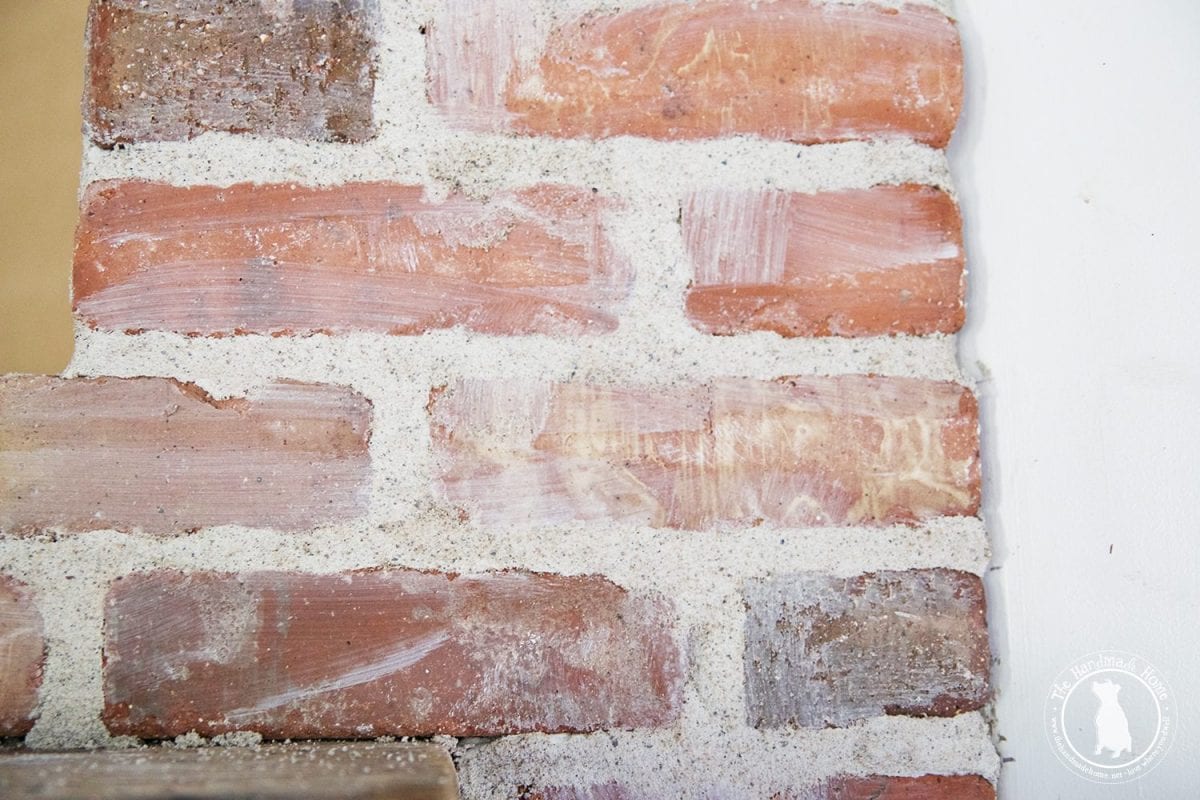
Before we even got started, we tried it out in the yard so he knew exactly what I was looking for. This is a heavier application. We decided to go lighter because I really liked the brick. And by we, I mean him. Because I was all, slather it on, suckas! But he was wise and waited. And he was right. Because it’s easier to add than to remove. I really like the brick just the way it is now. He told me if I wanted, I could always go back and add more later. But I’m showing you this so you know there are different routes to take in doing a mortar rub.
how to mortar rub brick on the fireplace – the application
Above, you’ll see that by using a brush application on a wet mixture, the brush strokes really show. And by using a wipe off application, it leaves a whiter look with the brick peeking underneath.
Whatever route you take, make sure that you practice on some spare bricks first. This will prep you to be familiarized with the materials, and you’ll know exactly which approach you want to take.
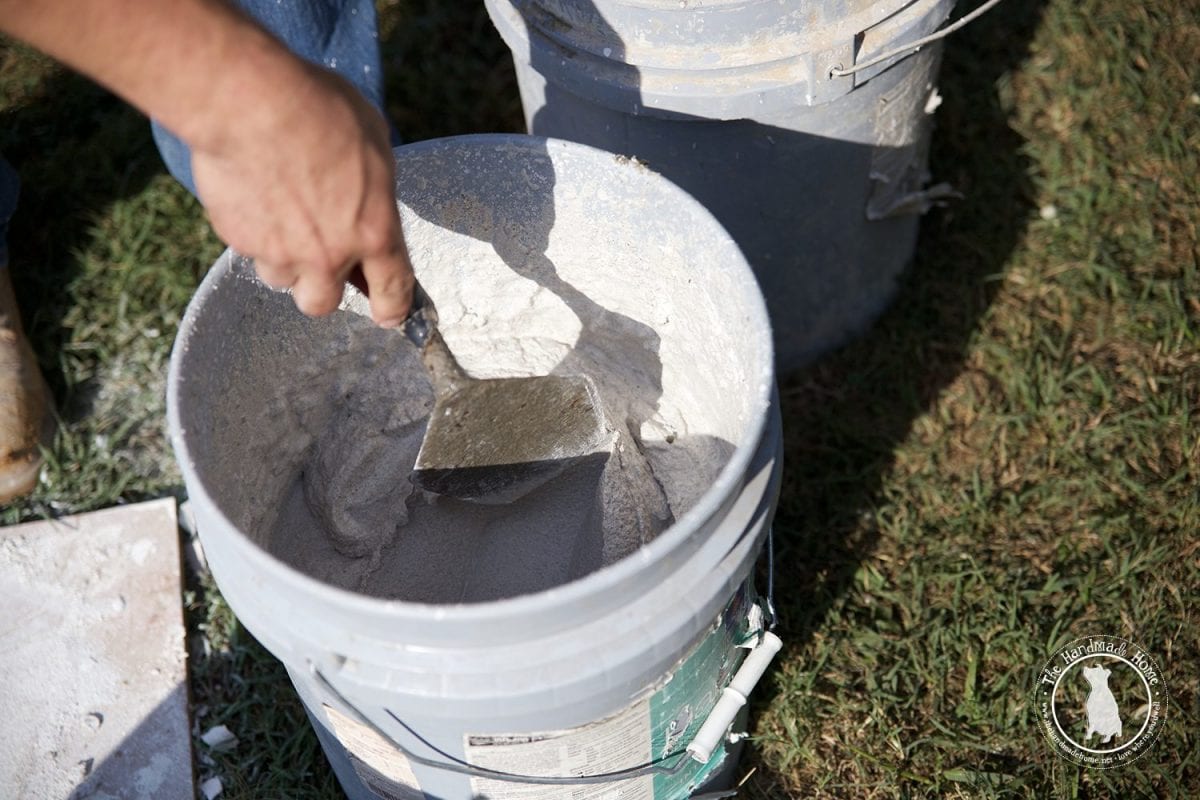
So first things first, mix your joint compound with your masonry cement.
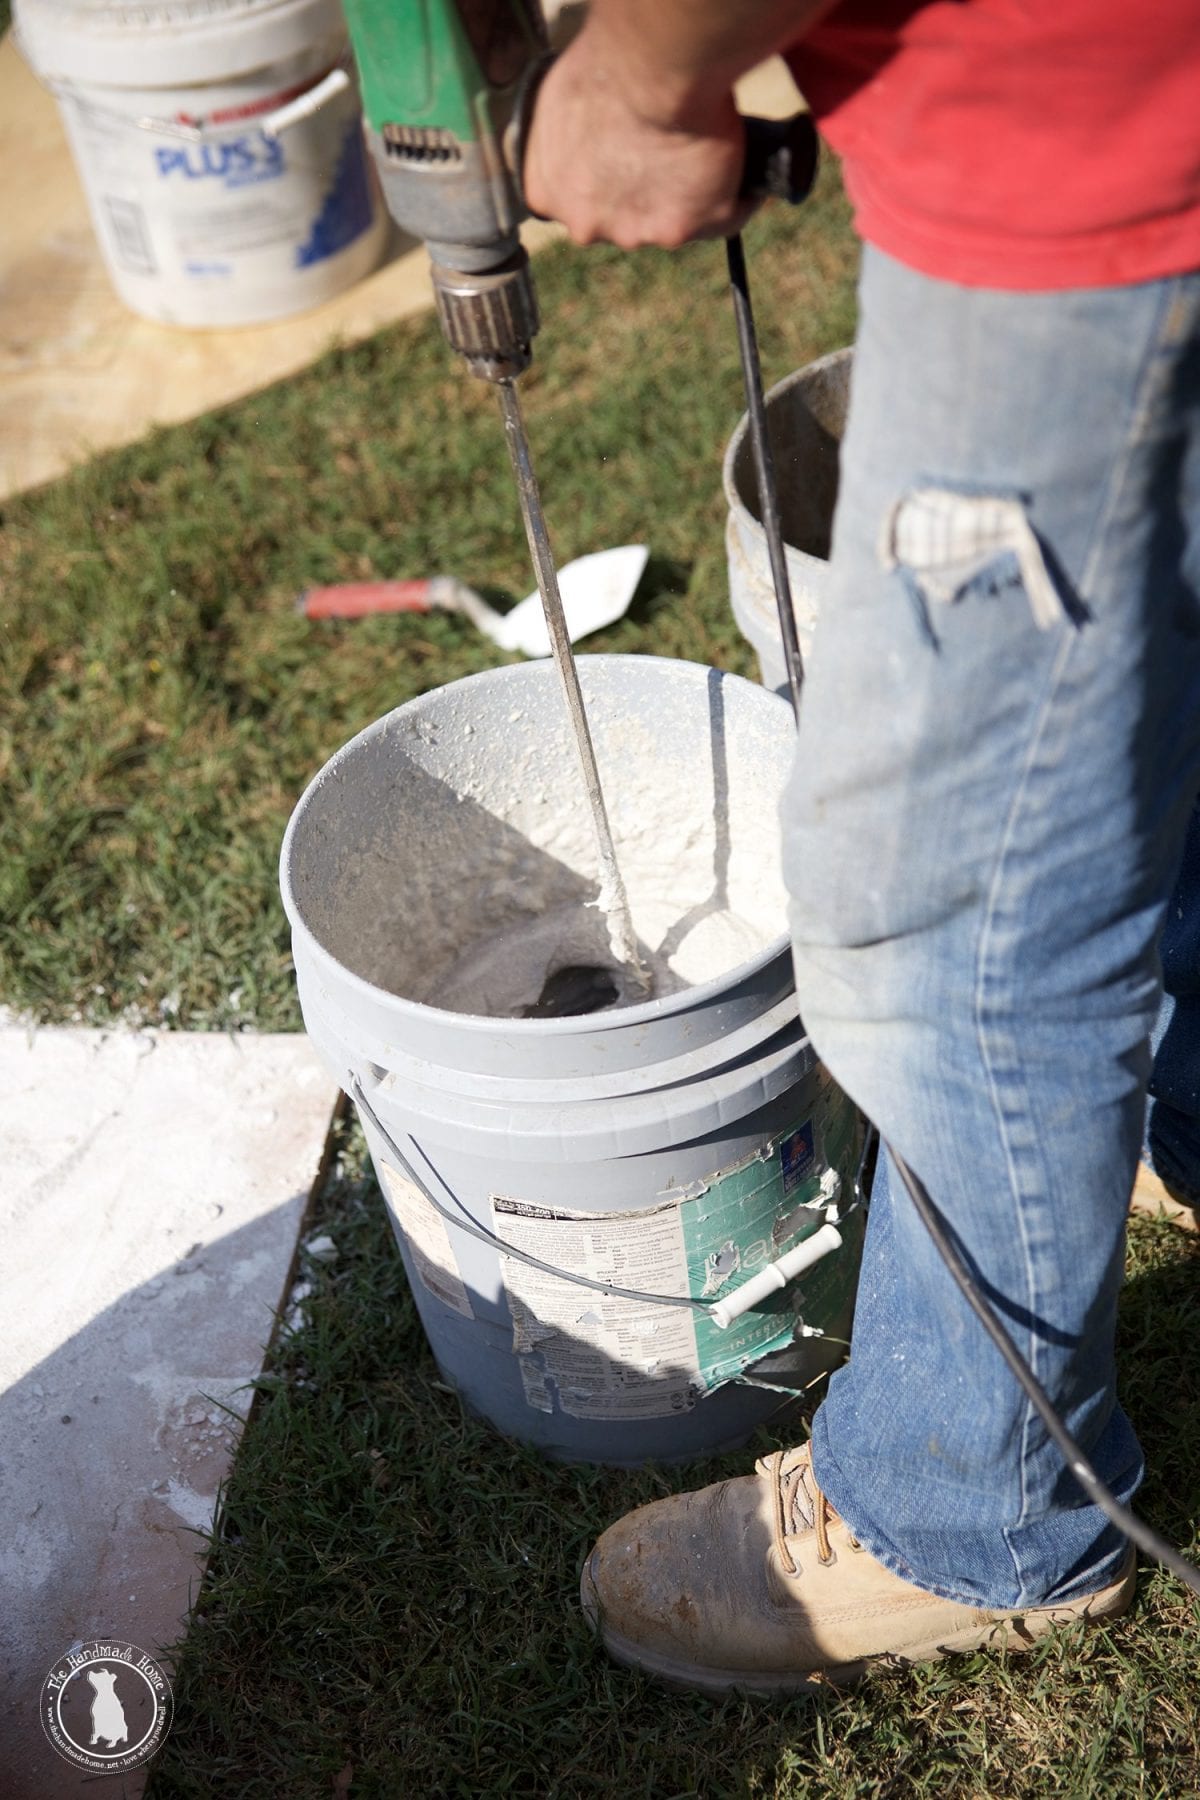
He told me 1/3 masonry cement to 3/3 joint compound. {Basically, it’s sand}. Mix it well, until you get a nice almost slushy texture. I think this is the hardest part, because if it’s too wet, then it’s a pain to work with… too dry, and it will crumble. Mix a little water, and then add as you go.

Here’s what it {the consistency} looked like when we were done: Smooth and ready to work with.
how to mortar rub brick on the fireplace – grout bag or icing bag?
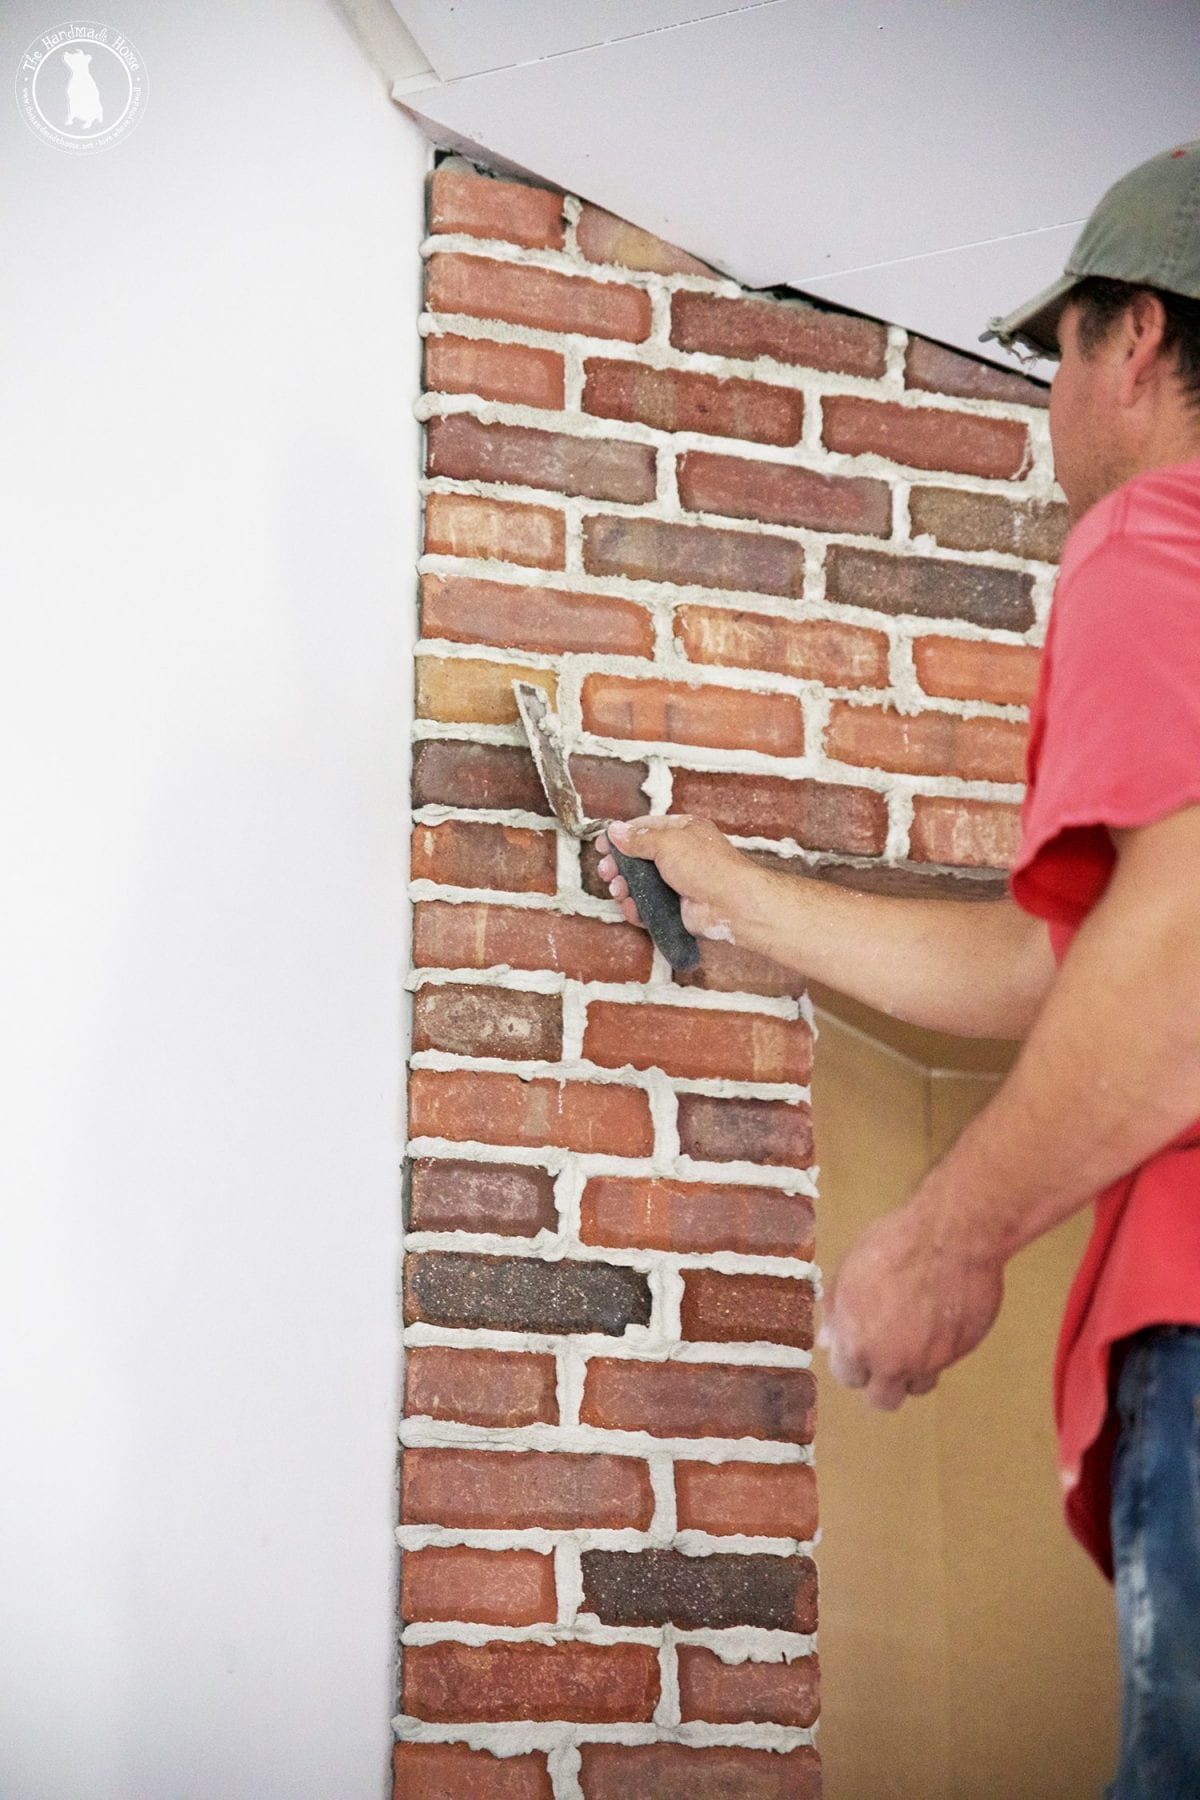
Once inside, he scooped it up with his trowel, and added it to the grout bag.

I know he made this look much easier than it actually is. But it felt like he was decorating a cake and I really wanted to play.
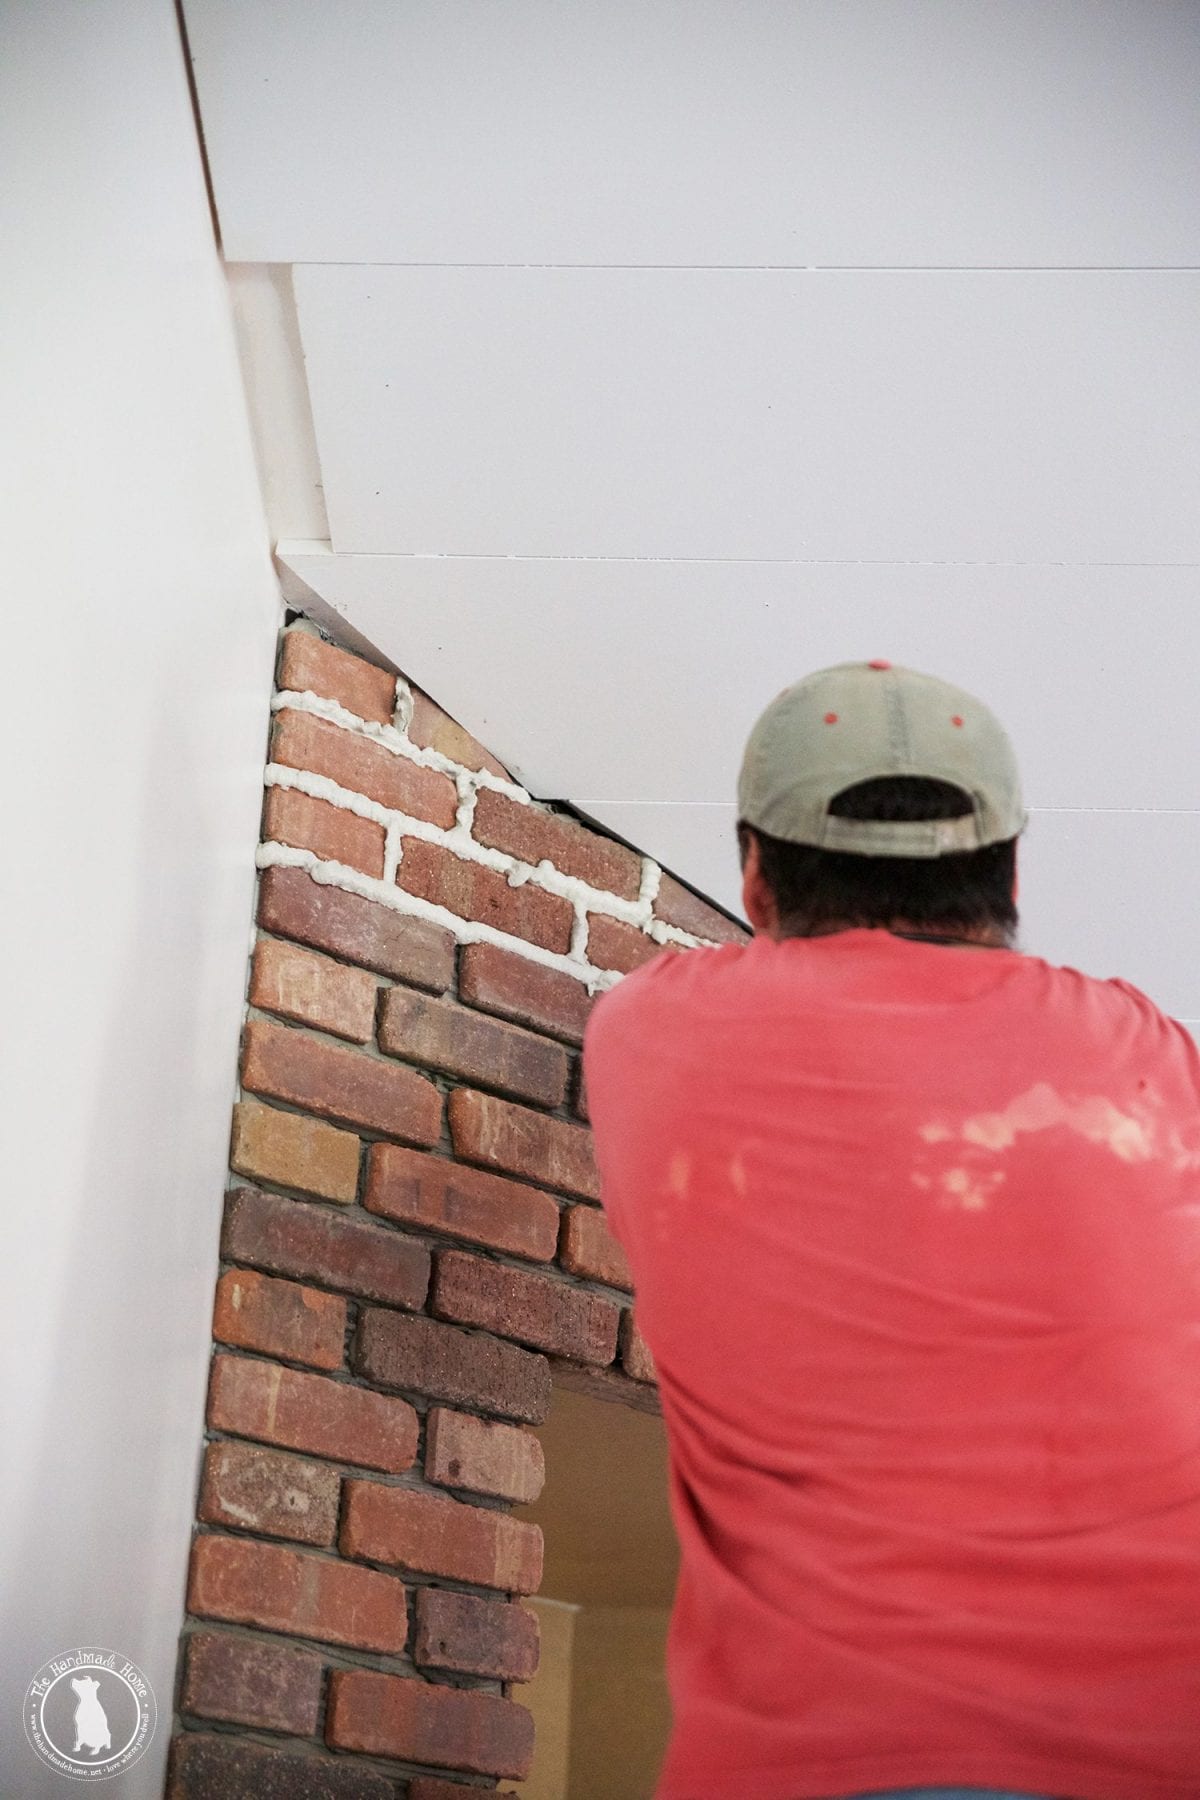
He said to watch carefully for bubbles, as you work. Squeeze it carefully in between each brick.
Note for those of you who may be wondering: If you have an existing fireplace and just want to add the rub, work in small sections, and simply apply over the existing mortar.
Shhhh. No comments on the angles of those planks. We’re trimming them out and you’d never know. The walls in an old house can get tricky and we’d had it at this point 😀 {Tutorials coming on this, too.}
how to mortar rub brick on the fireplace – scraping the excess
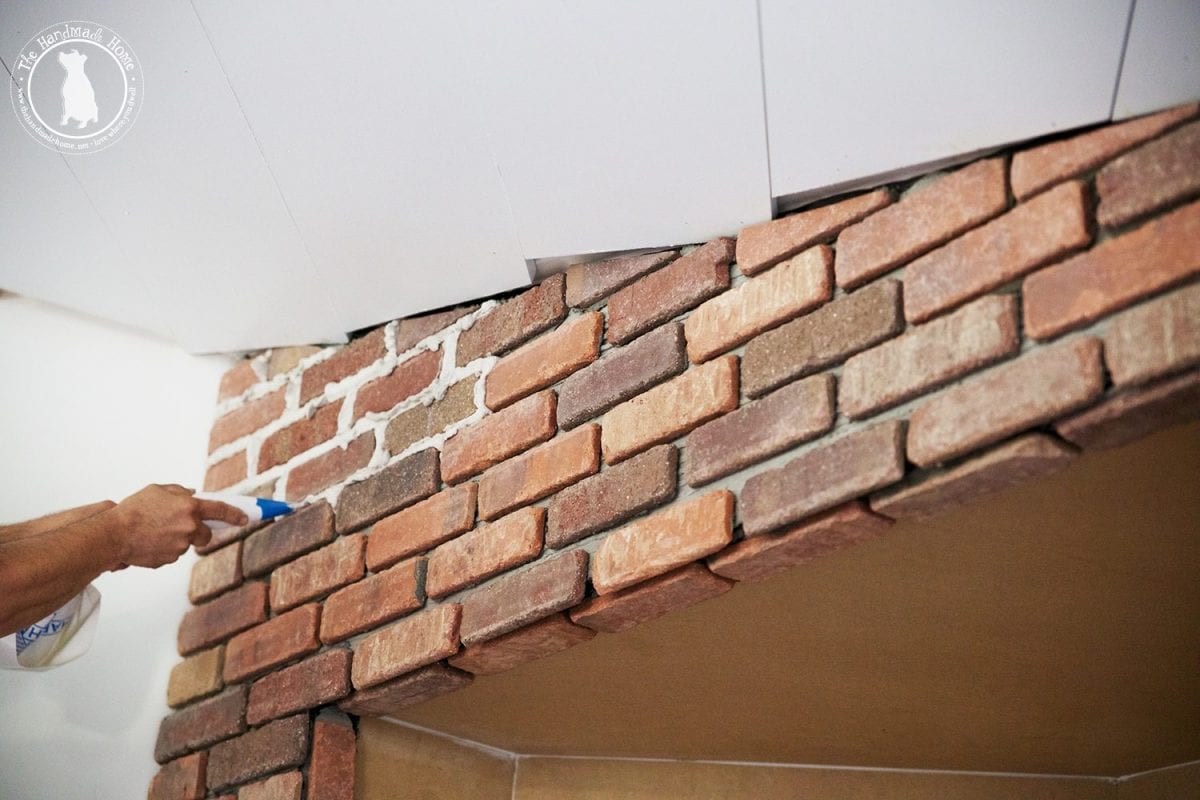
When he did one section and was statisfied, he went and removed the excess by scraping it off slowly with his trowel.
Slowly but surely he worked his way down.
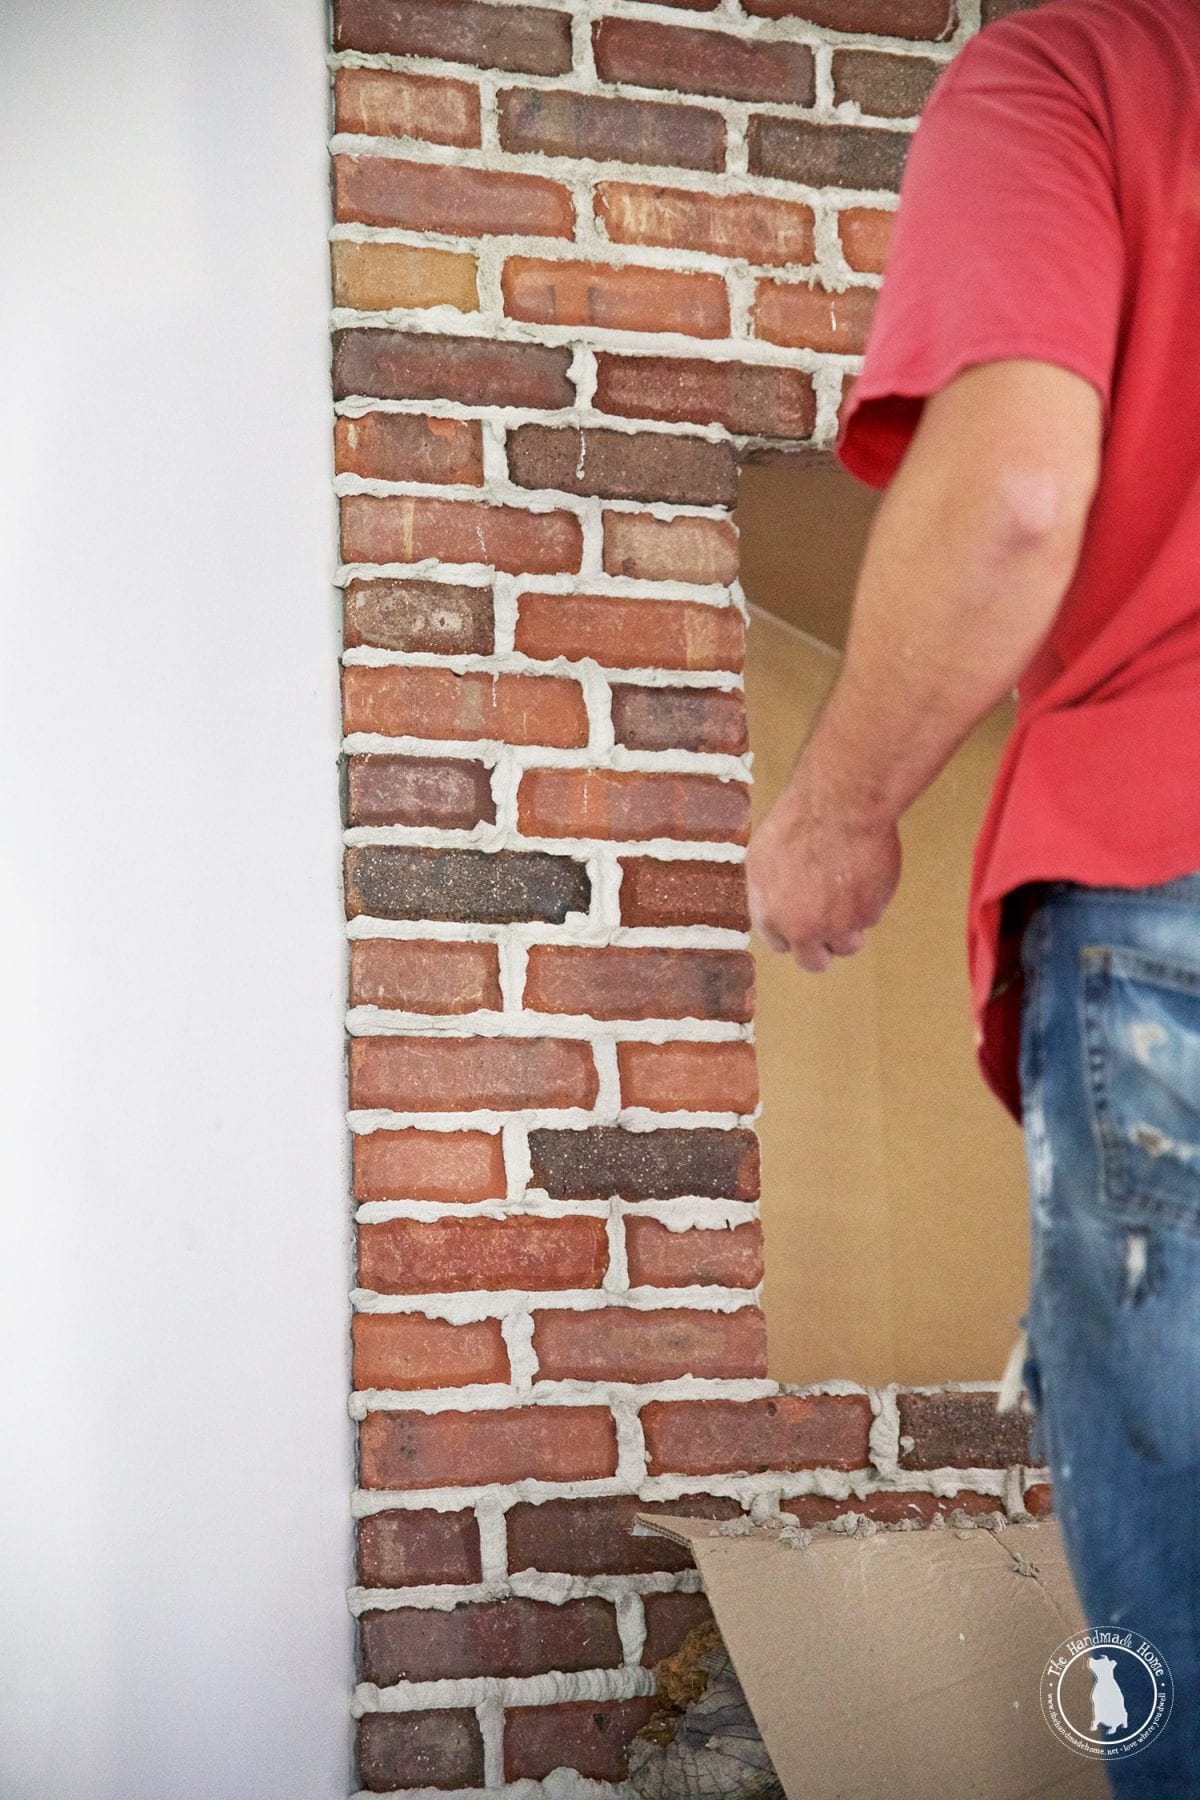
And this is where the magic happened: Because when the scraping was finito, he went back, and started to lightly brush with his brick brush. Just subtly in from the edges, for a nice, old-fireplace-feel.
how to mortar rub brick on the fireplace – light brush
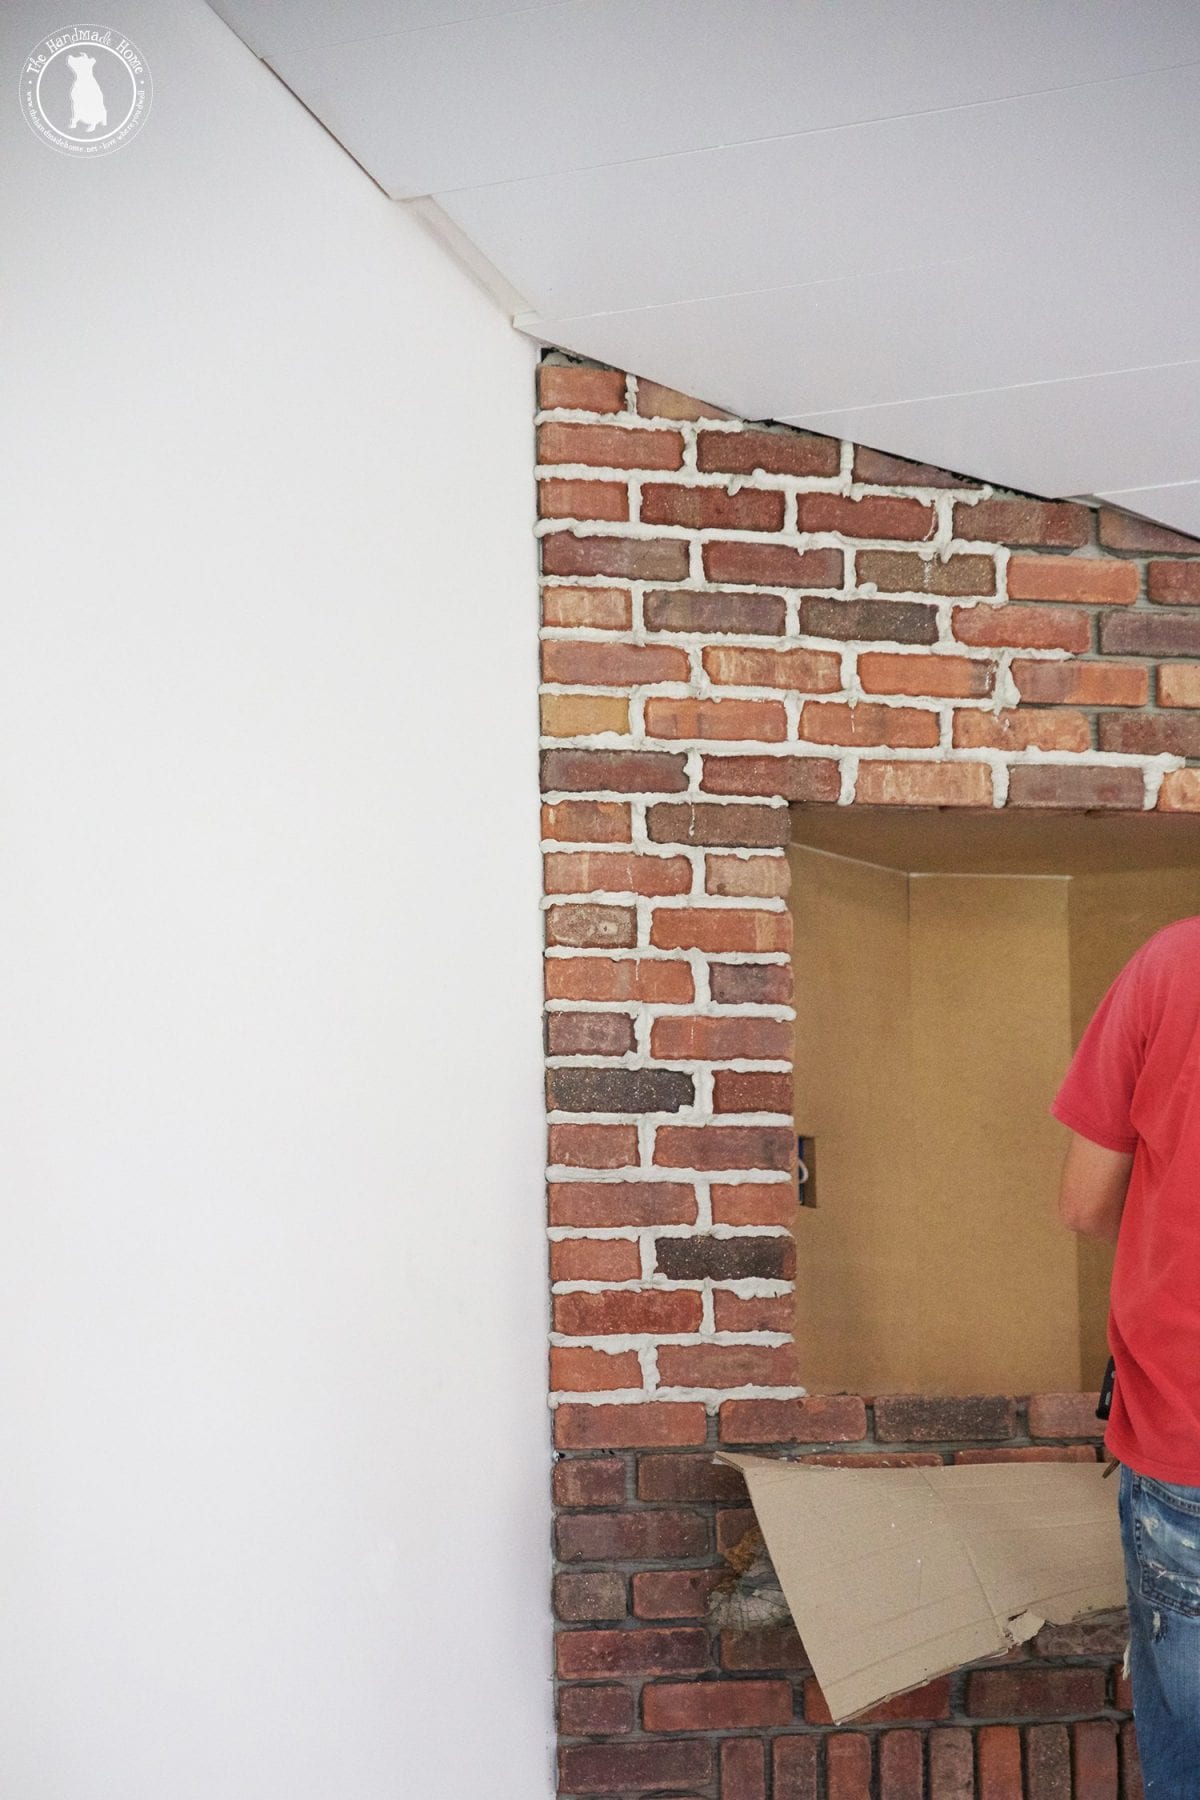
And he was right. Because at first I was all, MORE. But here’s the trick: I had to remember that the more it dried, the whiter the mortar became.

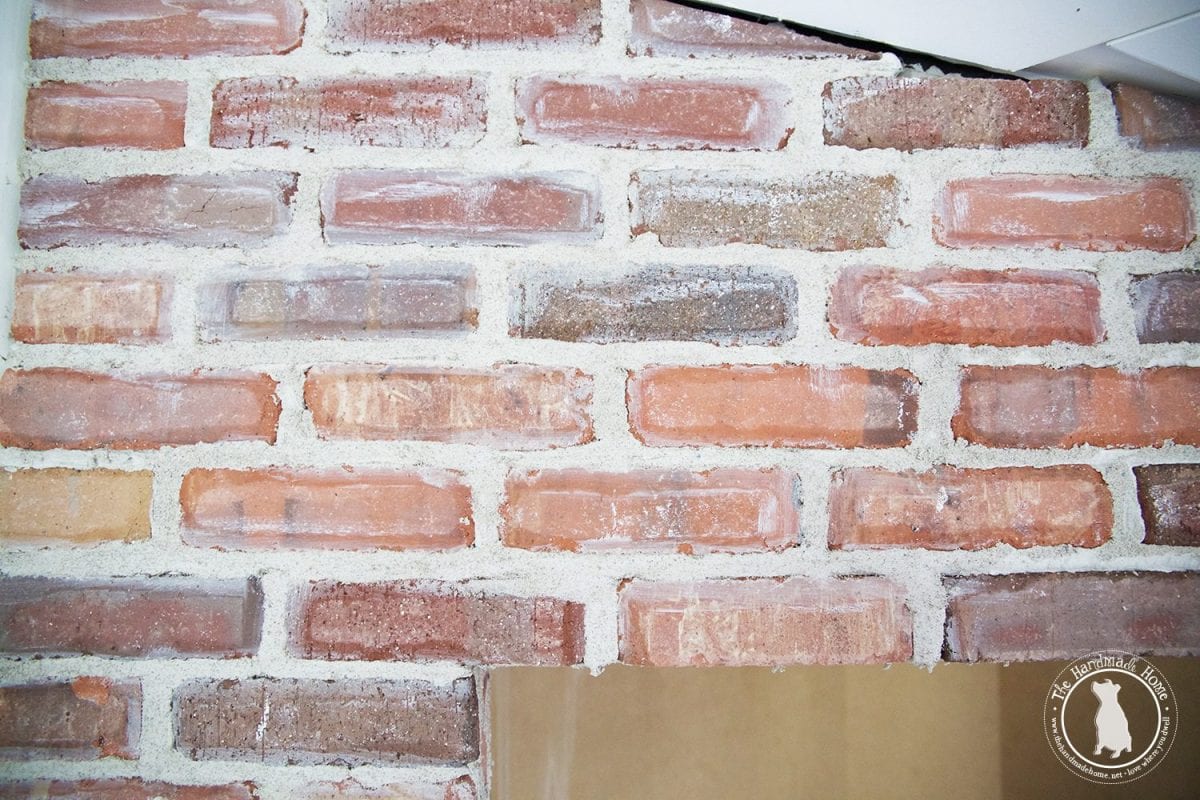
This is a shot right after it was applied. And the next day when we came back, it was even whiter.
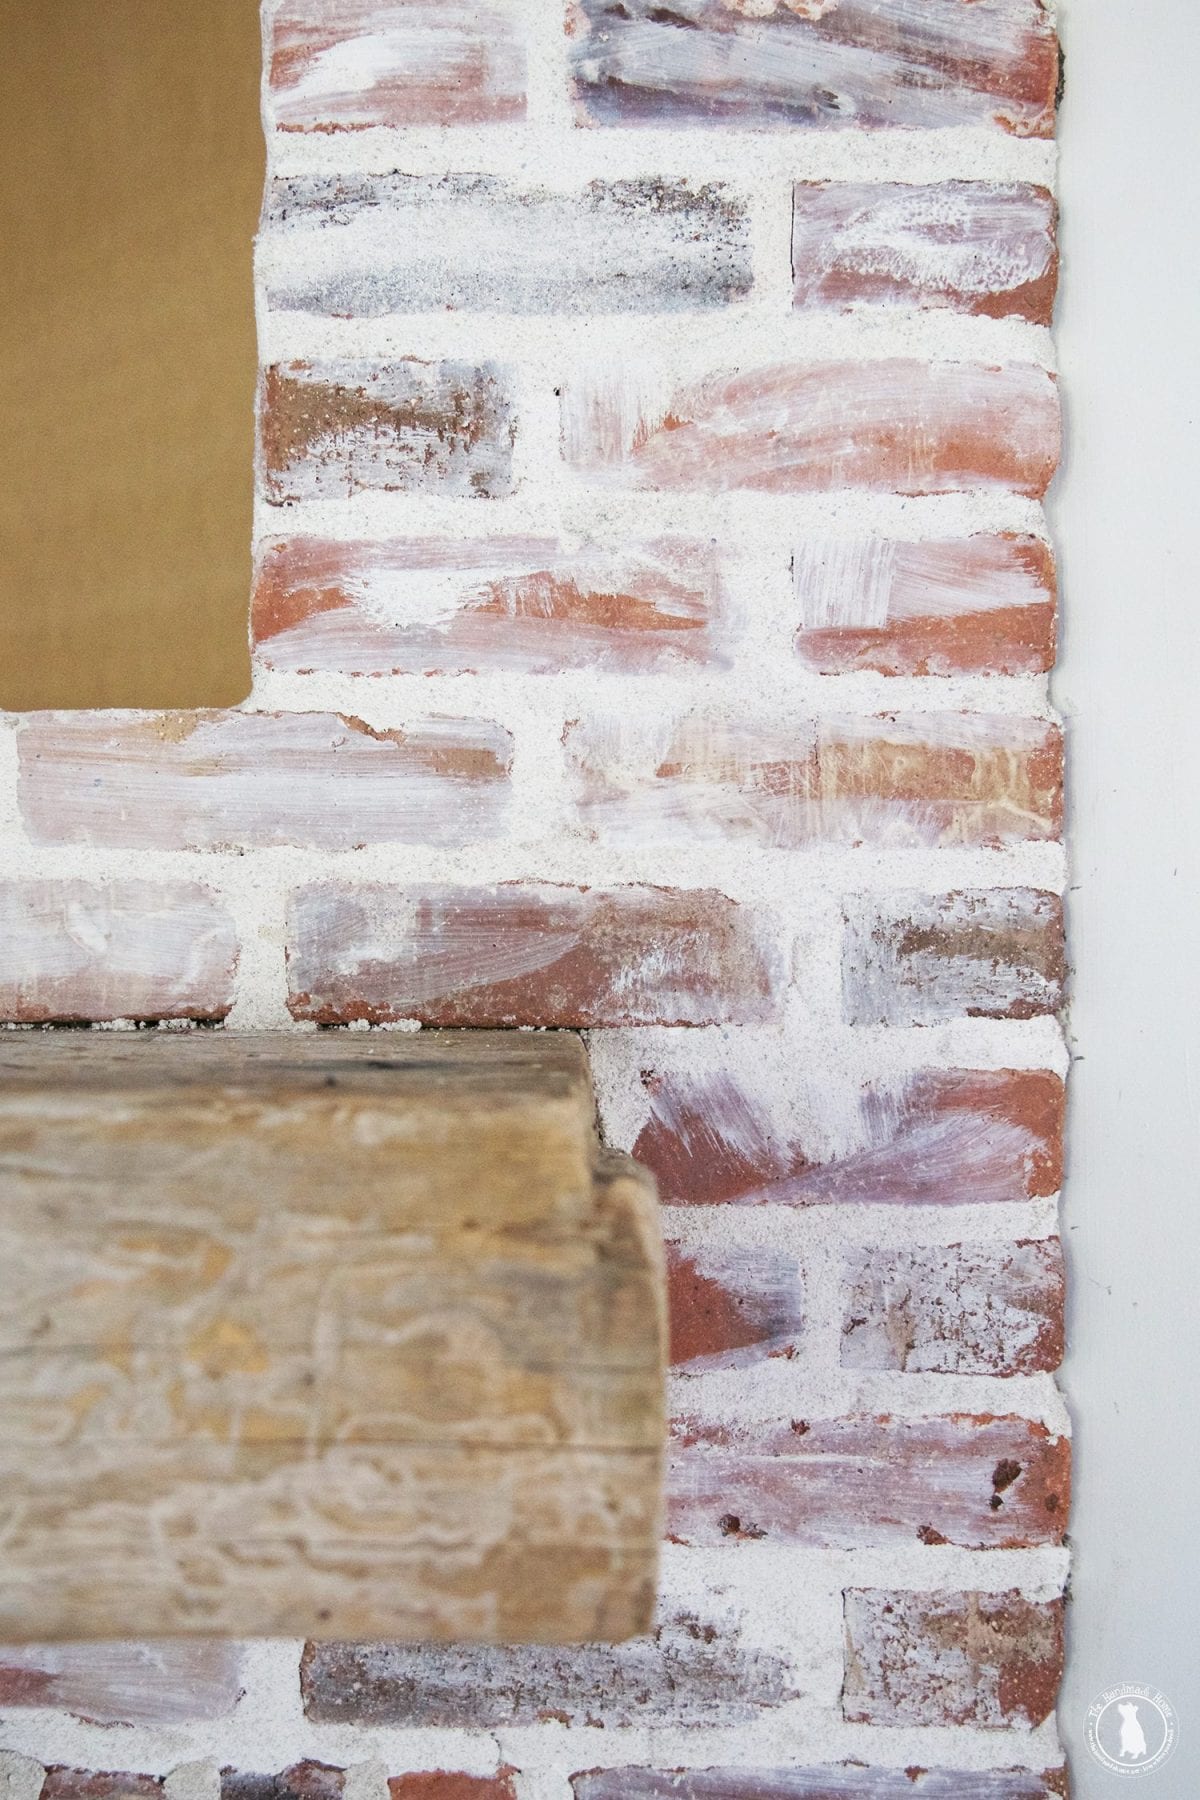
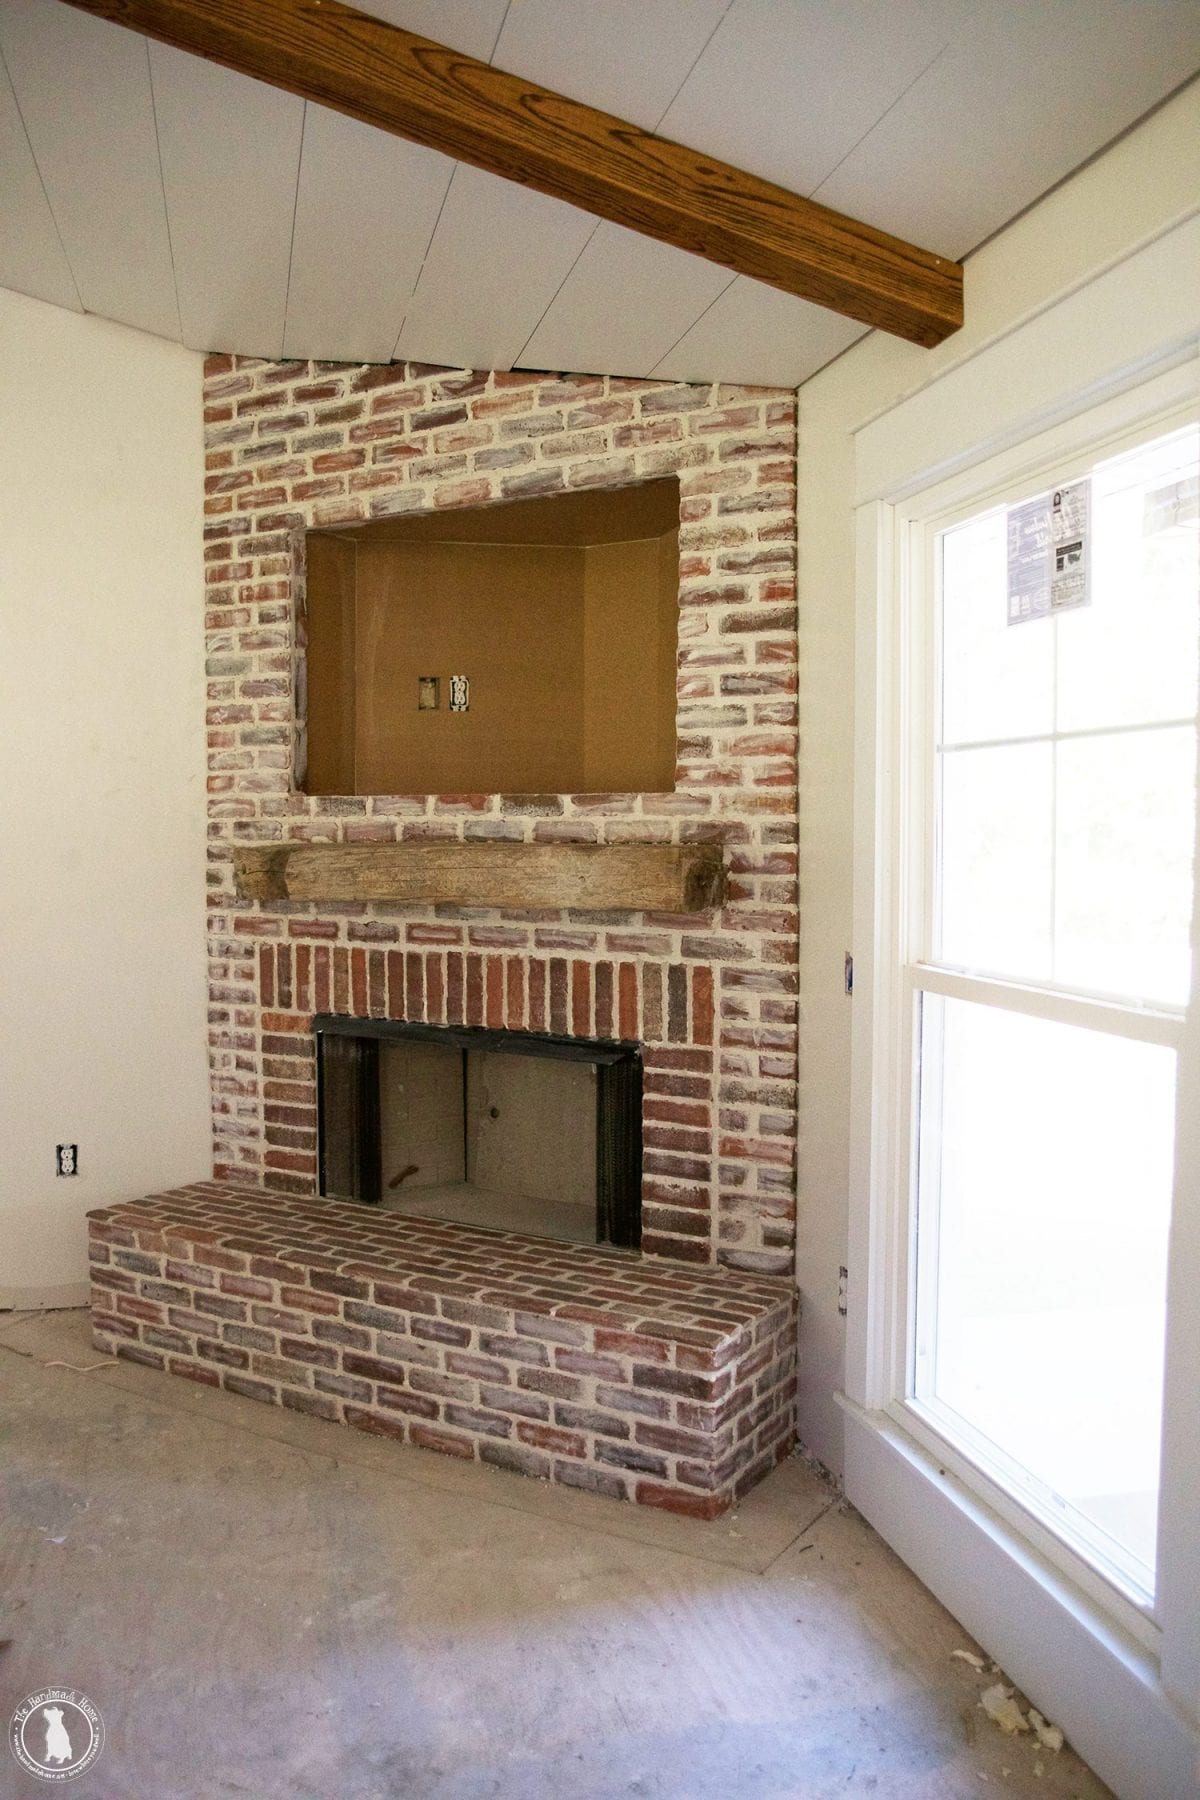
So we kind of went for a halfway between the heavy mortar wash, and a full out rub. It has subtle brush marks for that aged, timeless feel. He even came back with a dry brush around the very edges where the brick frames the firebox, and the top of the mantel when he was finished, to showcase a little of that detail. There’s less rub there, and it turned out beautifully.
We’re thrilled with the timeless, classic feel. Like something salvaged from the house. And the awesome brick to boot.
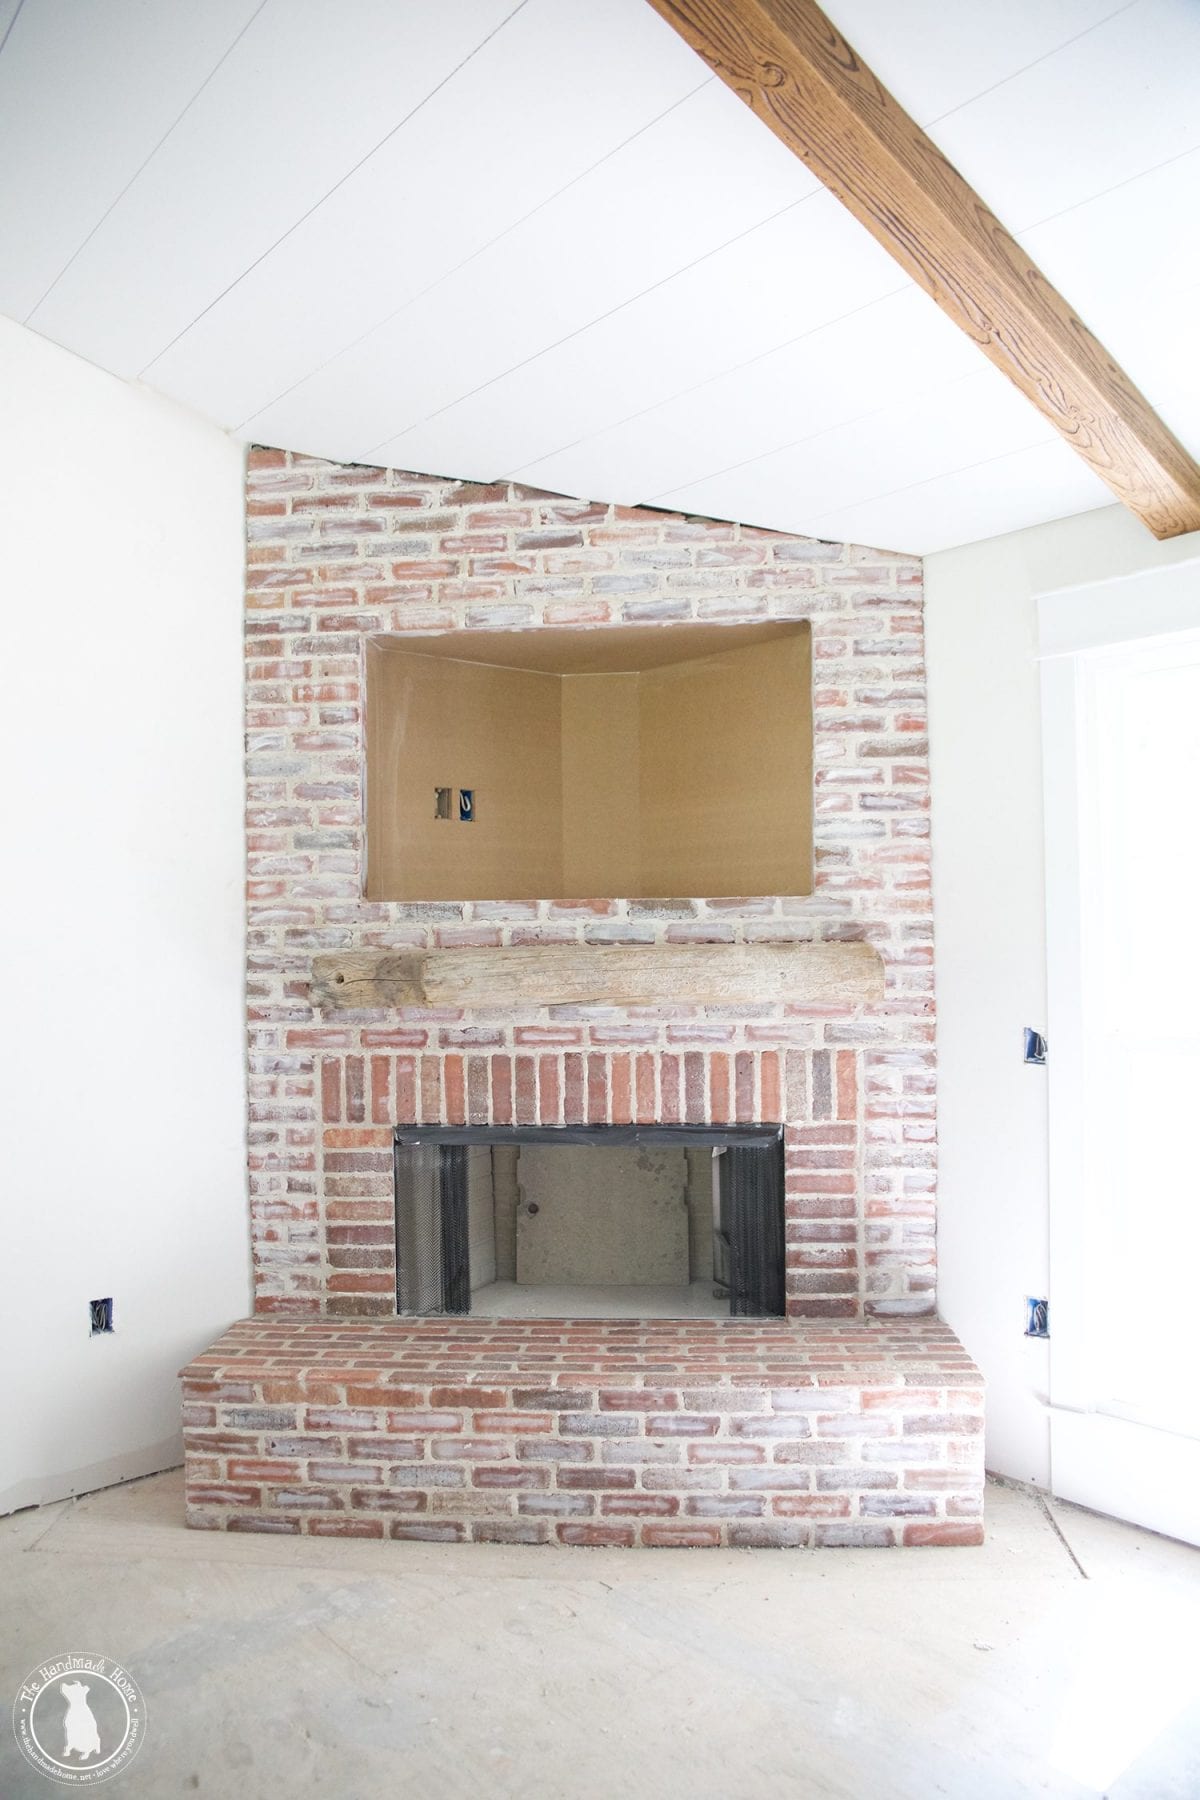
We still have to paint the inside, and finish up the firebox… along with caulking the sides where they join the walls. The hood-looking top will be removed – it’s required for inspections – and the side adjusted. So we’ll come back with our beauty shot and place it here when the trim is finished and the floors are in.
So close.
So far away.
But we were so excited to have a fun little detail of sorts to share, we wanted to go ahead and put it here for those who have asked.
I know he made the process look simple… I think it’s all in the practice run, and getting your mixture just right to avoid any issues. He said I can always go back and add more with a sponge later, but we’re loving the subtle appeal of it all… and plan to tackle it again with our outdoor fireplace in the future. You know… when we have more time and energy and stuff. I hope that happens soon.
Here’s another shot, late in the afternoon. We’re in love with that little piece of barnwood, too.
Coming up: all the finishing touches.
Have an inspired day!


Looks fantabulous! My 9 year old daughter walked in when I was looking at the pic of the brick on the ground and she asked if it was frozen bacon! perfect! The exact look you were going for! 🙂
I have always wanted to do this to ours. I might brave it now!