
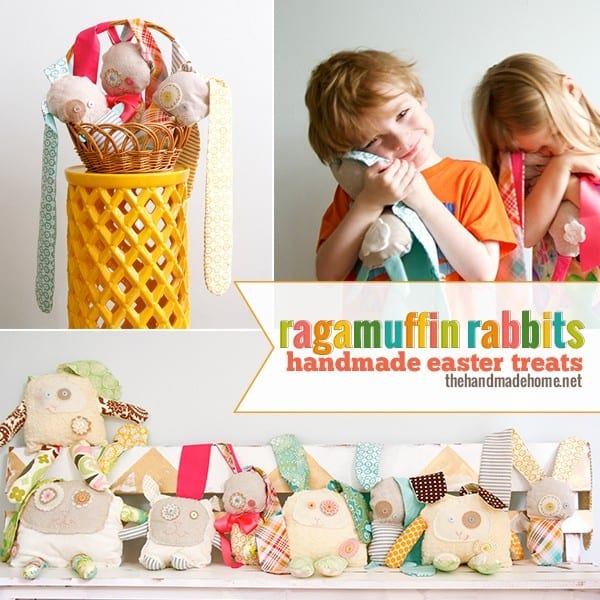
ragamuffin rabbits: handmade easter treats
 This weekend, I decided to take on a fun project for the littles just in time for Easter.
 You may remember Regina the Rabbit + Lulu the Lamb? I thought it would be fun to try a little ragamuffin version.
You know when you have something completely different planned in your head but your project has a happy ending anyway? Honestly, that’s kind of what happened. I had it in my mind that the other rabbits had a little family except the rabbits were pillows, and it started out as a whole different thing in my weird overactive imagination and I need to get out more. But sometimes I lose my mind and decide to make something random because A. Our kids love them and B. They’re awesome fun to style their spaces with, so it’s a double win for me. I’m a real sucker for fun kid stuff…
These would make some pretty great gifts for the Easter season, if I do say so myself.
 This is a great little fabric buster. If you’ve never made anything like this, but you can sew a pillow… you can do it. Think of it as lots of little pillows, connected to make something.
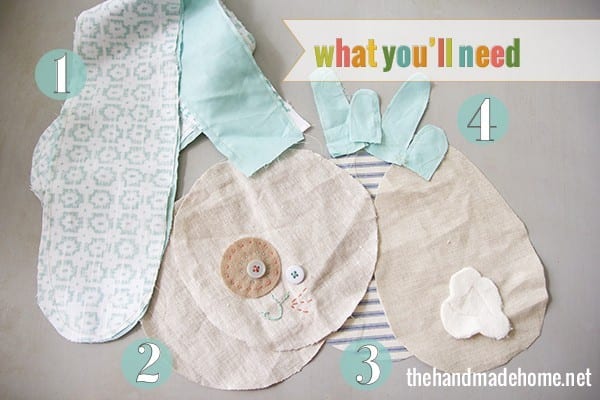
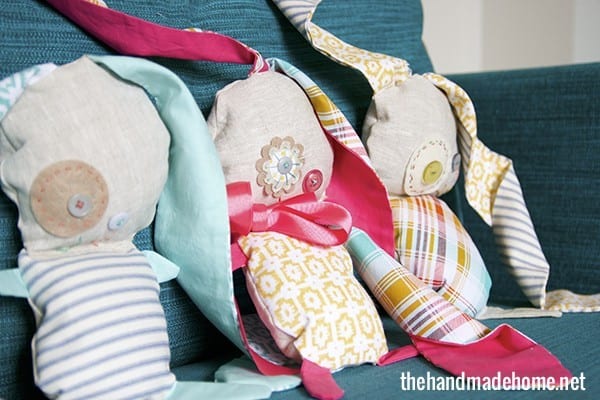
Here’s what you’ll need in un-sewn dimensions: {For all of these, you have the option of doing two or one sided designs with the fabric.} Also, you can do any size you like. These are smaller than our original design, with super long, fabulously floppy ears. Here’s the sizes I used.
Once you come up with your first cut, simply trace the rest with chalk. Or if it makes you more comfortable, practice with paper first for your pattern.
1. Fabric for the ears: (2 @ two sides each, so cut four of these) 21″ length x 5 ” width – curved at the end, slightly smaller at the bottom.
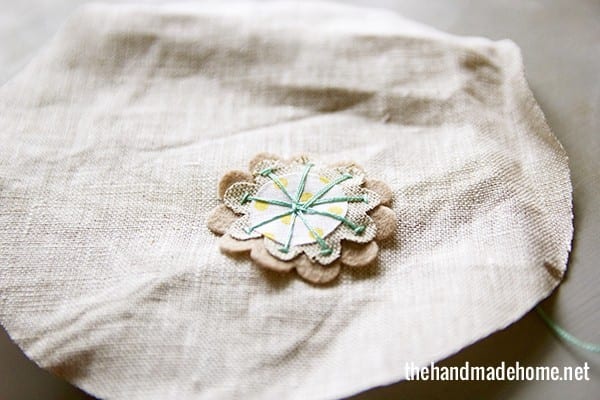
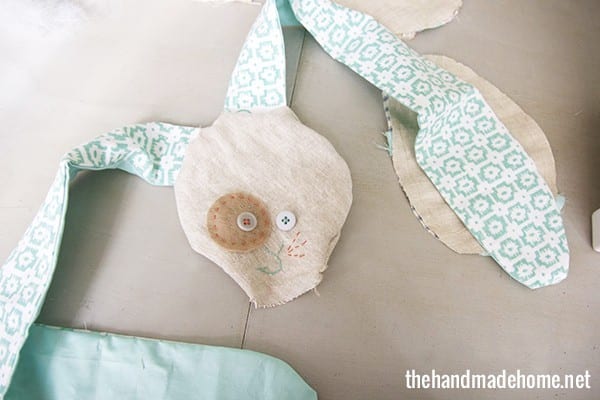
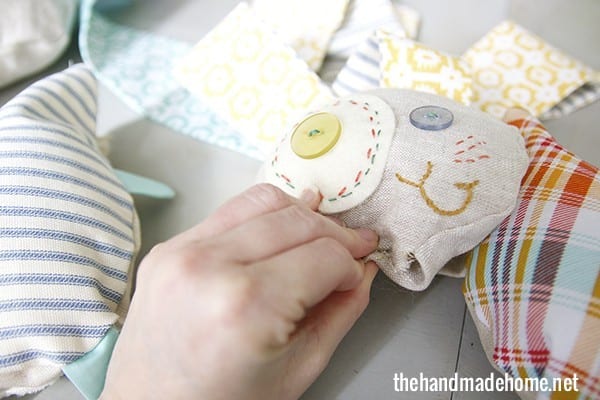
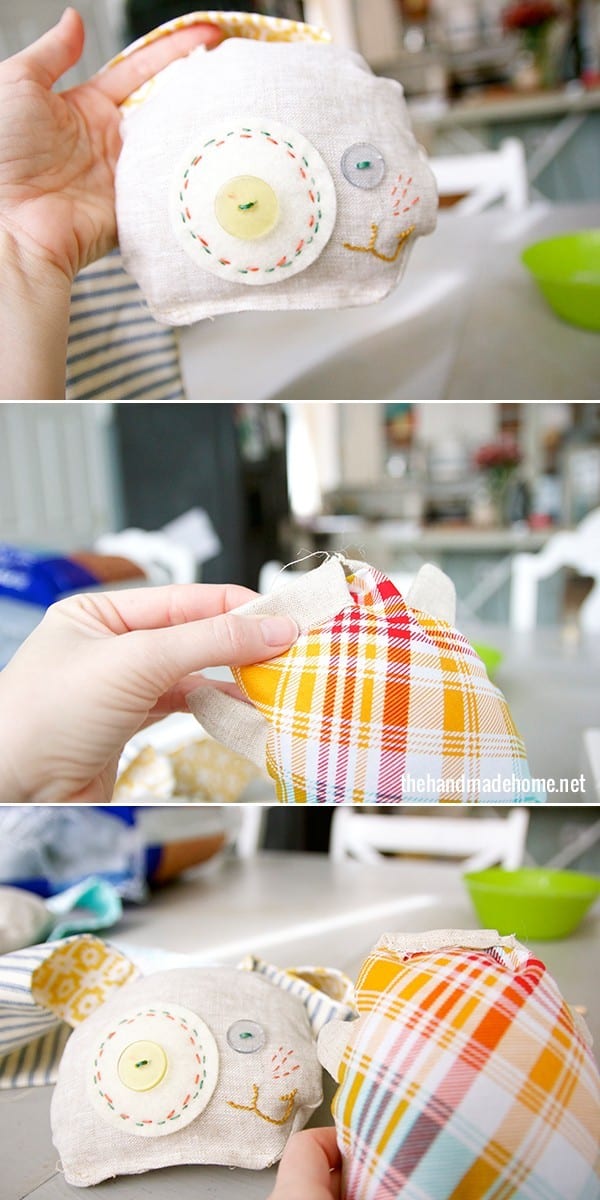
2. Fabric for the face: (2 @ 7″ diameter – I traced a bowl with chalk) I also did little buttons and some quick embroidery for the face along with a little felt circle for the eyes.
3. Fabric for the body: (2 egg shaped pieces @8″ length x 5.5″ width) + little tail (roughly 2″ diameter)
4. Arms: (2 @ two sides each, so cut four of these) 2.5 x 1.5 + Legs: (2 @ two sides each, so cut four of these) 3.5 x 1.5
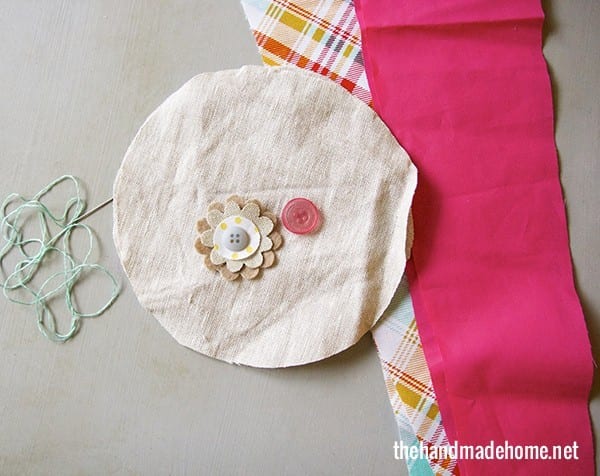 Once your fabric is cut, take a moment to do the face. I just used an assortment of fabric scraps from around our home and these little flower shapes I had left over from our mobile project, and used them as part of the rabbit’s face (for Emerson) I kind of make things up as I go, and prefer the sloppy look on the boys – they make for cuter rabbit faces. No worries if you mess up. They’re better that way.
Then set your face aside, and start on the ears. Sewing the ears is just like sewing a pillow. With the right sides (sides with the design) facing in, and the wrong sides out, start at the base and go all the way around with your sewing machine. Then turn them inside out by pulling them through the un-sewn base, and iron flat. There’s a detailed photo of this process, here in our first tutorial.
Then return to your finished face, and being careful in placing them that they don’t touch any other sides but the top where they will be sewn, pin them to the desired spot on the head. {Note: place the side facing down on top of the face, that you wish to be shown when rabbit if finished if you’re thinking about fabric patterns.}
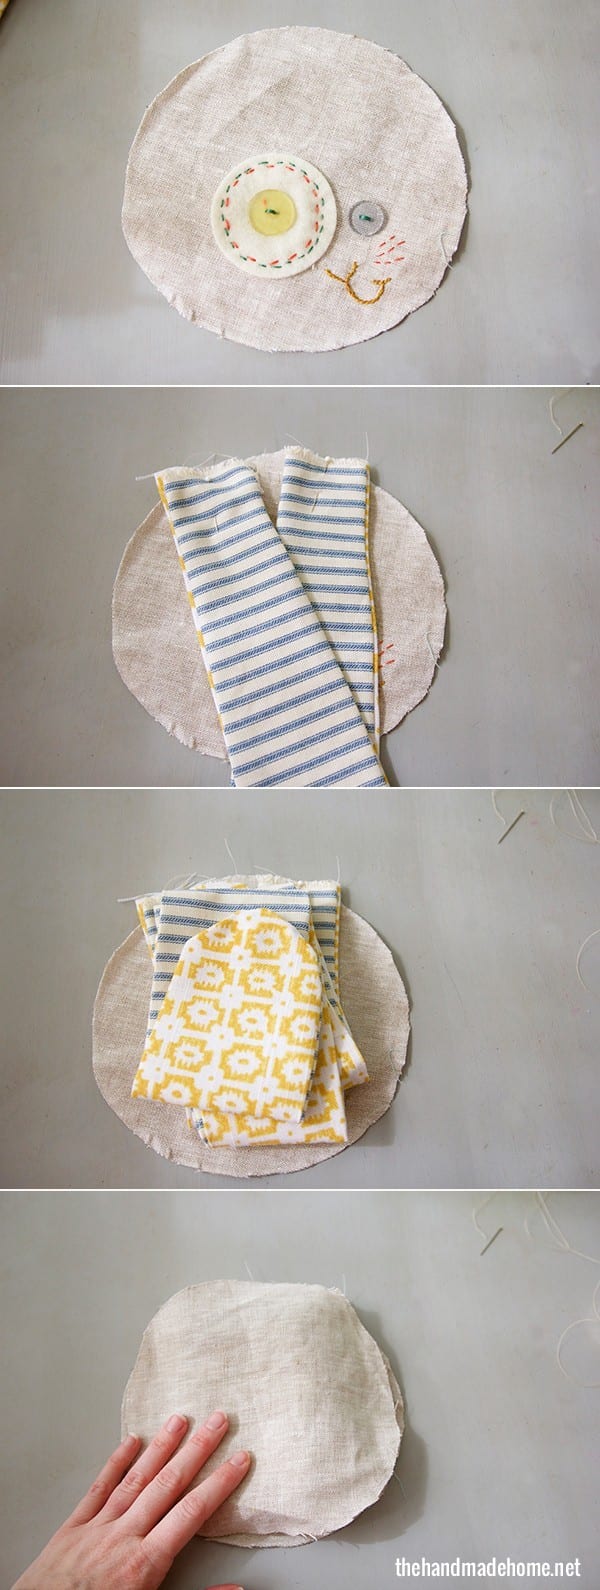
Place the back of the head, right side in, wrong side out. The ears will be a little bulky because they’re so long so pins will probably help.
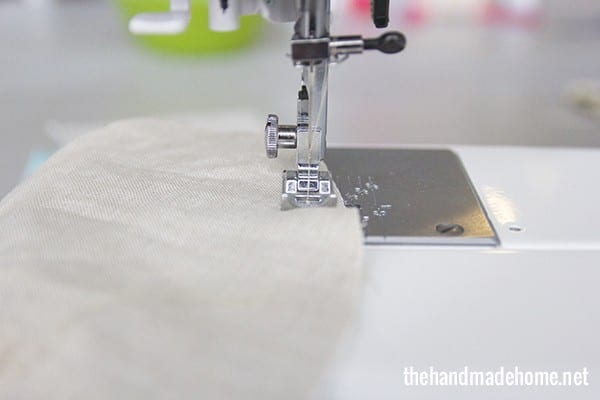
Use your sewing machine to seal the head, careful not to catch the ears in your stitching. I left my little opening near the bottom of the head, so that when I pulled it right side back out (ears first so you don’t bust any seams) it looks like this
 Next, move on to your arms and legs. These are just smaller versions of your ears that you just did. Sew them together, wrong sides out, right sides (the designs you wish to be shown) in. Leave the base unsewn, so you can pull them right side out. Iron to flatten.
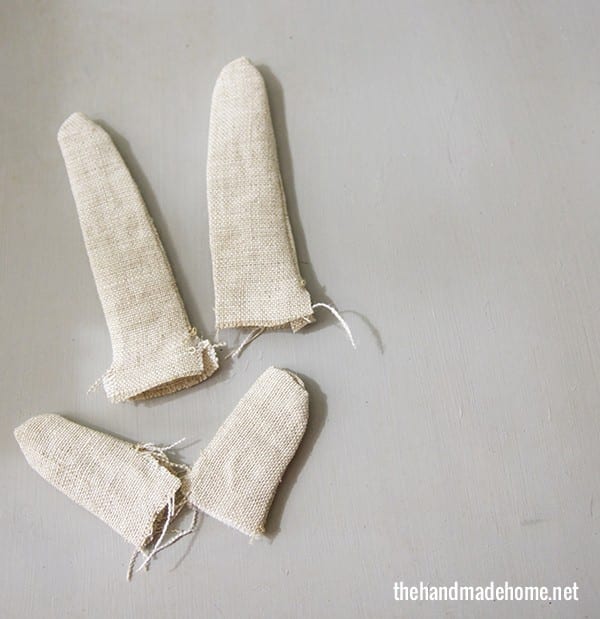 There’s also a more detailed version of this little arms/legs step, here. {The only difference is that in the first tutorial, we stuffed those.}
Before you attach the body parts, be sure your tail is on the back of your rabbit. I made a quick top stitch to attach it, and then this step below is just like the steps for attaching the ears to the head:
Arms facing inward on the body, then lay the back on top of the front… right sides in wrong sides out.
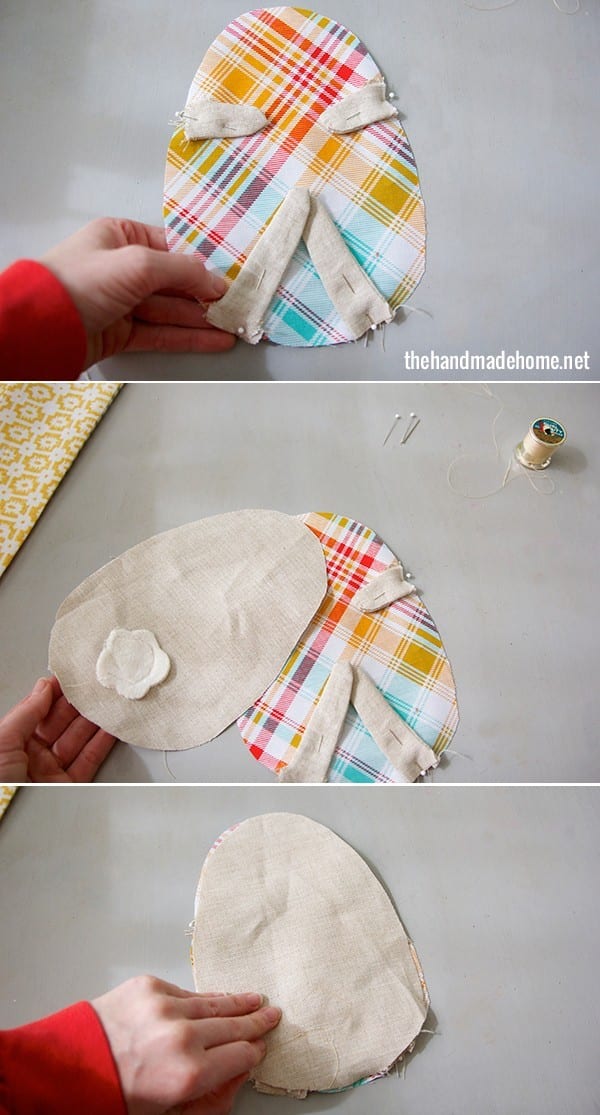
Give it a quick run on your sewing machine leaving the top open like a little bag so you can pull it right side out again, just like the previous steps. Take care to pull out all those pins first!
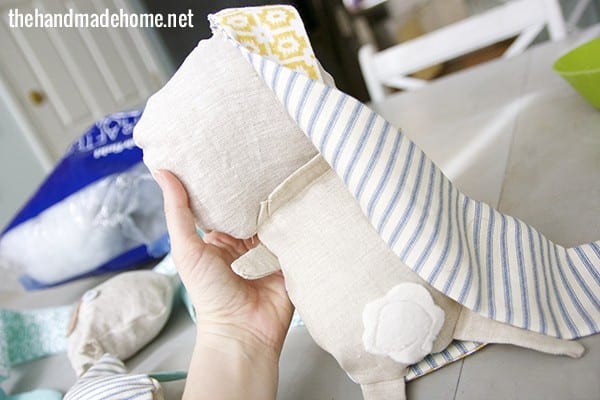
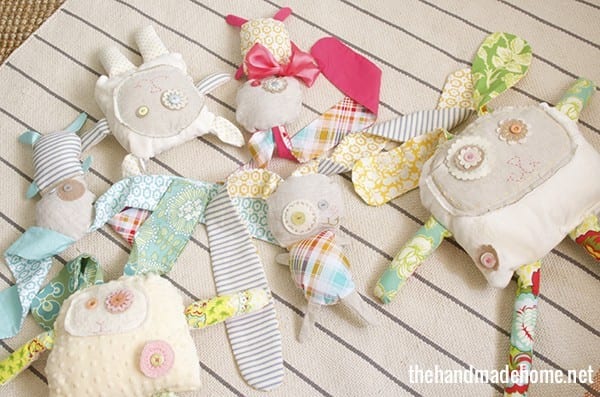
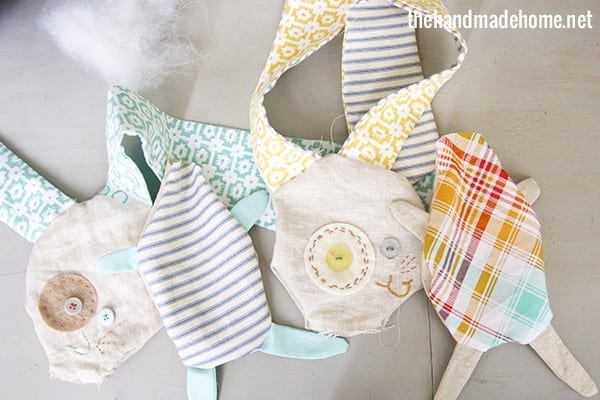 Now your little pieces should look like this, and you’re ready to stuff and fluff!
I went for the head first, and then sealed it up with a little top stitch. And then the body, with a separate top stitch.
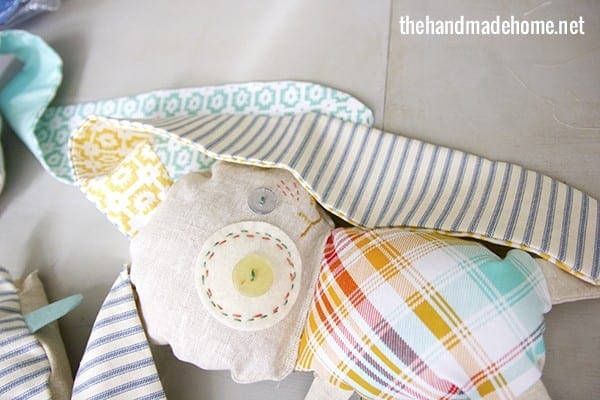
 I then took the head, placed it on top of the body, and used a top stitch a couple of times across the base of the rabbit’s head to join it to the body. Tada! It’s really that simple. I’m sure there’s a pro way to do this all in one step, but thought this way was kind of fun. Feel free to do your own versions!
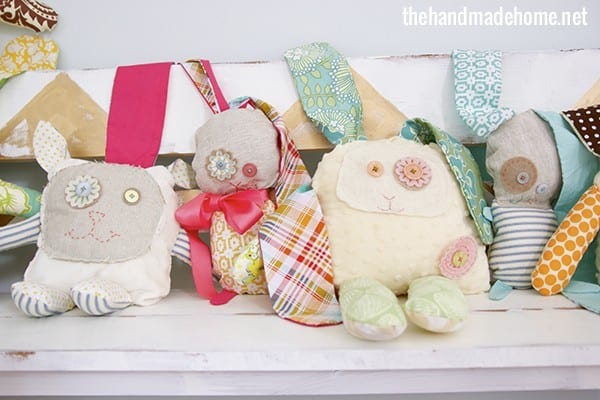
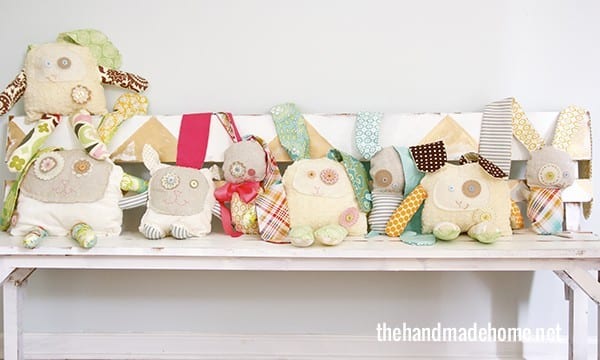
I liked this fun, casual old time rag doll look. You’ll end up with a little tag on the back of his neck, like he’s wearing a shirt.
Kind of reminds me of a lot of my own little toys I had growing up.
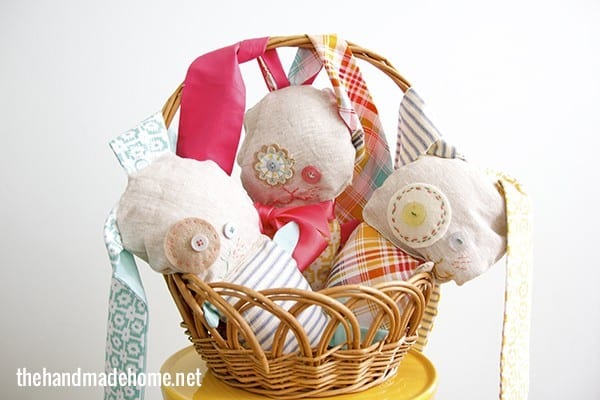
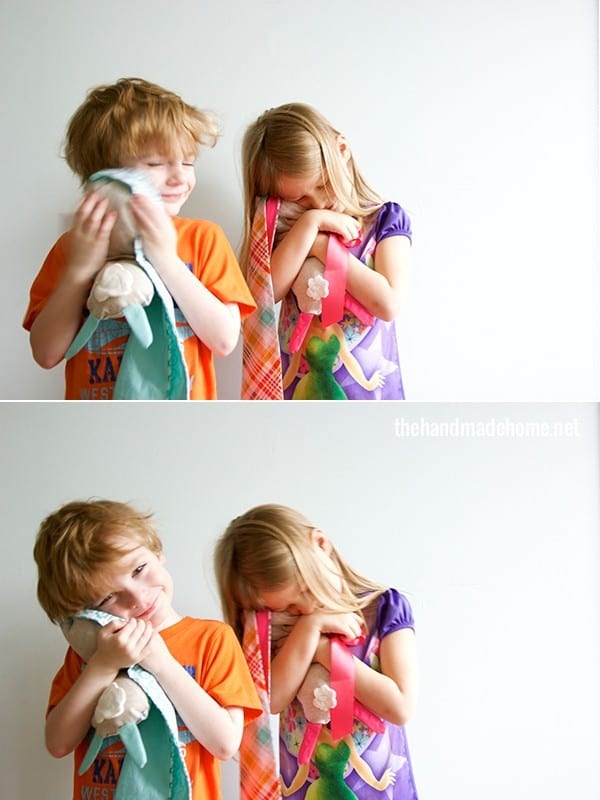
 And here he is from the front! I even finished Emerson’s off with a little ribbon. He’s a peculiar little guy and the kids LOVED all their versions.
I’m talking, we had to have all three in school today, sitting slumped at attention. Even my 8 year old loves them. {Shhh}
 We try to keep the stuffed animals under wraps at our house, but I adore things like this in their room for fun little handmade elements!

Perfect little easter basket fillers… and these were free with just a little time from what I already had!
Winning.
As always, let us know if you try them… and if you want to try Regina or Lulu, be sure to check them out here.
Always use extra care with very young children and these small parts – I would probably only do this for ages 3+ and if for younger… decoration only until they’re older.
Oh, and don’t forget… Online fabric store is having their one day sale today! {read: where we found most of the gorgeous fabric used in this photo} Don’t miss it…
 Have an inspired day!
I have loved Regina and Lulu for so long! These are so sweet and pair perfectly with the others! Maybe I can get my act together and make two if these for my girls!
Our kids really loved picking out the fabric, too. I’m not a big seamstress kinda gal, so it’s not bad if you cut all the fabric, and sew them together… if you’re doing more than one, spacing out the work helps. Have fun! ;} Thanks so much!
Um… These just might be the cutest things I’ve ever seen! Love.
Thank you, Anna! ;}
These are adorable! The little tails are too cute. Thank you for sharing 🙂
Thank you Kyla! I think the tails were my favorite part. ;}
You guys always have the coolest projects. I bet your kids love it!
Awe, thanks Layla. I’m pretty sure our kids don’t know any better… so there’s always that. But they do love the rabbits. Apparently Malone was showing his off at preschool this morning. ;} And now I’m paranoid because my sewing is far from perfect. ;}
These are SO sweet! I have got to learn how to sew ASAP! These are way cuter than stuffed animals. Thanks for sharing such a sweet idea!
P.S. I literally just signed up for Allume and I am SO nervous. I’m excited to hear y’all speak!
Can’t wait to meet you, Amber! ;}
You never run out of ideas! Great inspiration! These are so cute!
This is so cool! My kids already have their pet rabbits for quite a while now and I was thinking that I could make them a stuffed animal version of their pets.