
striped watercolor pillow
Last week, we high tailed it with all three kiddos + a {sometimes hyper} dog and went to my parents house while Jamin stayed behind to oversee the laying of the hardwoods. In the beginning of this project, we had good intentions of installing it ourselves. We were gonna be all, look y’all! We laid some hardwoods. Yay! And then we decided our sanity is more valuable than monetary savings and you probably don’t care that much.
If it were up to us and balancing family life with his job and educating three kiddos, we would finish in approximately six {more} weeks. In addition to all that tile in the bathroom… And then I remembered that this is our main living area and I just can’t anymore. I would be sucked into a black hole of insanity and die and the handmade home would cease to exist. The wood would bury me, or something else horrific from Final Destination part 25. But we want our house back, and just don’t care anymore. And I don’t want to die. Thus said hiatus.
In the world of creating a home and recovering from beercanmoldpocalypse, ya gotta know when to hold em and know when to fold em. We folded, and thoroughly enjoyed the folding.
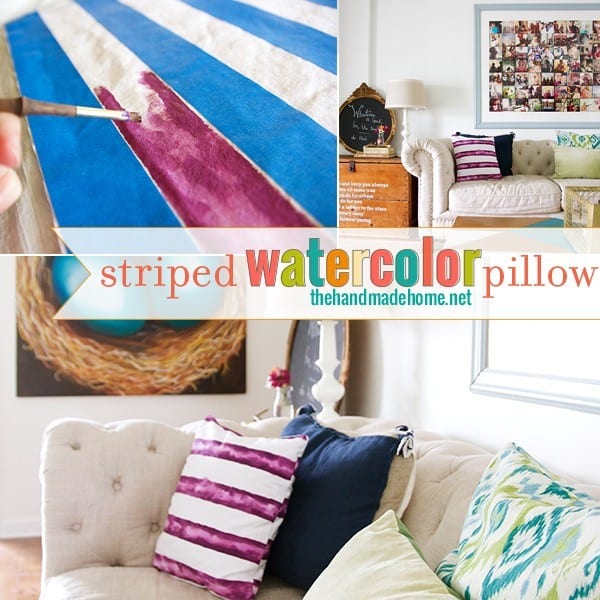
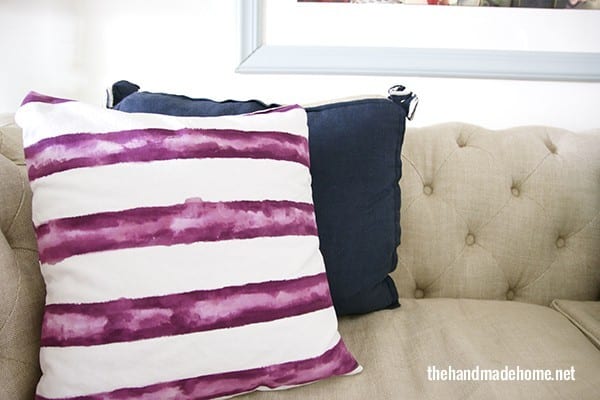
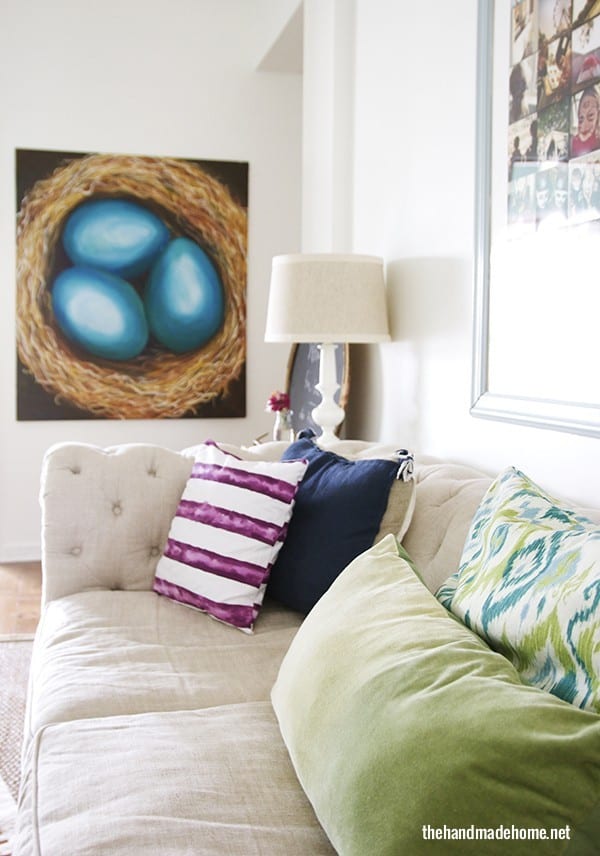
So I took on a small project while at their house, and made some watercolor pillows. They add a fun zing to our sofa, and that touch of purple I’ve been looking for. I couldn’t seem to find just what I wanted in an affordable option {surprise surprise} so I decided to make my own.
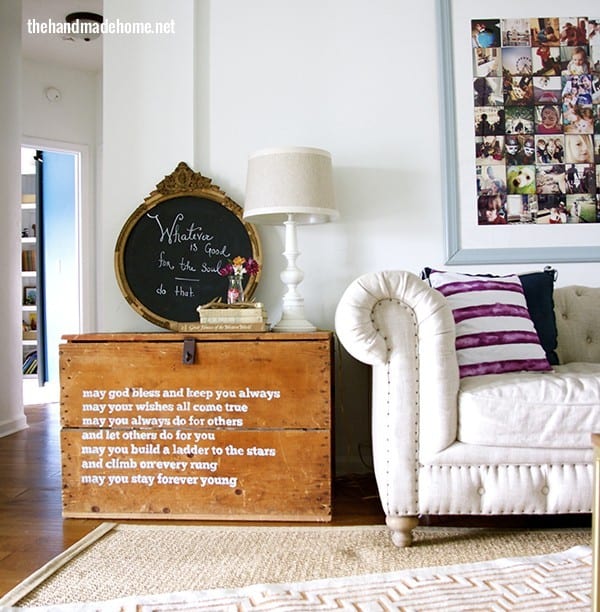
{Total side tangent: You can see a peek of the hardwoods in this photo – I have to say… we’re so glad we did this! We have more coming up in the summer tour of homes tomorrow, so stay tuned!}
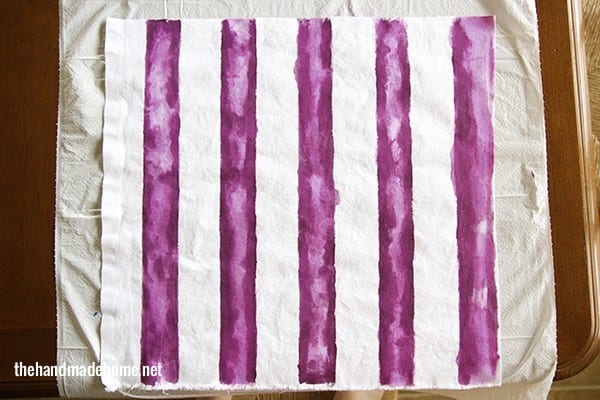
I picked up some basic duck cotton at the local craft store, along with some pillow fillers. After washing and drying the duck cotton (Yes, I’ve learned my lesson) it was time to cut. Our pillow filler was 16 x 16. Leaving some for a seam allowance, I cut two pieces to size.

Okay. So here’s the easy (and lazy) way that I made my stripes. You won’t need as many brushes as there are shown above, by the way. I just needed one small foam brush, and a small medium tipped artists brush. Sometimes I get excited and grab all the brushes.
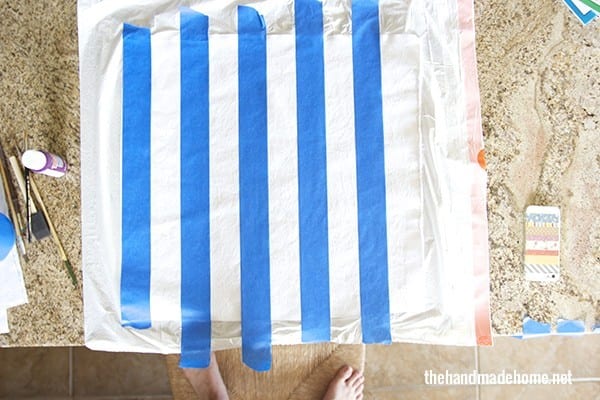
I got out some fat painter’s tape, and laid them vertically across the top. From one edge to the other. You could “leapfrog” them if you wanted to save tape, but I find that my edges stay truer and straighter this way. So basically I was extremely wasteful, and stretched them across.
Note the garbage bag underneath. I’m sure my mom secretly checked to make sure I wasn’t turning her countertops into our kitchen. ;} You may want to do the same.
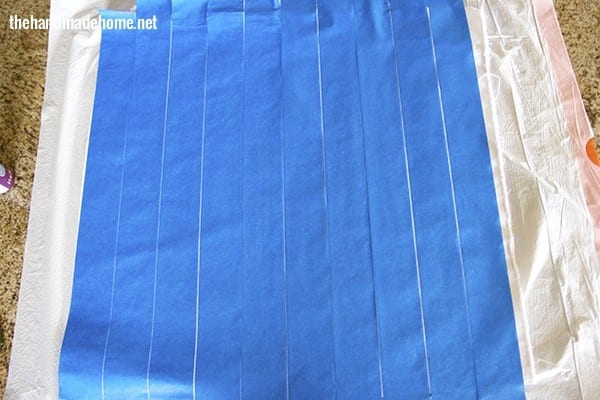
When you’ve laid them across the top, simply remove every other one. I saved these for the next round.
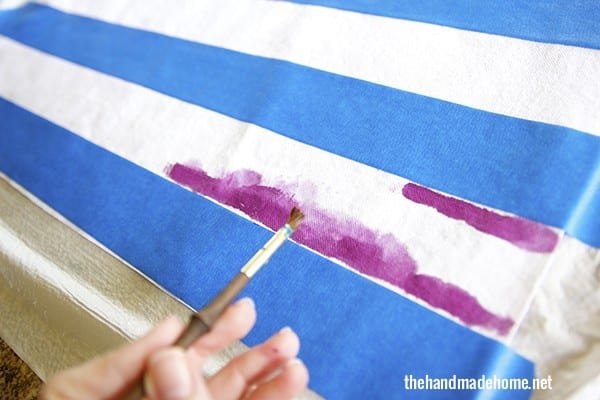
Starting with the first one, eyeball the edge. The tape is more of a guide than an actual seepage prevention measure. {Yes, I just made up that phrase. Aren’t you impressed?} I squeezed out some paint on a paper plate, and put it thicker on the edges. Then, I diluted it a little at a time, with some water as I went, darkening and lightening as I progressed to give it that “watercolor” look.
You don’t necessarily need freakishly long finger toes to rock this project, but I would highly recommend them.
It took a little while, but wasn’t bad for an afternoon project. I may or may not have made the kiddos do their reading while I worked. ;}
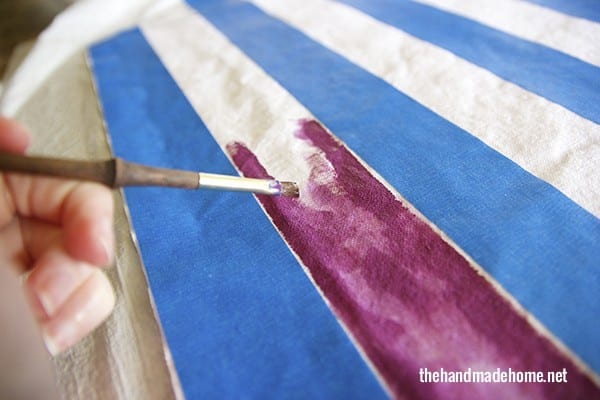
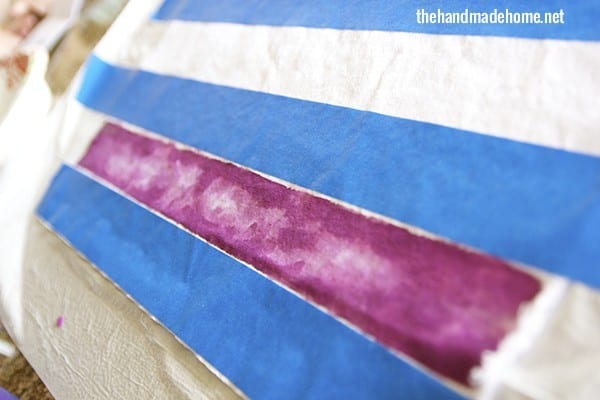
I found that alternating between the skinny brush for darker strokes, and the foam brush for diluted watercolor gave me the best results. I even slipped up a few times and the water went slightly under that tape. I think it added to the fun effect, so no worries if this happens. The key though, is keeping the watered-down part in the middle so it doesn’t happen that much.
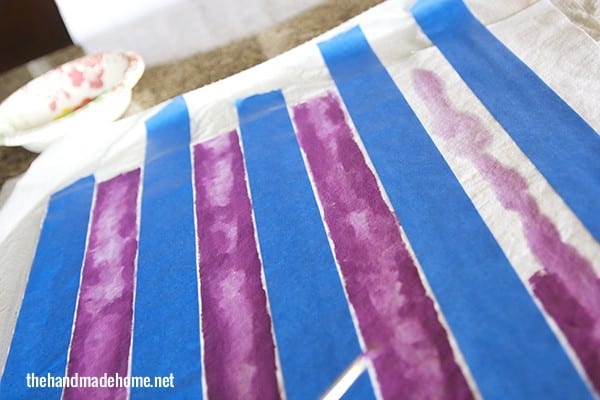
When it’s nearly dry, remove those stripes and move on to your next piece! You could technically just do one side, or match it up with a color for the backing if you’re done with the painting thing. I had so much fun {and knew that my kids would probably wipe their boogers on one side – TMI?} that I did two.
In the case of a booger emergency I will probably spot clean, or In the highly likely probability of something worse – wash on gentle in the washing machine.
I then placed the two faces right sides in, blank sides out {Trying my best to line up the stripes} and sewed them together. When you’ve finished three sides, turn them right side out, stuff and finish side four. I always try to finish my top seam where my pillow will be sitting, so you can’t see it.
Tada! My dad was a little confused because he wasn’t around for the stuffing point for it all to make sense. At this point he’s used to it and I told him I would send a photo today ;}
Such a fun shade of purple and great to use with any color!
 Let us know if you try it! Have an inspired day!

This is so delightful Ashley! I have been all about watercolor lately 🙂
Thanks, Kyla! It’s fun. ;}
Love it!!!
Finger toes, UNITE! My mom even makes fun of my freak toes. Mneh.
I seriously love how this pillow turned out! Did you add the fabric medium to your paint, or just go with the straight acrylic? I suspect that watering down the paint would help with the stiffness of acrylic on fabric anyway, so maybe it doesn’t need the medium. Oh, and I confess that I snorted into my coffee when you mentioned pre-washing your fabric this time. Such a sad, sad way to learn that lesson, but it made for entertaining reading when it happened (for us, at least!).
I’ve been looking for a project for my girls to do to help redecorate their room, and I think this would be perfect for making little pillows for their window seat. Thanks for the idea! On a side note, I’ve always hated that last seam on things and then my friend showed me how to make a ladder stitch. It makes an invisible seam and my ocd loves that;)
so pretty!
Hi, love your cushion and I’d love to give it a try. What sort of paint did you use, though, and did you not have to seal it in any way?