
tennessee flag art
If you’re stopping by for this little mini series, we’ve had a blast sharing this space with you. It was a great cause from La-Z-Boy for the wonderful people at the Ronald McDonald House.
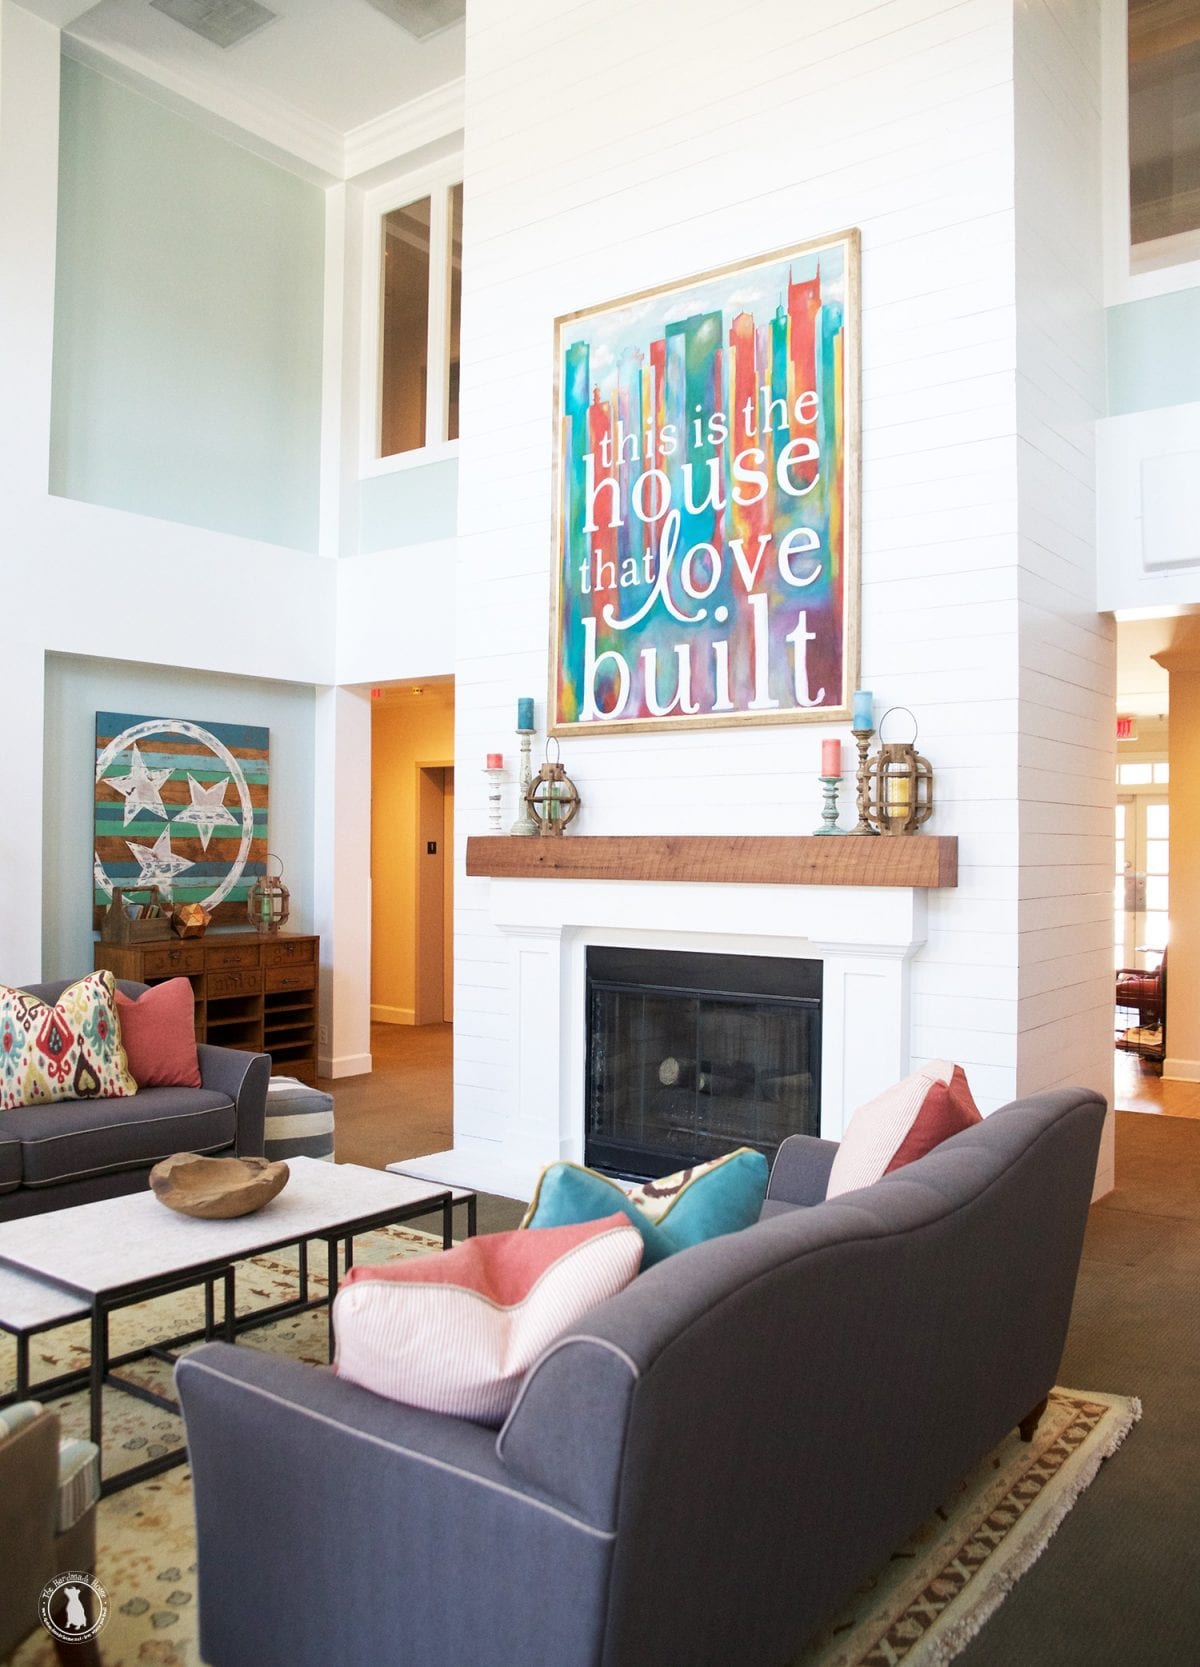
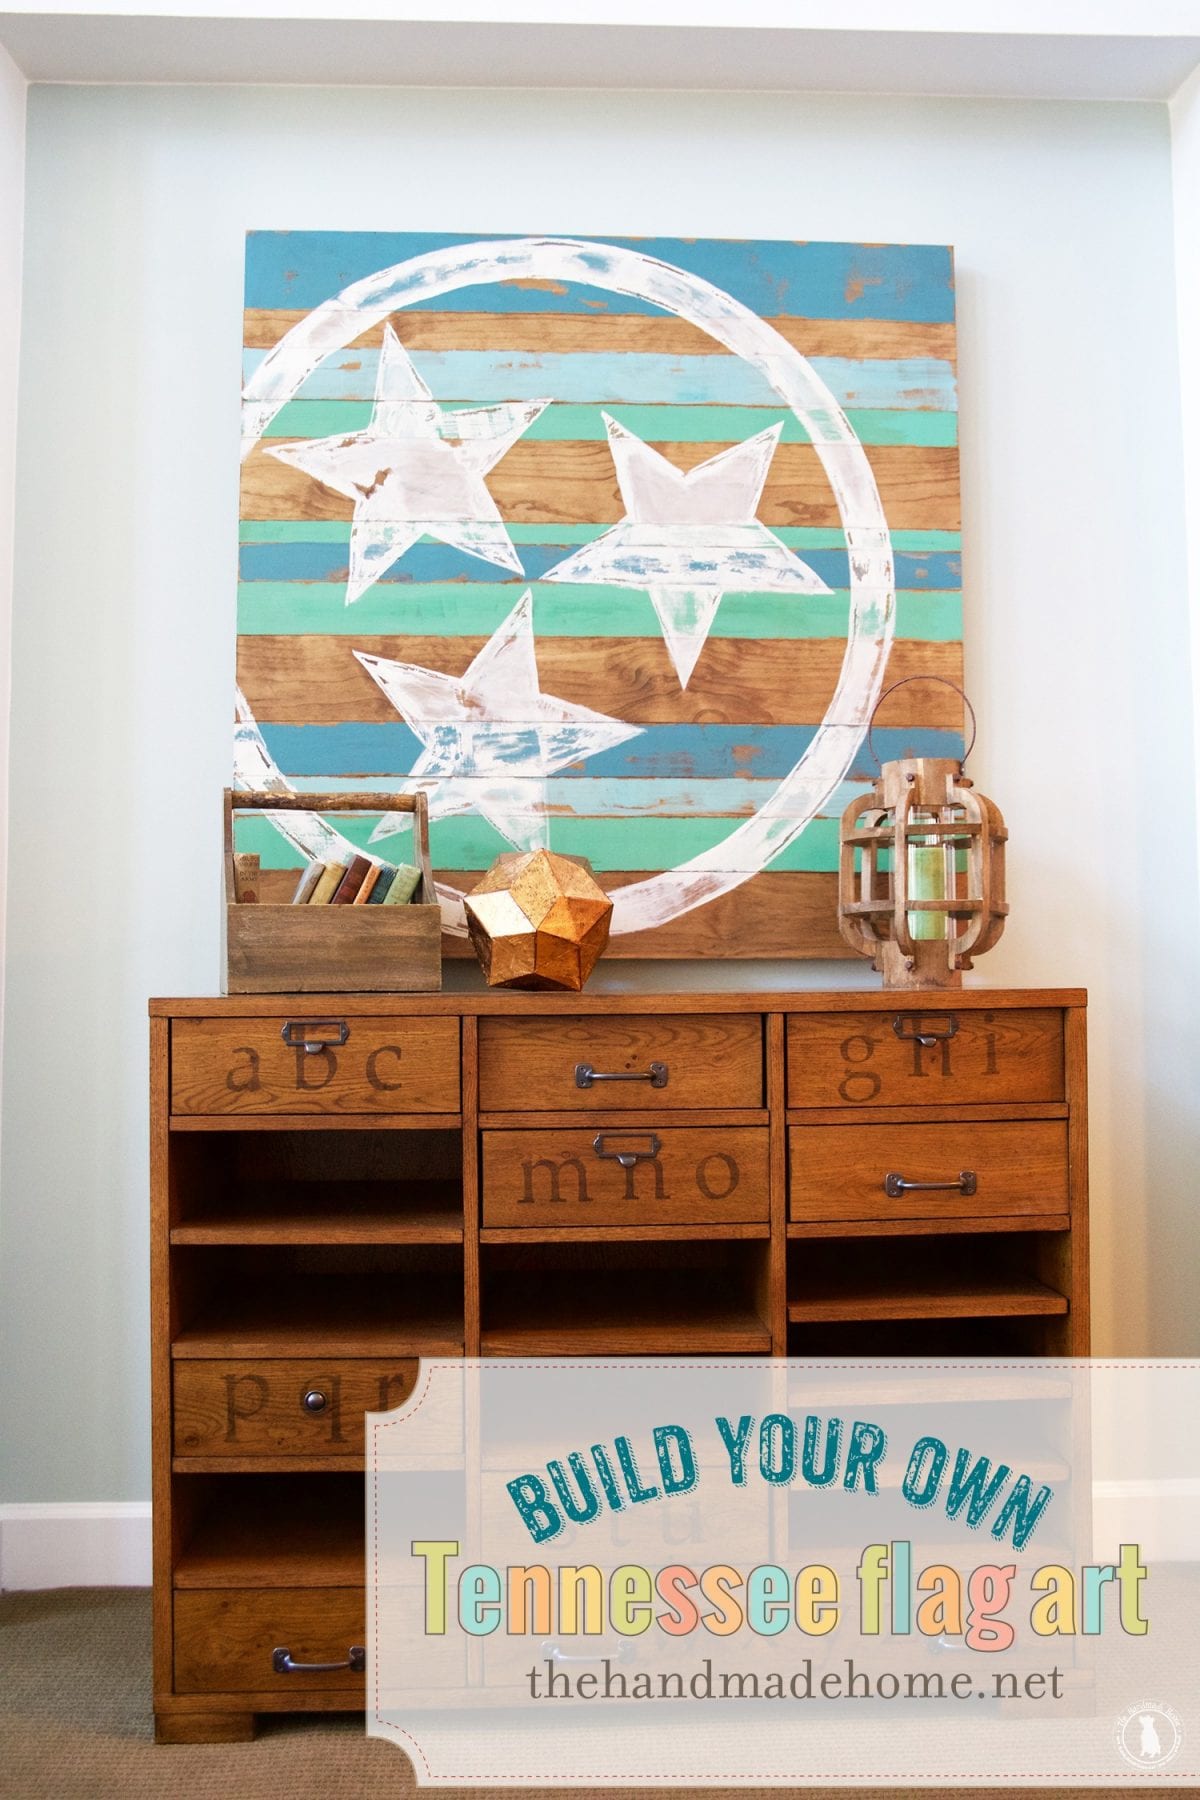
And today we’re back with one of our very favorite pieces: our Tennessee flag art.


We knew we wanted the space to have a touch of Nashville in it… Some personality with flare for the littlest of visitors to enjoy. So we really loved putting together this simple art for a one of a kind project.
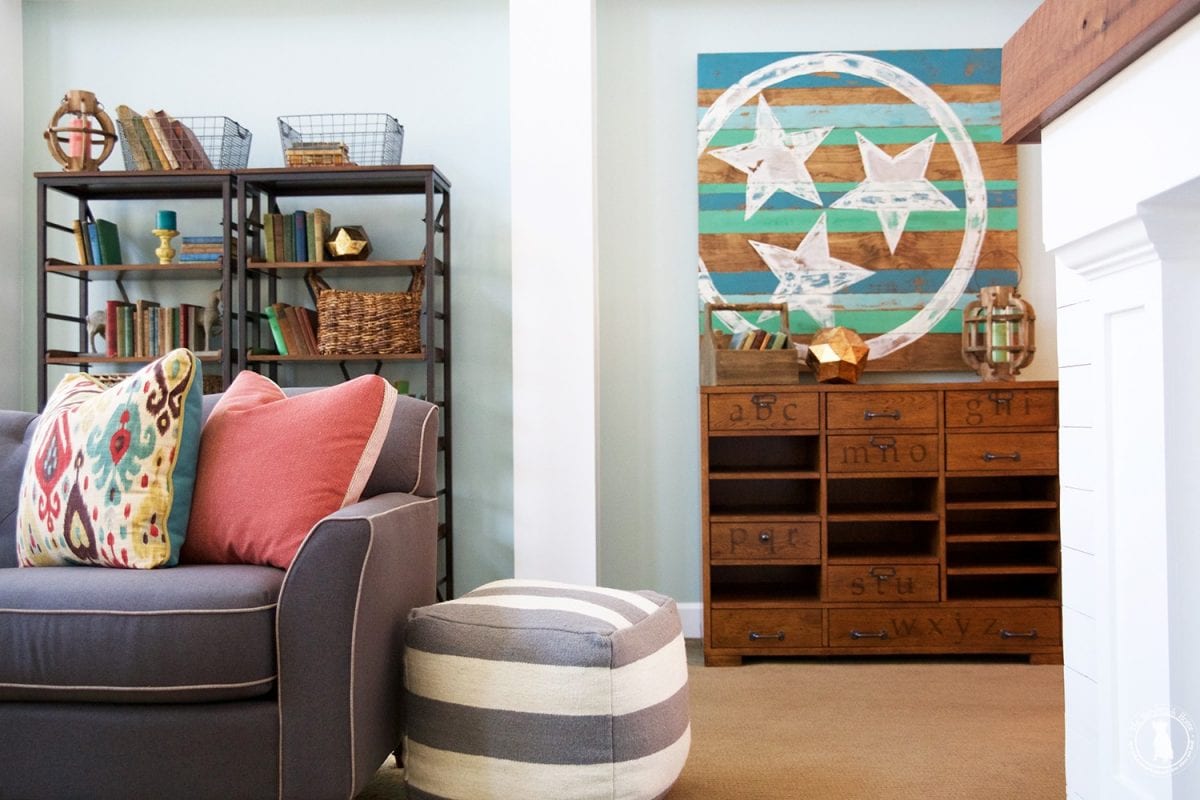
It’s colorful and full of local flare. Want to make your own?
Here’s what you’ll need: • varying sizes of wood planks • wood glue • scrap wood boards • 1 1/4 inch screws.
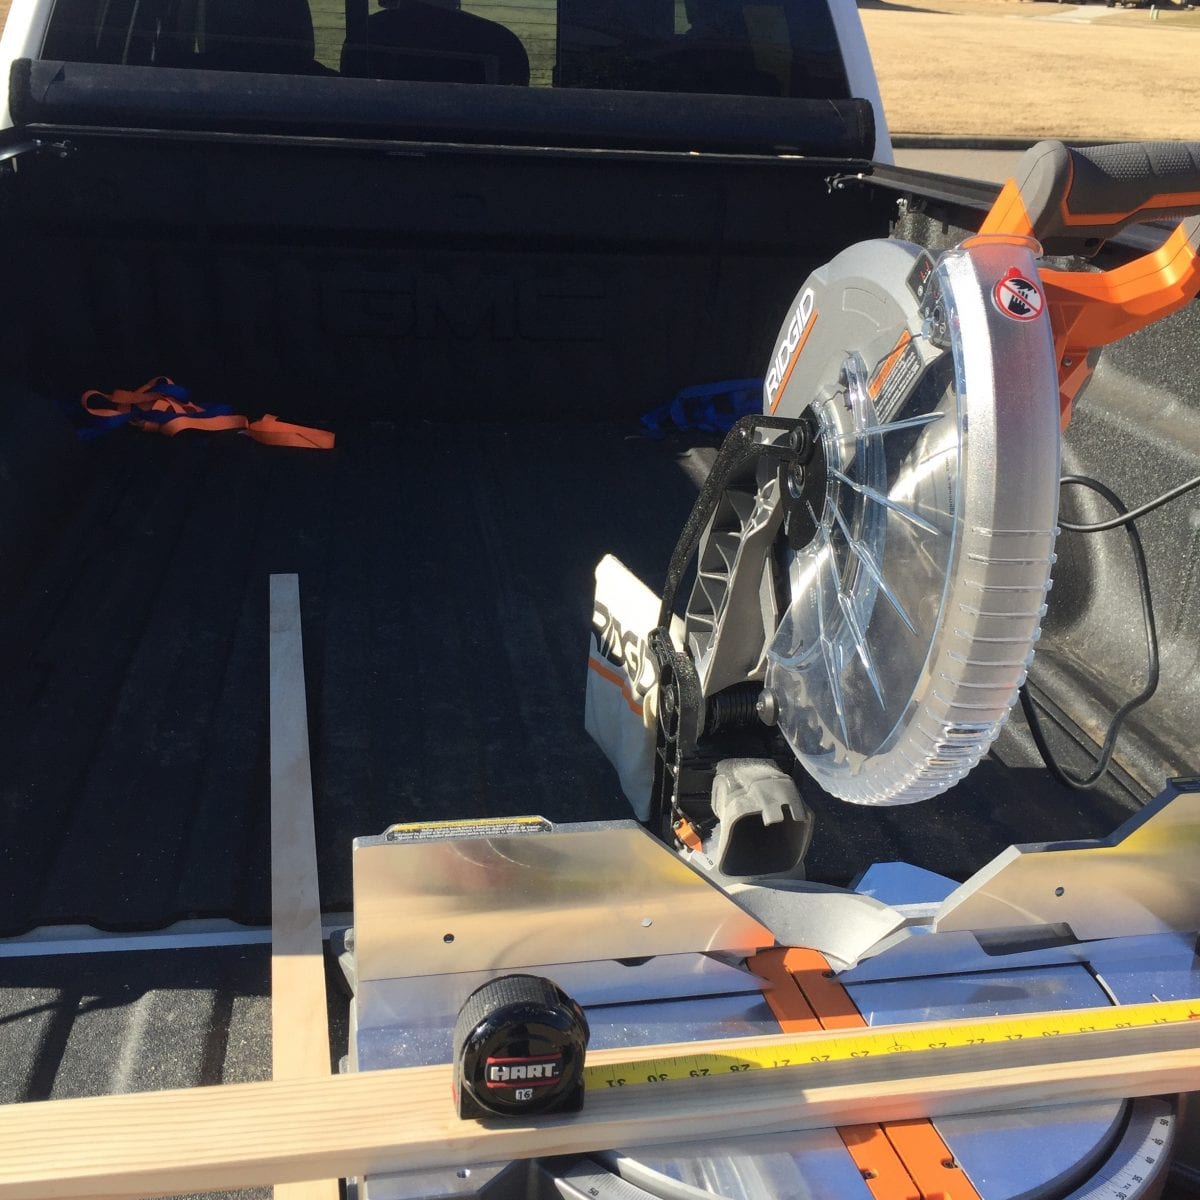
Start by measuring and cutting your boards. The great thing about this project is you can make it to fit your space.
For the basis of this project, you’ll be placing planks together, just like we showed you from our layered frame project… but at a larger size. Be sure to hop on over for assembly specifics.
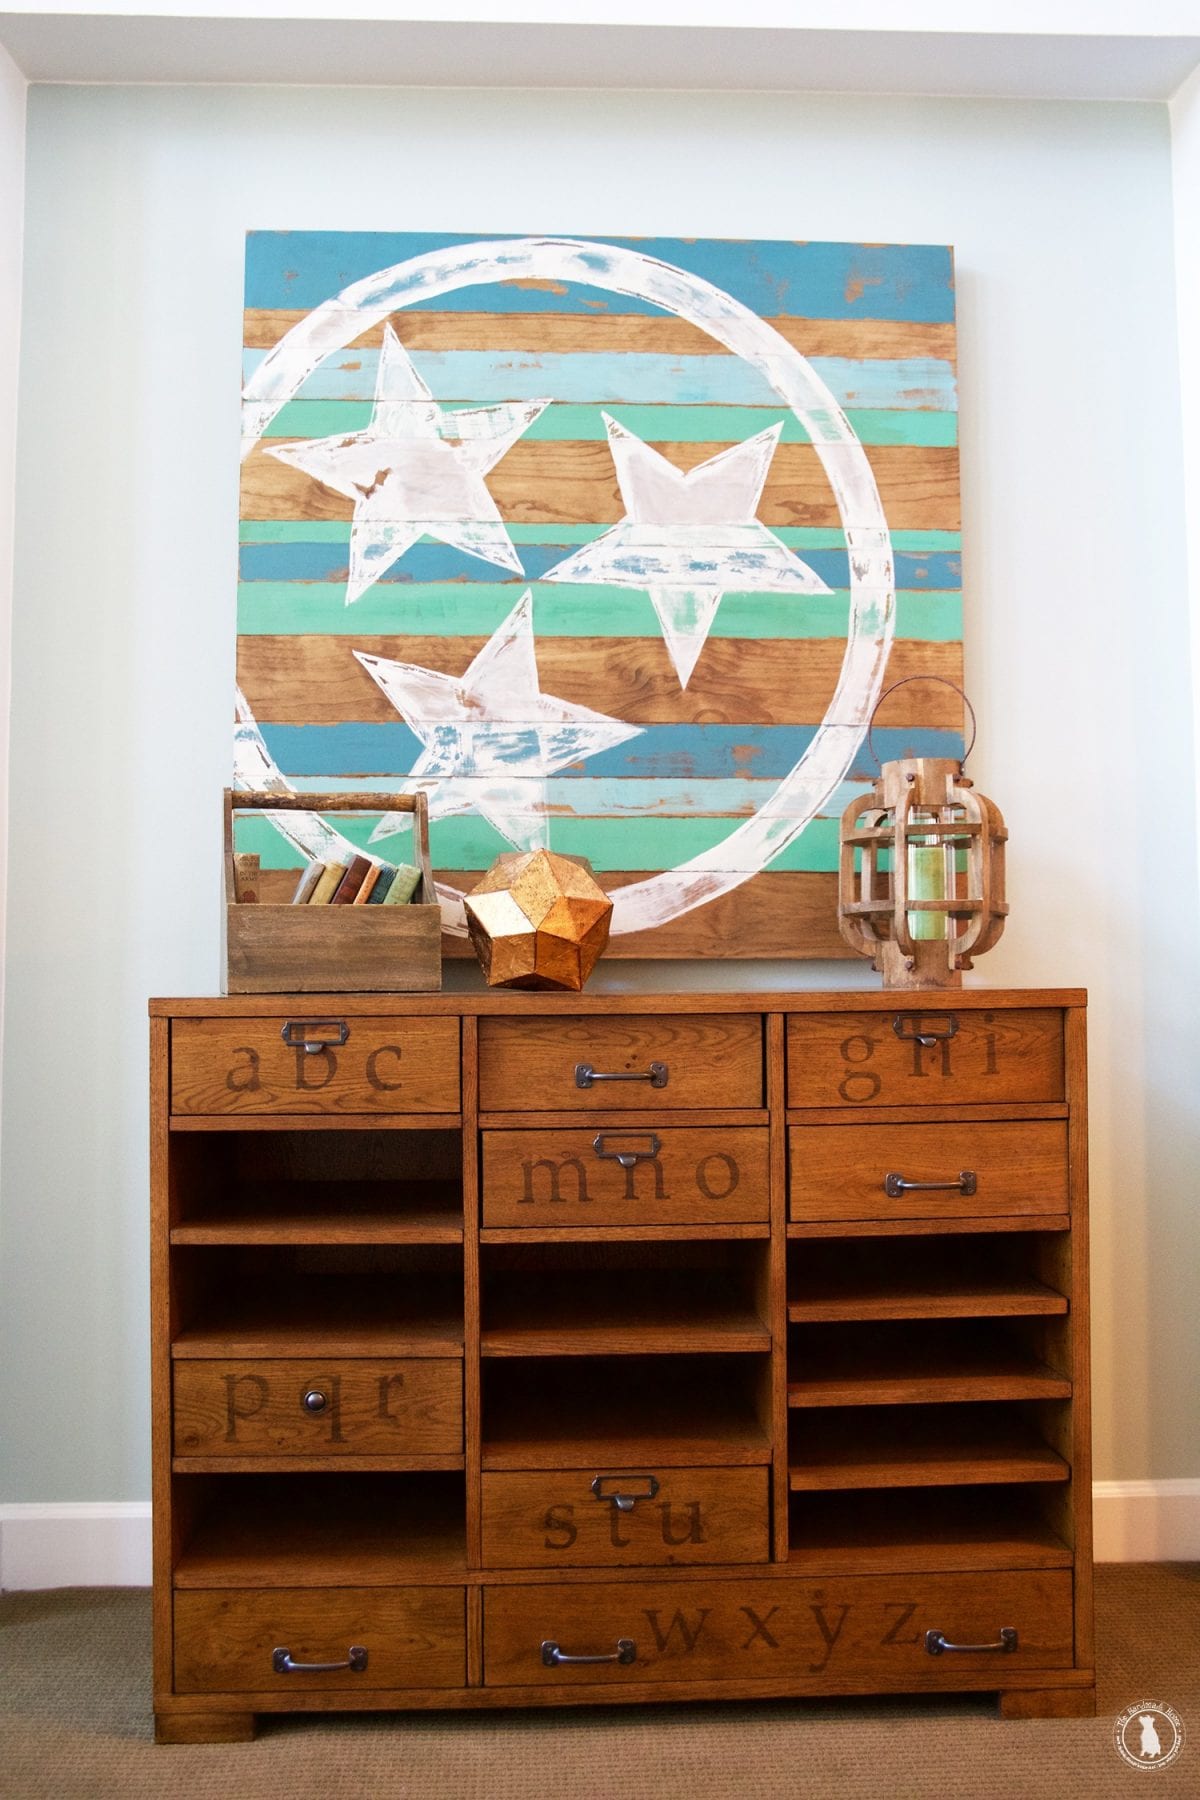
This piece measured almost 48 inches by 48 inches when completed. If you know us, you know we love those Big Bertha pieces in a space. You could simply glue these, but most of us don’t have a good way to clamp something this big. So we stabilized it on the back by screwing scrap planks the length of it using #10 1 1/4 inch screws. Of course, you could create your own version at your own size. Basically, just follow the same steps.
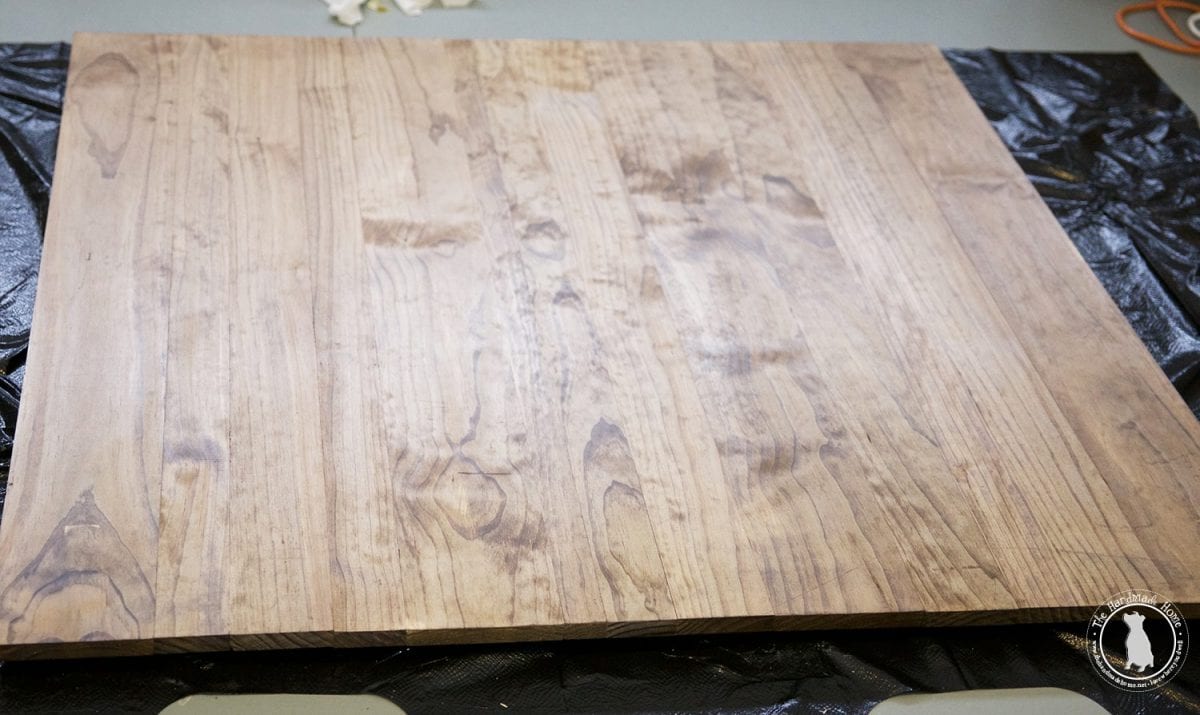
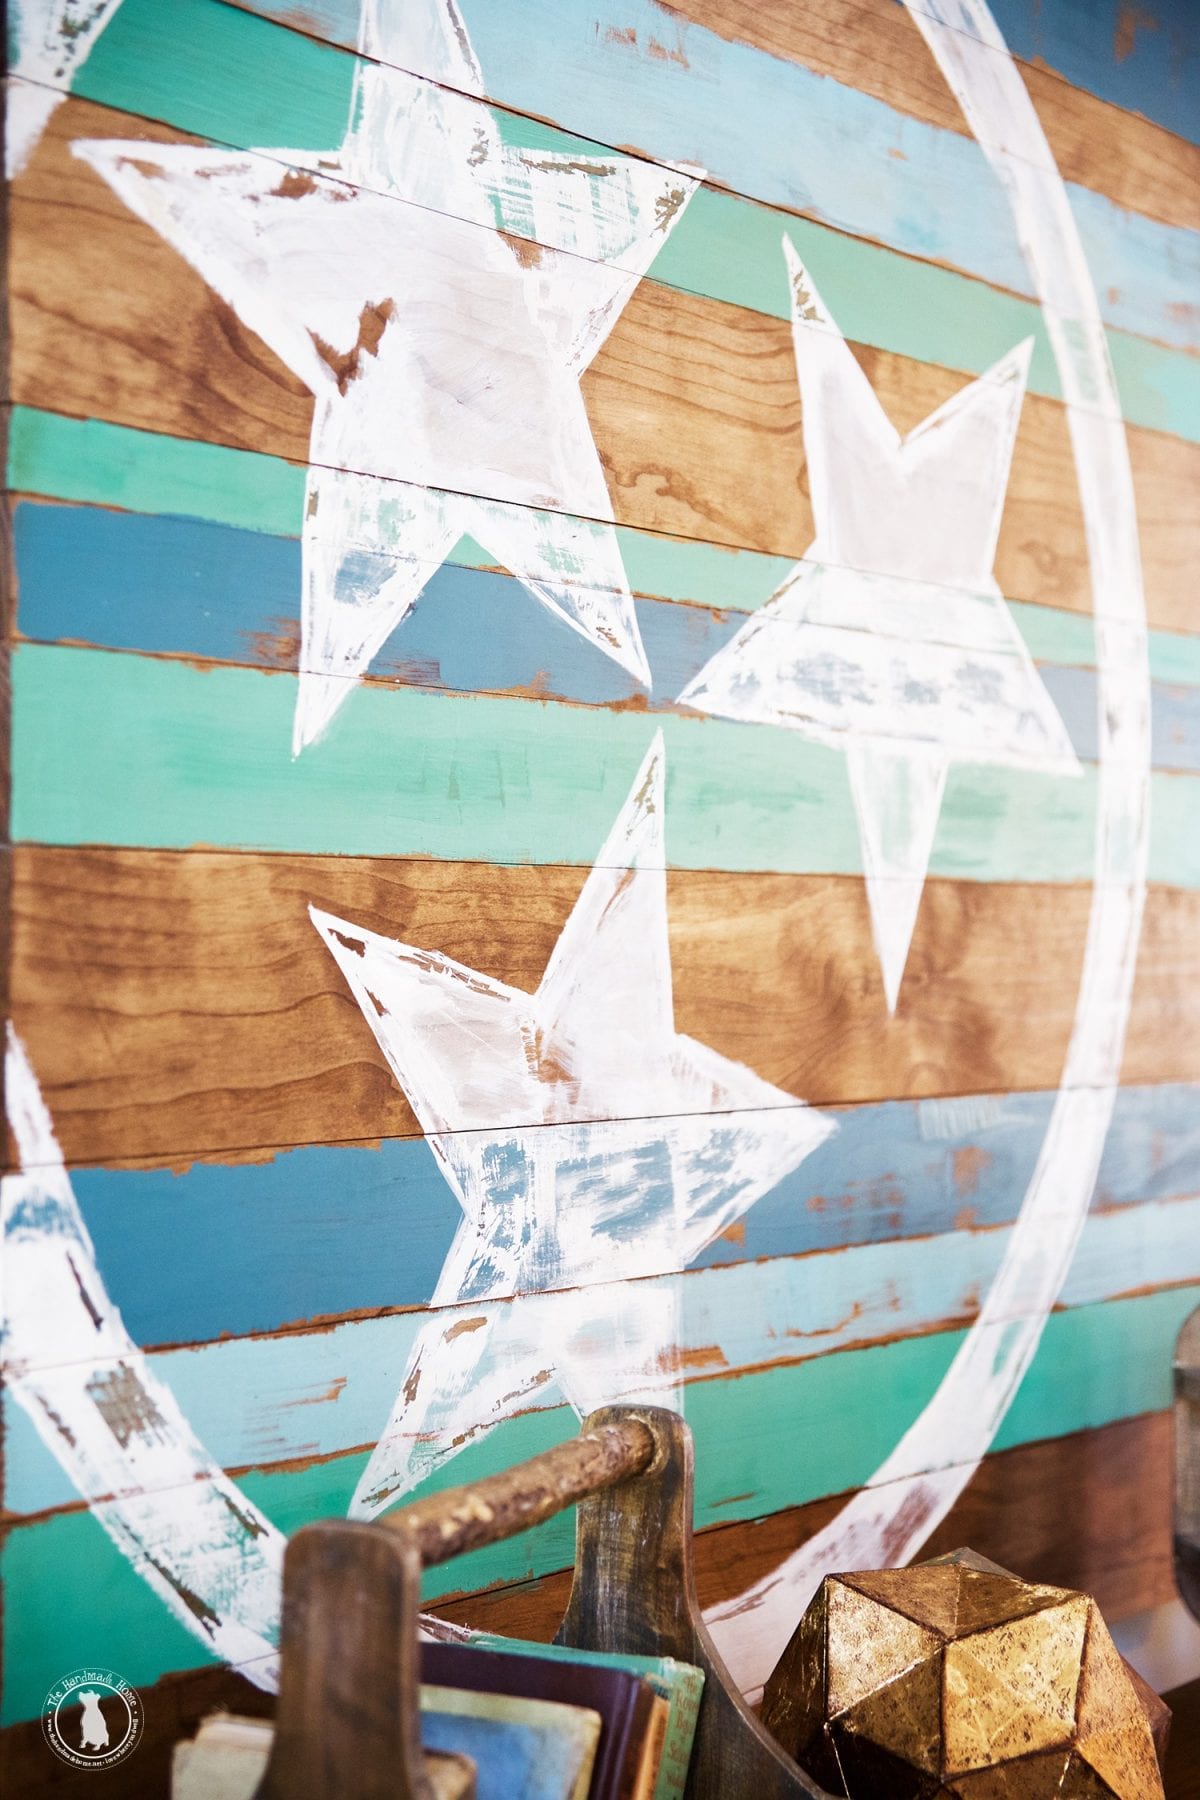
When it is stabilized, and sanded, add your stain. We used Minwax’s Early American, for a great classic tone of wood.
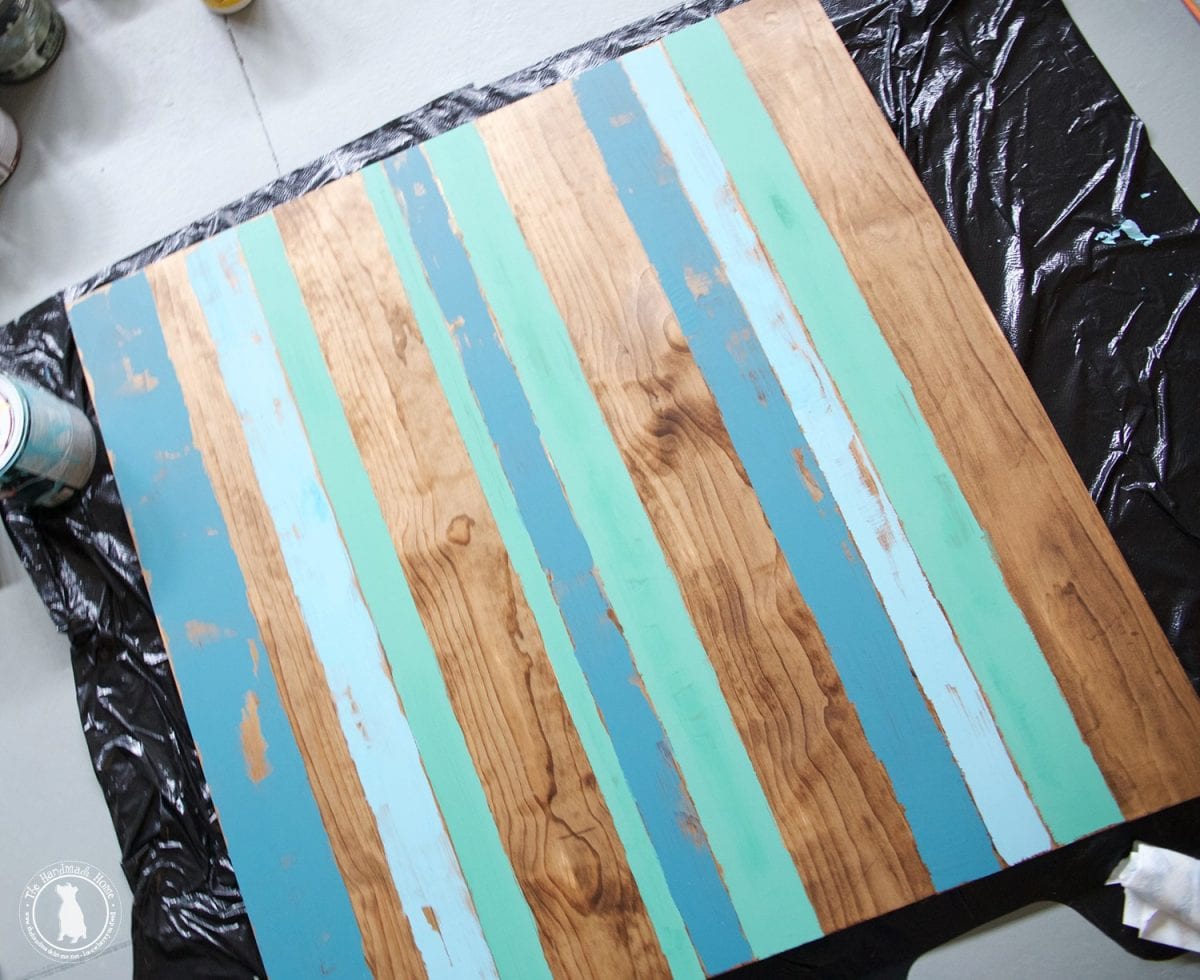
Once that initial stain is dry, it’s time to go back with any colors of your choosing, to fill in the planks you want to paint. You could paint your design on top of this and skip that step. But we loved the extra interest these punches of color added. If you look closely, you’ll see we put our planks together in various sizes to add interest to the piece. We went with colors already in then space, alternating as we went.
For that distressed look, please note that removing paint on top of stain can be tricker than it seems. So, we created this look as we went, instead. Move and push the paint with your brush in various directions, leaving gaps and spaces for that “older” feel. If you wish, use tape in between, but we just found that painting carefully along the edges gave it an older feel, anyway.
Let this layer dry.
Next, we added the top graphic. Since the Tennessee flag is so precise, we made a digital version of it, and turned it into a projection to trace. You can do this by using an old school projector {you never know what you’ll find to borrow at your church or tucked away in a classroom at your local school} and have it printed on a transparency sheet. Or use a new one, and project the art there. These are available on Amazon, and a great investment for projects around the home. Either way, we have the digital file for you to download, here: TN flag art
Simply take the art, and project it onto your planks. Helpful hint: it may take a while to get the image just right by focusing it when it’s on the board. Just make sure your art stands up straight, if it’s leaning against a wall because this could cause the art to be crooked.
We cropped ours a little for a more found feel, and a chalk pen worked the best for transferring the art. The white stands out, and if there are mess-ups, it wipes away easily.
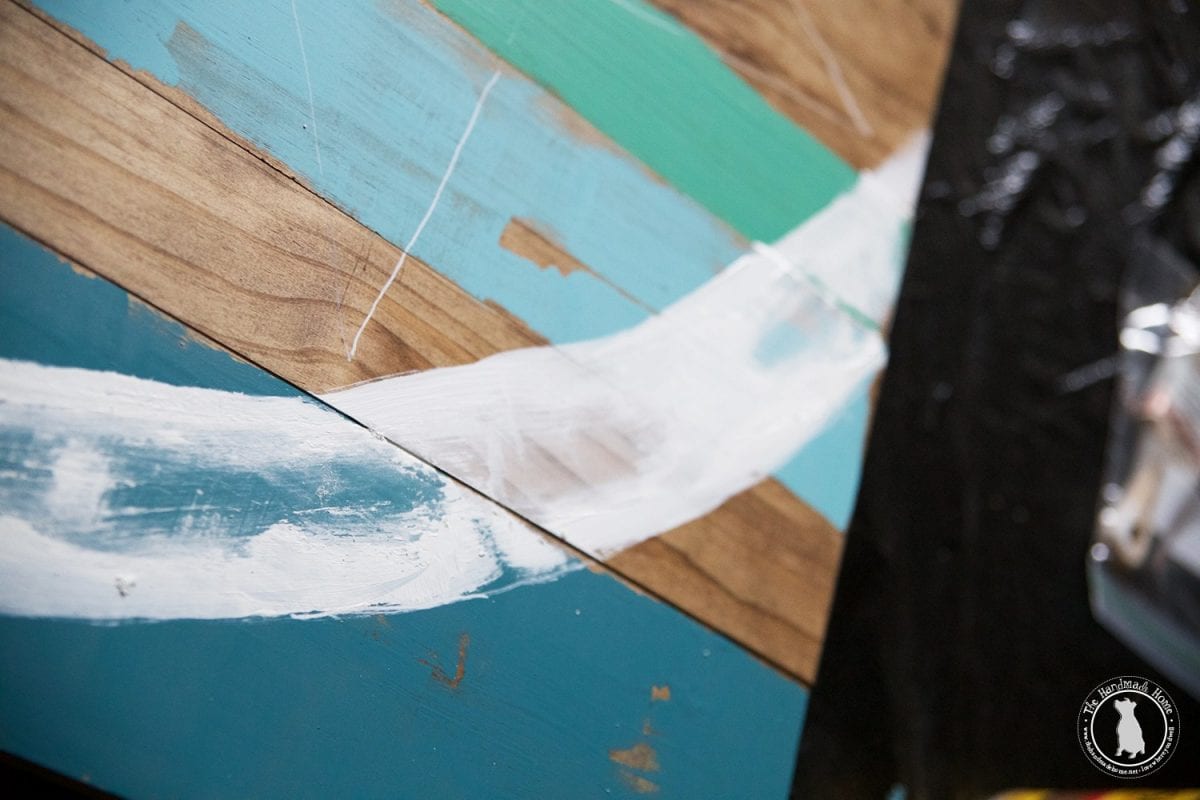
Since you want this to be distressed for that authentic feel, be sure to paint in sections as you go. We used a simple white on top, so that it stood out more. As we went, wiped some of the paint away, and brushed a little liberally for that old feel. We found that the paint wiped up easily when it was paint on top of paint, since latex removes easier. Just wait for it to get to that gloopy, almost dry stage that latex does, for that perfect effect when you remove it. It smears less, and leaves more of a gap.
On top of stain, you’ll see in the photo above, it wiped away but left a bit of a smear/light layer of white behind. With the white on top of blue paint it was more easily removed.
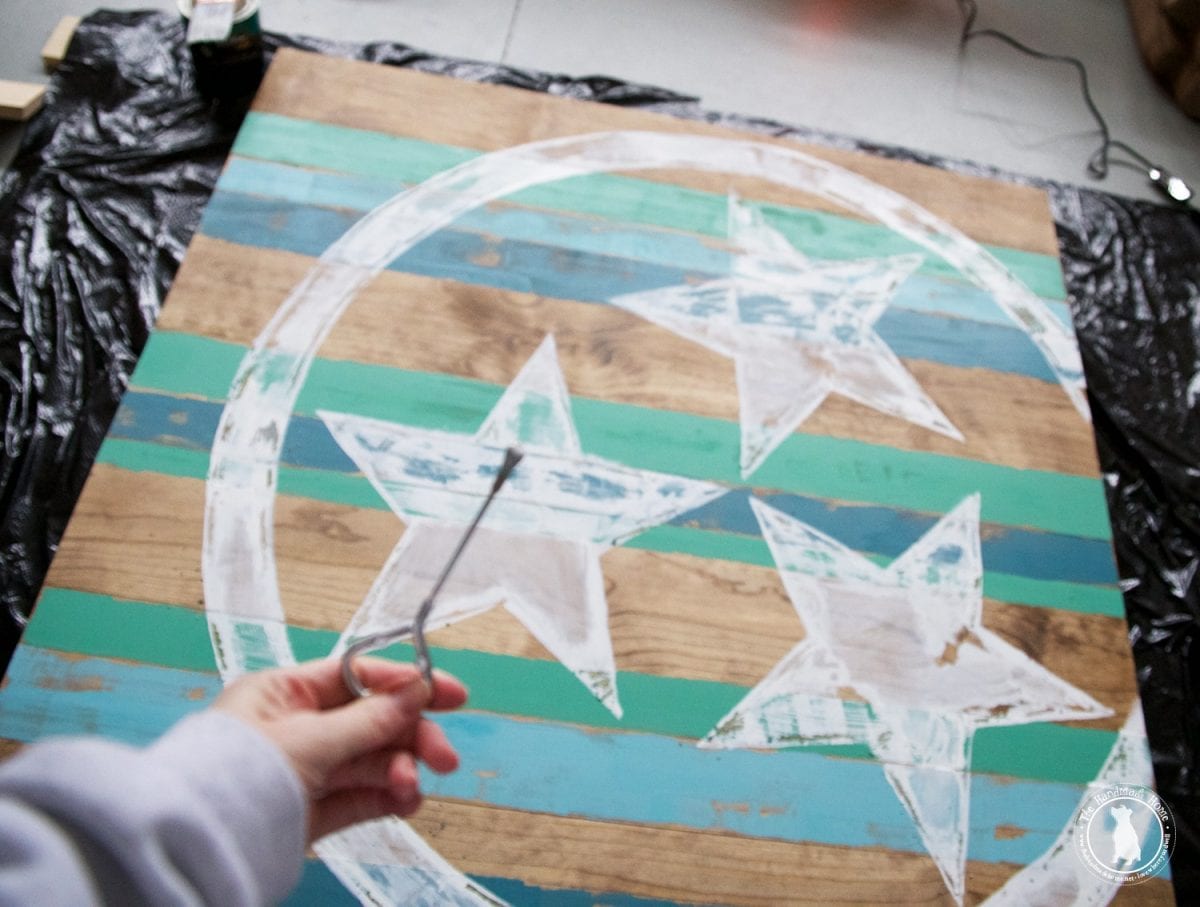
Once we had the entire shape painted, we went back and scraped some more away with a paint can opener. This pic is lame, I know… it was the best Ashley could do in between rushed painting sessions before the paint dried too much. We simply scraped in areas where we wanted that distressed feel.
And when we were satisfied with the design, we were finito. Tada!
A great, one of a kind piece for this sweet space. And yours, too… even if you don’t live in Tennessee.
Because you can use this technique for just about anything. You can project just about any image you want with the same kind of feel. As long as it’s a simple graphic, you never know what you’ll end up with. The possibilities are kinda endless. We’d love to see your ideas!
We love this piece so much, we may need it in our own home.
As always, we’d love to hear from you if you make it!
Let us know if you have any questions. Have an inspired day!
I am so making that! Love it.