
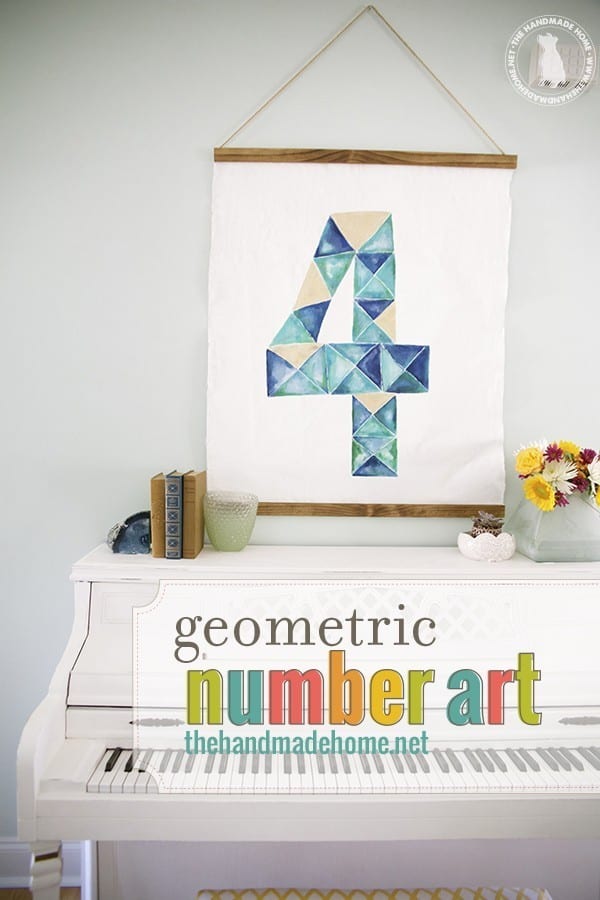
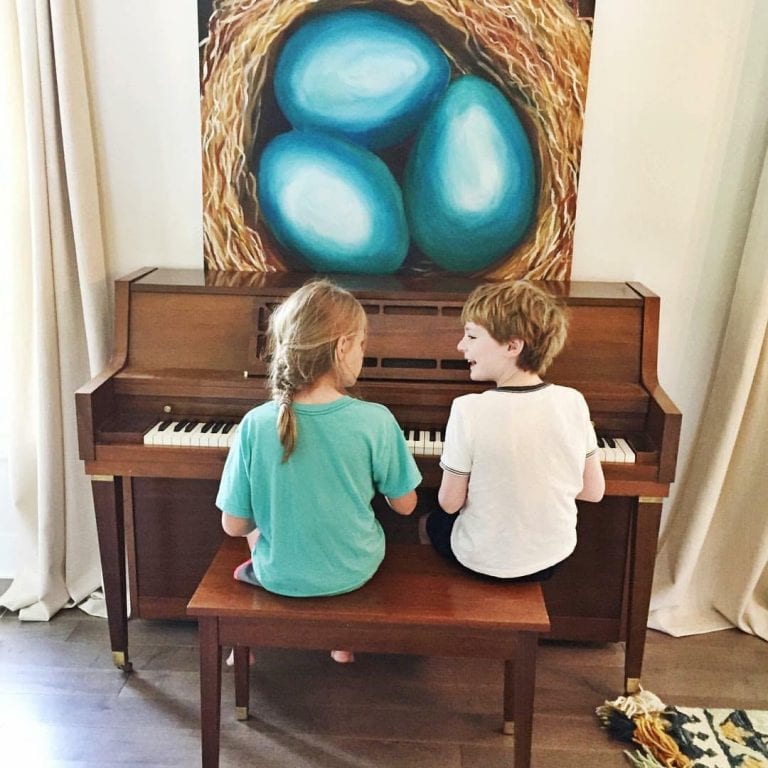
geometric number art
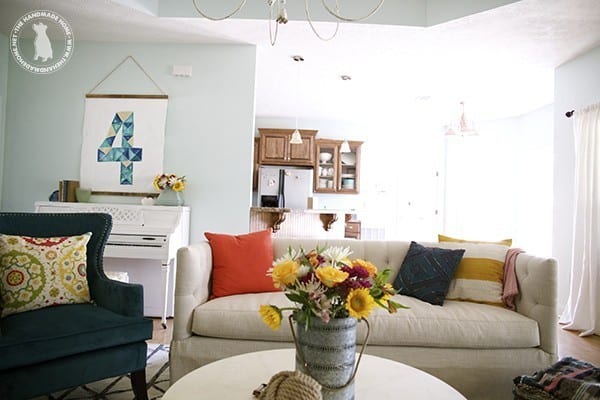
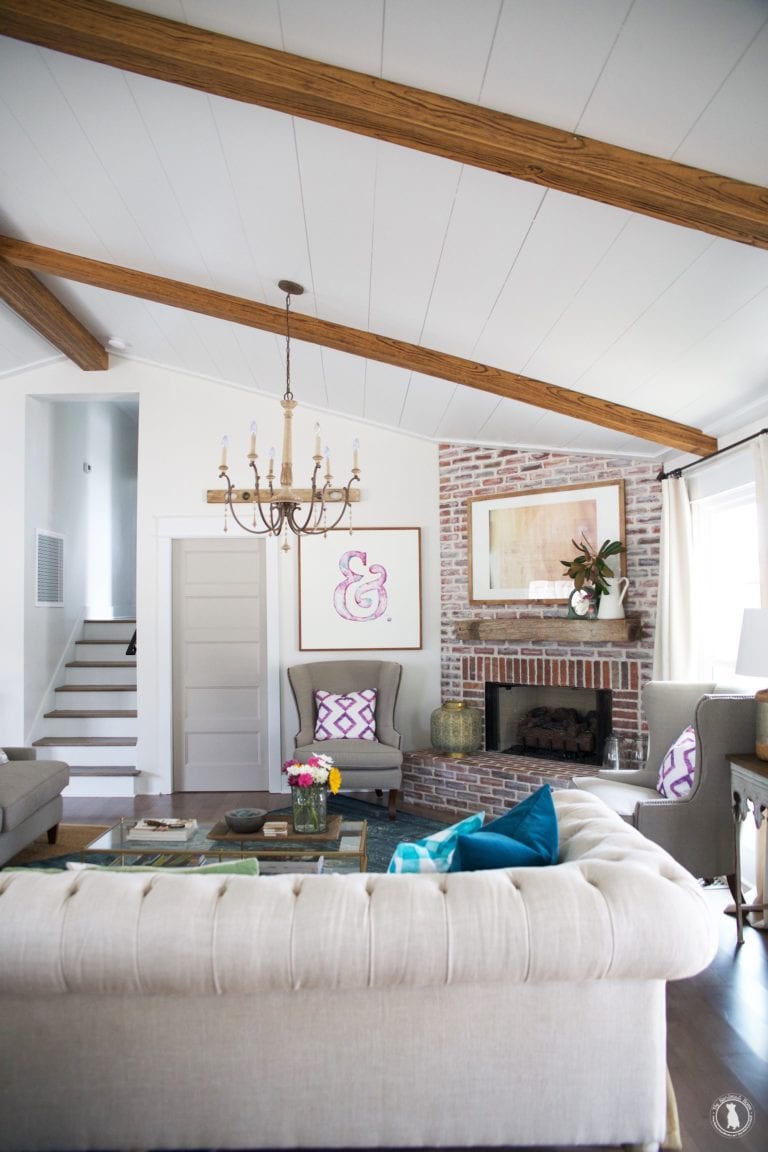
We really enjoyed sharing this fun living room reveal last week, so we’re excited to share a few how-tos and details in the upcoming weeks. Most of these are fairly simple projects that can add a whole lot of pizazz to a space!
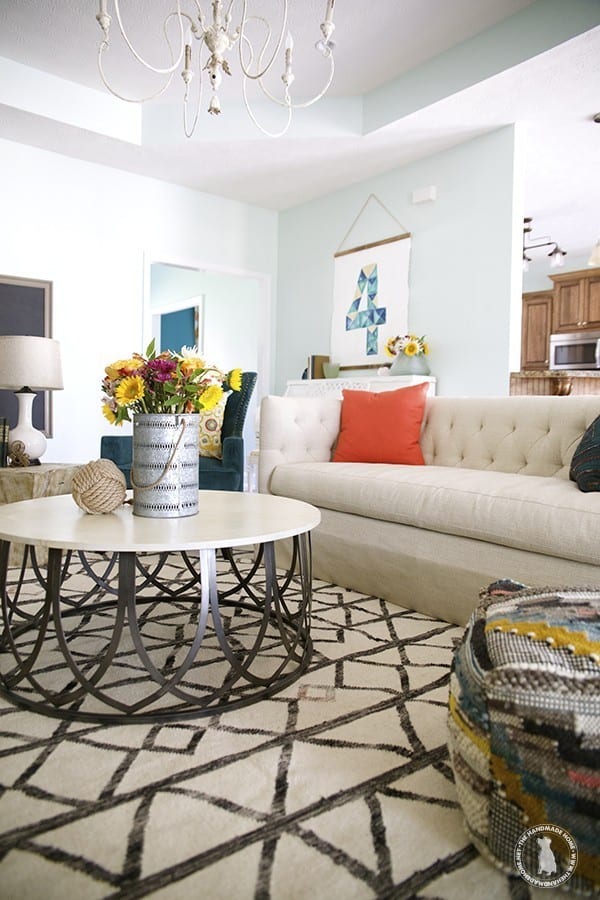
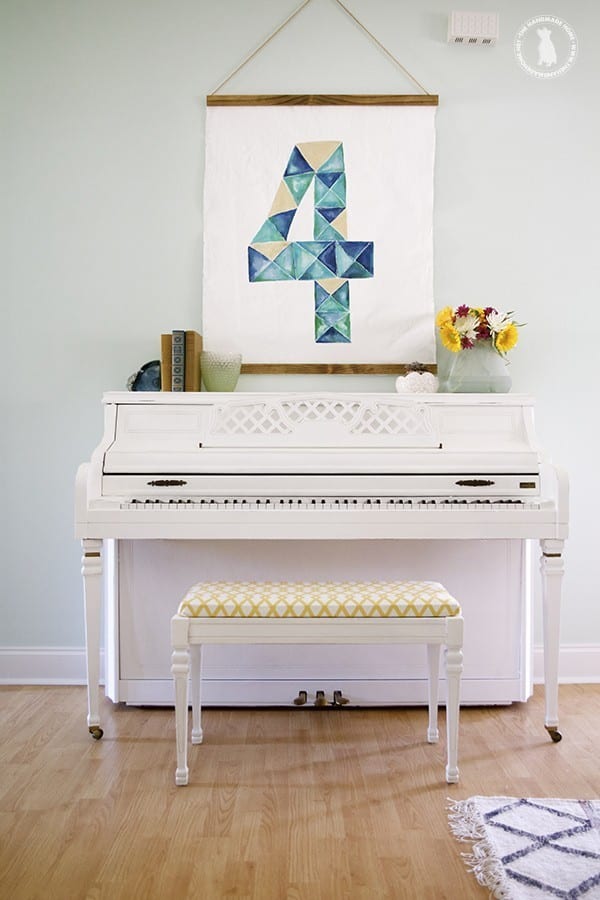
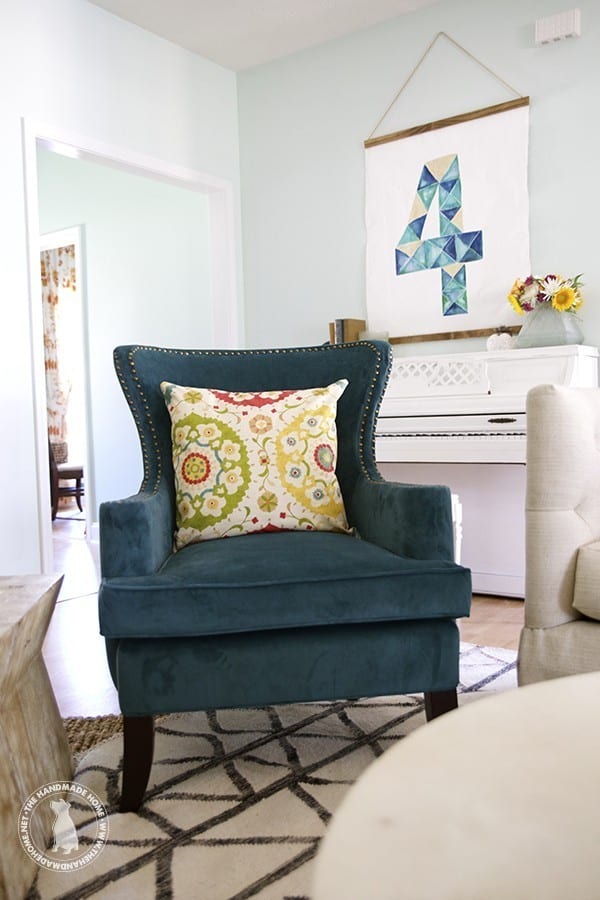
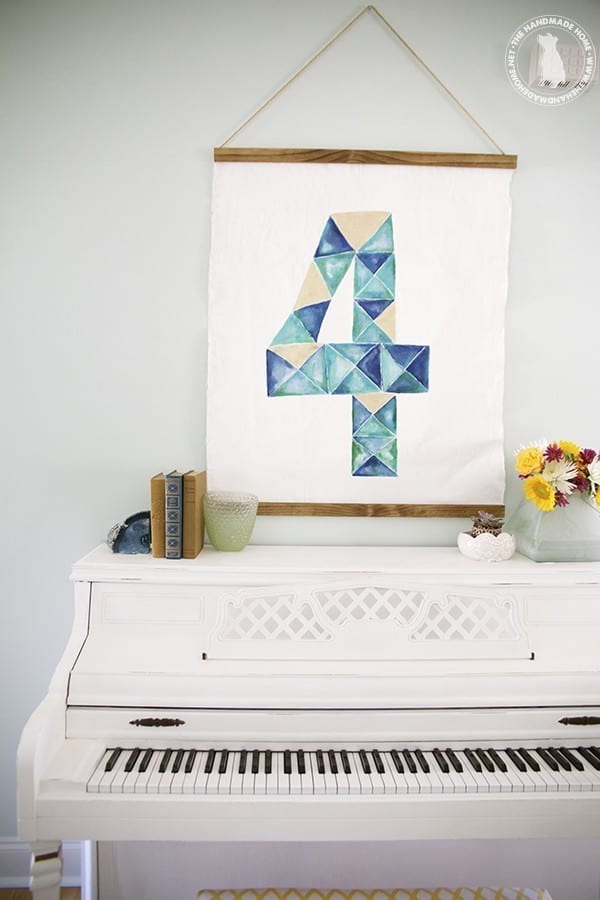
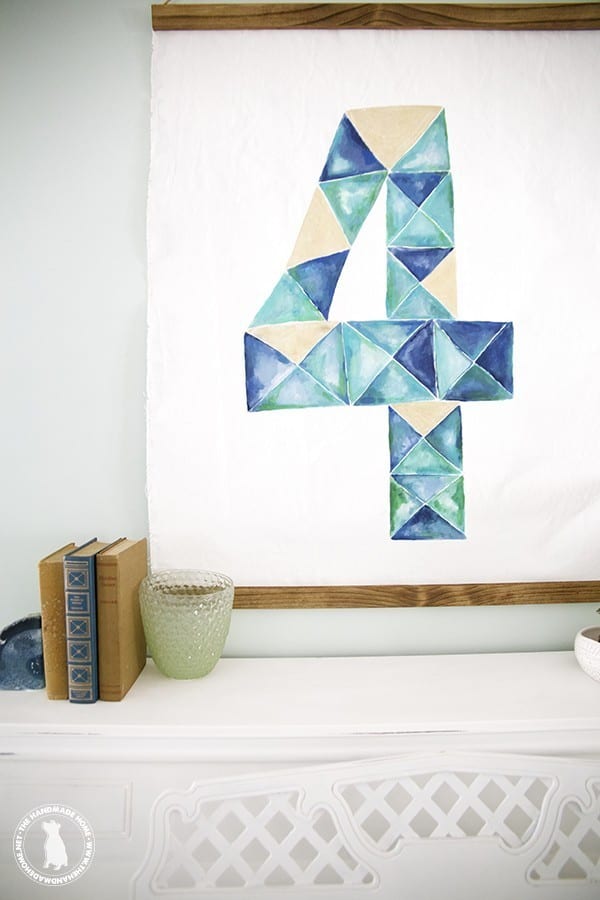
We made this geometric number art for Ginger and James and their sweet family of four. It worked perfectly over their freshly painted piano {more on that coming soon} and brought in some of that great variance of hues in their space with accent colors.
We loved bringing in a simple piece for a flare of fun in an unexpected way.
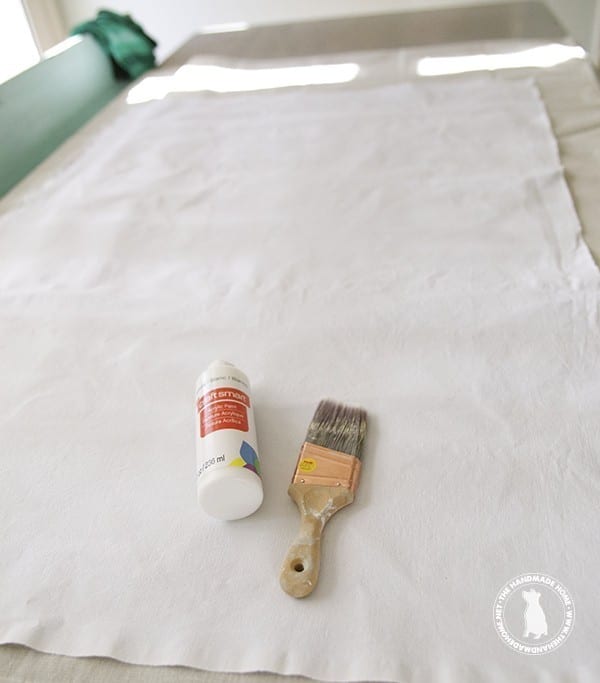
It was actually super affordable for the price of some acrylic paint, fabric, wood and twine. Here’s what you’ll need:
• Duck cotton of your choice {at the local fabric store} • slices of wood and stain • big brush and a few small brushes for smaller painting • pencil • stain • twine • staple gun
You could easily do this art on some canvas if you have any, but this was my cheap option with some enchantingly frayed salvage edges.
I simply cut it to length, and placed it on our kitchen table with a nice drop cloth, a large brush, and white {matte} acrylic paint.
PS. Be sure to use a drop cloth with a plastic backing so it doesn’t bleed through to your furniture, if you plan to paint it inside.
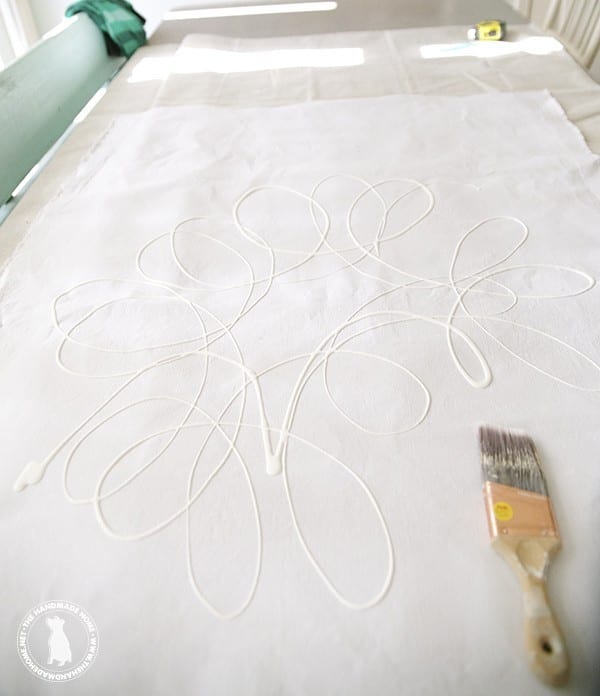
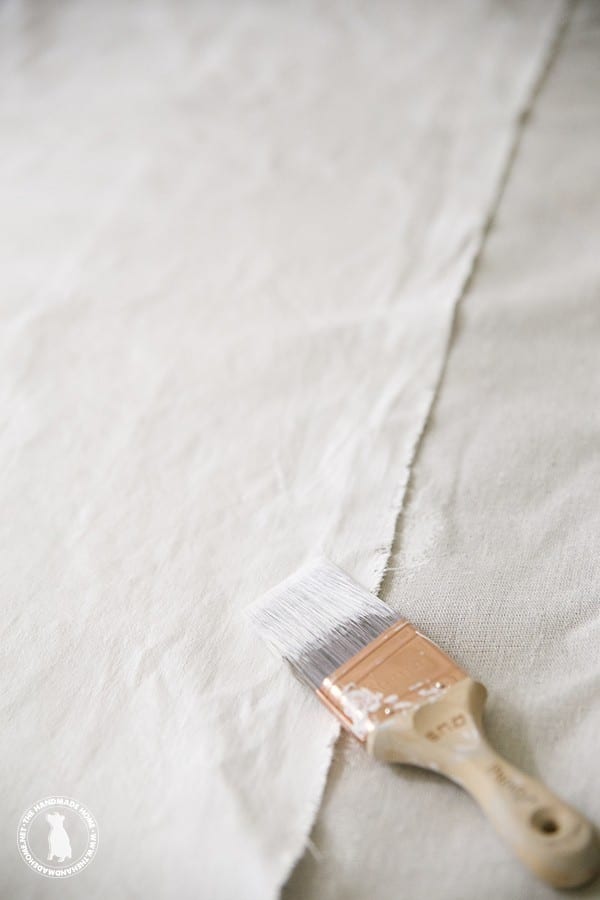
This white coat of paint will serve as a cheap primer for your cloth, and get it ready for any paint that you use. If you don’t prime your fabric, you run the risk of your paint bleeding. This probably took less than thirty minutes, and the entire thing was nearly dry by the time I finished the final corner.
So we spread it evenly over the fabric, with a large brush.
And when it was dry…
Sketched out a nice four on top of the fabric.
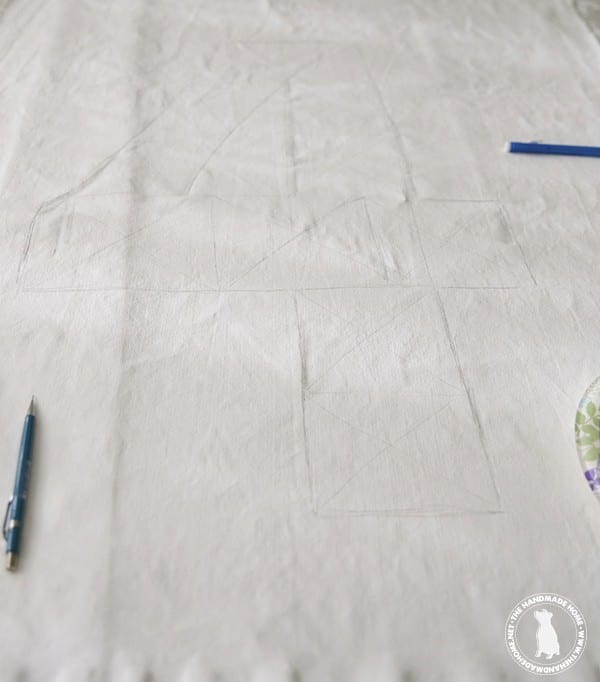
I simply eyeballed it alongside one of my favorite fonts, but you could always use the projector method if you want to get your lines just right.
When it was penciled in {lightly, so I could erase/paint over any mistakes} I divided it up into squares and then the squares into even x’s for the triangle look, where I could.
I wanted to keep the geometric look from becoming too rigid, {read: it was handmade and sometimes its a little fun to not be so precise} so I simply eyeballed as I went. Some areas of the four weren’t big enough for the squares and x’s {see upper left side of the 4} so we added triangles where appropriate, covering up any mistakes.
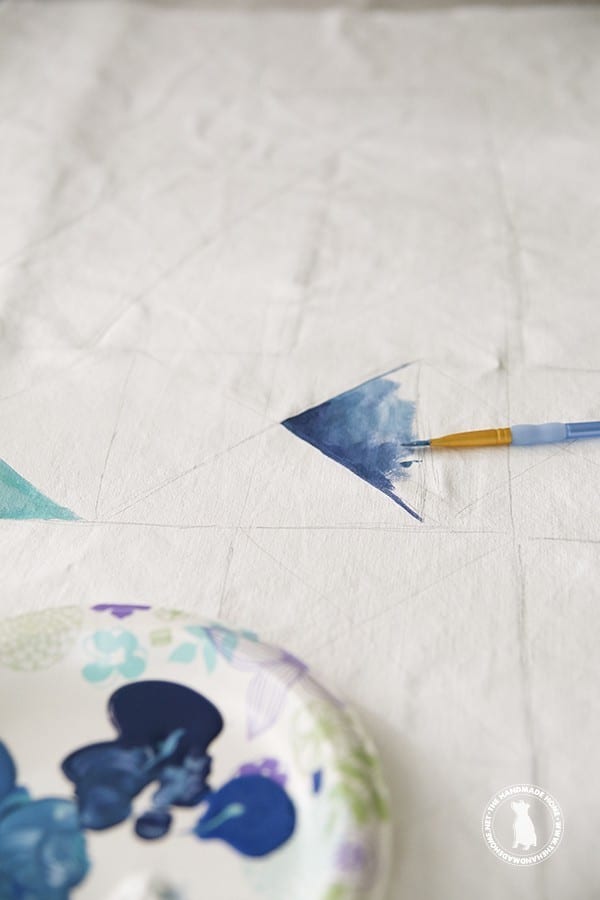
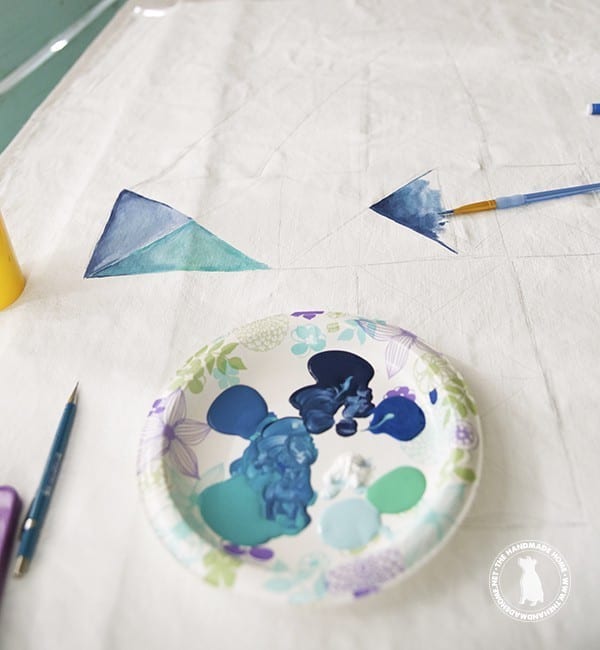
I then grabbed a bunch of different blues and a white from my acrylic collection, along with some gold paint.
 And shaded each one in with different tones, gradually blending as I went.
{I even had a little lego battle, narrated step by step, to keep me company.}
Helpful hint: if you use a gold paint, avoid anything of the gold leafing variety, and try to find something that works with fabrics. This way the metal will not separate from the paint and cause bleeding.
I used a little negative space in between each triangle, and from hues of aqua to a deep blue, shaded in each one as I went, using white and thinning out the paint with a little water, just like you would with watercolors.
I just kept the variance interesting, and blended it all in.

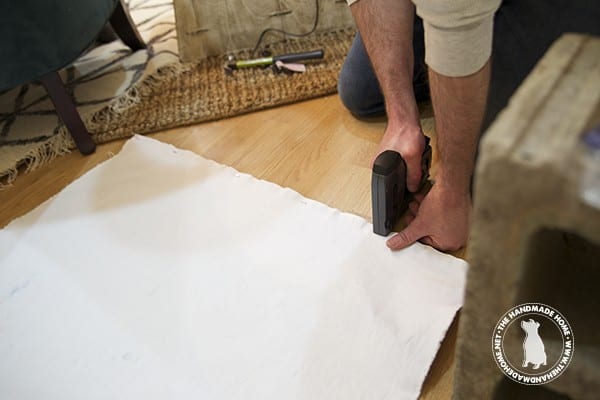
When it was dry, we flipped it over, and attached two wood pieces {cut to width- the thinner the better} and stained it for a nice contrast.
The fabric attached easily with a simple staple gun, and then we added a little twine for hanging on top of that to the back.
Tada! A great little geometric piece, special to their sweet family, with a vintage look.
And at a fraction of the cost.
You could really do any kind of art you wanted this way, and there’s no need to frame it… it’s fabulous as is!
As always, if you try it please let us know. And if you have any questions shoot them our way, we’d love to hear!
Have an inspired day!

so wonderful! THank you thank you! any chance you’ll share the wedding song project soon? I need to copy that for a friends living room. 😉
Thanks Elizabeth! Yes it should be up early next week! Thanks so much!
This is the cutest art. Ever. Thank you for the tutorial. I am making my own version this weekend and would have never thought to make something for the wall that way!
I love how simple this is! Thanks for sharing your process.