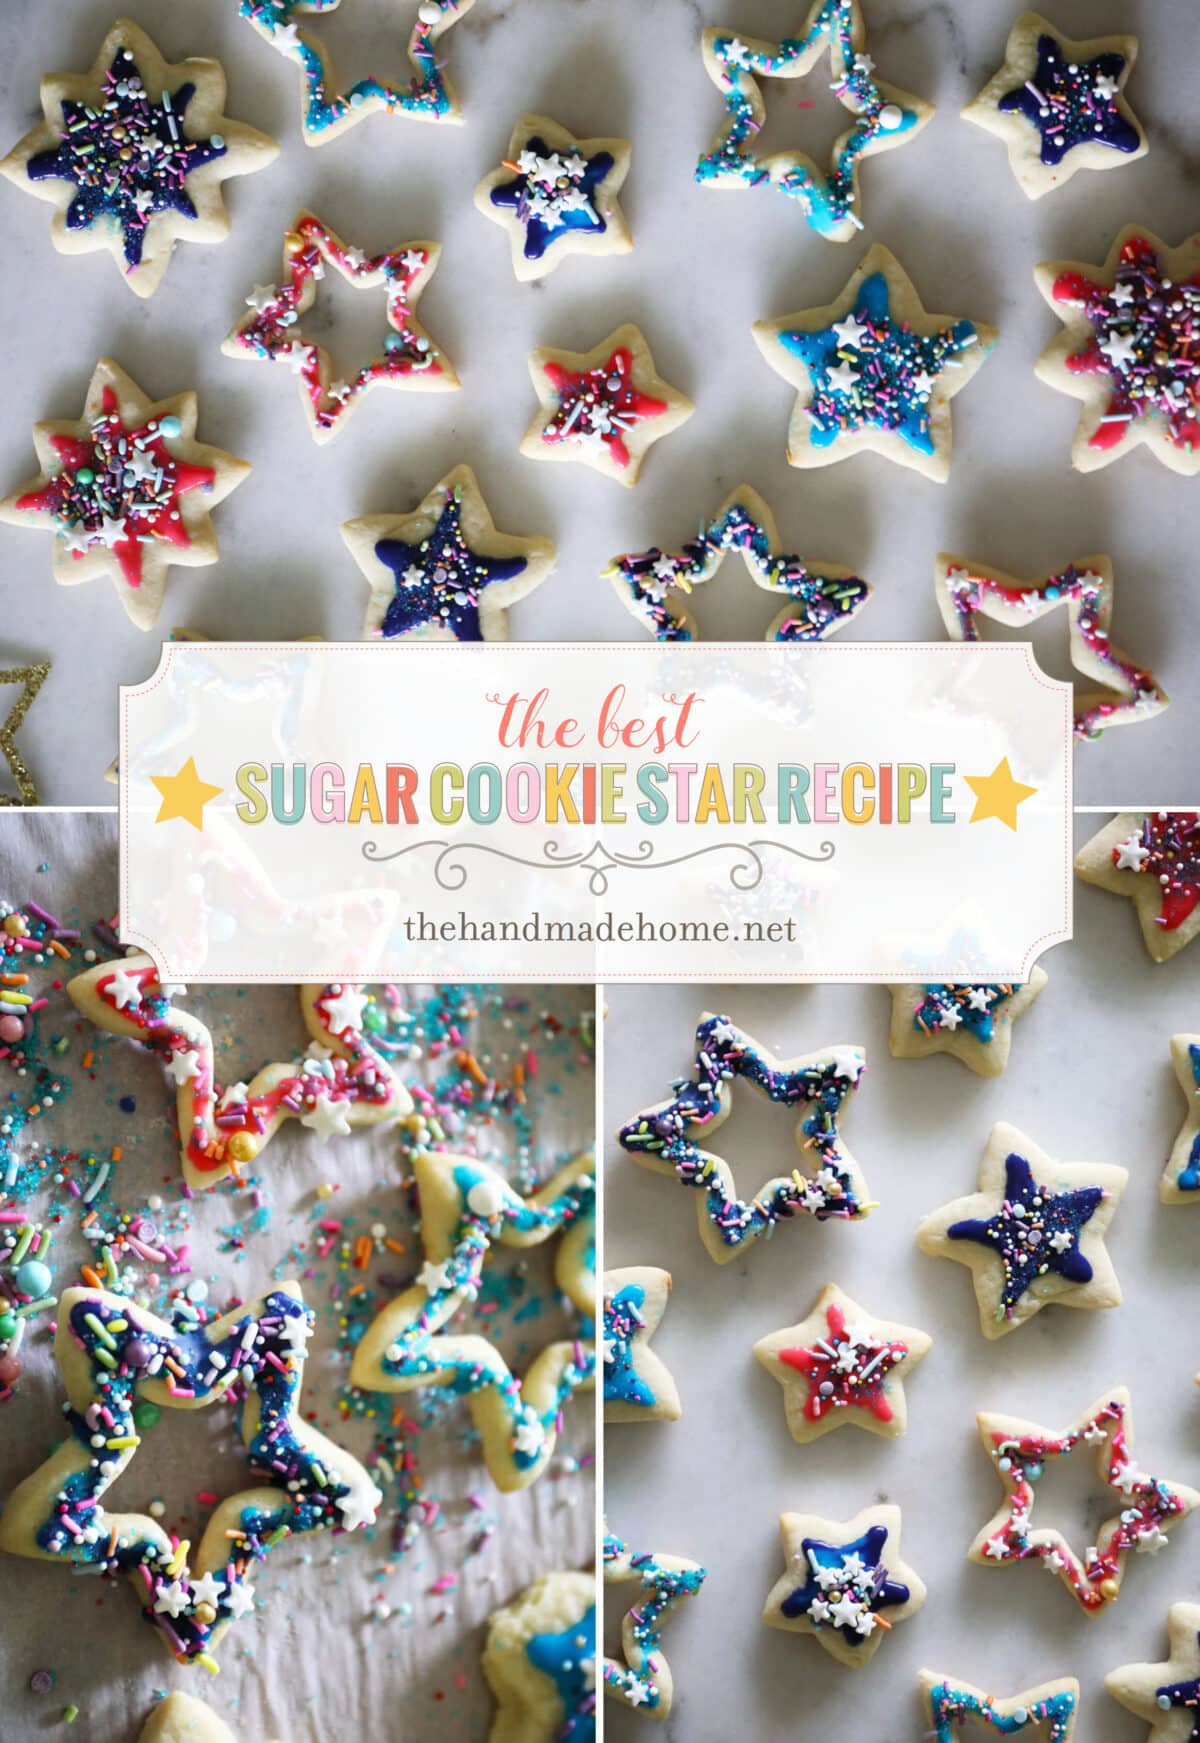
best sugar cookie star recipe
Our oldest graduates this week and asked to have a few friends over from his Astronomy class for one final project {and a bit of a party.} So, instead of tending to other things I needed to do like a regular person, I decided to try and be a cool mom and kill myself by going over the top. Everyone basically told me to calm down, so I definitely landed on being a little extra with some star-themed sugar cookies instead. In this case, they’re galaxy cookies, but with those summer holidays on the cusp, I thought here would be a good place to share them again. You know, just in case you’re feeling extra like me {read: compensating for those mom feelings by baking {and eating?}} and wanted to make some of your own. Or be patriotical in the near future. So, without further ado, the best sugar cookie star recipe!

These are adapted from Jamin’s Mom’s homemade recipe, and I’ve shared versions of them over the years, so you may have something similar. But they’re super simple to make.

Here’s what you’ll need to make the sugar cookies: {+ optional icing recipe below}
• 1 cup coconut oil {if you don’t have coconut oil, you can use shortening}
• 4 cups flour – all-purpose
• 1/2 cup of milk
• 2 eggs
• 2 cups sugar
• 1 tsp baking soda
• 1/2 tsp salt
• 1/2 tsp vanilla flavoring
• cookie cutters of choice – or go with traditional shapes, {I had a plethora of star cookie cutters, but here are some I’ve used in the past.}
• Parchment paper – I’ve decided these cookies bake better on these than foil.

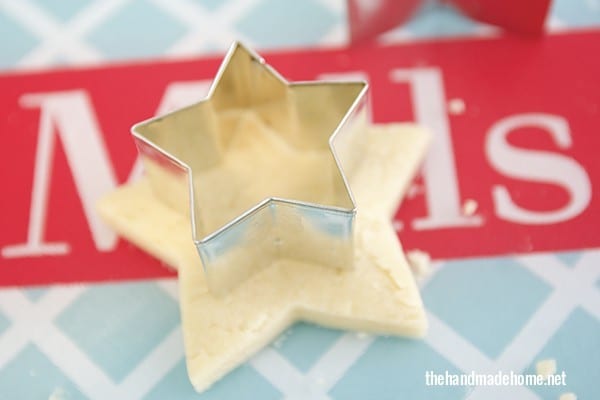
Cut your coconut oil {or shortening} into flour using a pastry blender, fork, or food processor until the consistency is similar to corn meal.
Then, combine the remaining ingredients and mix them with flour/coconut oil.

They yield a generous amount, and once one batch is made, the batter can easily be stored in the fridge for later. The possibilities are endless!
When I’m ready to cut some out, I use a little flour, and roll it out on a cutting board. Cut accordingly.
Placing on parchment paper, bake at 350 degrees for about ten to twelve minutes, depending on your oven.

Icing
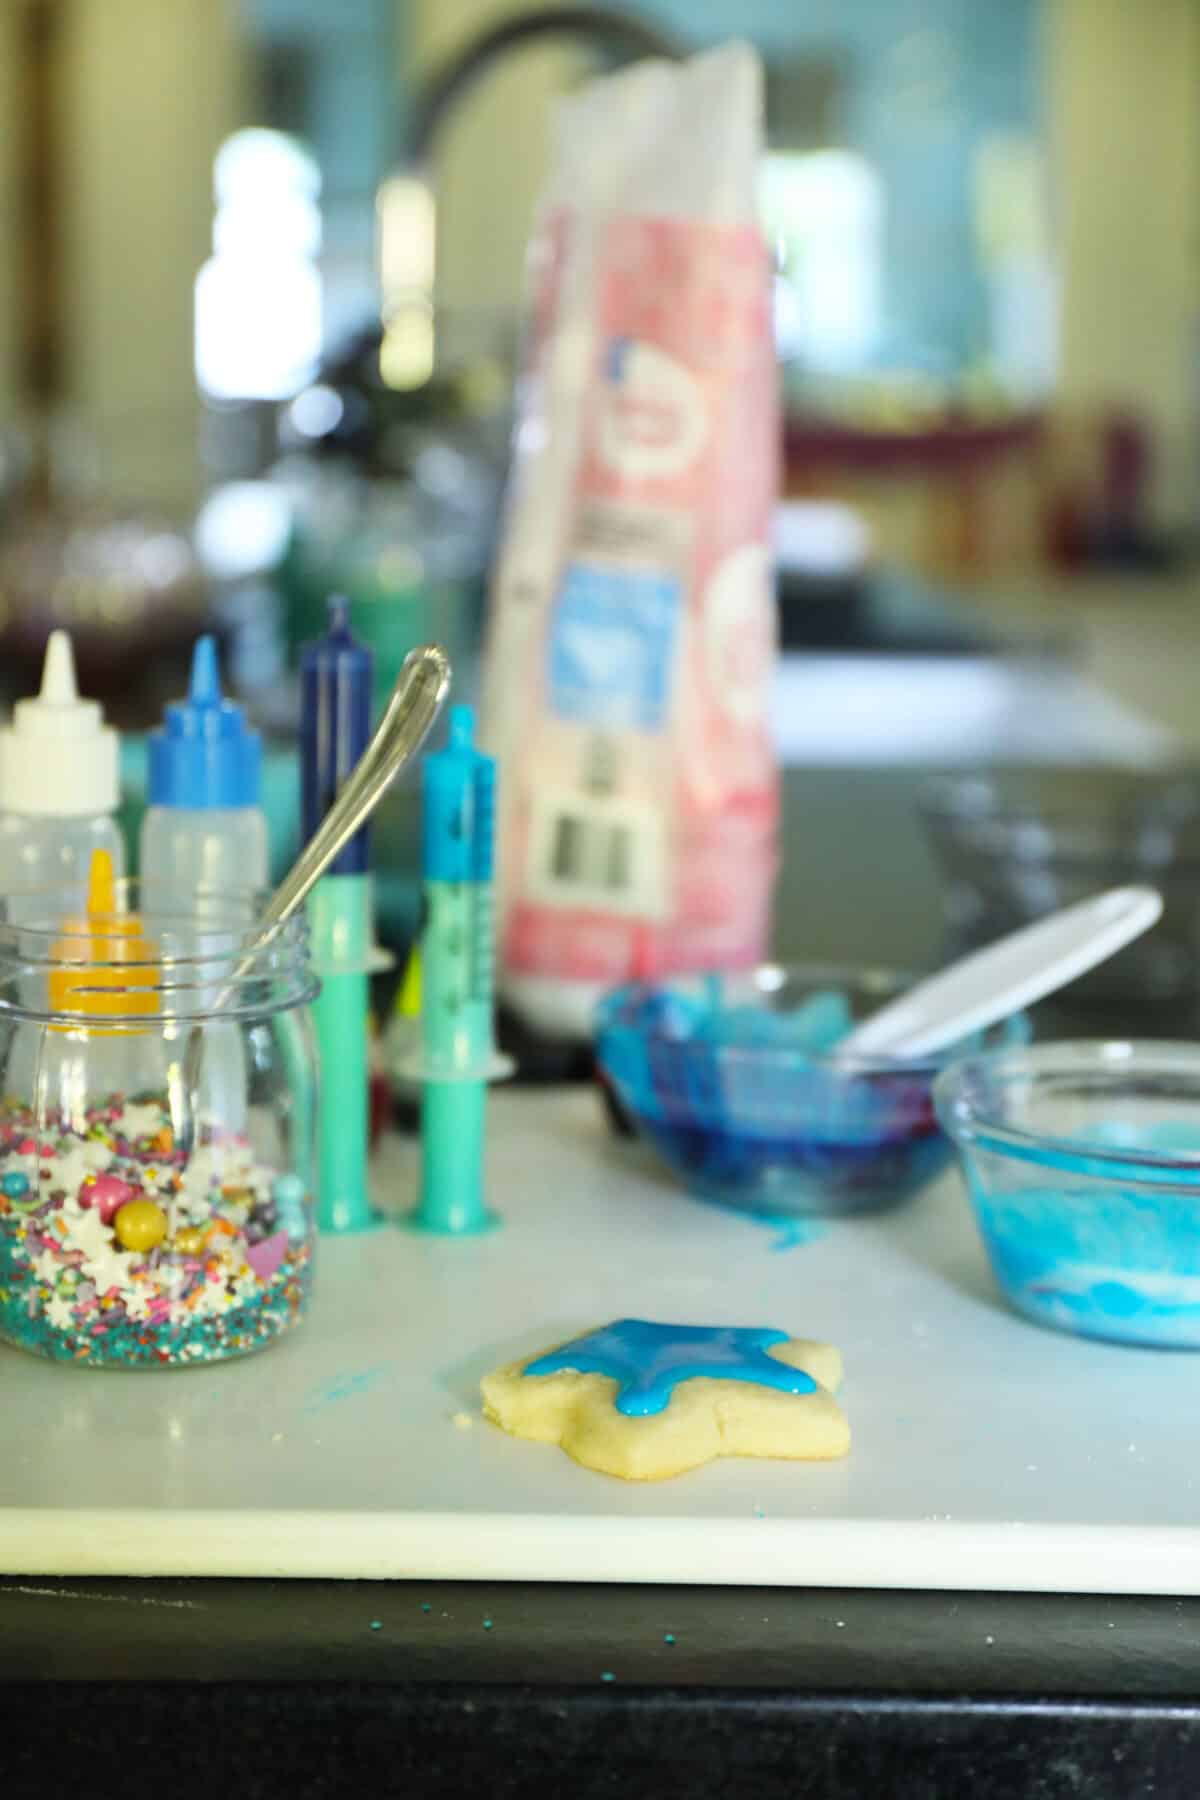
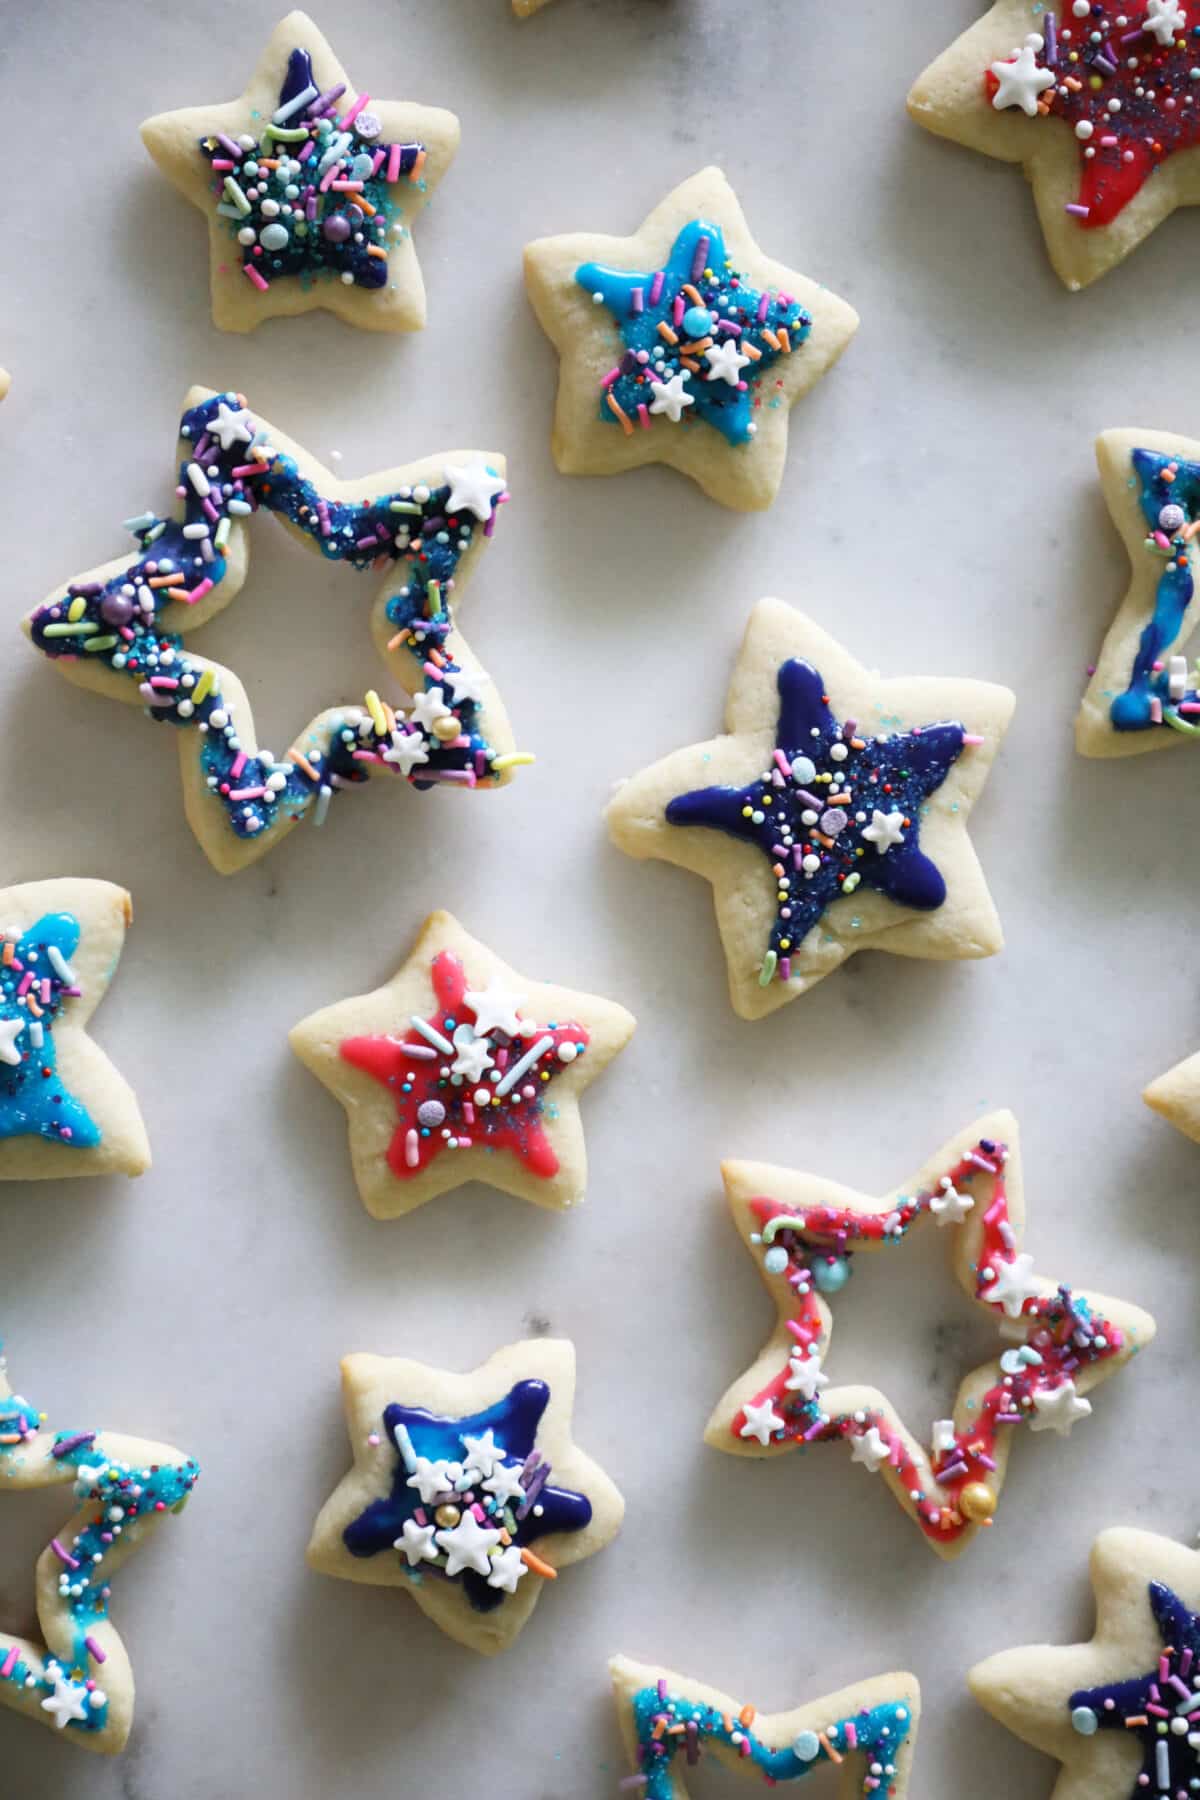
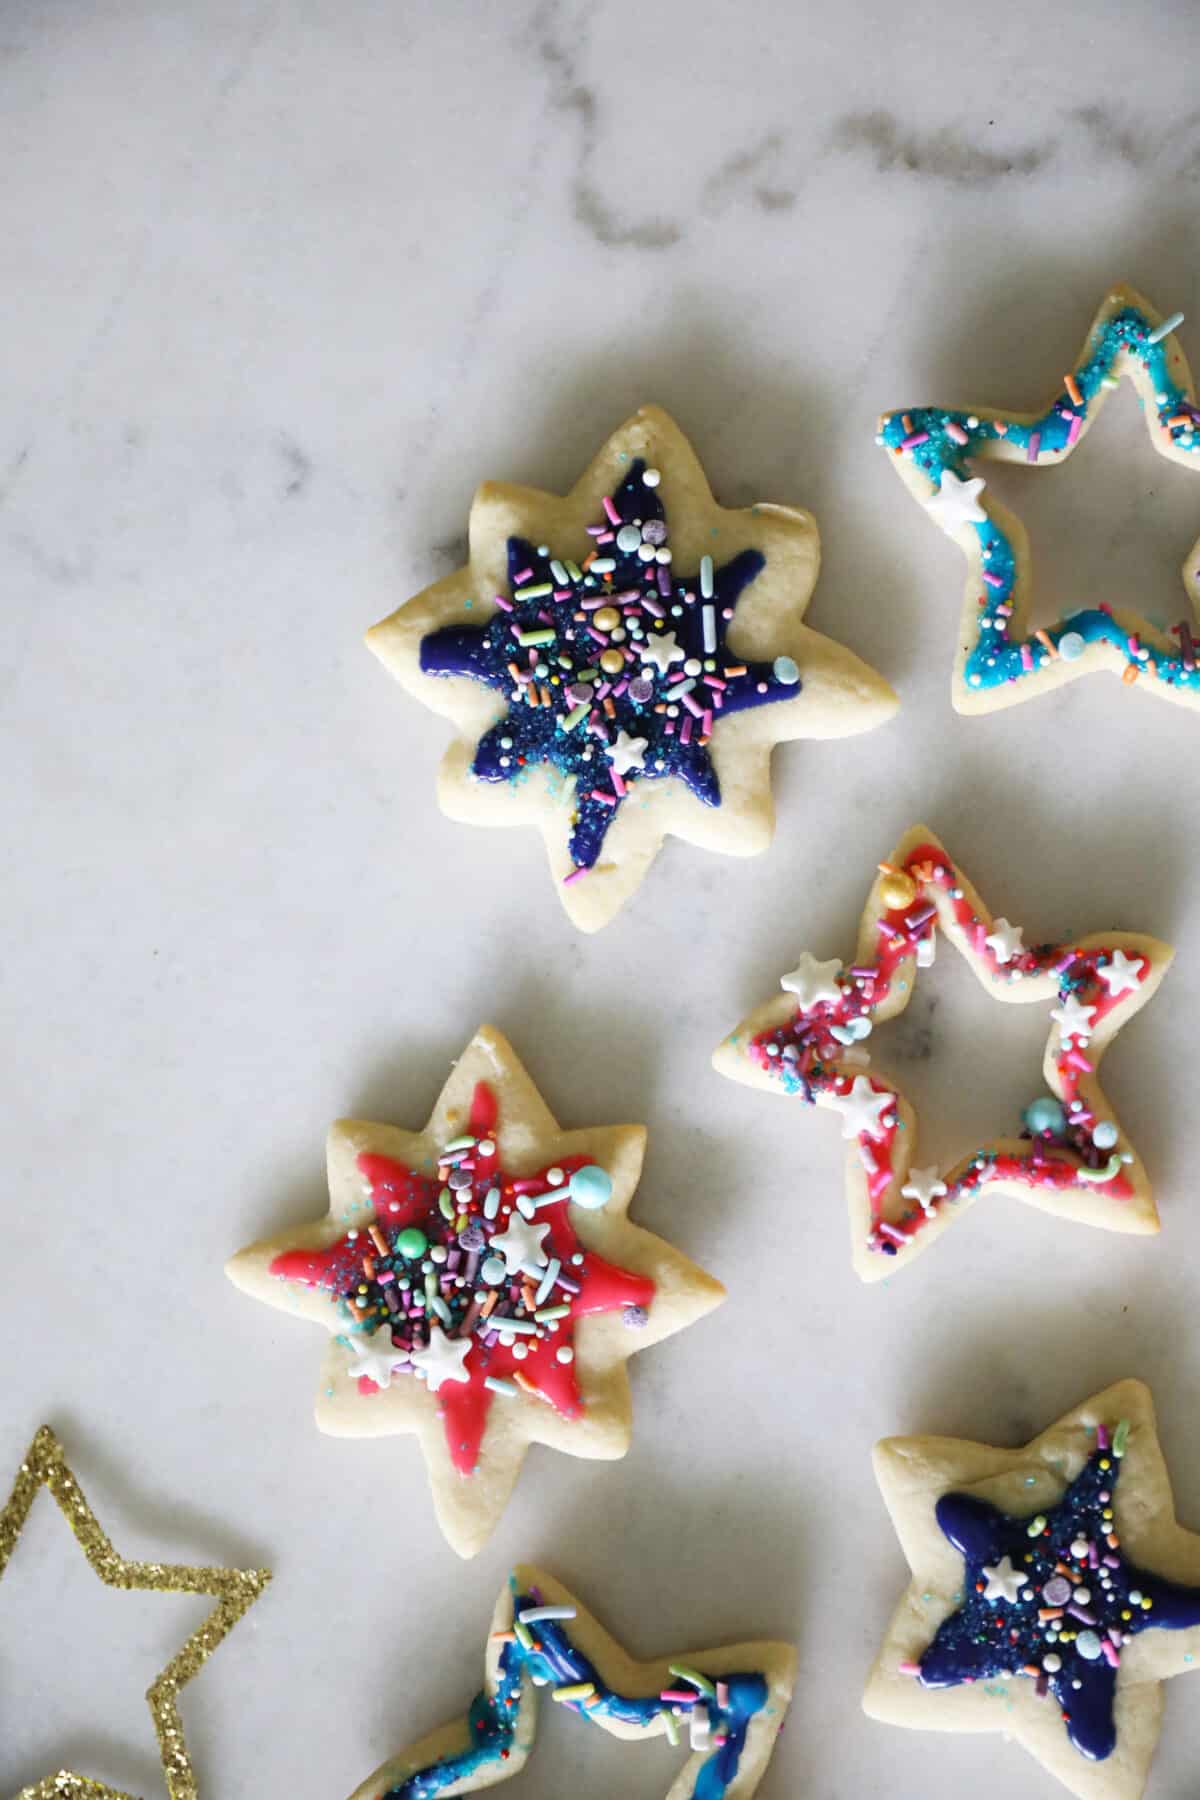
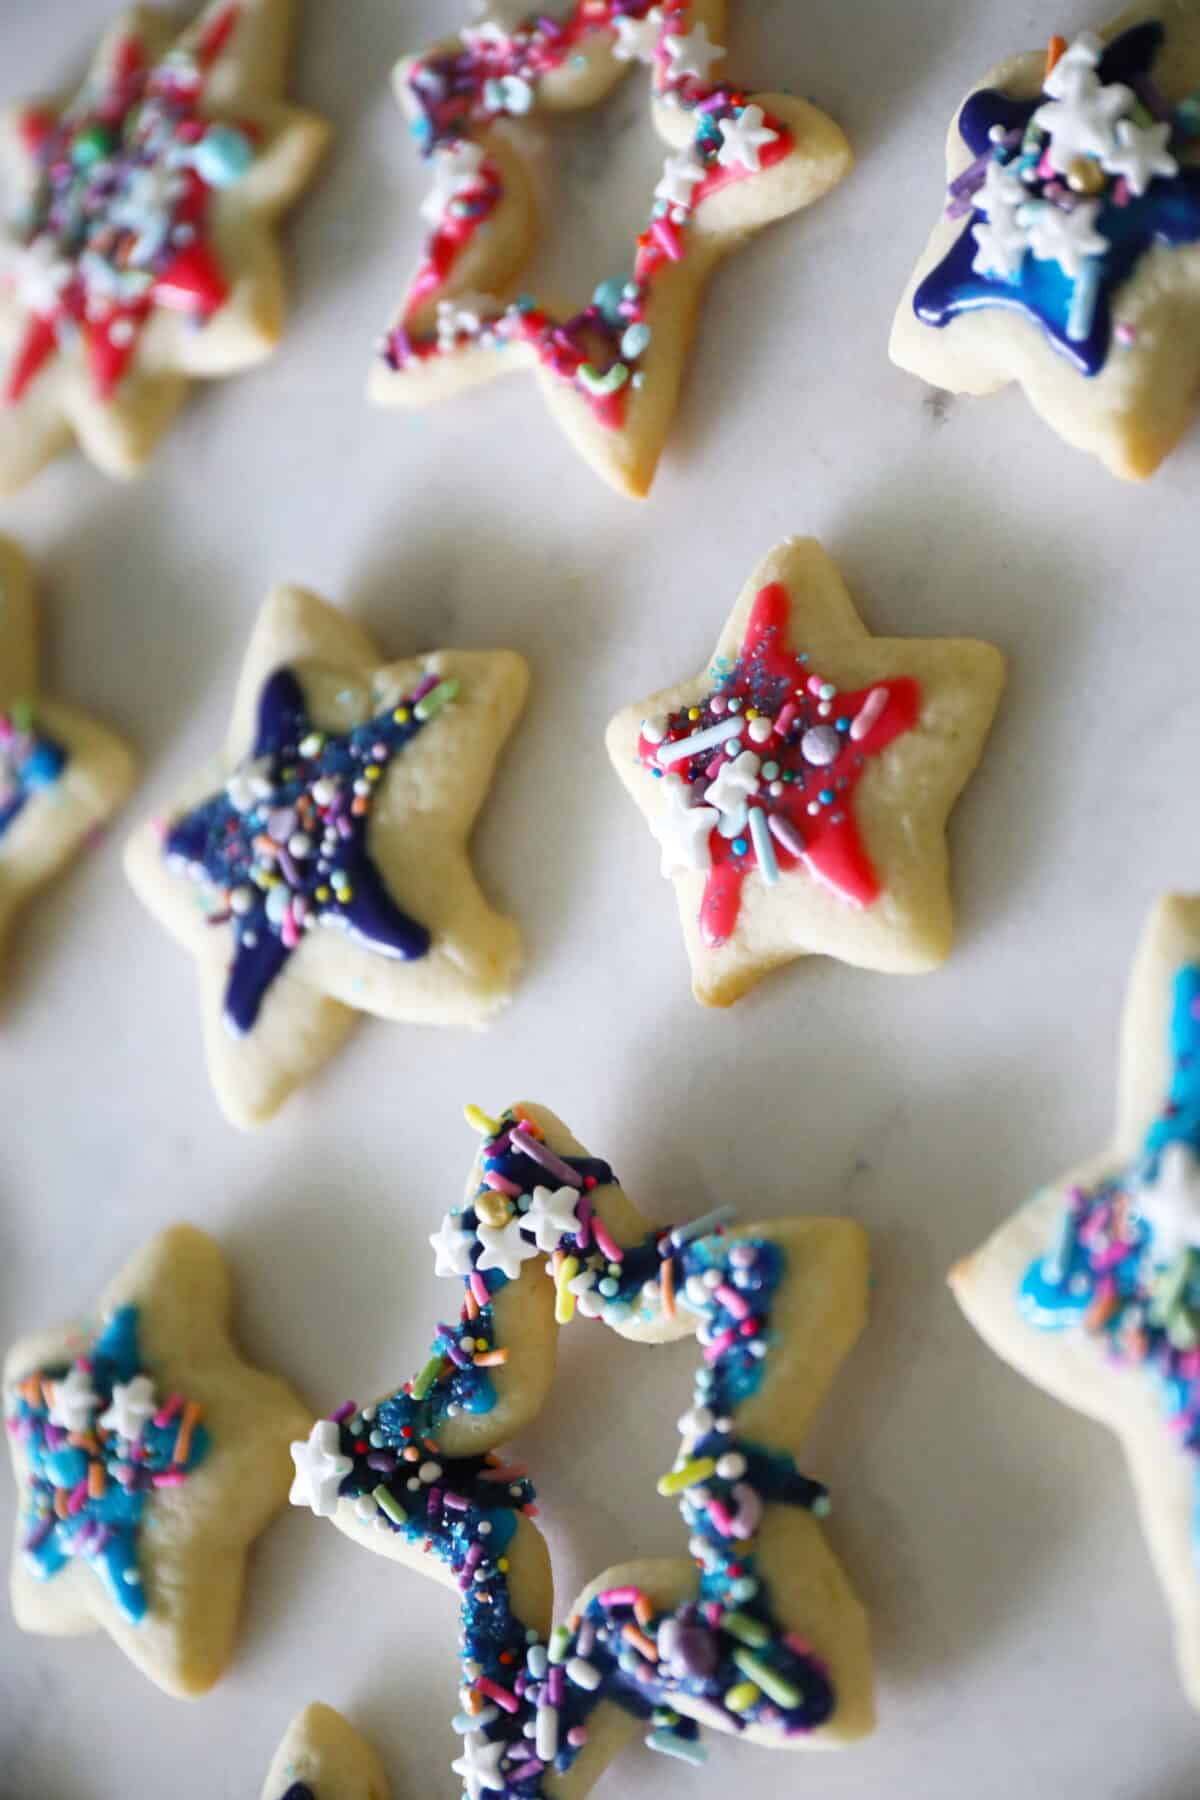
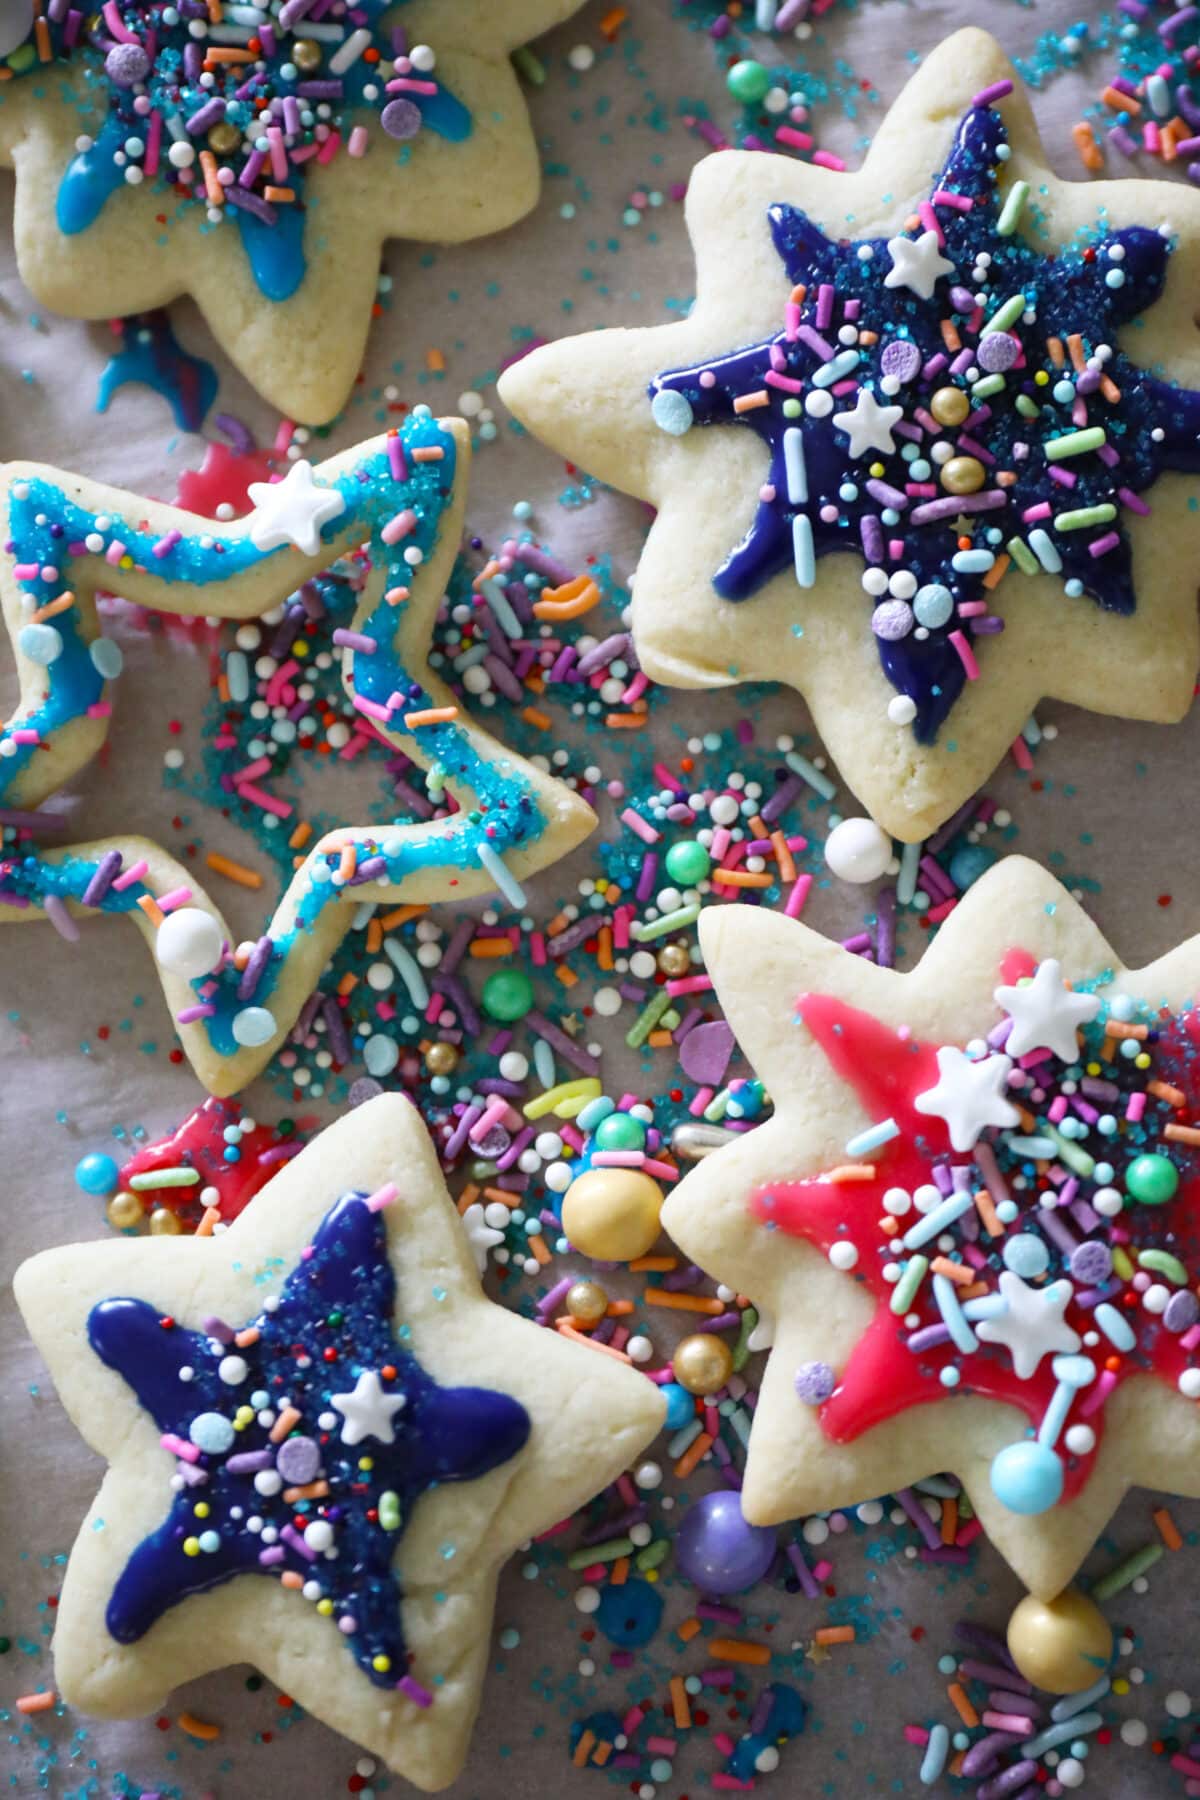
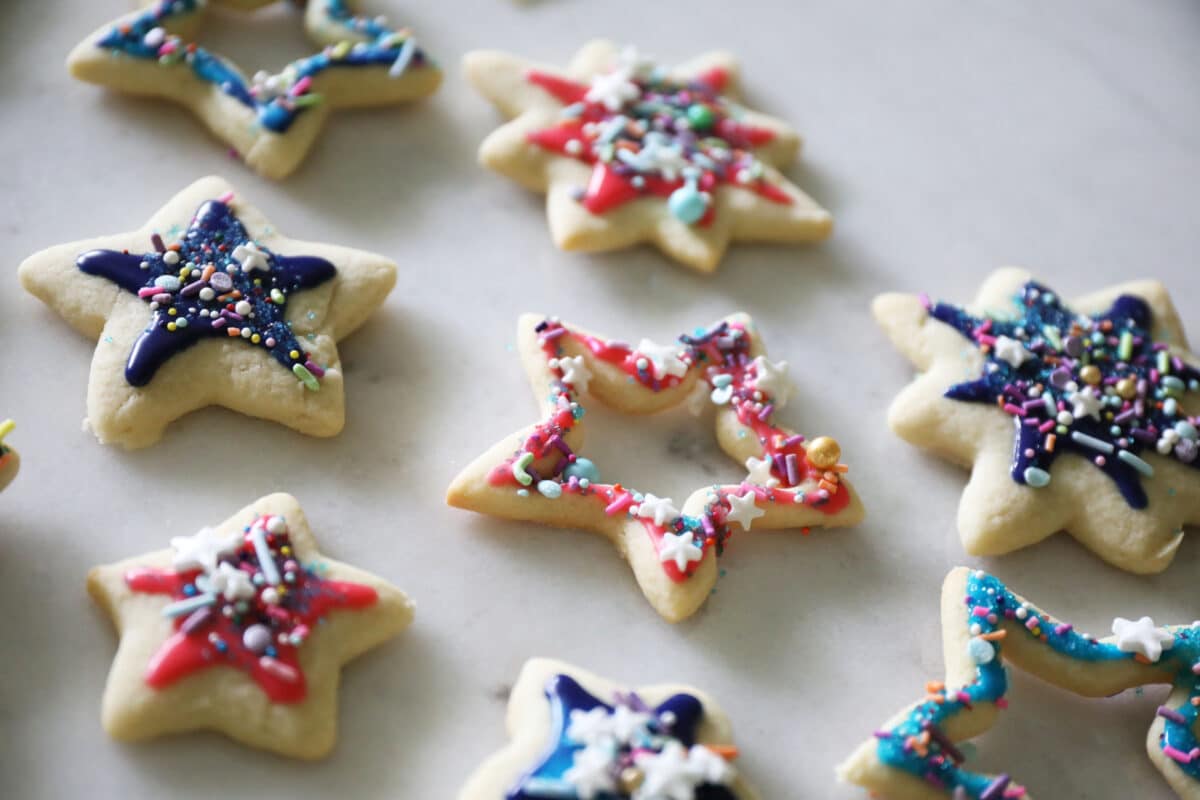
The icing is oh-so yummy and easy to mix! You can leave it plain or add food coloring for various looks. I found that the right tools made the difference in decorating. I used these little bottles to give me a little control {I started with some medicine droppers too, to see how those would do – so if you don’t have the bottles you may have some of these in your drawer} along with some food coloring, sprinkles, and more.
Tip: It may help to use some toothpicks or needles like this to control the icing.
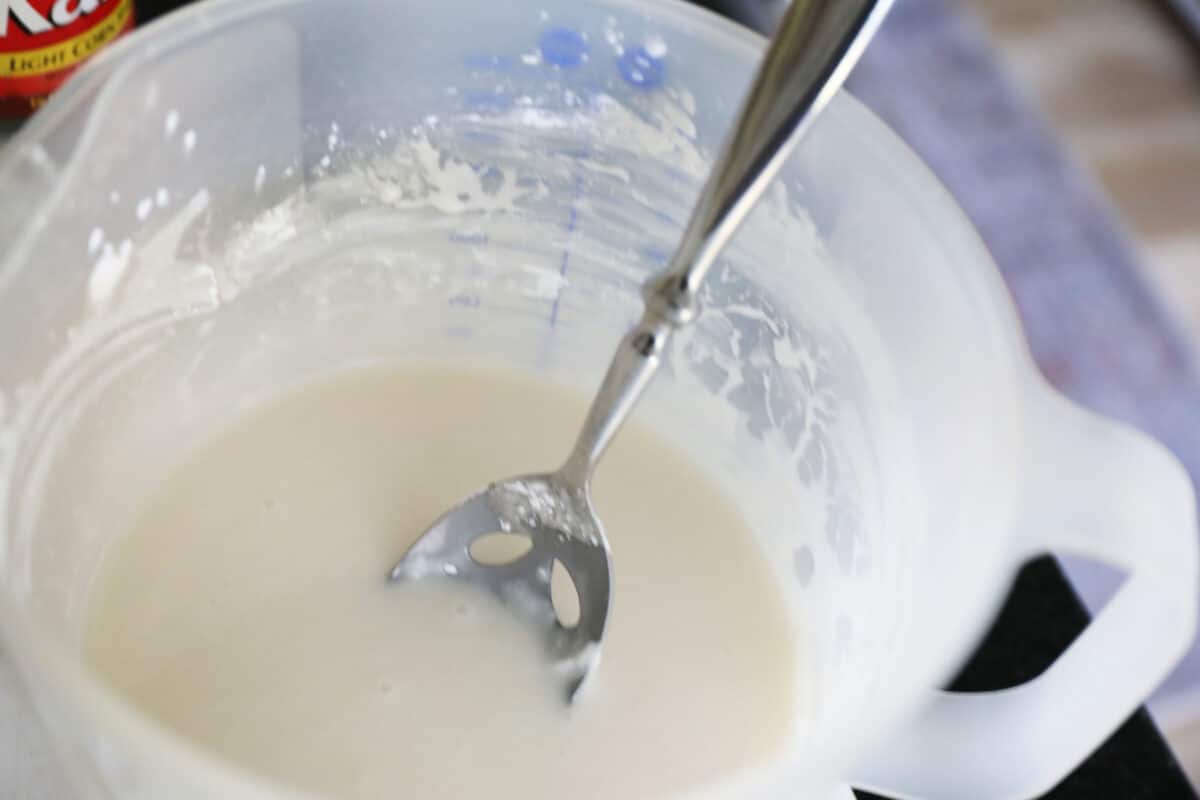
Icing recipe- oh so easy!
3 cups powdered sugar
4 Tbsp milk
1/2 tsp vanilla + 1/4 tsp almond extract
3 Tbsp light corn syrup
I mixed up my own galactical combo of sprinkles to put on the cookies once they were iced {I just combined a lot of the colors I liked}, and the rest was history.

Pssst… to make the hollow-shaped cookies, which I think are extra fun, it’s the same as my stained glass recipe. A smaller shape inside of a larger one. {See how we made these here.}

She’s 16, now! Time stop. Still a family favorite.

But decorate accordingly and enjoy!
I just had to share these oh-so-close to summer.
Are you curious about more versions? You can check out our Easter Version here and St. Patrick’s Day version here. The theme-y possibilities of these are endless.
I am far from a baker, but sometimes its fun to whip up a batch here and there of a little something.
As always, let us know if you try them. We’d love to hear.
Have an inspired day!