Remember this post? The one with the beautiful assortment of different ABC’s on the wall?
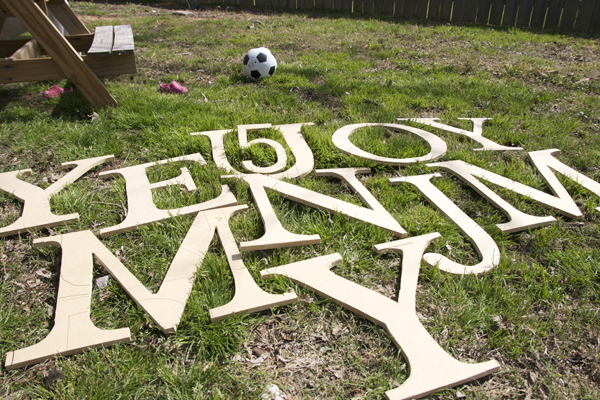
I was totally inspired to make some of my own. But the ones found here, close to the size I wanted, were 10 bucks a pop. But I wanted a little bit of a different look and I needed 11 of them.
At 10 bucks a pop vs. 25 dollars for an entire sheet of MDF, I, of course, went with the {slightly more complicated yet much more rewarding, I-had-this-stuff-lying-around-so-it’s-subsequently-free} custom version.
I can’t wait to show you how I’m using them all {I’m not finished yet} but in the meantime, here’s how I did it.
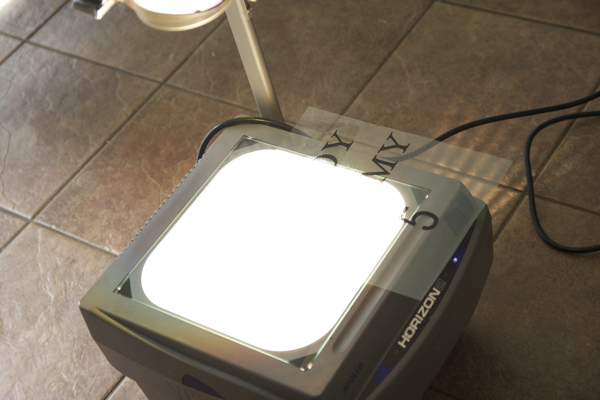
Never underestimate the power of the projector.
First of all, where on EARTH am I supposed to get a projector? you may ask. Go to church? I’m sure someone will let you borrow one. Projectors are like a church staple. Know a teacher? I don’t know about their rules and such, but I’m sure there’s ways. Work somewhere that they use one? Projectors aren’t really coveted items anymore, so I’m sure there’s ways around this one. Ya just never know when you’re going to stumble upon an old projector in a closet in a building…in the middle of the night…when you broke in because you weren’t supposed to be there…Think of who you know and how you can get your hands on one just for a night. But projectors…they’re all the rage in DIY land. {at least they are in my DIY land}
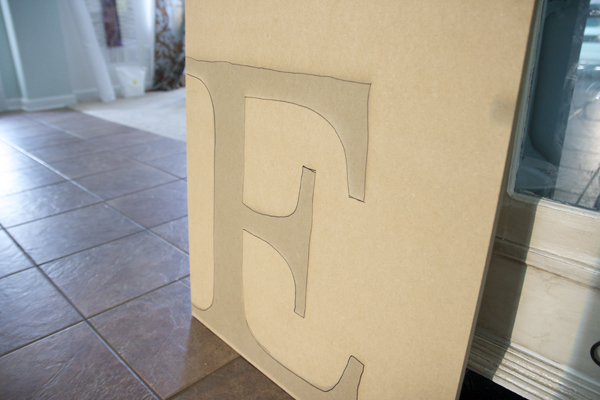
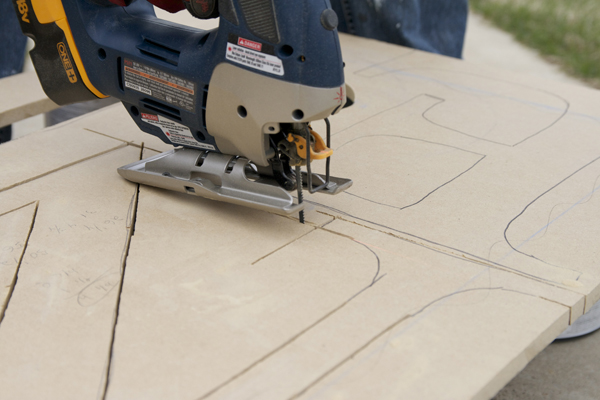
SO, I printed out the words I wanted, on a transparency, set up my MDF across the room, and went to town with my sharpie.
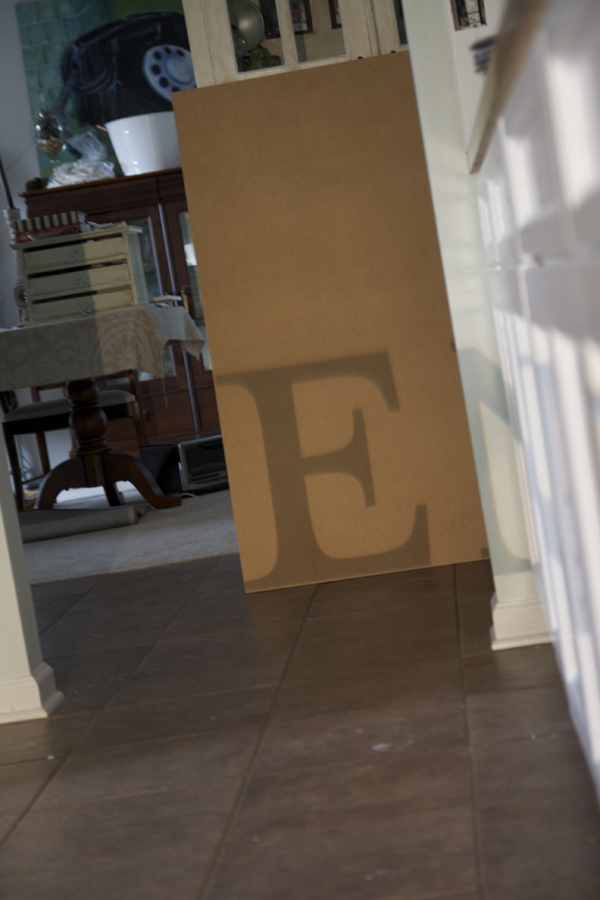
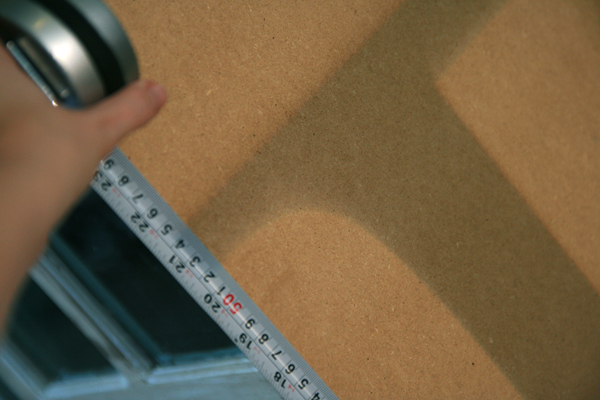
I could probably freehand this font, but I wanted it to be as precise as possible, and for each letter to measure the same. So I opted for the easy way, and went with the projector. Also note, because of where these puppies are going, I needed them all to be the same height. And with fonts, letters like e and j have different respective lengths. I made sure to measure each one individually. If you want to hang these letters on a wall, then no worries. If you want to prop them somewhere, pay attention. 😉
Then I busted out the sharpie.
And with the letters all traced, we were ready to cut. We used our circular saw, and our jigsaw. These are two of our staple power tools, and the combination of the two made it super easy to achieve the look we wanted.
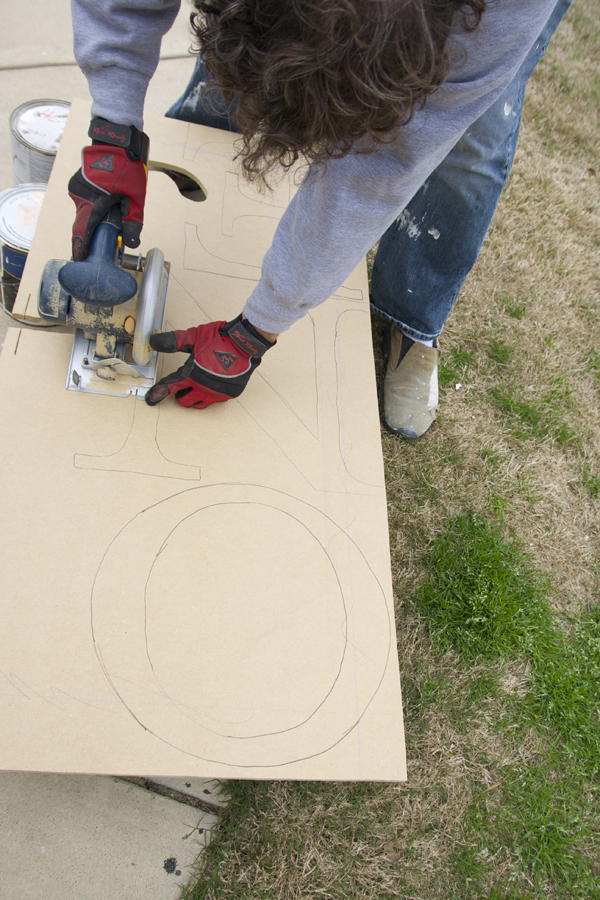
As you can see here, our letter’s weren’t perfect. I was in a hurry when I traced them, and the kids thought it was funny to jump in front of the screen and pretend like they were spiderman. Such is a the day in the life, and I decided to roll with it, random super heroes, hand puppets and all.
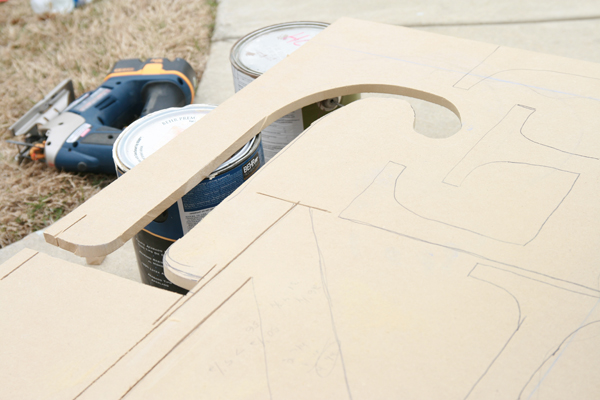
The key to cutting these in a safe and smart manner, are finding a straight edge, and beginning with the circular saw. Eliminate all the straight edges of your letter, with the circular saw. See the straight parts of the N here? we went to town with the CS and it worked out beautifully.
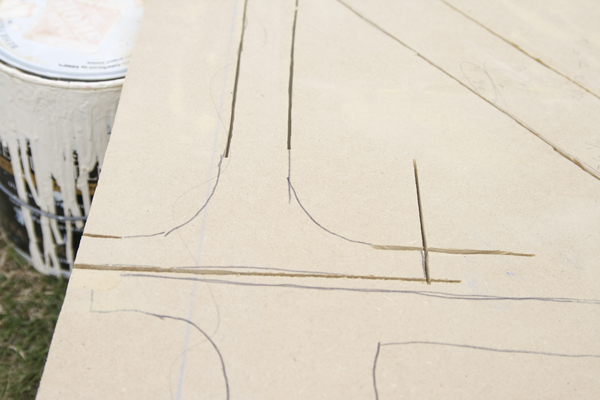
See here on the lines of the serif with the N? (The one on the top.) We only cut to the straight areas with the circular, and stopped to leave the rest for the jigsaw.
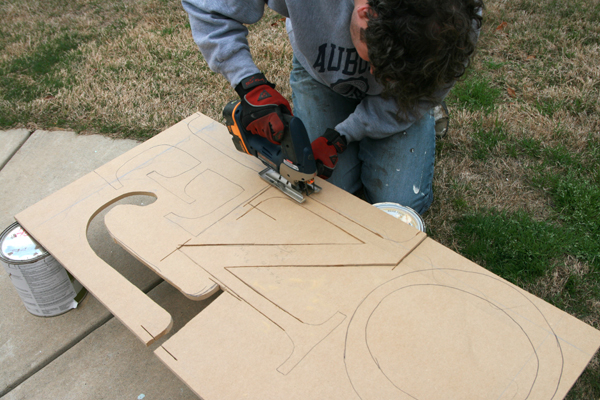
It’s basically just a gradual alternating of the saws, until the letter is freed.
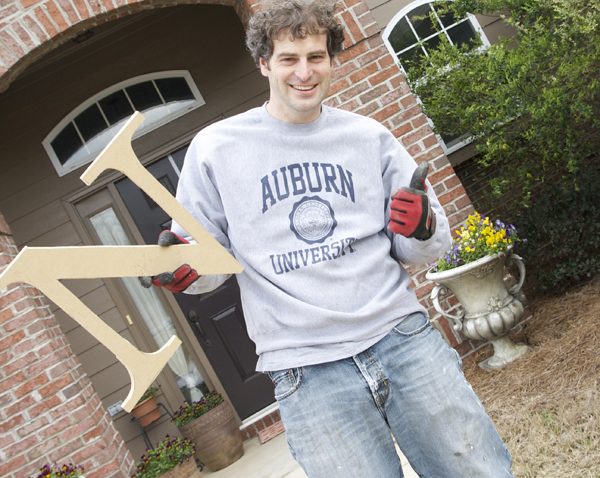
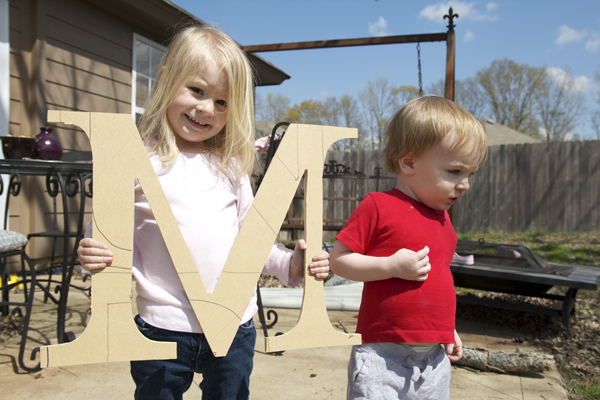
This is Jamin’s I’m-smiling-for-the-camera-sarcastic thumbs-up-I-really-hate-your-guts-because-it’s-freezing-right-now-face. He was still reeling from the cabinets and I’m all, “letters! letters!” And then I reminded him that I was saving him approximately 85 smacks.
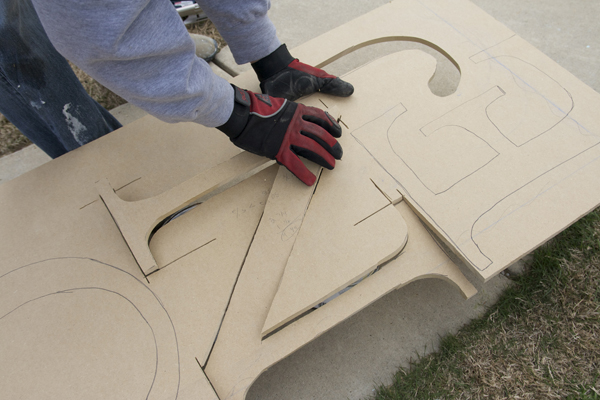
A few days later, when it was actually sunny, and purdy, and I could work, I took the kids and let them play while I busted out the sander. There will be, of course, some ragged edges, but you can help that a little with your handy dandy sander.
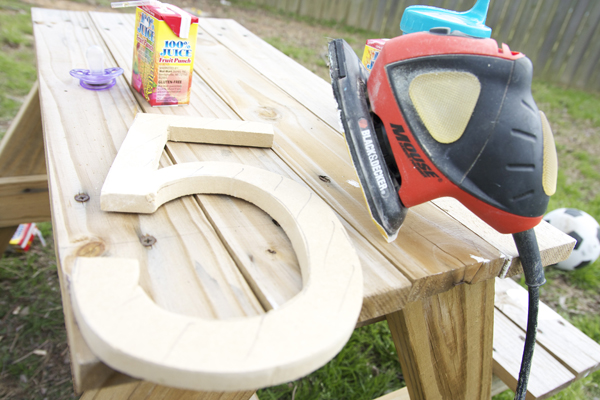
I used this little guy to get those delicate edges, and my rival-to-the-glue-gun-bff, wood filler for a few of our oops moments.
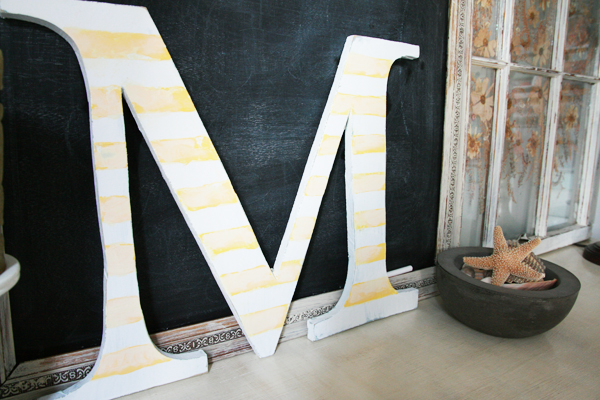
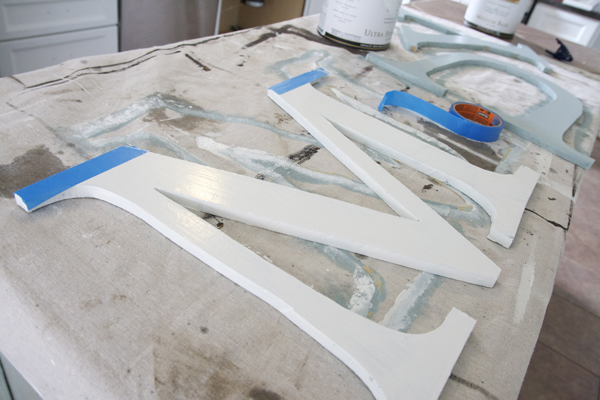
What you decide to do with them next is up to you, but I took them inside when the kids napped, and gave them their first coat of wedgewood grey.
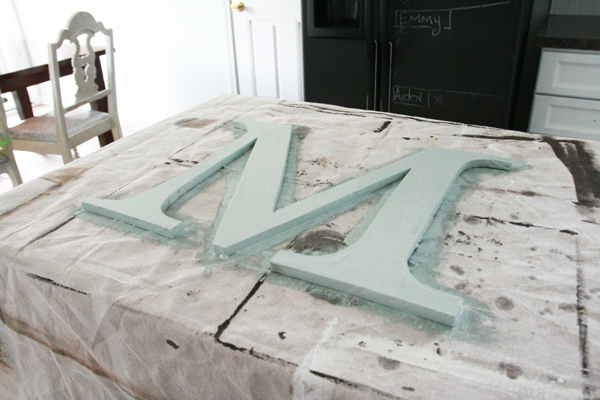
And their second coat of chantilly lace.
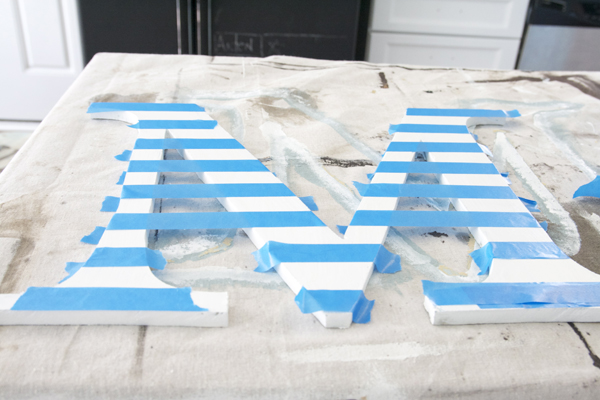
Then I taped them off, and gave them some stripes, with two shades of yellow. {for added dimension and variance. note: yellow can be a scary color, kind of like pink. I wanted to take a little of the edge off.}
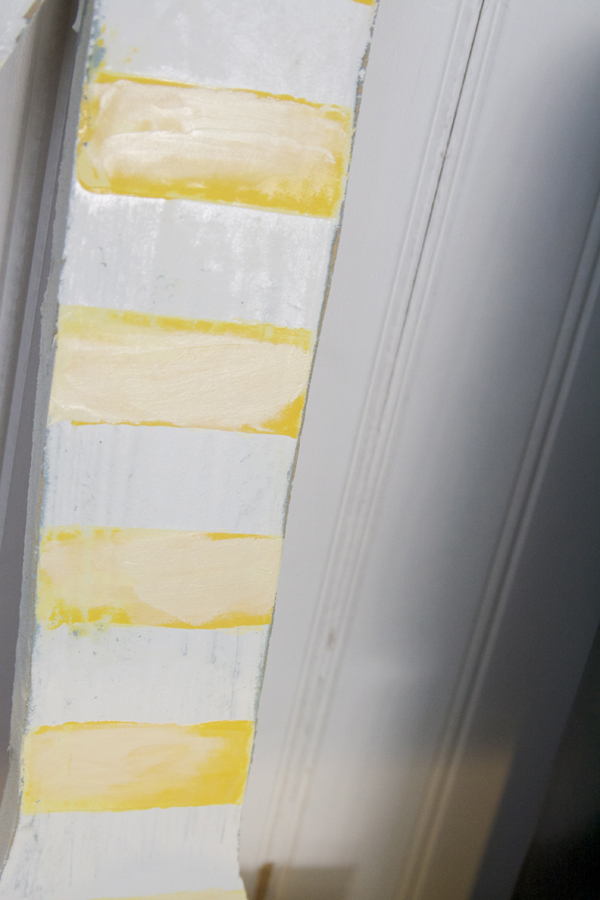
I then gave it a light sanding for that worn look, so some of my grey could subtly shine through.
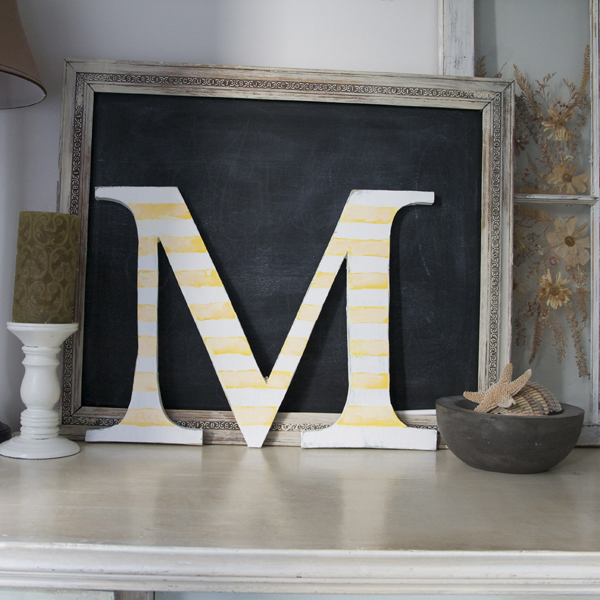
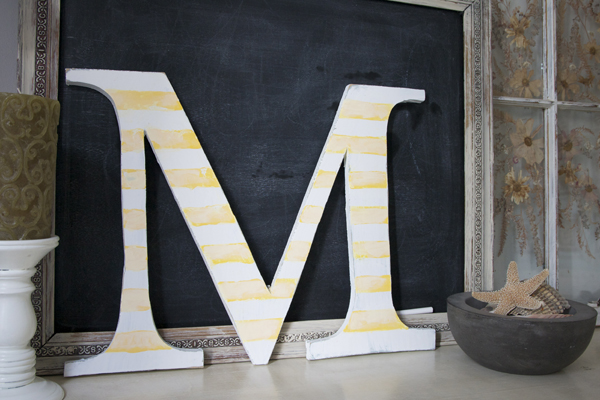
So there you have it! A little labor intensive, but a really fun, and totally manageable project. they’re not perfect, but in a way, I think some of the subtle differences only add to their handmade beauty. Especially for the fact that you make them yourself, can customize them to your preferences, and they’re actually in a solid material…and…I could keep going with that list of pros.
Let me know if you try it…I’d LOVE to see.

try?
moi?
surely you're slapping these badboys on etsy? right girlfriend?
cuz they are way too cute
&
jamin and dantheman are twins. matching shoes . tada
xo
are you kidding me? awesomesauce.
Love!
It's a good thing I already did my wall, because I might have been asking for a jigsaw otherwise. 😉
Hey this is really great DIY tutorial! I'm going to put a link to it and your site on my blog tomorrow! I love it -you make it look easy! 🙂
Great tutorial…also love the stripes and the AUBURN shirt!!
Blessings,
Linda
Rock on with your bad jig saw self.
Na na na na na na na…. na na na na na na. Gettin Jiggy with It.
MIss you!
xo
Kate
Thanks, this is a great tutorial, just what I was looking for! I am linking up with it on my blog.
I adore your letter projects; both the painted ones and the cloth covered ones are equally charming. These particular serifs seem ideal for cutting out in wood as they are nicely defined. Would you mind sharing what font you used?
Your creativity is inspiring. Thank you for this tutorial.
Hey girl! Thanks! I think it’s just regular old Garamond! ;)I’m a font purist/snob sometimes. Hope that helps!
WAR EAGLE!!! Love the letters & love the hubby’s sweatshirt! I’m gonna *try* this one weekend soon for my daughter’s apt in AUBURN!
I love love love this tutorial – thanks so much for sharing!
LOVE!!!