
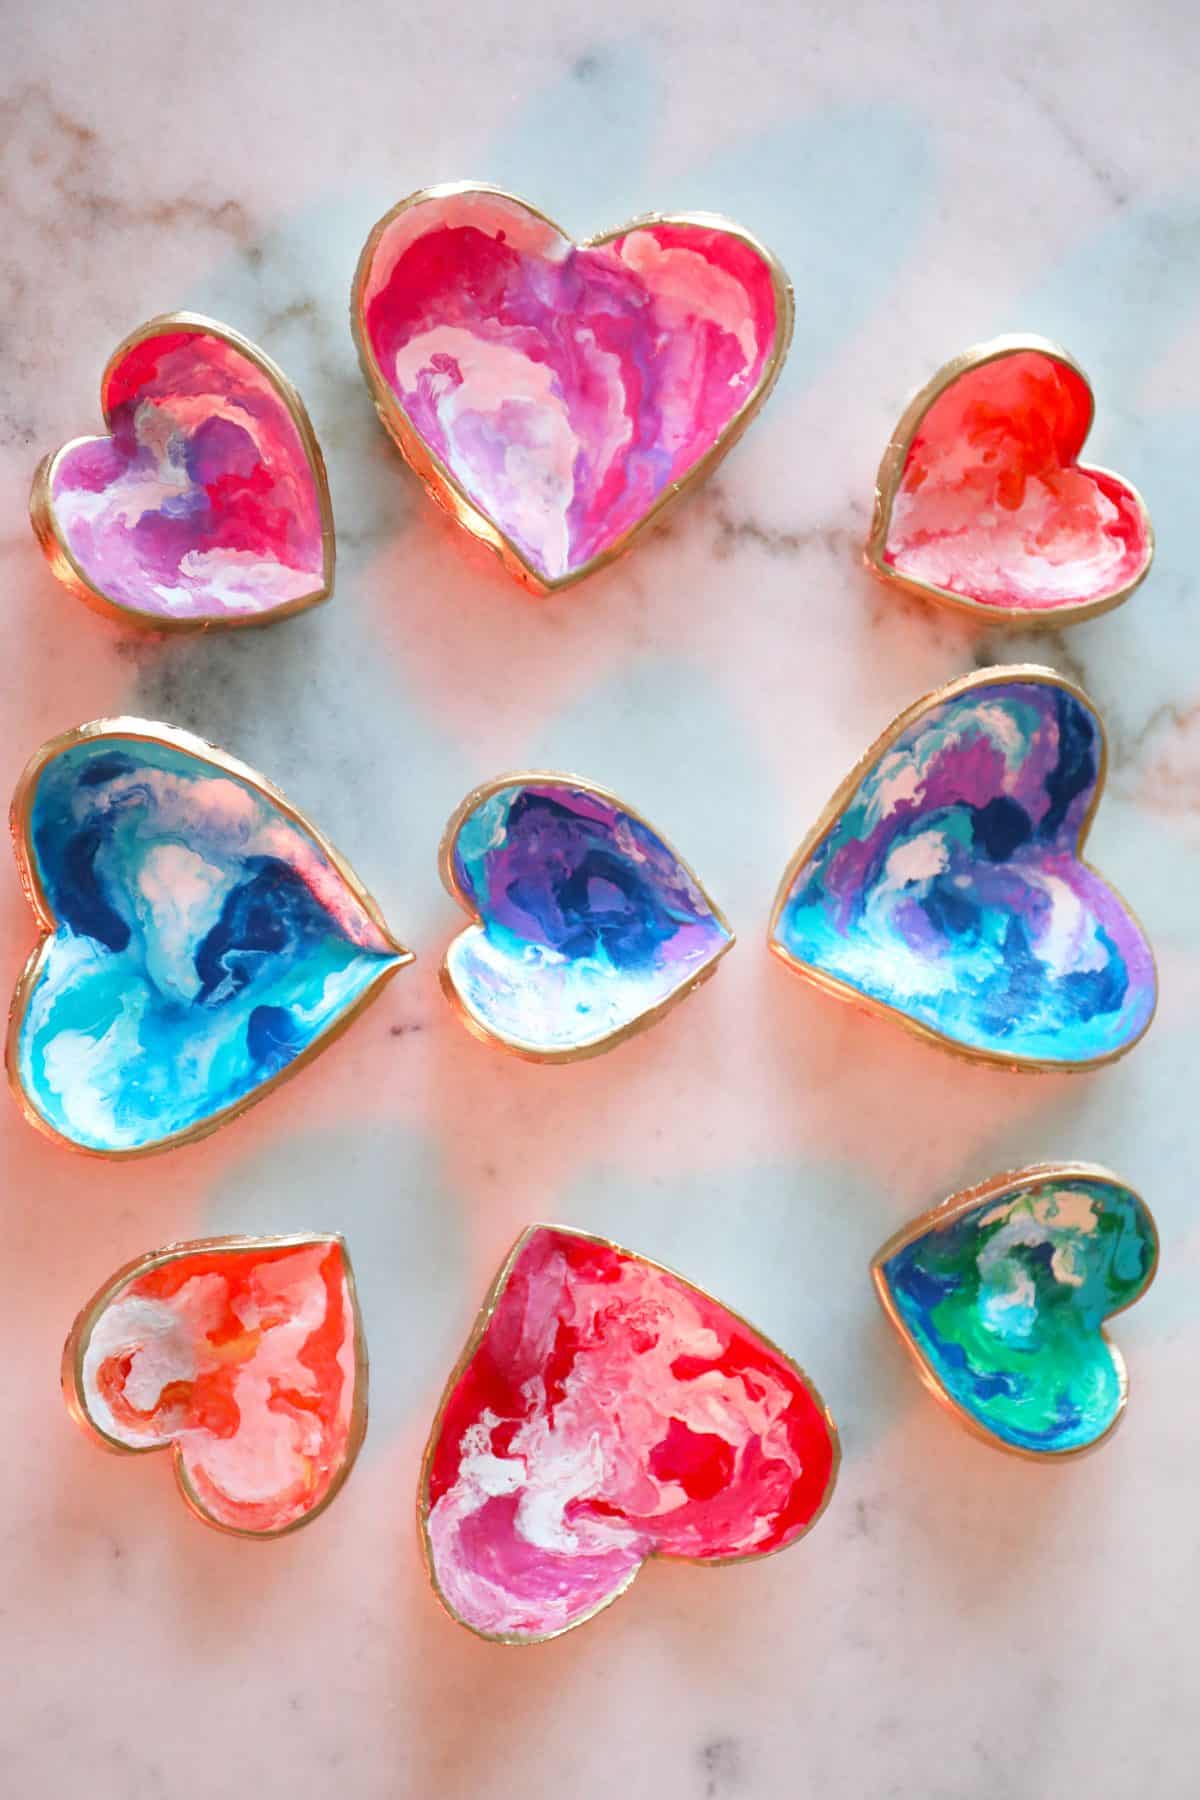
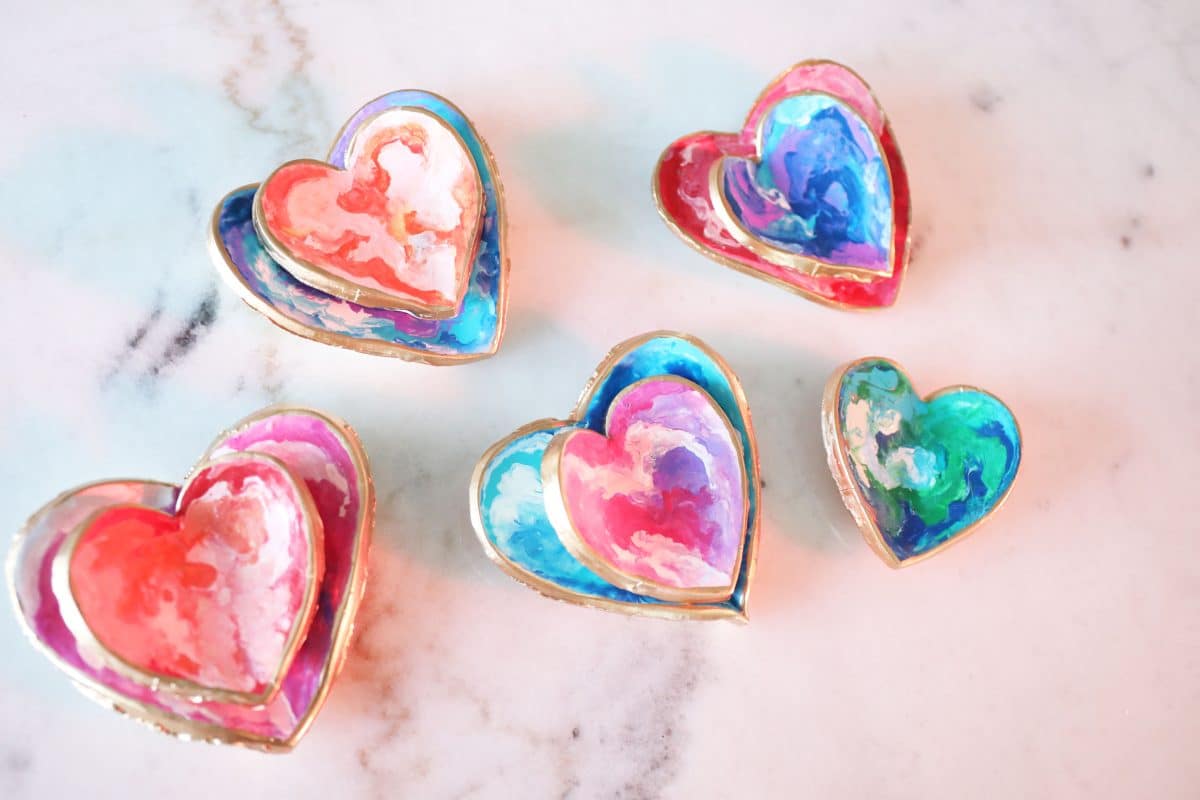
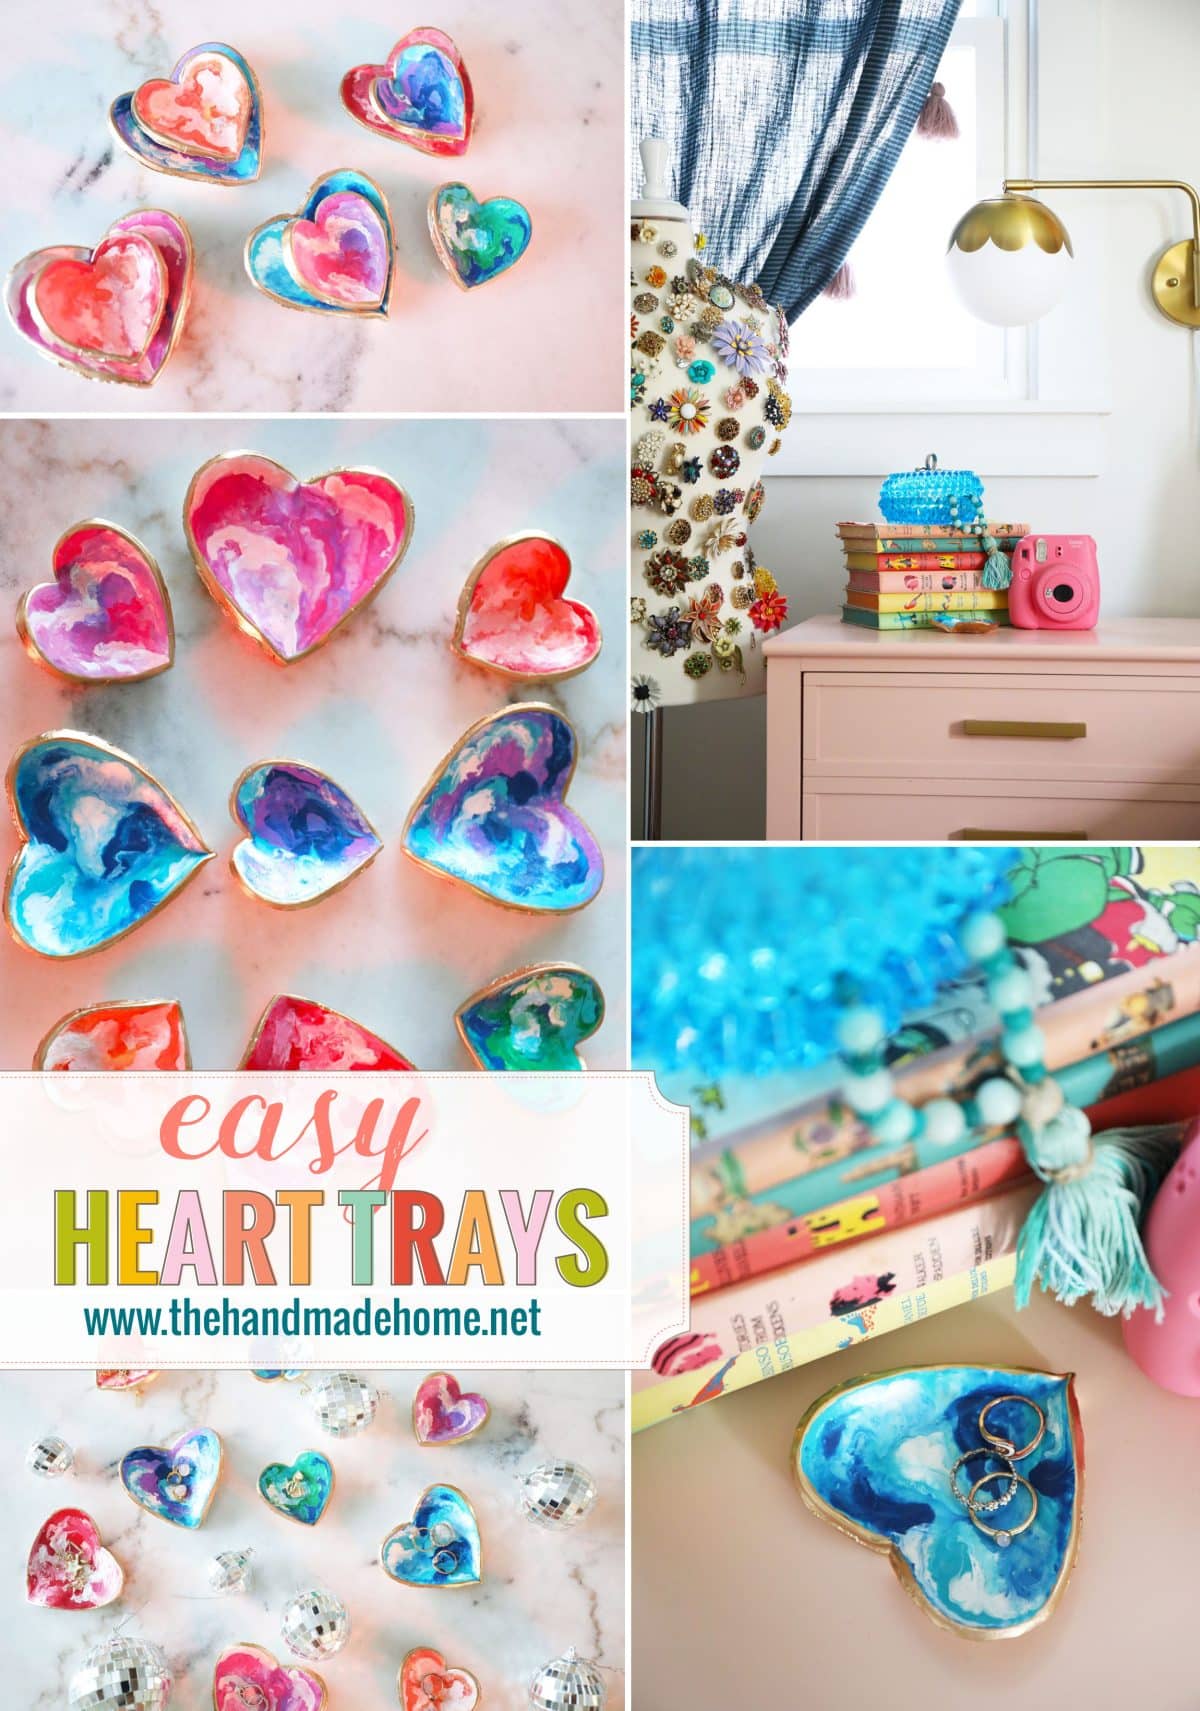
diy heart trays
In the spirit of all things snow days, Valentine’s and those handmade projects we love so much, we wanted to share these with you today: Easy DIY Heart Trays!
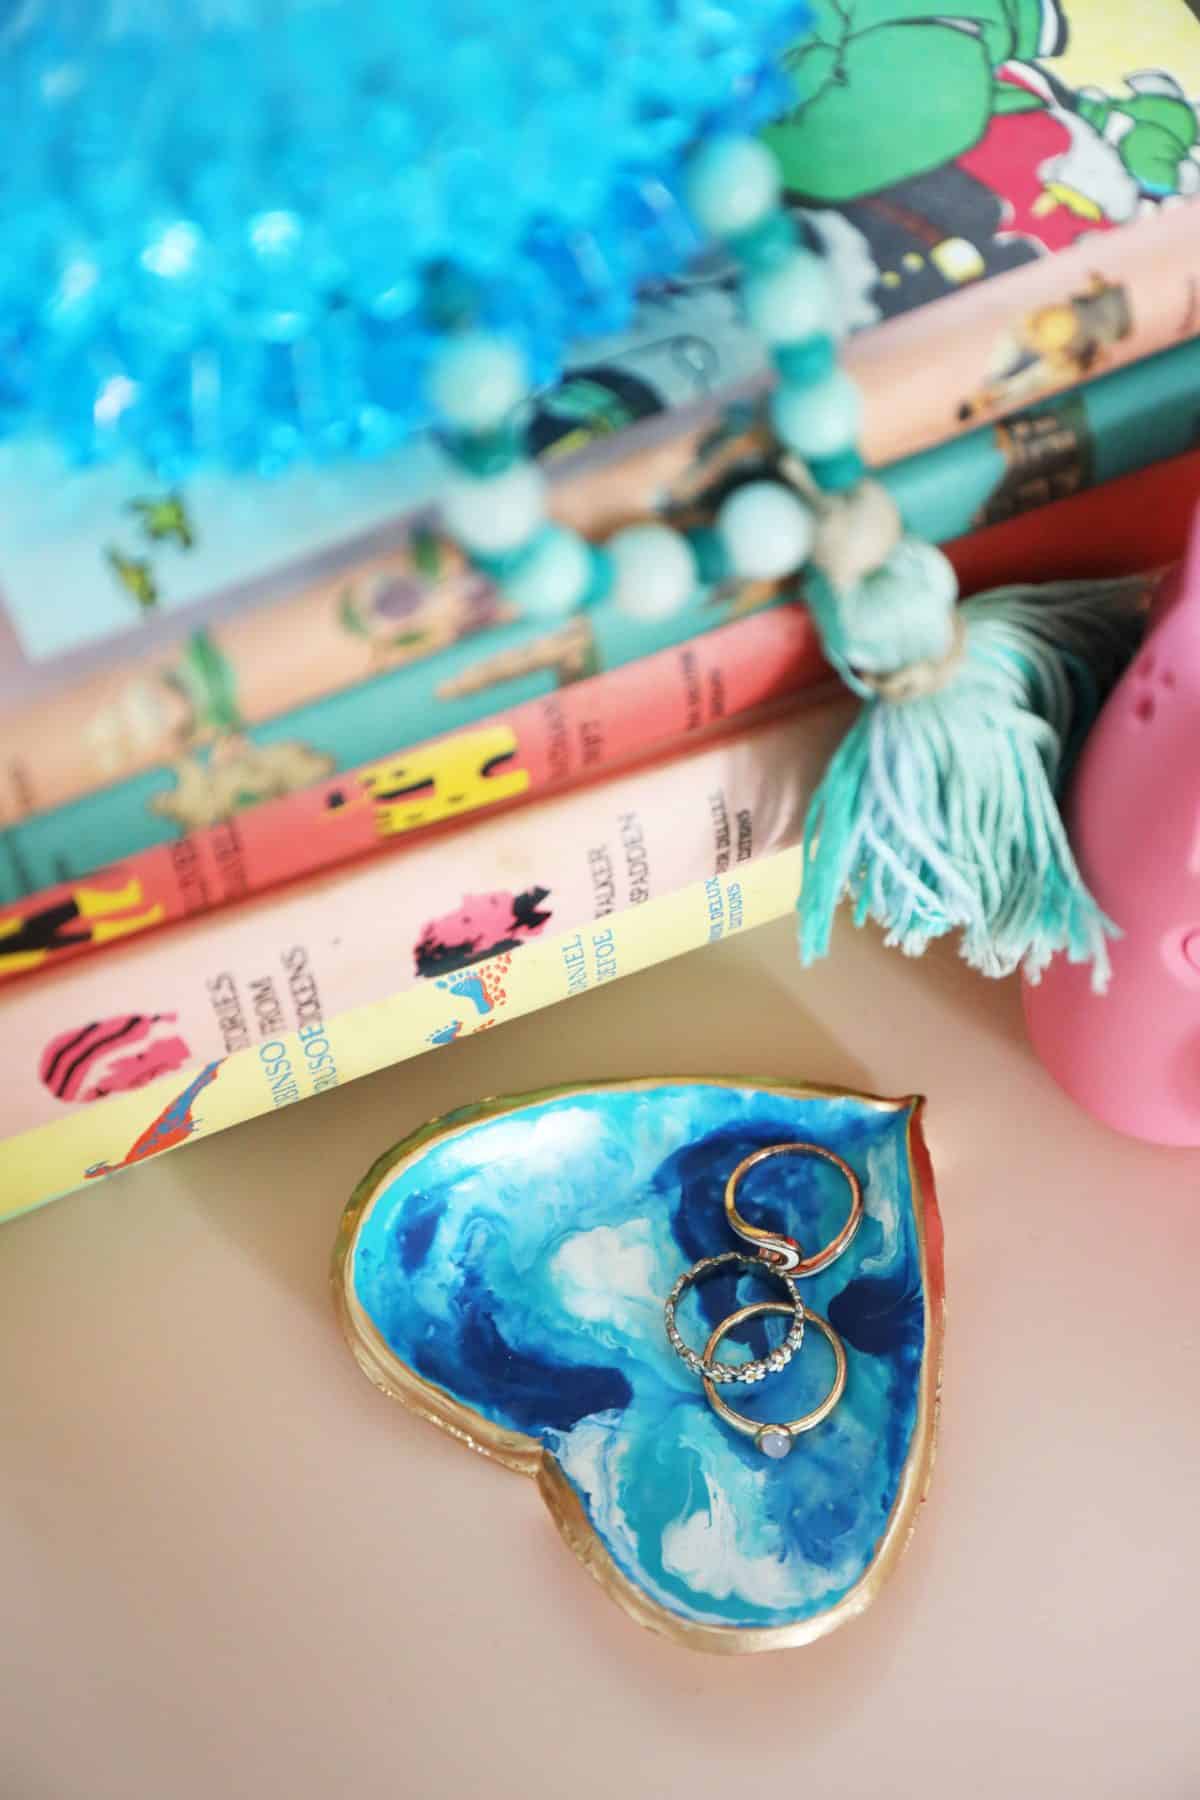
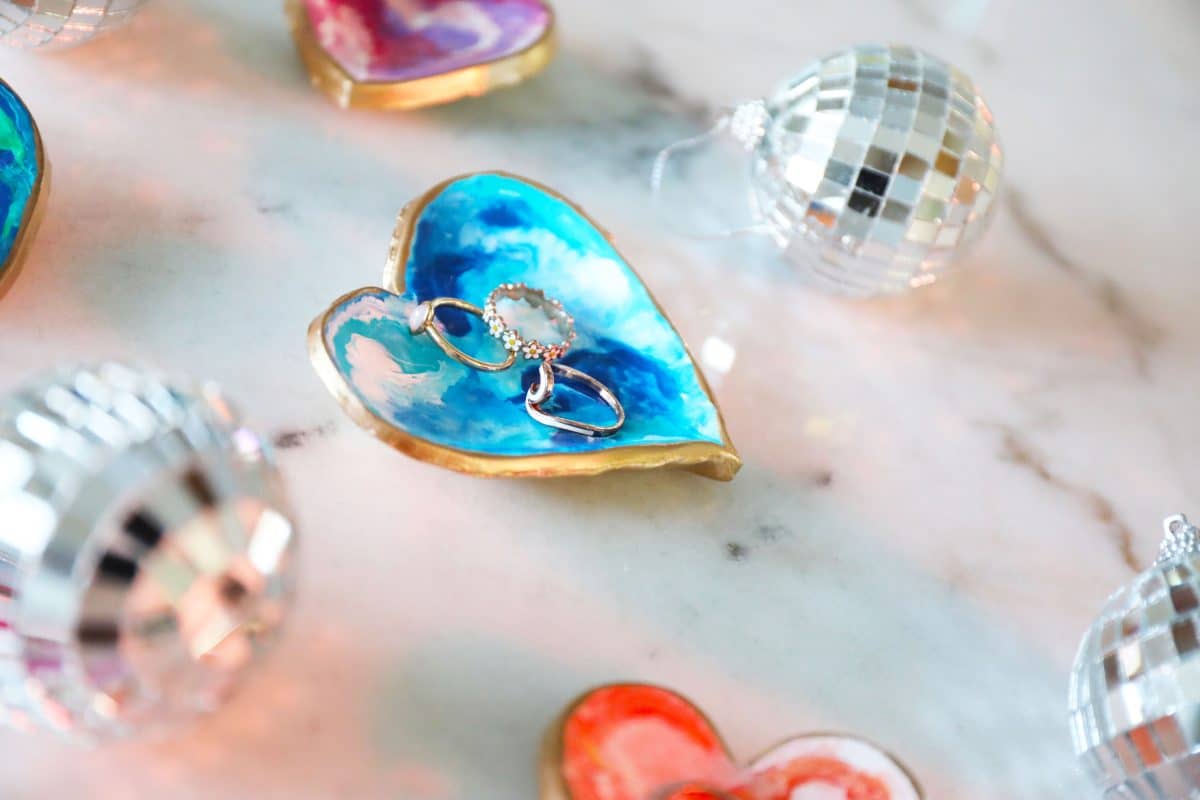
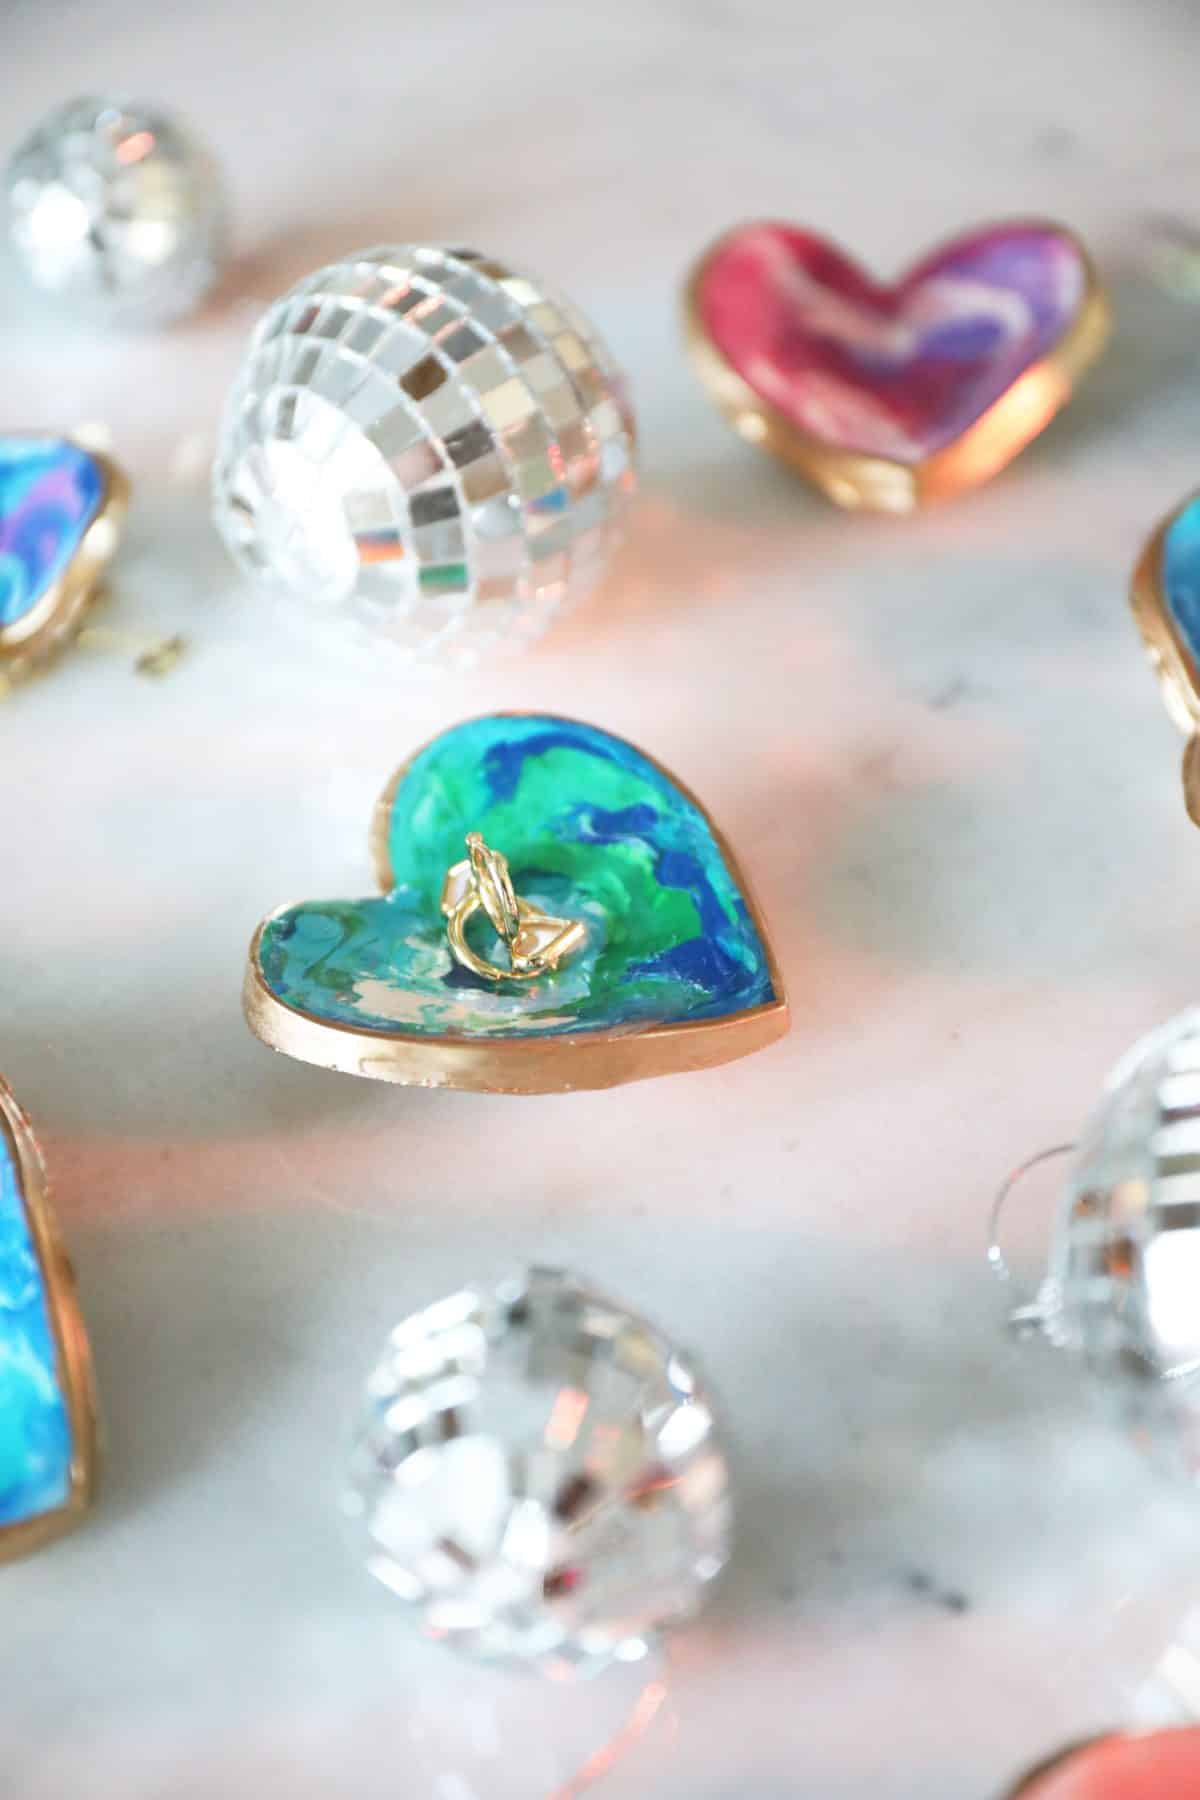
I don’t know about you, but I’m always looking for somewhere easy to stash my rings. Honestly, sometimes I forget to wear them as I am not a big jewelry person. I love them, but they’re kind of in the way if I’m working with my hands in some capacity. Which is all the time.

However, there is also always the danger of losing them.
So since we’ve been snowed in for about a week now, my daughter and I decided to create these easy heart trays this past weekend, and we had so much fun. It was a put on a movie we love in the cozy back room while we painted ’til our hearts content, kind of afternoon.
This is an easy way to remember where I last left that beloved piece of jewelry. I already had all the supplies on hand, and you might have them {or most of them} too!
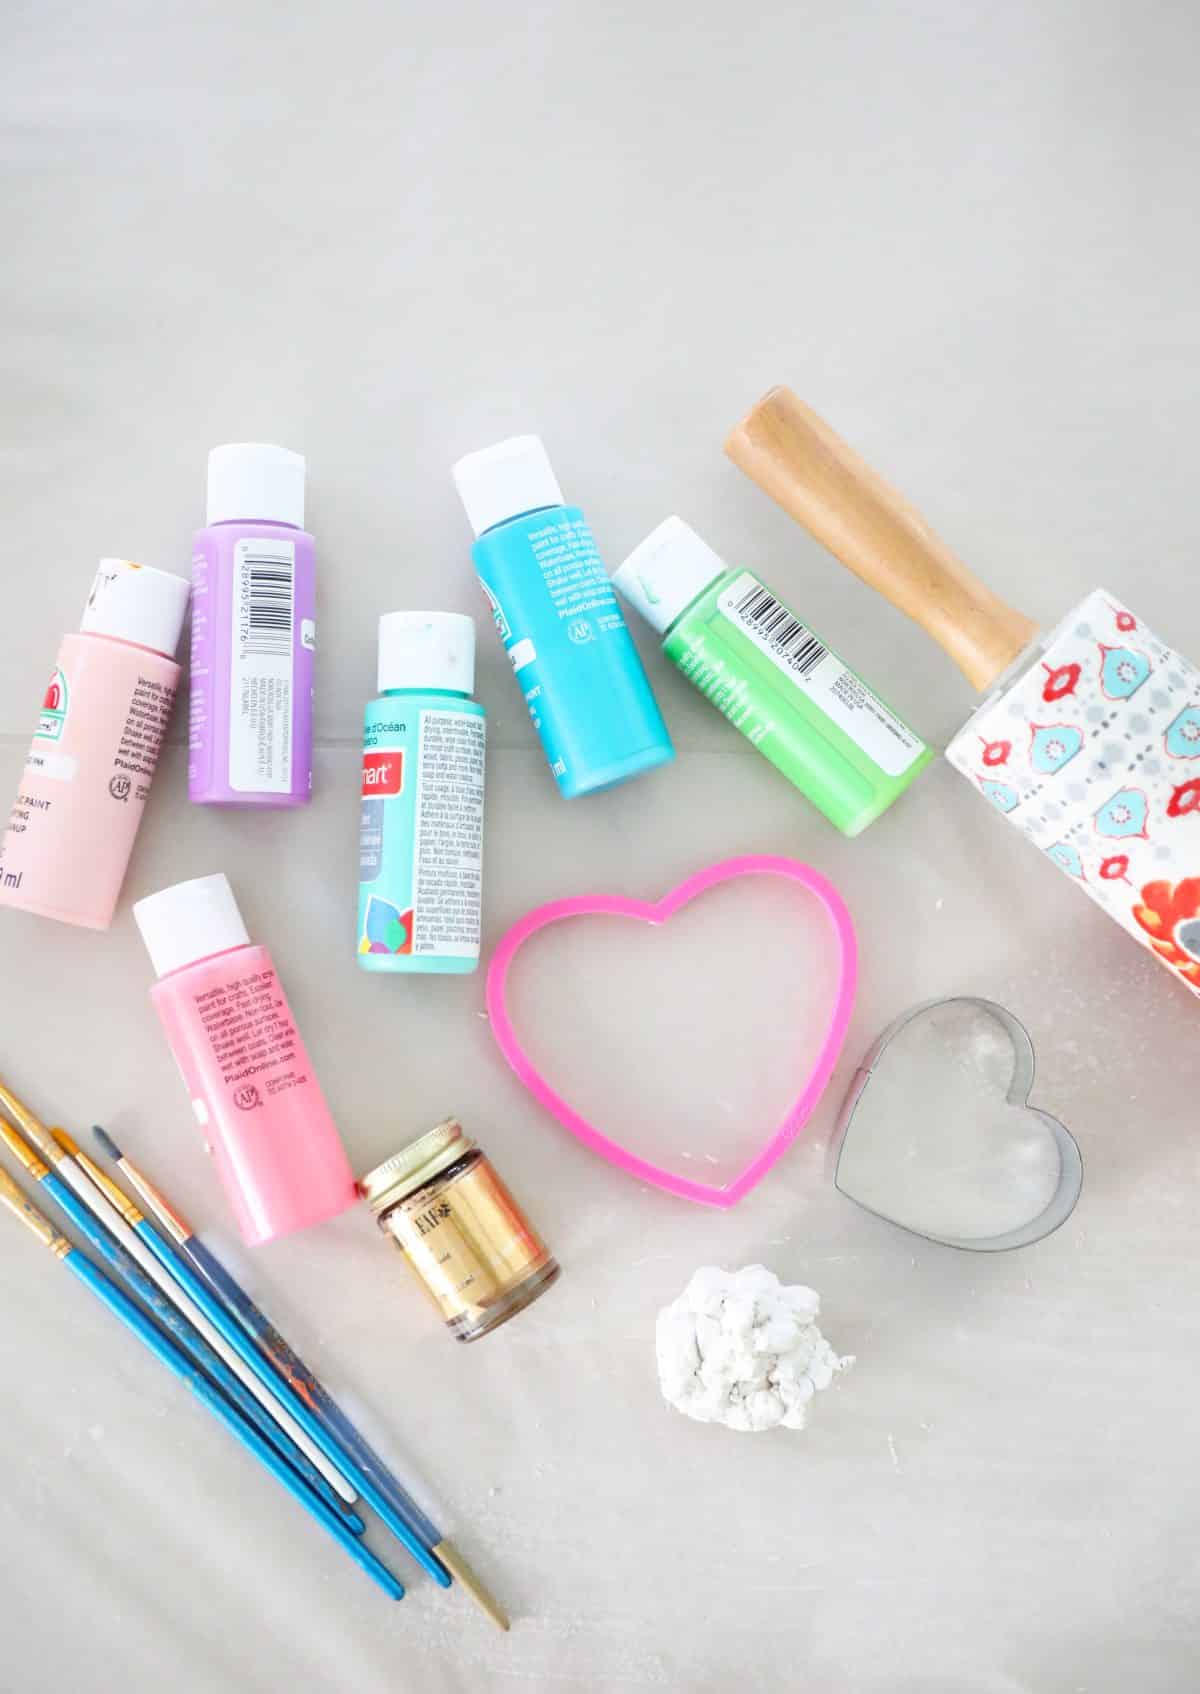
Here’s what you’ll need:
• Sculpey clay
• cookie cutters – {similar} I used two different sizes
• rolling pin
• foil + access to an oven
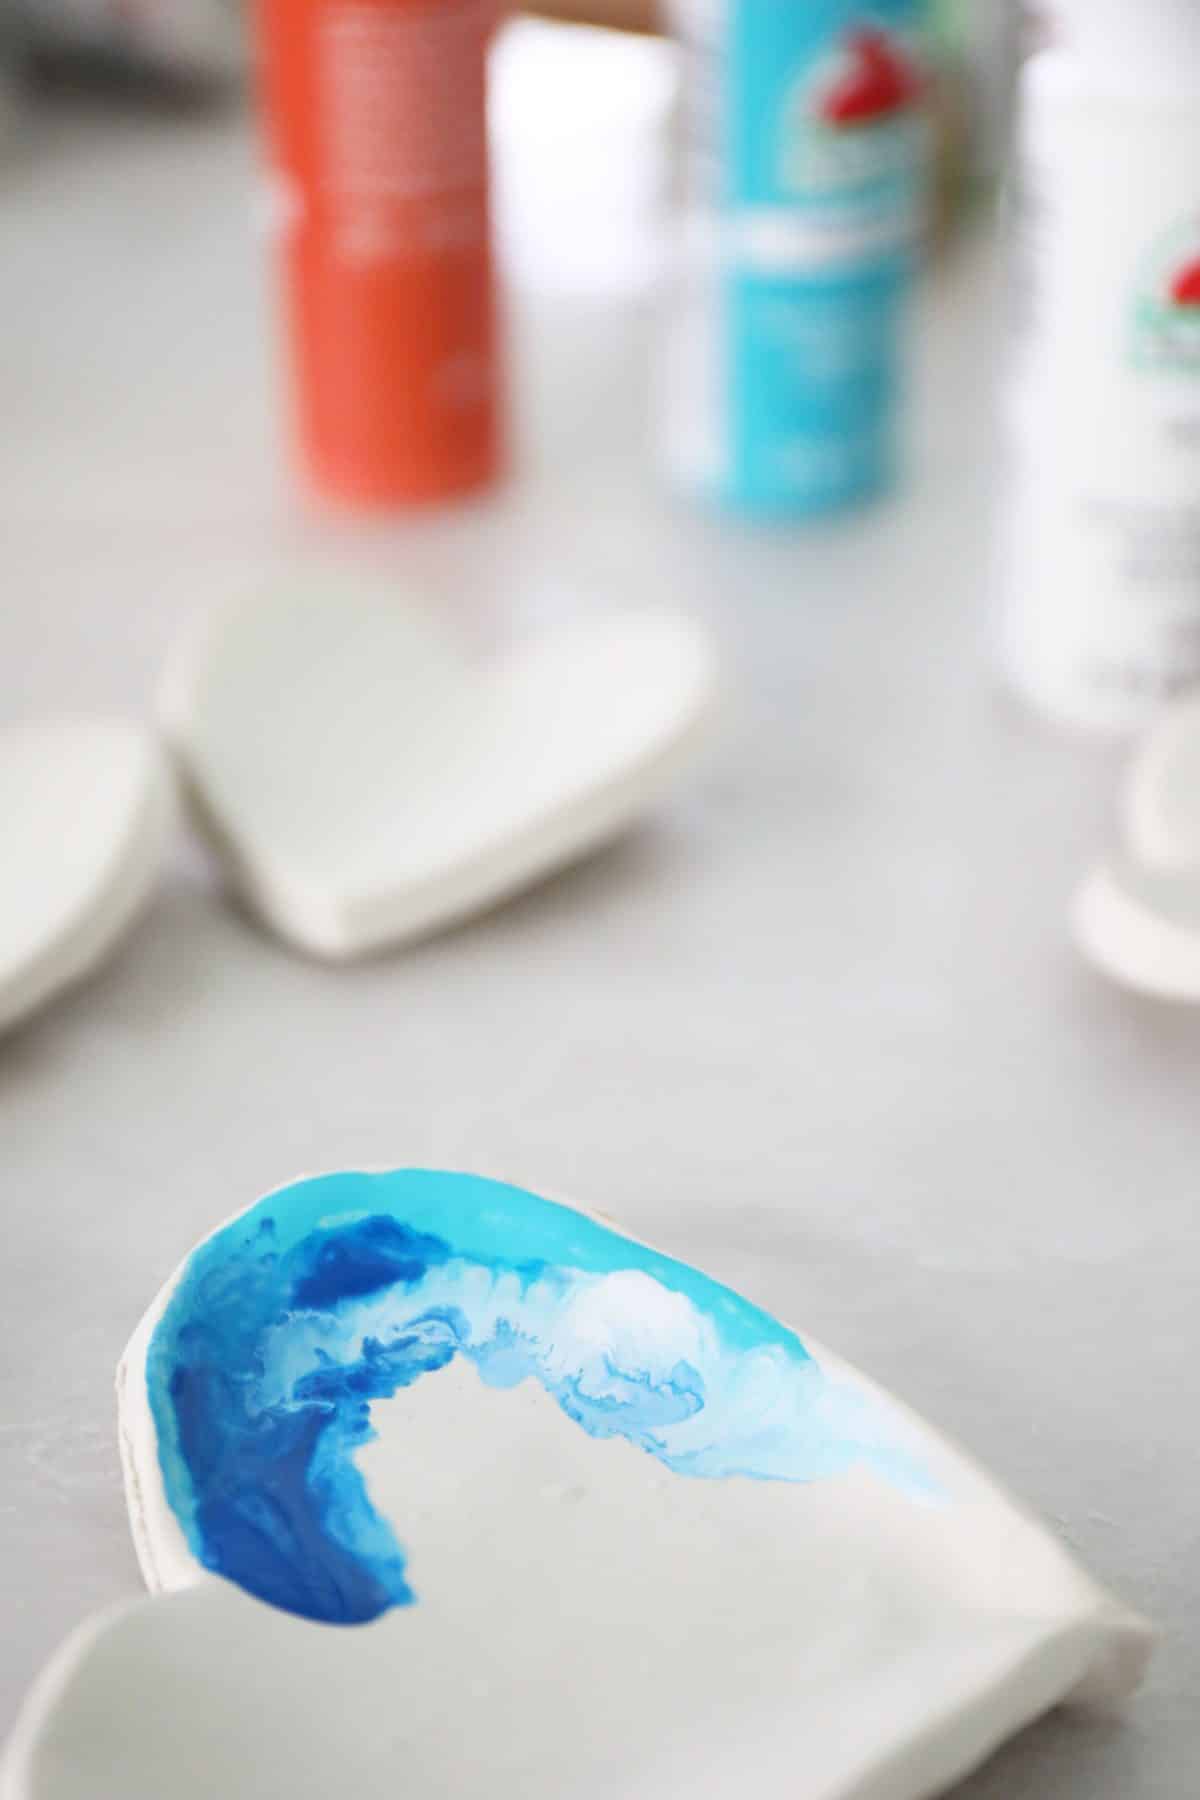
• paint of any kind {acrylic is best}
• paint brushes
• gold foil paint
• Sculpey glaze {optional}
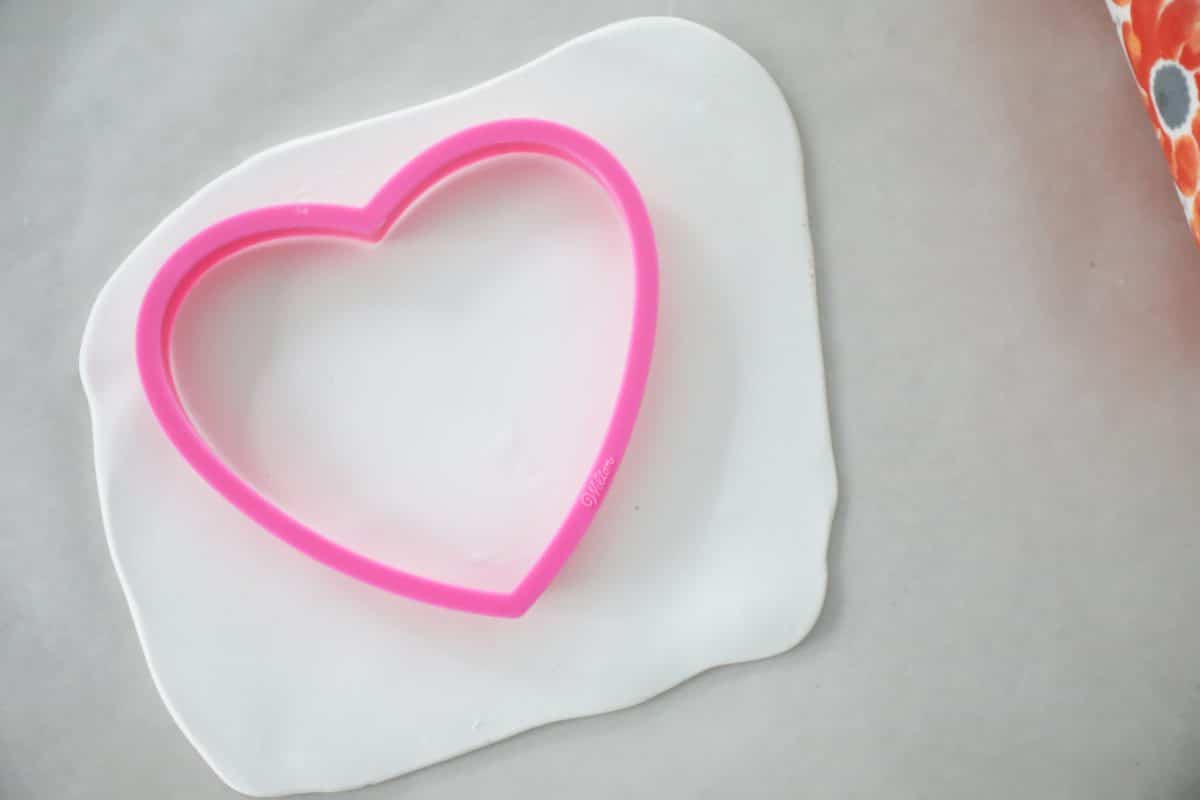
Warm your clay with your hands and roll out accordingly. I used two different sizes here to create some fun diversity from things I already owned. This little dish idea really works with any shape, but in the name of Valentine’s day, this is what we were going with. Gently press down and cut, pulling the excess clay away.
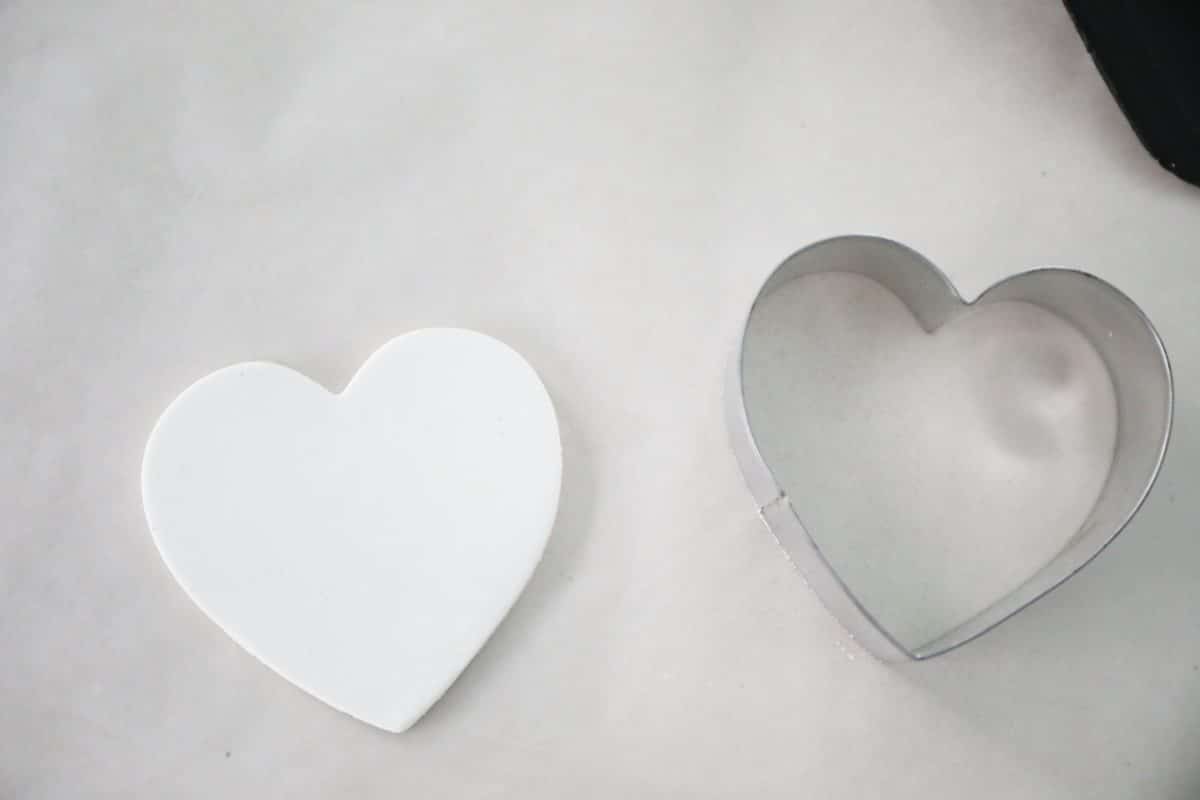
GENTLY turn up the sides with little disturbance {the smoother the better, so try leaving minimal finger dents behind} by playing with it on the edges. This may take a little practice.
Tip: My first batch cracked because I pinched it at the ends, and kept it thin. If you can keep the piece a little thicker as shown in the photo below, it helps.
Emerson ended up getting creative with the cracked batch and made her own versions which was fun – so no loss there.
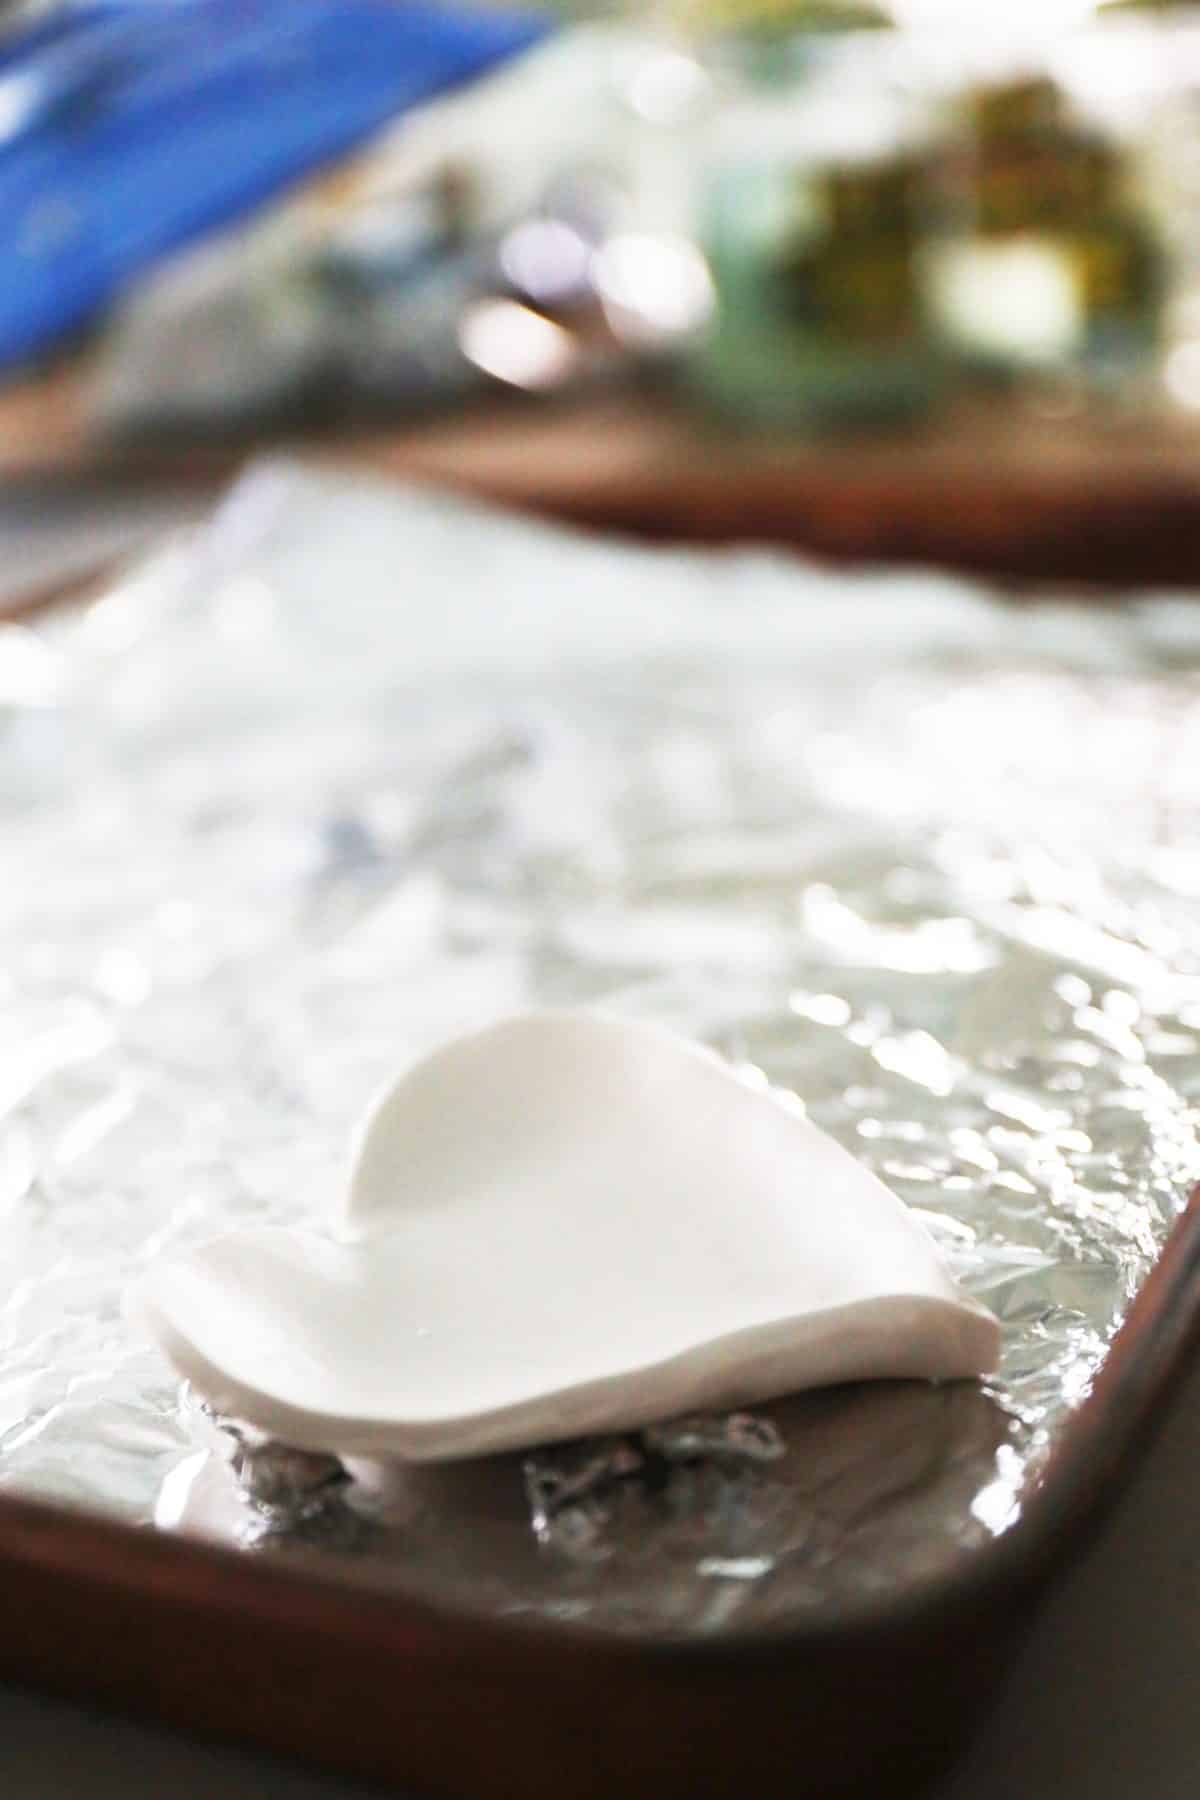
Tip: place tiny pieces of foil underneath the the edges so that the hearts don’t “wilt” in the oven. Support underneath will help avoid cracks.
Follow your clay’s specific directions and pay attention as they bake, but I never do more than 15 minutes on about 275.
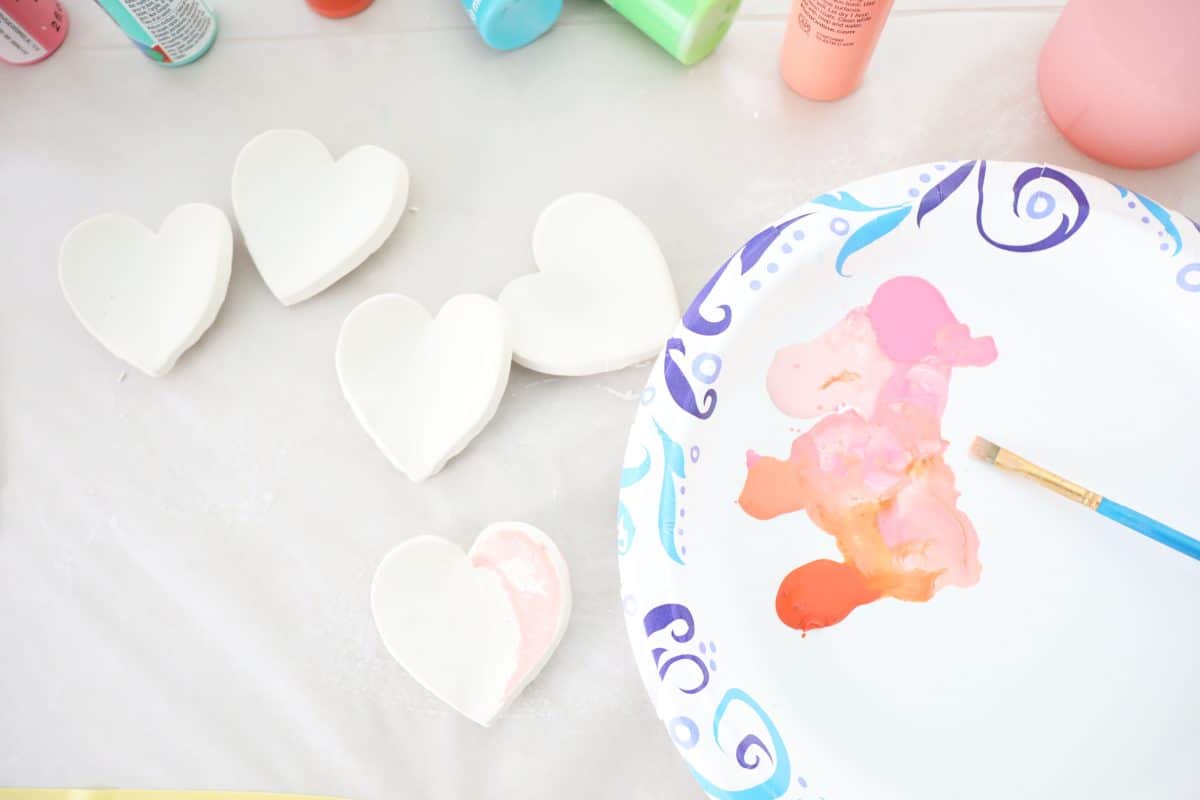
When they’re finito and cooled, you’re ready to paint!

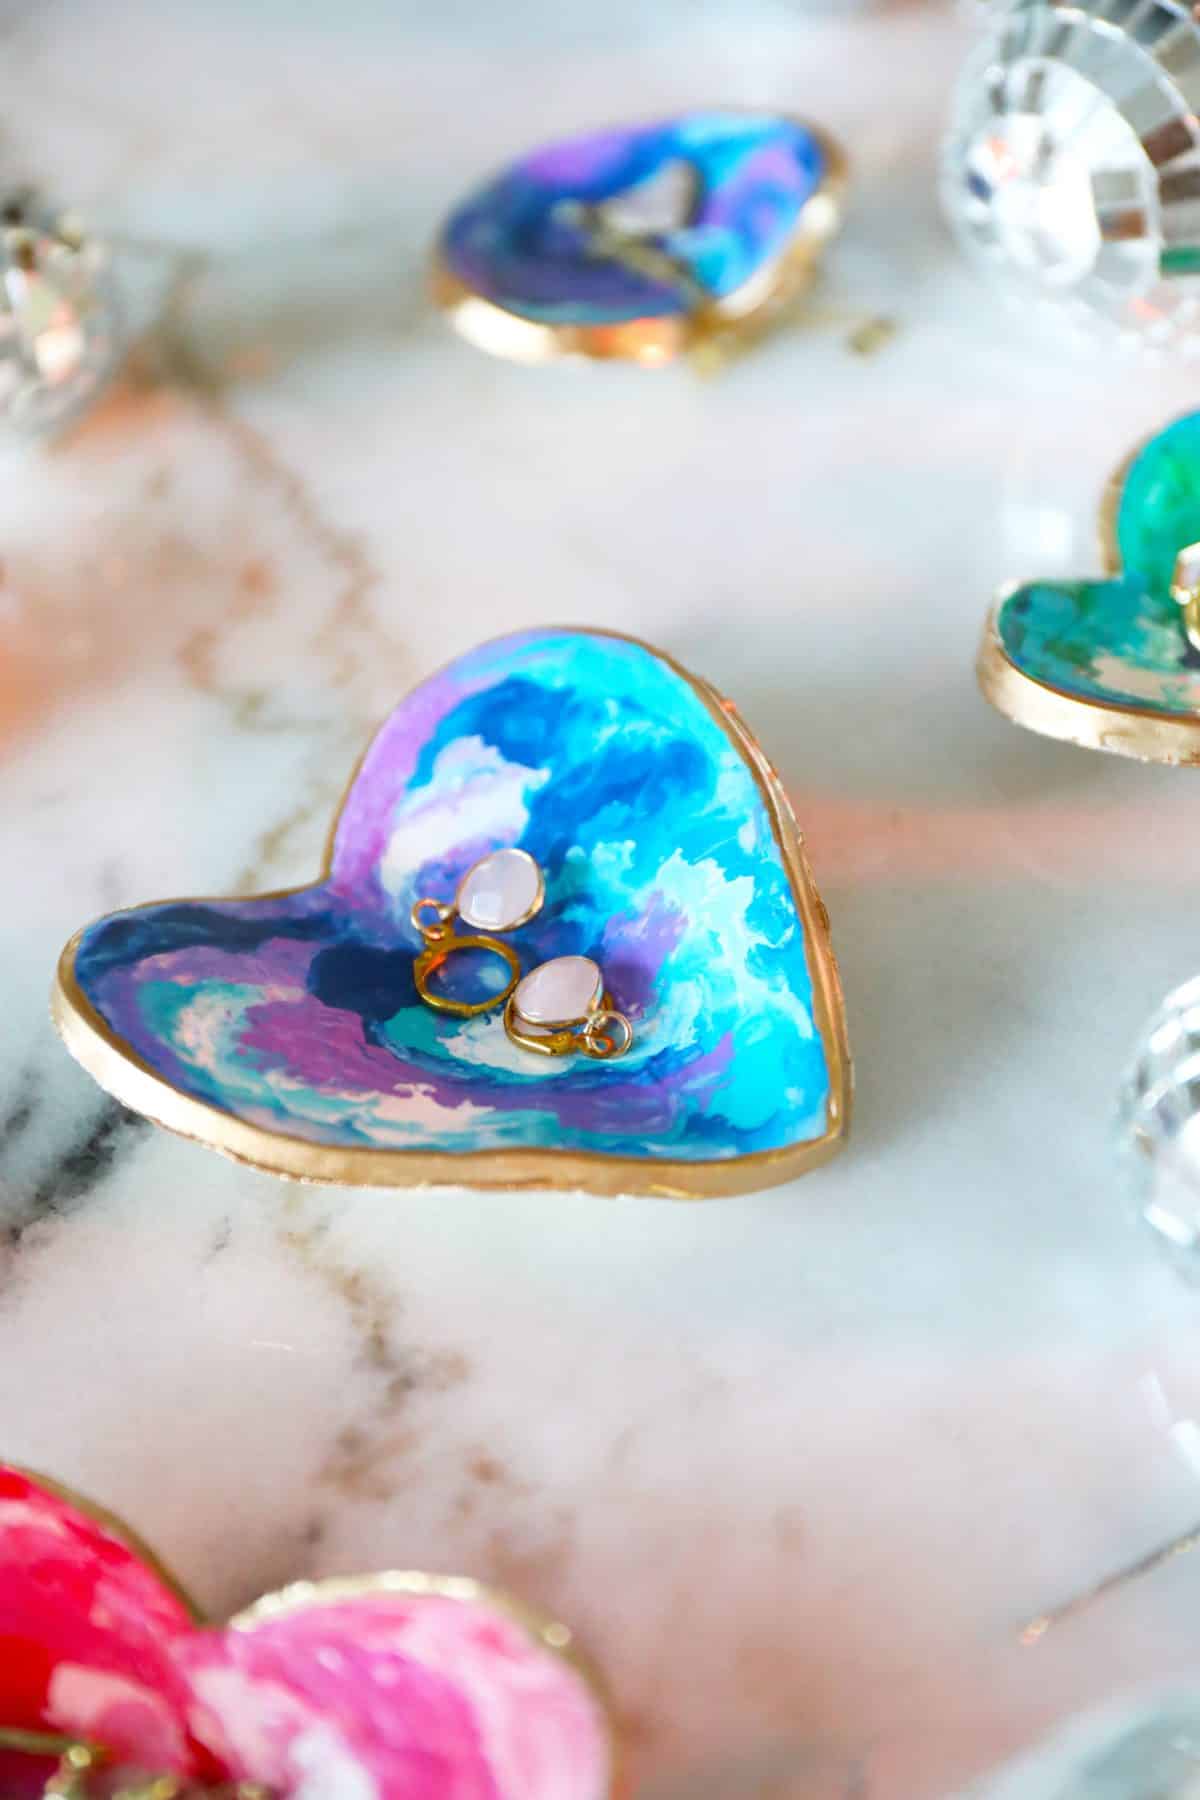
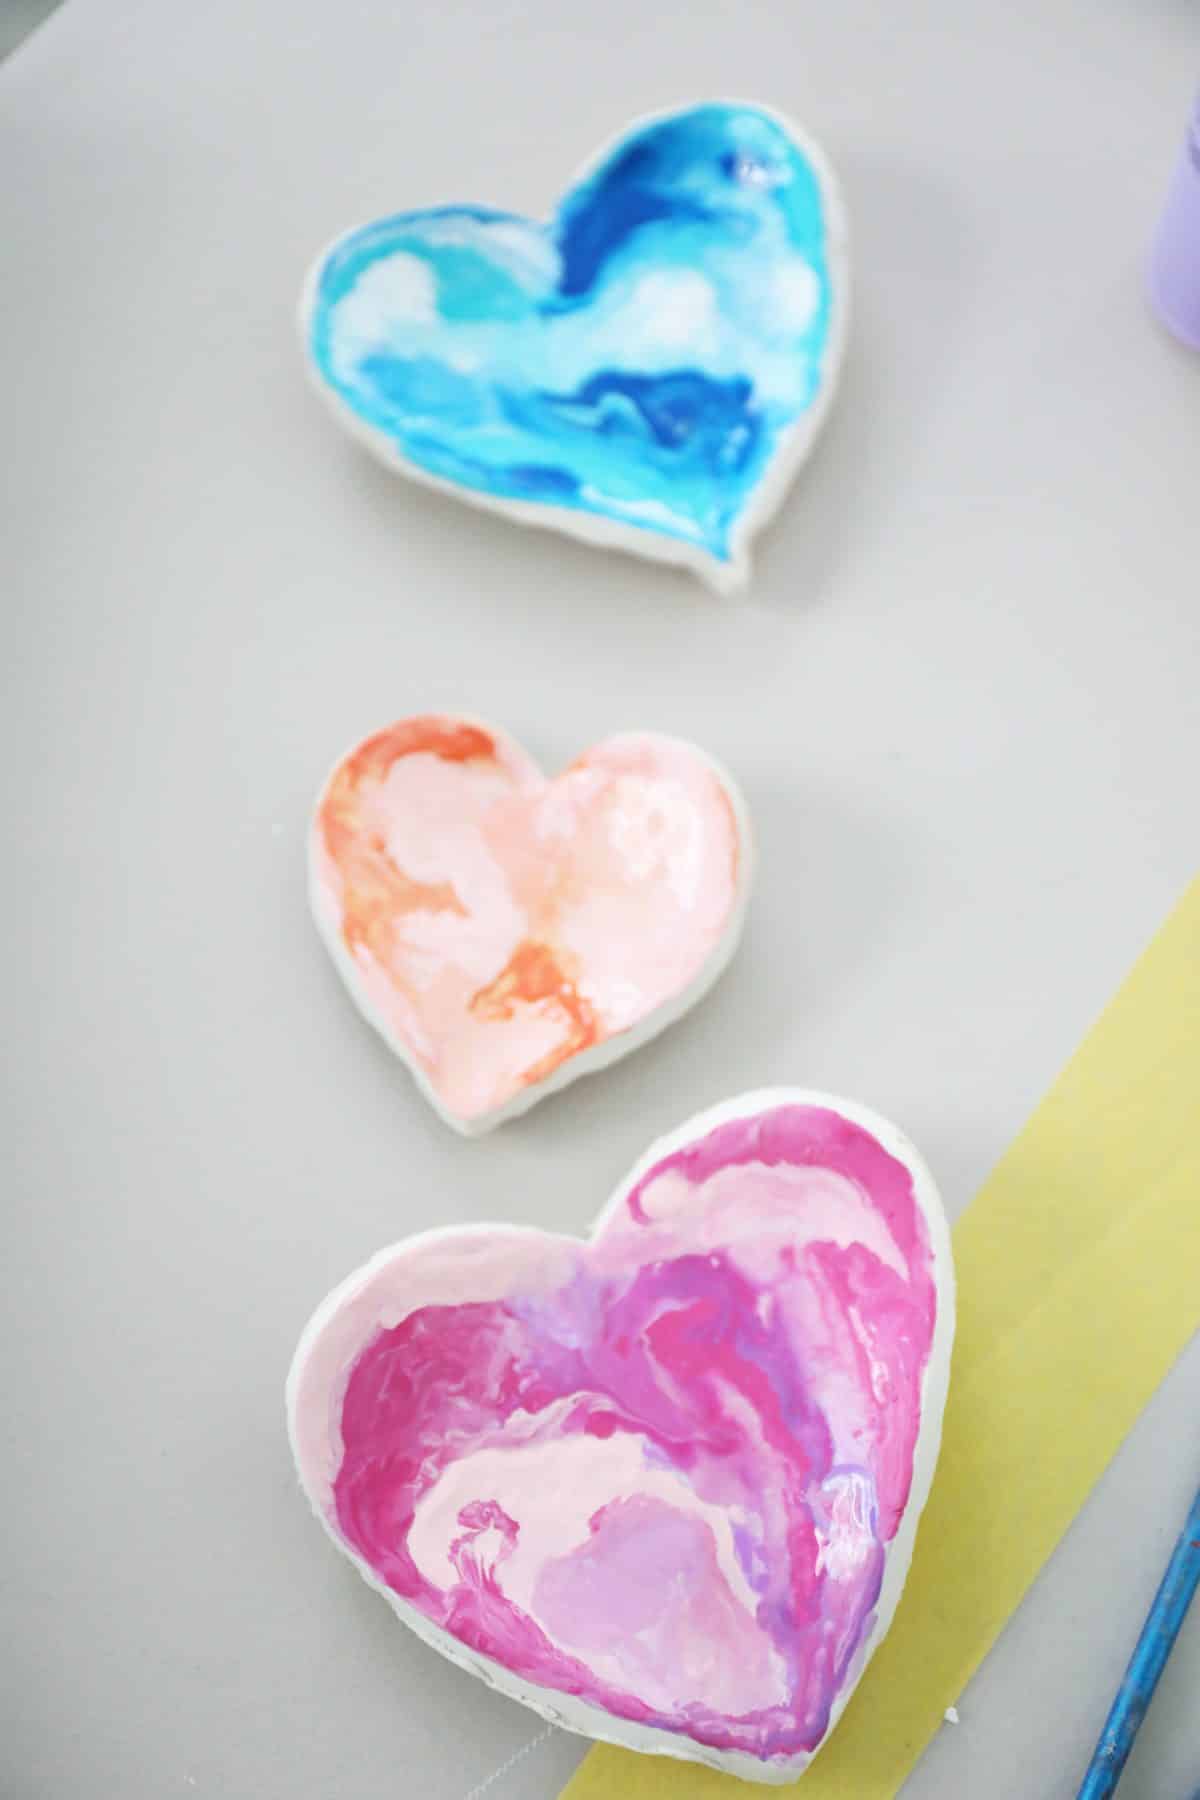
I create my colors by mixing different kinds together for that marbleized feel on a plate or palette ahead of time. It helped me create these fun swirls. It’s best just to play as you go along!
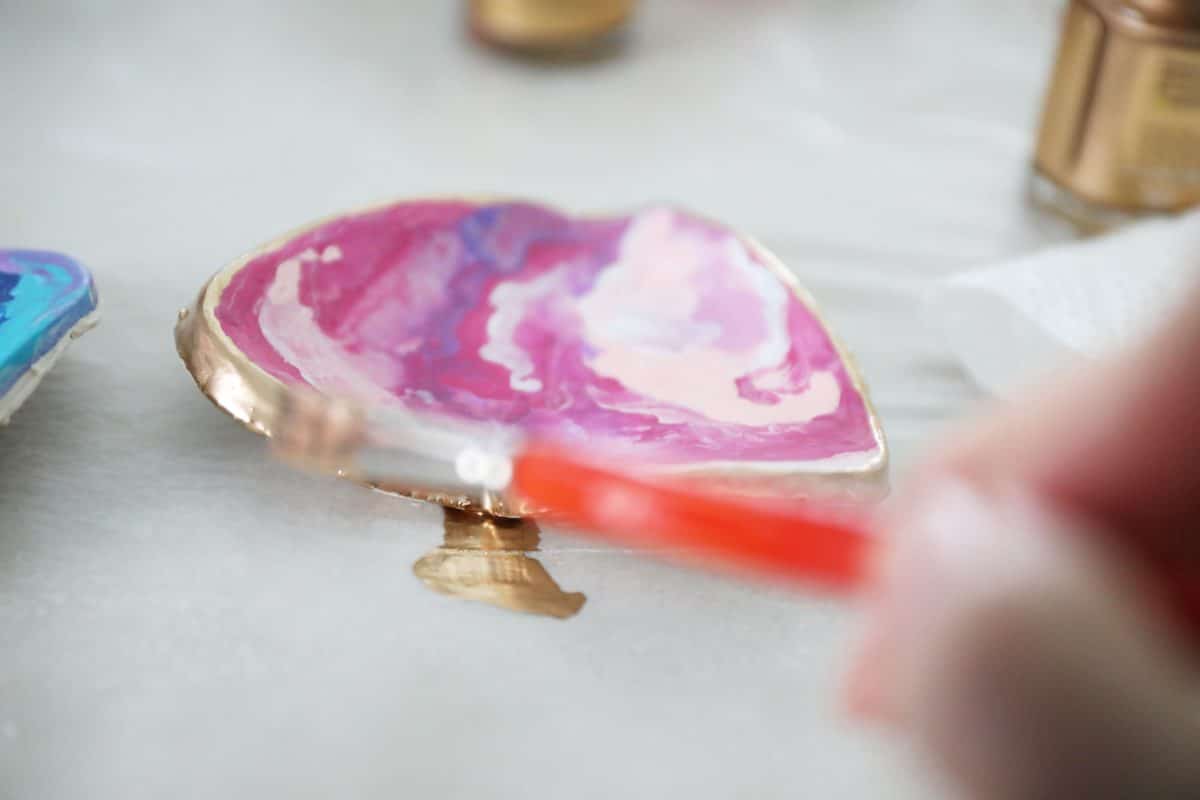
When the acrylic paint is dry, add the metallic gold paint to the edges for that extra zush.
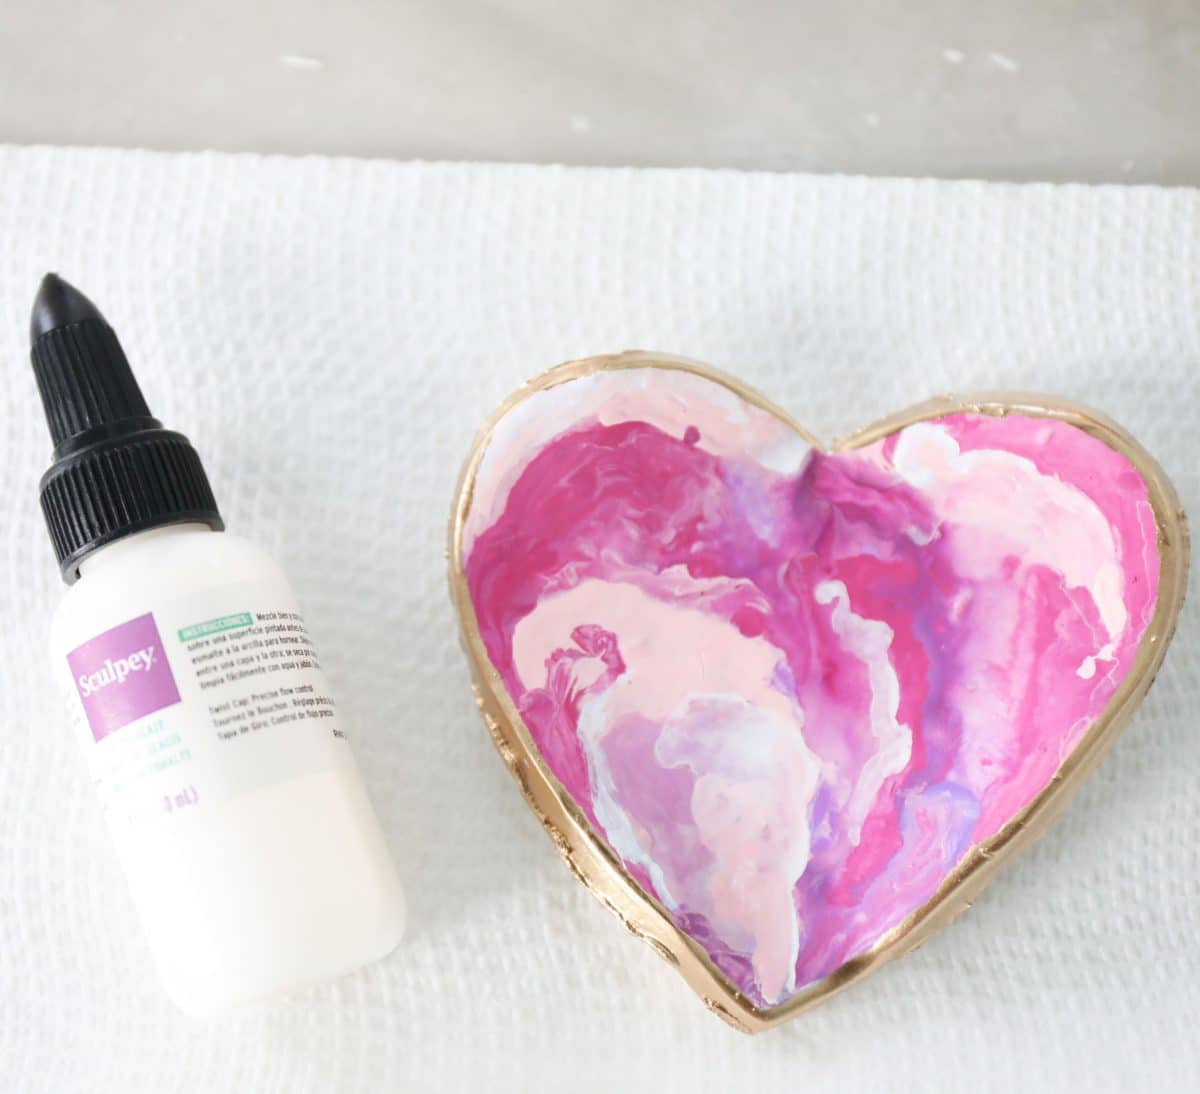
And when that was dry, we added the glaze on top for that extra polished feel.
A little goes a long way so with a fresh brush, squeeze out a little and add it to the top. Keep adding as needed but it makes a great polished look in the end, and really makes those colors shine.
Tada! Once they’re dry, you’re done.
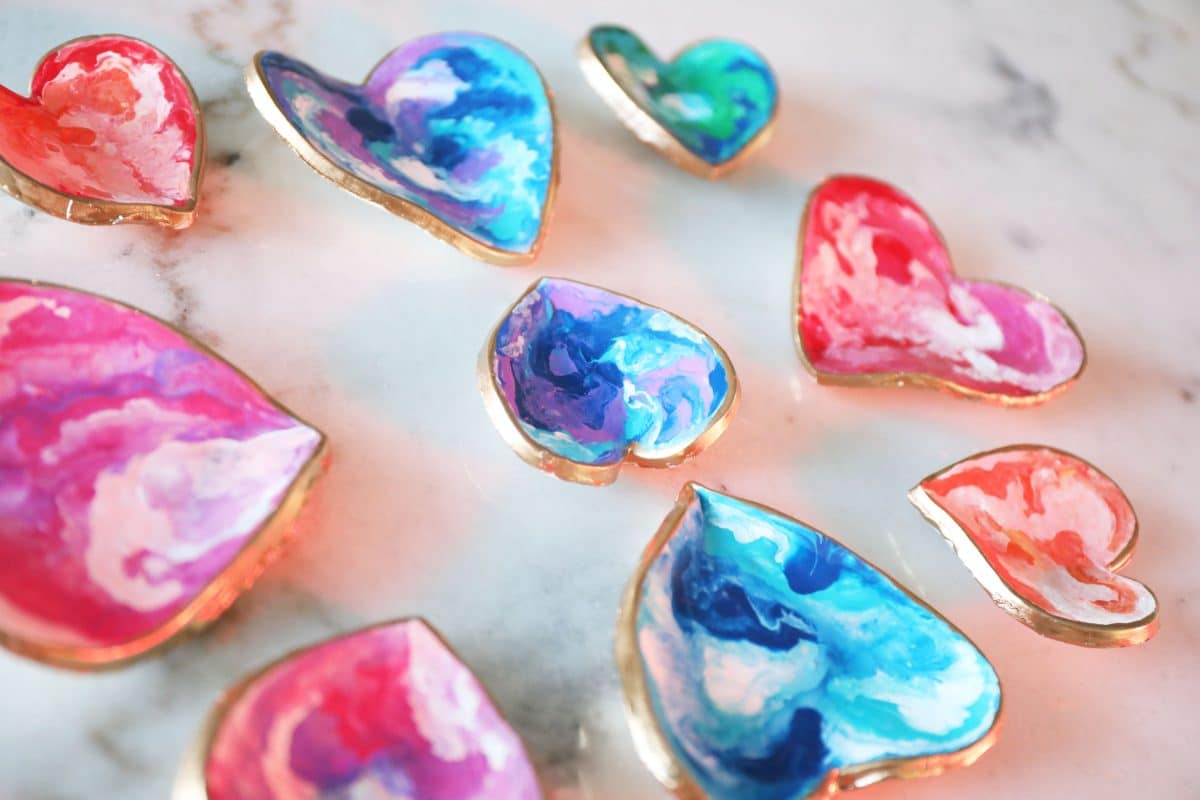
We love the fun colorful vibe that these give!
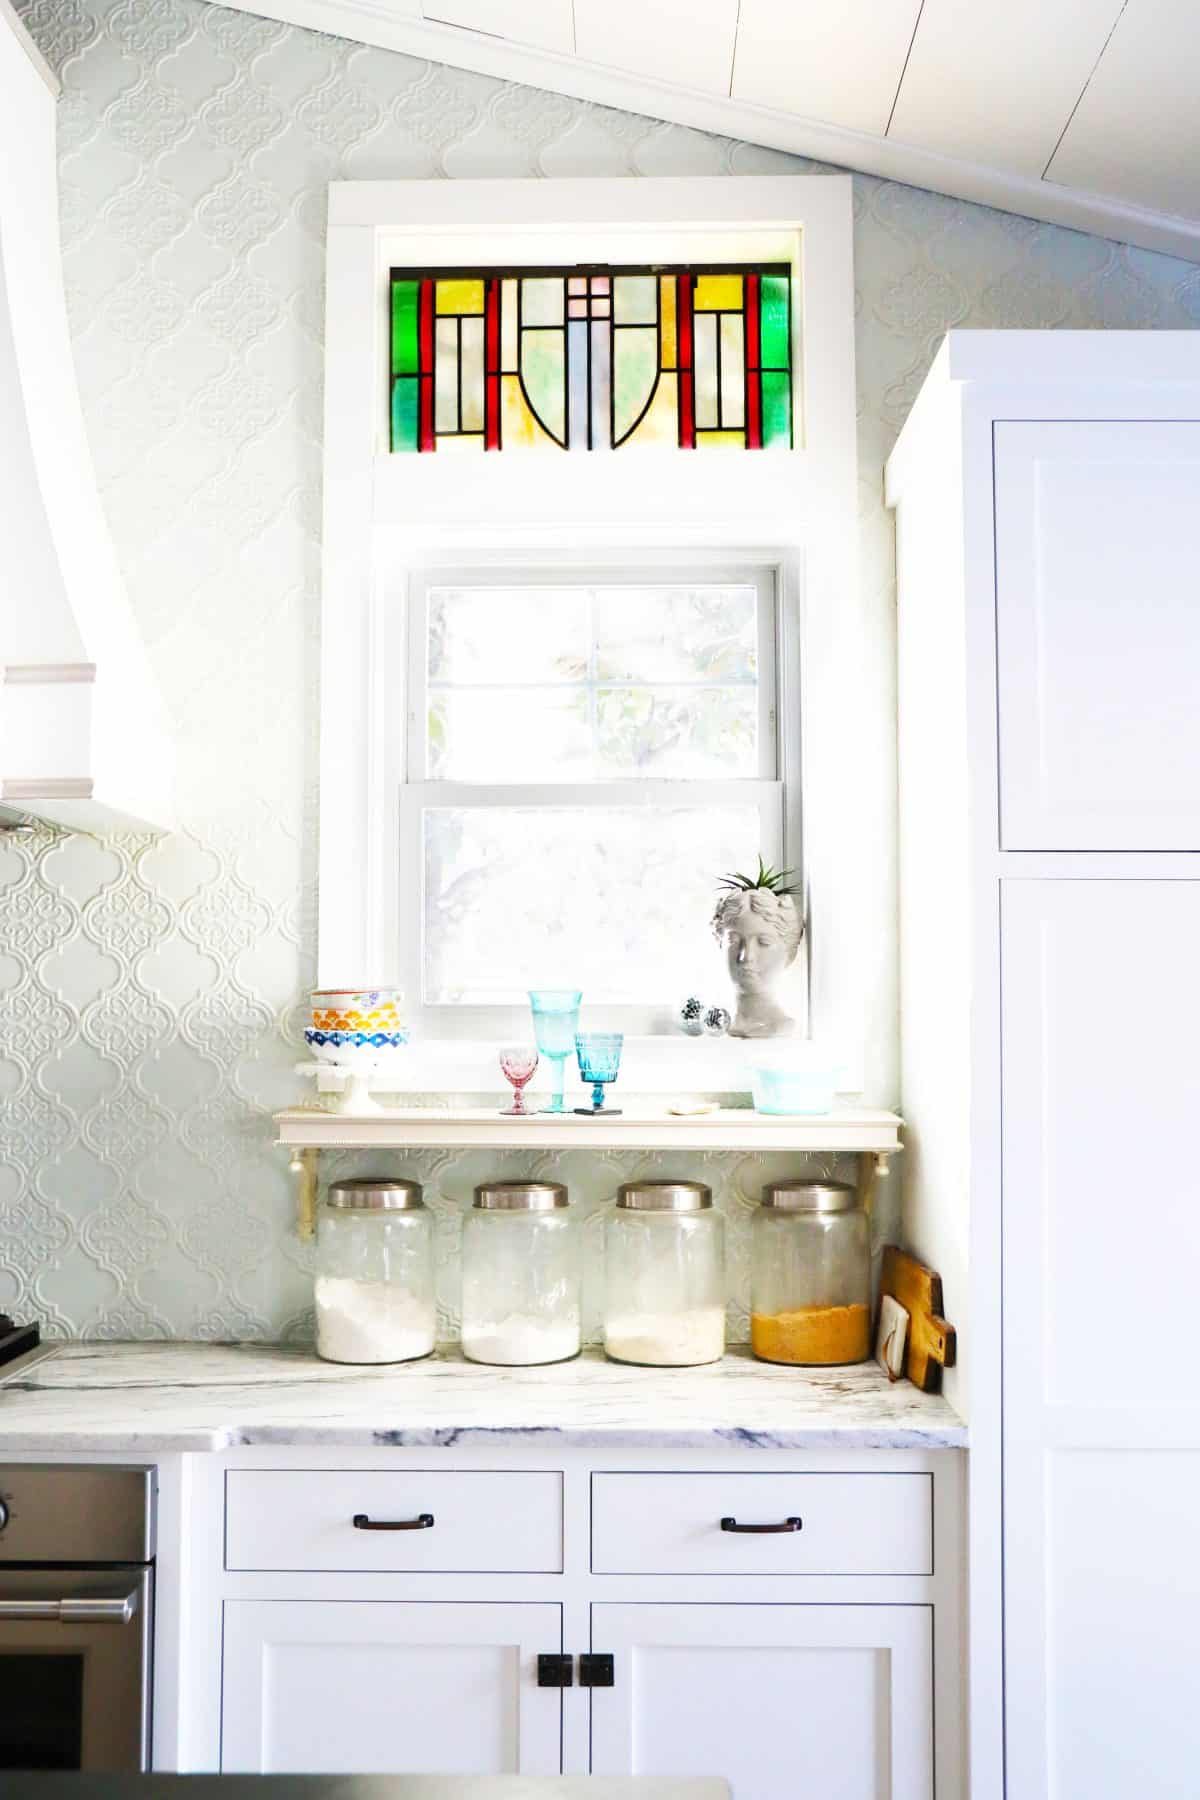
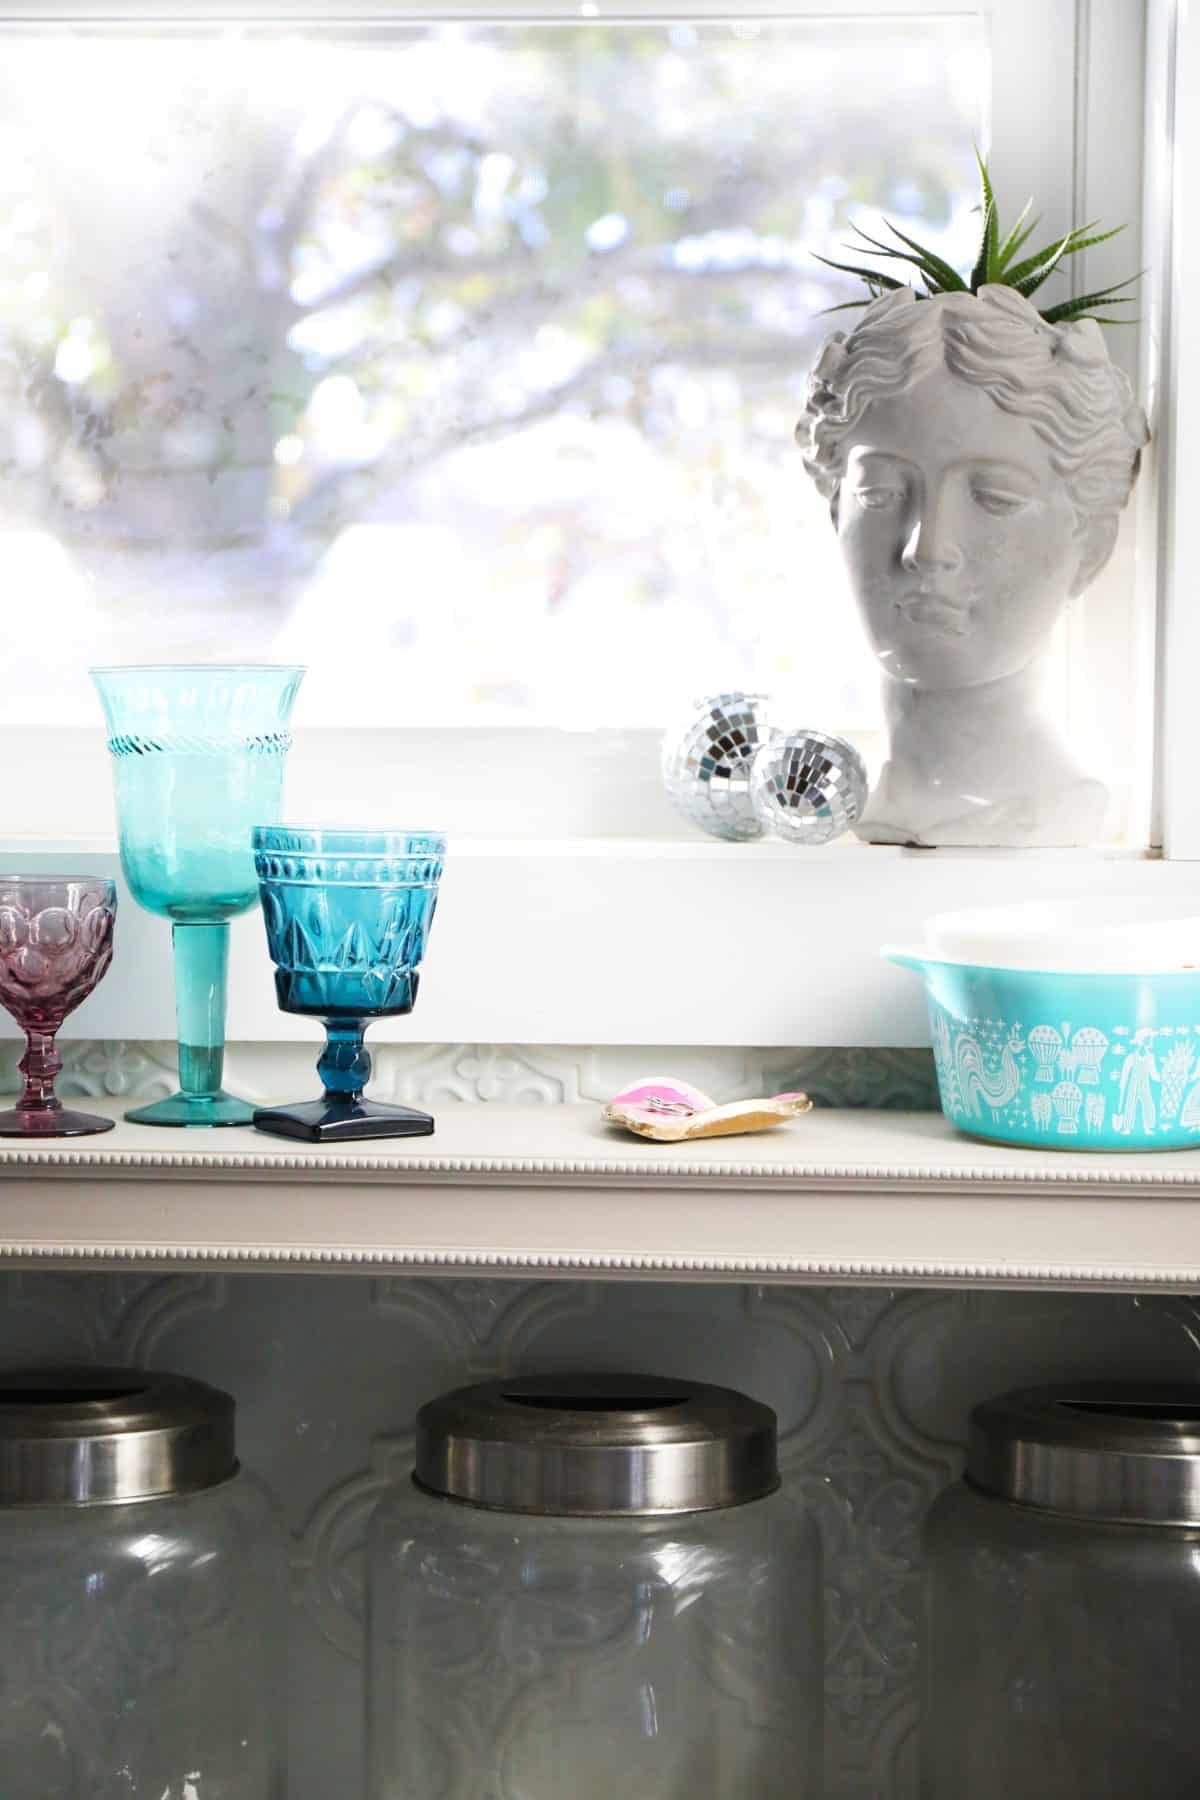
Hard to see here, but I actually have mine in the kitchen to hold my rings so that I always know where they are.
Emerson snatched up some for herself in her own room, and for gift giving.
They do make the perfect little valentine’s!
As always, let us know if you try them. Or if you have any questions. We’d love to hear. And see!

Here’s to the fun simple creations – it’s the perfect season for little crafts. Have an inspired day!
Very cute idea. Do I spy a stack of Best In Children’s Books? I have inherited a few of them and I love them. 🙂
Hi! Yes! I scored a collection at the flea market a few years back. They’re so fun to accent the kiddo’s spaces with!