diy wooden beaded monogram
Last week, we decided to do a fun little project for a little personalized accessory around the home.
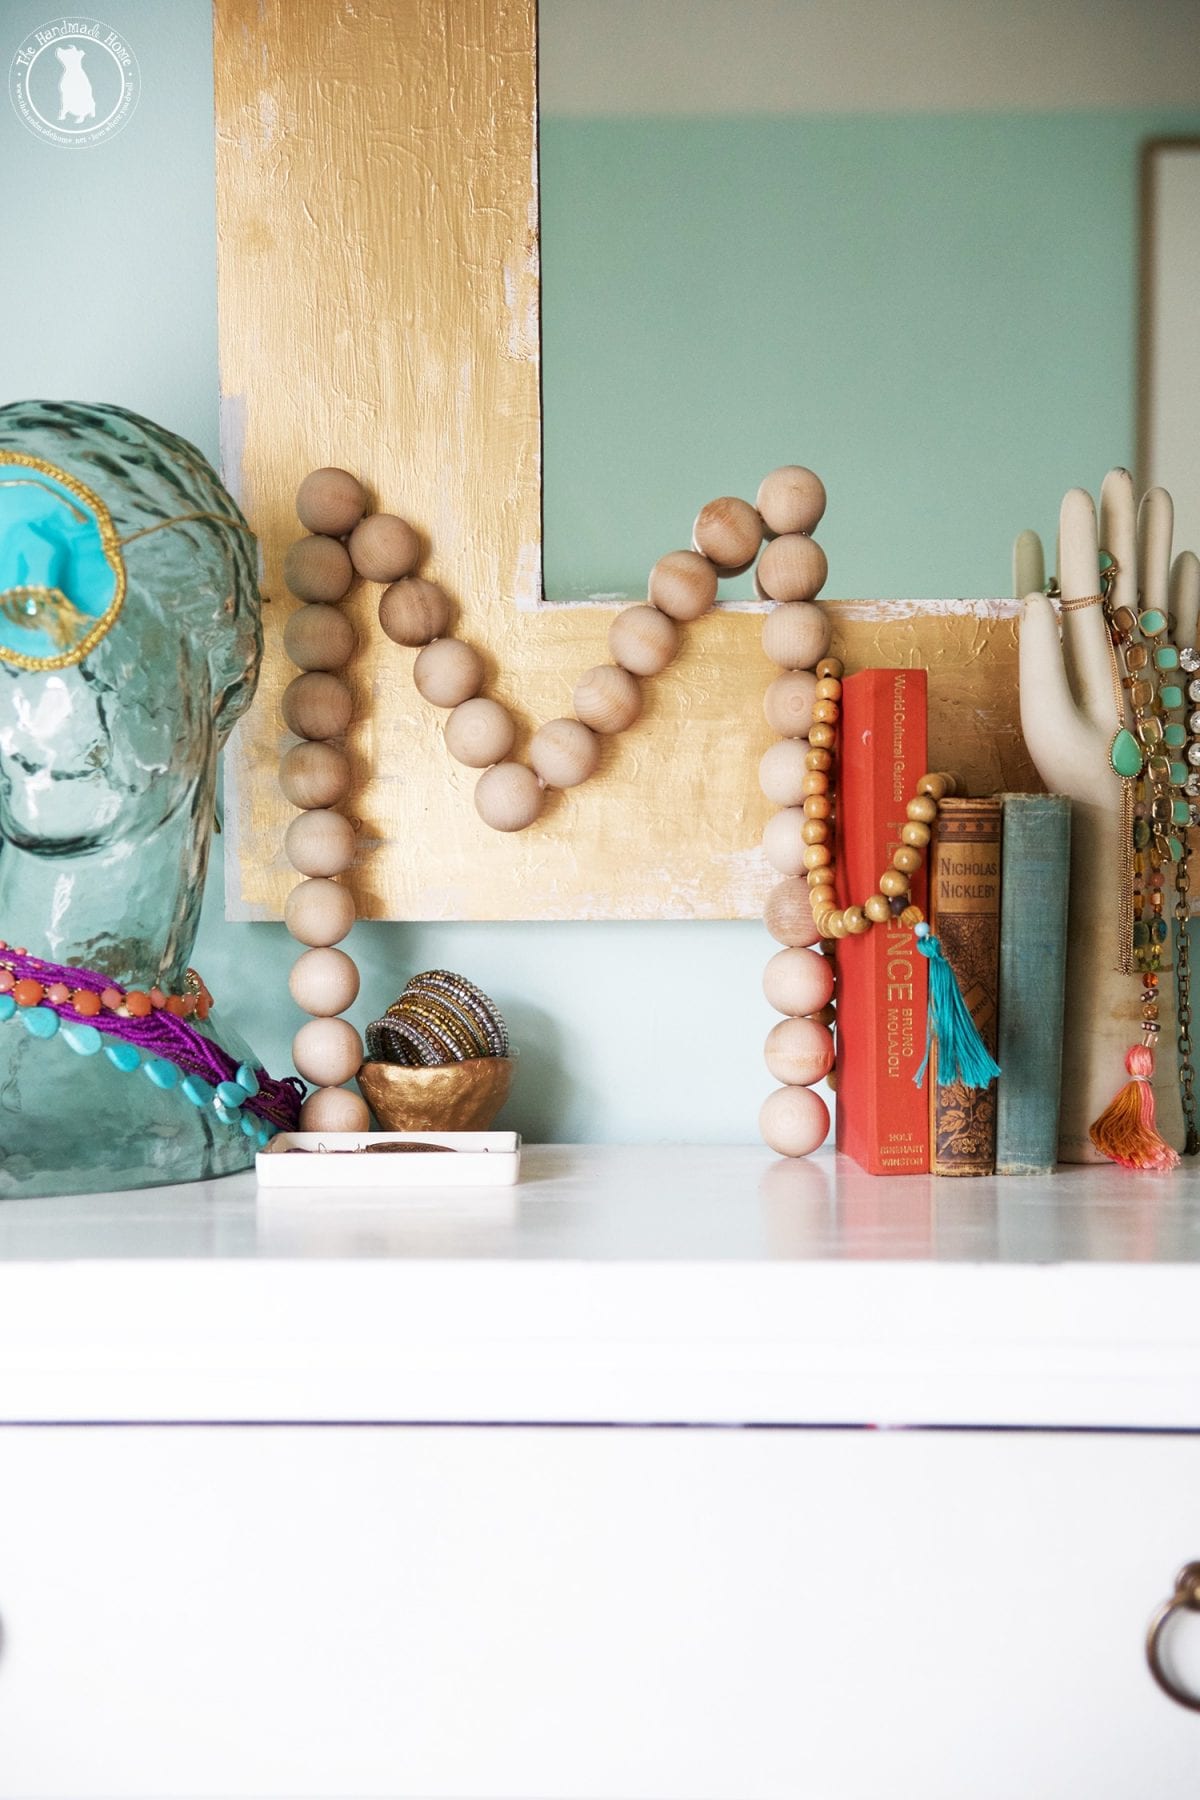
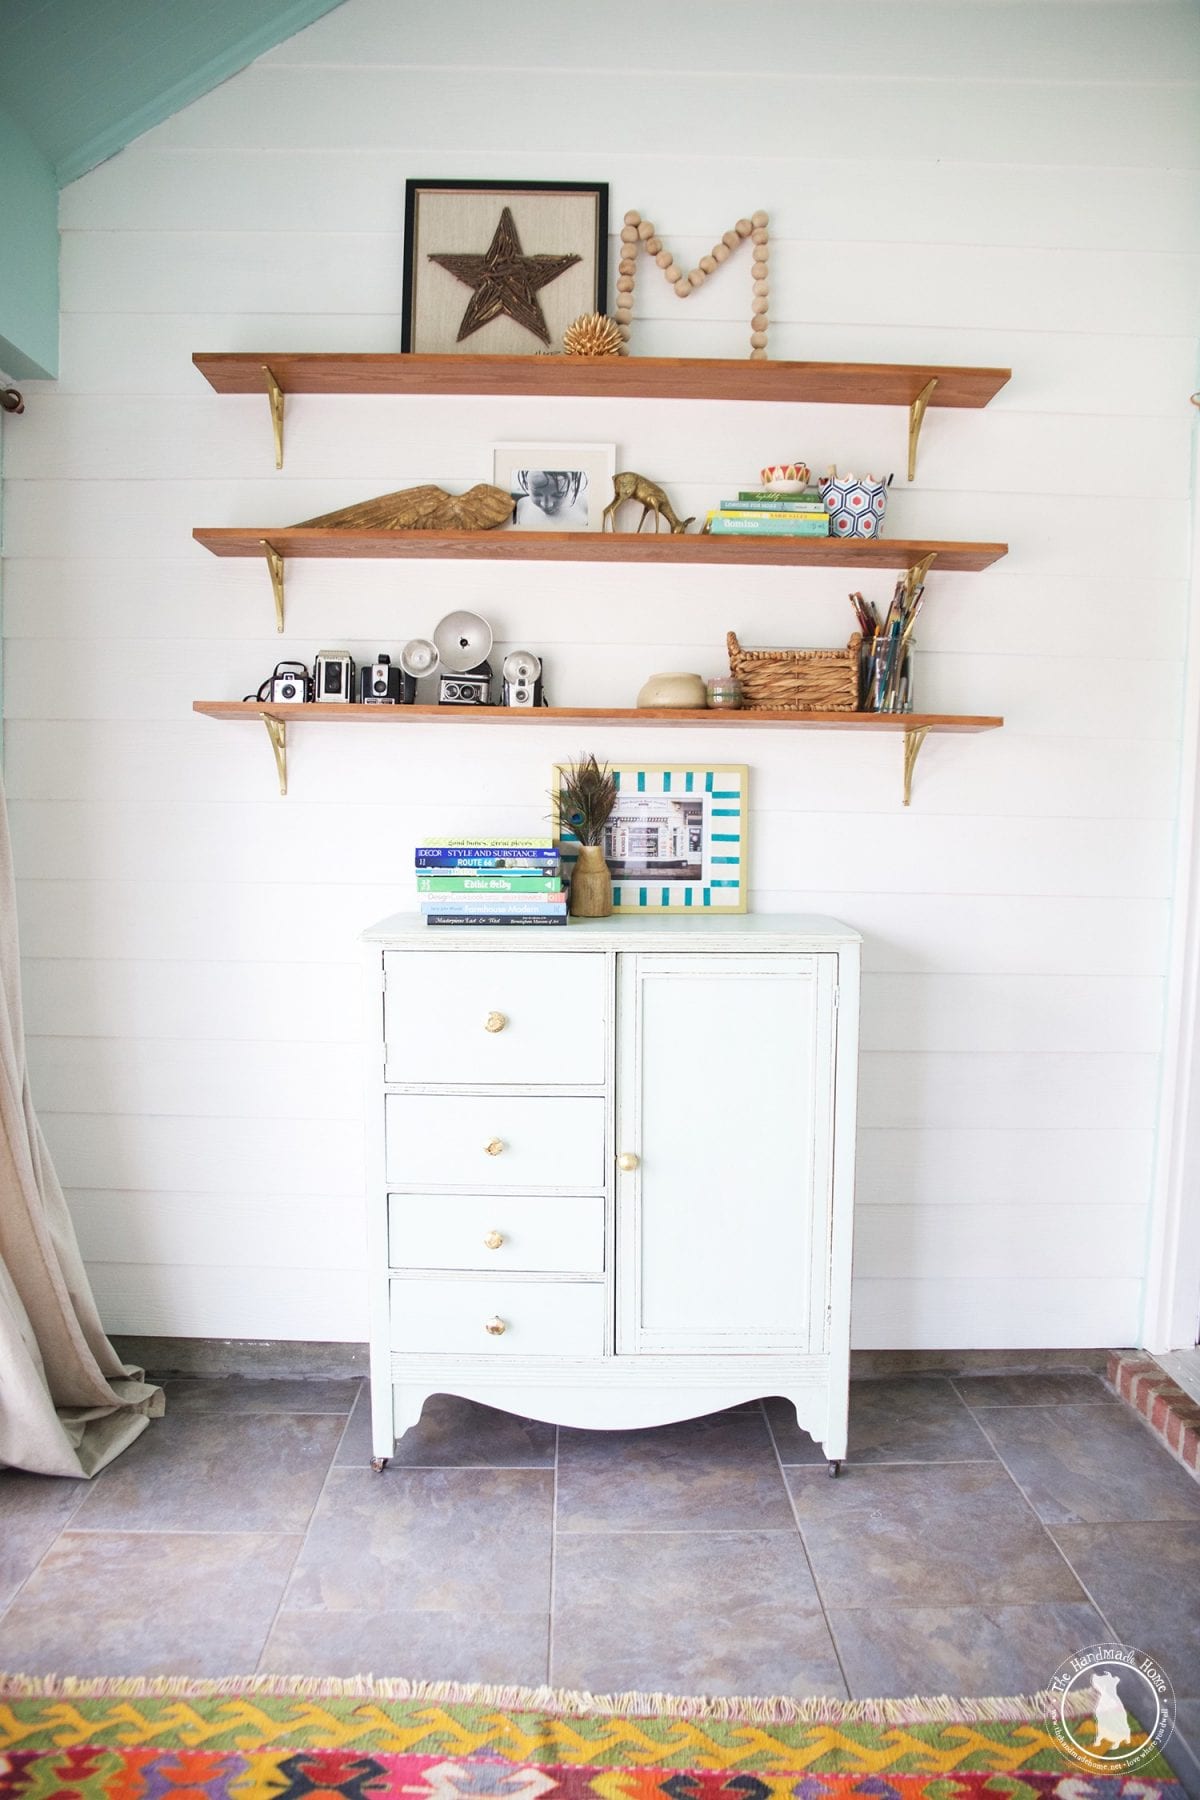
We ended up with such adorable results, we wanted to show you the fun ways you can style this little diy wooden beaded monogram in any space.
It can be personalized just for you, and it holds this great natural texture for a one of a kind look.
So today, we’re sharing this fun little how to – the perfect project for a gal’s night, parent/kid project… or just a quiet weekend. Here’s how we made it!
What you’ll need:
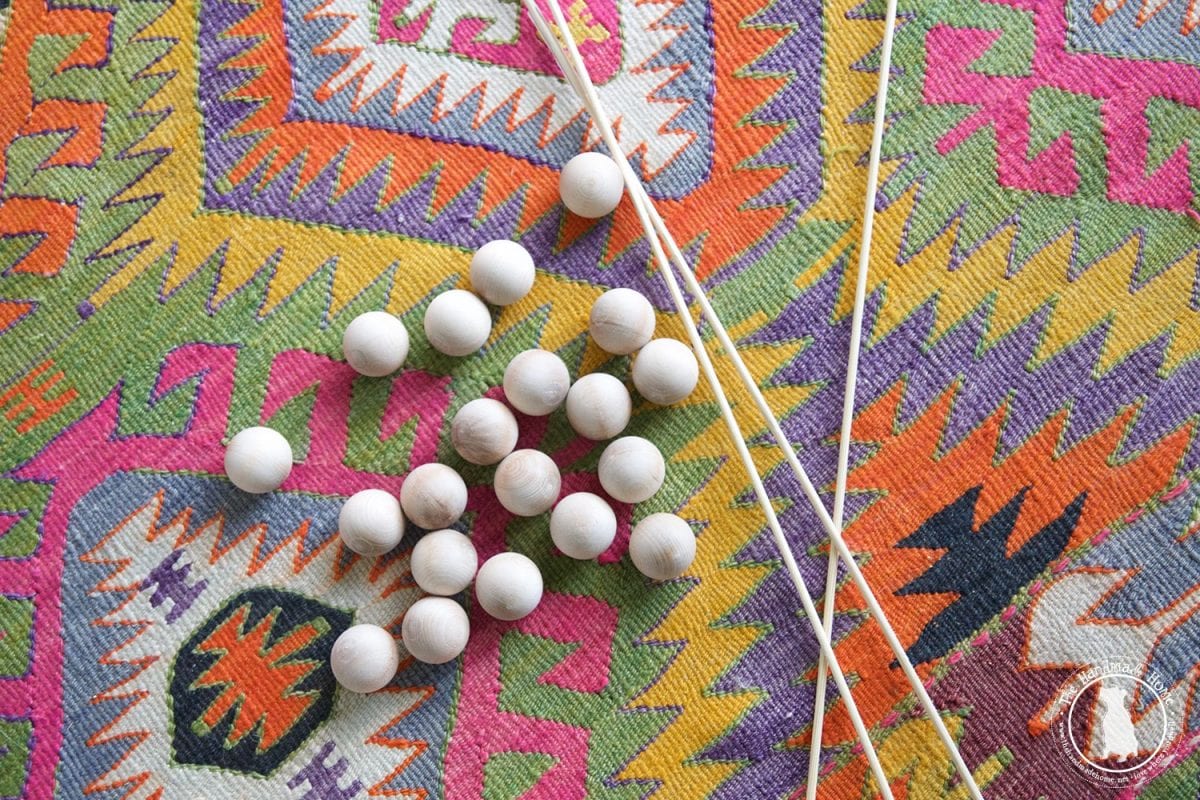
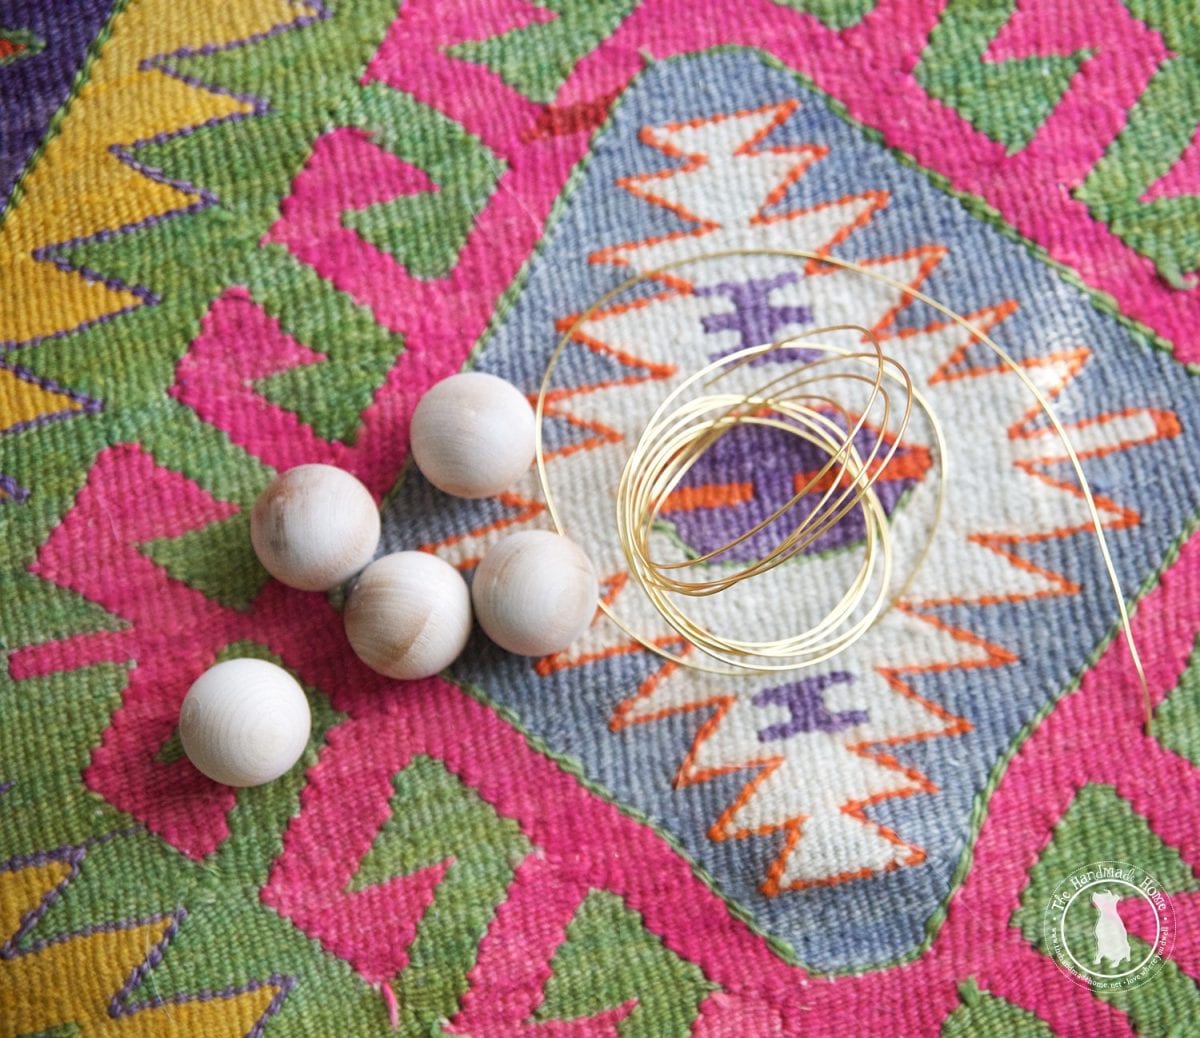
• Wooden Balls {1.5 inch} We ordered some wooden balls in bulk from this online store – order generously
• Drill + drill bit with width of choice we used a 1/4 inch bit
• Wooden Dowels {slightly smaller than the size of the drill bits, we used a 3/16 dowel} or for curvier letters like J or C, you’ll need a sturdy metal wire
• Glue {we used a combo of hot and wood glue – one to temporarily secure while the other dried permanently}
• Toothpaste {depending on your letter, this helps you drill at the correct angles… more on that below}
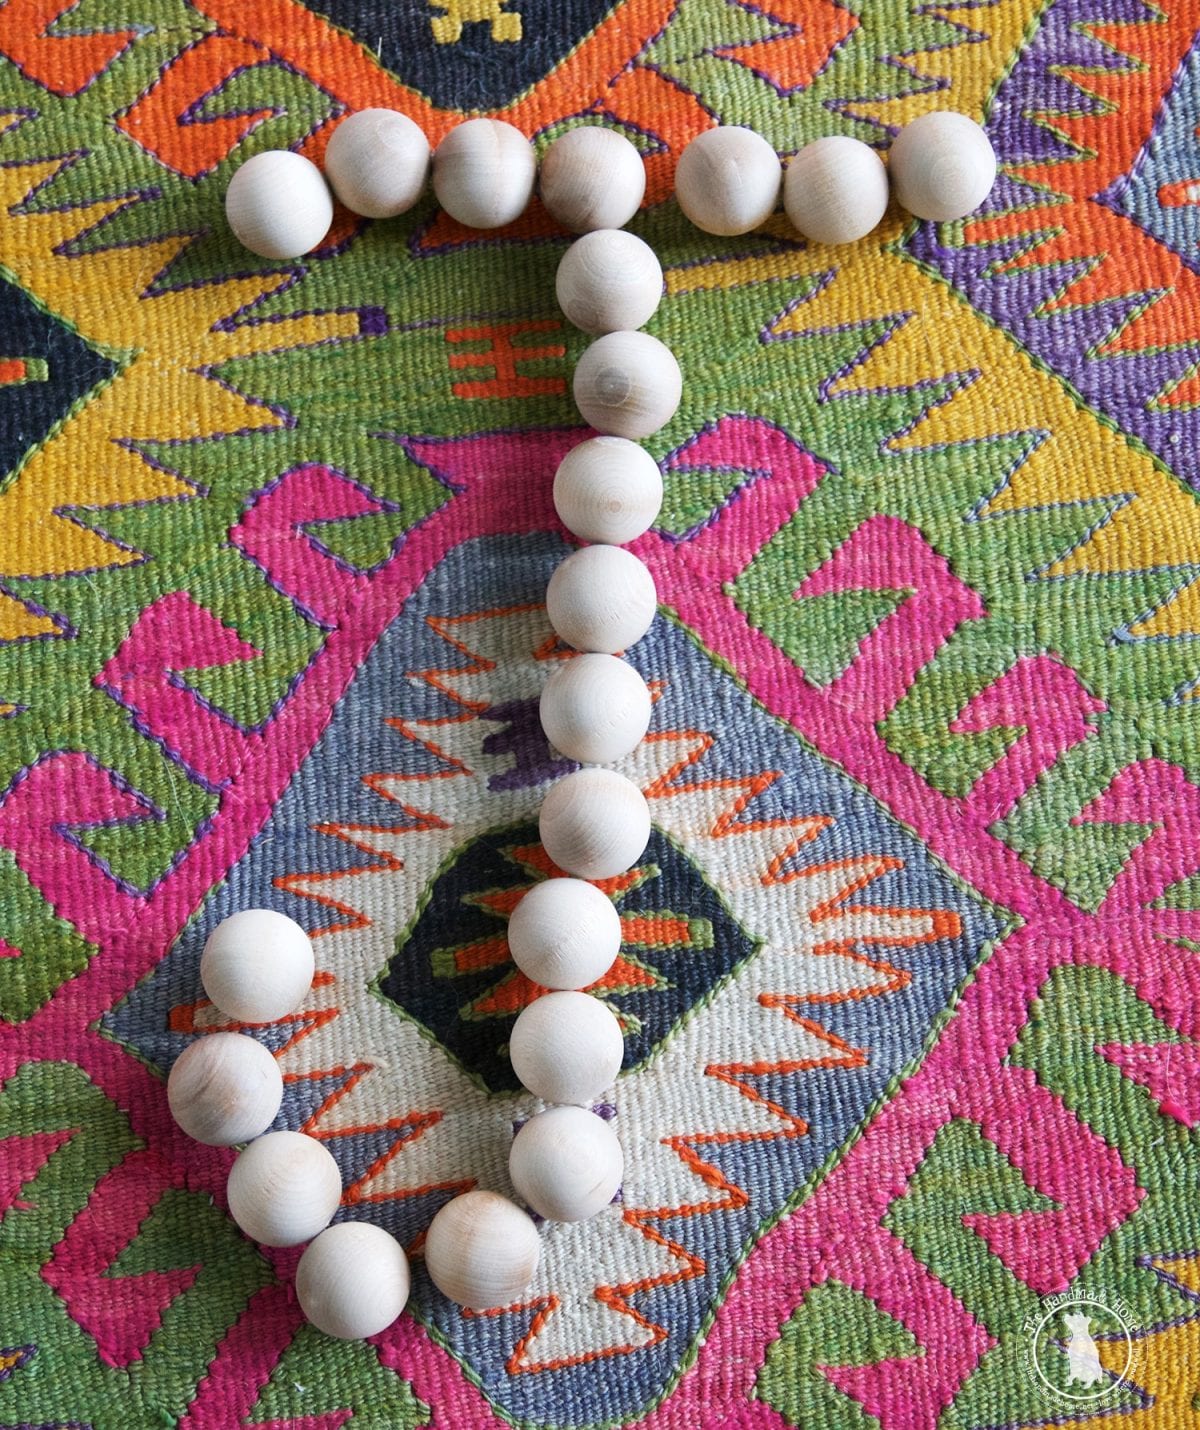
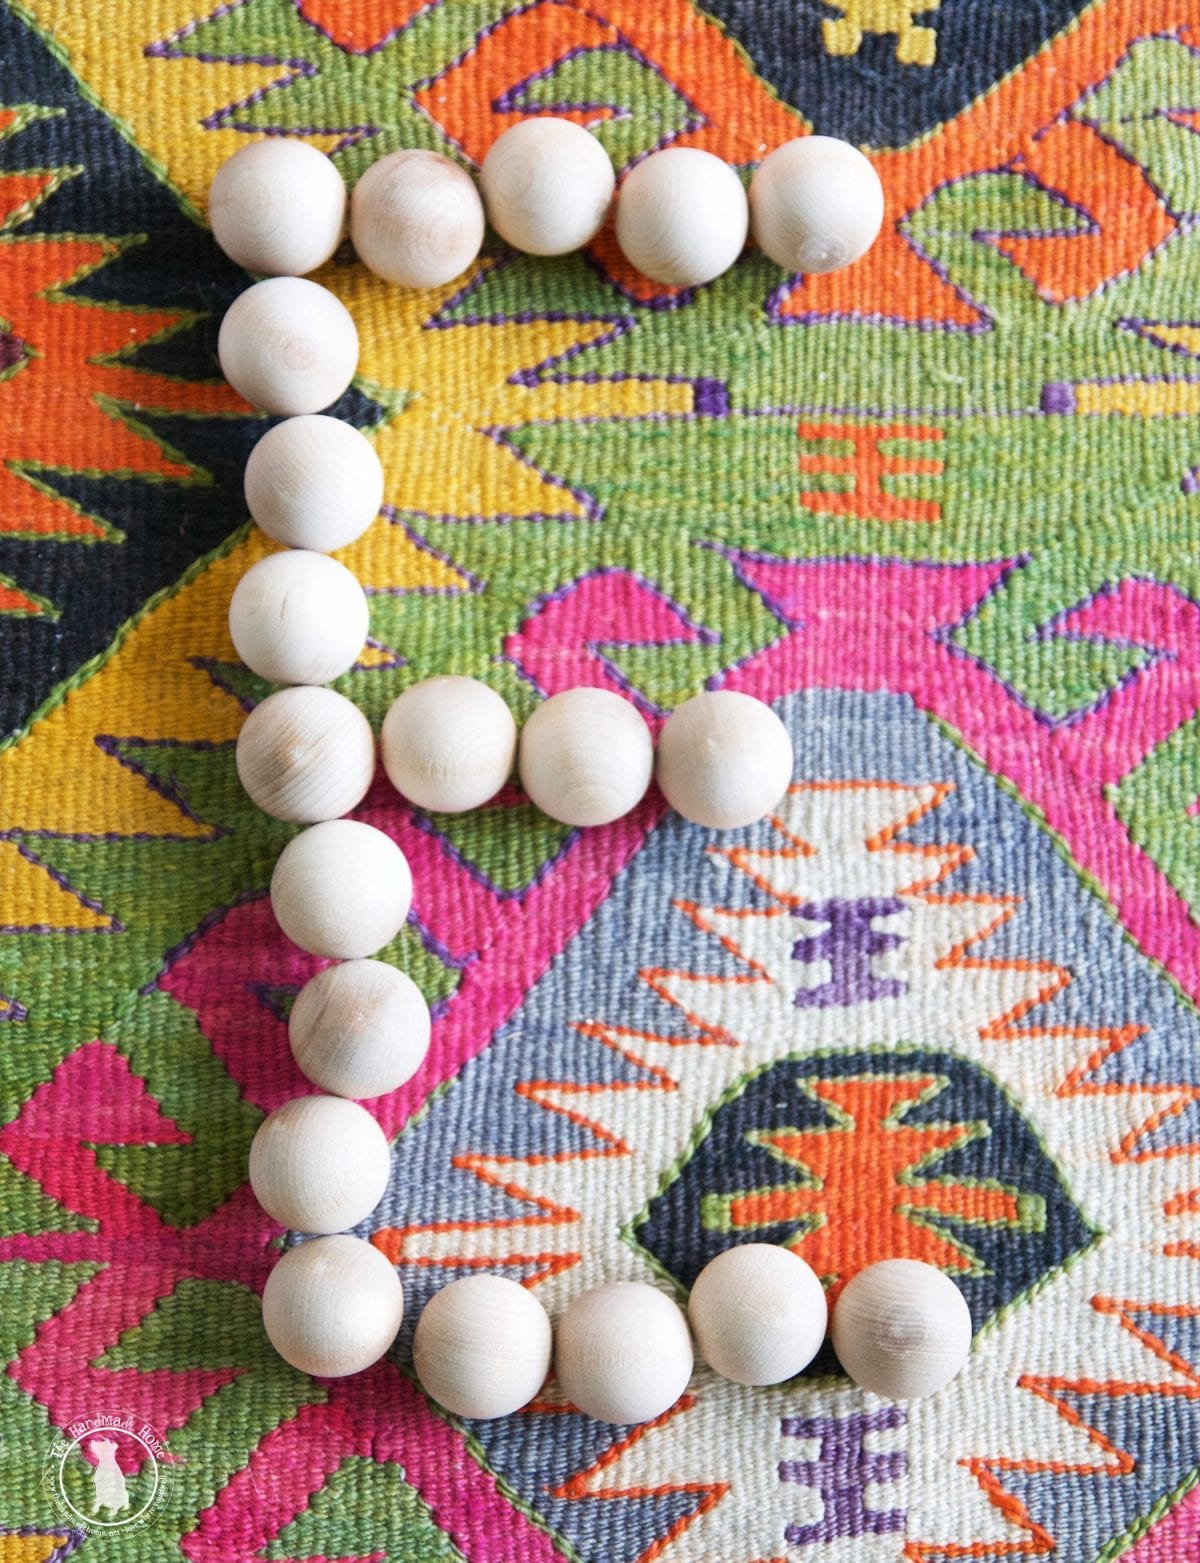
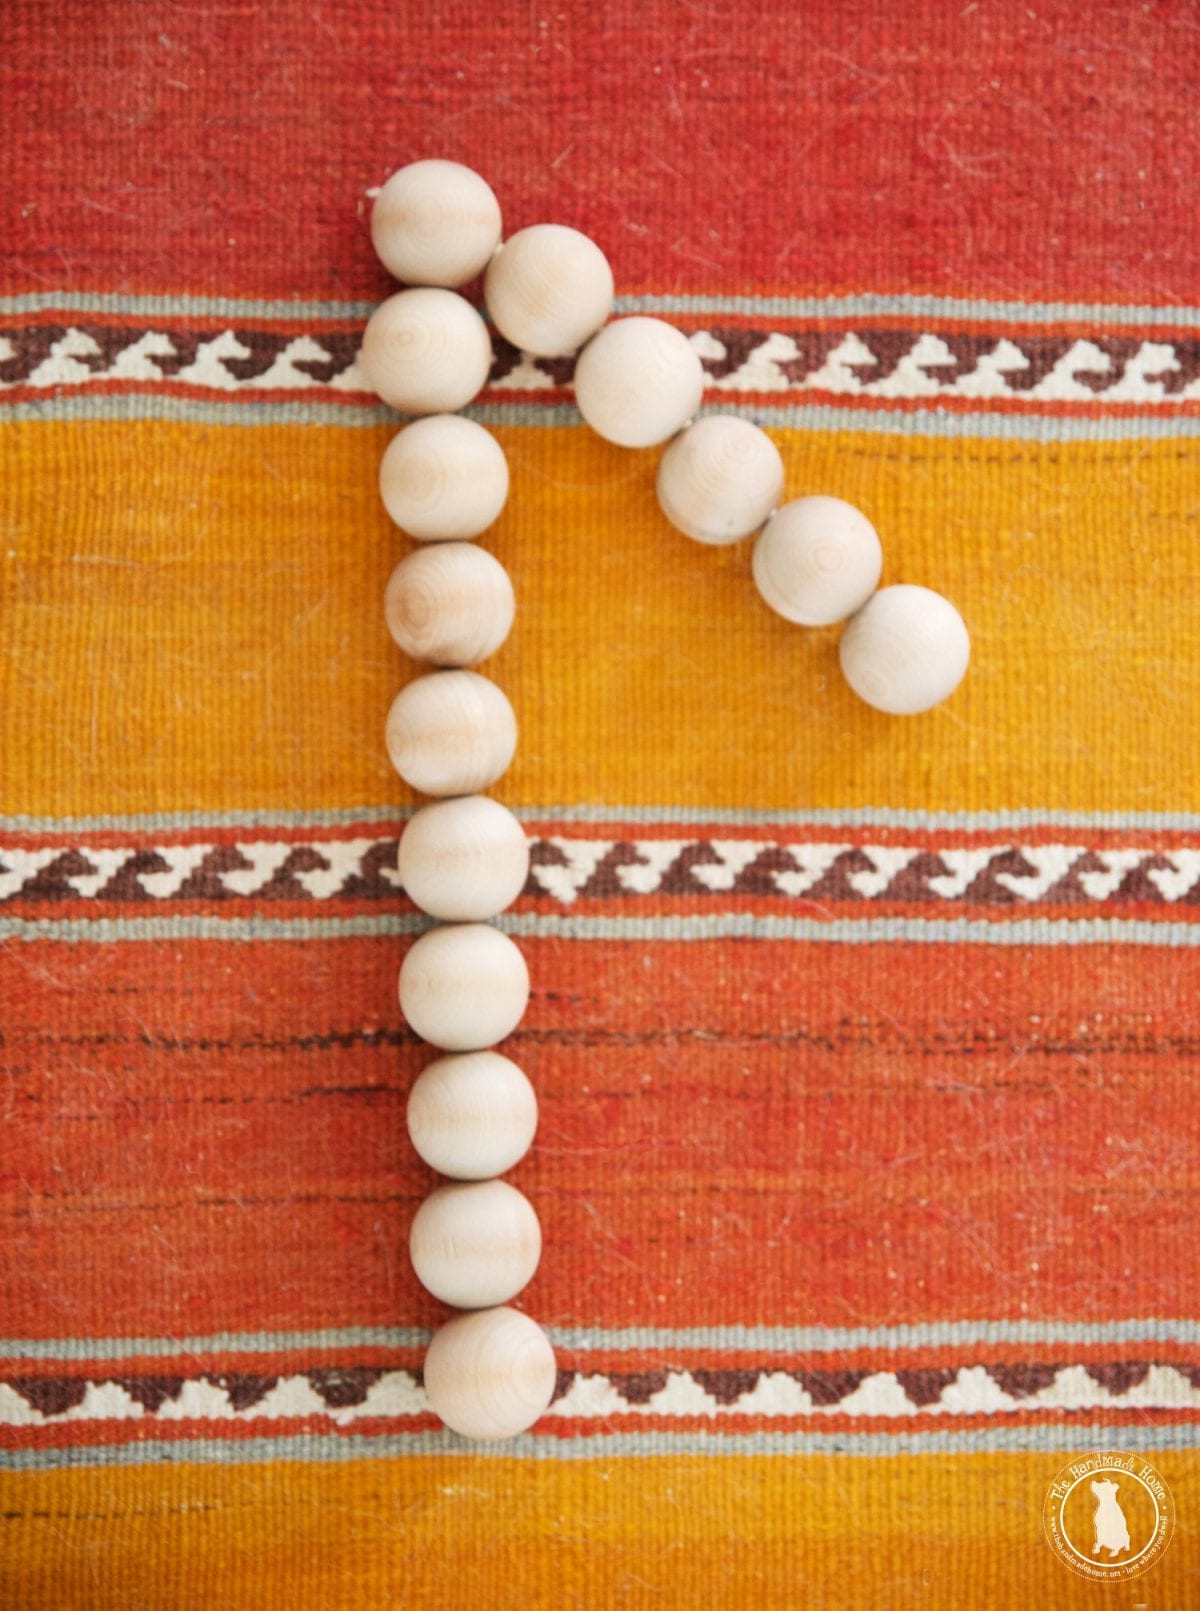
Depending on your letter {and size you decide on} take your wooden balls and lay them on the ground. You may go as big or small as you like. Just plan it out by laying them down to make sure your design works.
Hint: try to use dowels on all straight letters and when using wire on a curve, you might want to put some hot glue on the inside of the hole to help the wire hold its shape.)
Again, for curvier letters, you’ll want a sturdy or heavier gauge wire without too much give that you can manipulate to form your letter.
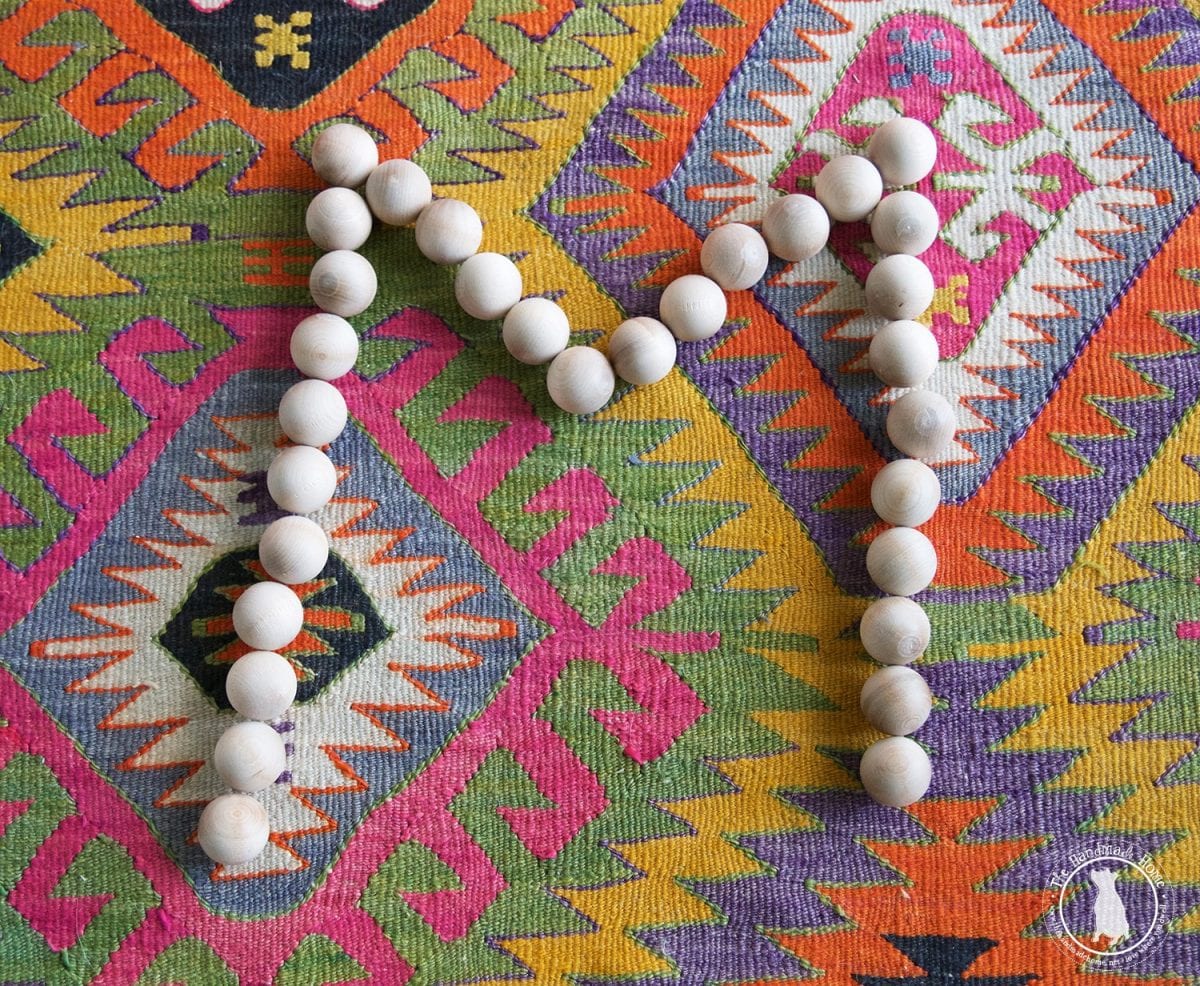
We laid out our M, but do as we say, not as we do, because this one was totally asymmetrical when we realized we had more on the left than the right. ;}
You can make any letter with these, they’re so much fun!
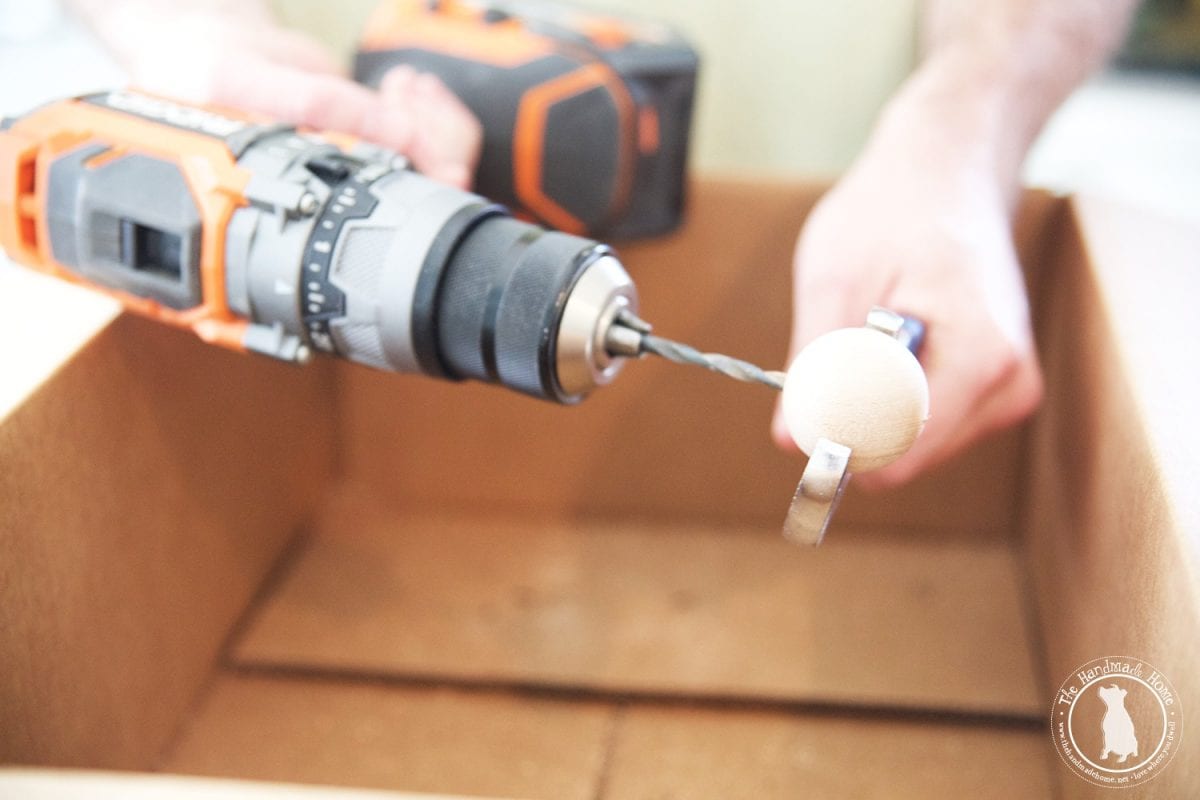
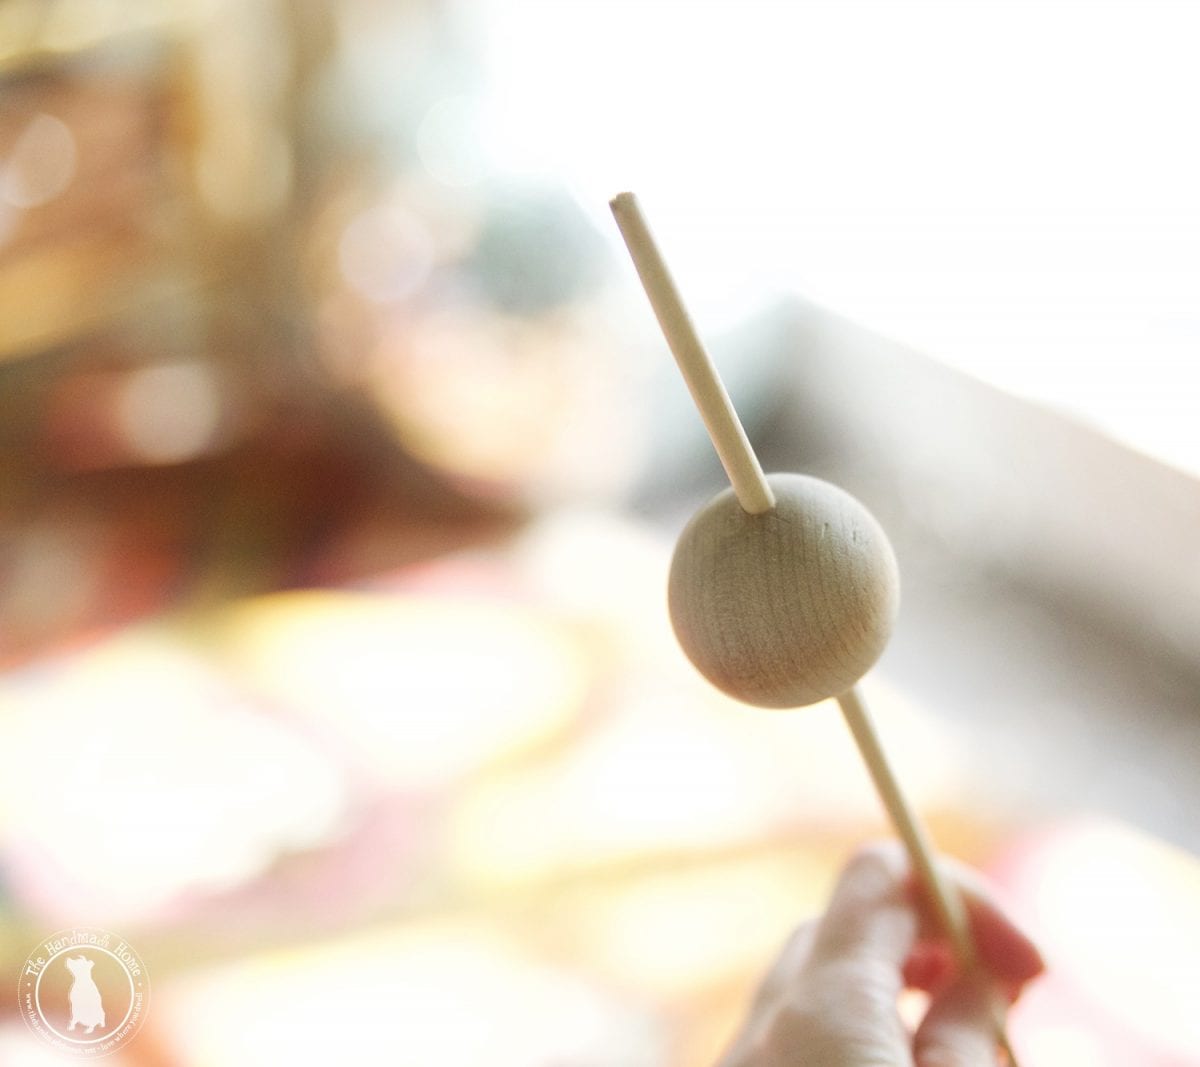
When you’ve decided on what you use, break out your drill, and carefully put a hole in each wooden ball. It’s a good idea to drill the hole slightly bigger than you dowel or wire. For instance we used a 3/16 inch dowel so we drilled the hole with a 1/4 inch drill bit. You might also find it easier to drill a pilot hole first, then drill the bigger hole. This allows for the bigger shavings to have a way to escape and gives you a little more control over the hole.
Also make sure to watch the level on the drill to ensure you are drilling straight through the ball. If you drill the smaller hole first and the hole is slightly off, you can adjust it with the larger drill bit. One more benefit to the pilot hole.
For the piece that will be on the end, we suggest only drilling half way through the ball to give it a cleaner look.
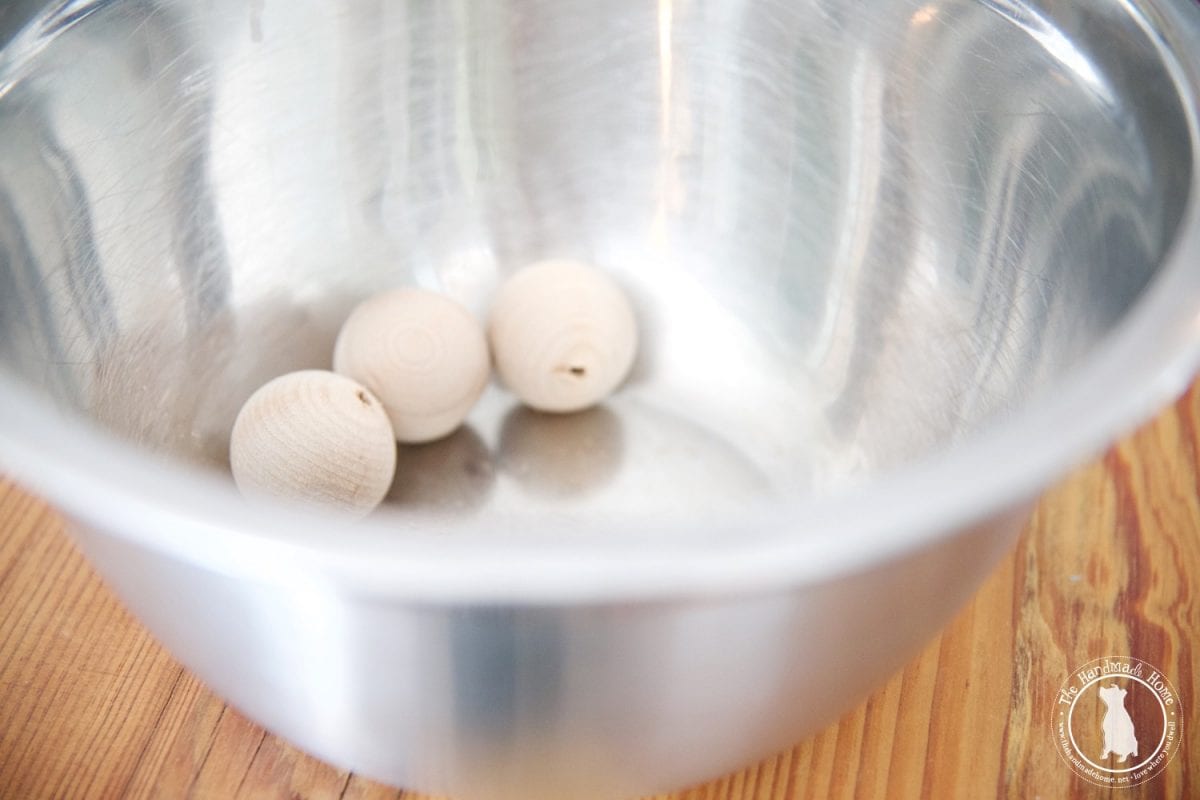
Helpful Hint: We just collected them in a bowl as we went so they wouldn’t roll off.
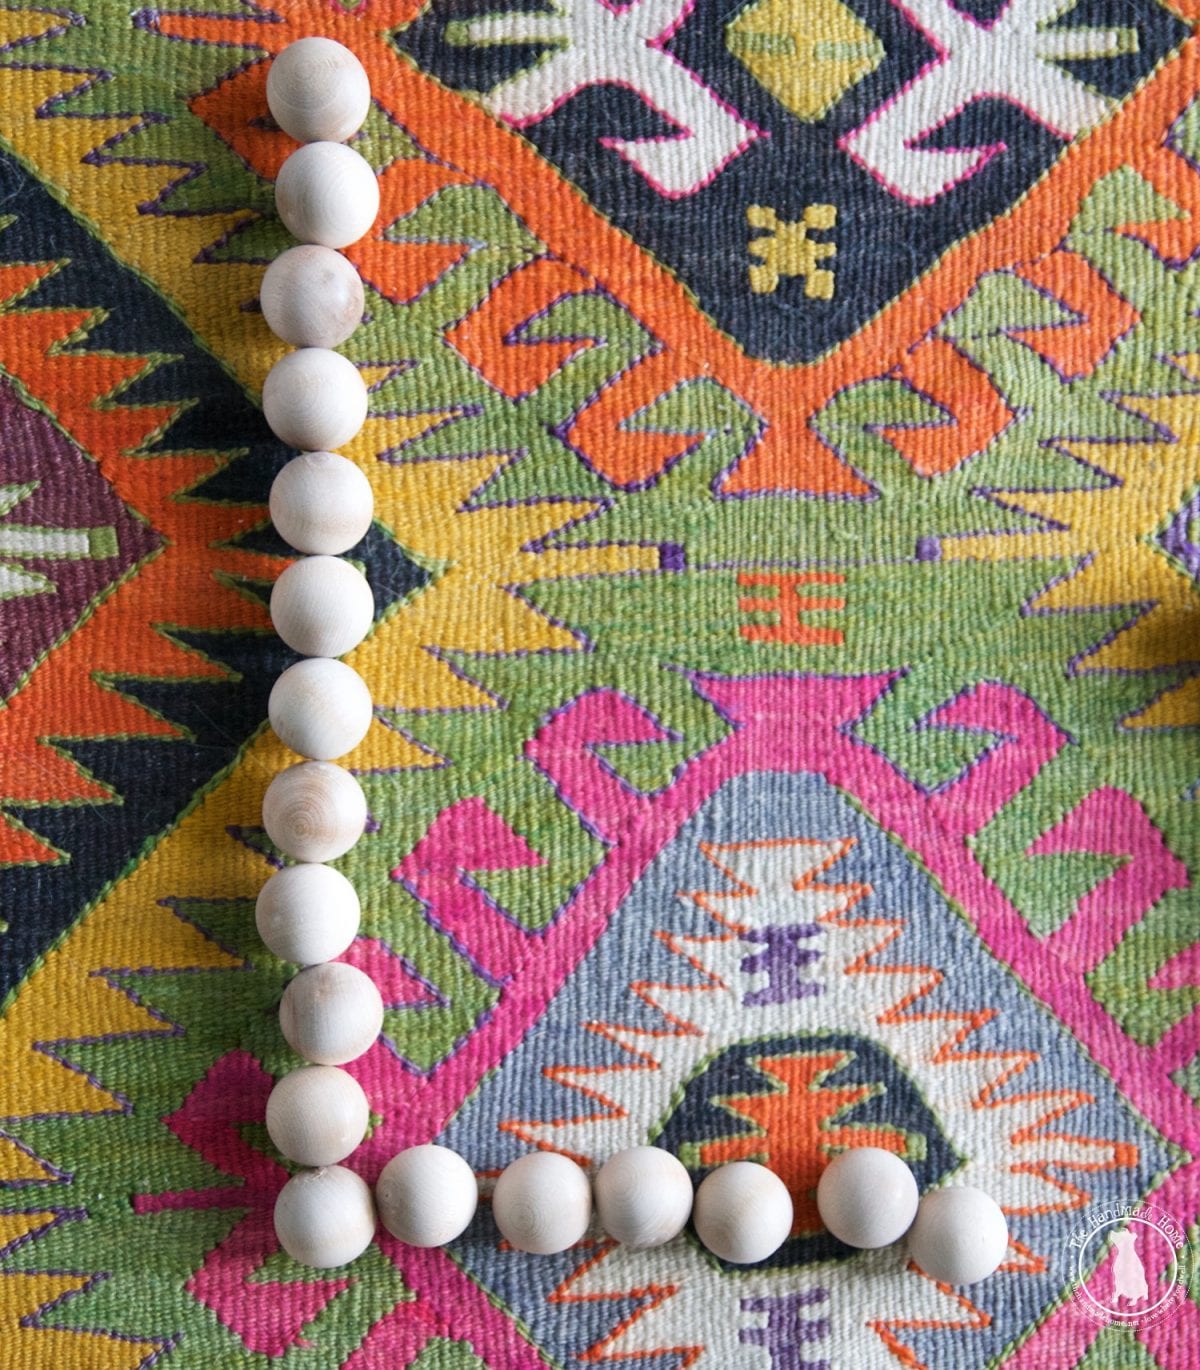
Once you’ve drilled all the balls, cut your wooden dowel to slightly longer than you will need.
Place a dab of hot glue in one of the end balls and push the dowel into it. Allow it time to dry.
From the opposite end, begin sliding the needed number of balls onto the dowel. (You can secure them with hot glue if you want.)
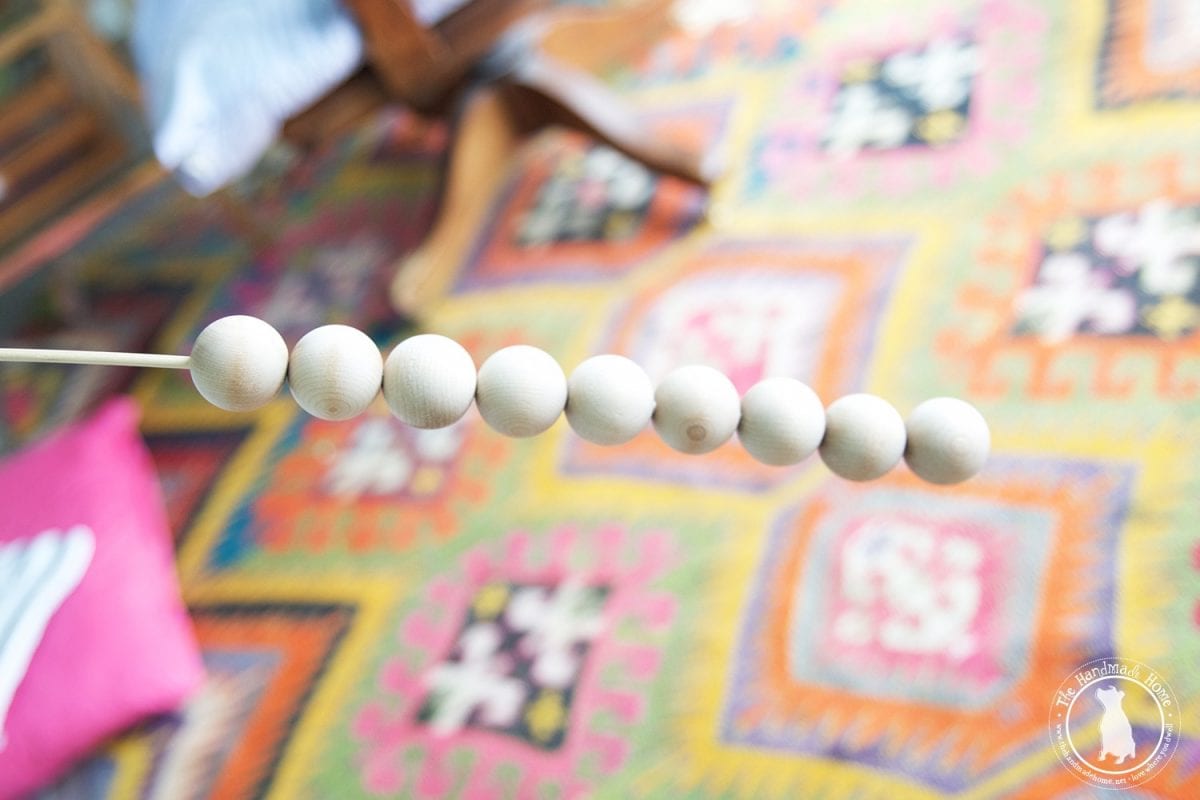
Before adding the last ball, clip off the excess dowel and then place the end ball on as you did the first one.
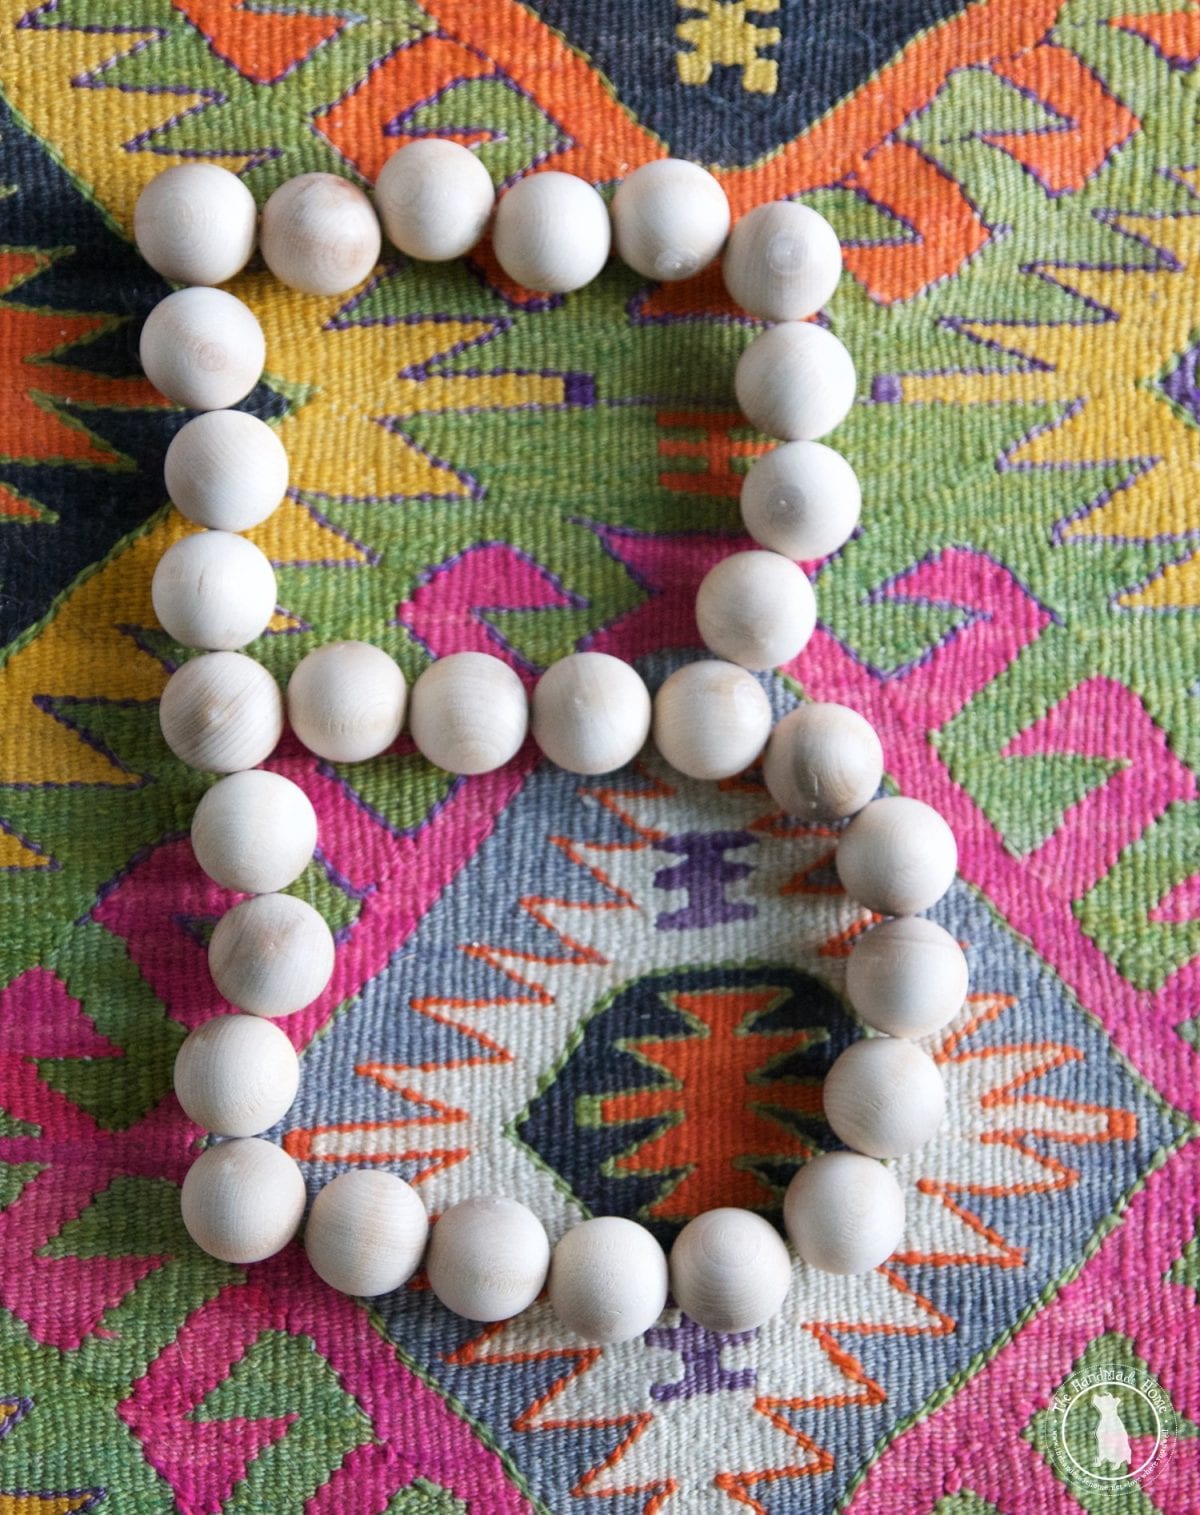
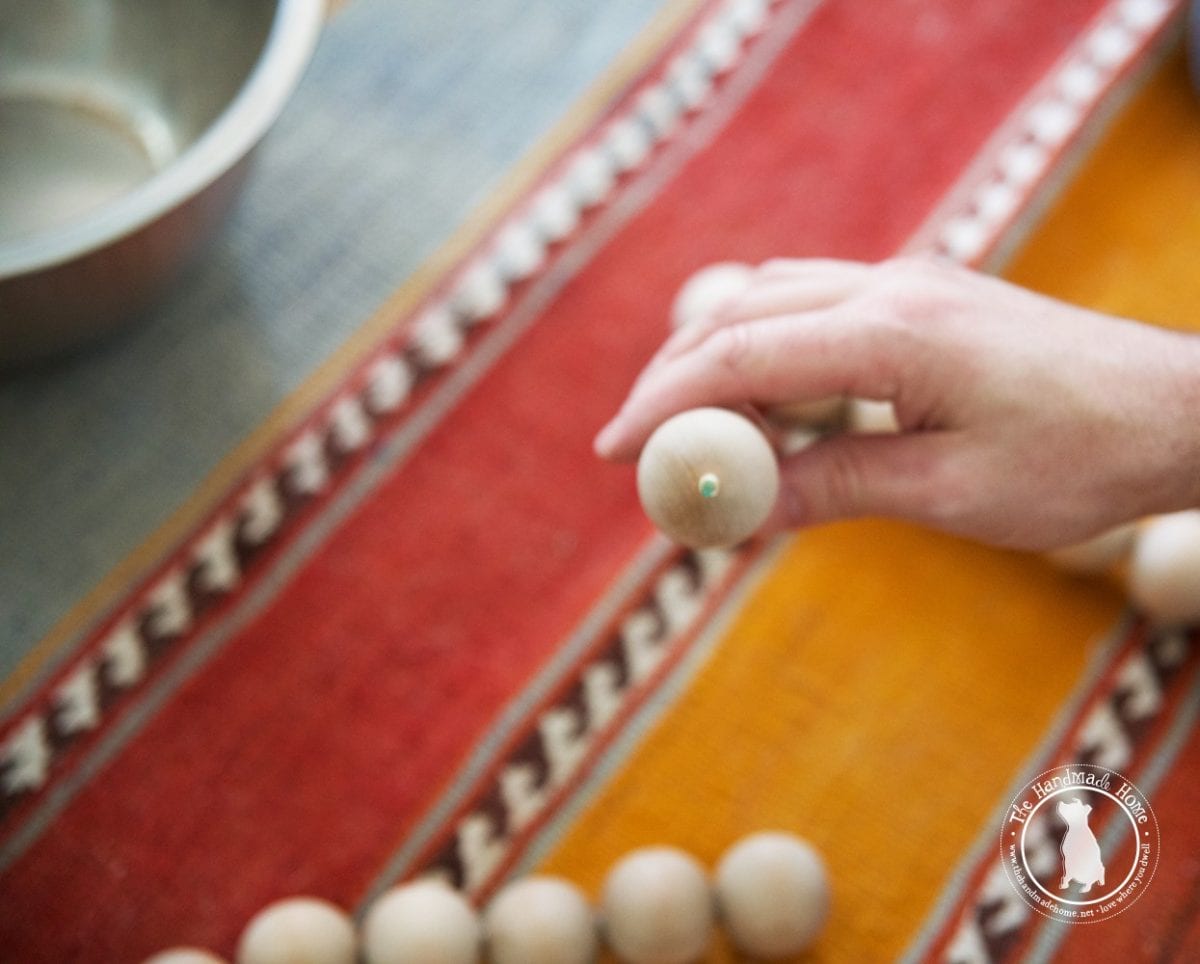
Now you will need to attach the individual piece to form your letter.
Place the pieces in the shape that they should go. Then carefully pick up one piece and add a dab of toothpaste to the side that will touch the other piece. Place the piece with the toothpaste back down, and push them together. You can now pick them up and you will have your mark to drill. Make sure to drill at a similar angle of the shape. Of course don’t go all the way through the ball.
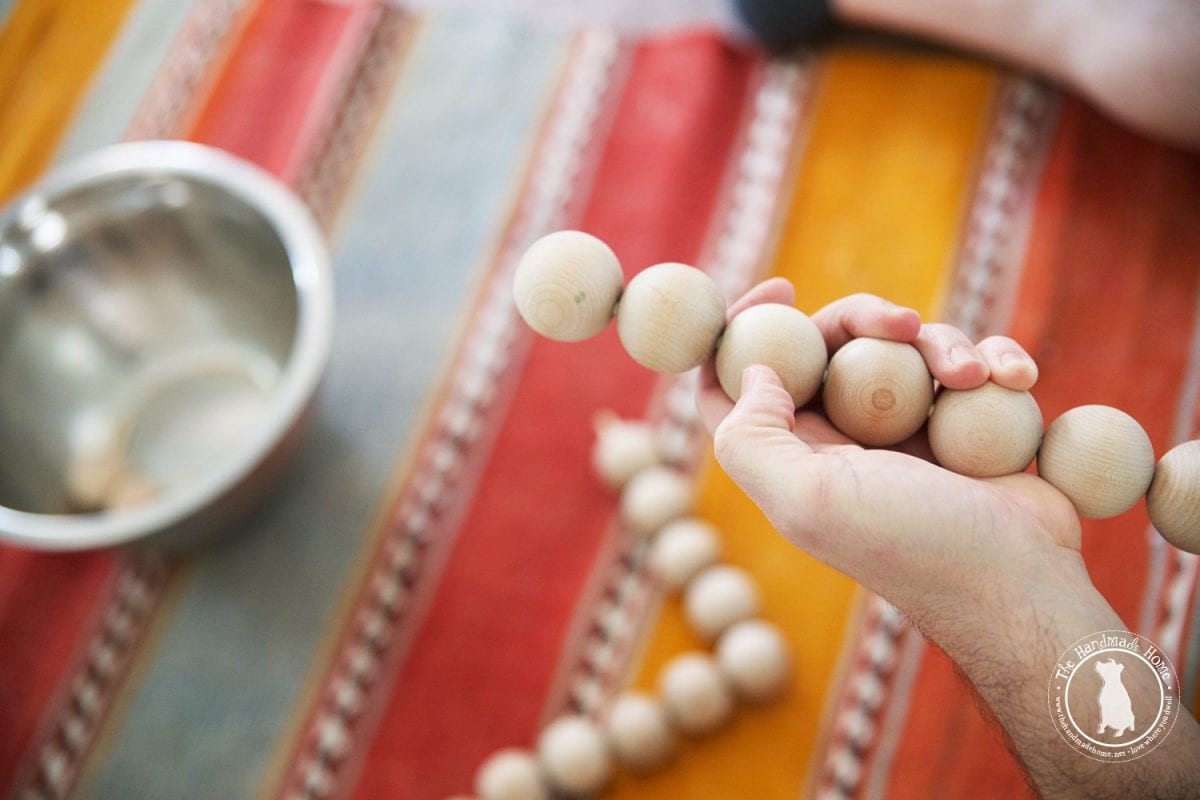
Then simply break off a small piece of the dowel, add a dab of hot glue and secure the pieces together.
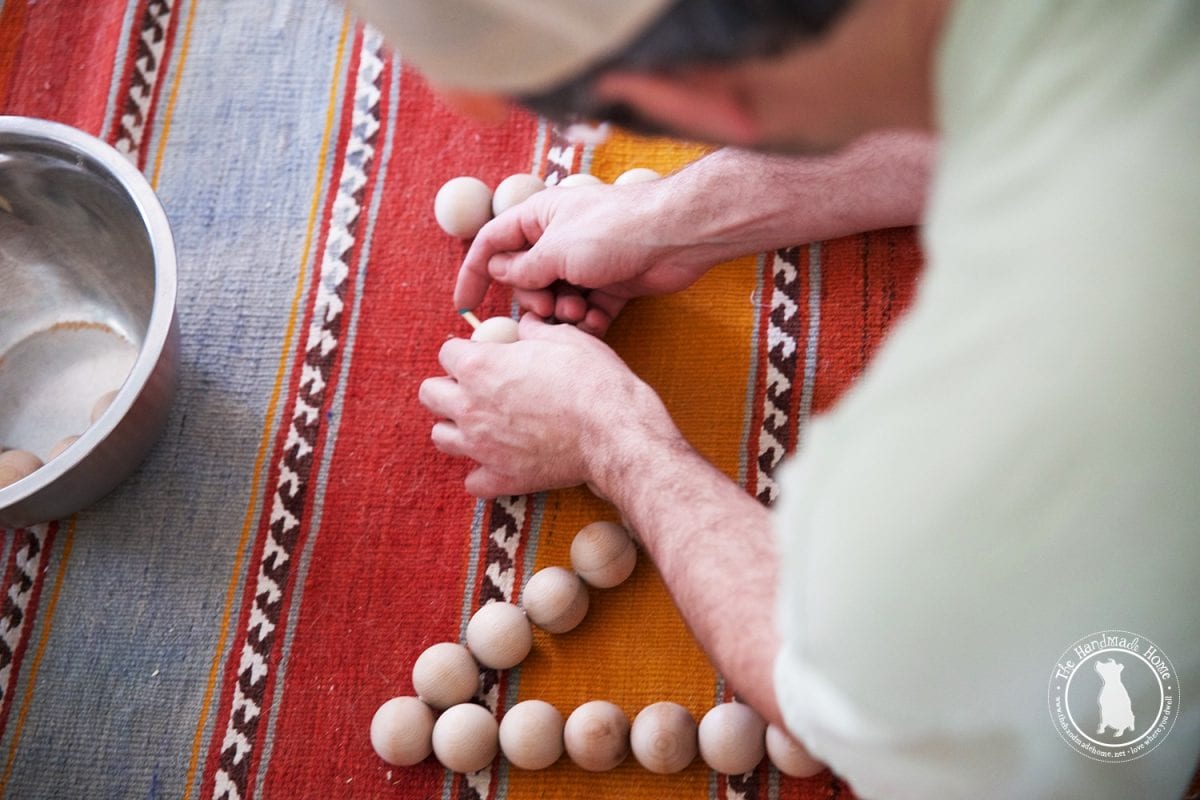
Repeat this step for all the sides that connect.
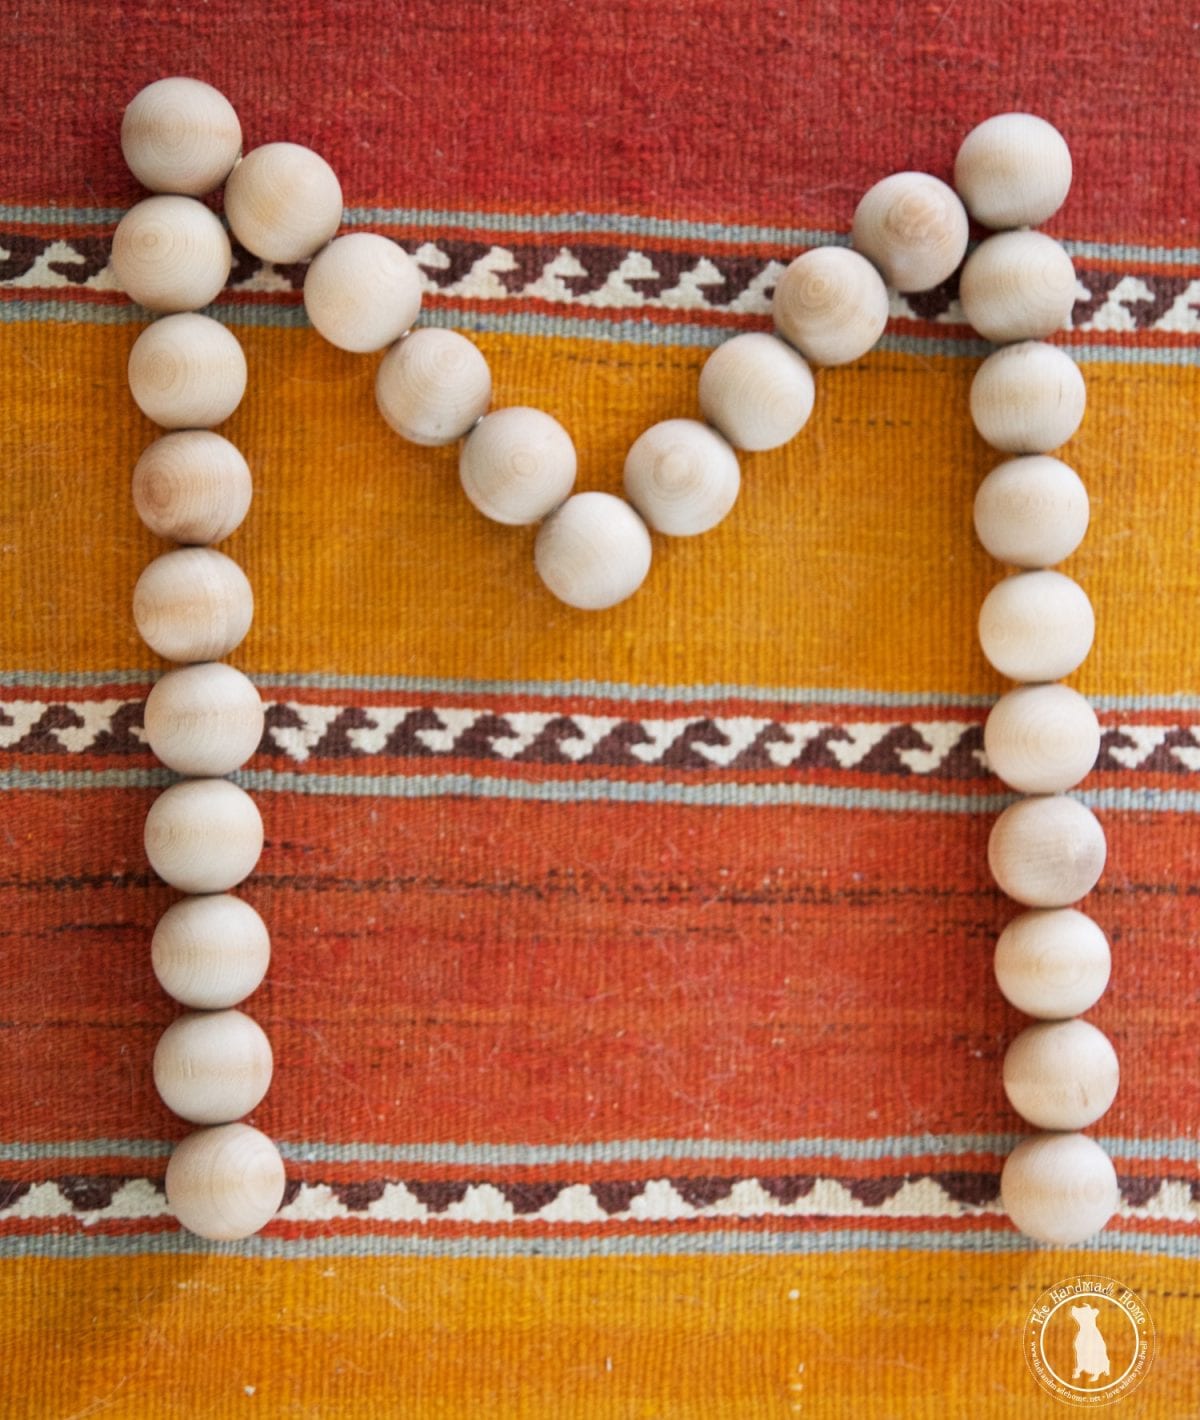
Tada! Your own wooden beaded monogram!

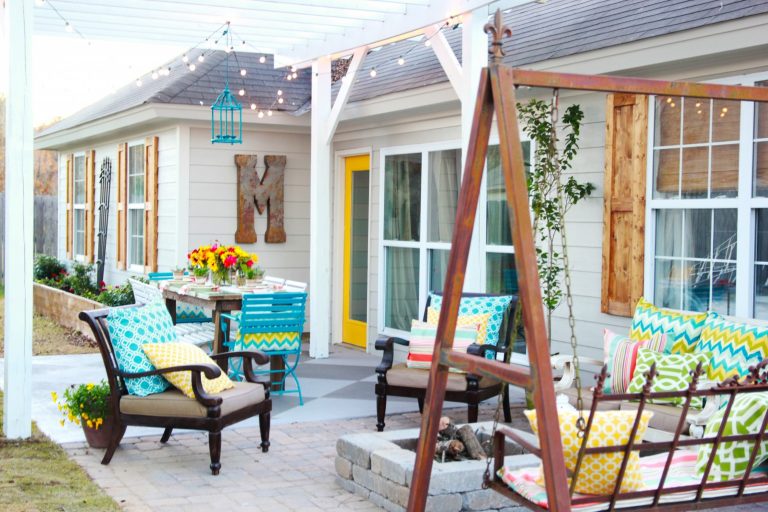
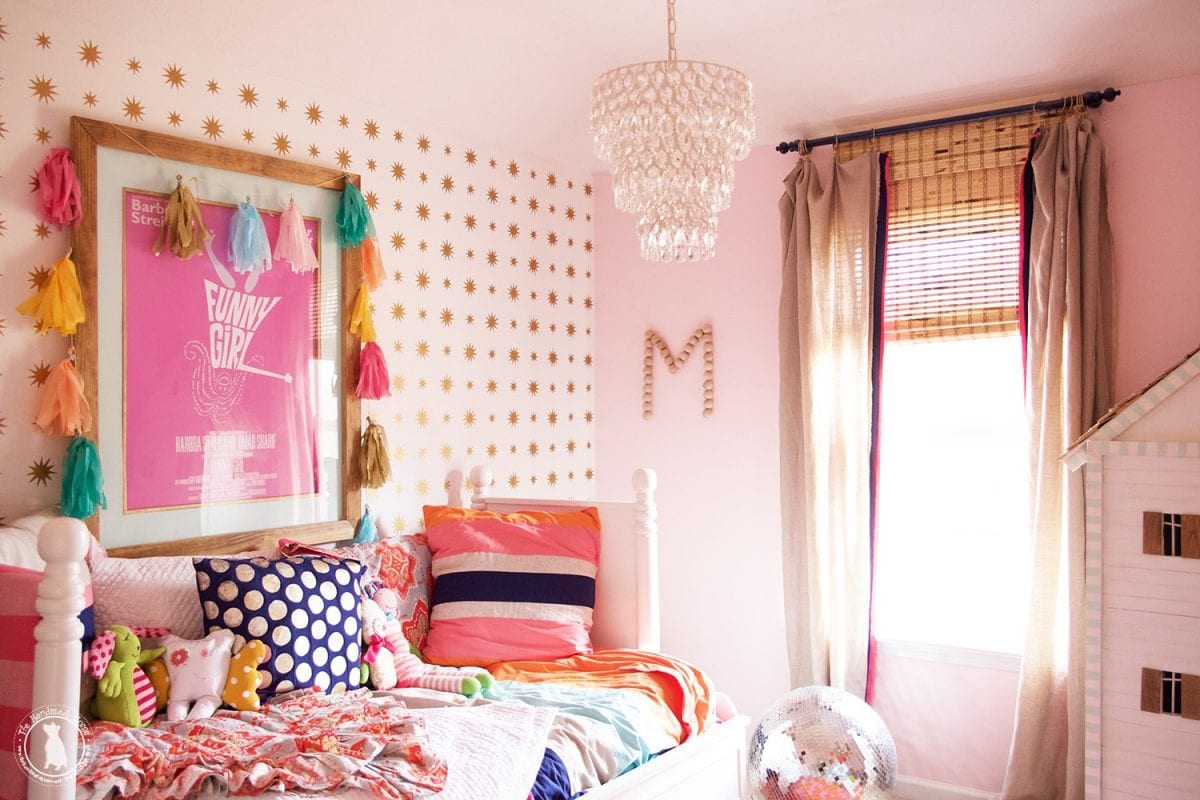
So from the wall {we mounted it with double sided foam tape} to an accessory on a shelf or dresser, these make such fun, one of a kind accessories!
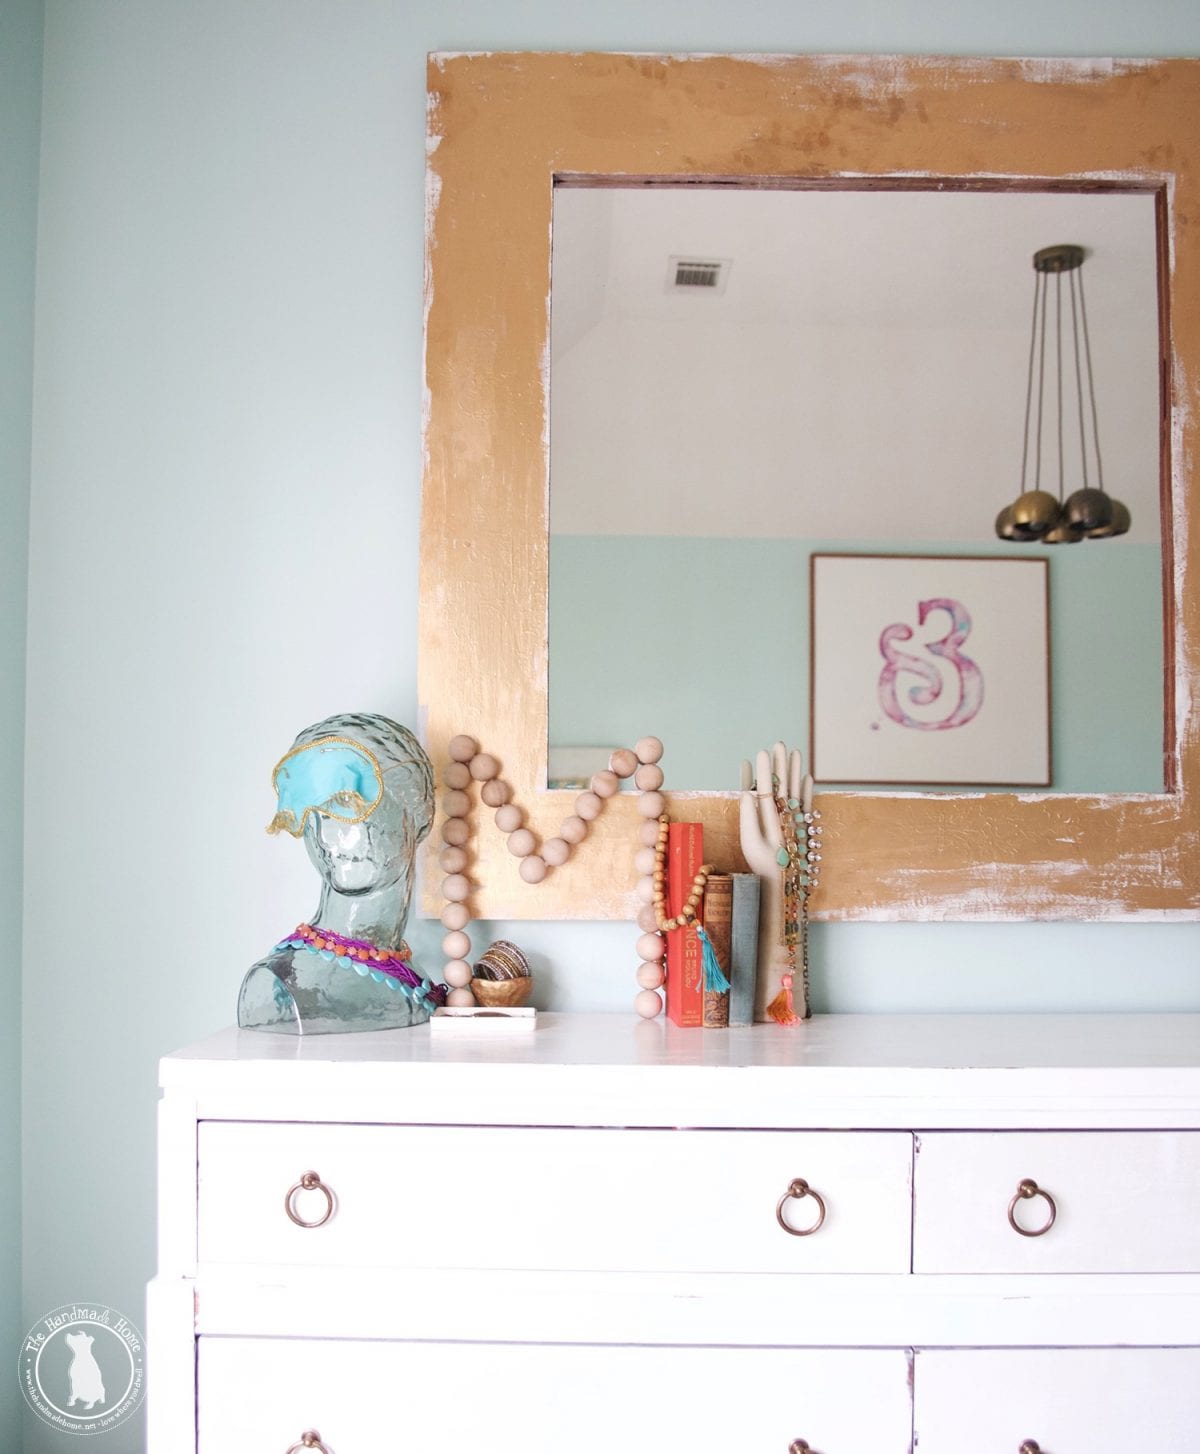
Just a fun little project to try out for your home. These would make fun wreaths, as well. As always, let us know if you try it. We’d love to hear!

Have an inspired day!