
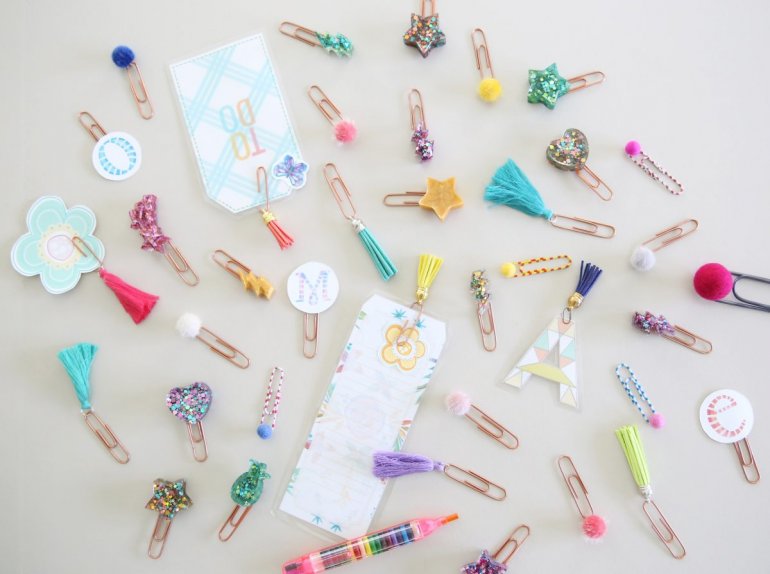
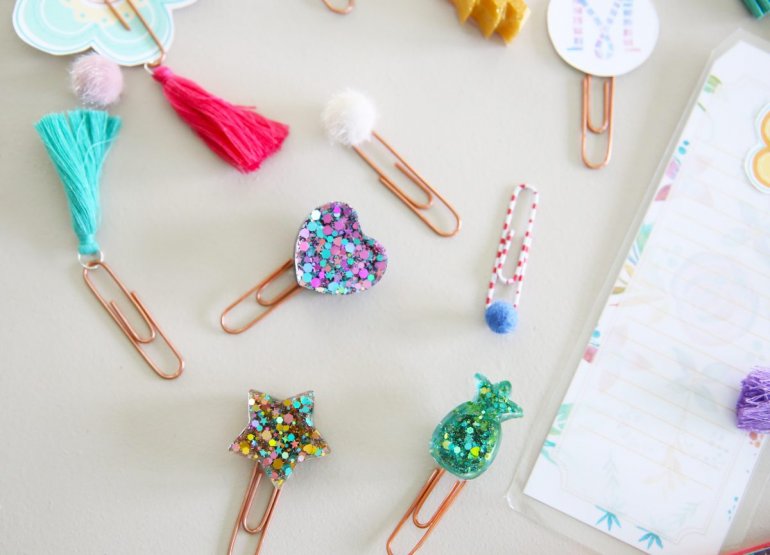
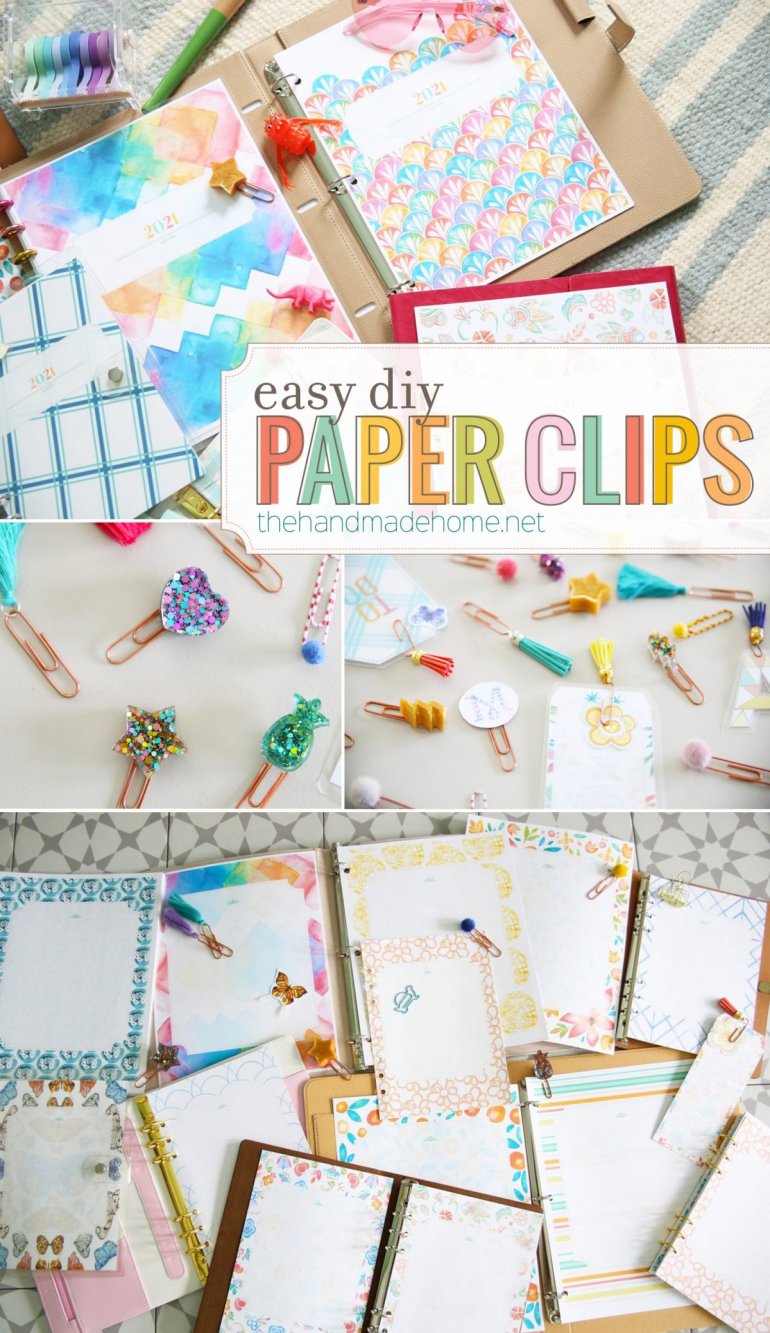
easy diy paper clips
We were thrilled to release our free 2021 planner on Monday. Since we always get a few questions about our little DIY paper clips and bookmarks, we thought it was best to include a little post here about them, all on their own. Especially since said 2021 planner is the longest post in the history of ever. Hopefully 2020 passes quickly with no more apocalyptical plagues, and we can move on to actually filling in said planners. Over it.
To help us organize, tab, divide and more, we definitely have our list of faves. So we’re breaking it down to share how we make them.
We thought this post would be especially fun for kiddos putting their planner together, adults who like to live a little on the side of hello kitty / lisa frank nostalgia, or anyone who wants to put this whole shebang together and present it as a gift to someone. Lots of possibilities!
I’ll be honest. I enjoy putting together things like this because I’m a nerd at heart. So there you have it.
I’ve divided them up into sections for some quick how to’s and links, so that you can definitely piece them together as you wish. So without further ado, how to make these easy diy paper clips! {some of the links below may be affiliate to support our neurotic paper clipping habit.}
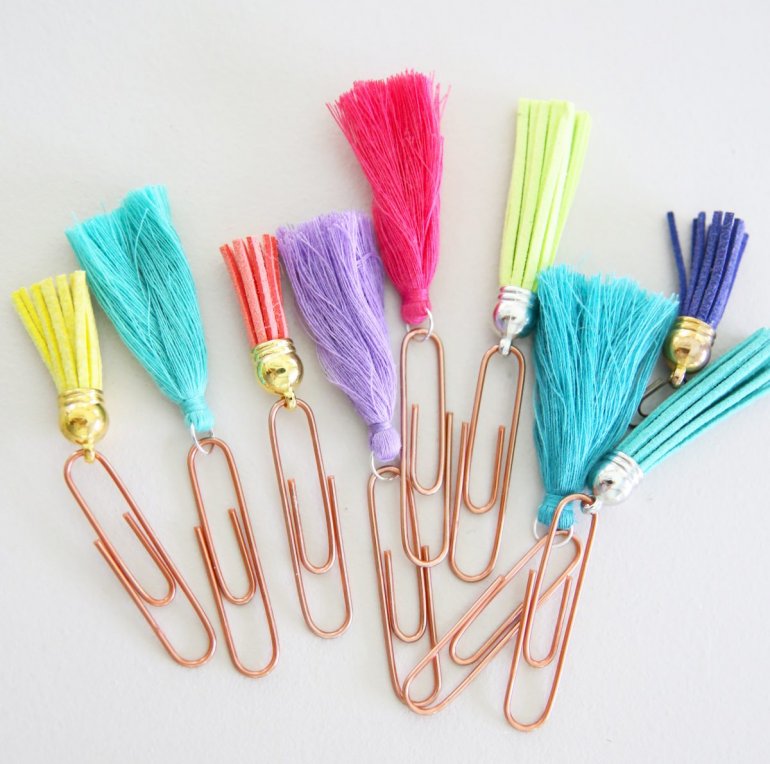
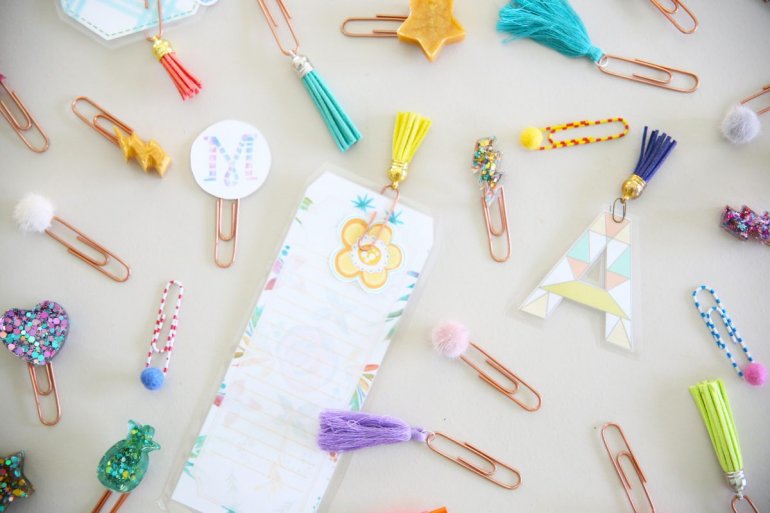
First up: the tassel clip
This is just really all about knowing where to find the supplies. But these make easy little markers for planners, books and more. Here’s what you’ll need:
1. Paper clips: we went with rose gold because, why not? more linked in our post here!
2. Tassel options here: fabric + short faux leather + long faux leather
If you’ve been tuned in for a while, then you know we’ve made a lot more with these guys. From teacher gifts to drink charms, and of course projects of the keychain variety… one can never have too many tassels. I realize how nerdy I sound. I’ll see my self out.
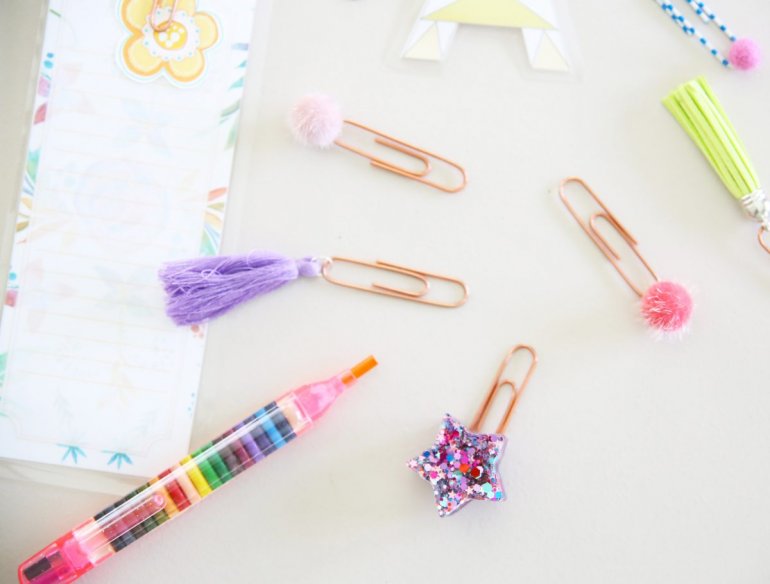
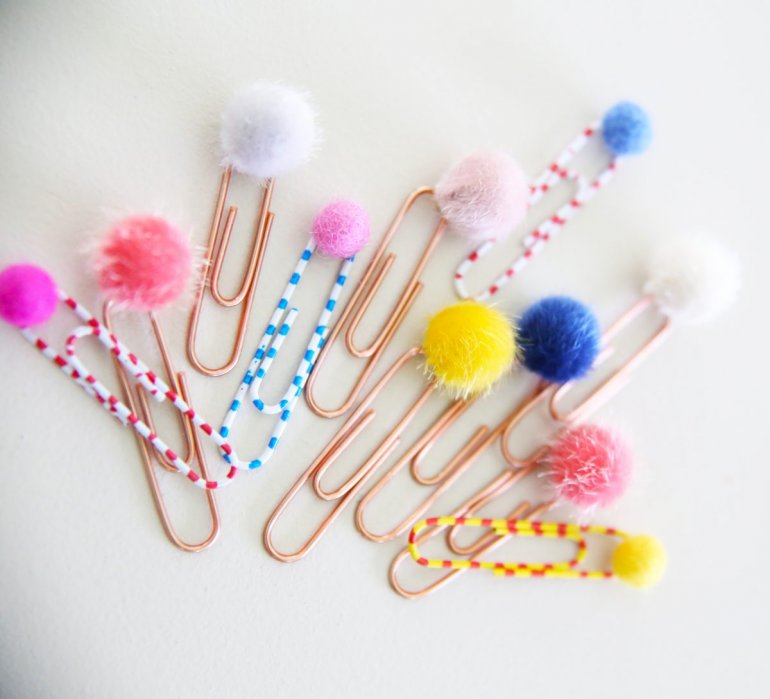
Next up: the pom pom clip
Because it’s nice to mix it up a little in the paper clip category.
What you’ll need:
1. Paper clips: we went with rose gold because, why not? + these from here
– more linked in our post here!
2. pom poms: we were able to loop these on and love the fun fuzzy free look
3. pom poms: we glued these on – love the various sizes they come in.
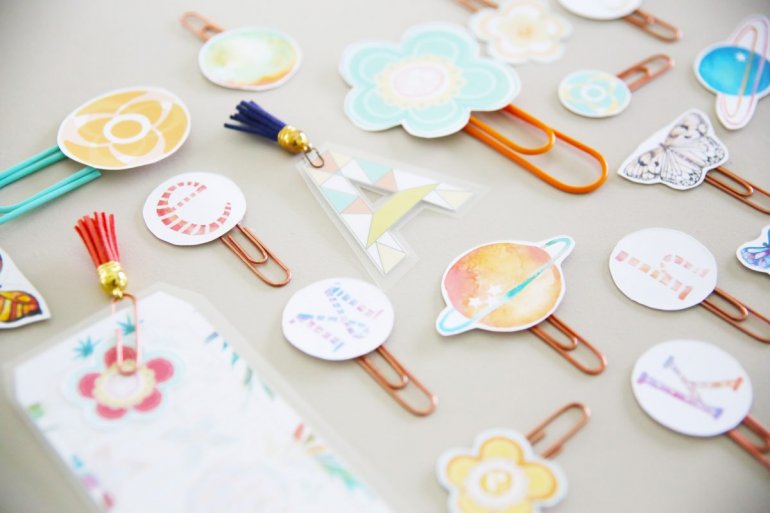
Which brings us to… the paper printables
All of these are available with our 2021 planner in the sticker section. Just print +cut + glue. We secured them to the top of our paper clips so you can get theme-y with it. From monograms to flowers and everything in between… I’m not even showing all the possibilities. Laminate for longer lasting pieces.
What you’ll need:
1. Our printables from the sticker section of our 2021 planner here
2. Paper clips: get your rose gold + jumbo variety, here.
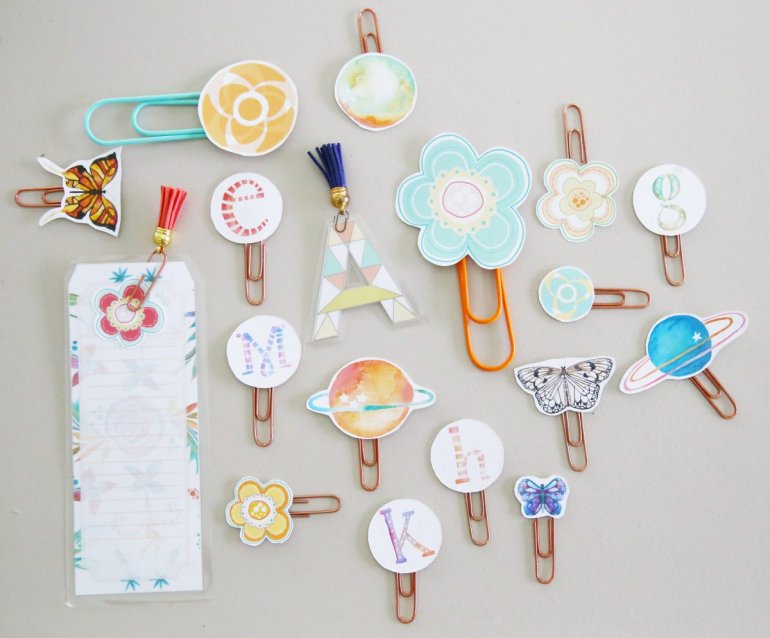
We love how fun and versatile these are! Maybe a great way to fire the kids up for back to school or home school? Fingers crossed.
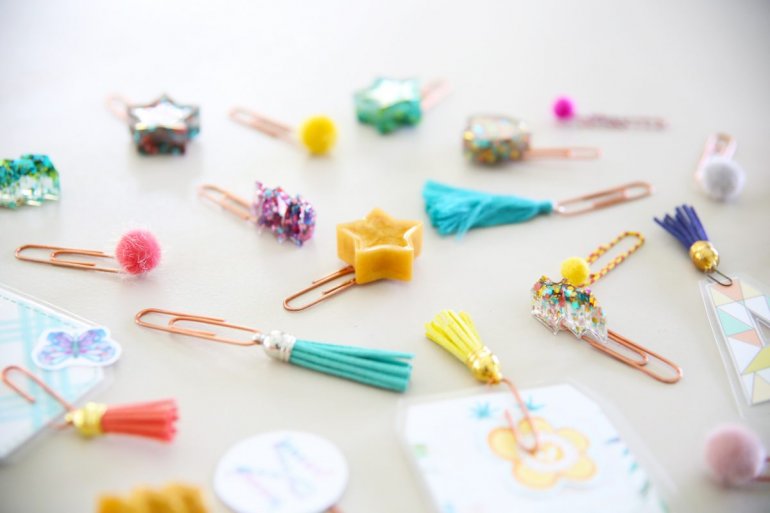
And finally… our glitter paper clips
Because these take us back to the 80’s. A little more work involved but seriously worth it. You know the covad got me all kinds of crazy with fun resin projects.
What you’ll need:
1. Paper clips
• resin kit – I like the easy cast because it comes with thorough instructions. Read them all, but I’ll cover more of that below.
• measuring cups {the kind you give your kids medicine with} – make sure they are marked for measuring.
• toothpicks
• glitter or other fillers – it’s fun to get creative with this one
• wax paper or another way to work on a protective surface – resin doesn’t come out, so make sure you’re covered + gloves
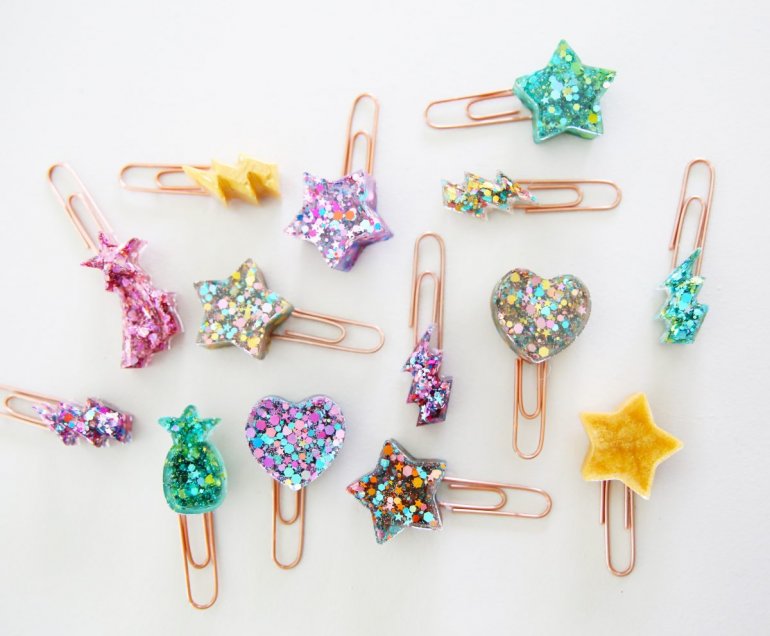
• Molds: I scooped up quite a few at the local craft store in the cooking section for super cheap. However, I quickly learned that cooking molds {just make sure they’re flexible/silicone} are a little different. If you want your resin to end up glossy, you can a. flip them over which is what I did or make sure they have a glossy inside especially made for resin. These were cheap and worked just fine because I flipped them:
star mold
heart mold
pineapple mold
lightning mold
Work off a protective surface, and in an area that is well-ventilated. Also work on an area that can be left that way to give the resin plenty of time to cure. This takes about 24 hours, give or take, so be flexible with wait time and the area being able to be left alone. {AKA the family dinner table is probably not a good option}
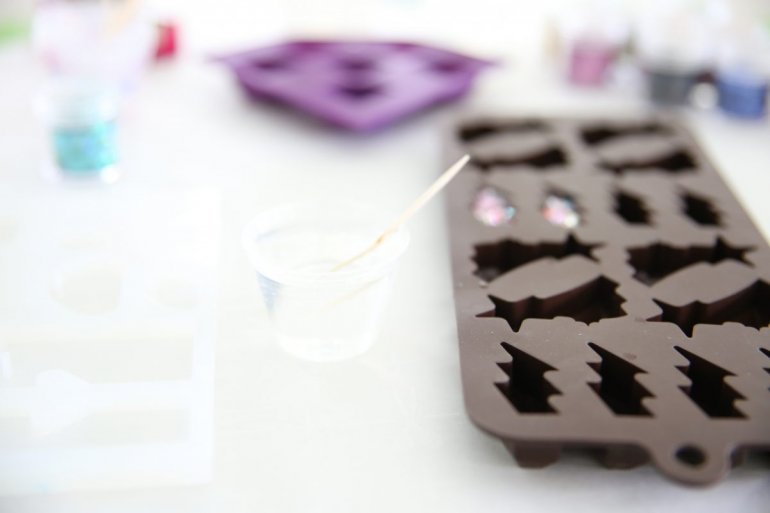
Measure out your resin according to the instructions.
Before I began, I read the directions about three times over, because it’s a very temperamental substance.
What I learned:
• Work in small amounts. This keeps it easier to deal with- It can get away from you quickly, so this is important.
• Use two different medicine cups to measure out your resin + hardener precisely. It’s a 1:1 ratio so make sure you have it right. I’m not kidding when I say this may include getting on the floor so that your head is level with the table and you can make sure your measurements are precise. Do what it takes and you’re good to go.
• If you don’t get the measurements right, you can have cloudy, sticky mixtures that never dry. So pay attention.
• Pour one into the other after you’ve measured, and stir in a figure 8 motion, with a toothpick. Work the sides, too.
• You’ll see it cloud up, which means the reaction is happening
• The instructions will be more precise, but stir for 2 minutes.
• Do not remove your toothpick, when stirring. This reduces air bubbles.
• After two minutes, pour it into another measuring cup, with a fresh stick.
• Stir for 1 minute. The mixture should start to clear up.
• Your resin will go from liquid to soft gel in about 15 minutes. Now you can add filler, or whatever else you wanted to add to your resin.
• You have that period of time to work with it. Stir again and you’re ready to pour.
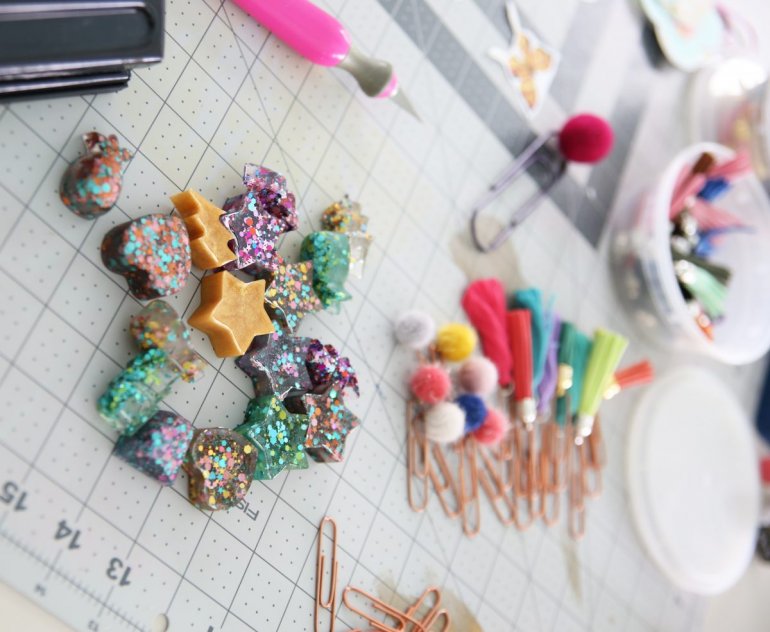
You let it dry, for about 24 hours until it’s no longer tacky, and you’re done! Remove + glue.
Clean up notes: you can use alcohol on your measuring cups while the resin still wet. I just clean them out with paper towels and some alcohol at the table. This probably goes without saying, but don’t use your measuring cups for medicine again after using with resin, since it’s not safe. And don’t pour it down the sink when cleaning – thus the paper towels. Also, if you get some on your skin, baking soda + salt are a good option for removal.
These make such fun little projects to go hand in hand with the planner.
We hope you enjoy and let us know if you try some of your own. We’d love to hear!
Have an inspired day!
Useful Content. Thanks a lot for the info!
Hi Ashley!
These are great! But I get an 404 error when trying to click link to the 2021 planner.
I was looking and downloading some pages just yesterday.
Very confused….