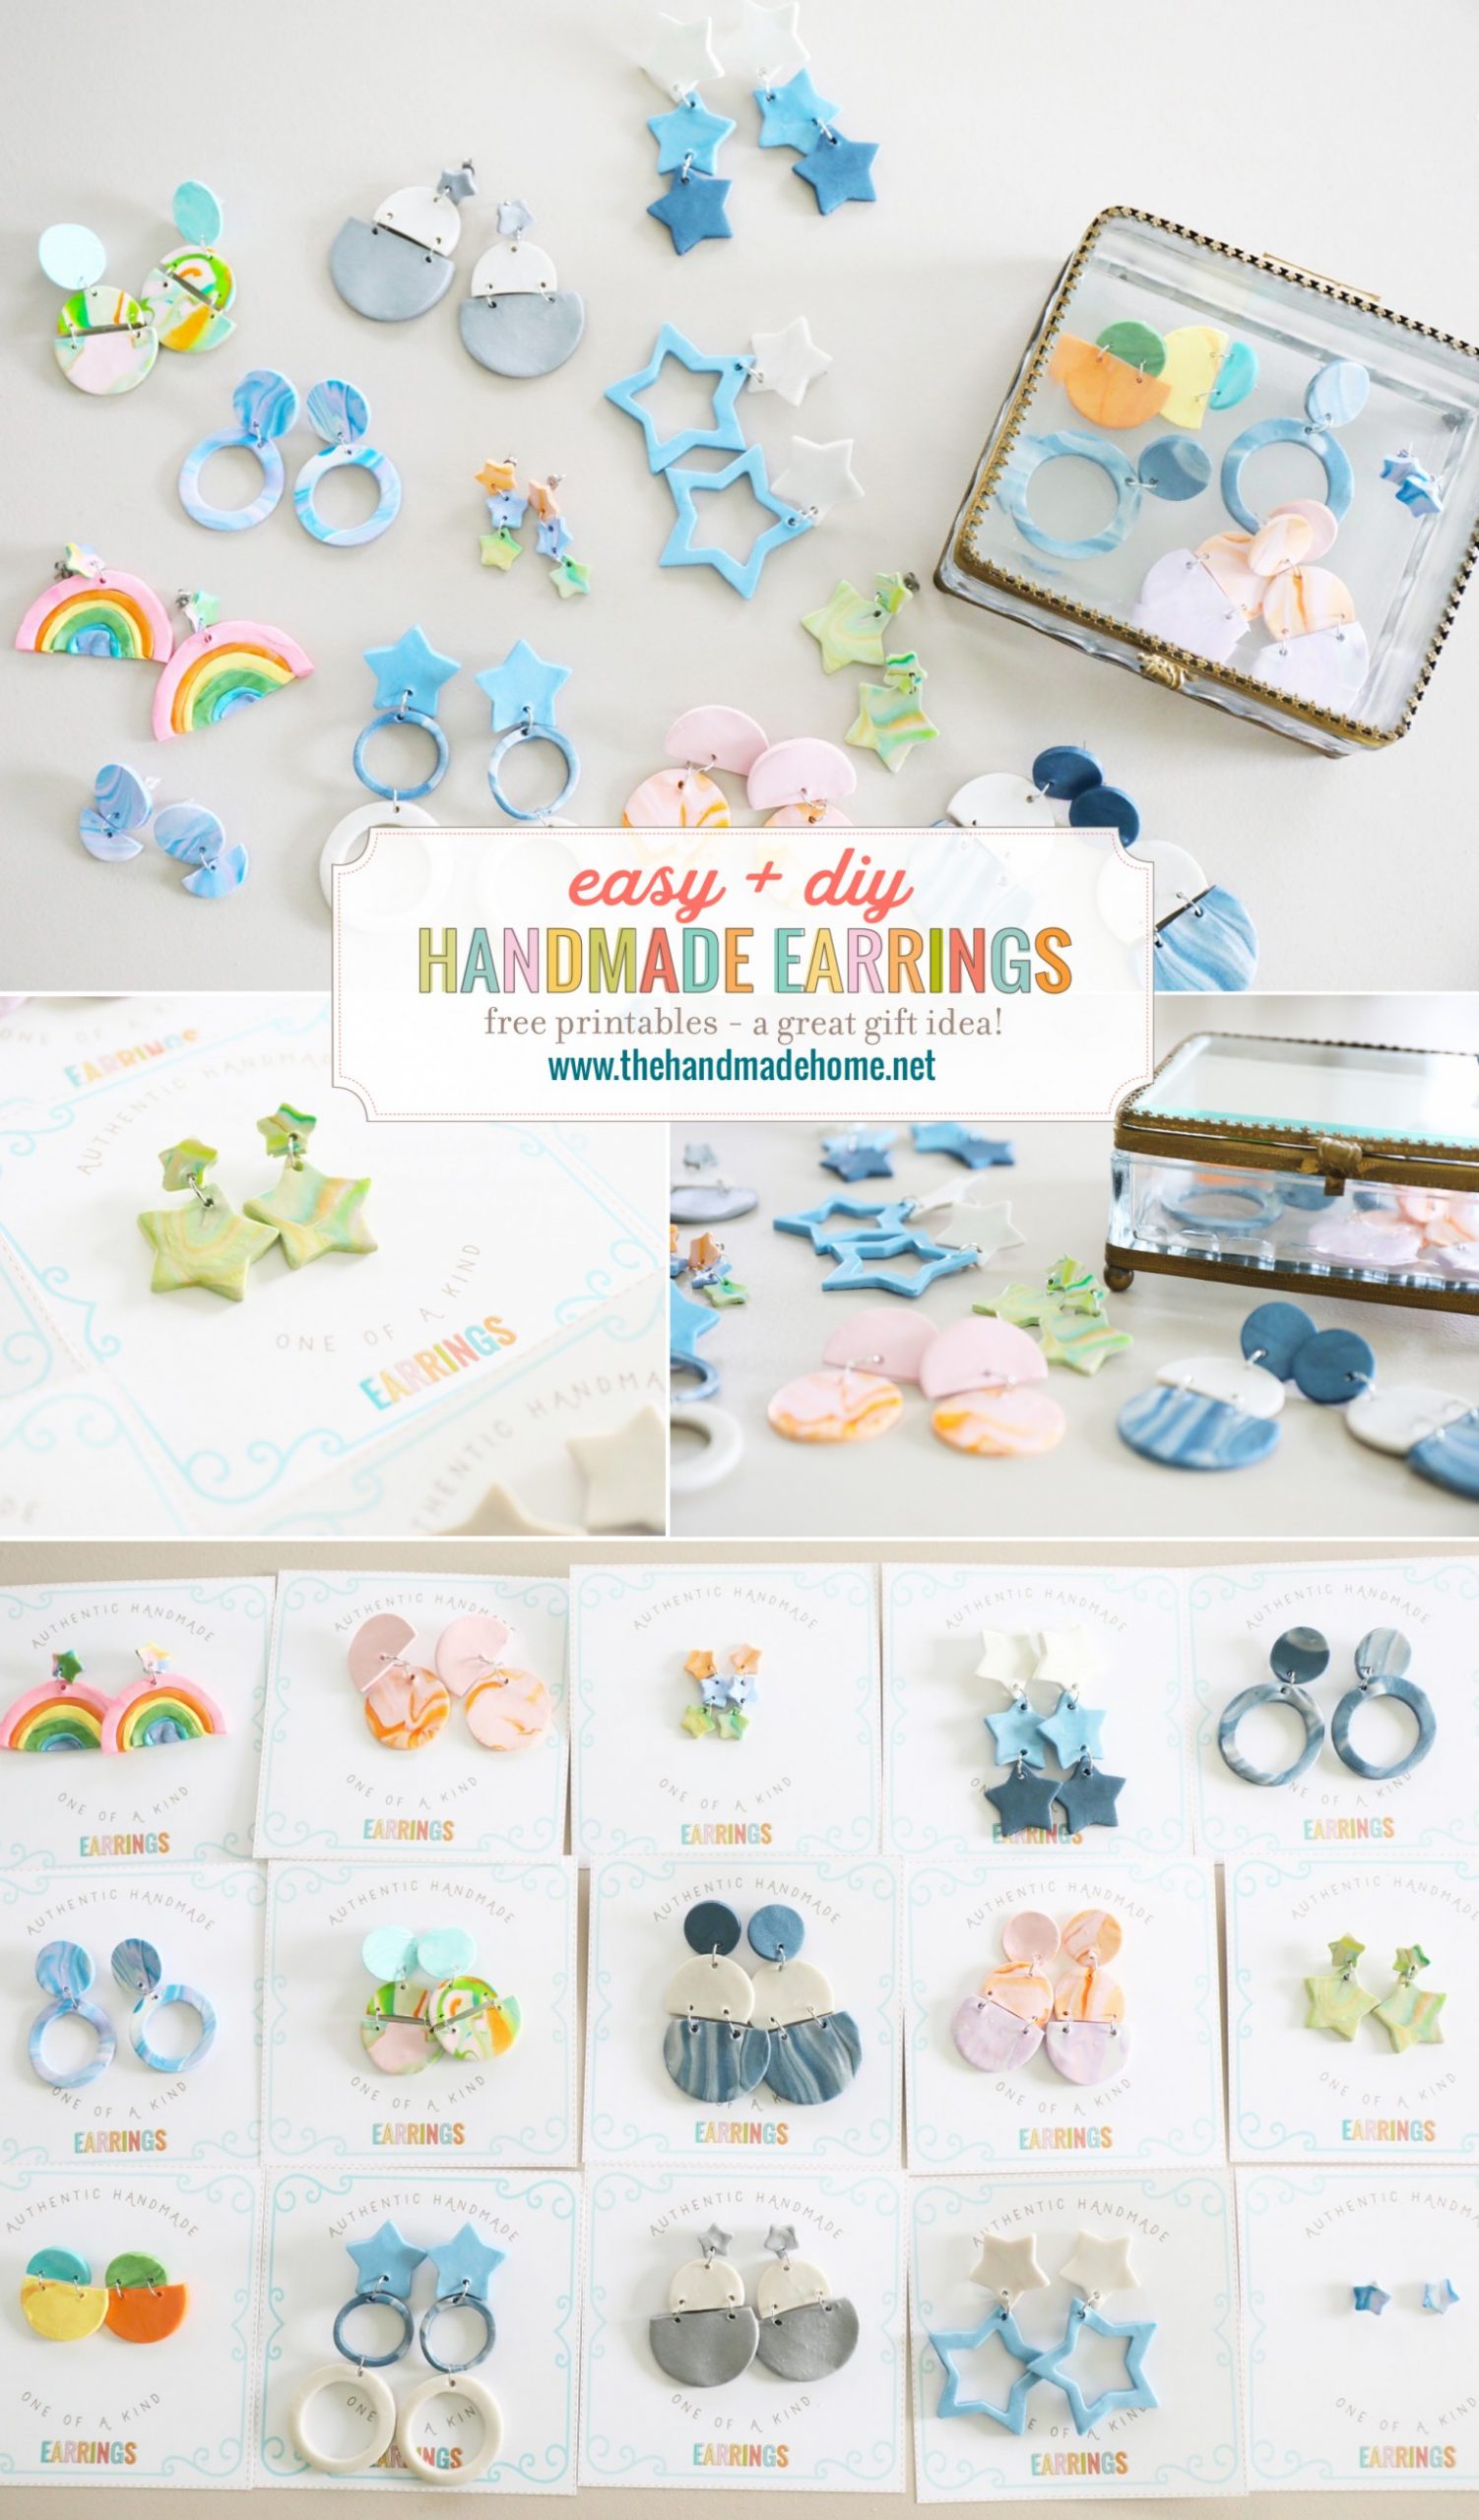
easy handmade earrings
This is one of those fun projects that can be perfect for a handmade, kinda last minute gift, or a fun project for those slower days ahead, after the holidays.
Our girl and I decided it would make a fun project one afternoon, and it was so fun to sit down and make these together! Nothing beats Christmas cookies, movies, and a fun handmade project.

There’s just something super therapeutic about working with clay. Kids especially seem to love it.

So I’m sharing how to make these simple earrings with a few basic supplies.
They’re adorable, quirky and fun, if we do say so ourselves.
It’s so easy to make them fun and colorful for kids, in a certain color theme, or go neutral.
Delicate or chunky, they’re so much fun!
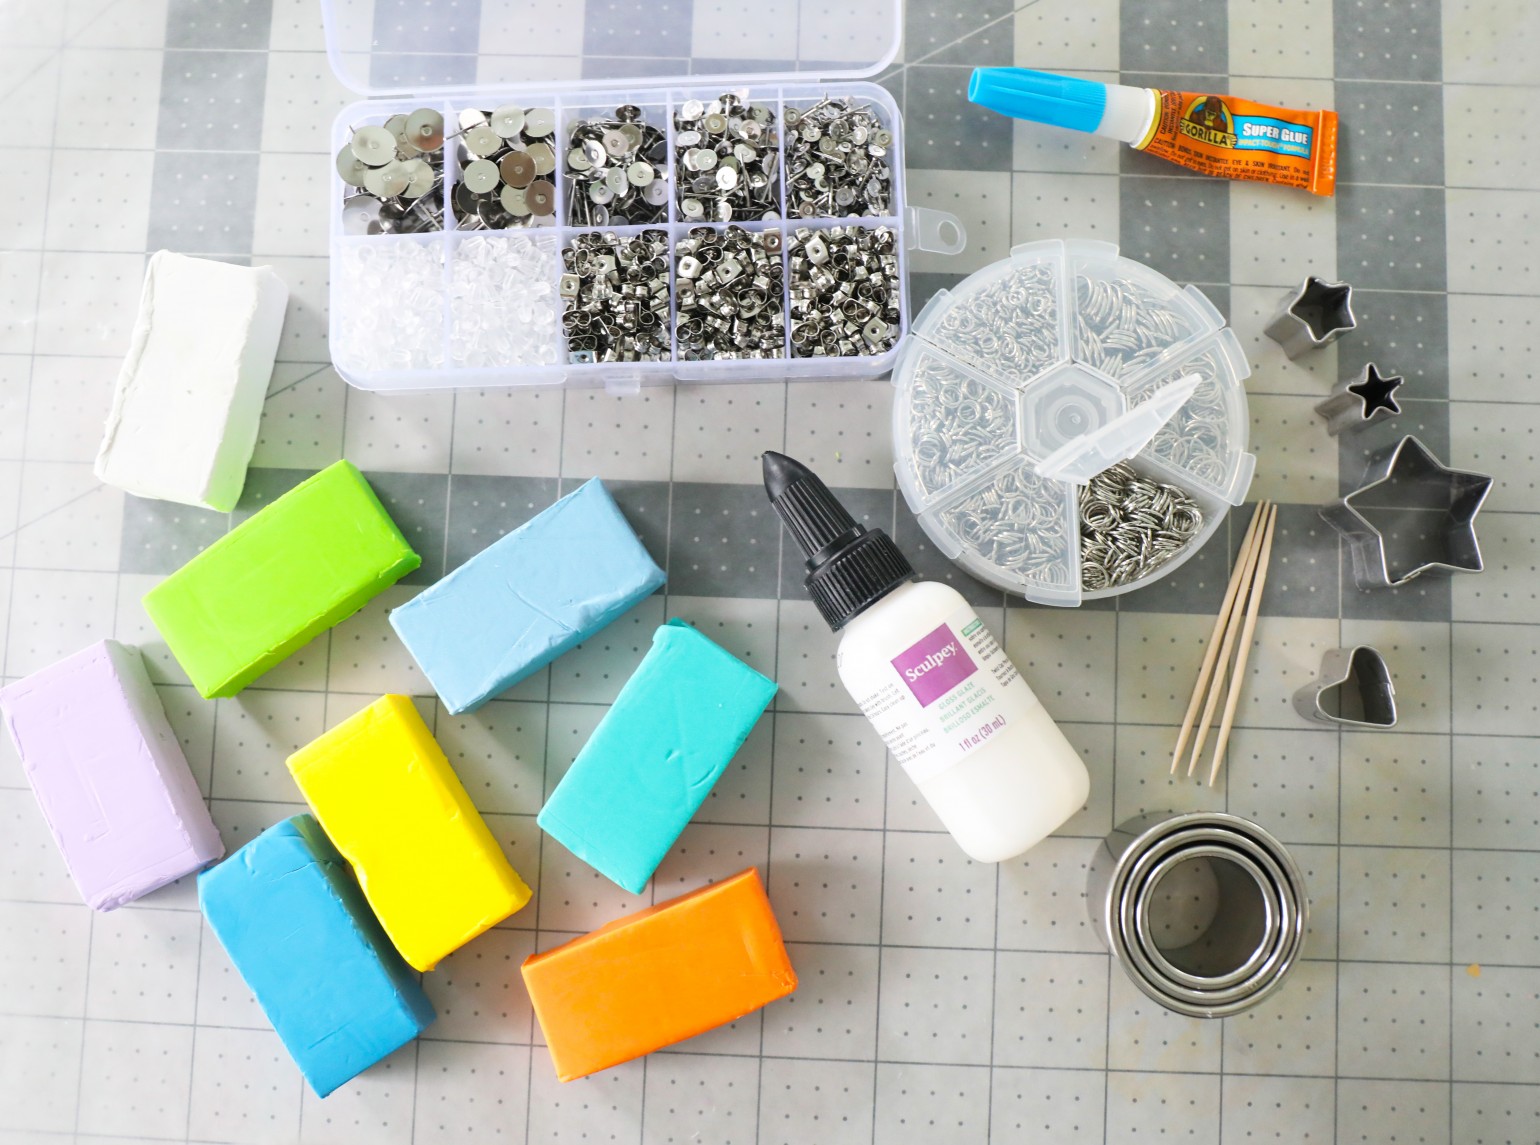
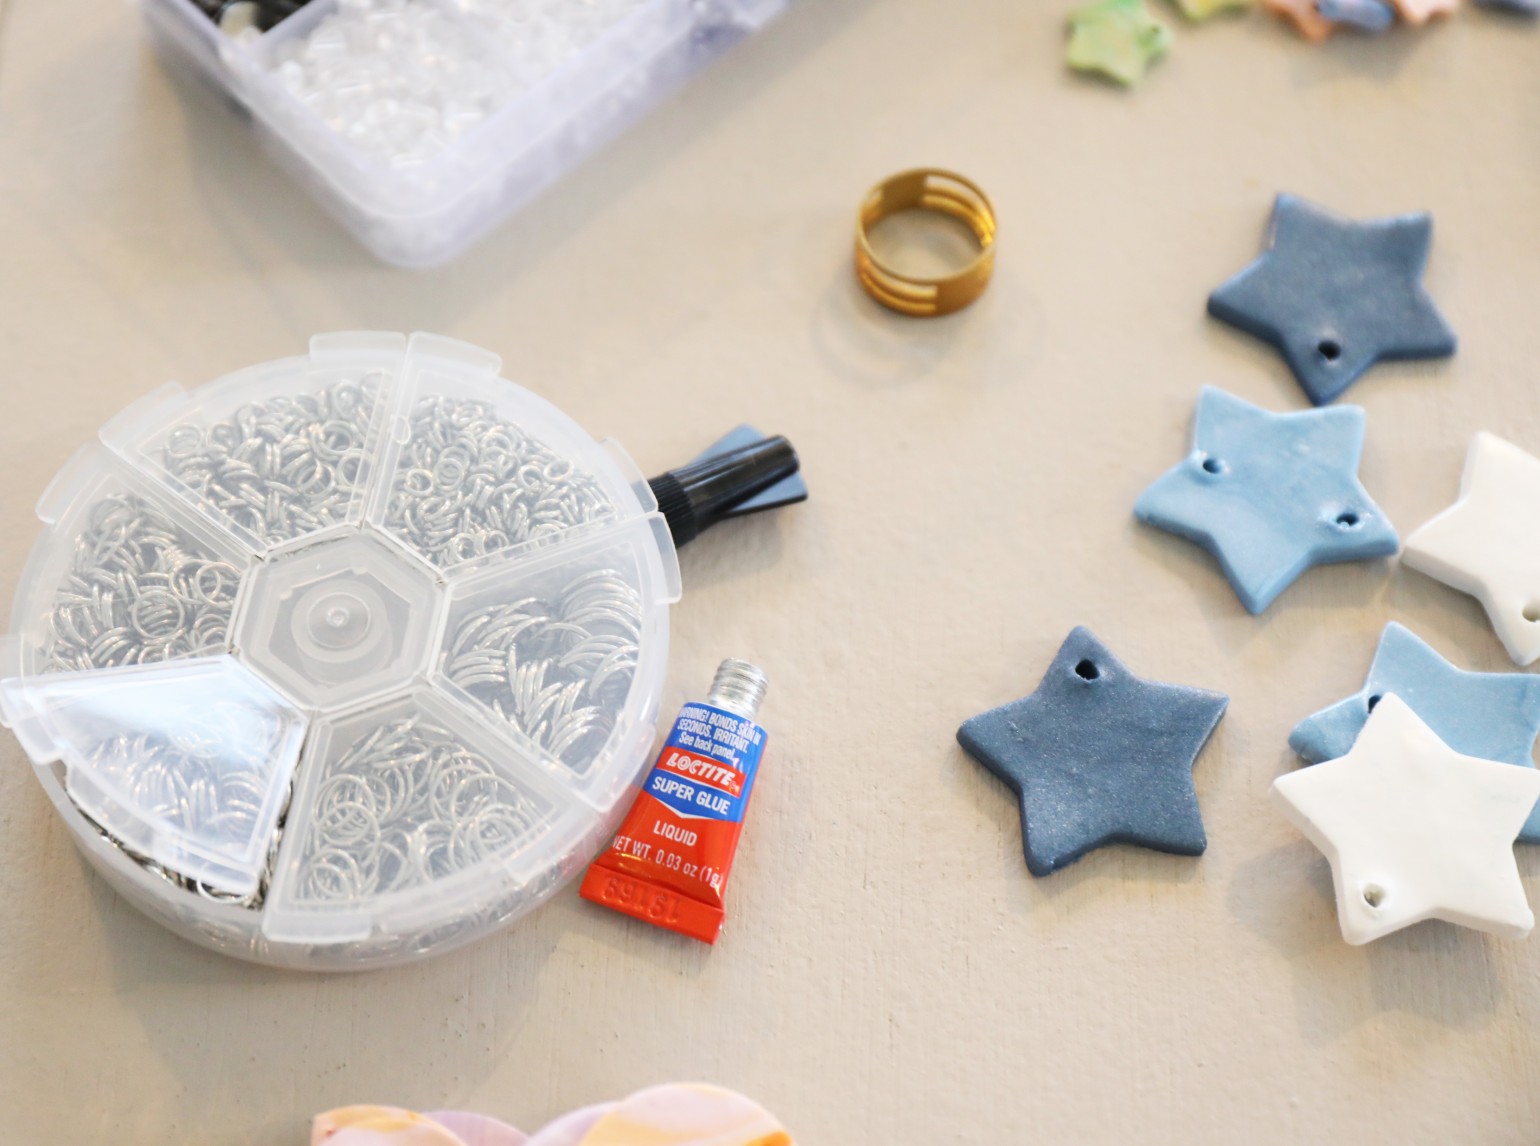
So without further ado, here’s what you’ll need:
• sculpey clay
• cookie cutters – {I used circular + stars}
• toothpicks
• super glue
• earring backs
• jump rings + plyers
• sculpey glaze + paintbrush
• wax paper or a protective surface + rolling pin
• access to an oven + foil
• X-Acto blade or some sort of knife + cutting surface
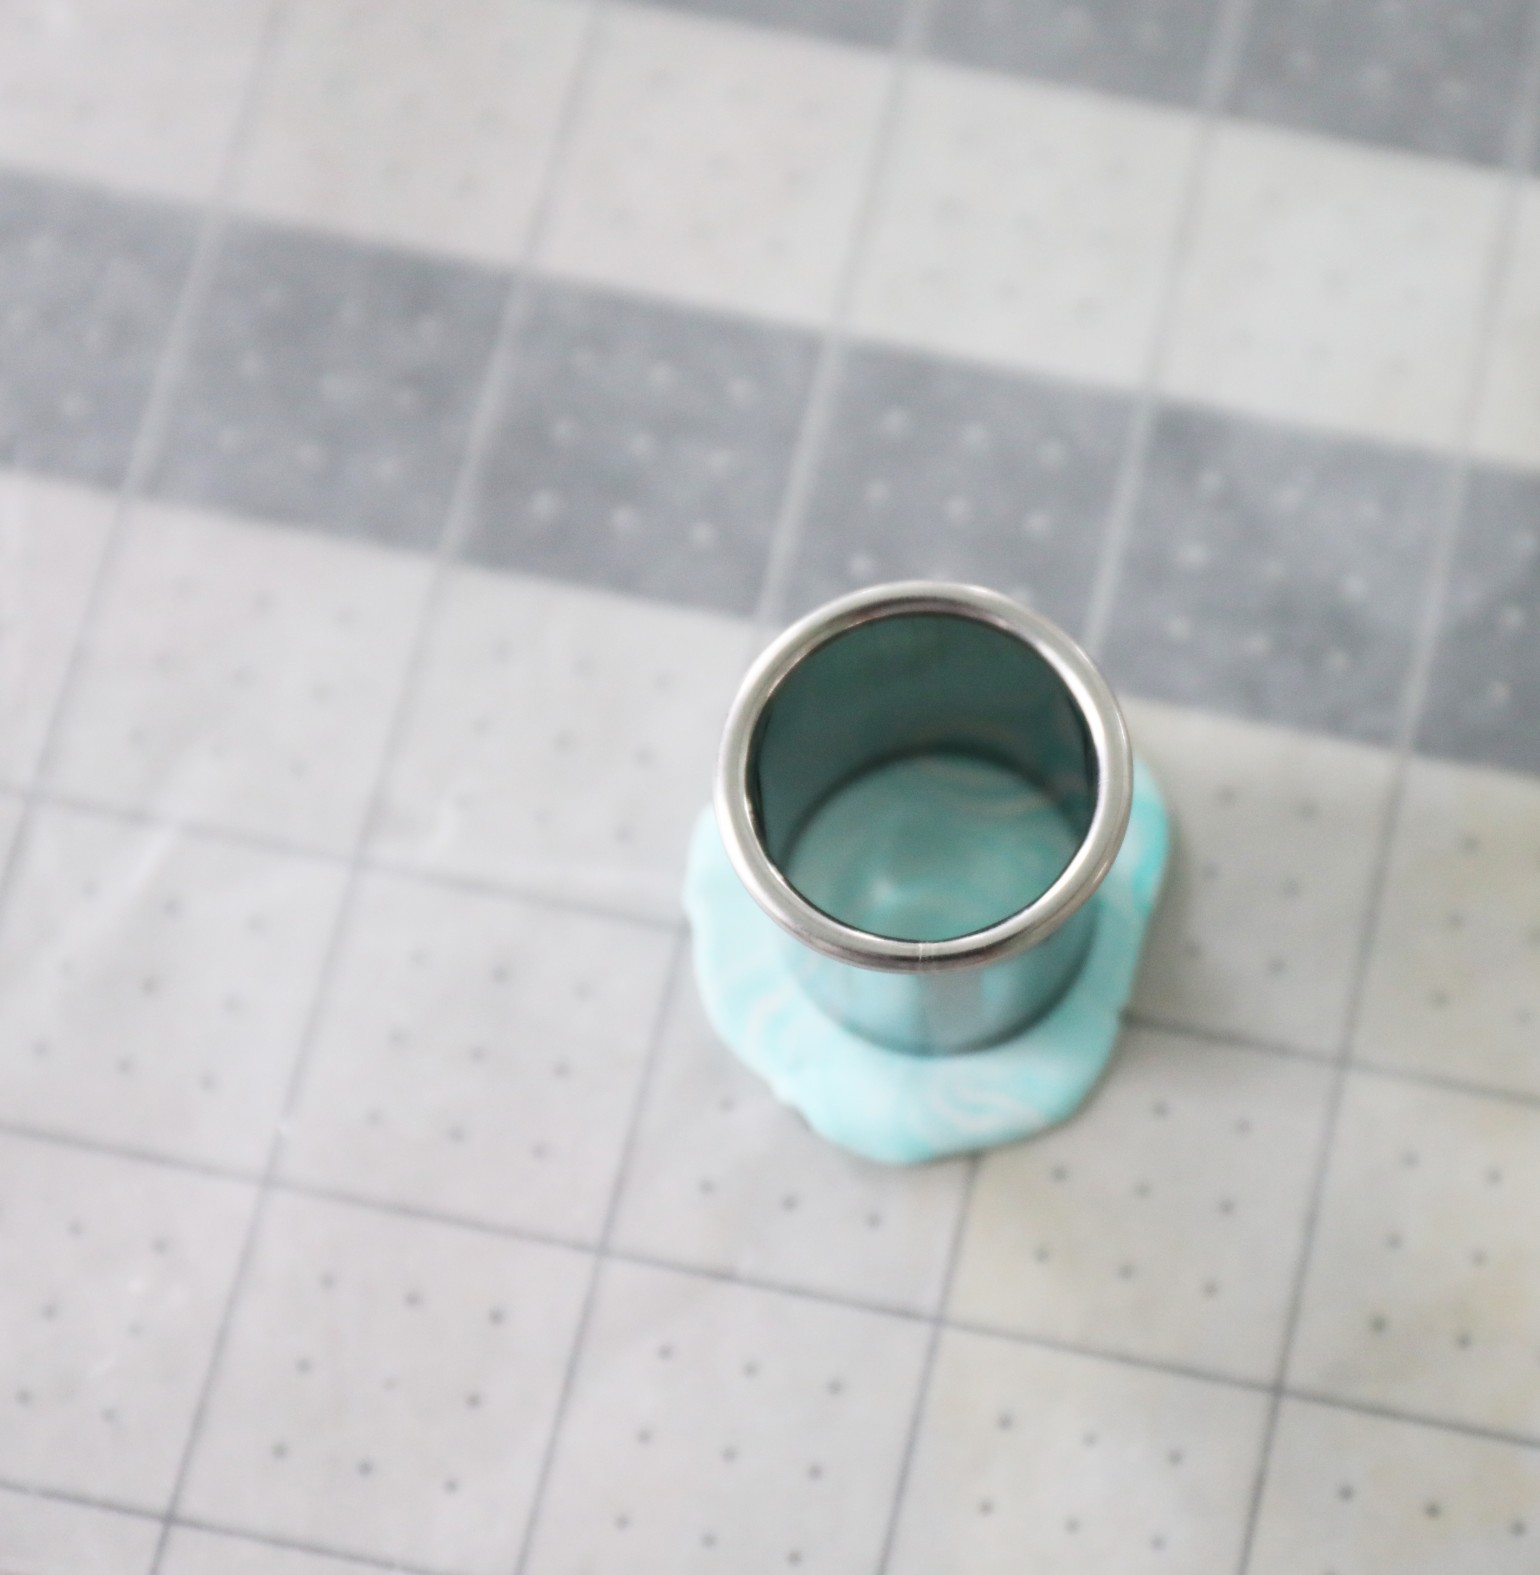
To work on our surface, I used a combo of wax paper + a self healing mat, so I could just cut as needed, then replenish the paper.
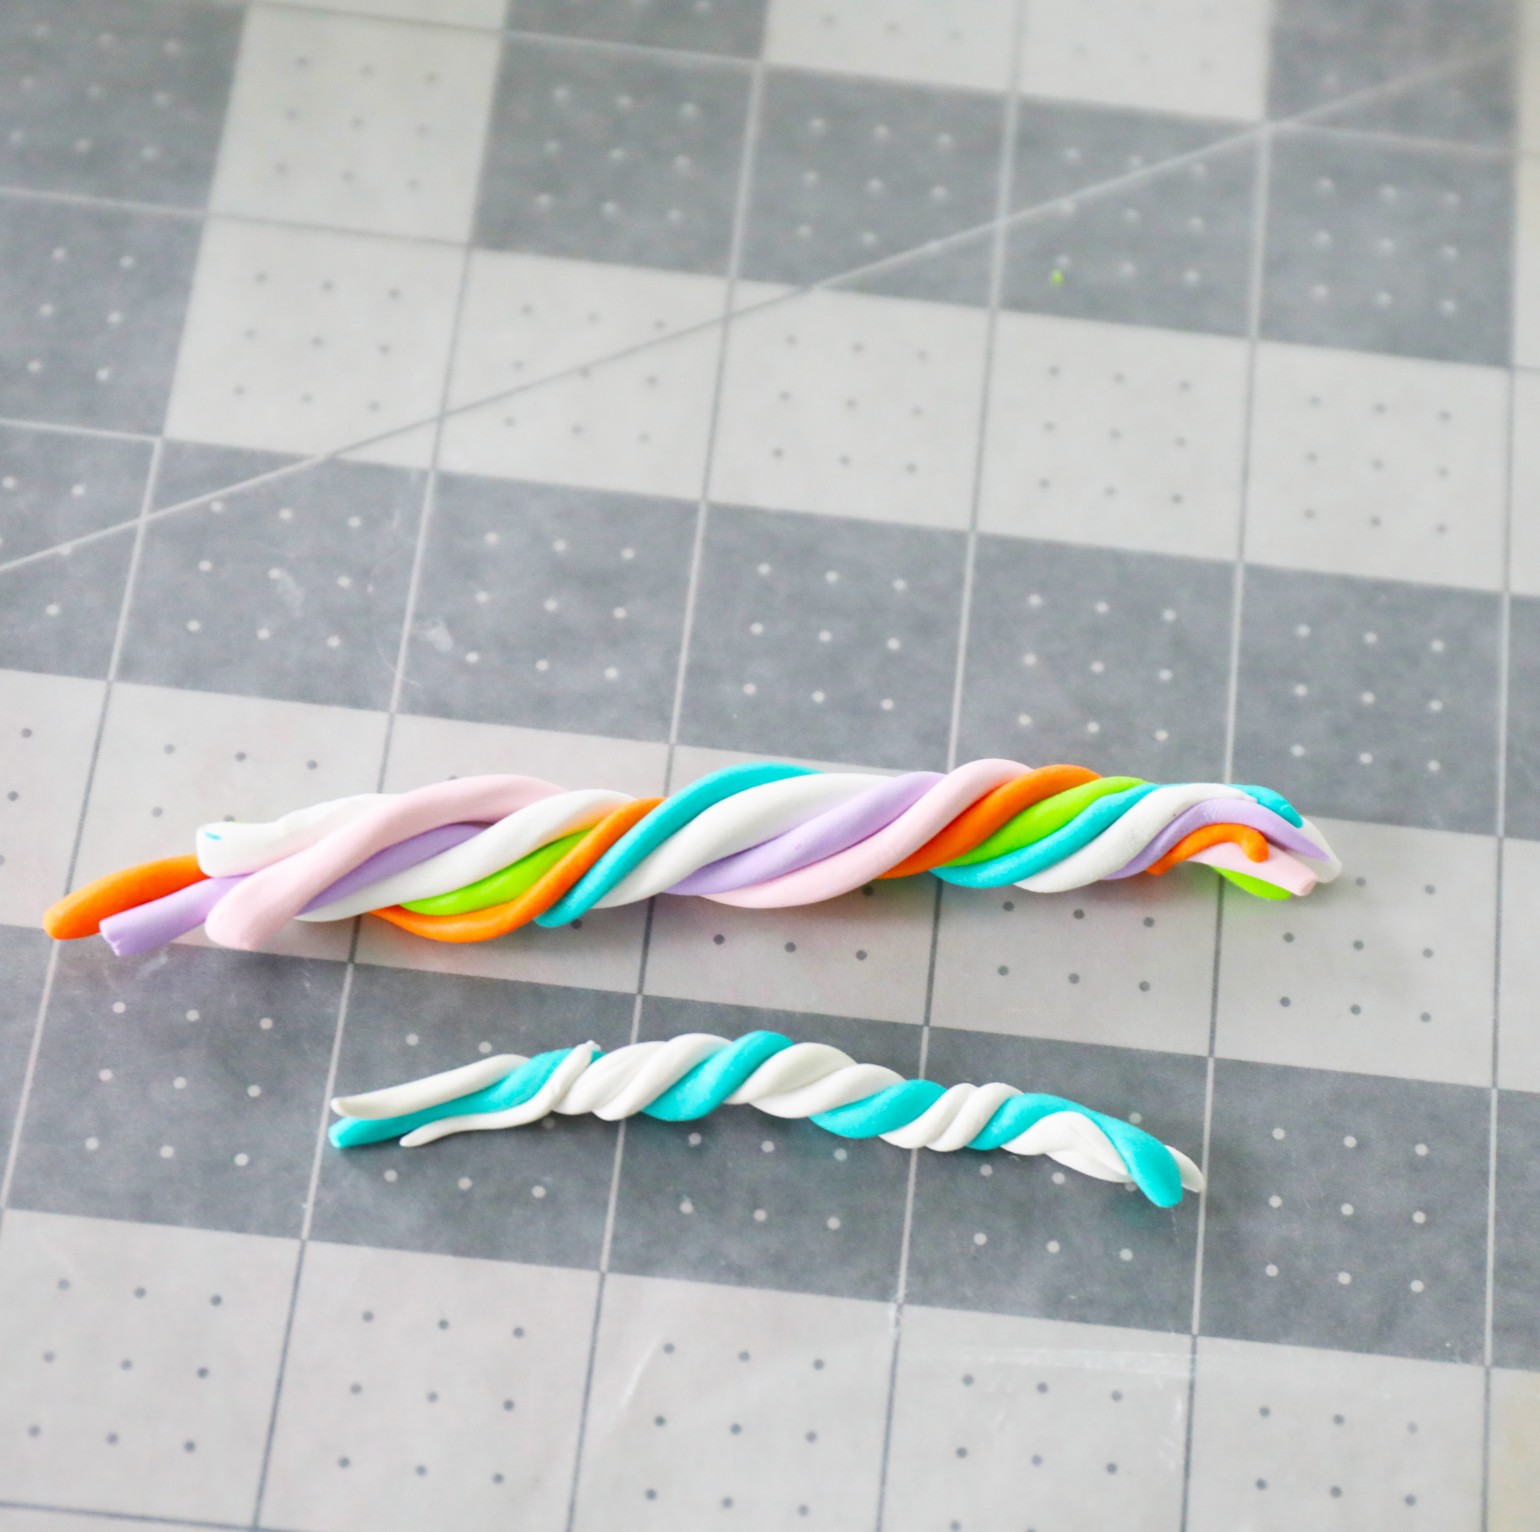
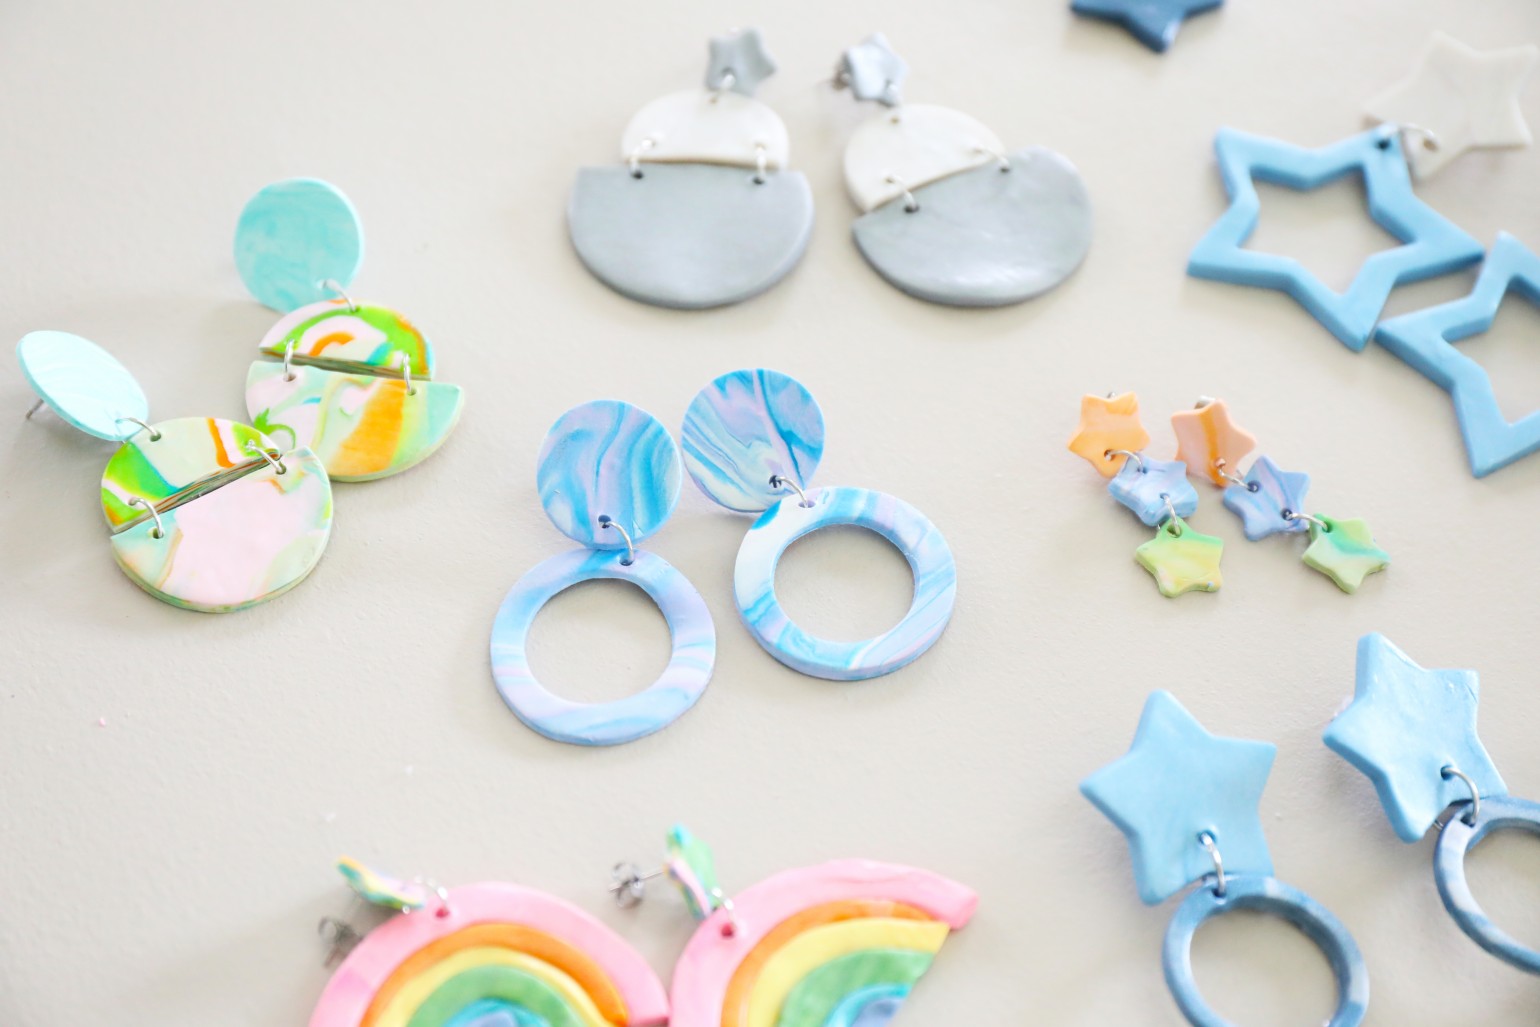
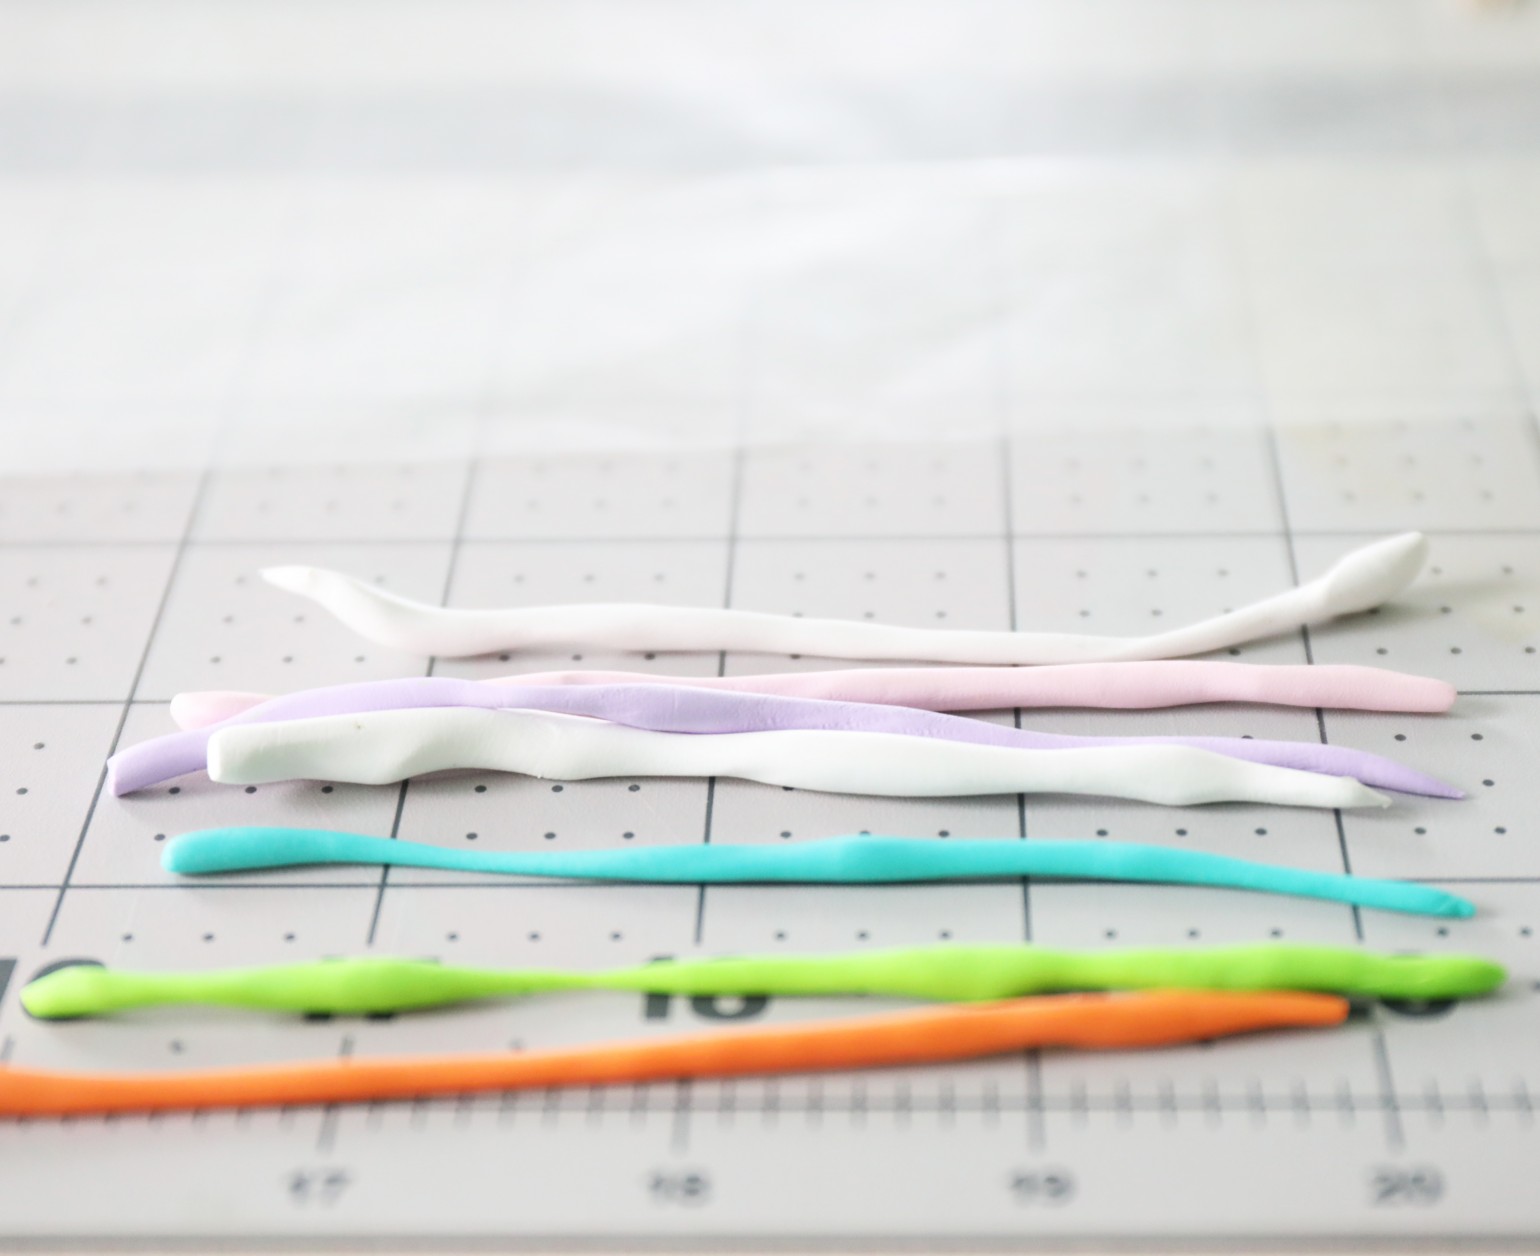
For the Marbleized look, I simply selected the colors I wanted, and rolled them out into little snakes, aka kindergarten play-doh style.
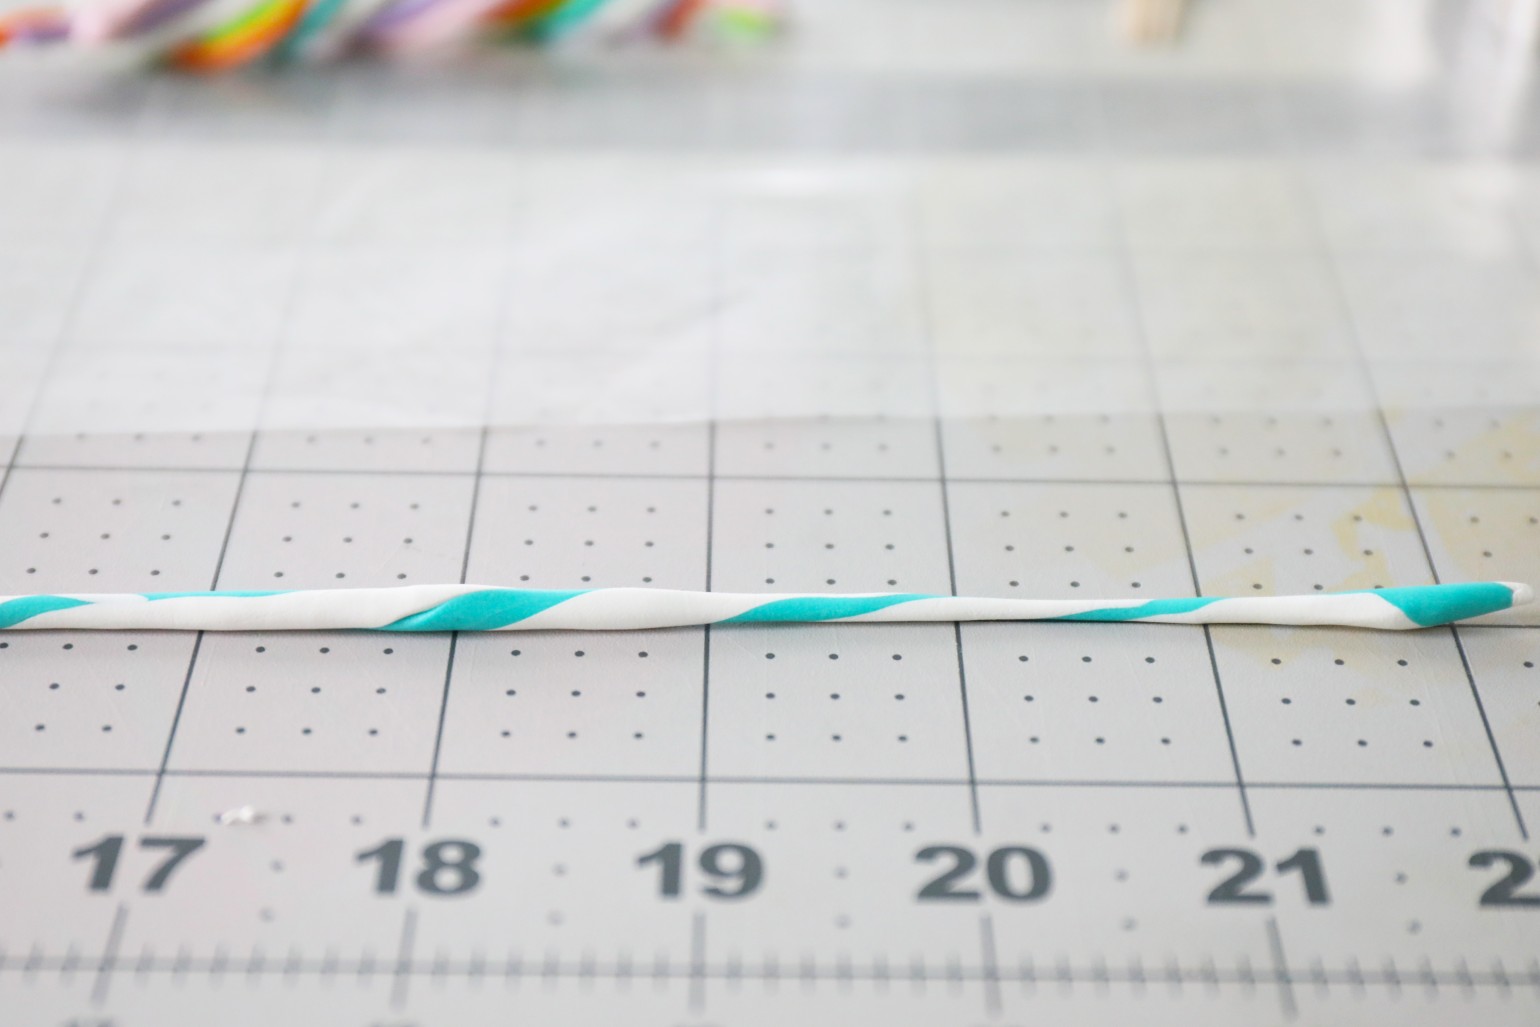
Then I would roll the colors together, into one longer snake.
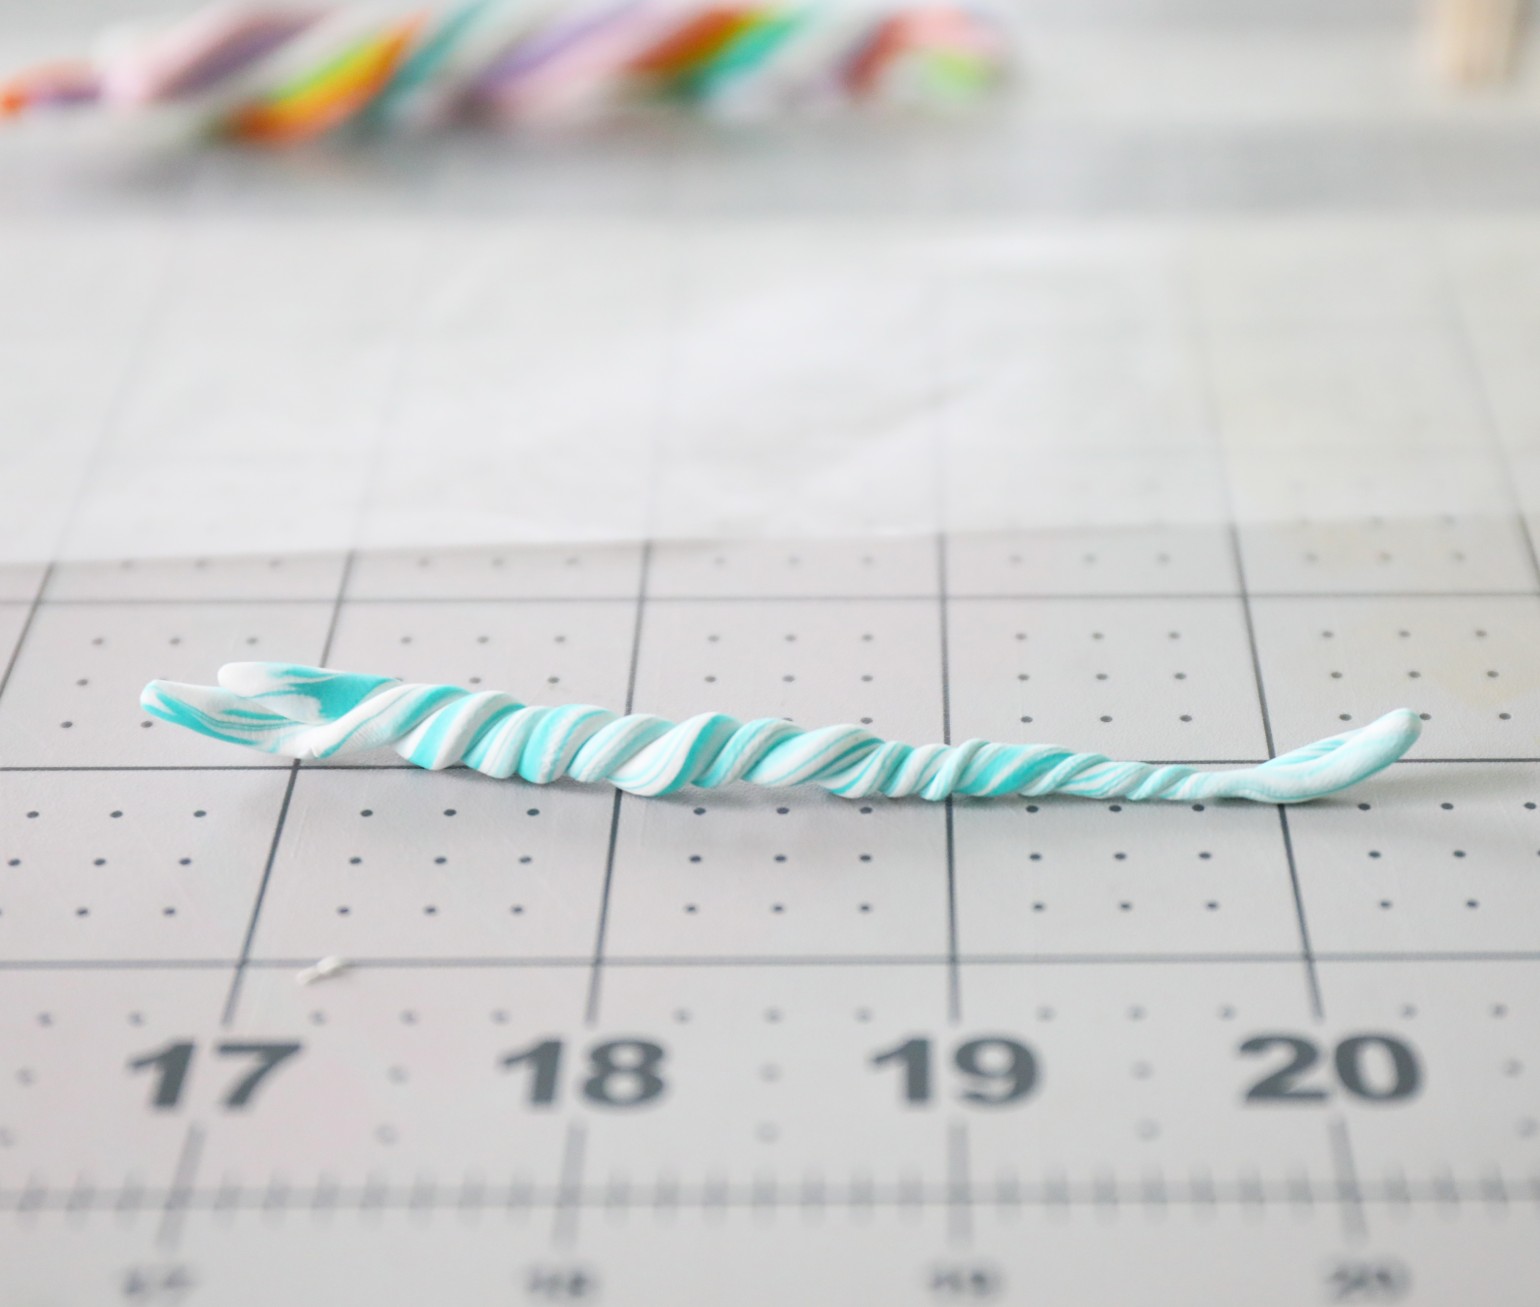
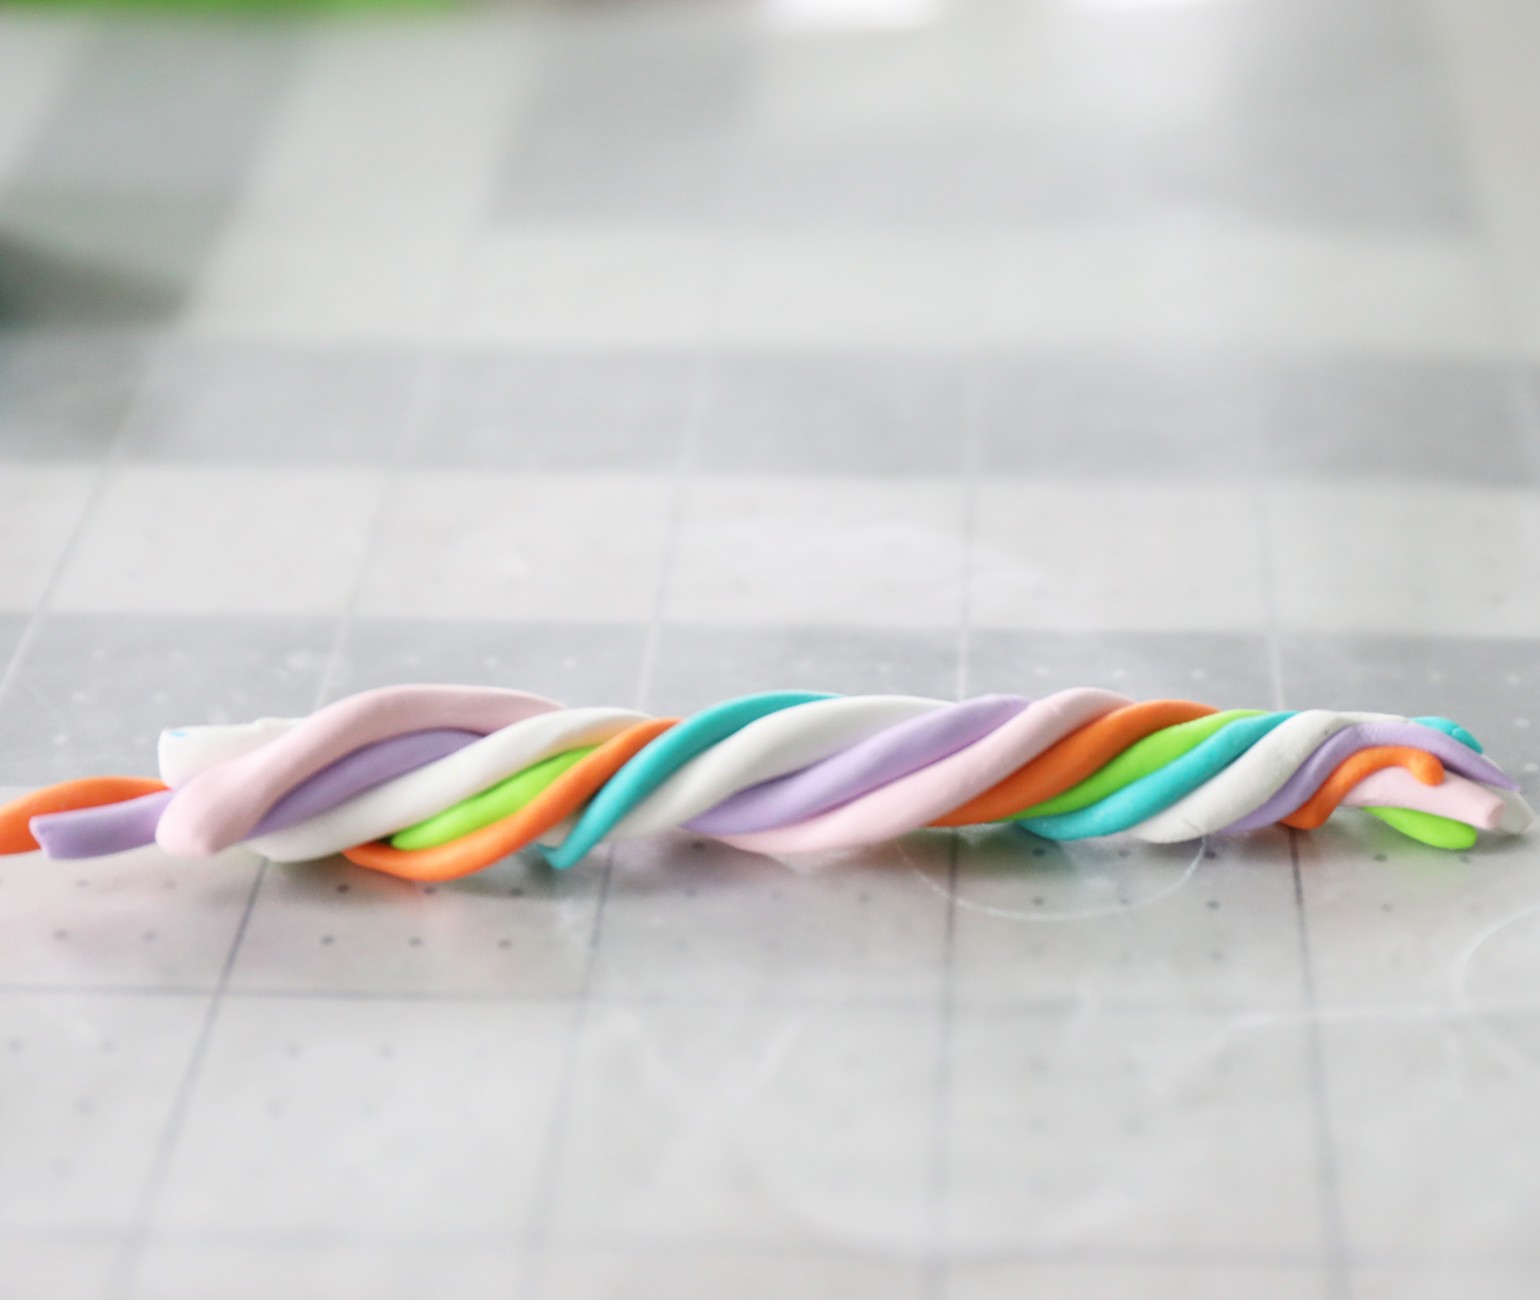
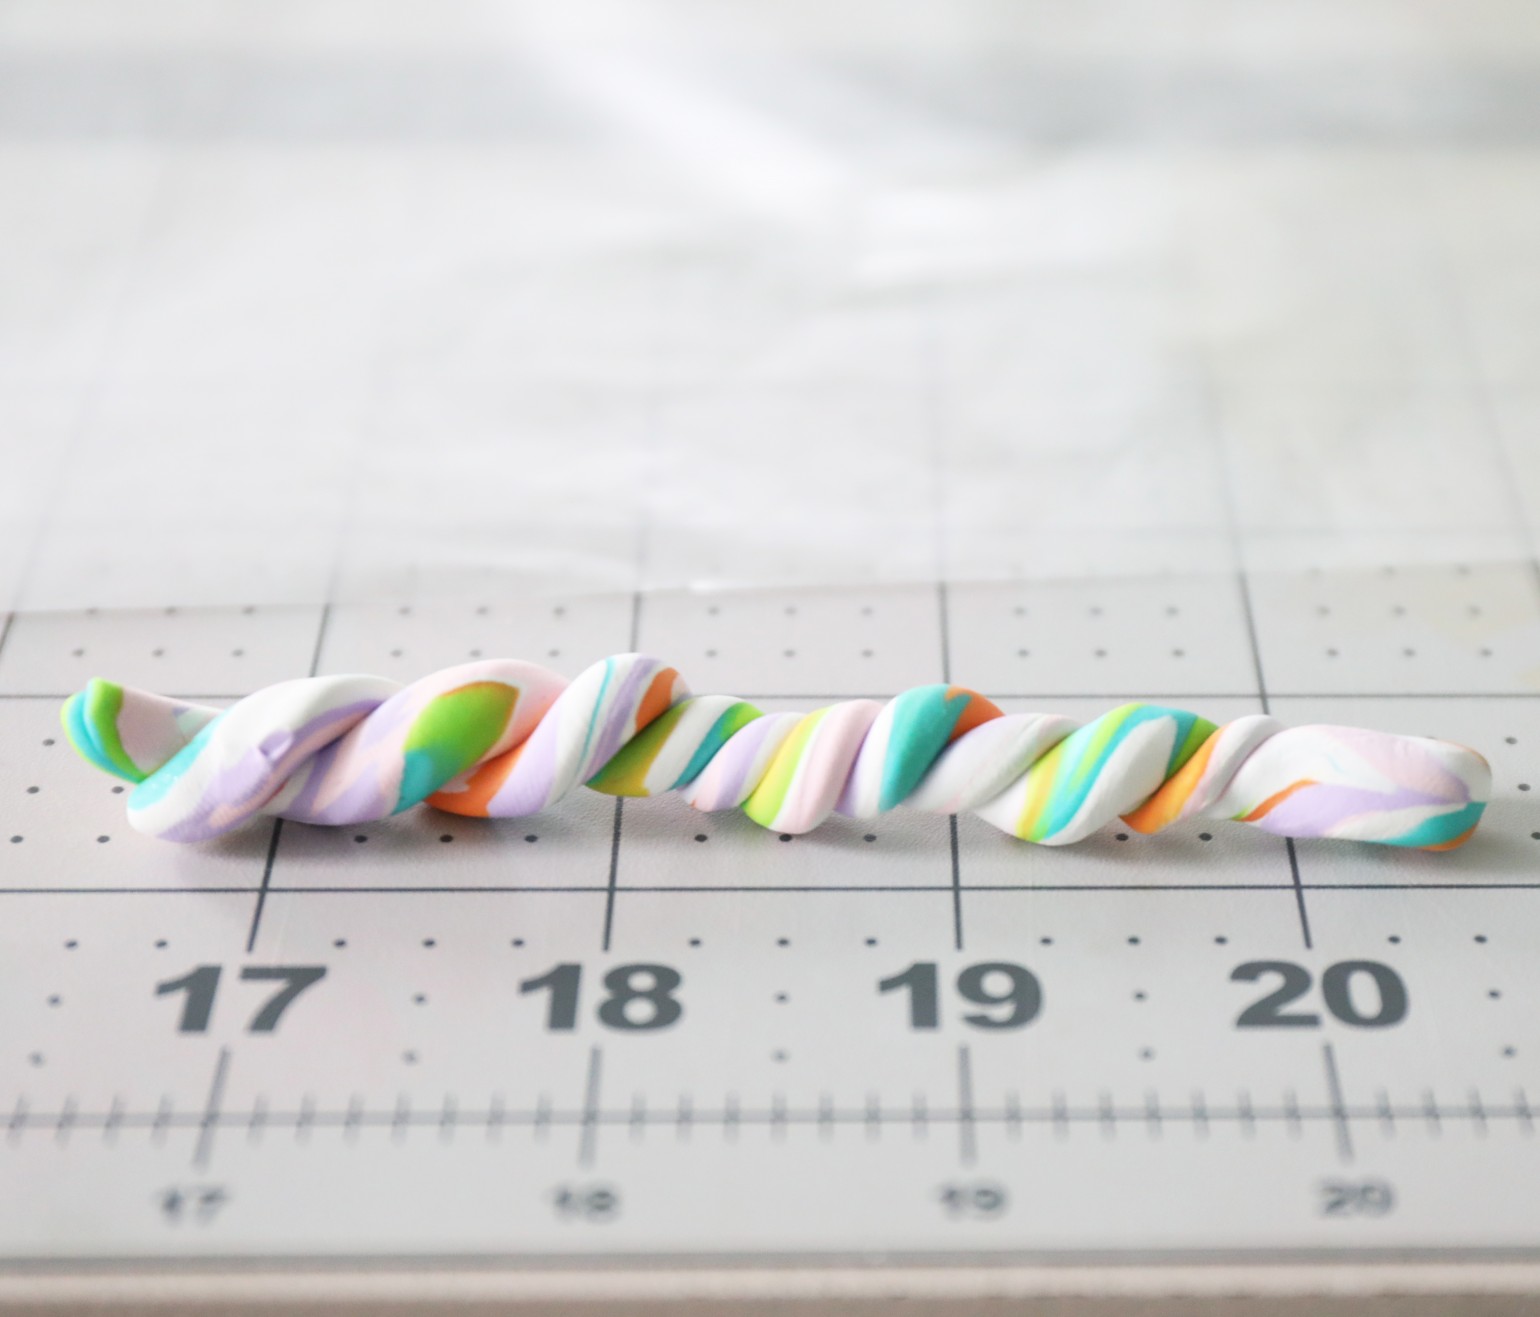
Depending on how marbleized you want it, {I’d do it at least three or four passes for a less chunky look} loop the snake back on itself, and keep twisting as you go. Then roll it into a snake again.
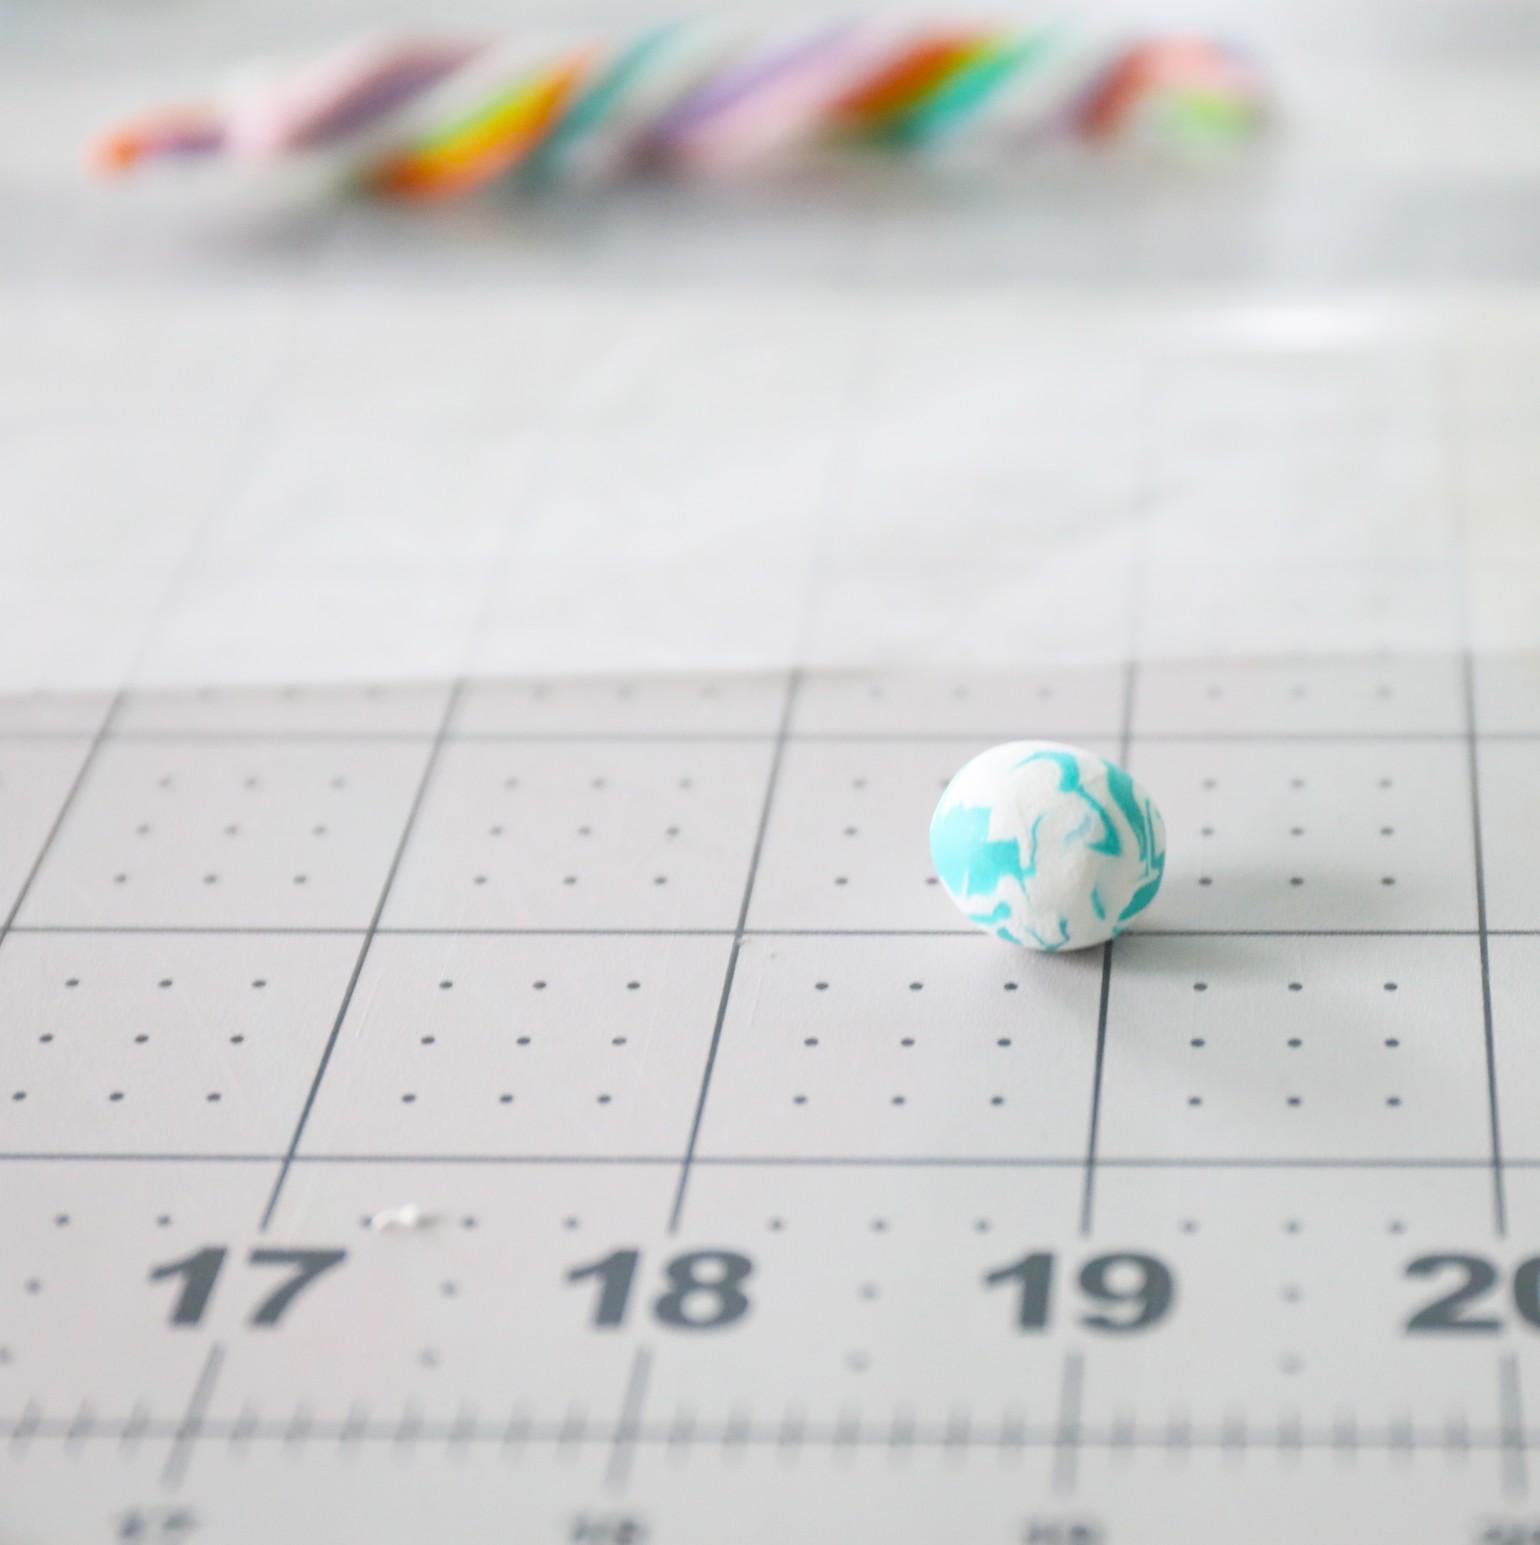
When you’re happy with it, roll it into a ball, and break out your rolling pin.
* I definitely recommend rolling your clay for the final time with the rolling pin on wax paper, so that it comes up easily once you use the cookie cutter.
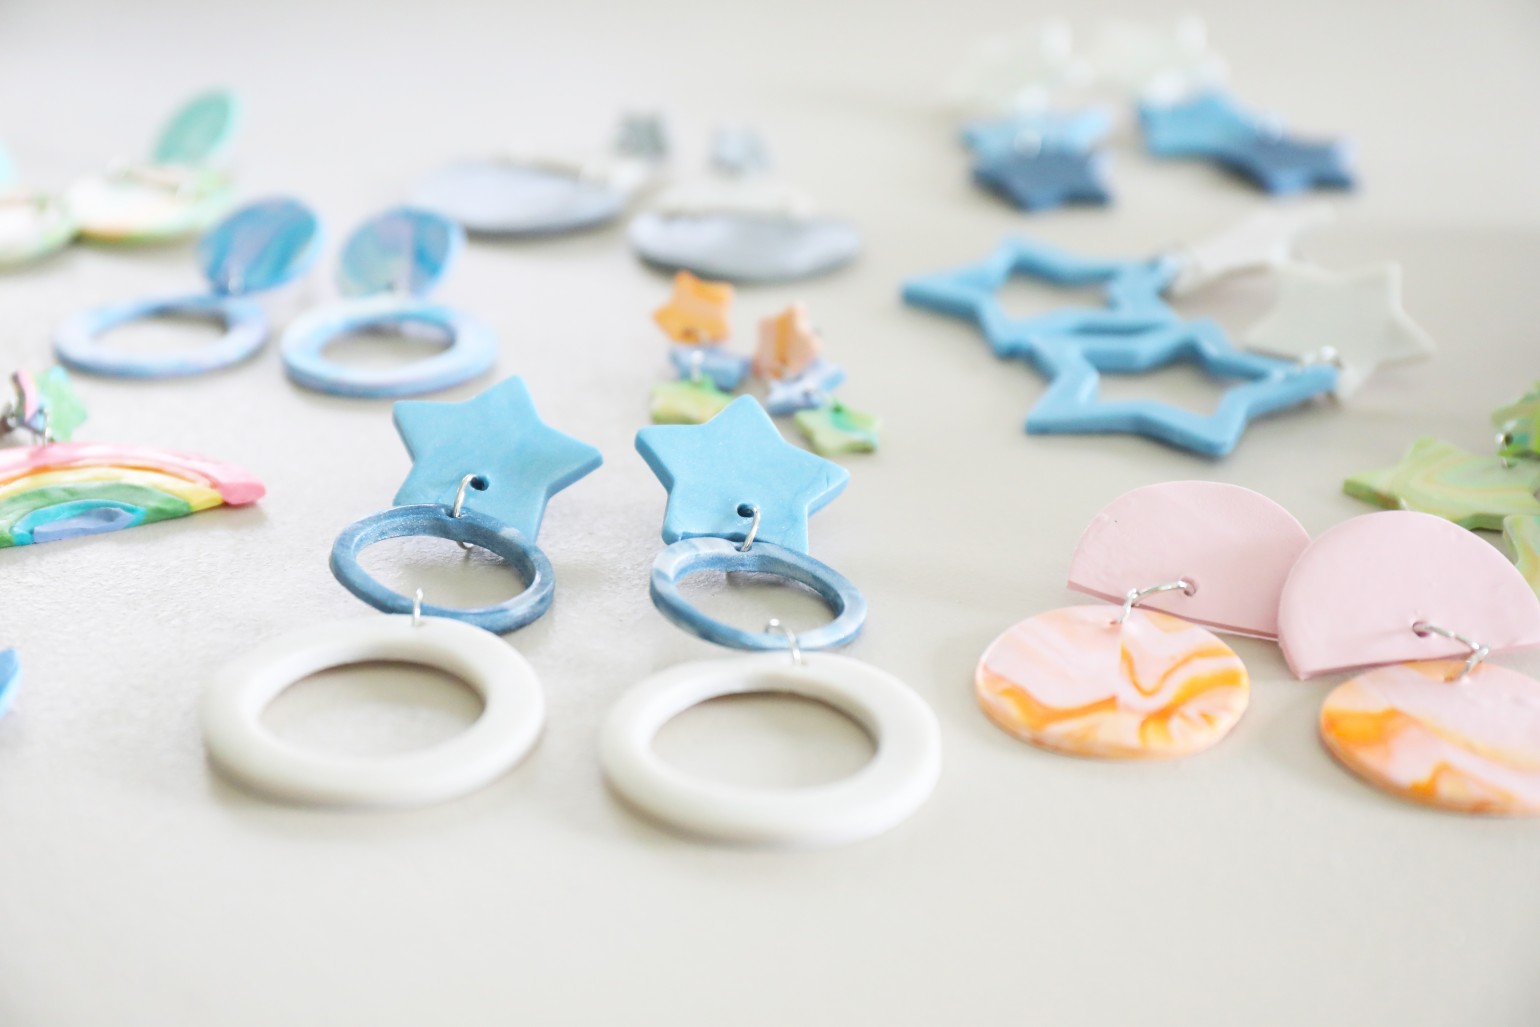
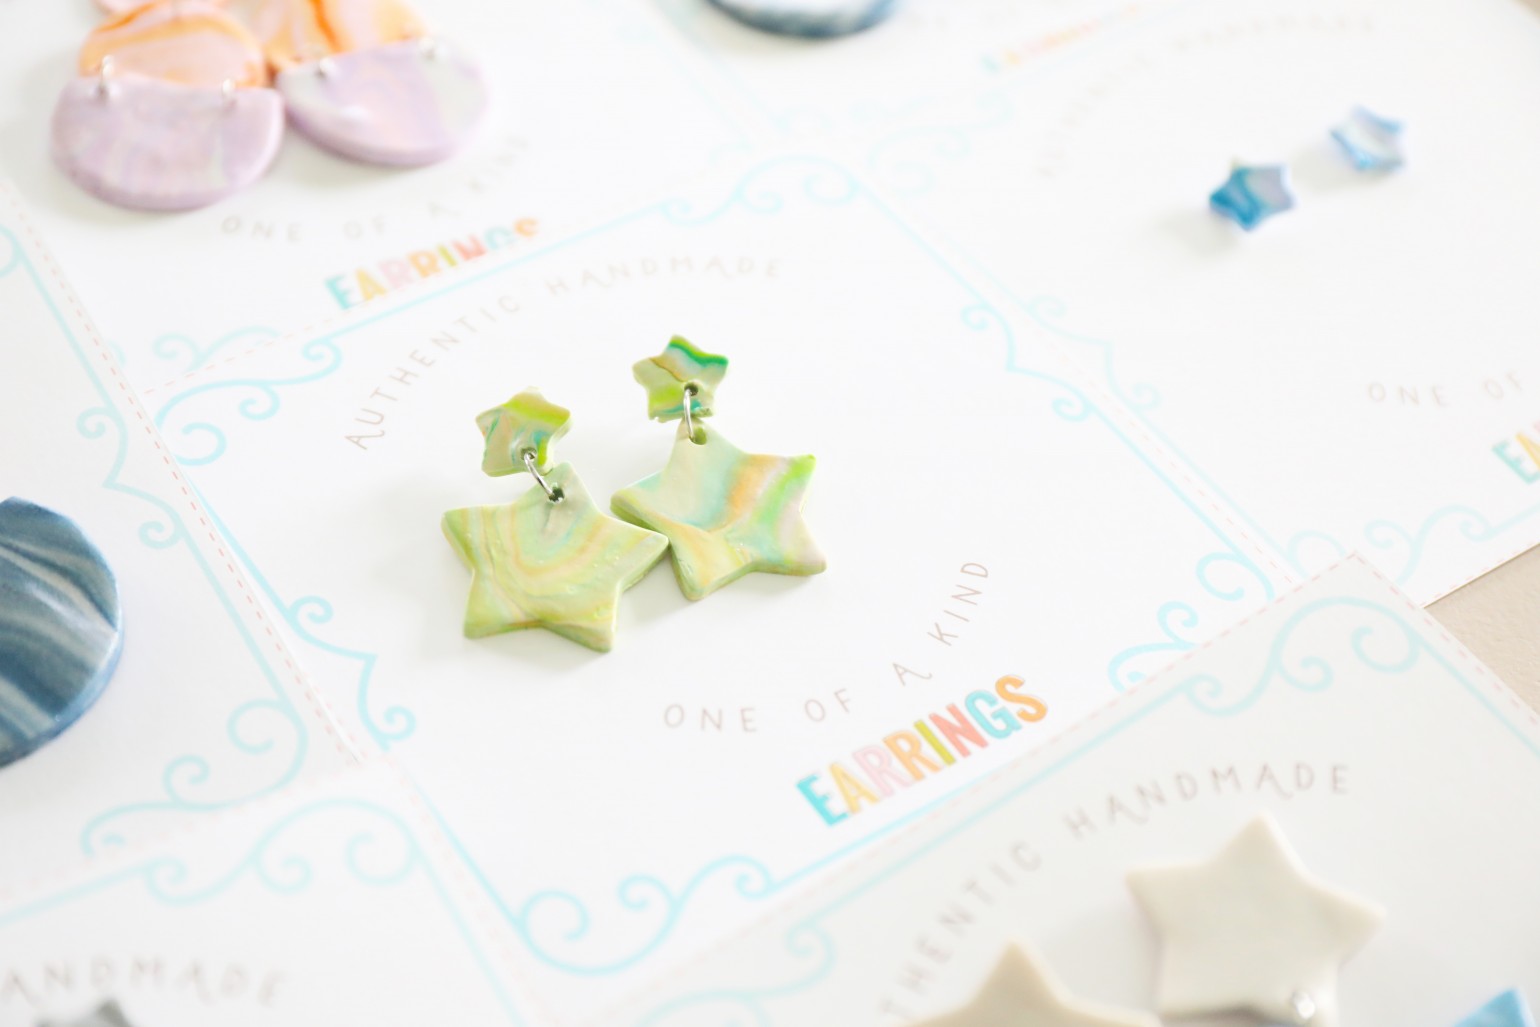
Use your cookie cutter on your flattened clay to cut your shape.
Here’s another example with multiple colors.
Little individual snakes, combined together in a twist,
And then one big snake which is looped over on itself and twisted again.
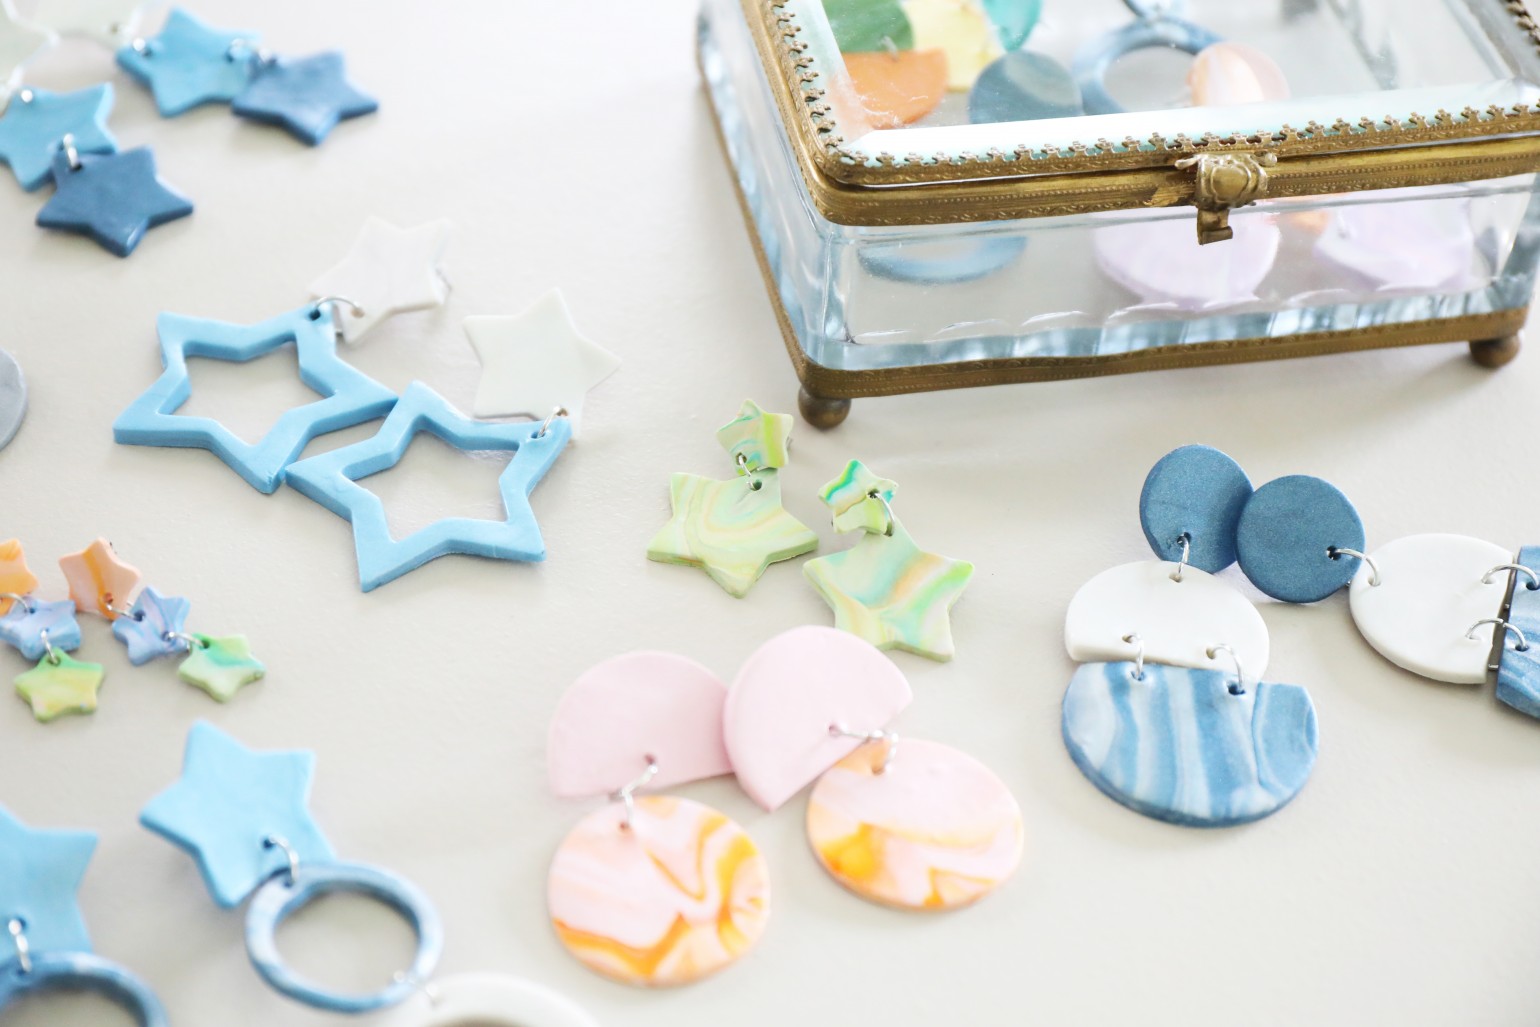
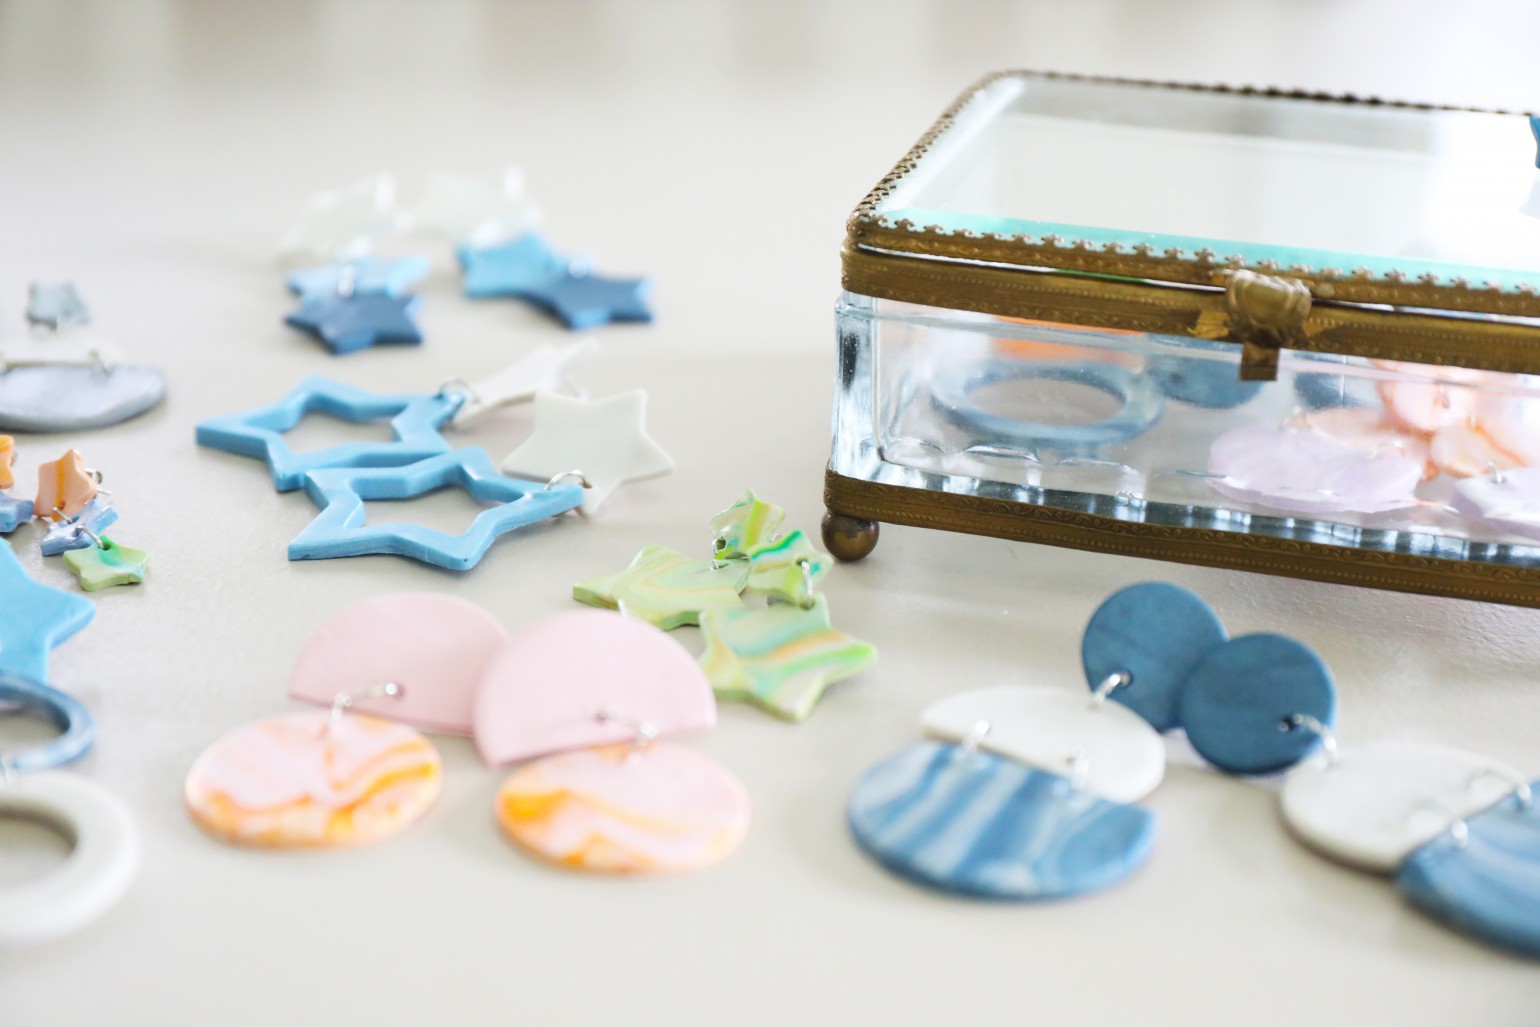
This is an example with less colors. For these earrings, we simply played with the different sizes of cookie cutters to make different shapes.
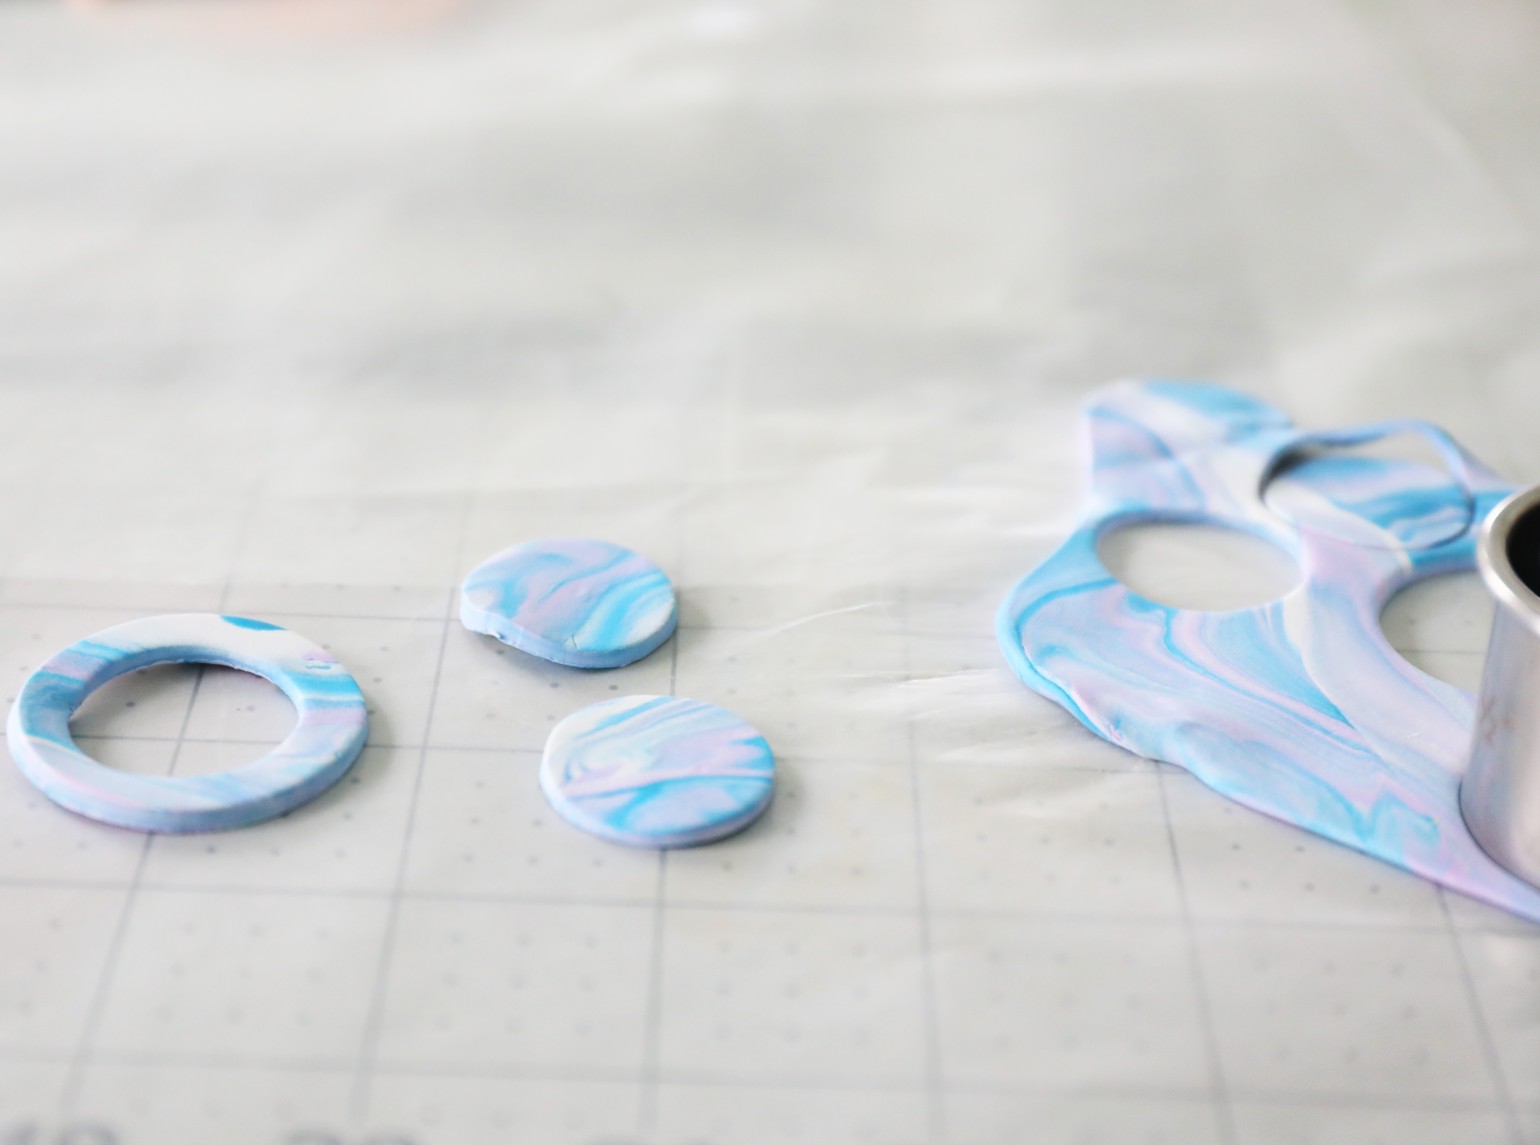
Some of the circles we sliced into, with a knife to make that semi circle shape.
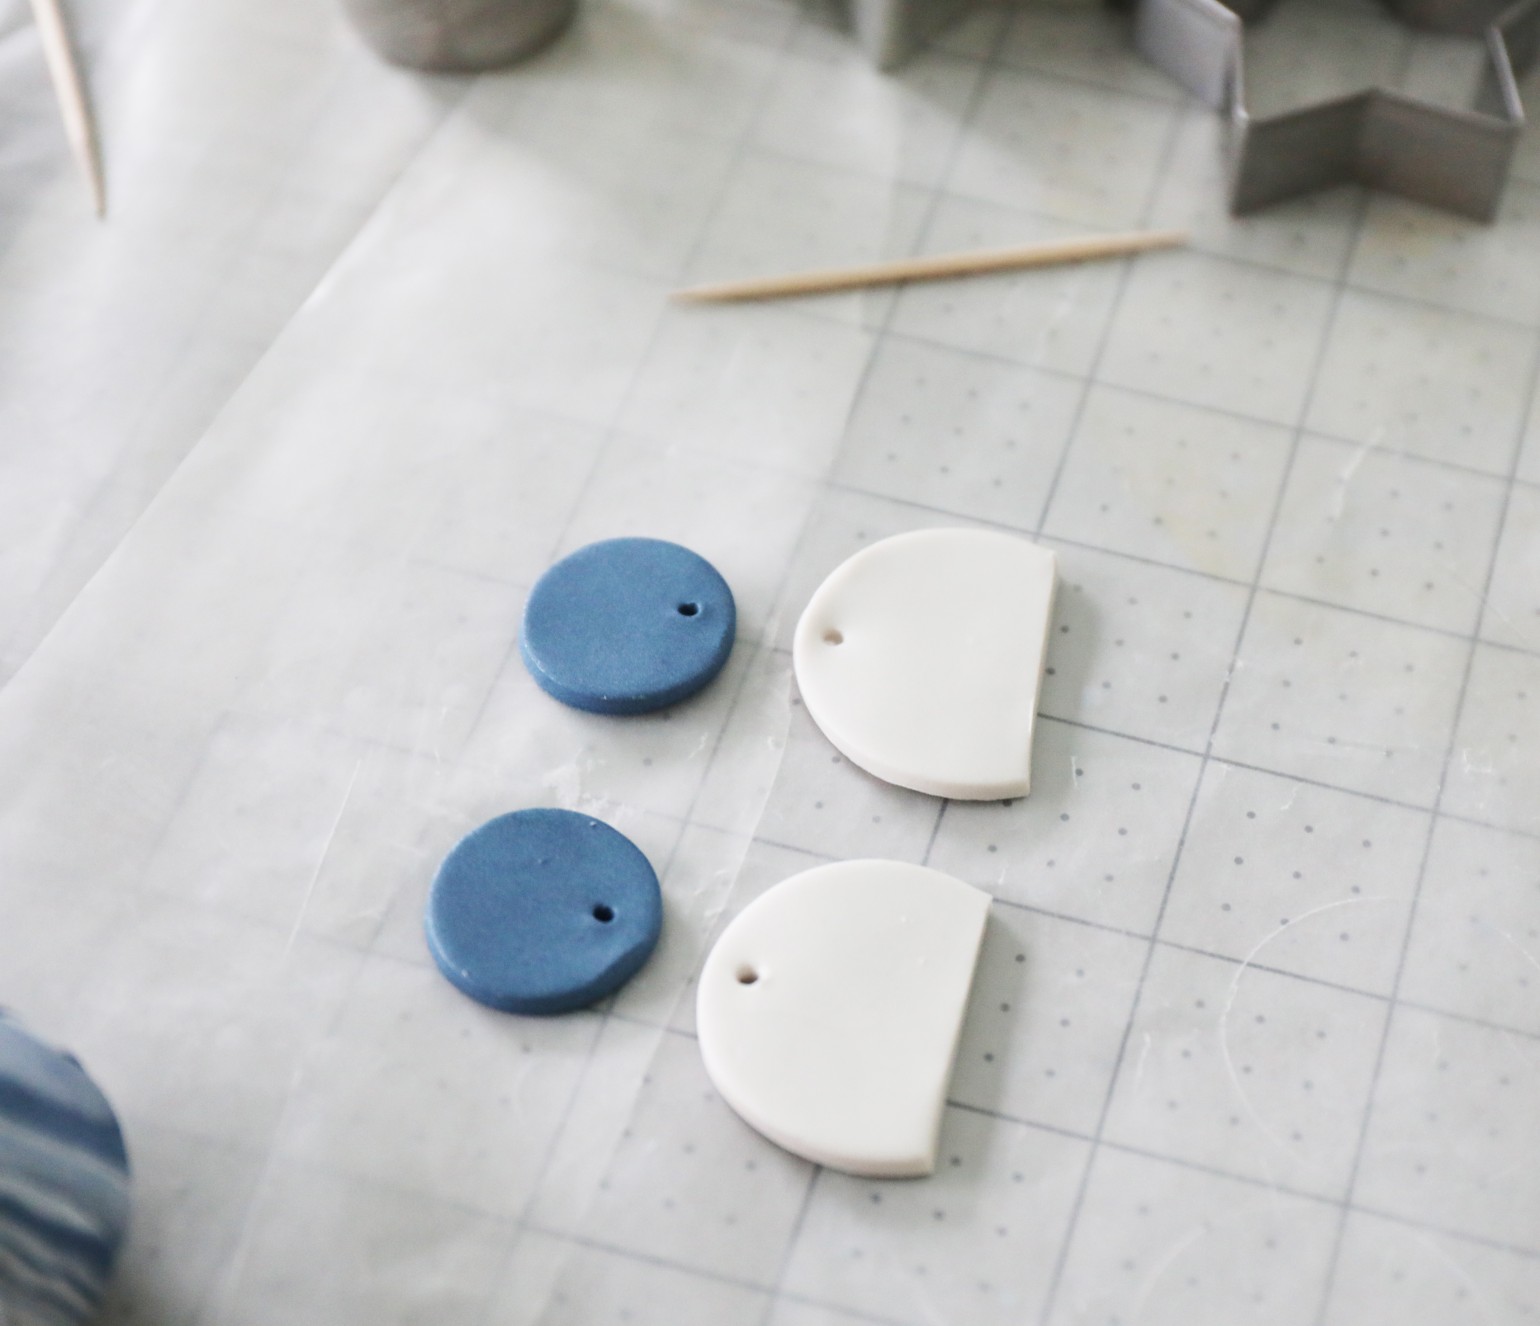
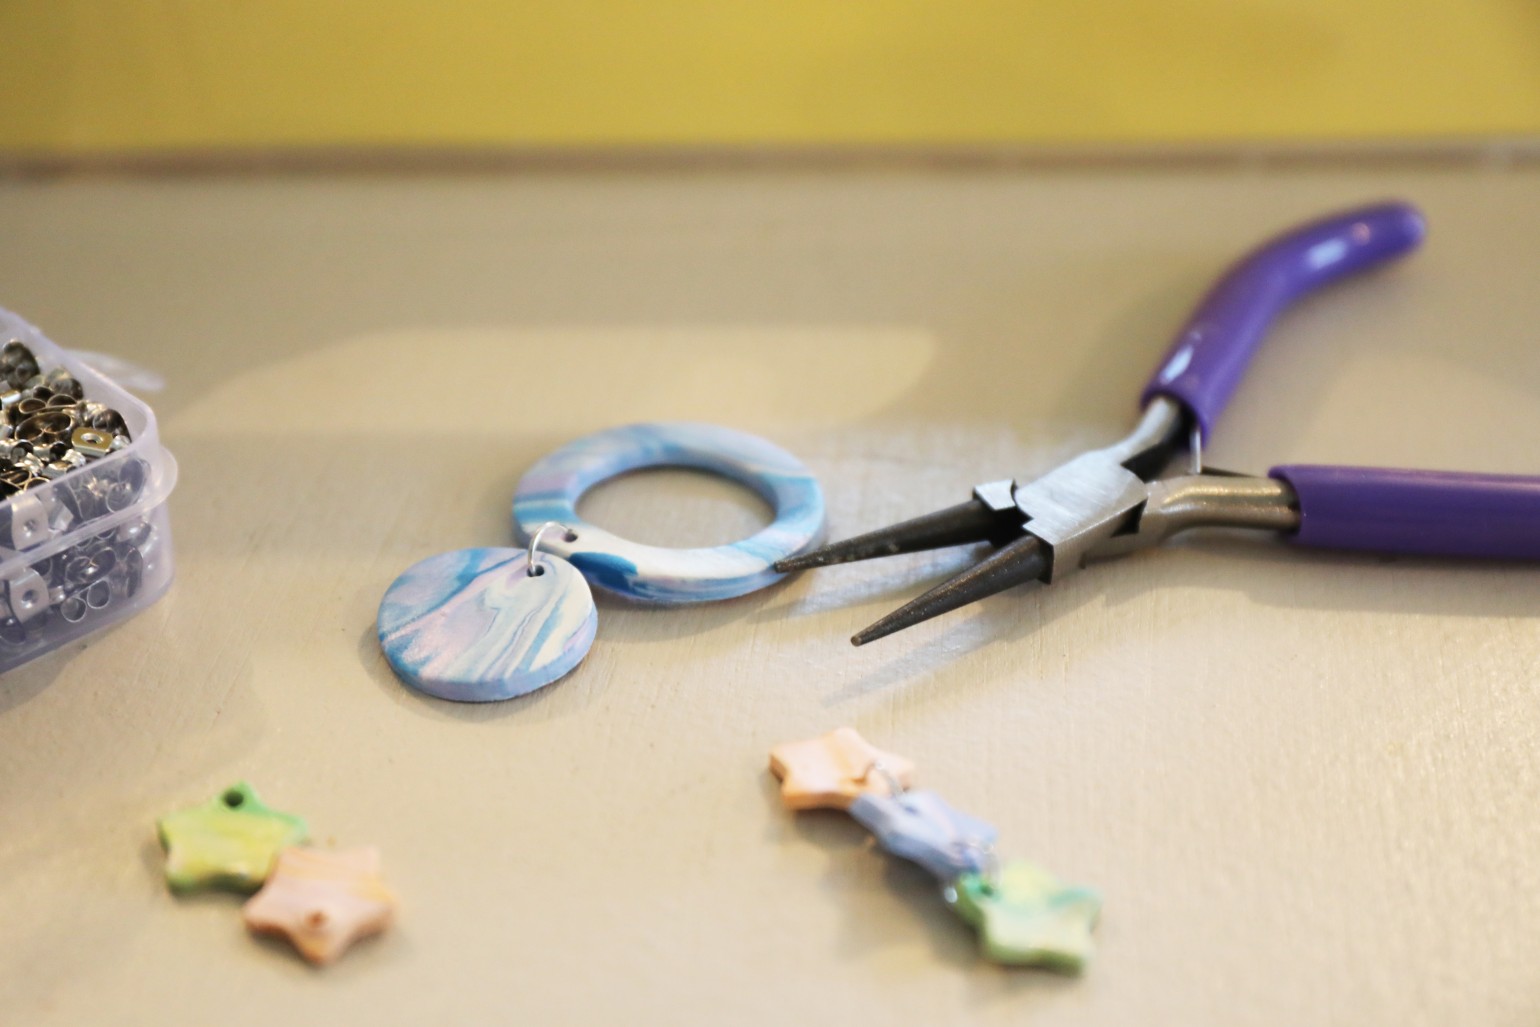
Whatever shapes you make, when they’re ready, make little holes with your toothpicks. Make sure they’re generous enough to get a jump link through.
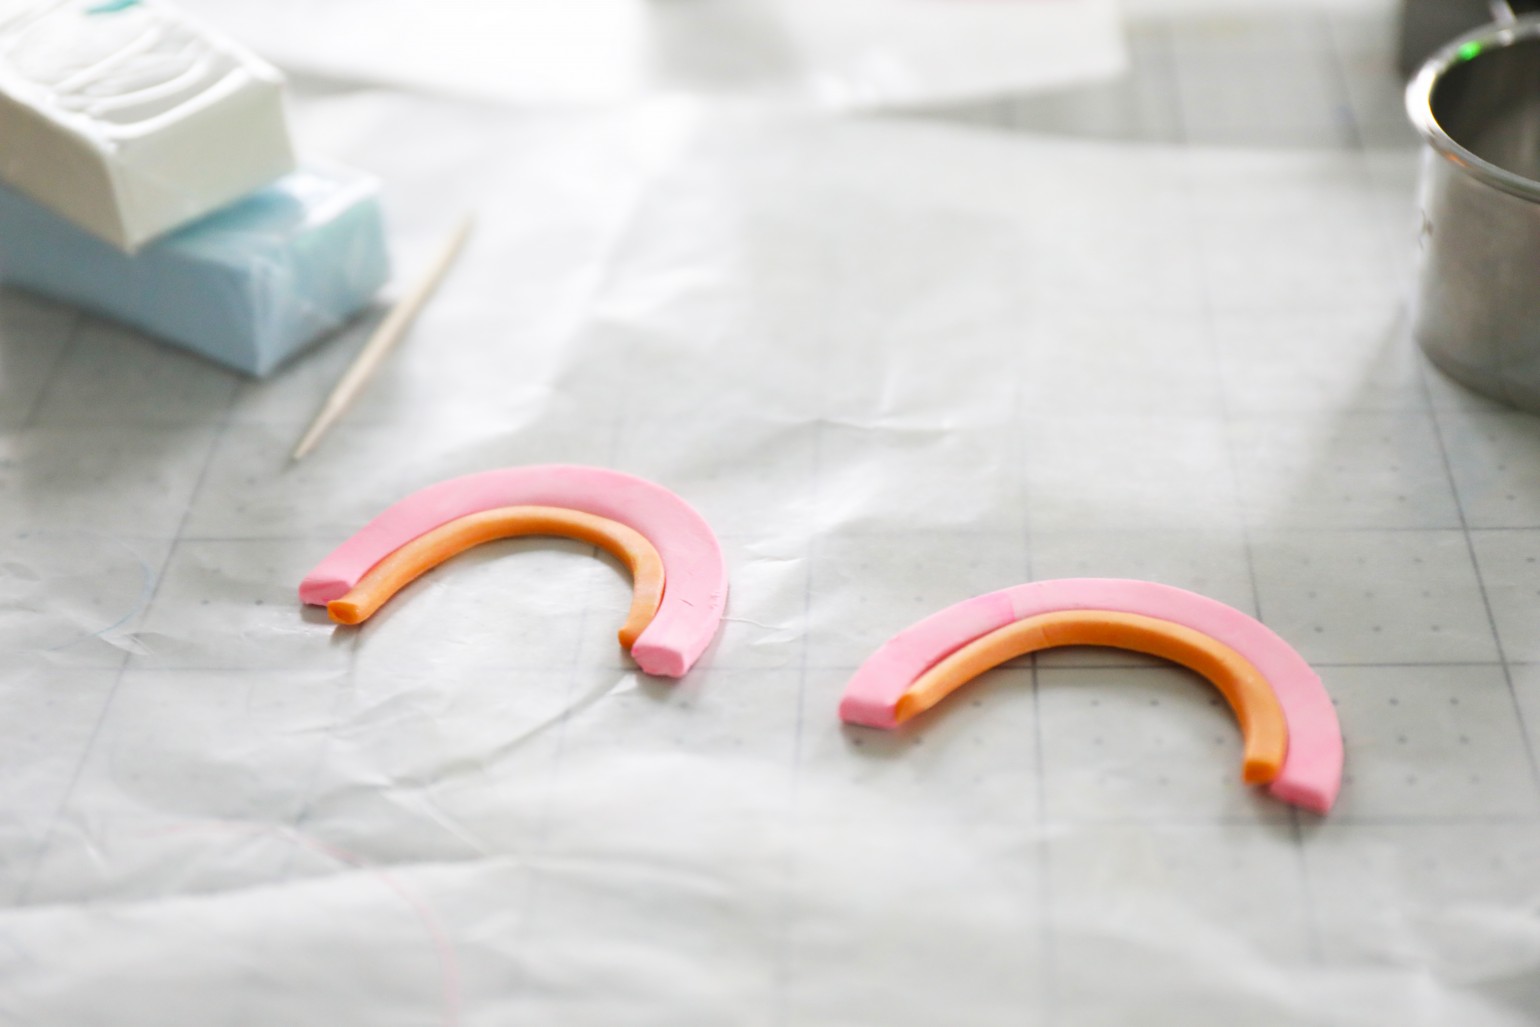
For the little rainbow earrings you see, we did the same with circular cookie cutters, just different sized circles. And when we were finished, we simply sliced through the middle with our knife for that rainbow shape.
Then we stacked all the colors gradually on top of one another, pushing them together as we went. At the very end, we trimmed them up so they had a unified length.
No matter what you make, when your clay is ready to bake, carefully place your shapes on some foil and a cookie sheet for the oven.
Follow the instructions on the back of your clay, and keep an eye on that timer {you don’t want all that work to burn and go to waste}!
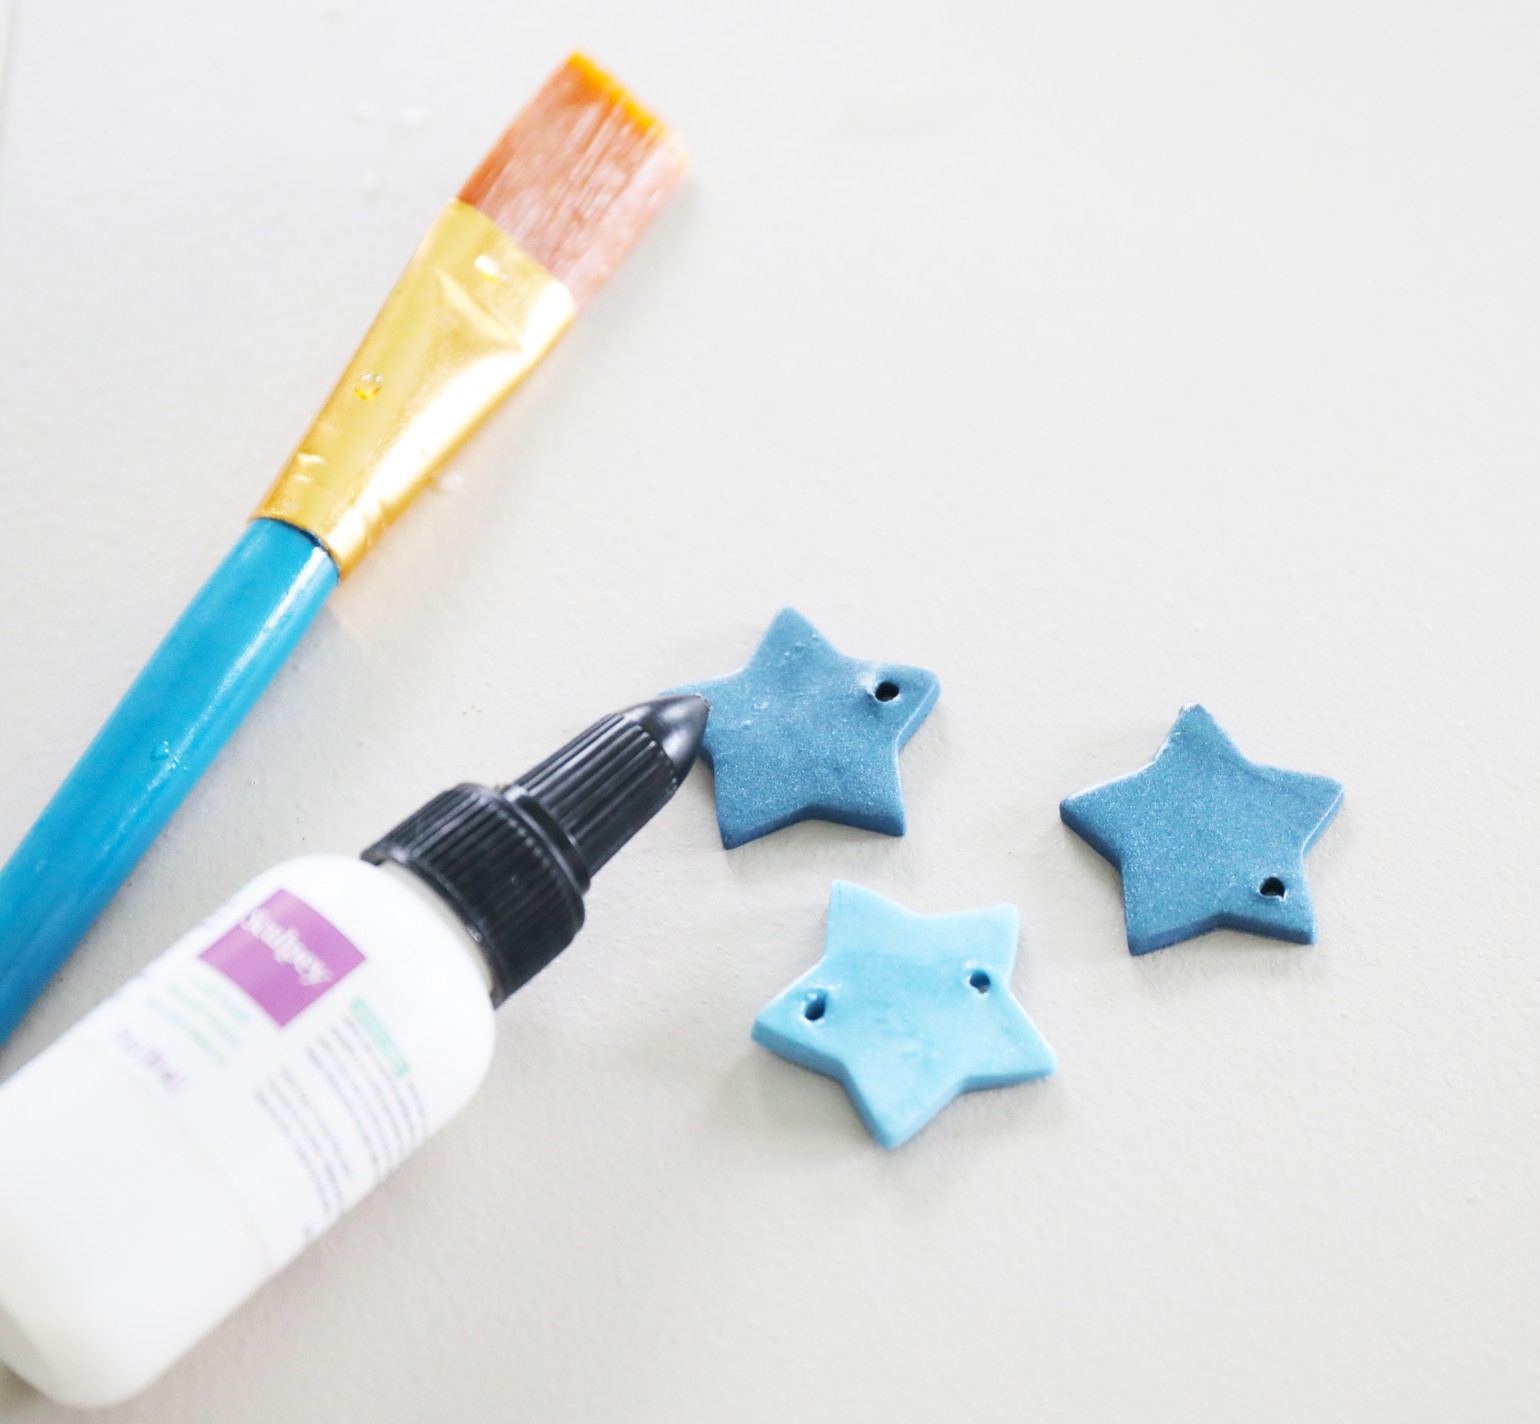
When they’re finished cooling, it’s time to bust out the glaze! This is a fun little extra step that gives your clay a polished/finished feel.
Then you’re ready to join your shapes with jump rings, and attach the earring parts to the back piece of your choice.
Tada! You’re ready to go!
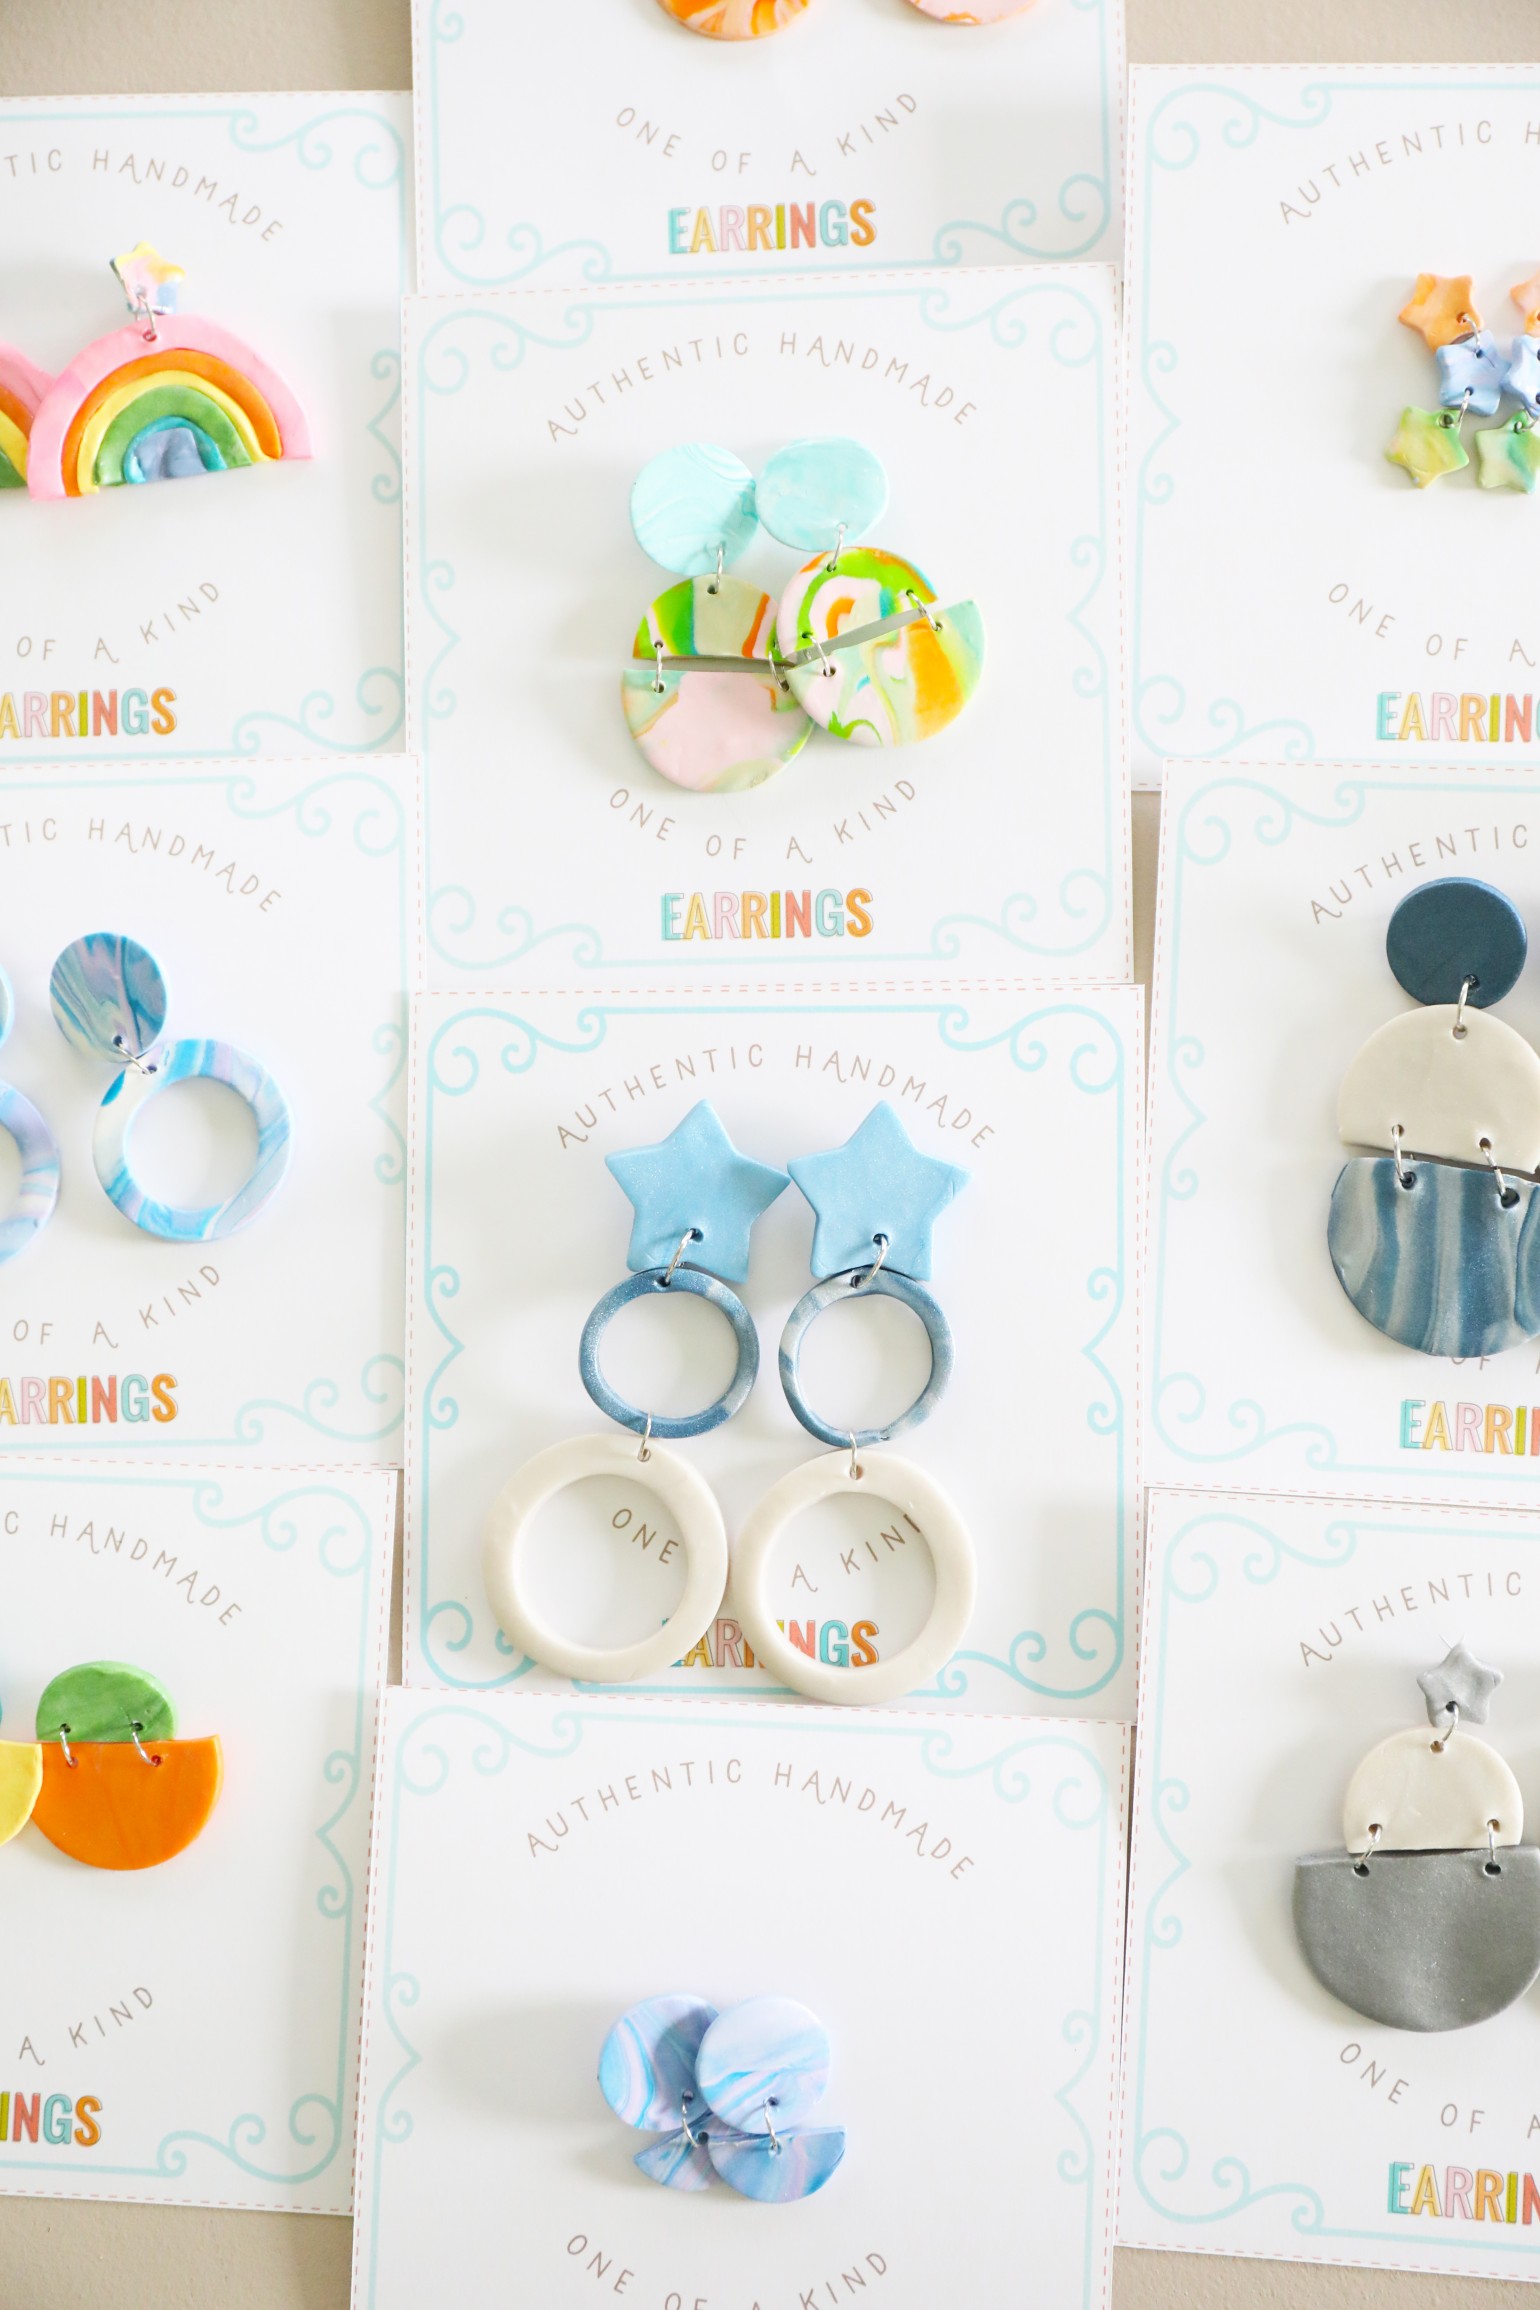
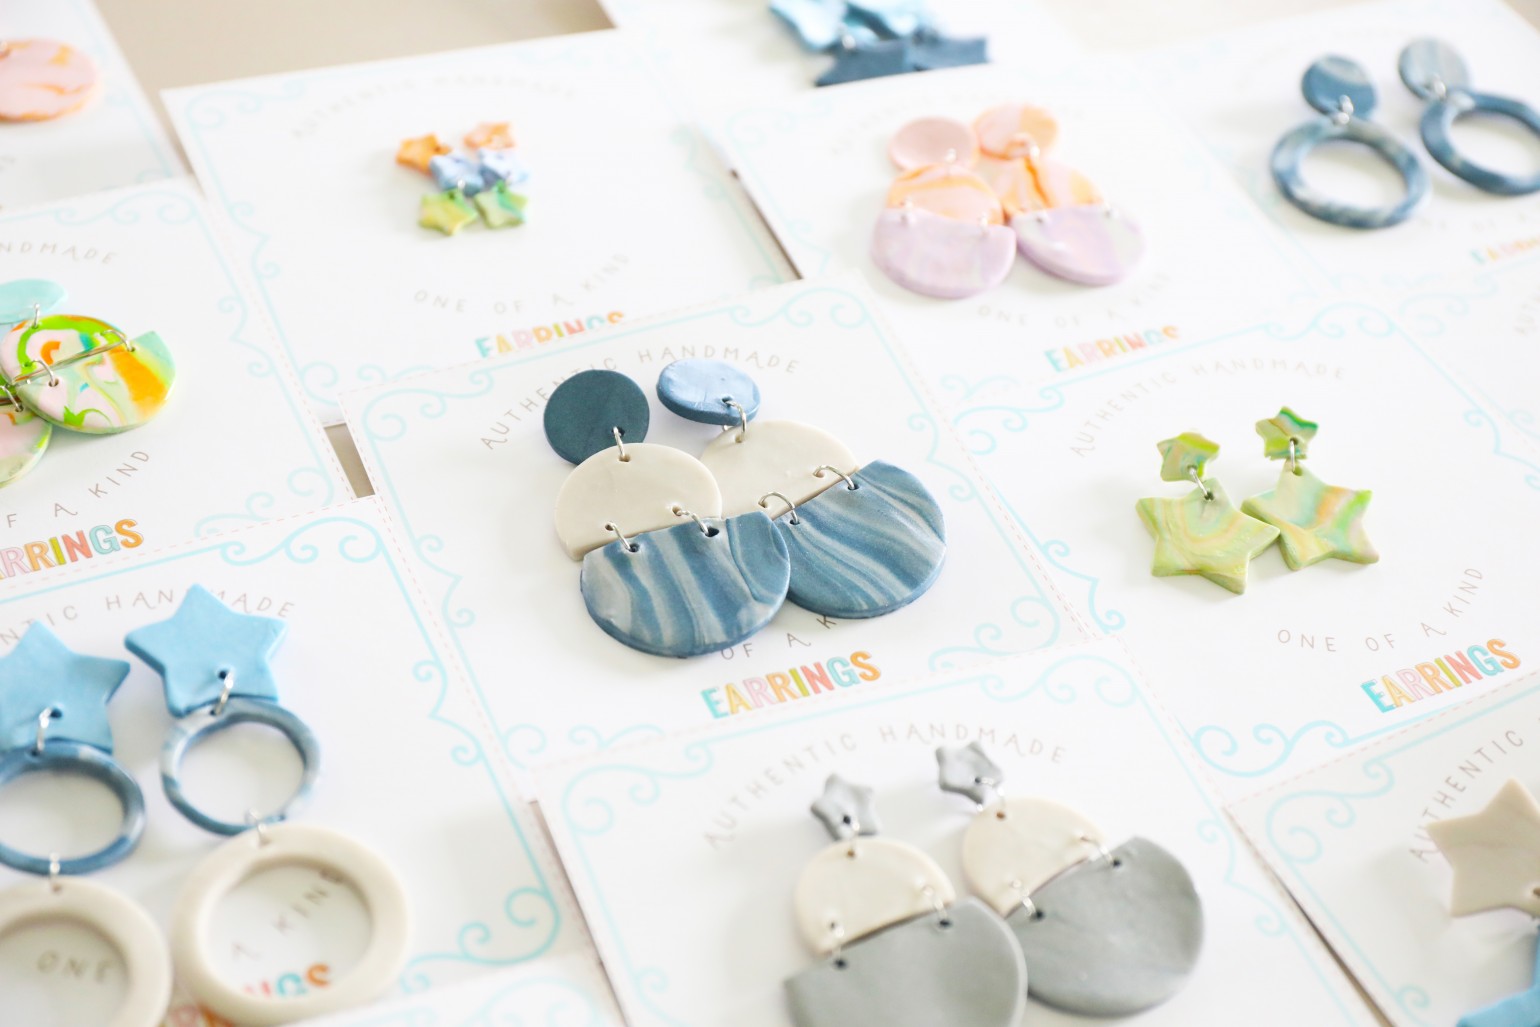
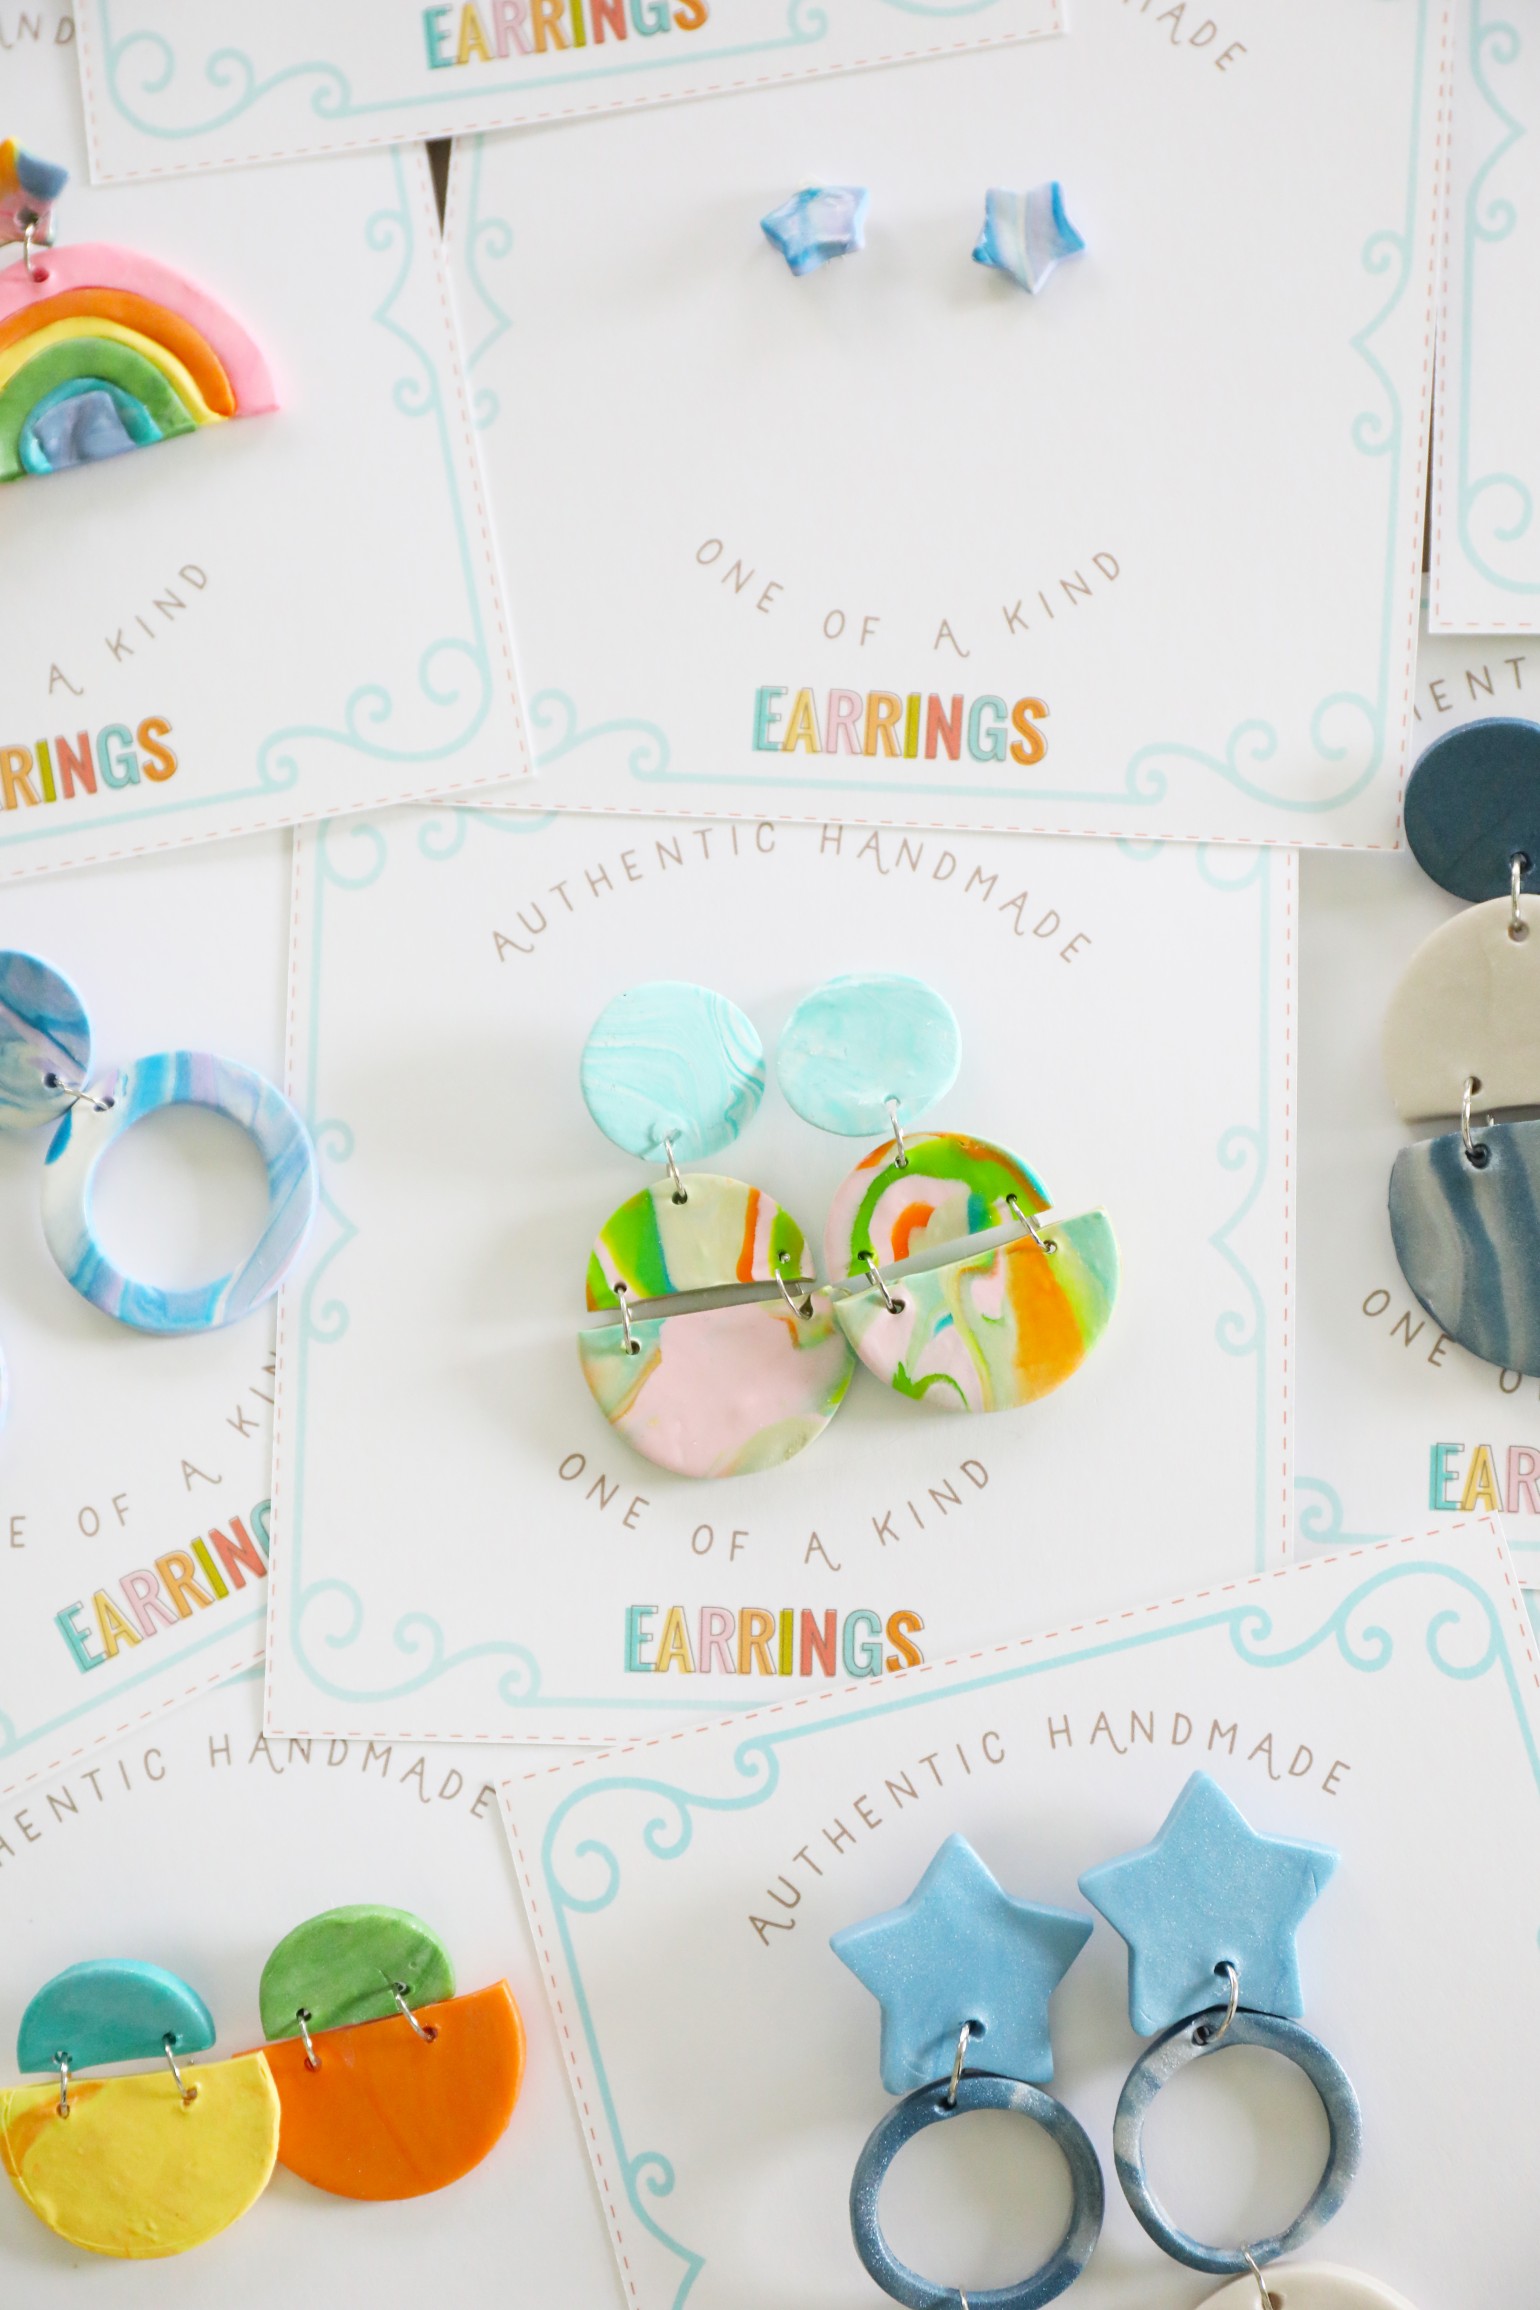
We even included these little earring cards as free printables, if you’d like to give them as gifts.
Want them? Get them here. Just click and print. We recommend card stock for these for that “official” feel.
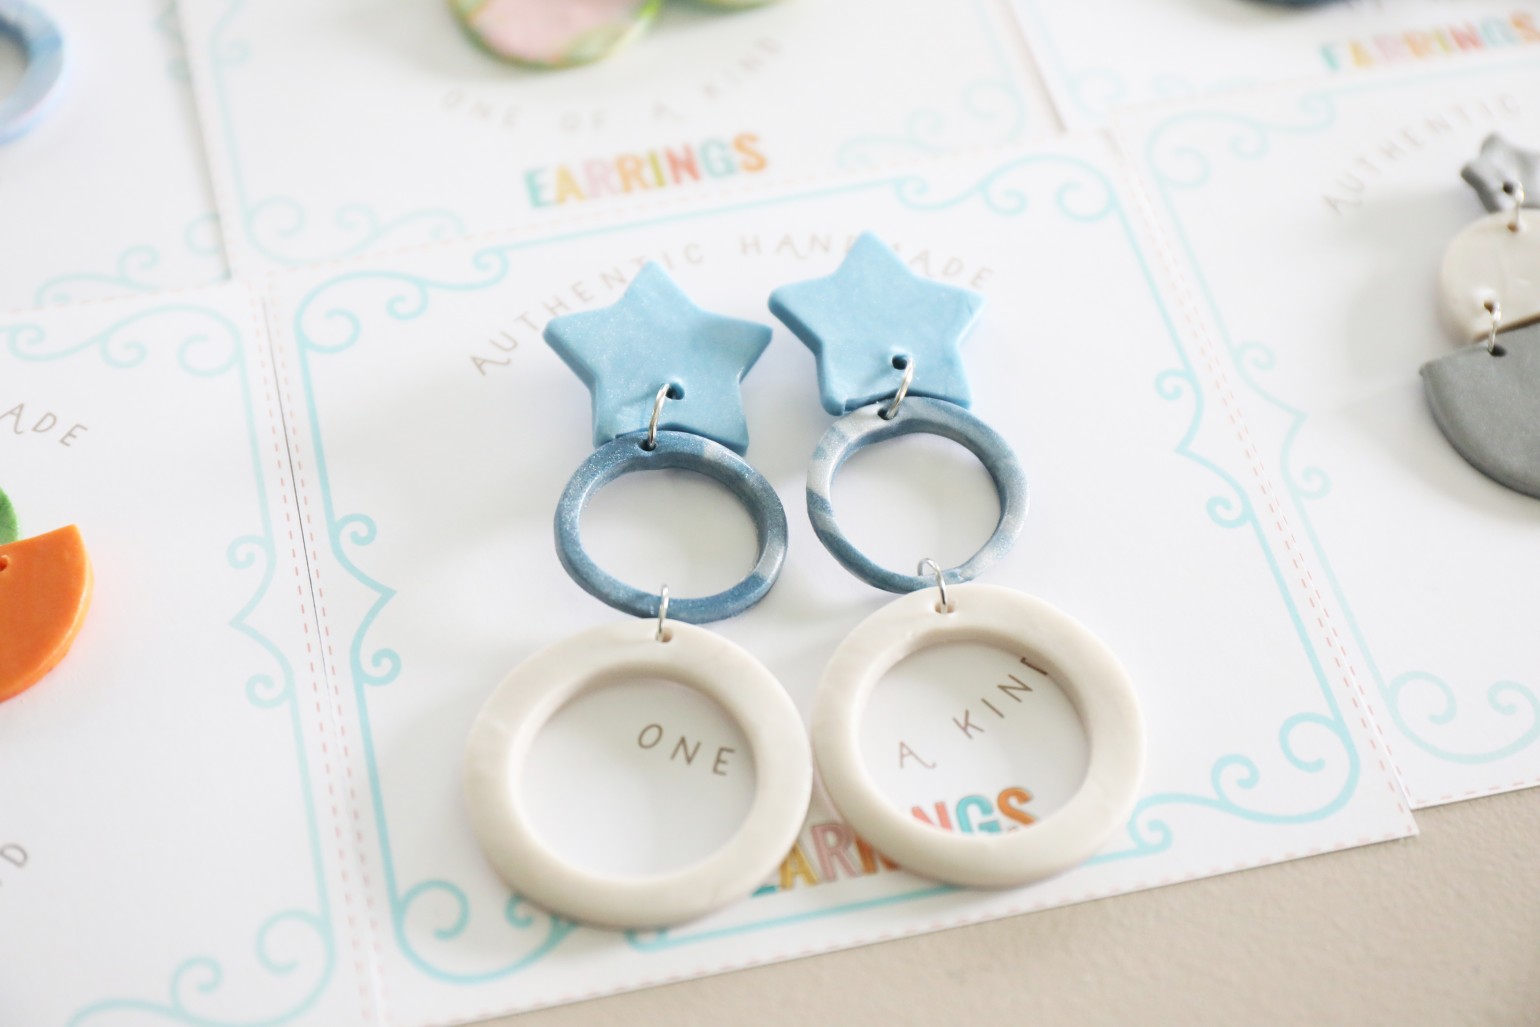
We printed, cut, and then made tiny little gashes with our X-acto blade in the cards, to place the earrings on them.
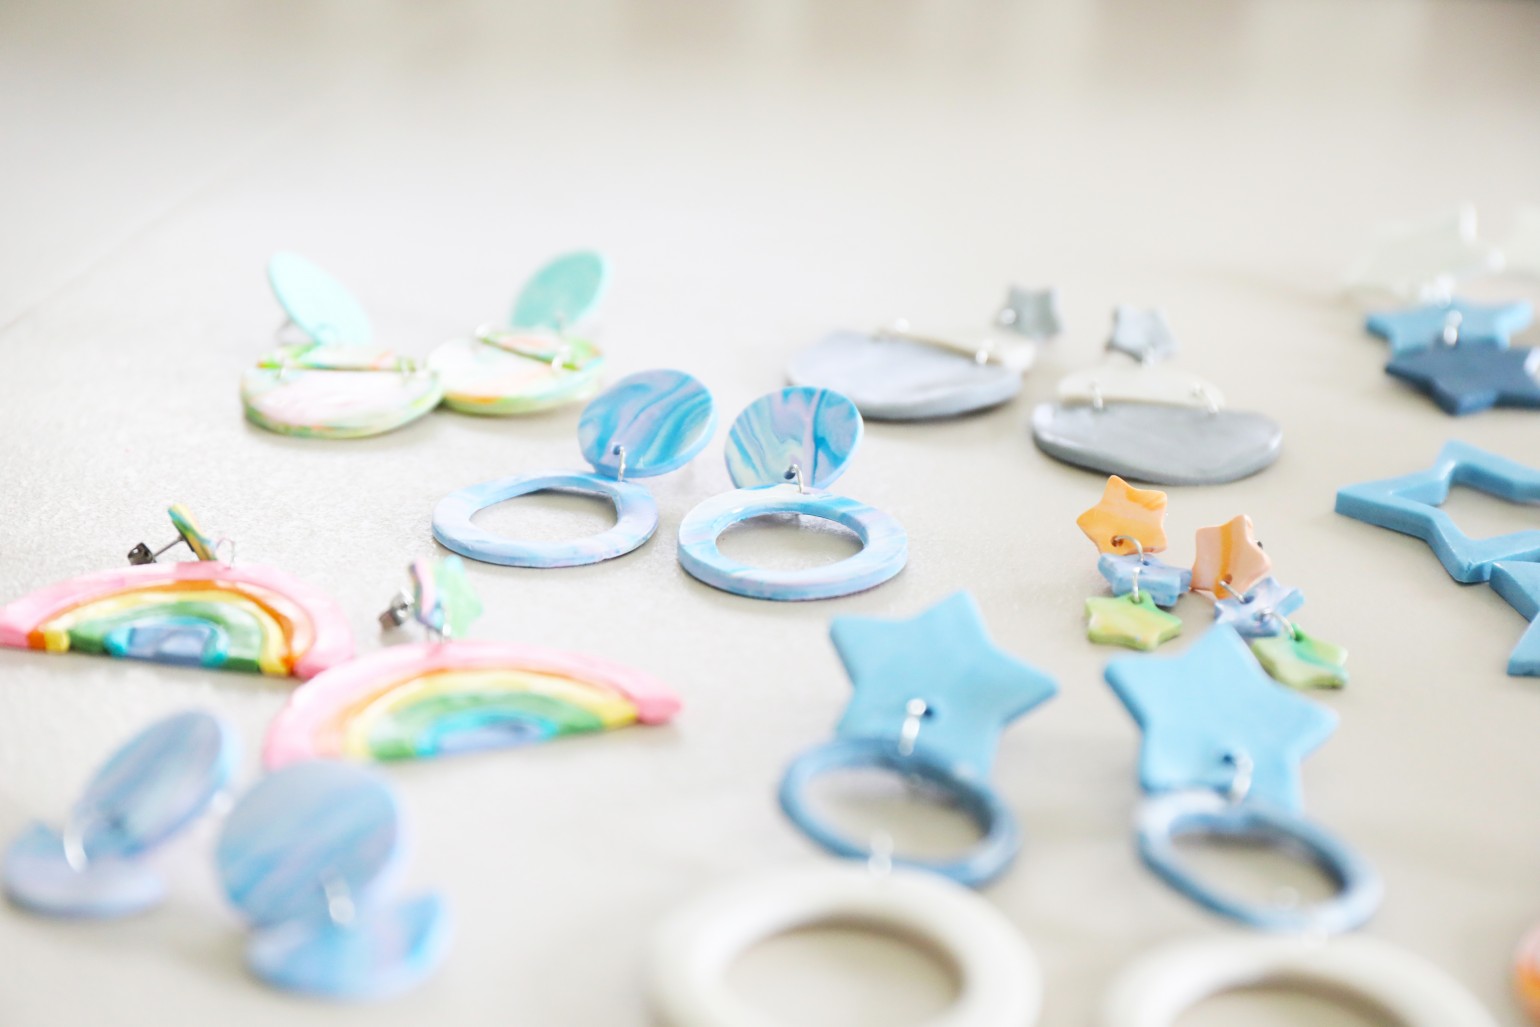
These make such fun sets and shapes! We love the way they turned out.
So many funky ideas, and perfect for kids + adults.
Our daughter loves them.
The perfect little handmade idea for over the holidays!

As always, let us know if you make these.
You know we’d love to hear.
And be sure to let us know if you have any questions – we’re happy to help.

Have an inspired day!